
BTTF's 92 EXTRA CAB DLX
 Apr 15, 2015 | 06:13 PM
#22
Thread Starter
Registered User
Joined: Jun 2014
Posts: 226
Likes: 9
From: California
Update: It's been a long while since I last posted but figured what the heck right? I have sanded a lot on the hood and front fenders but am no where near close to finished.
Currently that is not my priority though. My temp gauge stayed cold the whole time after the truck would warm up so I figured thermostat was stuck. Bought an autozone special and that turned out to be a bad idea. I had a high idle already and once I put the aftermarket thermostat in it started to idle/cut, idle/cut.
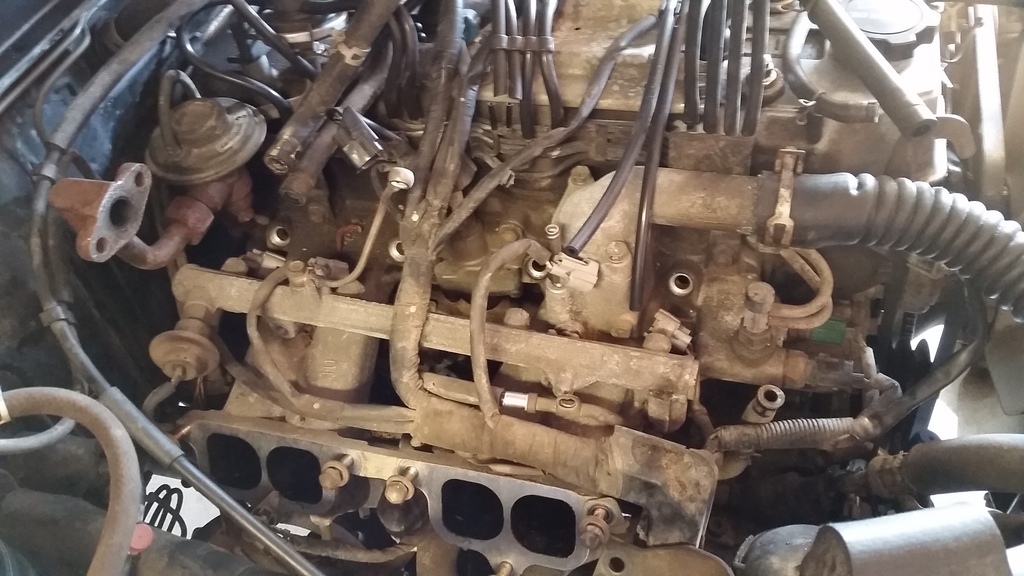
So, I wised up and ordered an OEM thermostat. While I was in there I decided to clean my throttle body, well that proved to be a rabbit hole thing to do because the black goo was all caked in the intake plenum. So long story short I took the plenum off, removed the fuel injectors, and went to town. Sent the injectors out for a rebuild/cleaning at my local fuel injector service, got them back and they look great.
Lot's of elbow grease and the the plenum looks a thousand times better. Not completely clean but I'm ok with that. Got all my stuff together and going to try and git'r put back together soon. Will post pics too.
Currently that is not my priority though. My temp gauge stayed cold the whole time after the truck would warm up so I figured thermostat was stuck. Bought an autozone special and that turned out to be a bad idea. I had a high idle already and once I put the aftermarket thermostat in it started to idle/cut, idle/cut.
So, I wised up and ordered an OEM thermostat. While I was in there I decided to clean my throttle body, well that proved to be a rabbit hole thing to do because the black goo was all caked in the intake plenum. So long story short I took the plenum off, removed the fuel injectors, and went to town. Sent the injectors out for a rebuild/cleaning at my local fuel injector service, got them back and they look great.
Lot's of elbow grease and the the plenum looks a thousand times better. Not completely clean but I'm ok with that. Got all my stuff together and going to try and git'r put back together soon. Will post pics too.


 Apr 18, 2015 | 04:10 AM
#27
Thread Starter
Registered User
Joined: Jun 2014
Posts: 226
Likes: 9
From: California
RE-INSTALLING FUEL INJECTORS. I used lube on the O-rings and they went in pretty smoothly. No fuel leaks I can see thus far.


Last edited by Back to the Future; Apr 18, 2015 at 04:11 AM.
Apr 18, 2015 | 04:13 AM
#28
Thread Starter
Registered User
Joined: Jun 2014
Posts: 226
Likes: 9
From: California
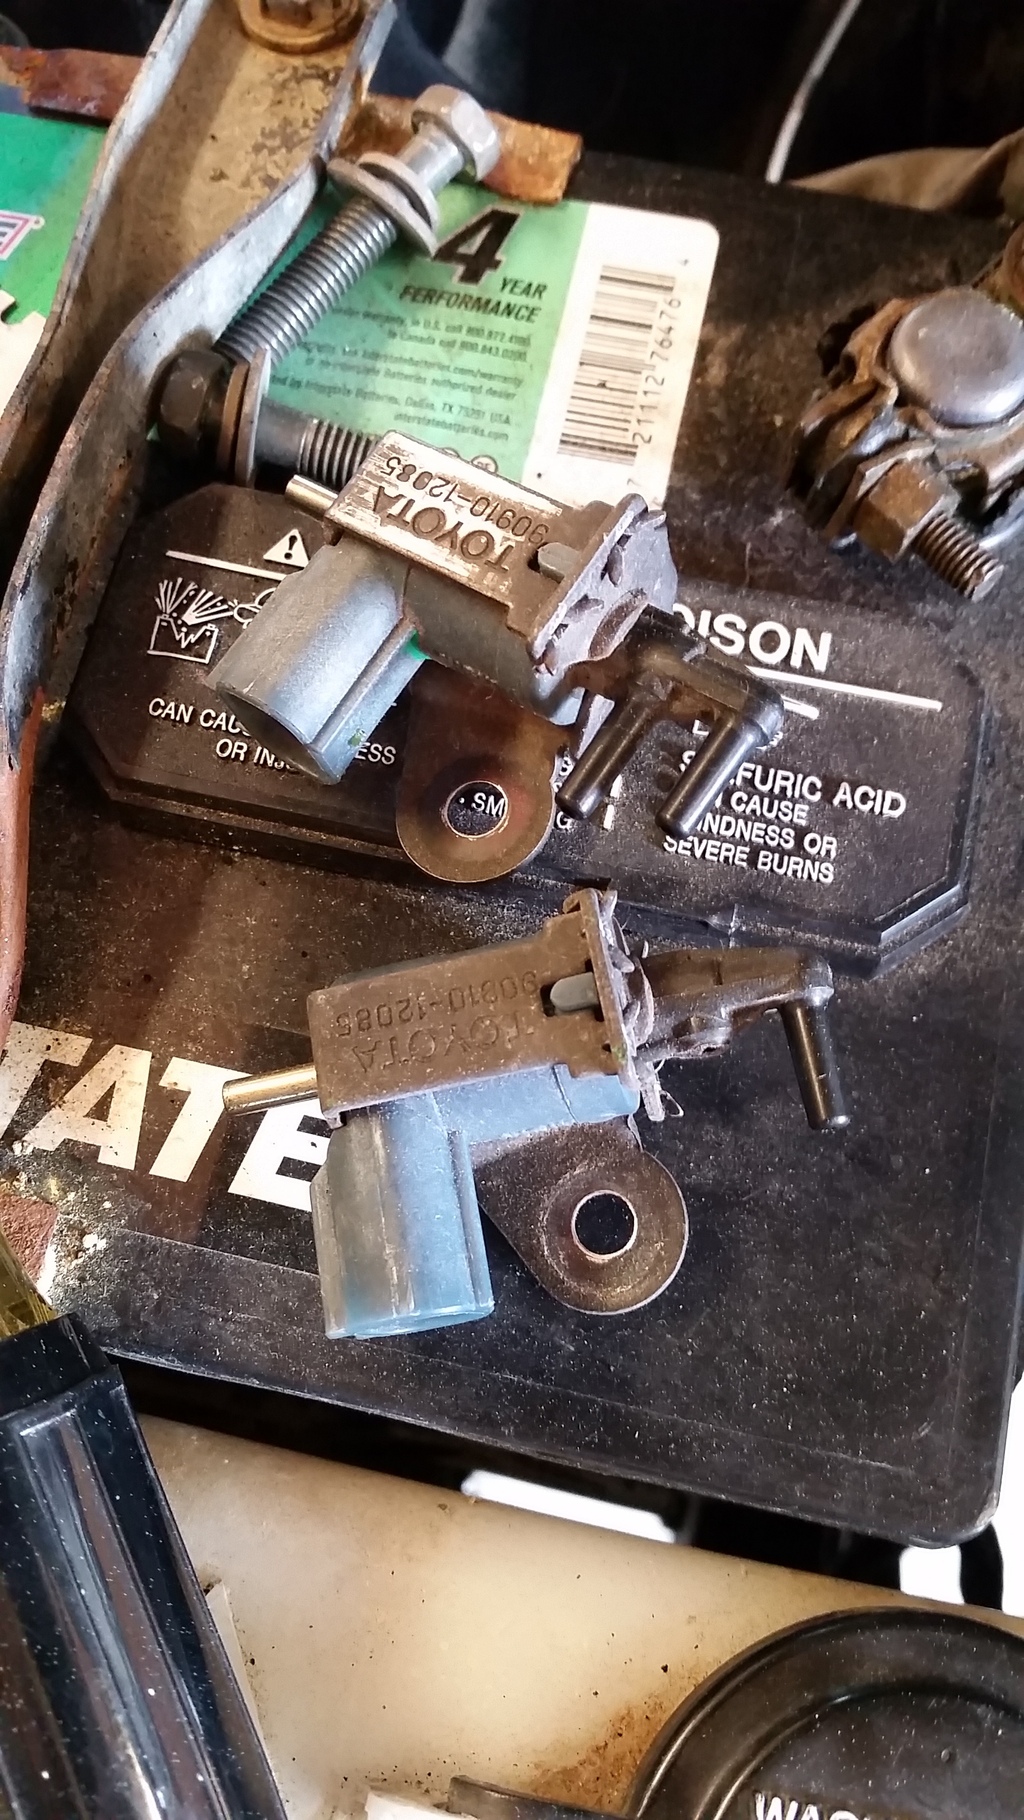
When I was replacing the vacuum lines I broke the nipple on my vacuum switching valve. This little bugger is $118 new from Toyota. I got my replacement used from Japanese Truck Dismantling for $35.

 Apr 18, 2015 | 04:18 AM
#30
Thread Starter
Registered User
Joined: Jun 2014
Posts: 226
Likes: 9
From: California
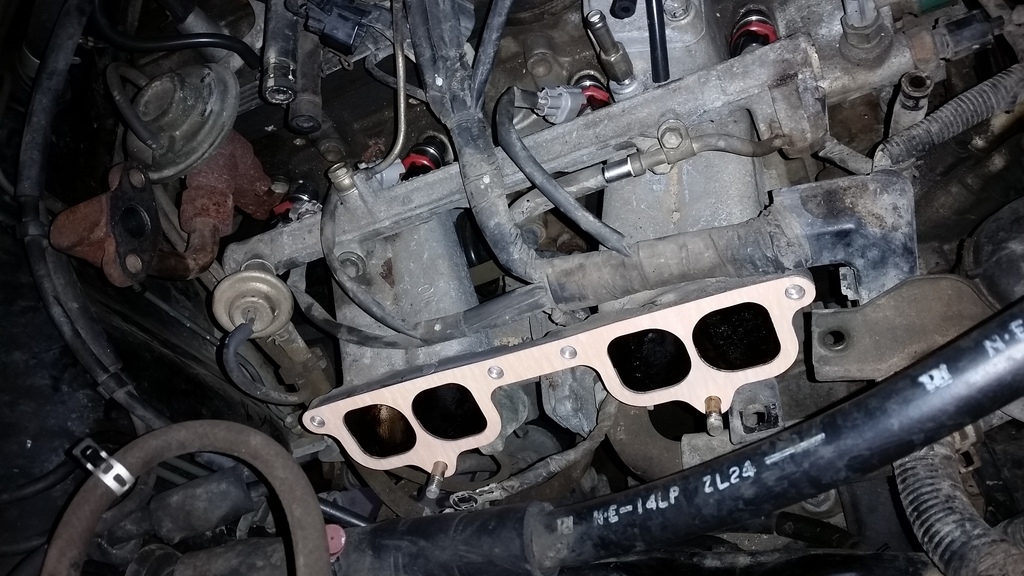
Inside the intake ports after cleaning. Turned out pretty good if you ask me. I couldn't find anywhere that would hot tank the plenum for cheap so I just scrubbed the heck out of it as best I could.


 Apr 18, 2015 | 04:34 AM
#34
Thread Starter
Registered User
Joined: Jun 2014
Posts: 226
Likes: 9
From: California
Here is the list of what I did:
Removed and cleaned carbon build up from throttle body and upper intake plenum. (What a PITA, but cheapest route)
Removed fuel injectors and sent them for rebuild. (look great and work perfect)
Removed and replaced all EFI vacuum lines with kit from LCE. (well worth $38)
Replaced Vacuum switching valve. This wouldn't have been necessary if I hadn't broke my original one.
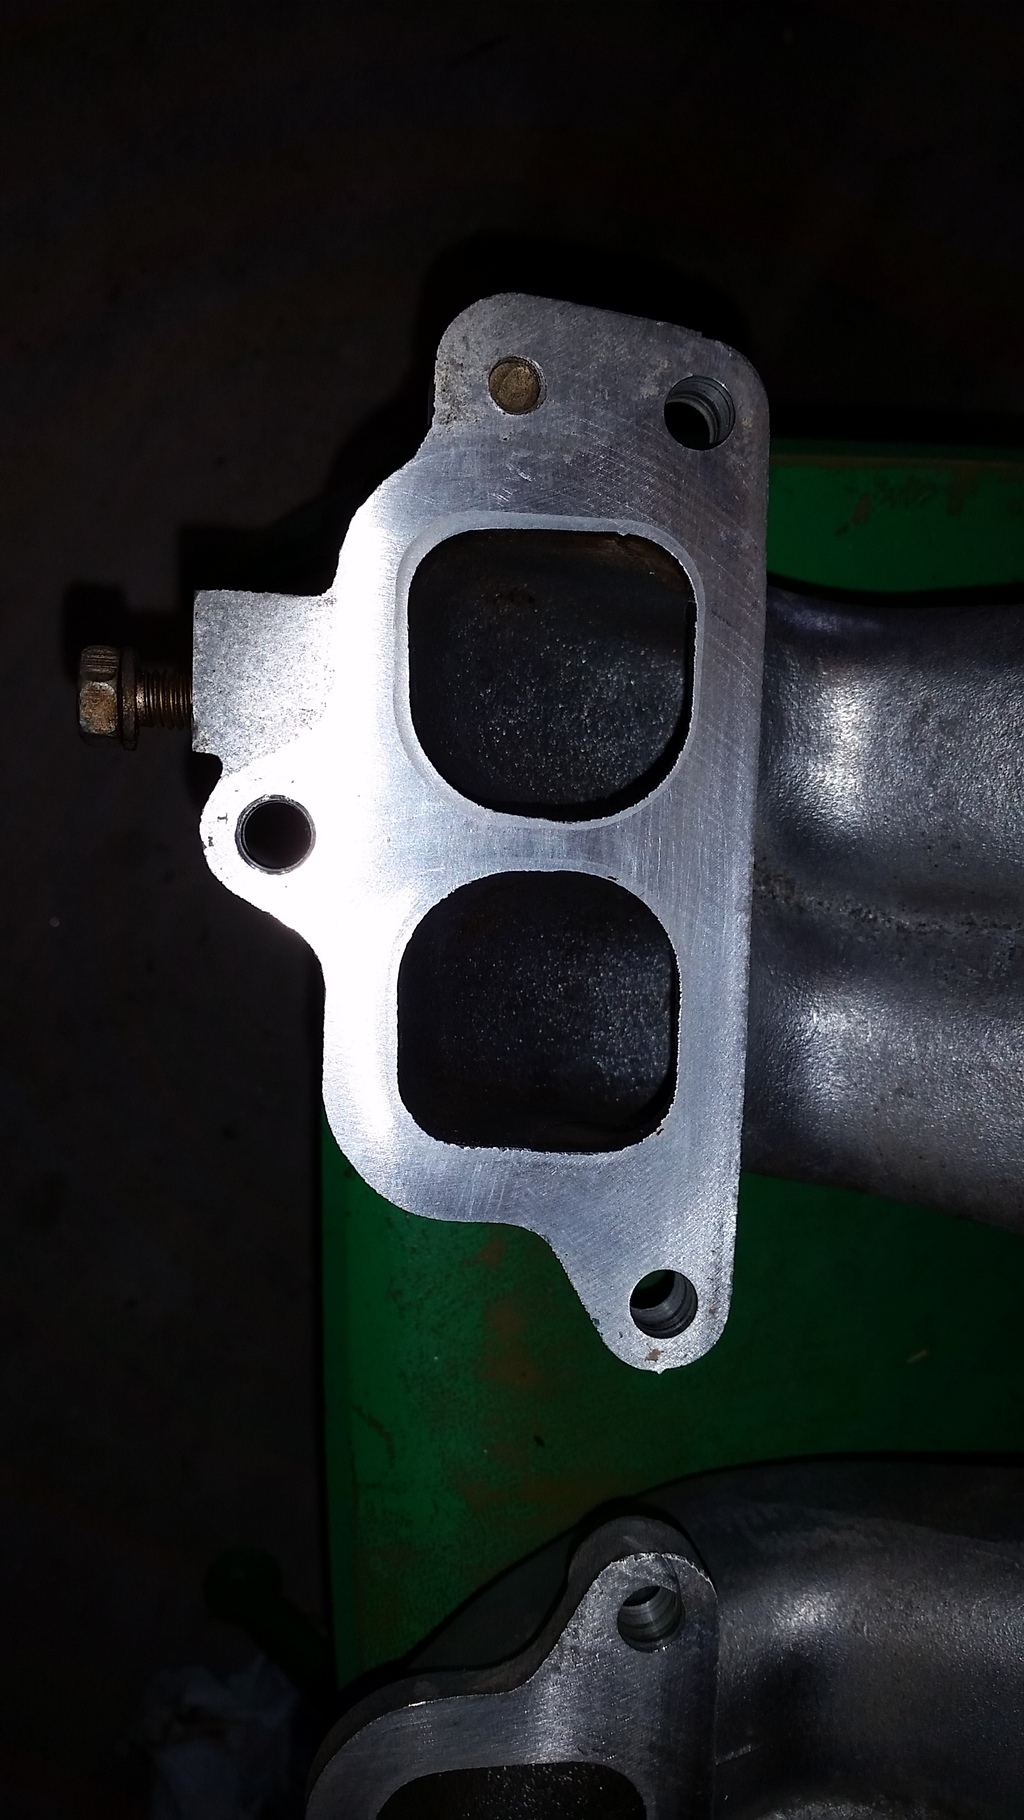
Replaced upper to lower intake gasket, EGR valve gasket, and cold start injector gasket.
Replaced thermostat and O-ring gasket with new OEM Toyota ones. (Never use after market thermostat on the 22re. I found out the hard way)
Total cost was about $215 bucks after all was said and done.
Even after all that, I still have a high idle which was the reason I started this little adventure in the first place. Oh well. I still love my truck and plan to keep on mechanic'an till I can't replace anything else! Guess I will be working on that for a long time huh?
Removed and cleaned carbon build up from throttle body and upper intake plenum. (What a PITA, but cheapest route)
Removed fuel injectors and sent them for rebuild. (look great and work perfect)
Removed and replaced all EFI vacuum lines with kit from LCE. (well worth $38)
Replaced Vacuum switching valve. This wouldn't have been necessary if I hadn't broke my original one.
Replaced upper to lower intake gasket, EGR valve gasket, and cold start injector gasket.
Replaced thermostat and O-ring gasket with new OEM Toyota ones. (Never use after market thermostat on the 22re. I found out the hard way)
Total cost was about $215 bucks after all was said and done.
Even after all that, I still have a high idle which was the reason I started this little adventure in the first place. Oh well. I still love my truck and plan to keep on mechanic'an till I can't replace anything else! Guess I will be working on that for a long time huh?
Apr 21, 2015 | 03:05 AM
#35
Thread Starter
Registered User
Joined: Jun 2014
Posts: 226
Likes: 9
From: California
Decided to drive her to work today. Ran great for a 23 year old engine with 200,000 plus miles on it. It was the first time in many years that I had it up over 70mph on the interstate. Felt like she would keep pushing if I kept my foot in the throttle so I am pretty happy about that. Needless to say I am confident that cleaning the TB, Plenum, and injectors was a worthwhile effort.
Downside. Always a downside right? When the truck is cold started it idles at about 1900/2000 rpms. Then when it warms up it drops to about 1100. The idle screw is all the way in so that isn't the problem. I checked the coolant hose that runs from the IACV the radiator intake port and it is clear. I looked at the IACV when I had the throttle body off and it is clean so I am not sure if that is the problem. Gonna do the tape test on the IACV today to see if that is the cause. If that proves to not be the issue I think I will probably replace the throttle cable since mine is factory. It needs it anyway and what can that hurt? The last thing I am going to check is the TPS. Hopefully that isn't the problem since those things are $$$.
Downside. Always a downside right? When the truck is cold started it idles at about 1900/2000 rpms. Then when it warms up it drops to about 1100. The idle screw is all the way in so that isn't the problem. I checked the coolant hose that runs from the IACV the radiator intake port and it is clear. I looked at the IACV when I had the throttle body off and it is clean so I am not sure if that is the problem. Gonna do the tape test on the IACV today to see if that is the cause. If that proves to not be the issue I think I will probably replace the throttle cable since mine is factory. It needs it anyway and what can that hurt? The last thing I am going to check is the TPS. Hopefully that isn't the problem since those things are $$$.
Last edited by Back to the Future; Apr 21, 2015 at 03:08 AM.
Apr 21, 2015 | 03:35 PM
#36
Registered User
Joined: Feb 2012
Posts: 407
Likes: 1
From: Daly City, CA
First of all, AWESOME name!
Second, as you mentioned, check the TPS when you have that chance. Its so much easier when the TB is off.
Other than checking all your sensors and check the throttle cable too. I do not have much else to tell you.
I have the same thing, 1k-1100 rpms until I gently tap on the gas, then it goes back down.
Apr 22, 2015 | 03:23 AM
#37
Thread Starter
Registered User
Joined: Jun 2014
Posts: 226
Likes: 9
From: California
Same to you my friend. I checked the power steering vacuum adjustment on the upper plenum by screwing it all the way in and that dropped the engine rpm some but it clearly wasn't the culprit. I noticed yesterday that once the truck is warm if I press the gas pedal the RPMs stay just slightly higher (1100-1300) so today I am gonna yank the throttle cable clean and lube it and re-install. That should help with that.
On another note I put some teflon tape on the the throttle body adjustment screw and that helped bring the RPMs down to about 900-950 which is close to normal operating idle speed.
I also checked for codes and the CEL blinked steadily so no issue there as far as I can tell.
I did the tape test but I didn't re-install the air duct back to the air MAF so the engine just cranked and died so I might do that again today accept this time hook it all back up and see what happens. I touched the IACV when the engine warmed up and it felt warm so I am not totally convinced that it is bad.
I just want the darn thing to idle up from cold start to 1100 like it used to and then once warm idle down to between 750-900.


 May 26, 2015 | 04:15 PM
#40
Thread Starter
Registered User
Joined: Jun 2014
Posts: 226
Likes: 9
From: California

New seat installed.

Old seat and bushing. Man what a difference.
Got it all back together and it shifts great. Now all I gotta do is change the tranny oil and it should shift buttery smooth.


