
BTTF's 92 EXTRA CAB DLX
 Aug 17, 2014 | 06:50 PM
#1
Thread Starter
Registered User
Joined: Jun 2014
Posts: 226
Likes: 9
From: California
BTTF's 92 EXTRA CAB DLX

This is my rig. Owned it since 1999. It was my graduation present from high school. Really looking to just get it back to OEM before I start my custom mods. It needs more things than I care to list but it is my baby and she will live again.
BTTF
Aug 17, 2014 | 07:01 PM
#2
Thread Starter
Registered User
Joined: Jun 2014
Posts: 226
Likes: 9
From: California
Little back story...She sat in my grandfather's barn for almost 3 years and the gas went bad. Needless to say I had to replace almost the entire fuel system just to get it running again. Fuel tank, pump, hanger, fuel filter. Only thing that stayed was the fuel lines. After that was complete got the tags renewed so I could at least drive it to the gas station. A long time ago my Grand Father put a single stage paint job on it and it has died. Oxidation, rust spots and spider web cracks all over. Looking to potentially do a roll on paint job to save on cost.
Small repairs here and there. Got the a/c backlight working again. Learned how to replace the bulb on here. THANKS YOTATECH. Since it had been in a barn the critters built a nest in the a/c blower motor. Got that cleaned out then broke my a/c ider pulley adjustment screw. Got the new a/c idler pulley assembly yesterday. Will get to it eventually.
Small repairs here and there. Got the a/c backlight working again. Learned how to replace the bulb on here. THANKS YOTATECH. Since it had been in a barn the critters built a nest in the a/c blower motor. Got that cleaned out then broke my a/c ider pulley adjustment screw. Got the new a/c idler pulley assembly yesterday. Will get to it eventually.
Last edited by Back to the Future; Sep 2, 2014 at 01:03 PM.

 Aug 17, 2014 | 07:09 PM
#4
Thread Starter
Registered User
Joined: Jun 2014
Posts: 226
Likes: 9
From: California
22re with 5 speed manual. Wouldn't have it any other way. Sure it is under powered but it is bomb proof.
Future mods will include new wheels/tires. I have had a performance accessories 3" body lift since the first year I owned it but just never installed it because I didn't need to. So that will get put in eventually. Not sure whether to do a engine rebuild or just re gear. I would probably end up spending close to the same money either way. It would most likely be a DD so I would prolly go with 4:88s and 33 12.50s. She is still IFS but that doesn't bother me. I day dream about a SAS but I don't have the $$$ for that right now.
Future mods will include new wheels/tires. I have had a performance accessories 3" body lift since the first year I owned it but just never installed it because I didn't need to. So that will get put in eventually. Not sure whether to do a engine rebuild or just re gear. I would probably end up spending close to the same money either way. It would most likely be a DD so I would prolly go with 4:88s and 33 12.50s. She is still IFS but that doesn't bother me. I day dream about a SAS but I don't have the $$$ for that right now.
 Aug 19, 2014 | 02:17 PM
#7
Thread Starter
Registered User
Joined: Jun 2014
Posts: 226
Likes: 9
From: California
Pic of the hood:
[IMG]http://i1280.photobucket.com/albums/a490/musikmanj45/Mobile%20Uploads/20140819_180340_zps6526452e.jpg[/IMG
DRIVER SIDE FENDER:
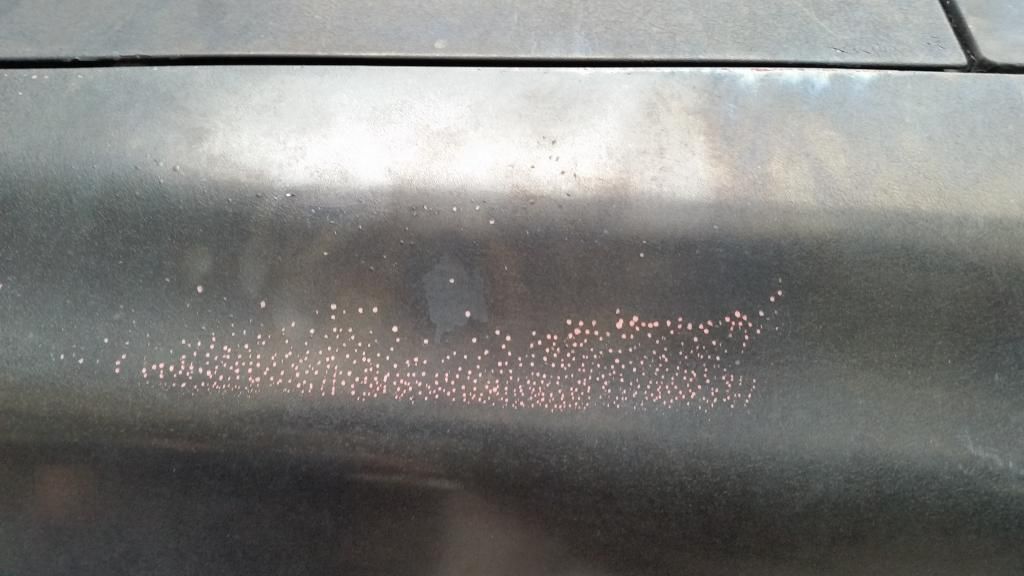
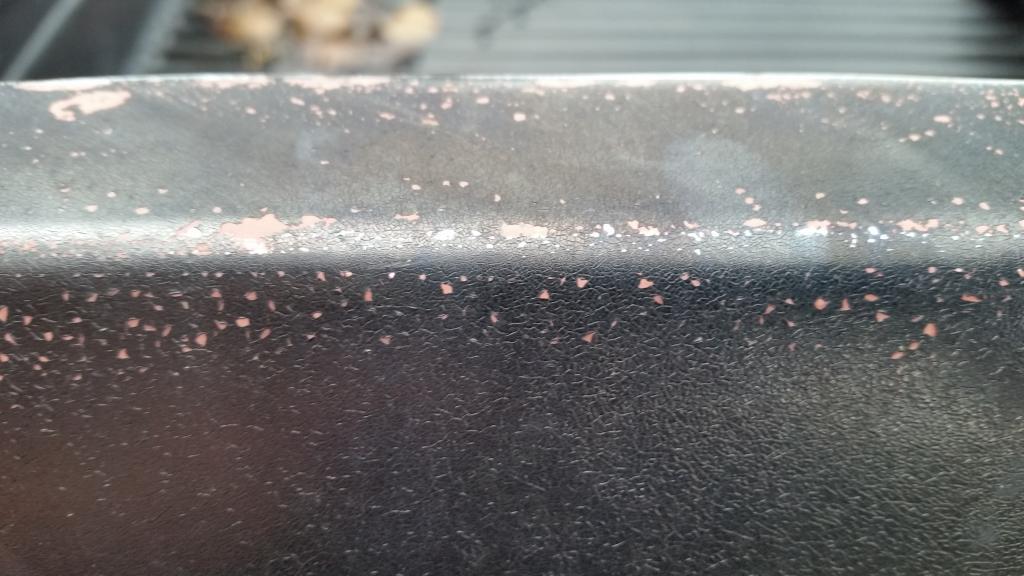
TOP OF DRIVER SIDE BED RAIL:
[IMG]http://i1280.photobucket.com/albums/a490/musikmanj45/Mobile%20Uploads/20140819_180340_zps6526452e.jpg[/IMG
DRIVER SIDE FENDER:

TOP OF DRIVER SIDE BED RAIL:

Trending Topics
 Aug 19, 2014 | 02:37 PM
#9
Thread Starter
Registered User
Joined: Jun 2014
Posts: 226
Likes: 9
From: California
The bottom line is I know I have to take it to bare metal to fix this. From what I have read this is probably the result a bad primer/prep before paint. The problem is that I have no experience with fixing dents. I have read countless times how the process should go but I am not confident that I can get the prep done right the first time and I don't have very much spare time to dedicate to this so I want to do it right so I don't have to paint again anytime in the near future.
I don't have the $$$ to drop on having a body shop do the prep and then painting. Any advice is good advice at this point.
I don't have the $$$ to drop on having a body shop do the prep and then painting. Any advice is good advice at this point.
Aug 24, 2014 | 07:01 AM
#10
Thread Starter
Registered User
Joined: Jun 2014
Posts: 226
Likes: 9
From: California
Well...just gonna go for it and do the Rustoleum roll on paint job. Going to start with the fresh air vent. Going to sand down with 80 grit, prime with Rustoleum black auto primer, and the hit it with the roller. I will post pics to show progress as it happens.
 Aug 24, 2014 | 03:34 PM
#12
Thread Starter
Registered User
Joined: Jun 2014
Posts: 226
Likes: 9
From: California

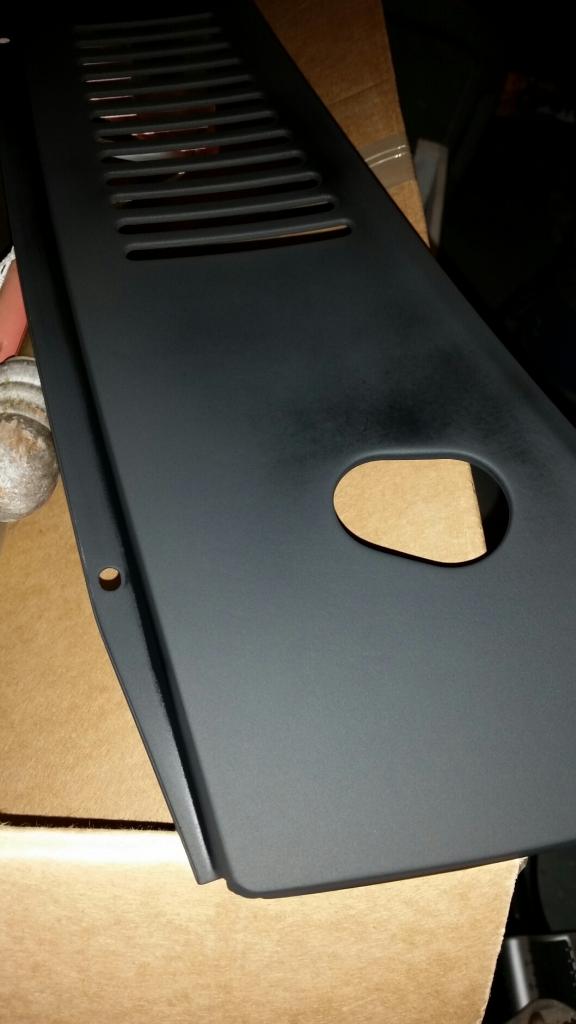
Well, after about 2 hours of sanding with the Black and Decker sander this is what it looks like. Most folks doing the Rusto roll on paint job say they never go all the way to the metal. I don't want any chance of adhesion problems later. Going to clean in off tomorrow prime it (keeping in garage over night). Then the fun begins with the roll on paint.
Last edited by Back to the Future; Aug 24, 2014 at 03:38 PM.
Aug 27, 2014 | 05:04 PM
#13
Thread Starter
Registered User
Joined: Jun 2014
Posts: 226
Likes: 9
From: California
Took it down to the bare metal, sanded with 80 grit, let sit for a couple days, sanded again to get of rust, cleaned with water, then cleaned of with rubbing alcohol, then put on first coat of primer. Next step will be to wet sand with prolly 320 or 400 grit, then prime with 2nd coat, wetsand with 400 grit again, then clean again, then apply first coat of Rustoleum.
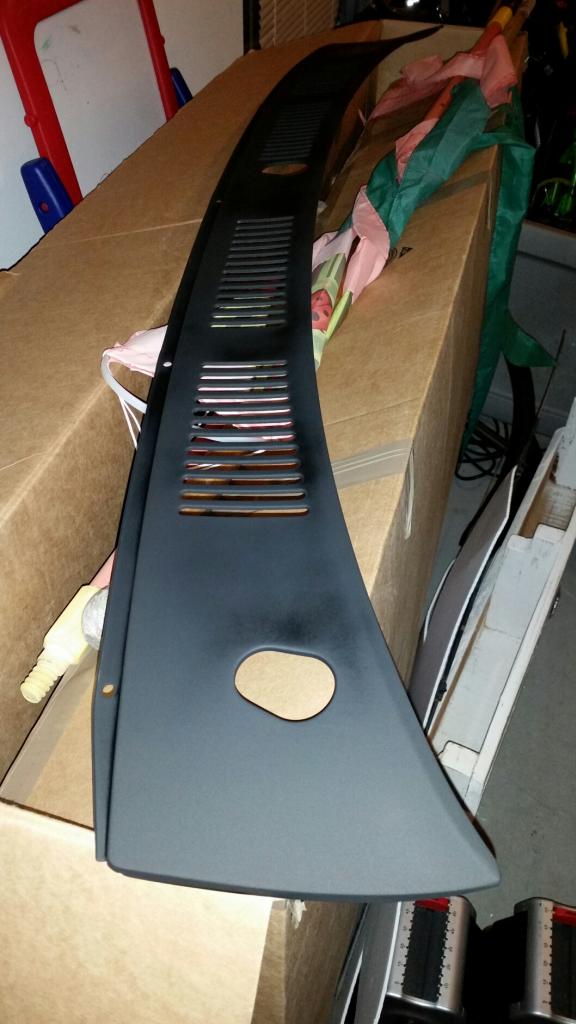


Last edited by Back to the Future; Aug 27, 2014 at 05:06 PM.
Aug 30, 2014 | 04:39 AM
#14
Thread Starter
Registered User
Joined: Jun 2014
Posts: 226
Likes: 9
From: California
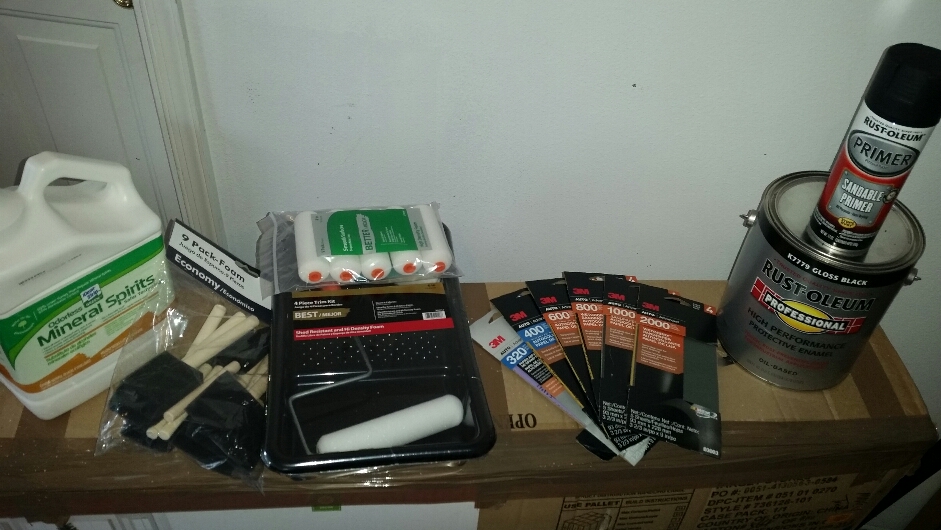
So I finally got all my supplies together. Here is the list, where it was purchased, and associated cost per item:
(1) gal Rustoleum Professional Gloss black: $26.88 WM
(1) can Rustoleum Black spray primer: $5.99
(1) gal mineral spirits: $9.47 WM
(1) pack 320 grit sand paper: $3.37 WM
(1) pack 400 grit sand paper: $3.37 WM
(1) pack 600 grit sand paper: $5.19 AZ
(1) pack 800 grit sand paper: $3.37 WM
(1) pack 1000 grit sand paper: $3.37 WM
(1) pack 2000 grit sand paper: $3.37 WM
(1) 6" foam roller kit : $6.97 HD
(1) Pack 4" roller refills: $8.97 HD
(1) pack foam brushes: $5.97 HD
TOTAL W/TAX: $86.84
WM: Wal-Mart
AZ: Autozone
HD: Home Depot

Last edited by Back to the Future; Aug 30, 2014 at 05:00 AM.
Sep 1, 2014 | 07:38 AM
#15
Thread Starter
Registered User
Joined: Jun 2014
Posts: 226
Likes: 9
From: California
First coat on and drying. Will hit with second coat later today then wet sand tomorrow. I barely put any paint in the cup and had a lot left over so I just slapped it on the hood....haha. No prep whatsoever. Guess that just means more sanding later.
Sep 1, 2014 | 04:24 PM
#16
Thread Starter
Registered User
Joined: Jun 2014
Posts: 226
Likes: 9
From: California
2nd coat on. There are some fibers in there that are pretty noticeable. I think they came from the regular roller that came with the kit. No worries though. Sanding will take care of that. I gotta say I am impressed with how the paint levels out though. Been mixing the paint to just thicker than water. Not sure what the ratio is but it seems to be working.
Sep 3, 2014 | 05:08 PM
#19
Thread Starter
Registered User
Joined: Jun 2014
Posts: 226
Likes: 9
From: California
So I got the vent all sanded after the second coat. Got all of the orange peel out.
Went to mix my paint with the mineral spirits and they turned white like milk. I forgot to shake it up so I figured that's all I needed to do so I put the cap back on and shook away....added some to my paint, mixed, added some more, mixed, added some more, mixed.. you get the idea. It wasn't thinning the paint at all and against my better judgement I rolled a coat on.
Well you can guess what the thick paint looked like. VERY orange peely.
Lesson learned for next time. Make sure your mineral spirits haven't went bad...I am pissed about this. Not because I have to wetsand some more but because that stuff was $10 a gallon.
Sep 3, 2014 | 07:48 PM
#20
Nice looking truck, its cool that you've kept it over the years! Sorry to hear about the setback with the paint, hope it doesn't discourage you to much! Look forward to seeing it when the paint jobs finished!


