
94mackyota's 94 Pickup Build Up Thread
 May 7, 2014 | 07:28 PM
#41

Thread Starter
Registered User
Joined: Aug 2013
Posts: 43
Likes: 0
Stripped down the remainder of the stuff inside the engine bay. Wire wheeled and sanded everything down. I bought some 2-part ceramic engine bay paint from Eastwood. It was a new product they were offering and I decided to give it a dry. I used two cans and sprayed the entire engine bay. It came out really nice. Took my radiator and condenser to a local shop and the guy repaired the leaks that I had. I used some radiator black from Eastwood to paint them. I also meticulously cleaned all of the rust and grime off of all of the other parts inside the engine bay. I painted all of them and put them back in their proper place. I was soon ready for the cab to get re-acquainted with the chassis. I put all new cab mount bushings in place from my energy suspension bushing kit. Went to tractor supply and bought all new grade 8 bolts for the cab mounts. Got everything bolted down.
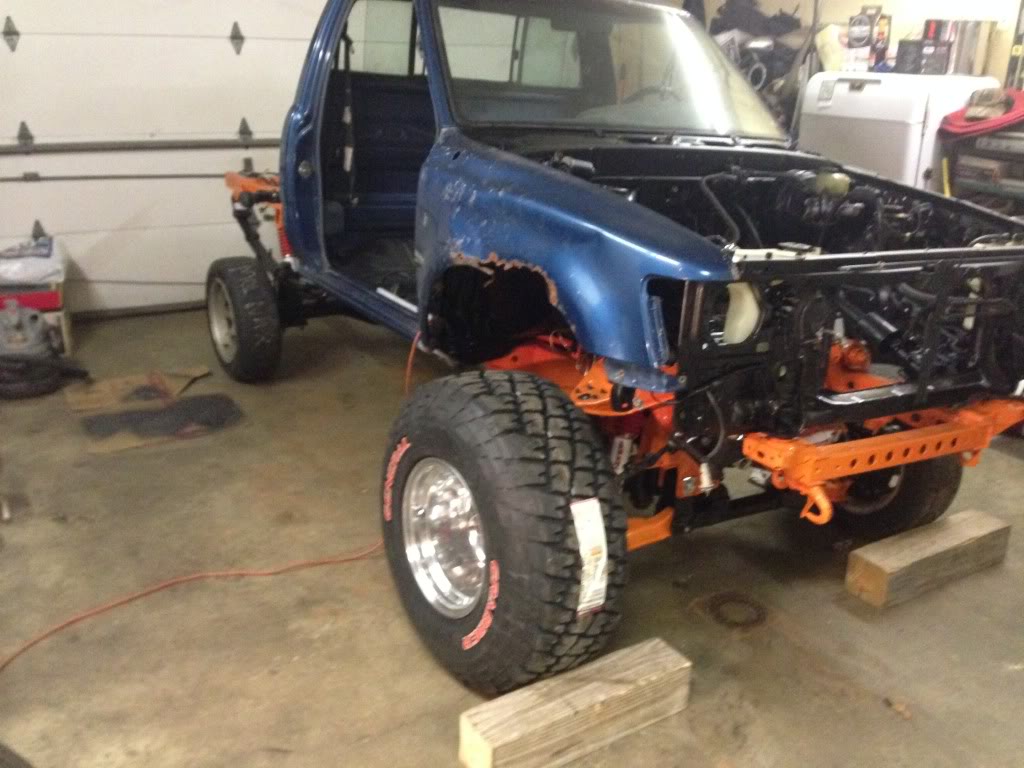
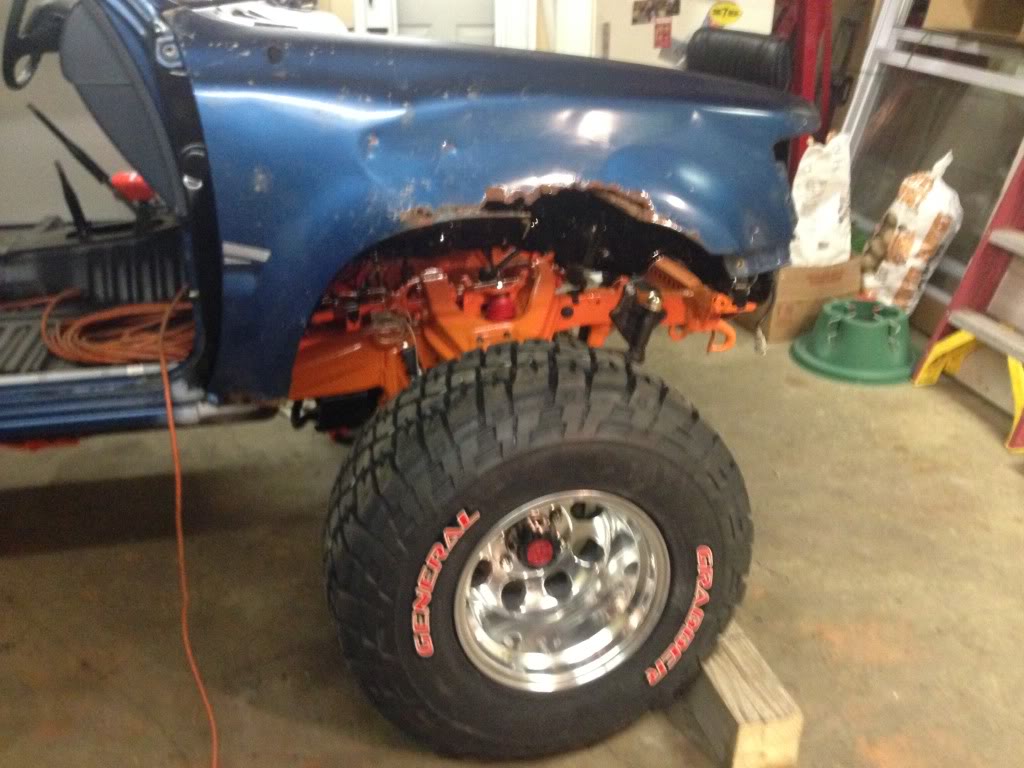
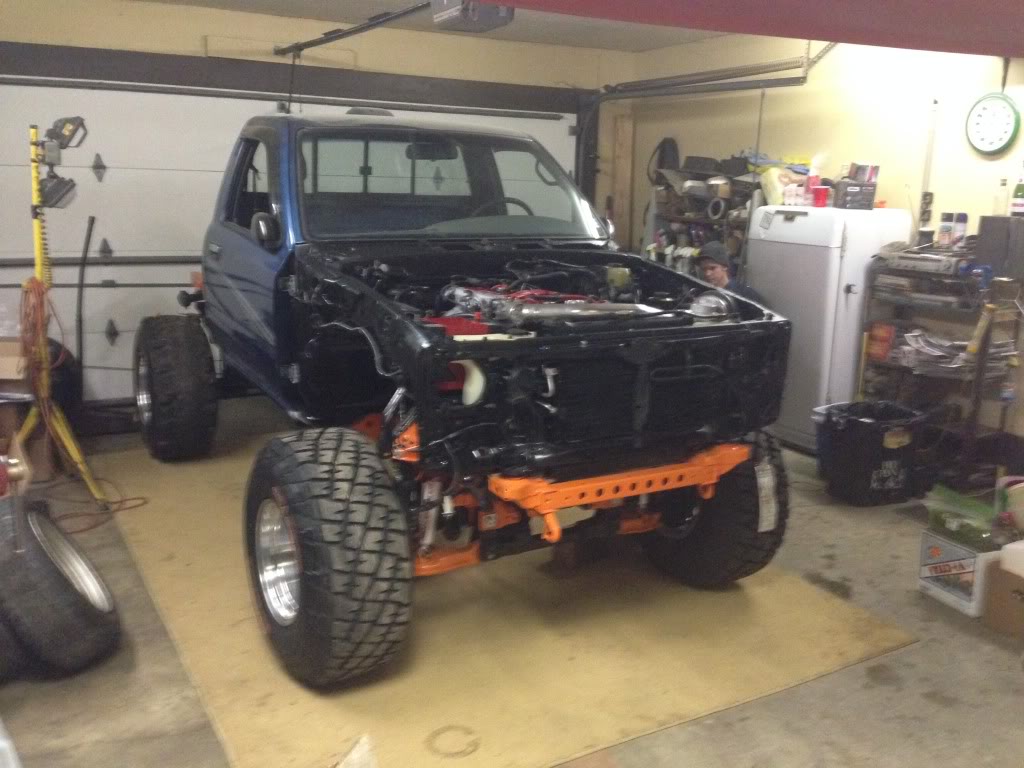
Couldn't resist trying on one of the wheels. Yes, I know the fender is gonzo. Just wanted to gauge the clearance. Obviously no issue there.
Got all of the lines and wires straightened out. Hooked the e-brake back up. Took a little bit of work to get everything freed up but finally got it working. So nice to have an emergency brake. Also took the dash apart because the truck came with the cluster that only had a speedo and temp gauge. I wanted the SR5 gauge with the oil pressure gauge so that I could make sure that the new engine had oil pressure on start up.

Couldn't resist trying on one of the wheels. Yes, I know the fender is gonzo. Just wanted to gauge the clearance. Obviously no issue there.

Got all of the lines and wires straightened out. Hooked the e-brake back up. Took a little bit of work to get everything freed up but finally got it working. So nice to have an emergency brake. Also took the dash apart because the truck came with the cluster that only had a speedo and temp gauge. I wanted the SR5 gauge with the oil pressure gauge so that I could make sure that the new engine had oil pressure on start up.
May 7, 2014 | 07:42 PM
#42
Thread Starter
Registered User
Joined: Aug 2013
Posts: 43
Likes: 0
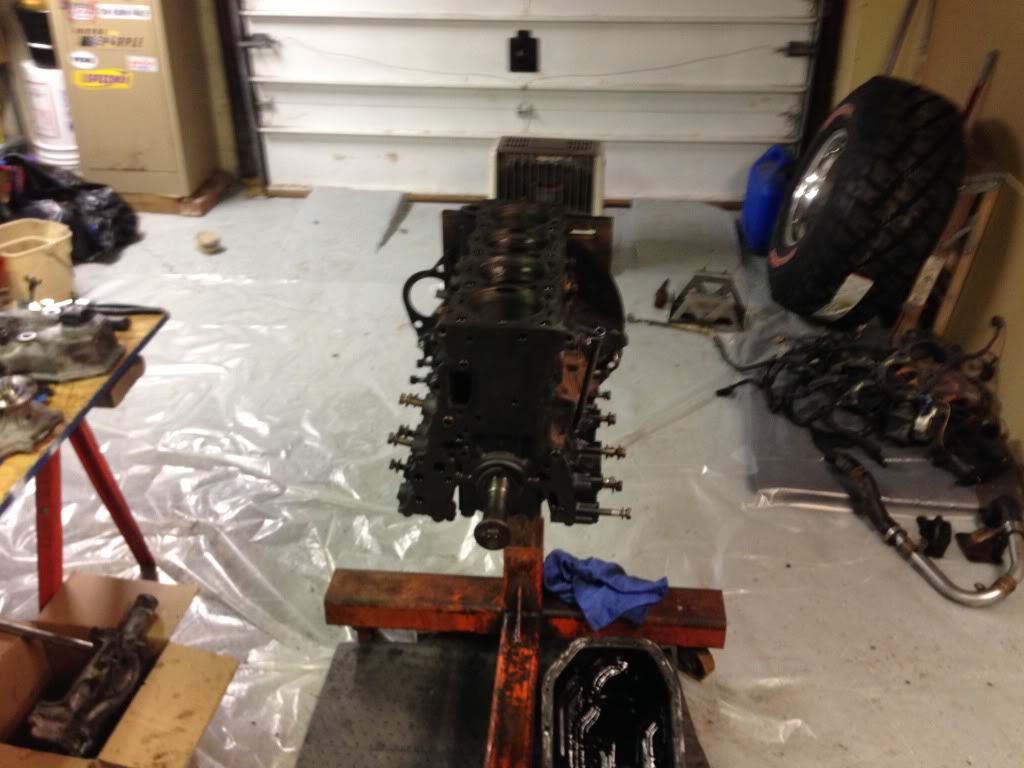
Got the SR5 cluster out of the donor truck and put in the dash. Made a mental note to order the mechanical oil sending unit for the new engine. Got the brake lines all hooked up. Filled the master cylinder up and tried to bench bleed it. Couldn't get any cooperation. Put it back in the truck and tried to bleed it. Still no luck. Played with it for over an hour. Got p'od at it and pulled one off the parts truck. Bolted it up and it worked fine. Finally figured out I ruined the initial one when I tried to clean the gunk out of it with brake cleaner....ruined the O-rings...now I know that's a bad idea. Eventually got all of the air out of the new lines and bled the load valve last as described in the FSM manual. Bought a new o-ring kit for the A/C system and bolted the condenser back in and hooked the lines up. Also bought an upgraded battery box from Ruff Stuff for a 78 series battery. Took a little bit of fab work to get it fitted in the original location but came out really nice. Rolled the engine out of the garage and degreased the heck out of it to get it ready for tear down. Wish I would've took more pictures of this stuff.


 May 9, 2014 | 07:58 AM
#44
Thread Starter
Registered User
Joined: Aug 2013
Posts: 43
Likes: 0
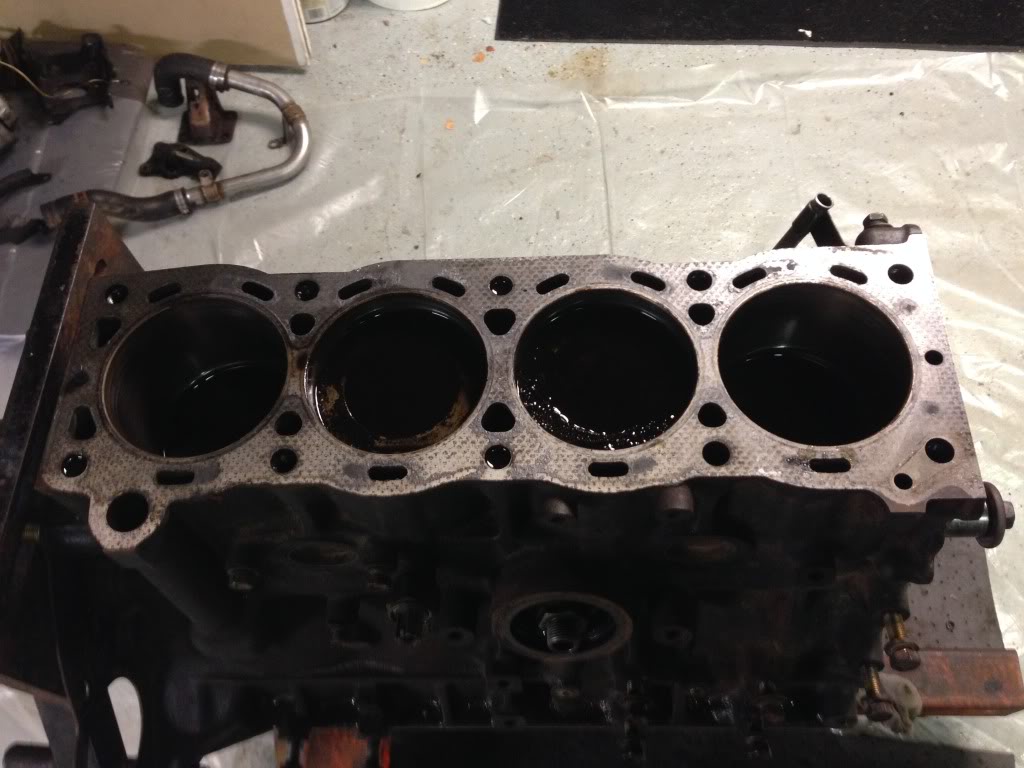
Debated on whether to tear the engine down or not because the PO said that it only had 10,000 miles on a fresh rebuilt with a new Toyota factory block and rotating assembly. The thing was leaking oil everywhere and the intake looked really sooty. I knew I wanted to upgrade the timing chain to a dual row and possibly put a cam in it for some more lower end torque. So, I began tearing the engine down against most people's word. What I found was very surprising and showed that I made the right decision. Some people just do not do good work....

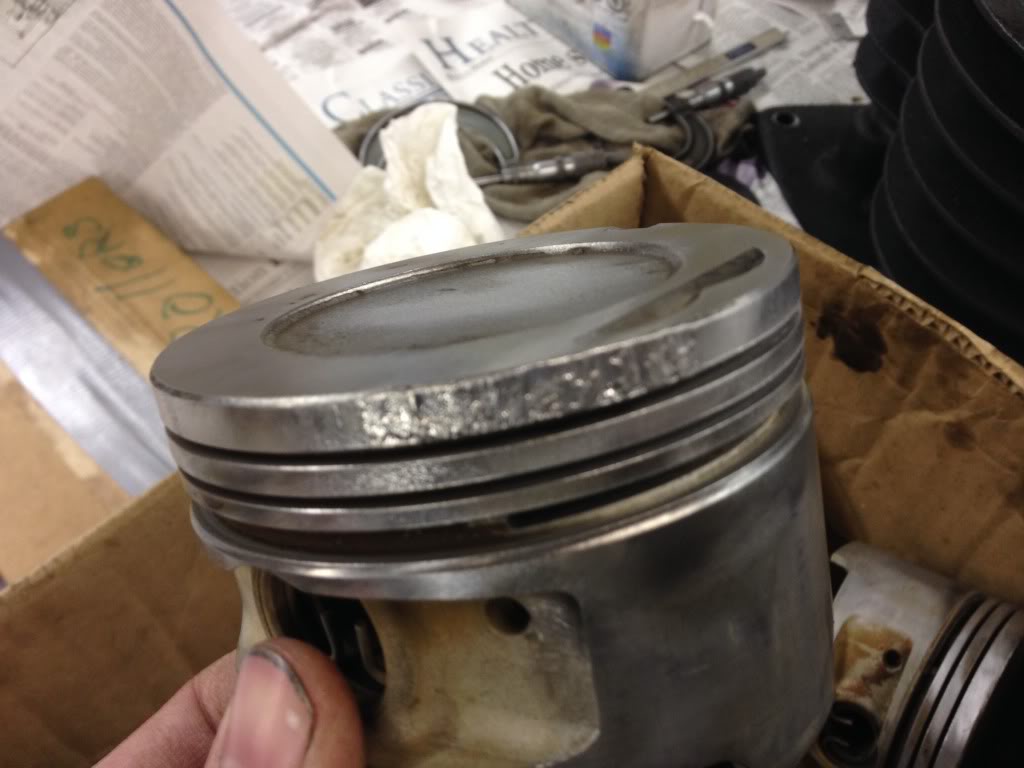
Top of the pistons were really carboned up. Not a good sign. Was thinking bad injectors or plugs.....it was the injectors. Also found out that the block was already bored 0.30 over.
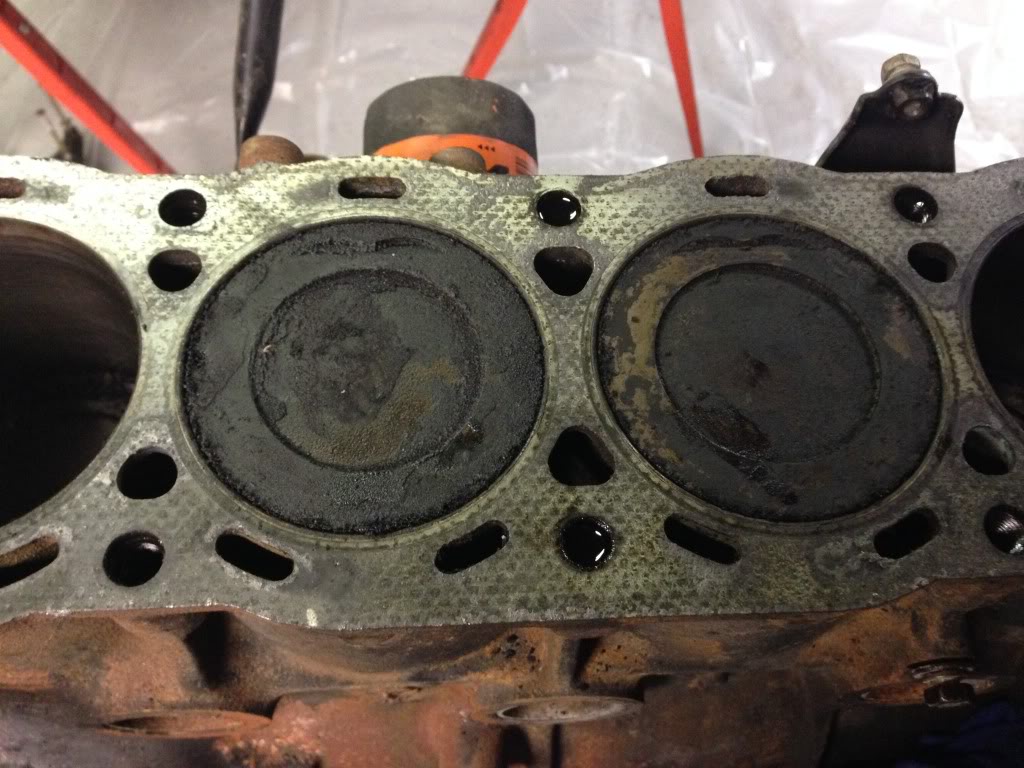
Combustion chamber in the head was just as bad.
Yuck.....broke the oil sending unit off in the block. What a stubborn SOB.
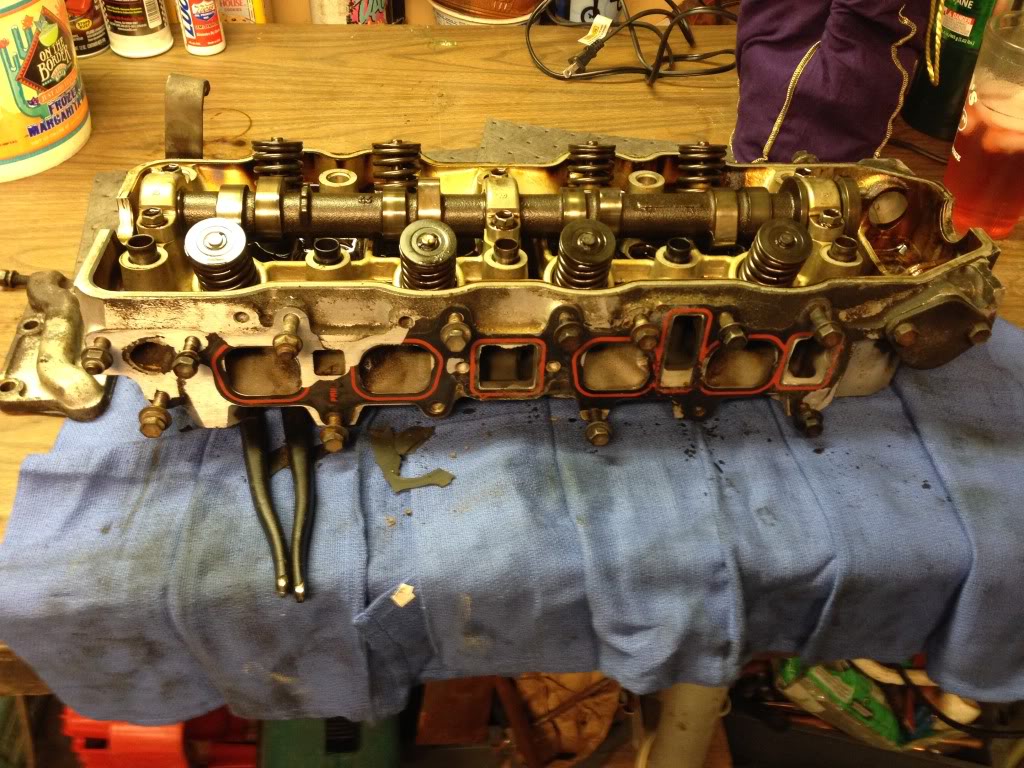
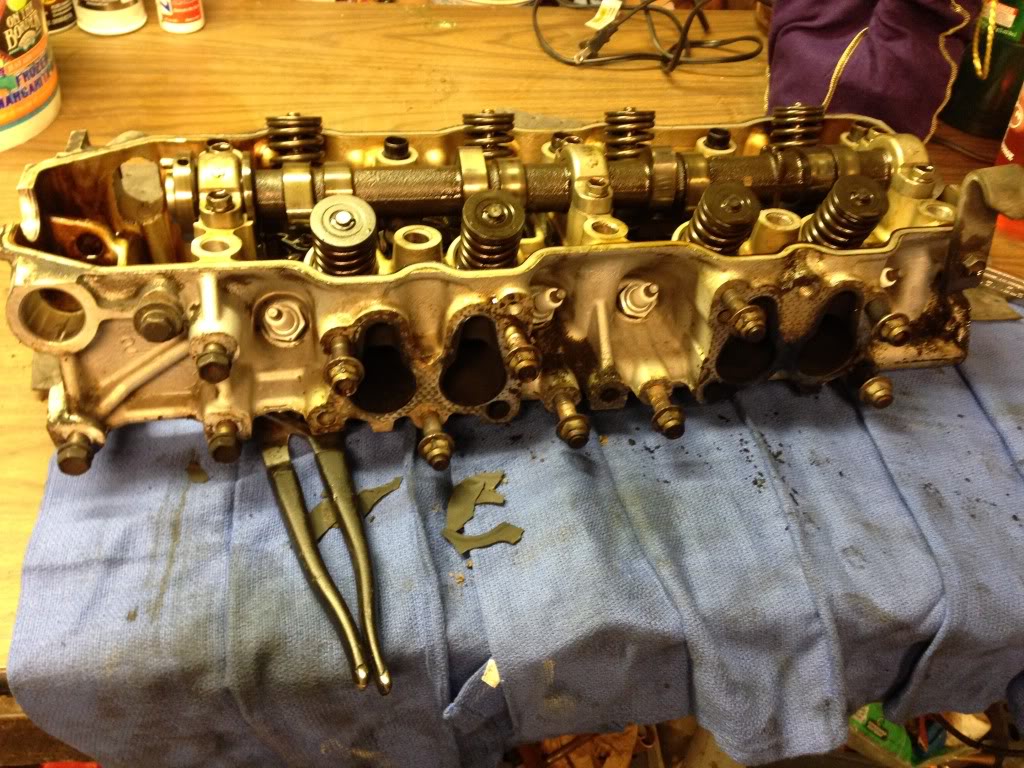
I scrubbed the top of the pistons up to get the carbon off of them. Pulled the timing chain and stripped the block down to nothing.
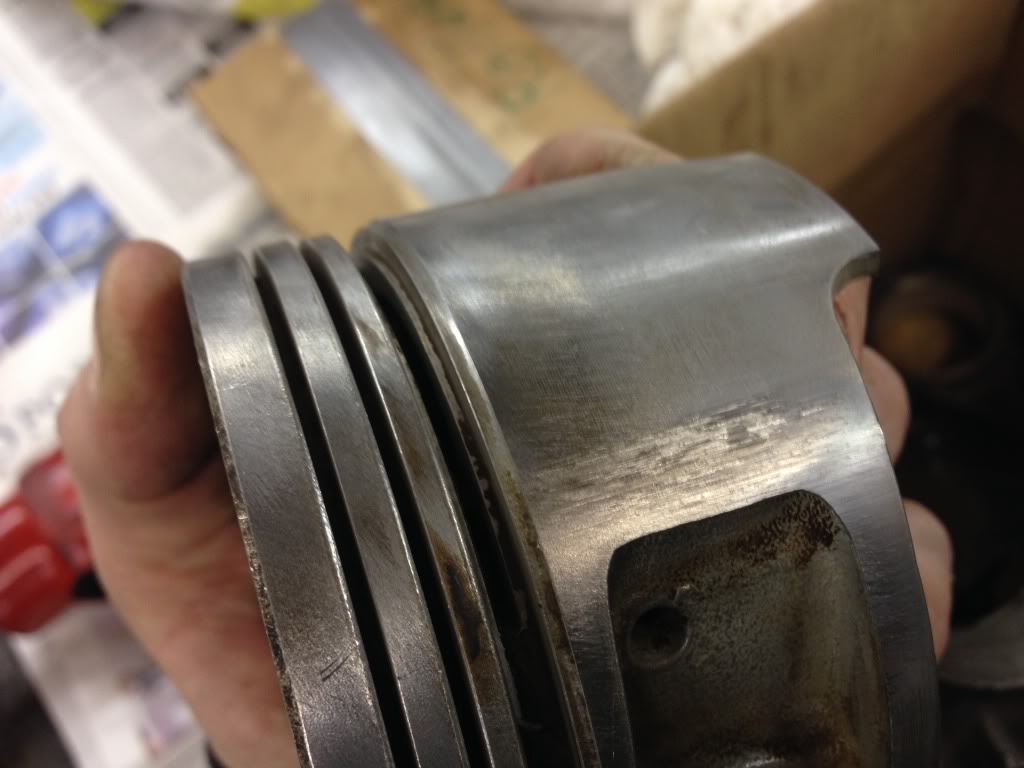
I didn't like the looks of the #2 piston. There looked to be some scoring at the top of the piston sleeve. All of the others looked fine. I made an executive decision to take the block and head to a machine shop to get them checked out. Also made a call to LCE performance and made a huge order.


Top of the pistons were really carboned up. Not a good sign. Was thinking bad injectors or plugs.....it was the injectors. Also found out that the block was already bored 0.30 over.

Combustion chamber in the head was just as bad.


Yuck.....broke the oil sending unit off in the block. What a stubborn SOB.


I scrubbed the top of the pistons up to get the carbon off of them. Pulled the timing chain and stripped the block down to nothing.

I didn't like the looks of the #2 piston. There looked to be some scoring at the top of the piston sleeve. All of the others looked fine. I made an executive decision to take the block and head to a machine shop to get them checked out. Also made a call to LCE performance and made a huge order.
May 9, 2014 | 06:17 PM
#45
Thread Starter
Registered User
Joined: Aug 2013
Posts: 43
Likes: 0
Made a rather large order from LCE performance Toyota for my engine:
Upgraded distributor cap and rotor
7.5 mm spark plug wires and wire loom
NGK spark plugs
Throttle Body spacer
Idle speed screw
Dual Row Timing Chain Conversion kit
-dual row chain and sprockets
-metal guides
-bigger oil pump
-bigger water pump
-bigger timing chain cover
Head Gasket Set
Head Bolt Set
All new rocker arms
Big bore throttle body
Pro Torquer Cam
Header Kit
Cold Air Intake
Billet Oil Cap
Flex fan with spacer kit
190 degree thermostat
Radiator hose kit
Radiator cap
Fuel filter
Header stud set
Street Performer Valve springs
Street Performer Valve retainers
Silicone Vacuum Hose kit
Short shifter kit
Pro flow exhaust
Also bought:
4 new pistons and rings...(you'll see why)
Goodyear Gatorback belts
Oil pan gasket
Lucas assembly lube
K&N oil filter
Oil pressure switch (for SR5 gauge conversion)
Royal Purple Break-In oil
Royal Purple Power steering fluid
Royal Purple- Purple Ice
Magnaflow High-Flow (No GUTS) Catalytic Converter
Flamethrower Upgraded 4-hole fuel injectors
and probably some stuff I missed...
This was a big chunk of change. I used my Christmas bonus and then some to justify these purchases.
May 10, 2014 | 11:43 AM
#46
Registered User
Joined: Mar 2014
Posts: 121
Likes: 0
From: Elkview, wv
Oh man, I bet that was expensive. I will be tearing down my DD engine since the headgasket blew. It probably warped the heads, so ill need to get a new set. Where if you know of any, could I get a set relatively cheap?
May 12, 2014 | 06:41 PM
#47
Thread Starter
Registered User
Joined: Aug 2013
Posts: 43
Likes: 0
I took my head to a machine shop to get resurfaced. It was relatively cheap. I would try that first
May 13, 2014 | 07:19 AM
#48
Thread Starter
Registered User
Joined: Aug 2013
Posts: 43
Likes: 0
Loaded up my engine block and head and took it to the machine shop. A day later they called me with the bad news. #2 piston was melted. I needed to buy a new piston and rings and get the cylinder honed. He told me that two other pistons were showing signs of the same thing so I opted to buy 4 new pistons and rings and get the block bored to 0.30 over. Here is a picture of my new paperweight.
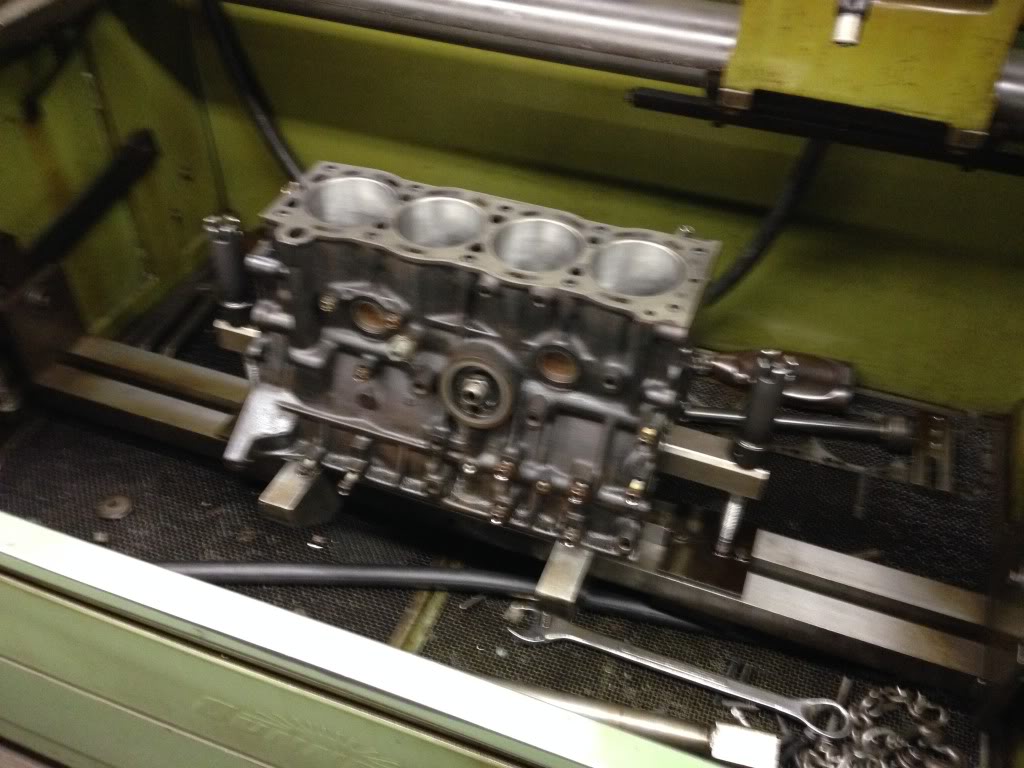
Here is a picture of my block on the lathe.
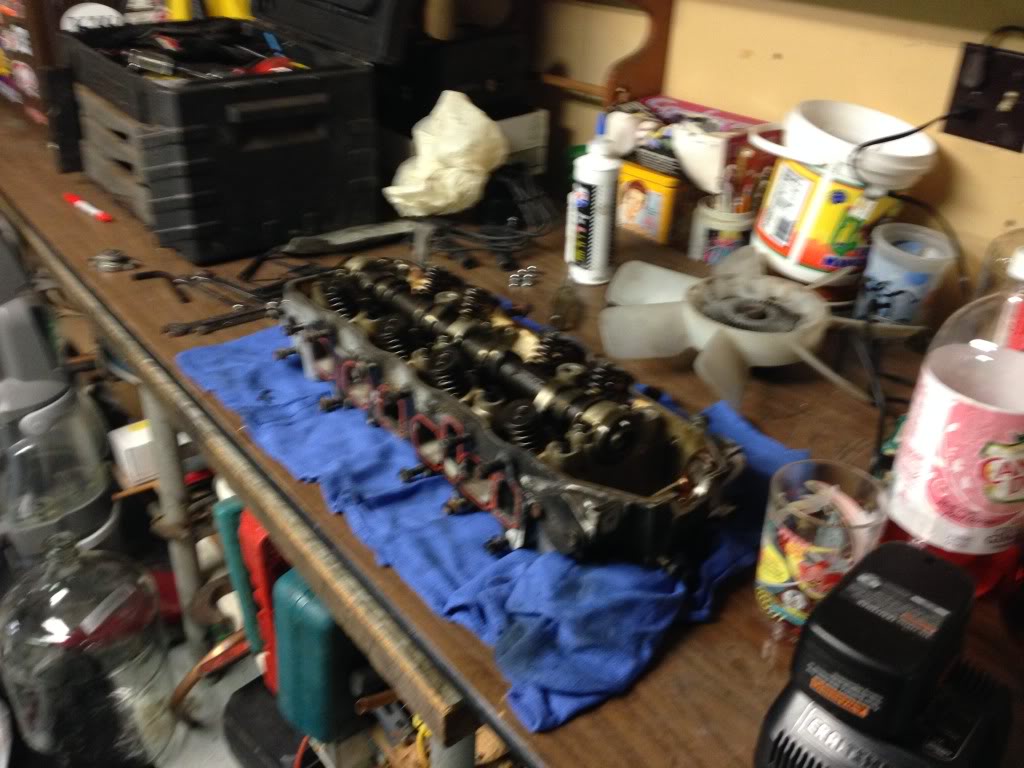
They polished the crank, checked the rods and bearings, installed the pistons, installed new freeze plugs, resurfaced and cleaned the head. Cleaned the valves, put the valves, valve springs, and valve seals back in. Installed the oil pump drive gear, dual row timing chain, metal guides and timing cover. Then they put the head gasket and head back on. Put new head bolts in with the new rocker assembly and upgraded cam. Then they set the valves. Most of this stuff I could've done myself but I wanted to make sure the valves were set correctly with the new cam and rocker arms. LCE wouldn't warranty their cam without buying new rockers. They also removed that stubborn piece of the oil sending unit that I snapped off.


 May 16, 2014 | 04:59 AM
#53
Thread Starter
Registered User
Joined: Aug 2013
Posts: 43
Likes: 0
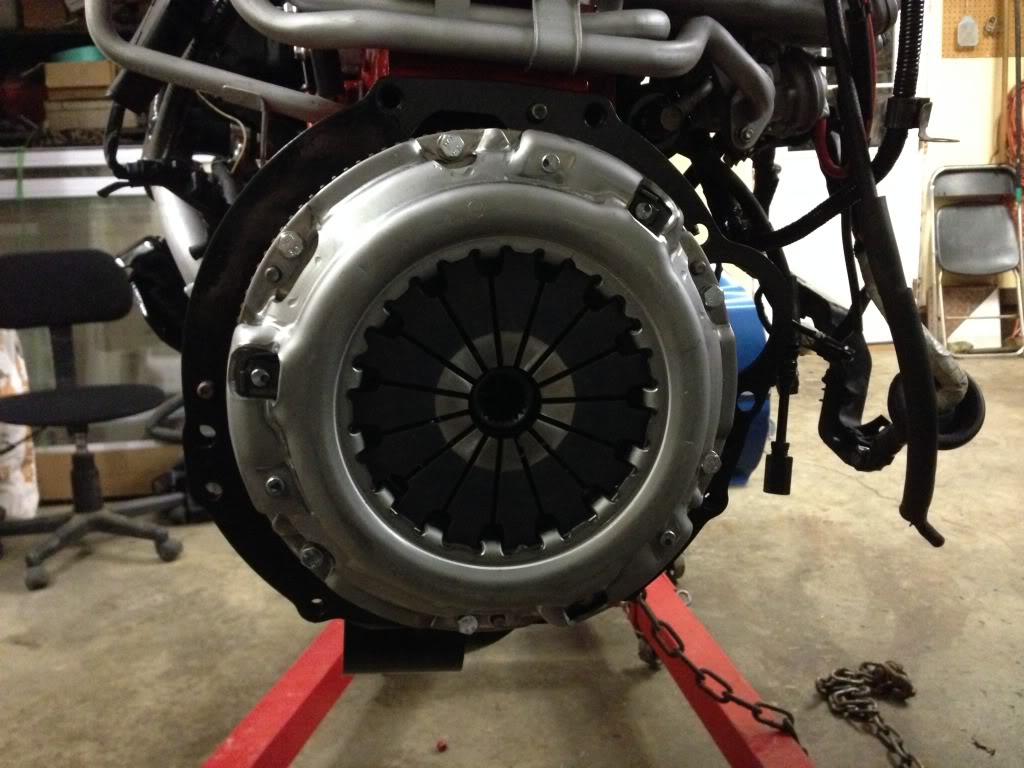
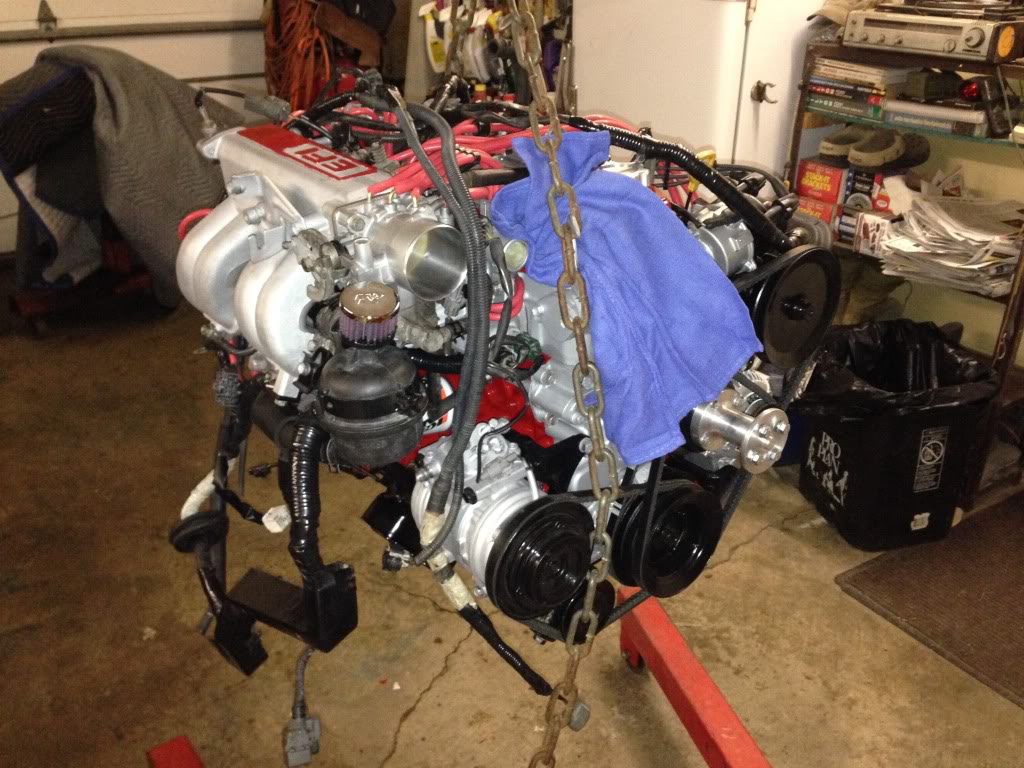
Got the order in from Marlin Crawler. Bolted up the new clutch and pressure plate and prepped everything for the motor install. It's been a long journey getting to this point.
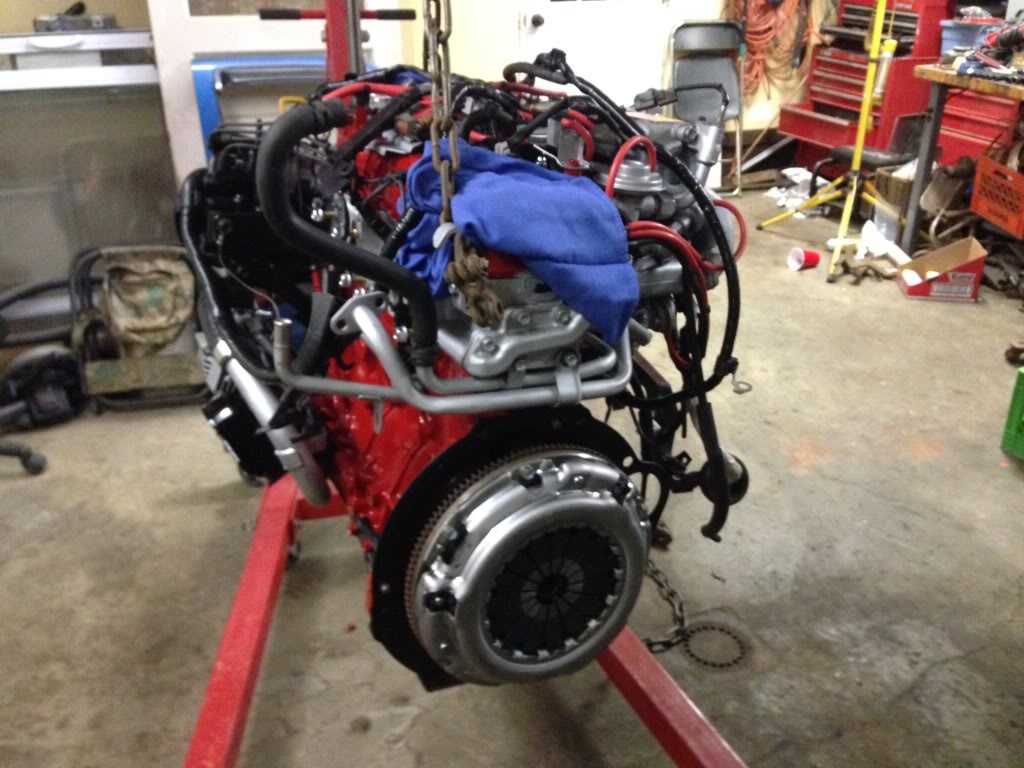
Put the small tires back on so I could get the engine up over the radiator supports without hitting the garage ceiling.
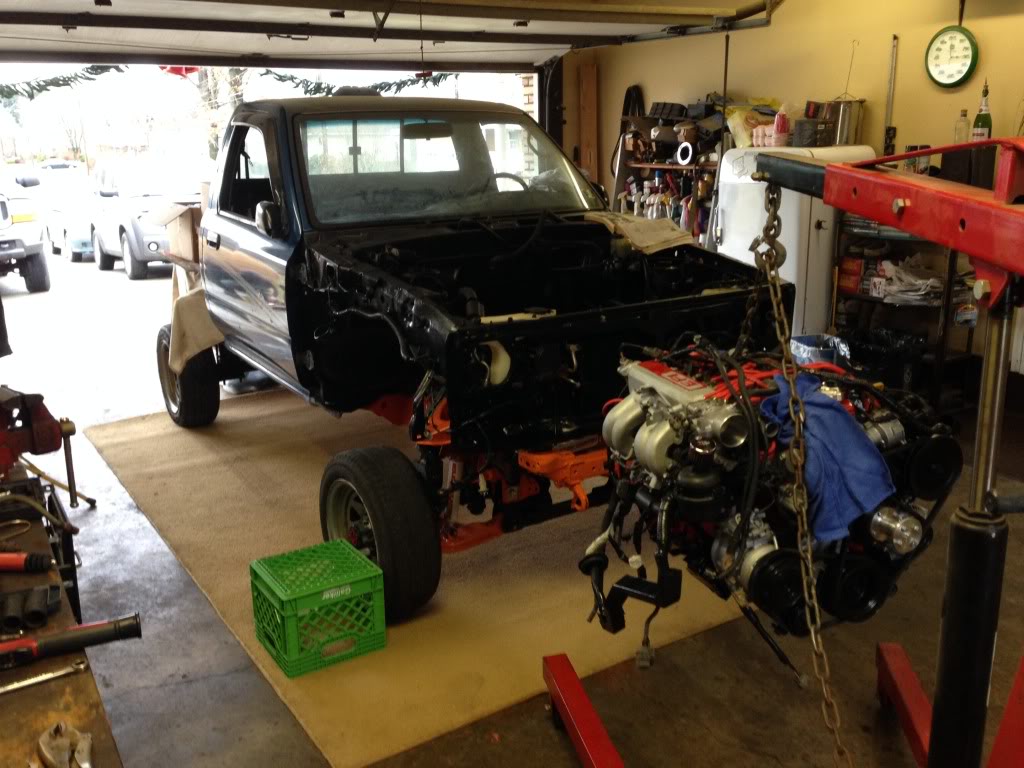
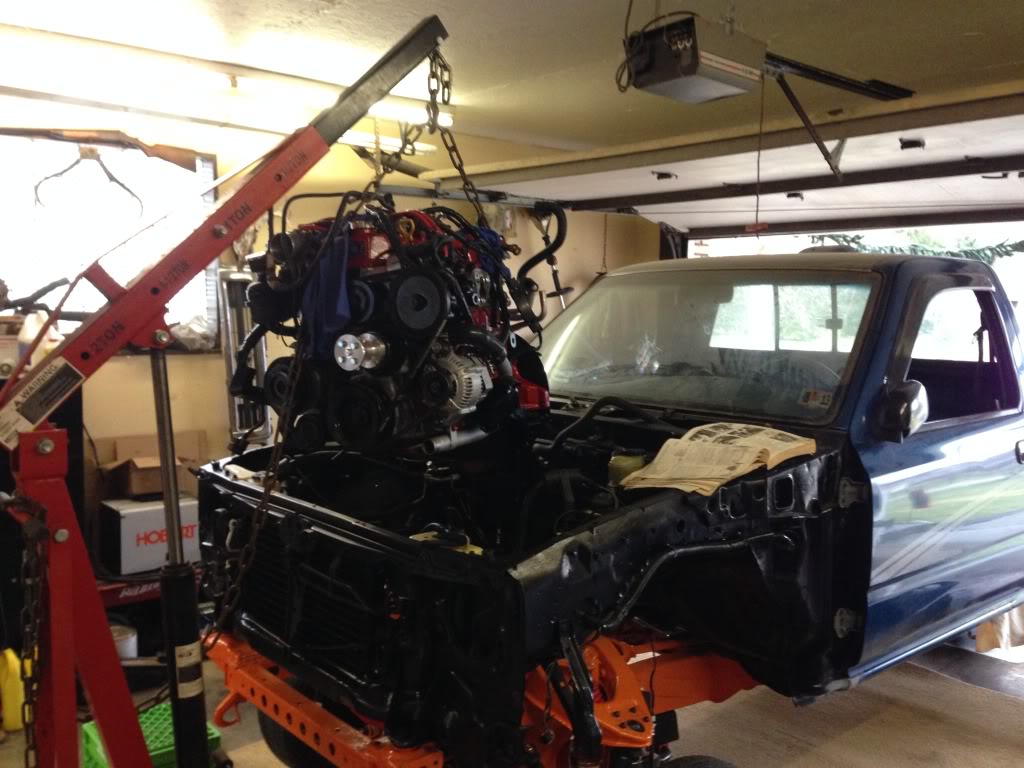
Here it is with the engine in. Not running yet but very close.


Put the small tires back on so I could get the engine up over the radiator supports without hitting the garage ceiling.


Here it is with the engine in. Not running yet but very close.
 May 16, 2014 | 06:02 AM
#54
Dude! Awesome progress! Engine looks great. Looking at your engine makes me wish I would have taken the time to get new accessories and clean up all my brackets. Seriously looks great.
Im digging the oil cap too!!
Im digging the oil cap too!!
May 16, 2014 | 06:13 AM
#55
Thread Starter
Registered User
Joined: Aug 2013
Posts: 43
Likes: 0
Thanks! The accessories are actually all the greasy ones that came with the truck. I spent a lot of time to clean them up and paint them with high heat engine enamel. I can't wait to work on my truck and not look like I came out of a coal mine.
 May 28, 2014 | 07:32 AM
#57
Thread Starter
Registered User
Joined: Aug 2013
Posts: 43
Likes: 0
Got the engine running. Had the distributor 180 degrees off. Fixed that and it fired right up. Took awhile to get the power steering system to burp the air out. Let it run for about 30 minutes at 2,000 rpm. Set the idle and then set the timing. It was a bear setting the timing. I couldn't find the right spot. It was either too far advanced or too far retarded. Had to pull the distributor and shift it a tooth. That solved the problem and it is now at about 7-8 degrees advanced. Brakes work good and the clutch feels really nice.

 May 28, 2014 | 07:38 AM
#58
Thread Starter
Registered User
Joined: Aug 2013
Posts: 43
Likes: 0
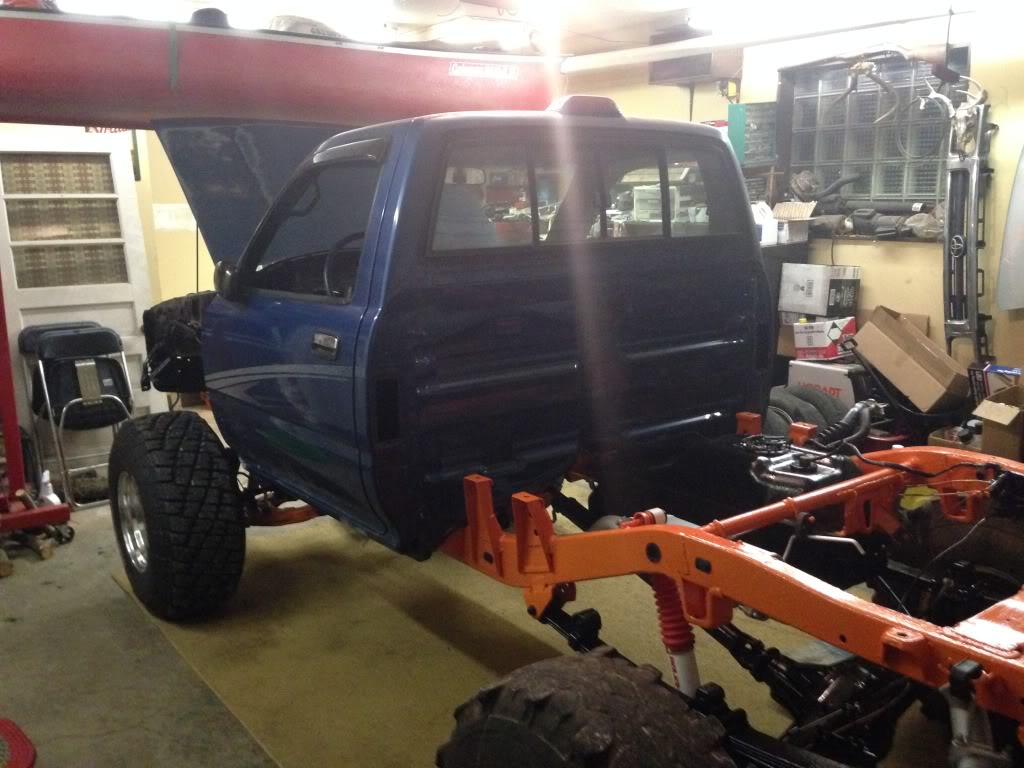
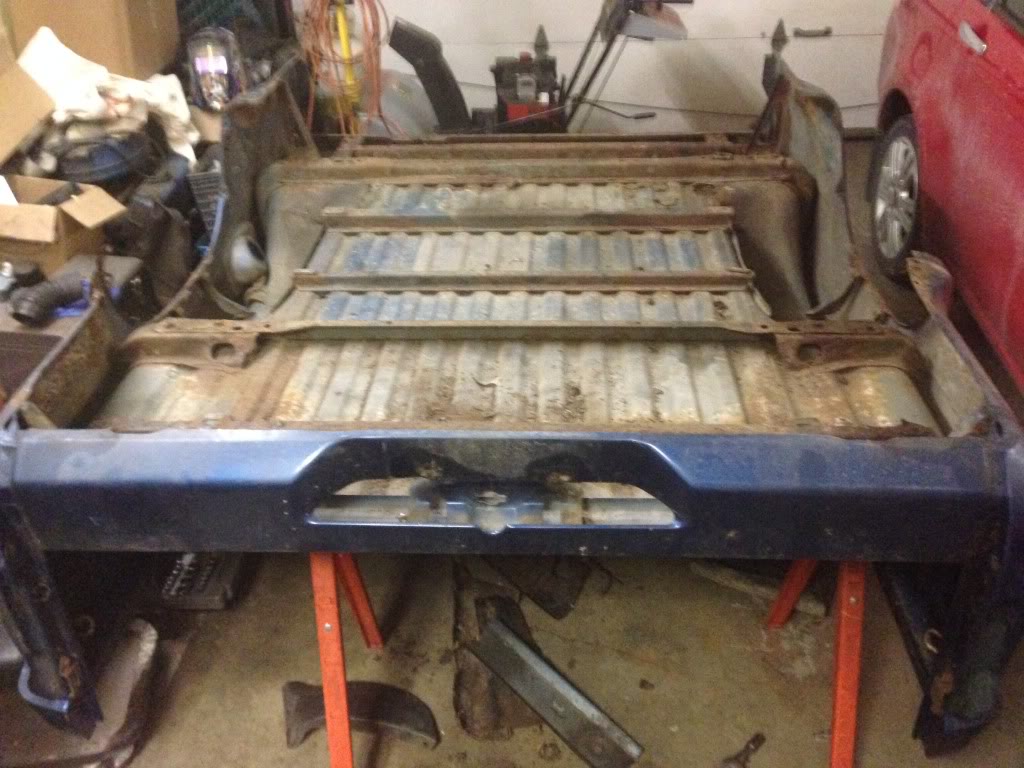
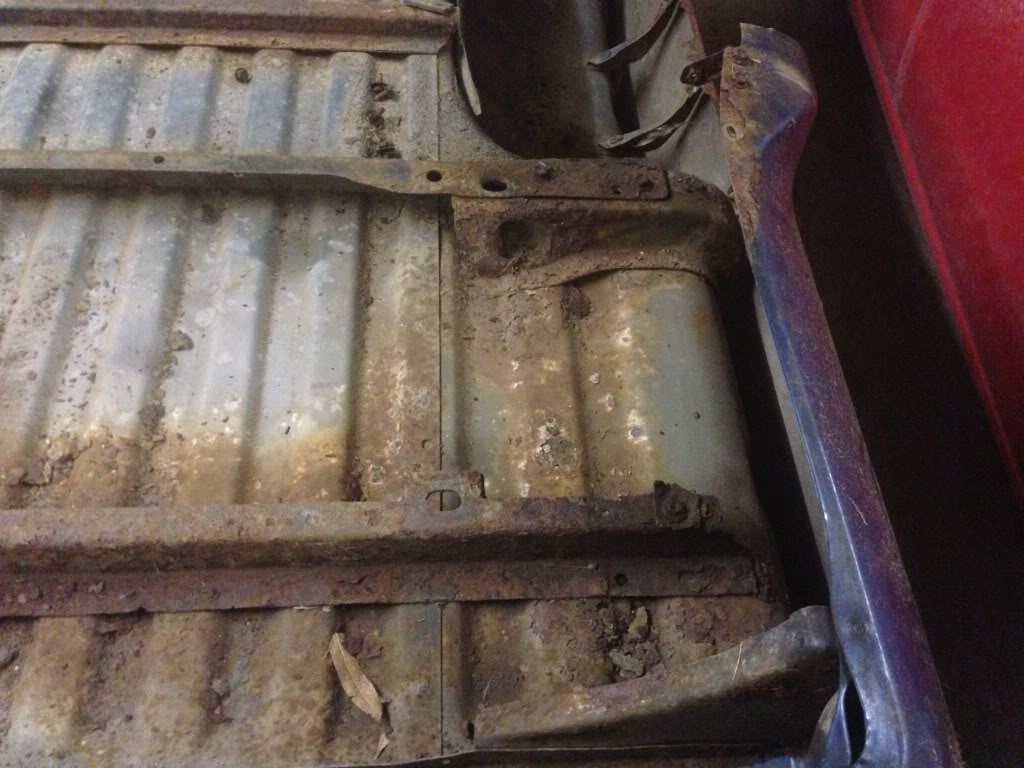
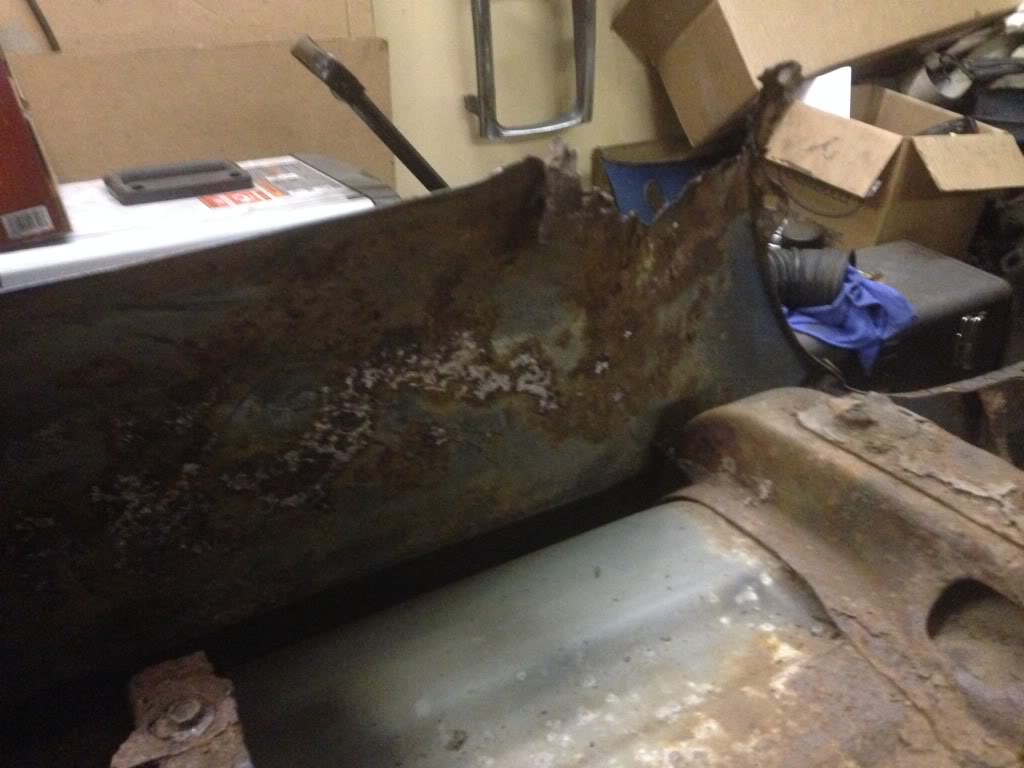
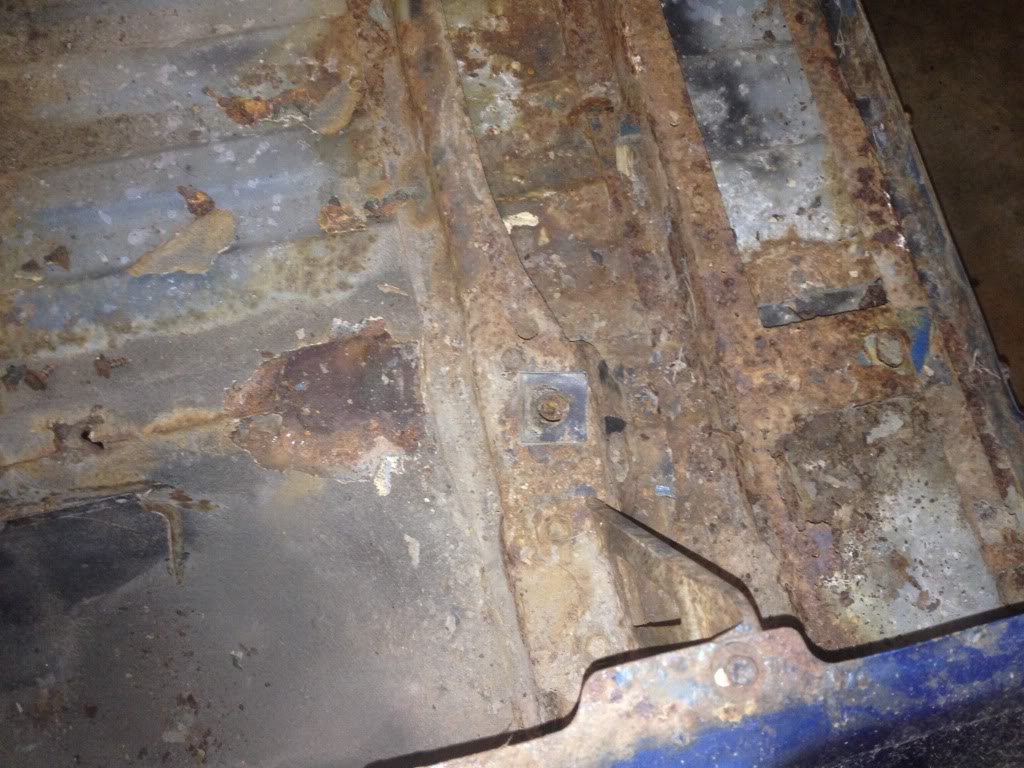
Brought the bed into the garage to start working on it. Started unbolting things and began on rust removal. Turns out the bed was in worse shape than originally thought. I guess I was too concerned over the frame damage when I first took the bed off. Here are some pictures of the rust bucket. Still actually in good shape for a PA bed though.
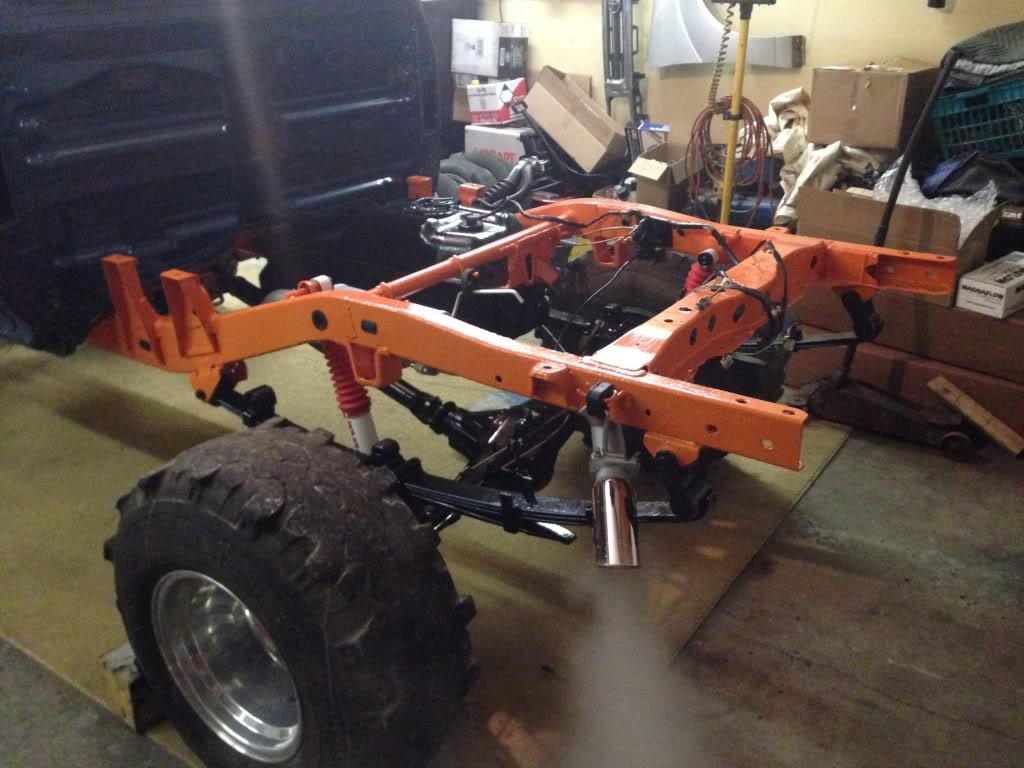
I had to make an executive decision to not fix the bed. I realized no matter what I did it was still going to be rusty and continue to rust. After some searching I found Tim from B&G Fiberglass. I looked at others that had his product and they all seemed happy with it. I was a little leery about buying an all fiberglass bed but I placed an order. And the waiting began......


I had to make an executive decision to not fix the bed. I realized no matter what I did it was still going to be rusty and continue to rust. After some searching I found Tim from B&G Fiberglass. I looked at others that had his product and they all seemed happy with it. I was a little leery about buying an all fiberglass bed but I placed an order. And the waiting began......


