94mackyota's 94 Pickup Build Up Thread
 04-09-2014, 05:59 PM
#1
Registered User
Thread Starter

Join Date: Aug 2013
Posts: 43
Likes: 0
Received 0 Likes
on
0 Posts
94mackyota's 94 Pickup Build Up Thread
I've been creeping around this site for a little over 2 years now looking at the build ups and the tech section. I am currently 1-1/2 years into my own build now. There is a lot of catching up to do so I will slowly post things until I get to the point where I'm at now. First a little backstory if you care to indulge. The obsession with Toyota pickups got its start when 3 years ago when my buddy bought a pickup off my neighbor for $300. He thought it was a good deal until he went to change the oil and found a bunch of large holes in the frame. We pondered on junking or beating the hell out of it for a couple weeks until we decided it would be worth our time fixing. We obviously bit off more than we could chew. We ended up taking the truck down to a rolling chassis and replating the entire frame. We put it back together, bought a better bed, did some body work and had it painted the original blue color. This took over a summer to do. After helping him for over 6 months and watching him enjoy his nice new 94 pickup I felt like I needed one also. The chance came a couple months later when a guy approached me saying that his frame broke by the back shackle and he wanted to sell the truck. I looked at the truck and it was in relatively good shape besides the break in the frame. It had a recently rebuilt Toyota crate engine and a nice Leer cap. So I gave him $800 for it. Not a bad investment so I thought. I removed the bed to begin fixing the frame. This is where the project took a turn.... It didn't look so bad at first. I cut out the bad section where the shackle was originally welded. I began to wire wheel the back half of the frame and started finding more holes. I said it's nothing that a welder can't fix. So I crawled under the cab and started beating on the frame to see if there were any thin spots. Well lets say the frame began to become swiss cheese. So off came the cab.....
 04-10-2014, 07:45 AM
#2
Registered User
Thread Starter
Join Date: Aug 2013
Posts: 43
Likes: 0
Received 0 Likes
on
0 Posts

This is my buddy's 94 Pickup that we redid a couple years ago. It was the truck that started the obsession.

Here is the first picture I took of my truck. This was after cutting the back portion of the frame out and figuring out that the cab had to come off.
Last edited by 94mackyota; 04-10-2014 at 07:55 AM.
04-10-2014, 08:36 AM
#3
Registered User
Thread Starter
Join Date: Aug 2013
Posts: 43
Likes: 0
Received 0 Likes
on
0 Posts

Pulling the engine


Engine out.

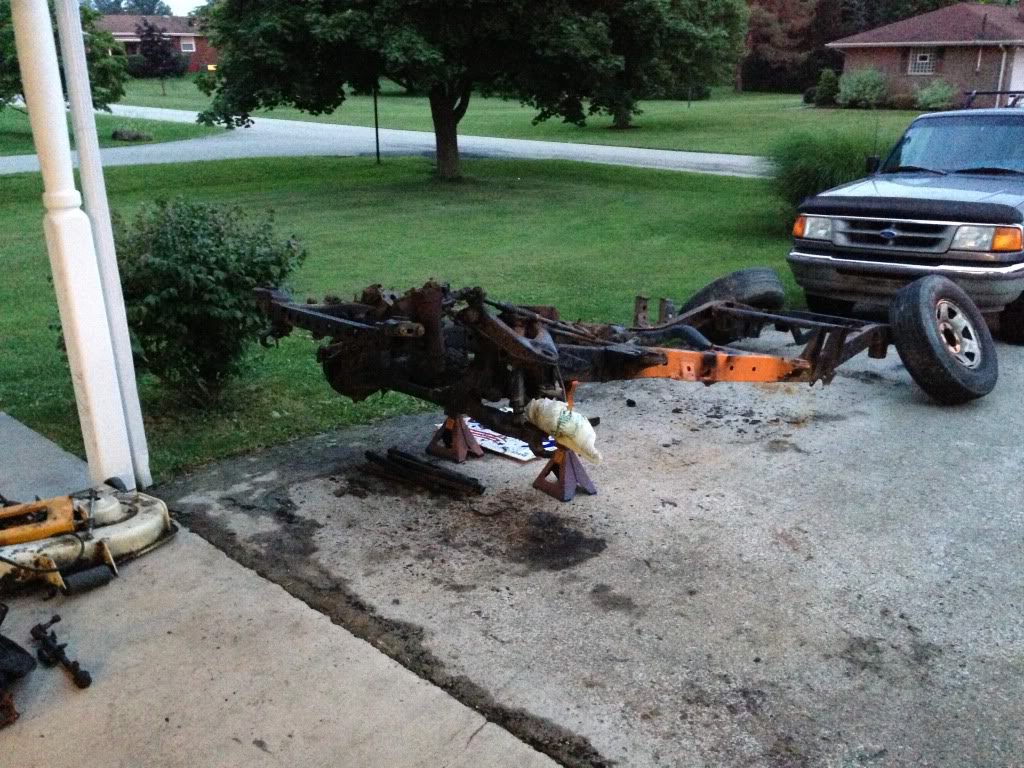
Getting ready to pull the cab off. You can see on the back part of the frame all the spots that were bad.

Staging the old ford to haul my cab.
04-10-2014, 10:48 AM
#4
Registered User
Thread Starter
Join Date: Aug 2013
Posts: 43
Likes: 0
Received 0 Likes
on
0 Posts
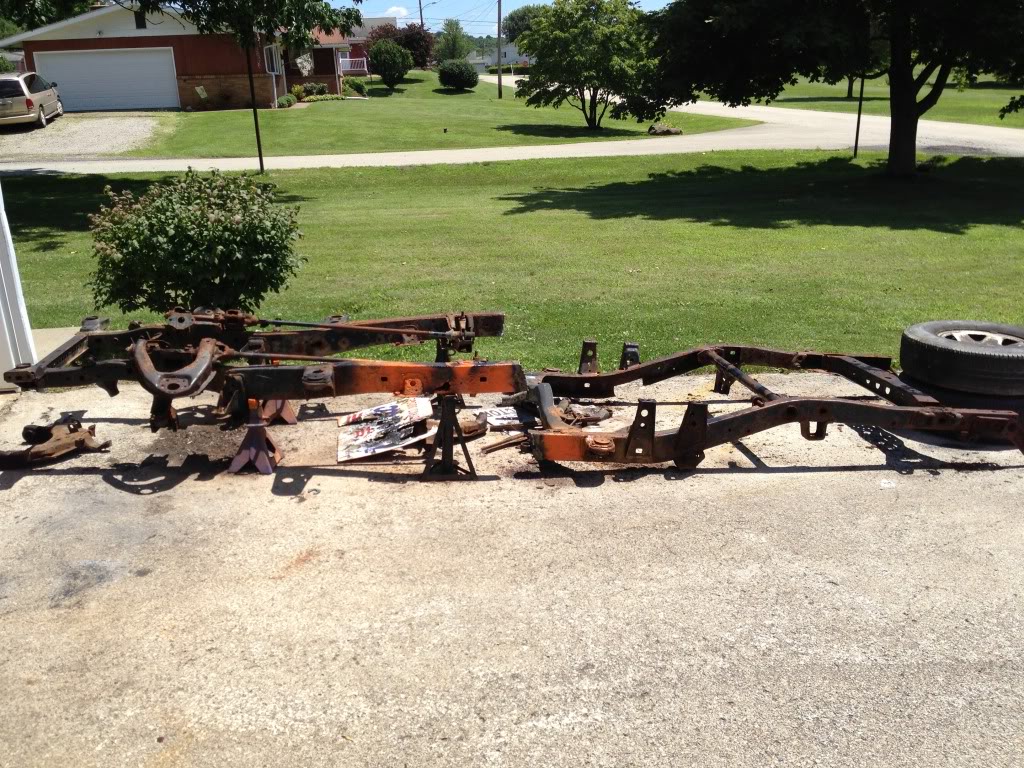
After removing the cab and taking a welding hammer to the frame, there were a lot more thin spots than originally expected. I cut out all the bad spots that needed fixed. Once I started to open up the box of the frame, the inside was in pretty bad shape. About two months earlier my buddy and I purchased a frame and drivetrain off a guy from an 88 4runner for $100. It was pretty hard to pass up a deal like that. Here are some pictures of us comparing the differences between the pickup frame and 4runner frame.
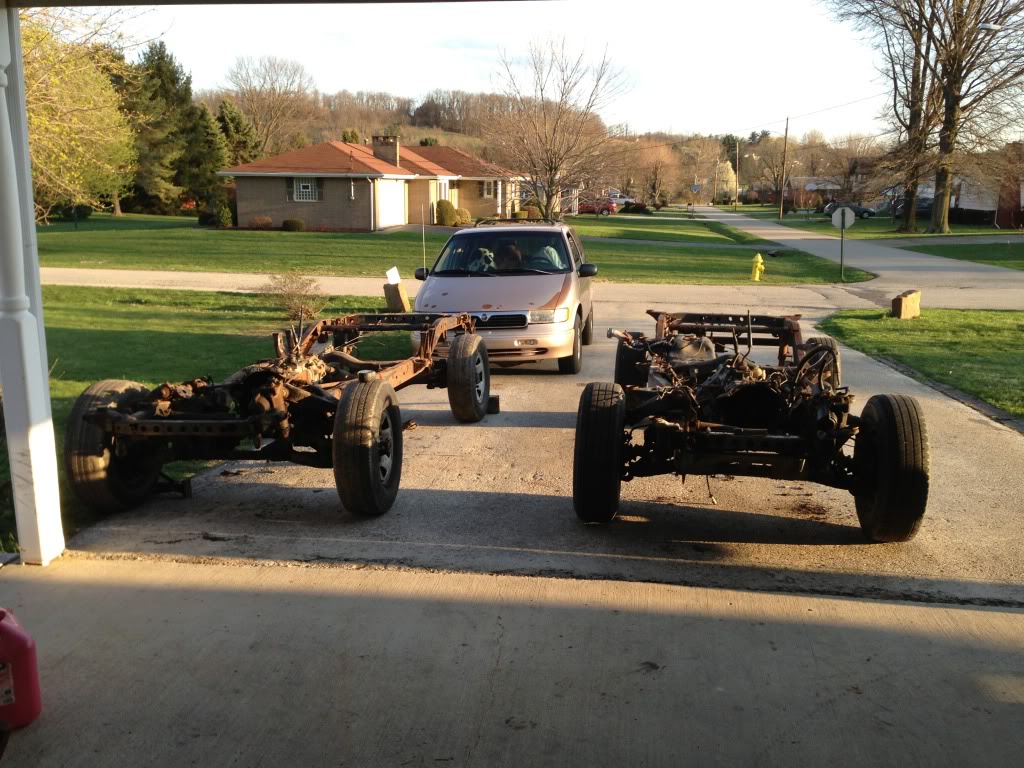
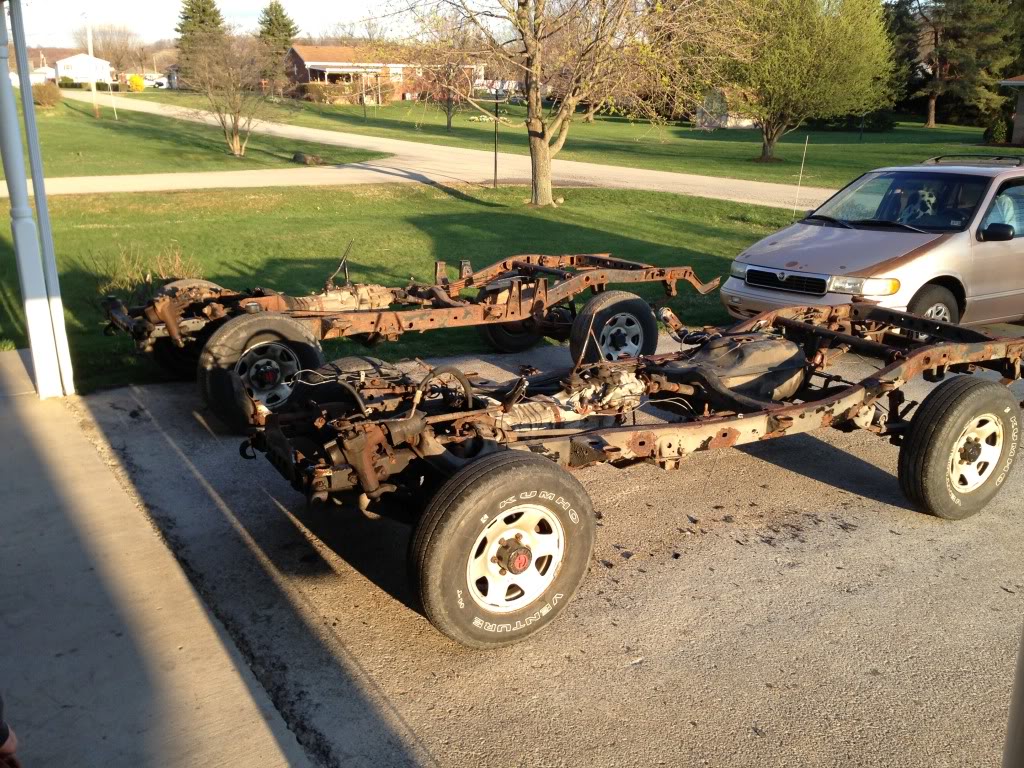
There were some subtle differences such as the cab mounts and bed mounts but the overall geometry was the same. The length of the 4runner frame was a couple inches longer but the wheelbase was the same. I contemplated what to do for about two weeks until a little miracle was shed upon my project. One day at work one of my coworkers was taking pictures of a potential gas well site. When he got back to the office he was making fun of the guy for having all of this junk in his yard. When I looked at the picture I immediately recognized that they were all toyota parts.

So I took a trip to the guys house on the way home from work that day to see what he had for sale. He said the only thing he was willing to part with was a frame......So I went and took a look at the frame he had parked in the weeds. I figured it would be just in as bad shape as mine because the Pa winters wreak havoc on Toyotas. To my surprise the frame was immaculate with one hole starting to form by the right front shackle and a hole in the gas tank support tube. I checked inside the box of the frame and there was little rust laying in the bottom. He said the frame had came from Vermont.
I offered him $300 and he said he would think about. I patiently waited for 2 days for a call. I knew that I needed this for my project and I think he knew it too. He finally called back and said I could have it for $500 with the differentials in it. I went there the next day and brought it home. Once I got it home I stripped it down to nothing but the frame. I degreased the whole thing and power washed it inside and out, blowing all of the crap and corruption out of the inside.
Trending Topics
04-14-2014, 10:01 AM
#8
Registered User
Thread Starter
Join Date: Aug 2013
Posts: 43
Likes: 0
Received 0 Likes
on
0 Posts

Preparing my rusty frame to go to the scrapyard. Took all of the good pieces off of it.

Started fixing the minor holes in my "new to me" frame. There was a hole starting to form above right front shackle as you can see. The intermediate tube that supports the exhaust and gas tank was also bad. I cut the tube out and made a new one with some new steel tubing.


Got everything mocked up and finished welding. Added some extra plates on the shackle areas. Also added some plates to the rear of the frame where the back bumper mounts because the p/o decided to torch off the bumper and heat stress the frame.
04-14-2014, 10:17 AM
#9
Registered User
Thread Starter
Join Date: Aug 2013
Posts: 43
Likes: 0
Received 0 Likes
on
0 Posts
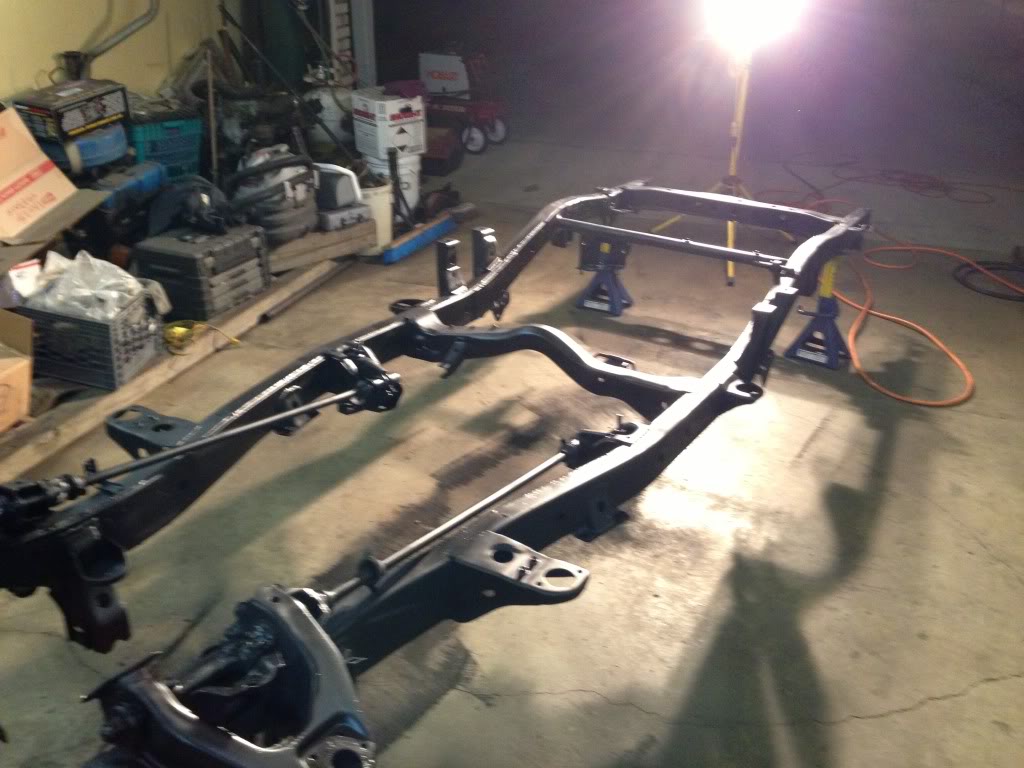
After I finished welding everything, I wire wheeled the entire frame and spot checked it to make sure there weren't any thin spots. With all of the plastic plugs removed I took the shop vac and sucked any rust or dirt that was still on the inside of the frame. In hindsight I should've took it to get sandblasted but the wire wheel did okay. I wanted to try and counteract the rust which is hard to do. After some extensive research I came across a product from Eastwood called Rust Encapsulator. I bought that, a couple cans of internal frame coating with a 360 degree, 6 ft wand and paintable undercoating.


 04-14-2014, 11:11 AM
#11
Registered User
Thread Starter
Join Date: Aug 2013
Posts: 43
Likes: 0
Received 0 Likes
on
0 Posts
Yeah, it wasn't cheap but well worth the price. I ended up buying most of my paint products from them for the rest of the project as well. I also got some thermocoustic barrier from them at half the price of the dynomat stuff.
04-14-2014, 12:11 PM
#12
They have always had good prices and shipped relatively fast. I did know that they sold the sound barrier stuff. I will have to check that out. Would be nice to put on the inside of the exterior panels in the back of the runner. Gets kind of noisy back there at highway speed.
04-15-2014, 06:17 AM
#13
Registered User
Thread Starter
Join Date: Aug 2013
Posts: 43
Likes: 0
Received 0 Likes
on
0 Posts
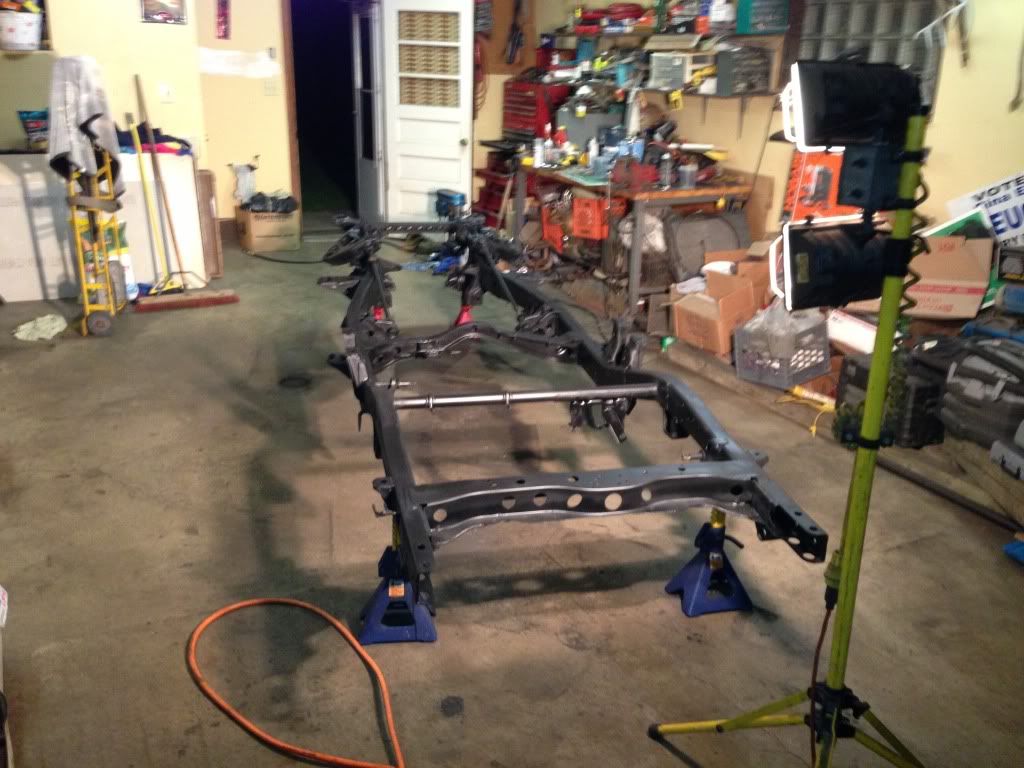
After getting the frame covered in rust encapsulator and undercoating, the project took a turn from a regular DD build to a show truck build. My buddy's dad works for an excavating contractor. They happened to have a bunch of gallons of Mack orange single stage enamel paint. The color that used to be on the old black and orange Mack trucks. He asked me if i wanted to paint my frame with it. I splashed some on for a test spot and really liked it. I planned on painting the truck black anyways, so orange would look pretty good.
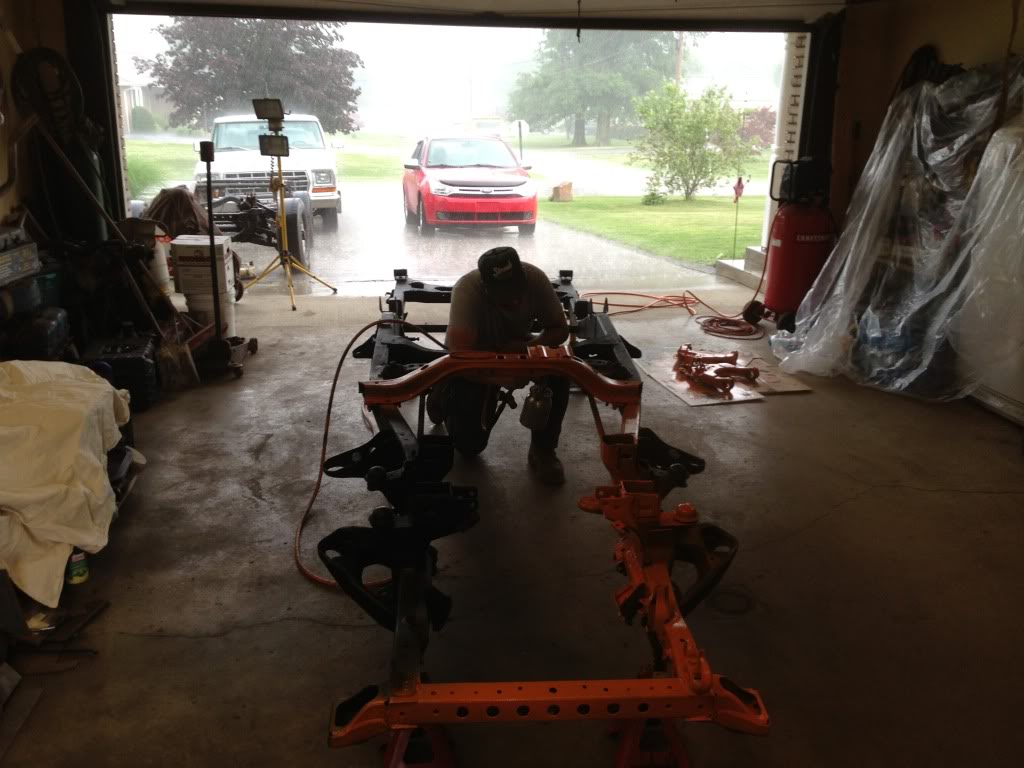
That's my buddy's dad spraying the first coat. He couldn't wait to get his hands on the paint gun.
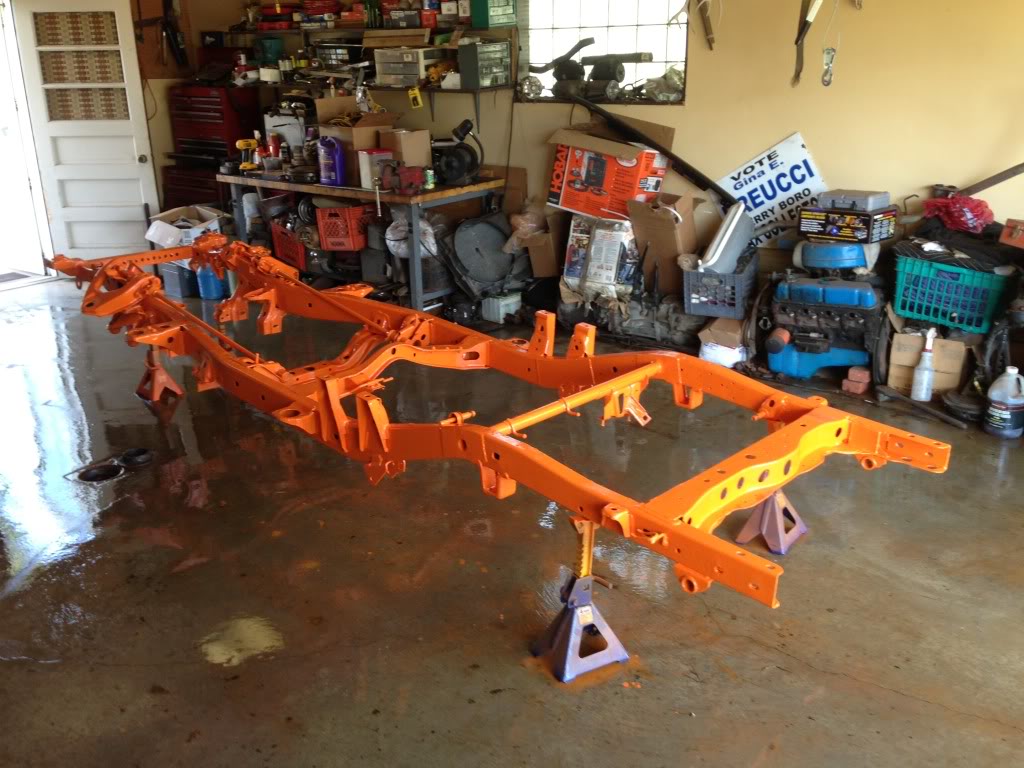
It's definitely different.....hence why my screen name is 94mackyota.

That's my buddy's dad spraying the first coat. He couldn't wait to get his hands on the paint gun.


It's definitely different.....hence why my screen name is 94mackyota.
04-15-2014, 08:45 AM
#14
Registered User
Orange is awesome! Keep up that, and the truck when seen will be unforgettable. Even the ones you see now are unforgettable, being that they're stock. Something like this will be burned into someone's mind forever!
04-16-2014, 06:07 AM
#15
Registered User
Thread Starter
Join Date: Aug 2013
Posts: 43
Likes: 0
Received 0 Likes
on
0 Posts
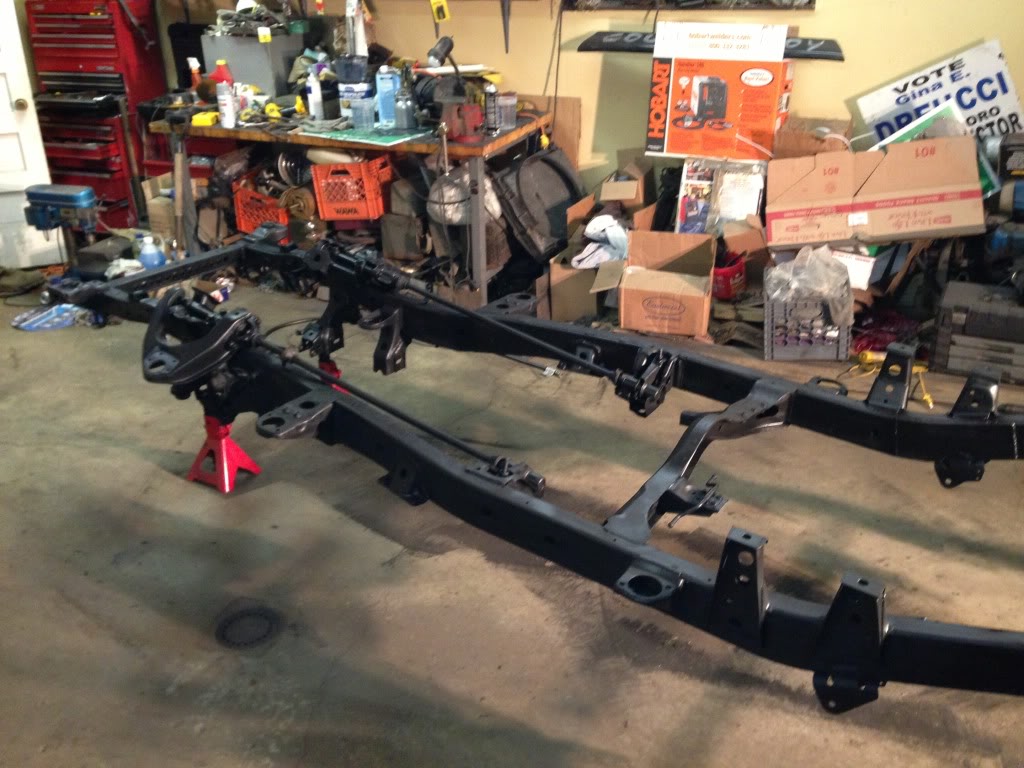
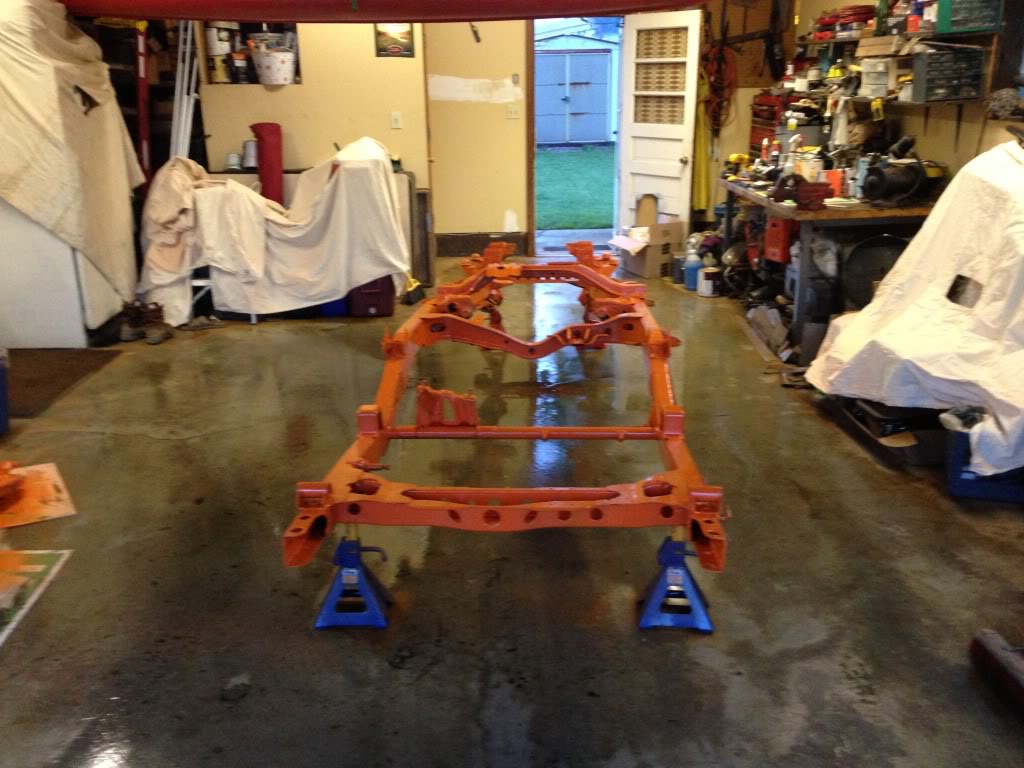
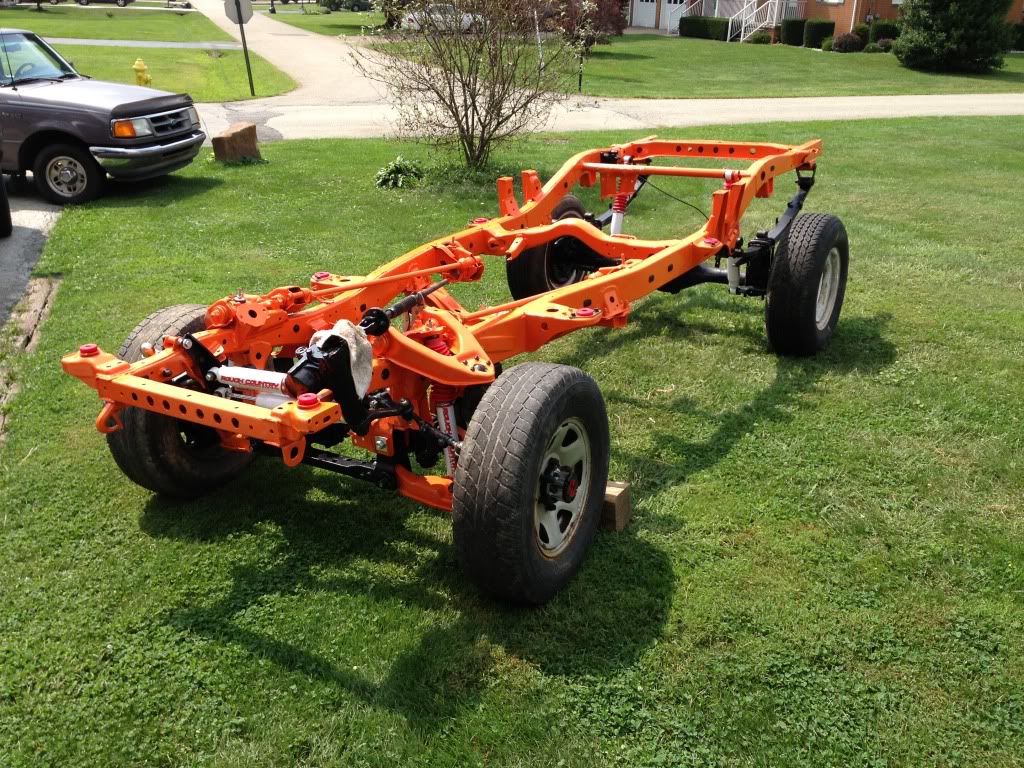
Now that the frame was all painted it was time to begin re-assembly. I ordered a total bushing kit from Energy Suspension. It came with all the leaf spring bushings, sway bar links and bushings, A-arm bushings and cab mount bushings. I also made a call to Rough Country and ordered a 4-5" suspension lift and a dual steering stabilizer. We needed to start ripping part off of the original frame.
That is my buddy and his dad stripping down some parts for me. Those bushings and collars in the leaf springs were SOBs to get out. I cleaned the rear end up with a wire wheel, made sure all the bleeders and brakes were free and painted it with rust encapsulator, undercoating and a top coat of Rustoleum. I checked the drums for any warpage or defects and painted them with some red caliper paint. I also painted all the other parts and bolts that were going to go back on the frame....a very tedious process.
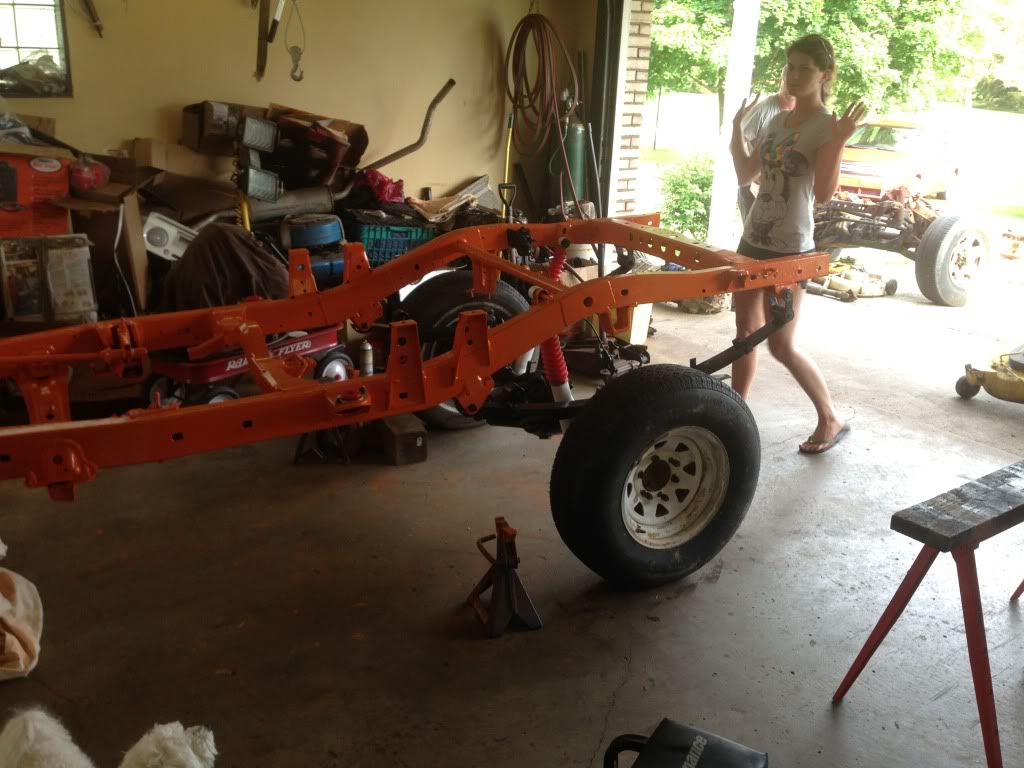
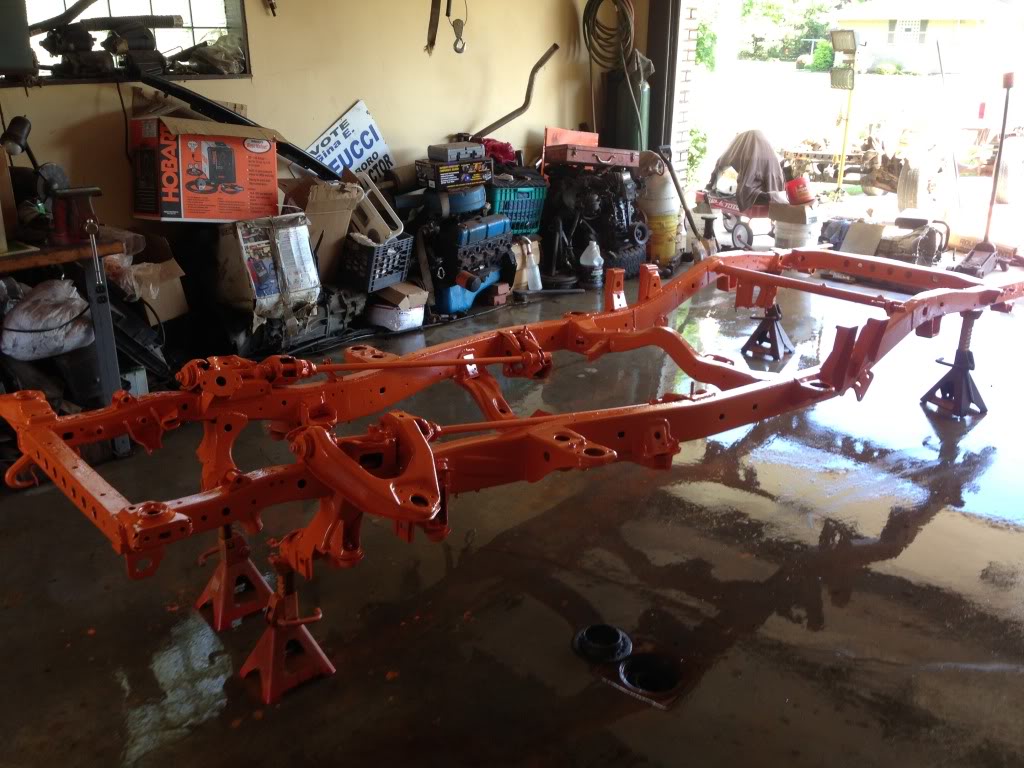
There is the frame with the rear end and lift in place. It took awhile to get everything lined up and fitting correctly. I am still not sold that everything is setting straight until I take it for an alignment and check some measurements.
04-17-2014, 10:01 AM
#17
Registered User
Thread Starter
Join Date: Aug 2013
Posts: 43
Likes: 0
Received 0 Likes
on
0 Posts
Drained the diff fluid and replaced it with some new gear oil. Wasn't any shavings in the pan and the magnetic plug was fairly clean. I'd say that's a good sign. Then I started tearing down the IFS from my original frame. Those hubs can be stubborn to work on.
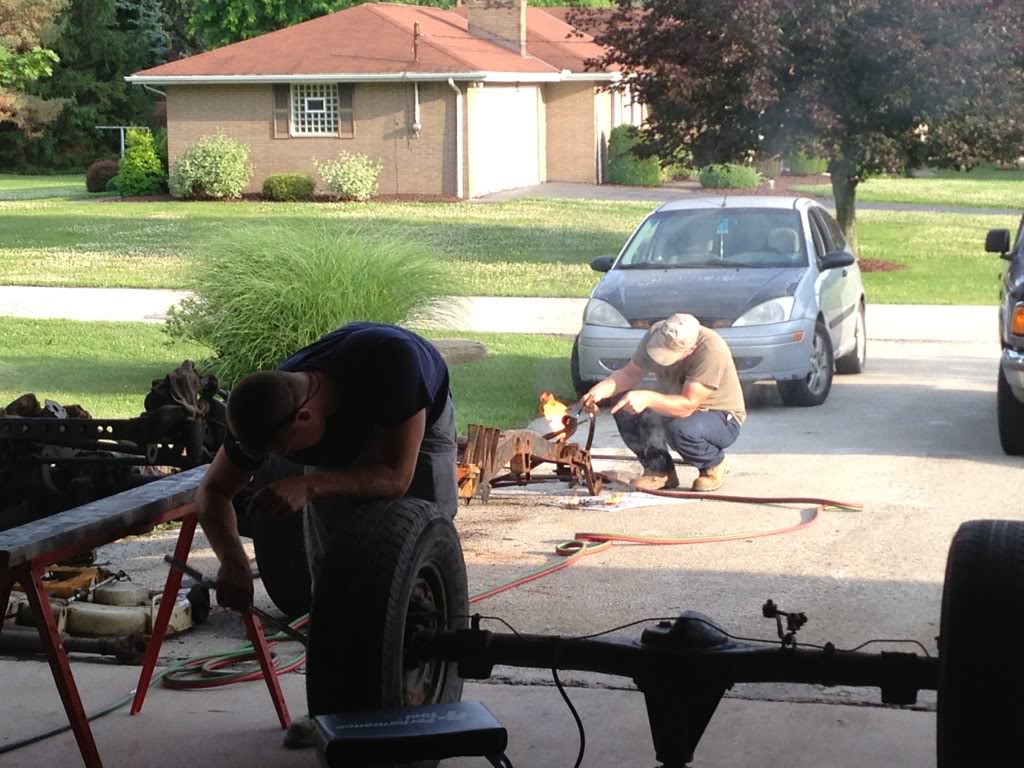
Stripped the remainder of the parts off and got it ready for junk. Couldn't resist cutting it in half, also might I add that it didn't take much. There was so much rust inside the frame that the torch didn't even want to burn through it.
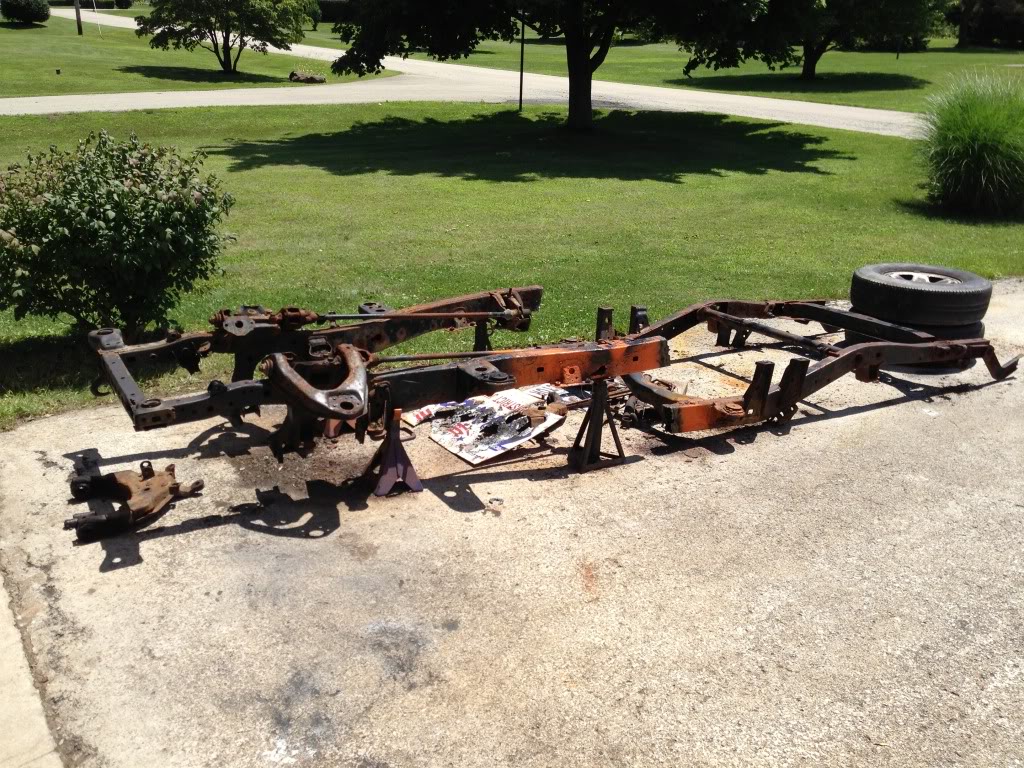
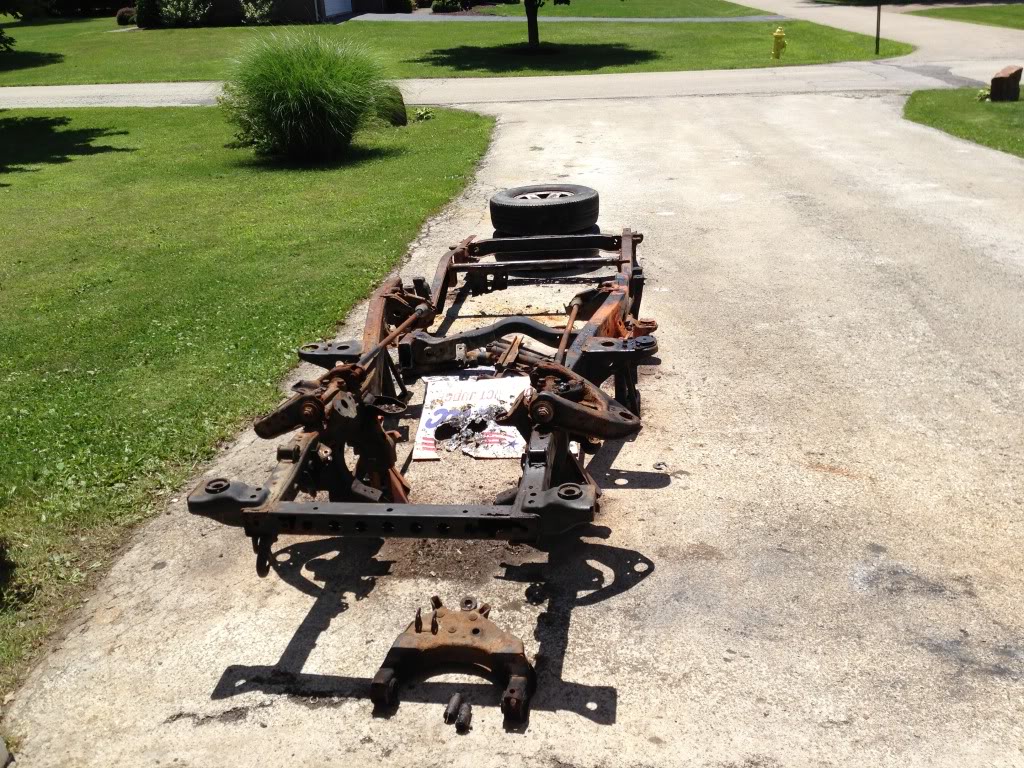
It was a shame to do that but it just simply wasn't salvageable.
04-18-2014, 08:15 AM
#19
Registered User
Thread Starter
Join Date: Aug 2013
Posts: 43
Likes: 0
Received 0 Likes
on
0 Posts
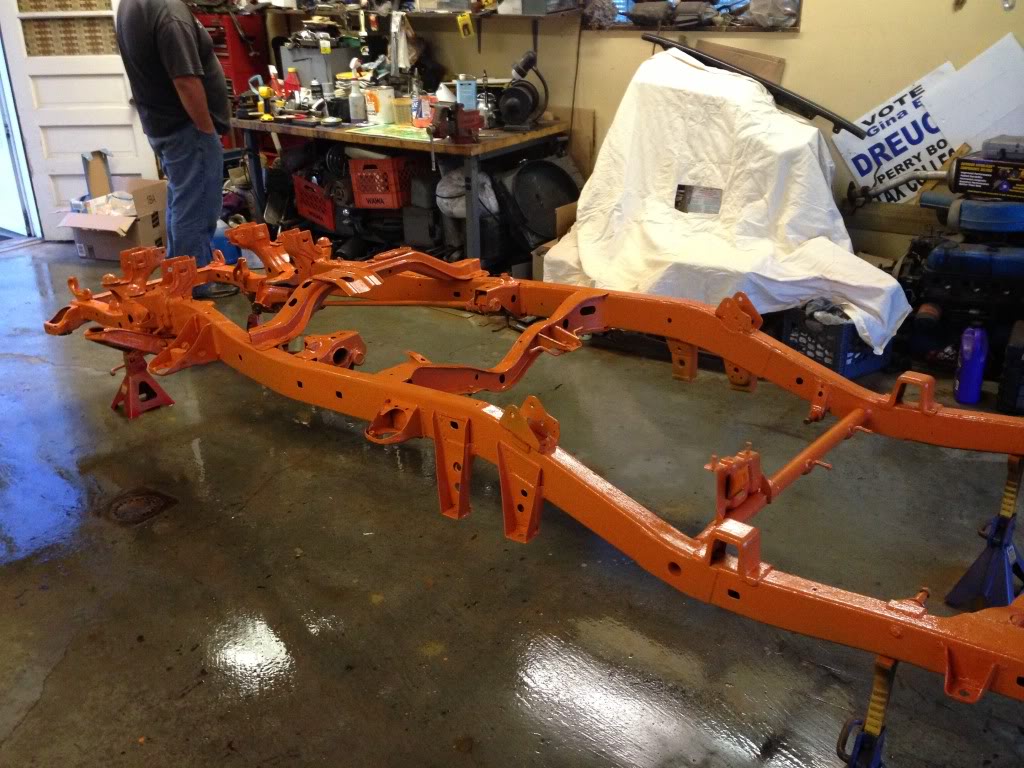
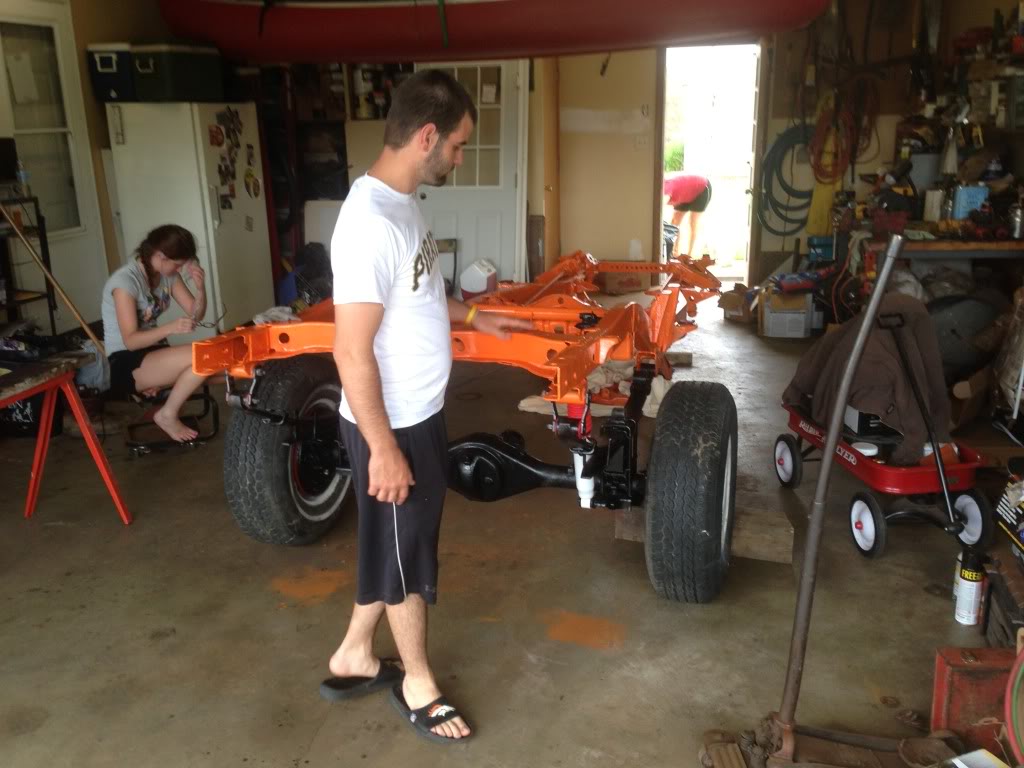
Got the front diff wire wheeled and painted. Drained the fluid and swapped it with some new stuff. Went to Napa and ordered ceramic pads, brembo rotors, new brake compression lines, ball joints, tie rod ends, idler arm, steering arm and a new transmission mount. Cleaned everything up and painted them. Painted the calipers with some red ceramic caliper paint. Also cleaned and painted the hubs. Started assembling the front end, incorporating the rough country 5" lift and dual steering stabilizer. All this took me about two weeks to finish. After 4 months I finally had a rolling chassis!
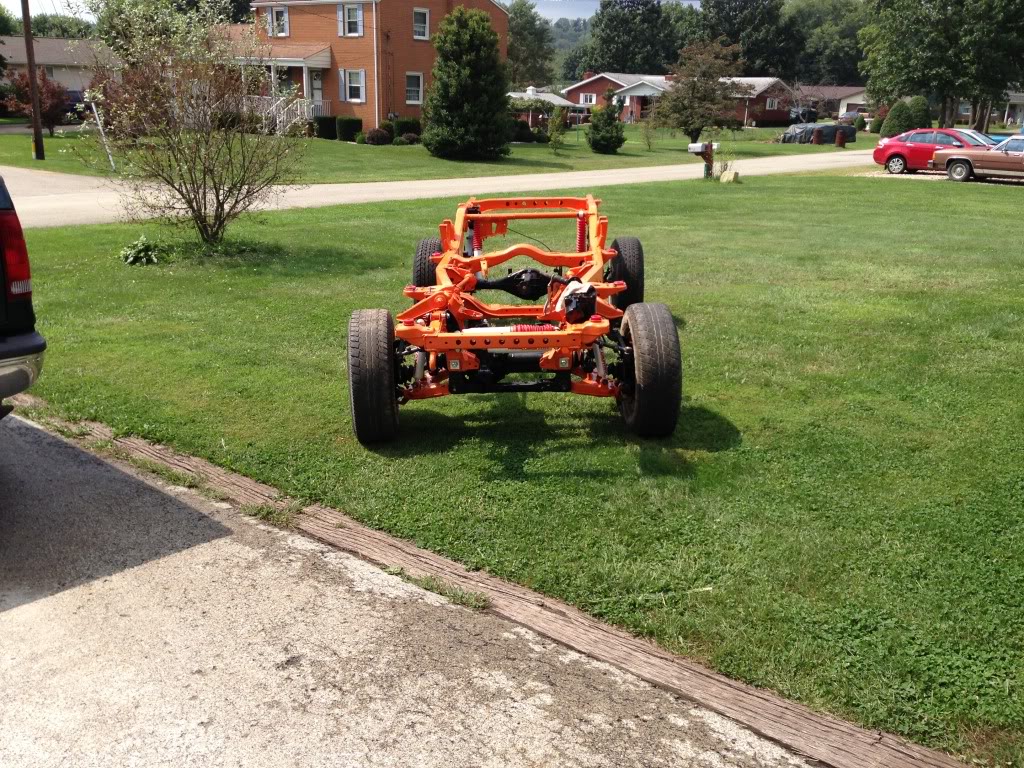
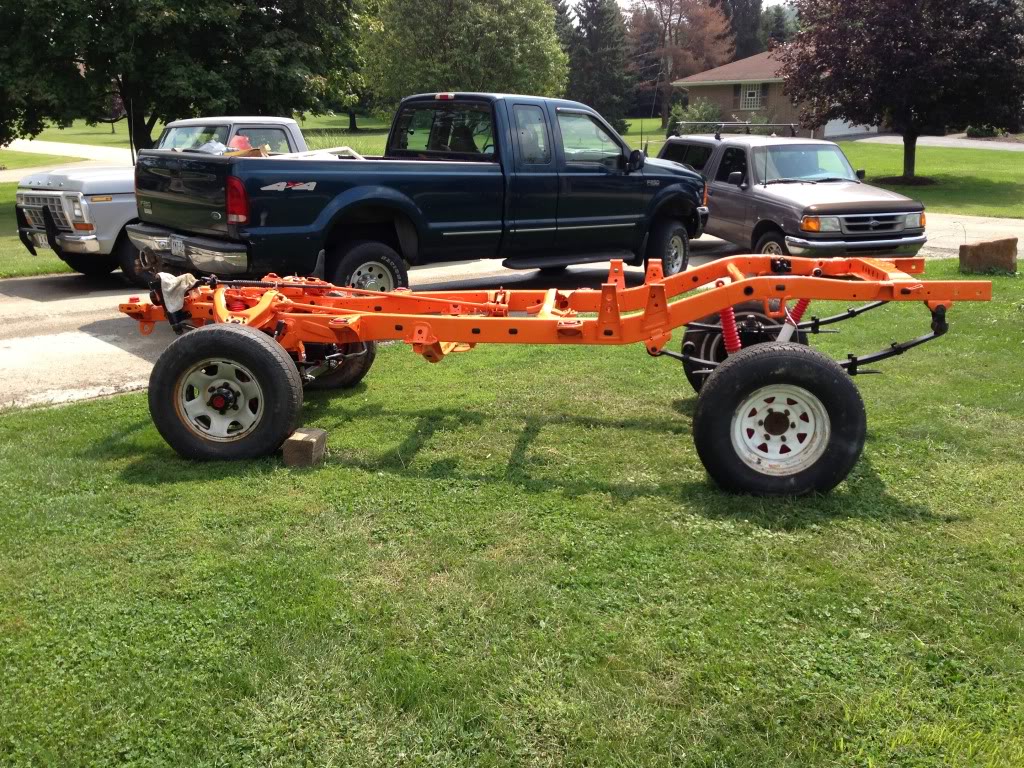
Came out pretty nice I think.


Came out pretty nice I think.
04-18-2014, 12:05 PM
#20
Registered User
Rolling chassis looks great. The orange really stands out. What color are you painting the cab n stuff. If the cab was black, the orange would really stand out.


