
87 SR5 4Runner Restore
 May 6, 2015 | 10:39 AM
#1
Thread Starter
Super Moderator
iTrader: (1)
Joined: Aug 2008
Posts: 11,787
Likes: 28
From: Anderson Missouri
87 SR5 4Runner Restore
I got this truck as a parts truck for a previous build. It was cheaper for Tom to buy the whole truck out of a salvage yard for the SR5 options then it was to buy them a piece at at time. He asked if I wanted the truck when he was done with it and I said yes!!! I was going to let one of my kids fix it up but will let them fix my 86 Runner that I am going to use as parts for this one.
My 86 is a base model truck with SR5 Options. My 85 is a base model truck with an 87 harness that has all the options that came on a truck as this 87 Runner has. Some of the options that I cant add because it is controlled by the main harness is Cruise Control, Drop Light, Glovebox Light, Electric Mirrors, Windows, and Door Locks. I will need to use my 85 and this runner for comparison to get both of the options to work,
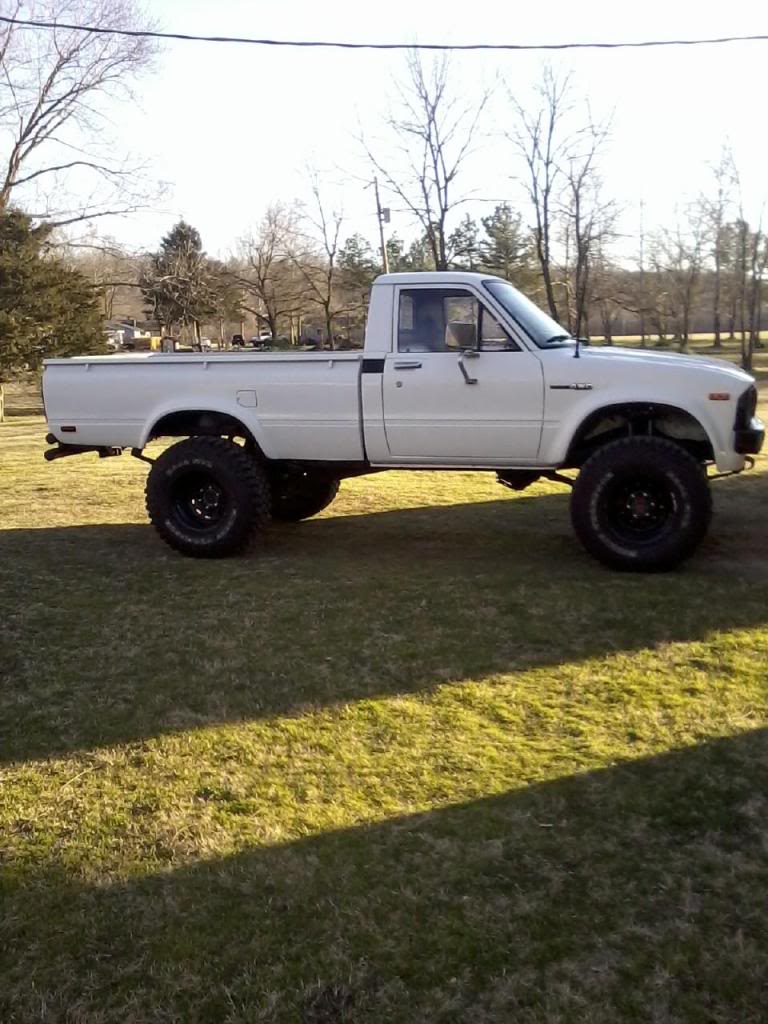
It is a rock solid truck just looks terrible. Been down that road before on my other builds. When it is done it will be a twin to Chefyota4x4 truck. My 85 will be my daily driver as I need a truck to haul more Toyota parts, lol This will be a complete restore. I will be a few months yet before I get serious with it as I want to finish my 85 pickup. I have another 1st gen runner to get my fix on so no hurry on this one.
I do want to show what all is to be expected when buying an older Toyota. This one will have just as many issues as a nice find that most are unaware of. When I look at a truck I am mostly concerened with a good frame and body.
Here it is in the shop getting ready to donate the transmission and transfer case for a current build.
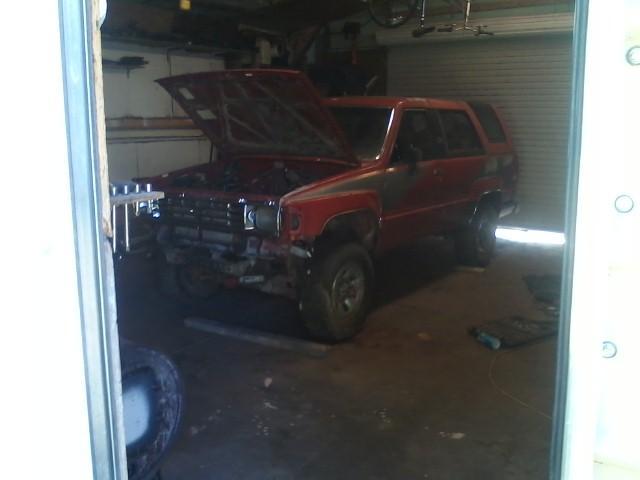
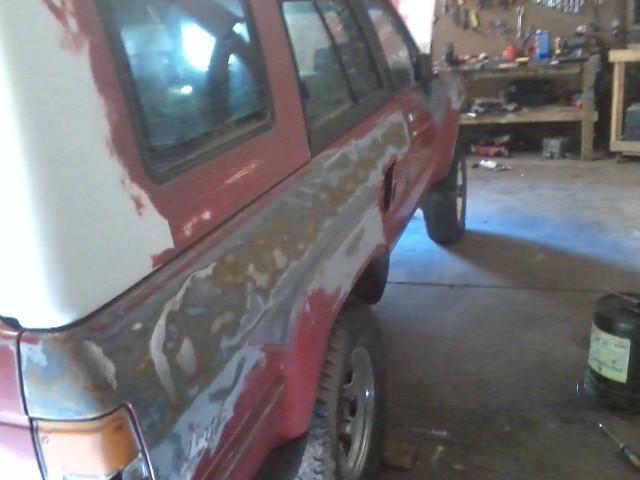
Where Justin got crazy with a sander. It will be getting fixed at a later time, at least he is trying to learn and damage I can undo.
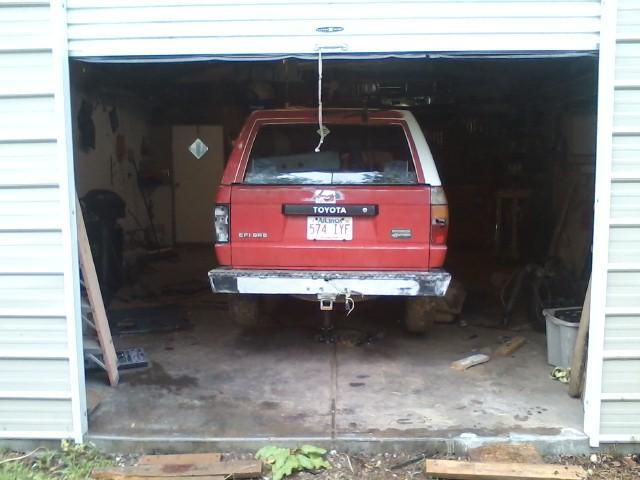
Back view of the truck bumper that will be going bye bye.
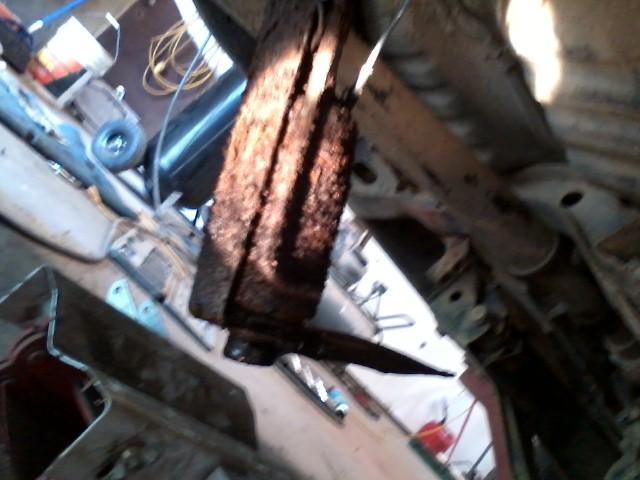
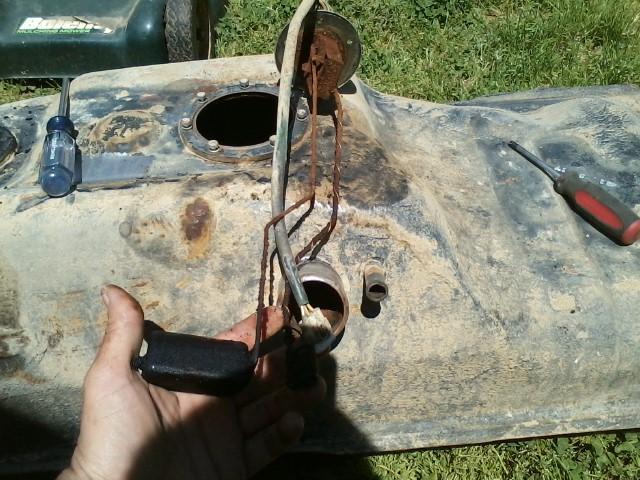
Since I had it in the shop, I pulled the gas tank to refurbish it. I was unable to get the Fuel Pump Assembly to seperate. I am soaking it down with rust dissolver. This is an expensive and hard bracket to find. A 14 and 17mm wrench is used to seperate them.
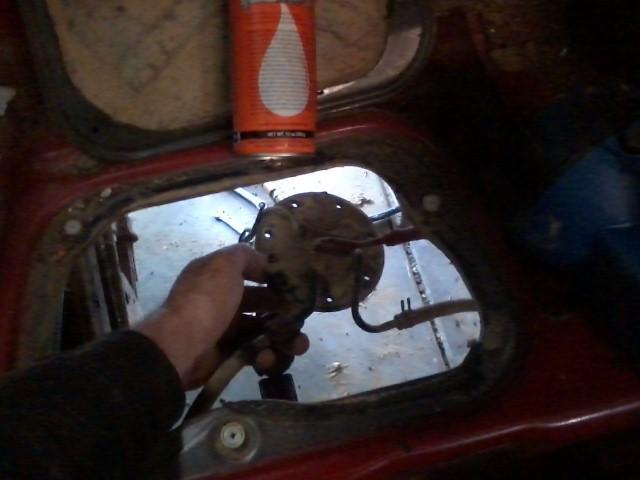
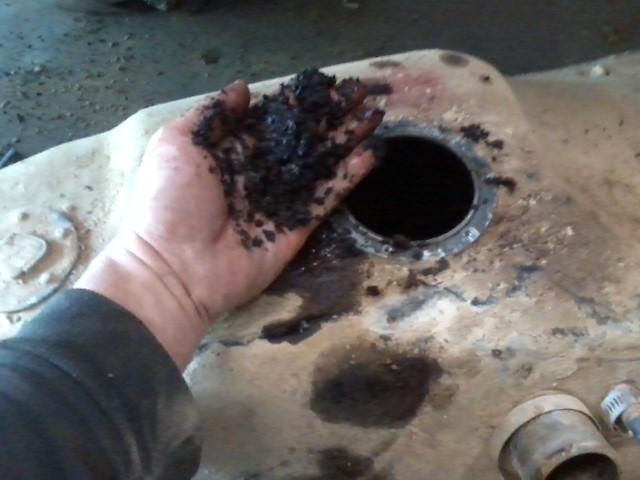
This is not uncommon to see what some fuel pumps can look like. It looks like rust. I believe it is a chemical build up. I have cleaned many tanks and when cleaned there is no pitting in the tank. One reason I dont run fuel cleaners thru my tank. If it has a lot of build up in the tank, you just dissolved it and clogged your fuel filter. The fuel filter will not catch all of the gunk and can clogged injectors. I also get my fuel pumps off of ebay for about $35 shipped. A Toyota dealer wants about $300, part store $150, and Denso is about $150. I have never had a ebay pump to fail. Just dont run your tank on empty as that destroys all electric fuel pumps. Gasoline keeps the pumps cool.
Tank is in great shape. All of the gunk in the tank can be cleaned. It will have fish scale on the sides of the tank and the bottom will have up a 1/4 inch of build up. I put some white vinegar in the tank to start breaking it up. I normally clean tanks in the winter. The fumes are what are explosive, not the liquid gas.
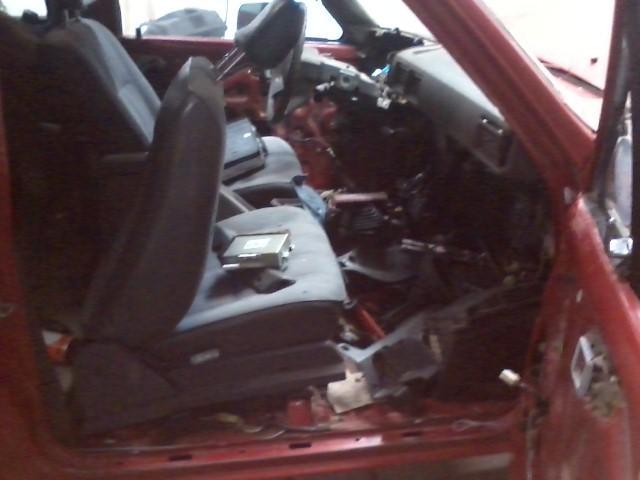
Interior was stripped when I got it. I have stored some parts in it. You may be able to see some butchered up wiring which is a common find on these old trucks. I have most parts for it.
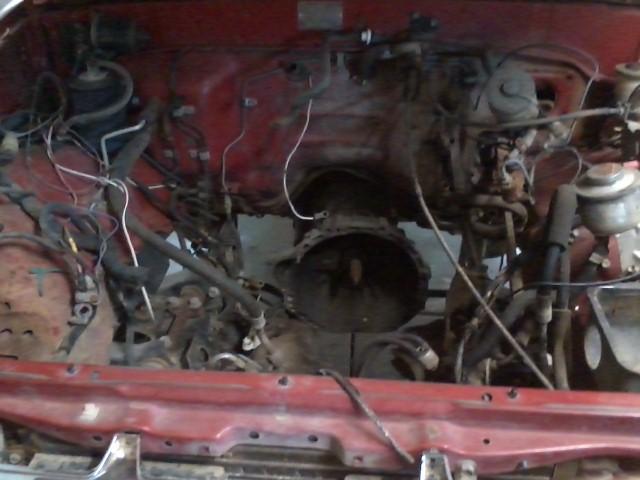
Injector harness is cut, more butchered wiring, and missing parts. I will stay the same color. Repainting and engine bay is a pain in the rear. Learned that on my 85. No hurry to do that again. Otherwise it is in great shape. Transmission is getting a new home for a current project.
Here is another SR5 option. The Low Fuel Light. All guages, SR5 and Non SR5 have the Low Fuel Light. From what I can tell, it has to be wired into the main harness to work. This Float assembly has the bulb and 3 wires for the light. The Float assembly is corroded up and will not operate. I have been able to get them to work by soaking a few days in rust dissolver and a wire brush. Time will tell if this one can be saved. I have interchanged Flaot assemblies in the past between SR5 trucks and non SR5 trucks. Also notice I stick the bolts back in their locations when possible. That bagging nuts and bolts can get confusing when reassembling.
10 minutes worth of work already making a difference in the cleaning.
My 86 is a base model truck with SR5 Options. My 85 is a base model truck with an 87 harness that has all the options that came on a truck as this 87 Runner has. Some of the options that I cant add because it is controlled by the main harness is Cruise Control, Drop Light, Glovebox Light, Electric Mirrors, Windows, and Door Locks. I will need to use my 85 and this runner for comparison to get both of the options to work,
It is a rock solid truck just looks terrible. Been down that road before on my other builds. When it is done it will be a twin to Chefyota4x4 truck. My 85 will be my daily driver as I need a truck to haul more Toyota parts, lol This will be a complete restore. I will be a few months yet before I get serious with it as I want to finish my 85 pickup. I have another 1st gen runner to get my fix on so no hurry on this one.
I do want to show what all is to be expected when buying an older Toyota. This one will have just as many issues as a nice find that most are unaware of. When I look at a truck I am mostly concerened with a good frame and body.
Here it is in the shop getting ready to donate the transmission and transfer case for a current build.

Where Justin got crazy with a sander. It will be getting fixed at a later time, at least he is trying to learn and damage I can undo.

Back view of the truck bumper that will be going bye bye.

Since I had it in the shop, I pulled the gas tank to refurbish it. I was unable to get the Fuel Pump Assembly to seperate. I am soaking it down with rust dissolver. This is an expensive and hard bracket to find. A 14 and 17mm wrench is used to seperate them.

This is not uncommon to see what some fuel pumps can look like. It looks like rust. I believe it is a chemical build up. I have cleaned many tanks and when cleaned there is no pitting in the tank. One reason I dont run fuel cleaners thru my tank. If it has a lot of build up in the tank, you just dissolved it and clogged your fuel filter. The fuel filter will not catch all of the gunk and can clogged injectors. I also get my fuel pumps off of ebay for about $35 shipped. A Toyota dealer wants about $300, part store $150, and Denso is about $150. I have never had a ebay pump to fail. Just dont run your tank on empty as that destroys all electric fuel pumps. Gasoline keeps the pumps cool.

Tank is in great shape. All of the gunk in the tank can be cleaned. It will have fish scale on the sides of the tank and the bottom will have up a 1/4 inch of build up. I put some white vinegar in the tank to start breaking it up. I normally clean tanks in the winter. The fumes are what are explosive, not the liquid gas.

Interior was stripped when I got it. I have stored some parts in it. You may be able to see some butchered up wiring which is a common find on these old trucks. I have most parts for it.

Injector harness is cut, more butchered wiring, and missing parts. I will stay the same color. Repainting and engine bay is a pain in the rear. Learned that on my 85. No hurry to do that again. Otherwise it is in great shape. Transmission is getting a new home for a current project.

Here is another SR5 option. The Low Fuel Light. All guages, SR5 and Non SR5 have the Low Fuel Light. From what I can tell, it has to be wired into the main harness to work. This Float assembly has the bulb and 3 wires for the light. The Float assembly is corroded up and will not operate. I have been able to get them to work by soaking a few days in rust dissolver and a wire brush. Time will tell if this one can be saved. I have interchanged Flaot assemblies in the past between SR5 trucks and non SR5 trucks. Also notice I stick the bolts back in their locations when possible. That bagging nuts and bolts can get confusing when reassembling.

10 minutes worth of work already making a difference in the cleaning.

Last edited by Terrys87; Mar 21, 2016 at 10:25 PM.
May 6, 2015 | 01:15 PM
#2
Looks like its gonna be fun Terry. If you need any parts, give me a shout. I still have quite a bit of 84-89 stuff.
Tony
Tony
Last edited by flg8r22; May 6, 2015 at 01:18 PM. Reason: additional info
May 6, 2015 | 04:00 PM
#3
Awesome idea Terry.
there are some great build /restore threads but not a lot of how to and why type threads..
The putting fasteners back where they came from is such a stupid simple idea idea it is overlooked. I don't know now many times i have run to the hardware store because i misplaced a baggy of parts..
there are some great build /restore threads but not a lot of how to and why type threads..
The putting fasteners back where they came from is such a stupid simple idea idea it is overlooked. I don't know now many times i have run to the hardware store because i misplaced a baggy of parts..
May 7, 2015 | 02:19 AM
#4
Thread Starter
Super Moderator
iTrader: (1)
Joined: Aug 2008
Posts: 11,787
Likes: 28
From: Anderson Missouri
Hello Robb... I made that trip many a times for nuts and bolts. I have been trying to make my threads more useful on how to do or find things. I still have a hard time finding info on the internet at times so try to help with what I do know. I use the first page of my threads a reference for info on what I have done in the past. I use it alot myself. Been wanting to make some more "How To" Theads such as Cleaning the EGR or similar things. I know there are more things that can be made just trying to figure out which ones need done.
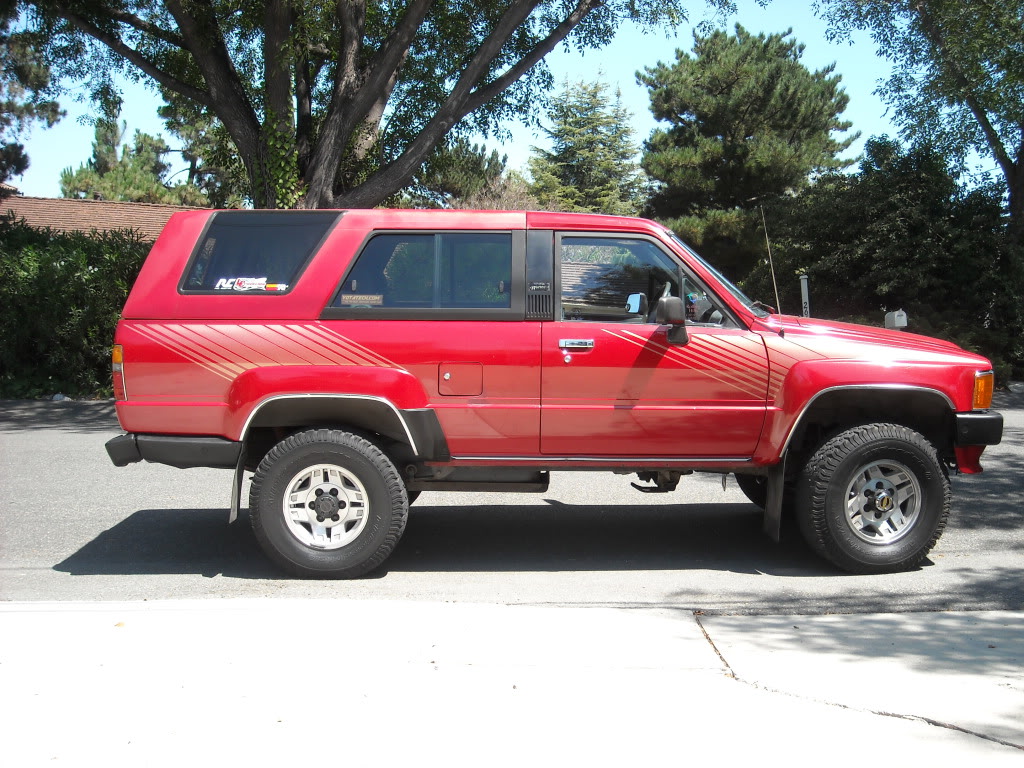
Thanks Tony... You were one of the first ones to welcome me to Yotatech. I did a 1st gen truck that was headed for the scrapper. Found it for a friend and did the paint and body work. I started another 1st gen truck build but after doing the truck below, I want a short bed. I know where one is at and have been trying to get it for some time. Owner wont part with it just yet. Been sitting 5 years. It is a short bed SR5. Here is some of the other trucks I have done since you been gone https://www.yotatech.com/forums/f198...l#post52046575
Here is the $450 1st gen scrapper bound truck I did a while back. It was rough when I got it.
May 7, 2015 | 02:33 AM
#5
Thread Starter
Super Moderator
iTrader: (1)
Joined: Aug 2008
Posts: 11,787
Likes: 28
From: Anderson Missouri
These screws usually wont come out with a screw driver. I get a gentle grip and break them loose. If they wont turn fairly easy, I start soaking them in PB Blaster. The flat part of the triangle on the fuel float points to the left rear/drivers side rear bumper.
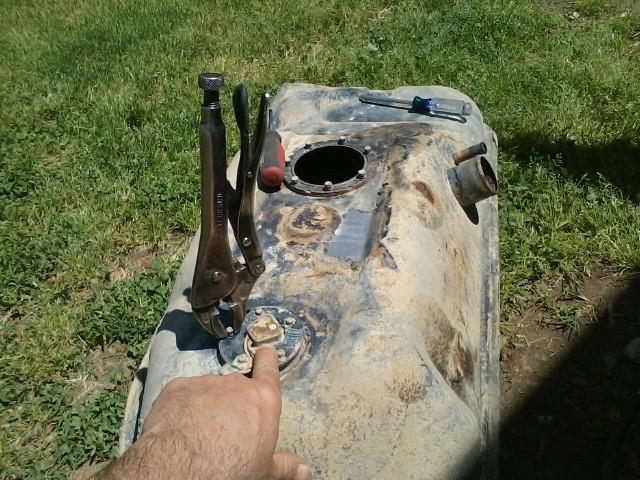
A common issue that most may not know of is the Charcoal Vent and Return Line can be clogged. Happens on well taken care of daily drivers. These were clogged. I use low pressure air to check lines. I do NOT use high pressure to clear the clog. Possiblity of just compacting the clog.
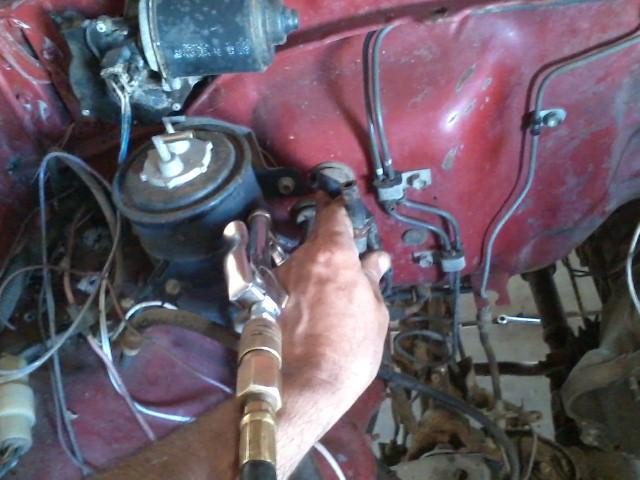
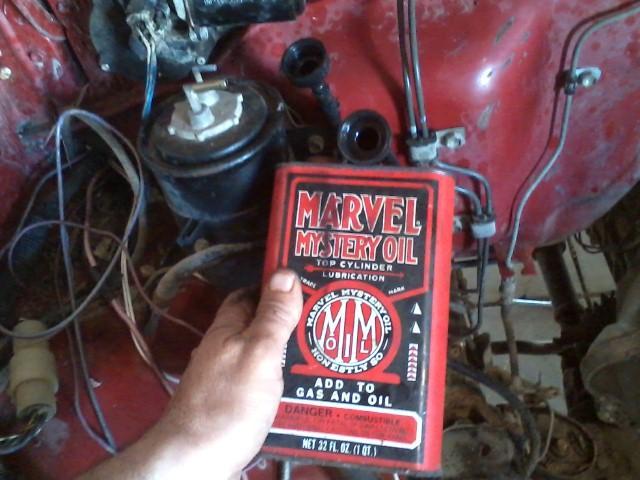
When clogged, I use gear oil bottle caps as funnels and start soaking with Marvel Mystery Oil. It can take a few days to work its way thru. Just keep adding some a day at a time. Can take a while to get all the way thru. I will add more and update more when I get the Fuel Pump Bracket off and show what is also clogged on it. Metal line on firewall is the Return Line. The rubber line coming off of the Charcal Canister runs to the Fuep Pump Bracket as well.
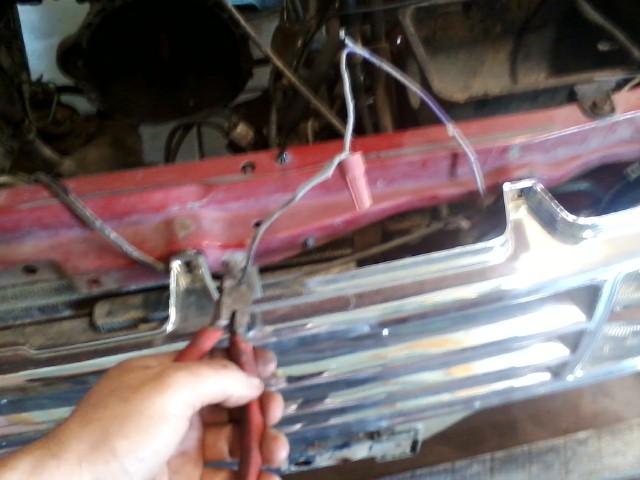
More common problems on these old trucks. Wire nuts and added wiring. Stereos and Trailer towing wires are the most common and cause several issues. I just start cutting all Non Factory wiring. There are 4 harnesses that make these trucks up. Main harness across the dash, Tail light/Fuel tank harness, Headlight Harness, and Injector Harness. All are easily replaced with the exception of Main Harness. Here is How To swap a main Harness https://www.yotatech.com/forums/f116...4-88-a-278925/
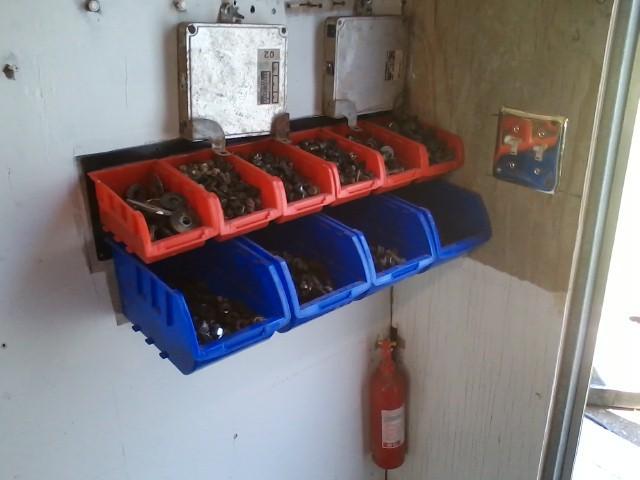
I got this from Orsheilns. Works great for common nuts and bolts. I have containers from Harbor Freight for smaller screws. Every time I am at the salvage yard, I am getting a coffee can full of bolts.

A common issue that most may not know of is the Charcoal Vent and Return Line can be clogged. Happens on well taken care of daily drivers. These were clogged. I use low pressure air to check lines. I do NOT use high pressure to clear the clog. Possiblity of just compacting the clog.

When clogged, I use gear oil bottle caps as funnels and start soaking with Marvel Mystery Oil. It can take a few days to work its way thru. Just keep adding some a day at a time. Can take a while to get all the way thru. I will add more and update more when I get the Fuel Pump Bracket off and show what is also clogged on it. Metal line on firewall is the Return Line. The rubber line coming off of the Charcal Canister runs to the Fuep Pump Bracket as well.

More common problems on these old trucks. Wire nuts and added wiring. Stereos and Trailer towing wires are the most common and cause several issues. I just start cutting all Non Factory wiring. There are 4 harnesses that make these trucks up. Main harness across the dash, Tail light/Fuel tank harness, Headlight Harness, and Injector Harness. All are easily replaced with the exception of Main Harness. Here is How To swap a main Harness https://www.yotatech.com/forums/f116...4-88-a-278925/

I got this from Orsheilns. Works great for common nuts and bolts. I have containers from Harbor Freight for smaller screws. Every time I am at the salvage yard, I am getting a coffee can full of bolts.

Last edited by Terrys87; Jul 2, 2016 at 06:49 AM.
May 7, 2015 | 02:44 AM
#6
Thread Starter
Super Moderator
iTrader: (1)
Joined: Aug 2008
Posts: 11,787
Likes: 28
From: Anderson Missouri
This build will slow down here shortly as I want to finish my other truck before starting this one and a few other things. Just getting it ready while it was in the shop. Like most, I have to deal with the budget thing. I pay as I go and dont max out a credit card for the build. My builds usually cost me $2500-$4000 to do. I expect it to take 2-3 years. This one will cost me less as I will use my current 86 Runner for parts. I allow $25 a week for my spending. When I have to save for a larger part to purchase, I save that $25 until it gets to the what I need. There is always other things that can be done with supplies I have on hand, cleaning, and easy and cheap repairs that can be done and are needed. You just have to look for them.
Some may question on building a junk yard dog, but the going price for a running daily driver in most areas 1000-4000. They will have several of the issues that are already being showed in the previous pics. There will be more as I get into it. This will be a stock build and I have taken each one of mine on a long distance trip when completed at some time and it is always great getting there and back with no break downs on something that I built instead of buying.
Some How To
Cleaning Ventilation https://www.yotatech.com/forums/f116...trucks-286766/
This thread can be used for several different things https://www.yotatech.com/forums/f116...4-88-a-278925/
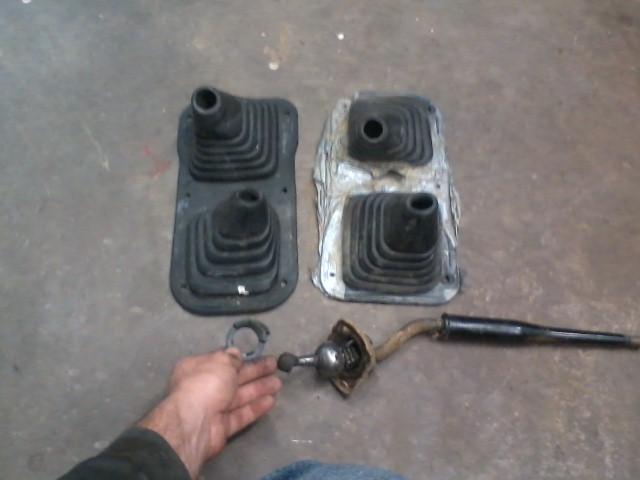
Some more uses for Duct Tape. I will replace the old one with the one on the left when I get to it. Another issue with these trucks is the shifter bushing. You can get them thru Toyota at a reasonable price and other places like Marlin Crawler. It makes a big difference on the shifting.
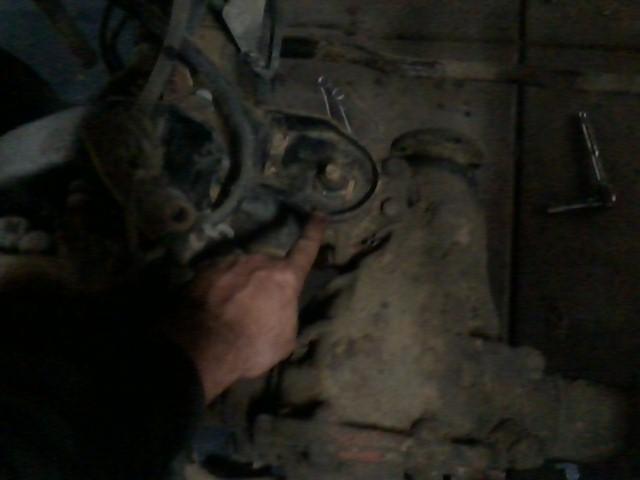
With the motor in and you drop a bolt and unable to find it. Most likely place that it is going to be. This is a hard area to see when the motor is in.
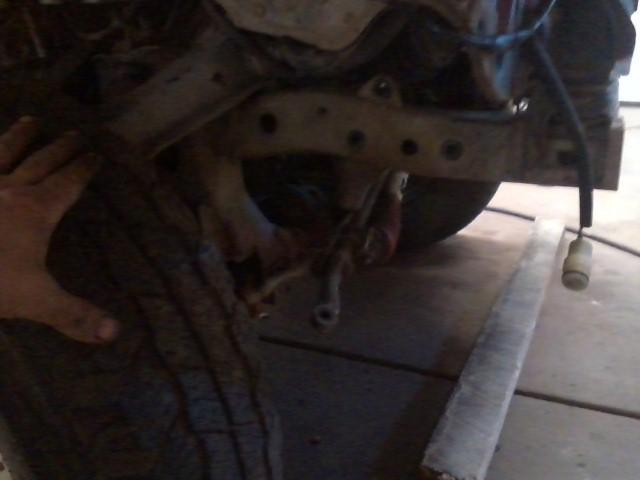
More of a reminder for me that I will need to replace the Idler Arm. I am going to rebuild the front end on this truck and have most new parts ready to go. I did have to replace the Idler Arm I had in my stash of parts on my 86. If you keep an eye out on some of the online stores, I have found Idler Arms for about $15 on close out prices. Front end parts is not something I would get out of the boneyard.
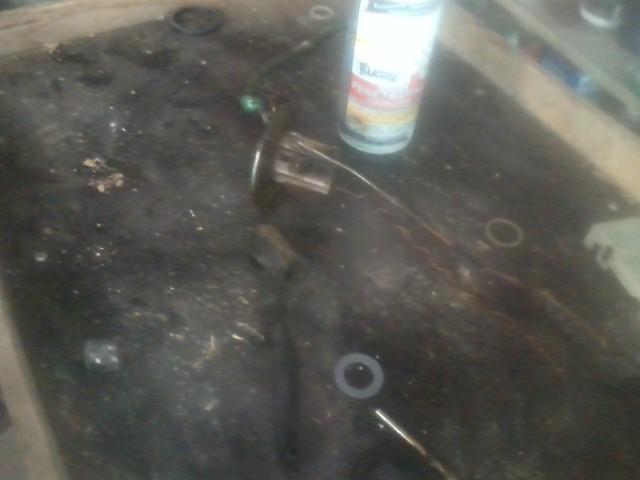
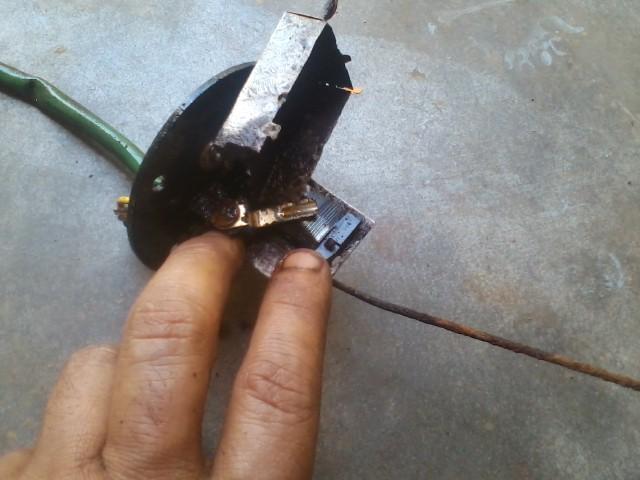
Day two of soaking the Float Assembly and it is still frozen at the pivot points. I lift the 3 tabs and took the cover off. More gunk in there.
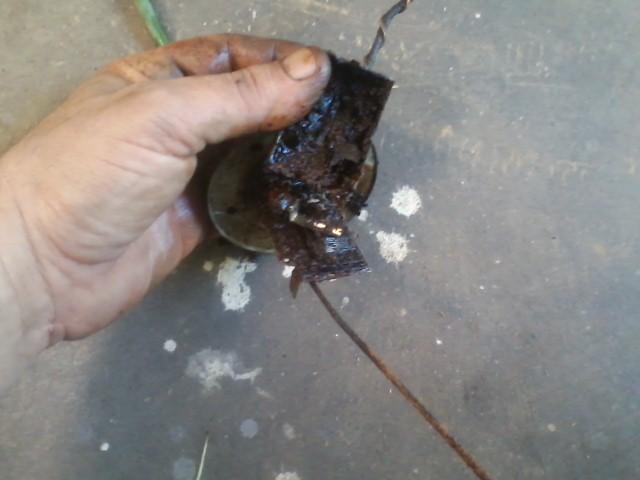
I will let it soak a few more days to get the pivot points broke free. Once I do get it broke free, I will cyle it several times until it is working like it should. I think I have enough access on my 85 truck to connect it and test it out. I could use a meter to test but nothing like seeing it in operation on the fuel guage to see. I used some electrical contact cleaner to remove alot of the gunk.
Where my pointer finger is, that is wire that is as fine as hair. If your guage does not read accurate at the quarter or less tank, usually these wires are worn into. Where my middle finger is, this is usually where it is frozen. I really think once I get the pivot point freed up, I think this is going to be a great float to use.
Long range goal to where I want it. (What it used to look like) https://www.yotatech.com/forums/f199...thread-210796/
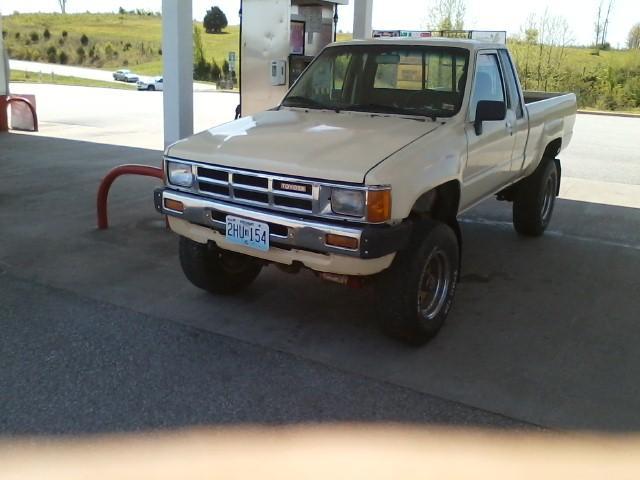
Here is my 85 and it was in as bad of shape when I got it.
My cost for it.
Spent so far.
Motor Rebuild, I had a head so no cost for it......800
Clutch............................................ ...............150
SR5 Tach.............................................. ..........20
SR5 Door Panels............................................ ..40
Main Harness........................................... ........50
Injector Harness........................................... ..100
Denso Plug Wires............................................. 25
Fluids............................................ .................52
Denso Plugs............................................. ........ 8
O2 Sensor............................................ ...........25
Peel and Seal.............................................. .....30
Paint............................................. ................307
Sandpaper...(1500 grit)....................................10
Exhaust........................................... ..............100
Windshield........................................ .............200
Brakes...(Spent so far)....................................270
Battery........................................... .................80
Interior paint (Spent so far)...............................46
Lense Restorer.......................................... .......12
Title............................................. .................227
Front Axle Kit............................................... ..207
Front Rotors............................................ ........62
Shocks- Traded parts for....................................0
Total so far............................................... ...2781
Expect/still to Spend.
Tires............................................. ................600
Distributor Rotor............................................. .25
Distributor Cap............................................... ..15
Fluids............................................ ..................30
Carpet............................................ ................100
Interior Paint............................................. .......40
Wiper Blades............................................ ........20
Stripes........................................... .................200
Front Bumper............................................ ........75
Tail Light Conversion Kit.....................................25
Some may question on building a junk yard dog, but the going price for a running daily driver in most areas 1000-4000. They will have several of the issues that are already being showed in the previous pics. There will be more as I get into it. This will be a stock build and I have taken each one of mine on a long distance trip when completed at some time and it is always great getting there and back with no break downs on something that I built instead of buying.
Some How To
Cleaning Ventilation https://www.yotatech.com/forums/f116...trucks-286766/
This thread can be used for several different things https://www.yotatech.com/forums/f116...4-88-a-278925/
Some more uses for Duct Tape. I will replace the old one with the one on the left when I get to it. Another issue with these trucks is the shifter bushing. You can get them thru Toyota at a reasonable price and other places like Marlin Crawler. It makes a big difference on the shifting.

With the motor in and you drop a bolt and unable to find it. Most likely place that it is going to be. This is a hard area to see when the motor is in.

More of a reminder for me that I will need to replace the Idler Arm. I am going to rebuild the front end on this truck and have most new parts ready to go. I did have to replace the Idler Arm I had in my stash of parts on my 86. If you keep an eye out on some of the online stores, I have found Idler Arms for about $15 on close out prices. Front end parts is not something I would get out of the boneyard.

Day two of soaking the Float Assembly and it is still frozen at the pivot points. I lift the 3 tabs and took the cover off. More gunk in there.

I will let it soak a few more days to get the pivot points broke free. Once I do get it broke free, I will cyle it several times until it is working like it should. I think I have enough access on my 85 truck to connect it and test it out. I could use a meter to test but nothing like seeing it in operation on the fuel guage to see. I used some electrical contact cleaner to remove alot of the gunk.
Where my pointer finger is, that is wire that is as fine as hair. If your guage does not read accurate at the quarter or less tank, usually these wires are worn into. Where my middle finger is, this is usually where it is frozen. I really think once I get the pivot point freed up, I think this is going to be a great float to use.

Long range goal to where I want it. (What it used to look like) https://www.yotatech.com/forums/f199...thread-210796/
Here is my 85 and it was in as bad of shape when I got it.

My cost for it.
Spent so far.
Motor Rebuild, I had a head so no cost for it......800
Clutch............................................ ...............150
SR5 Tach.............................................. ..........20
SR5 Door Panels............................................ ..40
Main Harness........................................... ........50
Injector Harness........................................... ..100
Denso Plug Wires............................................. 25
Fluids............................................ .................52
Denso Plugs............................................. ........ 8
O2 Sensor............................................ ...........25
Peel and Seal.............................................. .....30
Paint............................................. ................307
Sandpaper...(1500 grit)....................................10
Exhaust........................................... ..............100
Windshield........................................ .............200
Brakes...(Spent so far)....................................270
Battery........................................... .................80
Interior paint (Spent so far)...............................46
Lense Restorer.......................................... .......12
Title............................................. .................227
Front Axle Kit............................................... ..207
Front Rotors............................................ ........62
Shocks- Traded parts for....................................0
Total so far............................................... ...2781
Expect/still to Spend.
Tires............................................. ................600
Distributor Rotor............................................. .25
Distributor Cap............................................... ..15
Fluids............................................ ..................30
Carpet............................................ ................100
Interior Paint............................................. .......40
Wiper Blades............................................ ........20
Stripes........................................... .................200
Front Bumper............................................ ........75
Tail Light Conversion Kit.....................................25
Last edited by Terrys87; Jul 7, 2016 at 03:58 AM.
May 10, 2015 | 02:43 PM
#7
Thread Starter
Super Moderator
iTrader: (1)
Joined: Aug 2008
Posts: 11,787
Likes: 28
From: Anderson Missouri
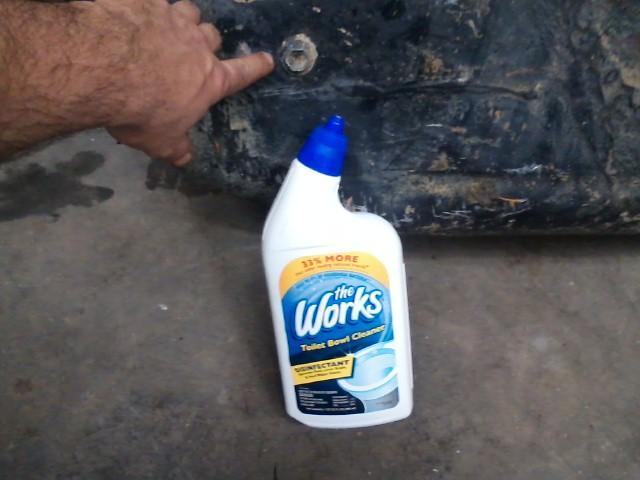
I took a rubber hammer and did some tapping on the bottom of the tank to help break loose of some the build up in the tank and had it soaking in a gallon of white vinegar. It got the bottom of the tank clean but I did not put enough to get the sides cleaned. I read on the web to use "The Works" for cleaning tanks. I will give that a try.
I will not ever pull the drain plug from a tank again. I have pulled 3 in the past and two of them leaked. Red Kote will seak that. The threads will have a build of corrosion and mostly strip the threads in the tank.
The Works and the drain plug I would suggest never pulling out.
I got nearly a pound of junk out of the tank. I had some larger pieces to come out but they kept breaking up when I picked them up. I would bet at its worse there was 2 pounds of build up in the tank. It is looking great inside for what has cleaned up.

This is off of Toms Build but I found what I will start using for cleaning some parts. These work great.
Copied from Toms build.
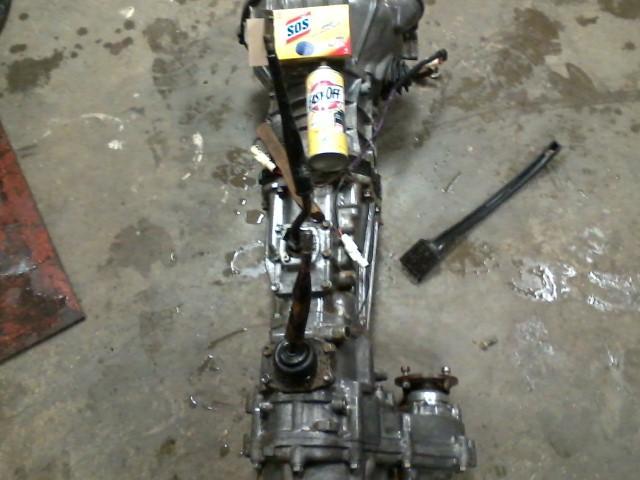
I have a transmission or transfer case issue with this runner. I pulled the transmission and transfer case out of the red runner and got it cleaned up. I have spent hours scrubbing one of these things getting them clean and the high pressure at the carwash doesnt do anything for cleaning either. I have tried all the cleaners out there, Purple Power, Simple Green, industrial cleaners. Out of desperation I wanted to try something else.
Easy Off Oven Cleaner and some steel wool pads work great. I got the transmission wet and let the Easy Off soak about 5 minutes and with a wire brush in some areas and a steel wool, it cleaned up quick.
My new parts cleaning material.
I will not ever pull the drain plug from a tank again. I have pulled 3 in the past and two of them leaked. Red Kote will seak that. The threads will have a build of corrosion and mostly strip the threads in the tank.
The Works and the drain plug I would suggest never pulling out.

I got nearly a pound of junk out of the tank. I had some larger pieces to come out but they kept breaking up when I picked them up. I would bet at its worse there was 2 pounds of build up in the tank. It is looking great inside for what has cleaned up.

This is off of Toms Build but I found what I will start using for cleaning some parts. These work great.
Copied from Toms build.
I have a transmission or transfer case issue with this runner. I pulled the transmission and transfer case out of the red runner and got it cleaned up. I have spent hours scrubbing one of these things getting them clean and the high pressure at the carwash doesnt do anything for cleaning either. I have tried all the cleaners out there, Purple Power, Simple Green, industrial cleaners. Out of desperation I wanted to try something else.
Easy Off Oven Cleaner and some steel wool pads work great. I got the transmission wet and let the Easy Off soak about 5 minutes and with a wire brush in some areas and a steel wool, it cleaned up quick.
My new parts cleaning material.


Thread
Thread Starter
Forum
Replies
Last Post
88yodabasket
86-95 Trucks & 4Runners
15
Jul 13, 2015 01:32 PM


