
85 Extra Cab Saved from Crusher
 Feb 19, 2013 | 09:30 PM
#22
Contributing Member
Joined: Mar 2003
Posts: 11,334
Likes: 0
From: COTKU,Ontario,Canada
FWIW around here it is the 22r carb'd that are the rare ones... solid axle was standard IFS did not come until 86... 3 gasers were 22r 22re 22rte, the 3VZE replaced the 22rte for 88 on. the rarest beast of all is the 22rte.
Toyota found the 22rte was failing too much basically because a lot of folks did'nt allow the turbo to idle long enough after driving to properly cool down which is why they brought in the 3.0 6cyl. for the peeps what wanted/needed the power.
Toyota found the 22rte was failing too much basically because a lot of folks did'nt allow the turbo to idle long enough after driving to properly cool down which is why they brought in the 3.0 6cyl. for the peeps what wanted/needed the power.
Feb 20, 2013 | 11:29 AM
#23
Thread Starter
Super Moderator
iTrader: (1)
Joined: Aug 2008
Posts: 11,787
Likes: 28
From: Anderson Missouri
Hello kornhuskerwizard... I just use a wire brush on it to get it to shine. I will post some pics below showing what I used. If you want the shine to stay, you will probably need to put some clear coat on it as the oil from your hands will show up on it. I am glad that I can do motor work but I have always have always like the challenge of what you can do with autobody and the difference that it makes.
I could afford to buy a truck that is already to go but I like the challenge of seeing what I can make it look like when done. It is nice when I do get one done, I can truly say I built it and didnt buy it. There ususally isnt much I havent touched on one when done. I am studying up on rebuilding transmissions and doing upholstry work
This is about the 7th truck that I have taken and done quite a bit to. All but one was in bad shape. One thing that I do like about these trucks is with a little effort you can make one real dependable. I normally dont believe in selling a great truck but these trucks dont worry me. I have always liked the 4Runners and the Extra cab will work great for me as I am 6 feet tall and the standard cabs are to crowded for me. The 86 Runner and this one are my keepers.
Hello yotagoon... Welcome to Yotatech. When I first started working on cars, I literally had to just get a Haynes Manual and start from there. I too had auto class and it really didnt do much for me. When I got into Toyotas, I didnt know a thing about them and then one day I discovered YT. I learned a ton of things on this site and a few others.
I seen your 86 thread and have an 88 white runner just like yours. I have had 2 new trucks with 7 miles and 15 miles on the odometer and my all time favorite truck now is my 88 Runner. I just love that little truck. It was in bad shape when I got it but now other then not having cruise control on it, I just soon drive it as any new car. Yours is in better condition then when I got mine, but if you keep at it you will get it to where you want it. I remember being in your shoes and trying to learn Toyotas and I am still learning but I post any info and tricks that I learn on my 88 Runner build below and they are easy and low dollar fixes. If you get stuck on something that you arent sure of give me a holler and I will see what I can do to get you going again. I probably have experienced it and might save you some headaches. I will try to add info that I think you might want to know about a certain part when I come across it.
Hello aviator.. I was thinking that the fuel injection was still new at that time and hadnt quit taken off. I was one that complained when they were switching from carburator to fuel injection. Now I am not so familiar with carbs anymore and they are a little more complicated to me then fuel injection.
I like how with carbs you really dont have much to deal with as far as sensors and maybe I should of went that way but I thought fuel injection was rarer so I just sold of an older 22r motor, a Webber, and a stock carb. I have a complete 22r harness but I am alot more comfortable with the fuel injection so will go that way. Had I of known the carb was rarer, I probably would of switched it over.
I am not so much into the solid axle craze as most are, I just like the fact that it makes it a little more rarer. IFS has always worked well for me and for what I do. I have been into some knarly areas in IFS and never had a problem with it. You just cant put your foot into it when getting into or out of some situations.
That Turbo does intimidate me a little bit. Thought I wanted one but one of my frieds has one and I think I will stay 22re. Thanks for the information and Thank You for keeping Yotatech the one and only site running l ever joined and running like you guys do.
Feb 20, 2013 | 12:05 PM
#24
Thread Starter
Super Moderator
iTrader: (1)
Joined: Aug 2008
Posts: 11,787
Likes: 28
From: Anderson Missouri
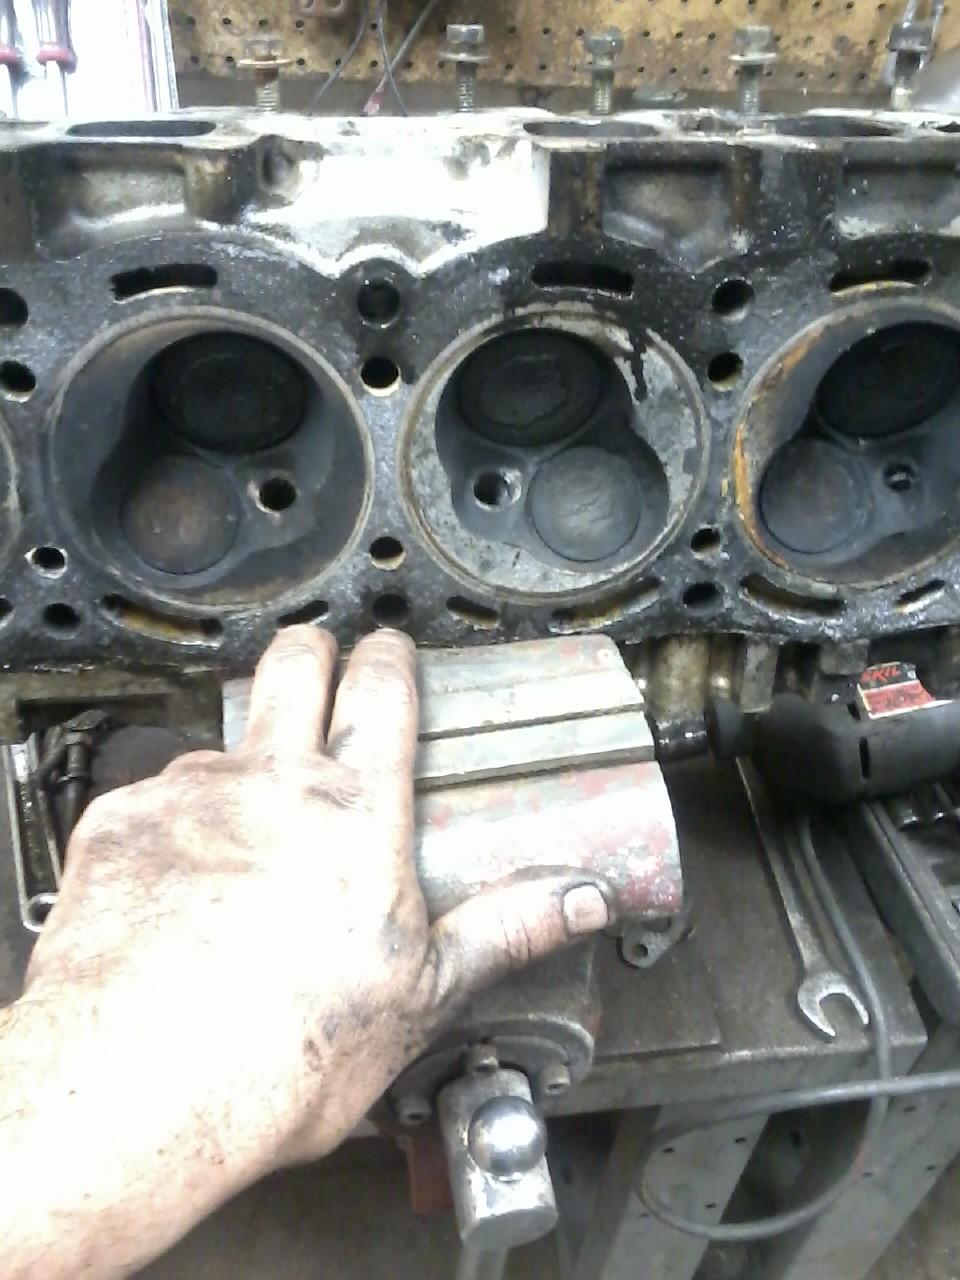
This isnt the head I will be using on this project, but I am using parts off it for this project and it will get used on another when that day comes if the machine shop says it is good. One thing to look for on these heads is with aluminum head and steel block, the metals start fighting each other and the aluminum loses. The aluminum water ports start to corrode and a machine shop will have to add metal and then reground it down.
A machine shop can fix it but a new head can be had for about $250 so if it is more then $180 I will replace it. I made the mistake of spending $210 when I could of had a new one for forty more. The ground strap that goes from the head to the body is what stops the corrosion from happening as far as I understand it. Alot of times I see this strap not hooked or missing.
Only one water jacket has a little corrosion on it but looks to be in great shape otherwise. Usually it is the longer slots that are bad.
I had to take two intakes and make one. Here are the dirty sensors. Cleaning temp guage one in between #2 and #3 cylinders has helped my temp guage to be more stable then jumping around.(Top Right).
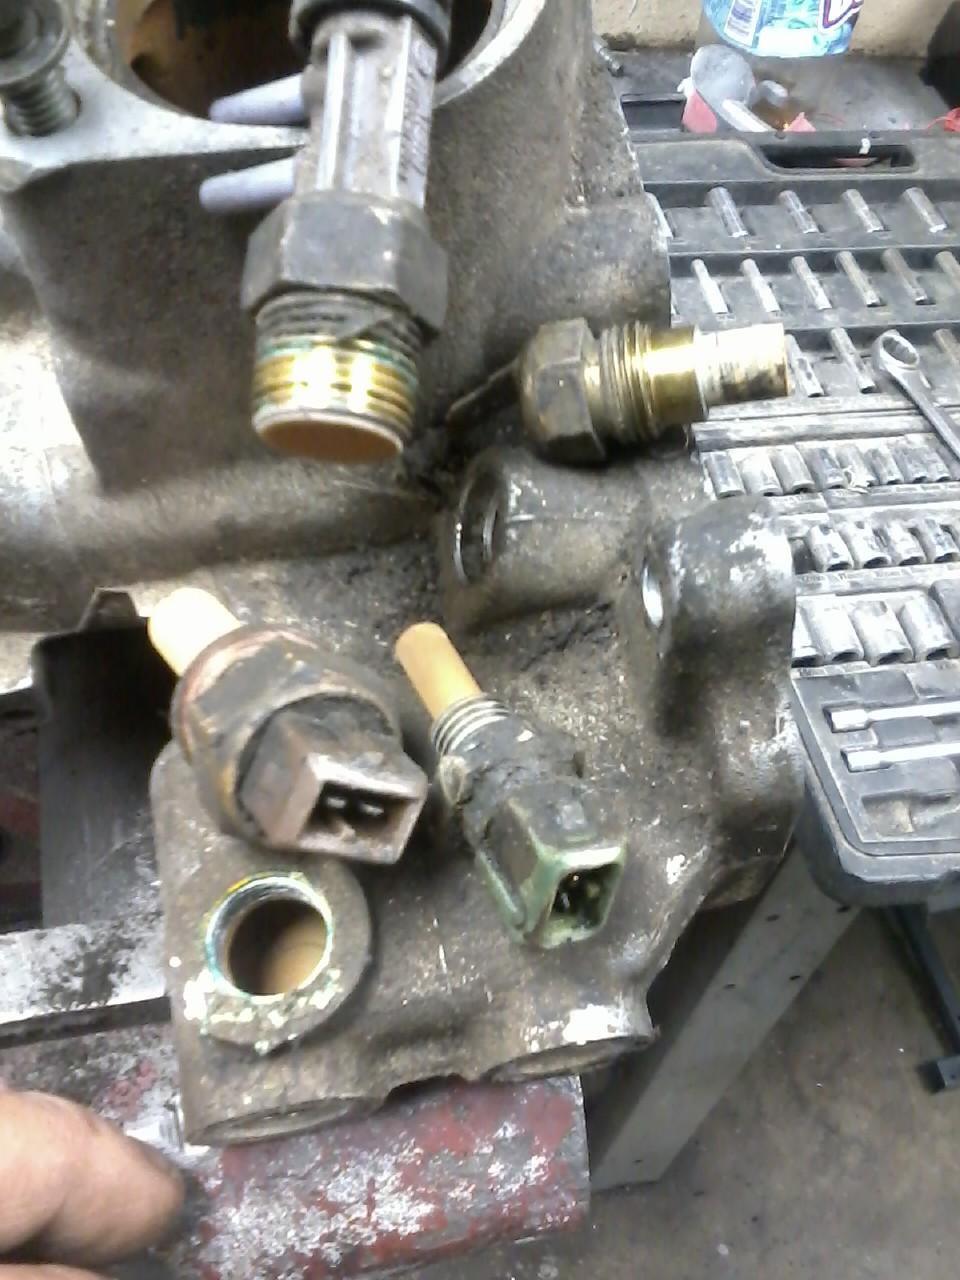
Here they are cleaned. I just use a brass tooth brush and water to get them cleaned. The manual says to wrap the Cold Start Injector Time Switch (Sensor with Brown top)with plumbers tape. I do them all. I haven done it yet but will when I put the motor together.
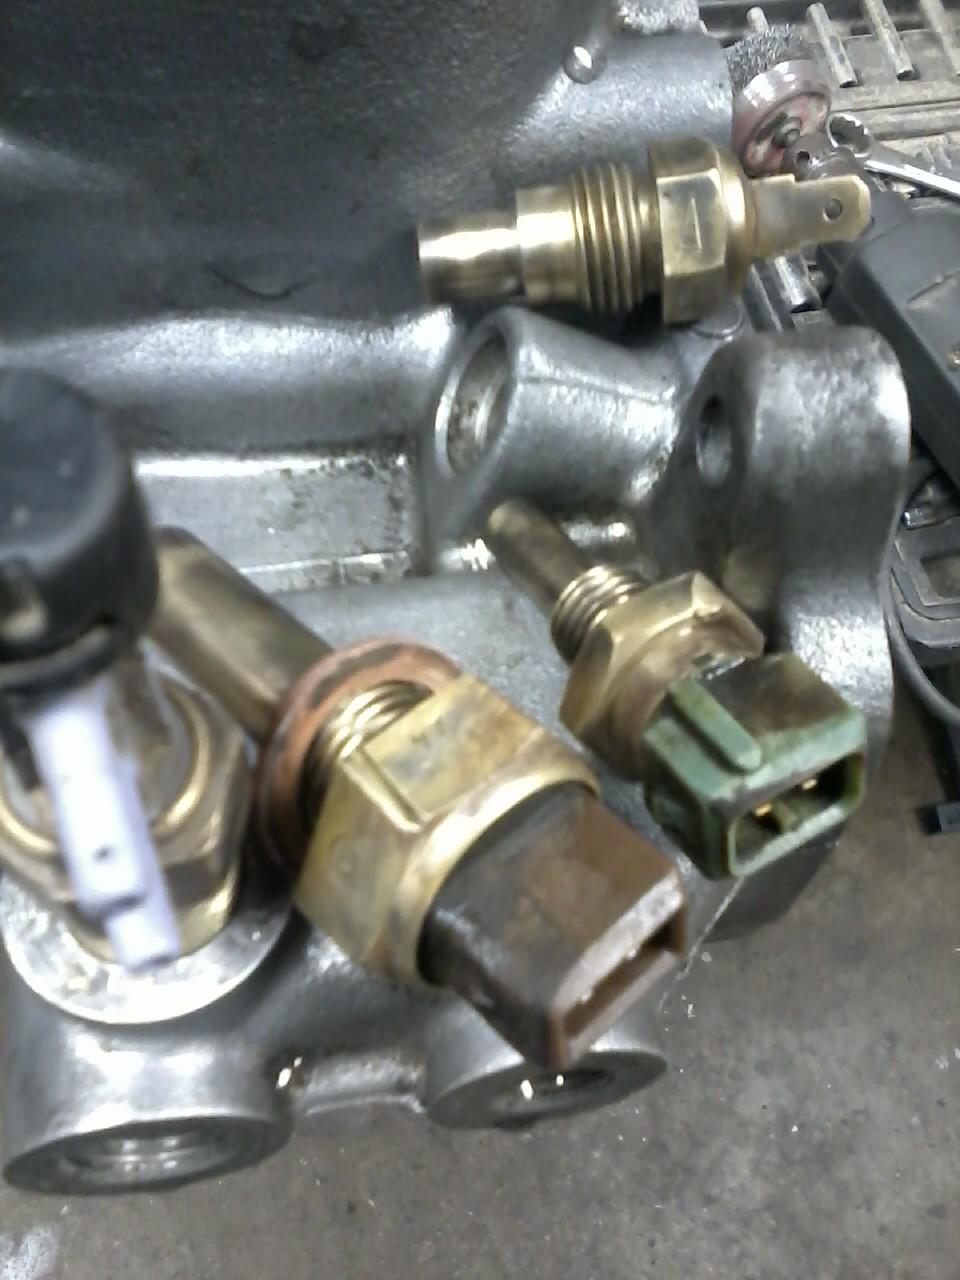
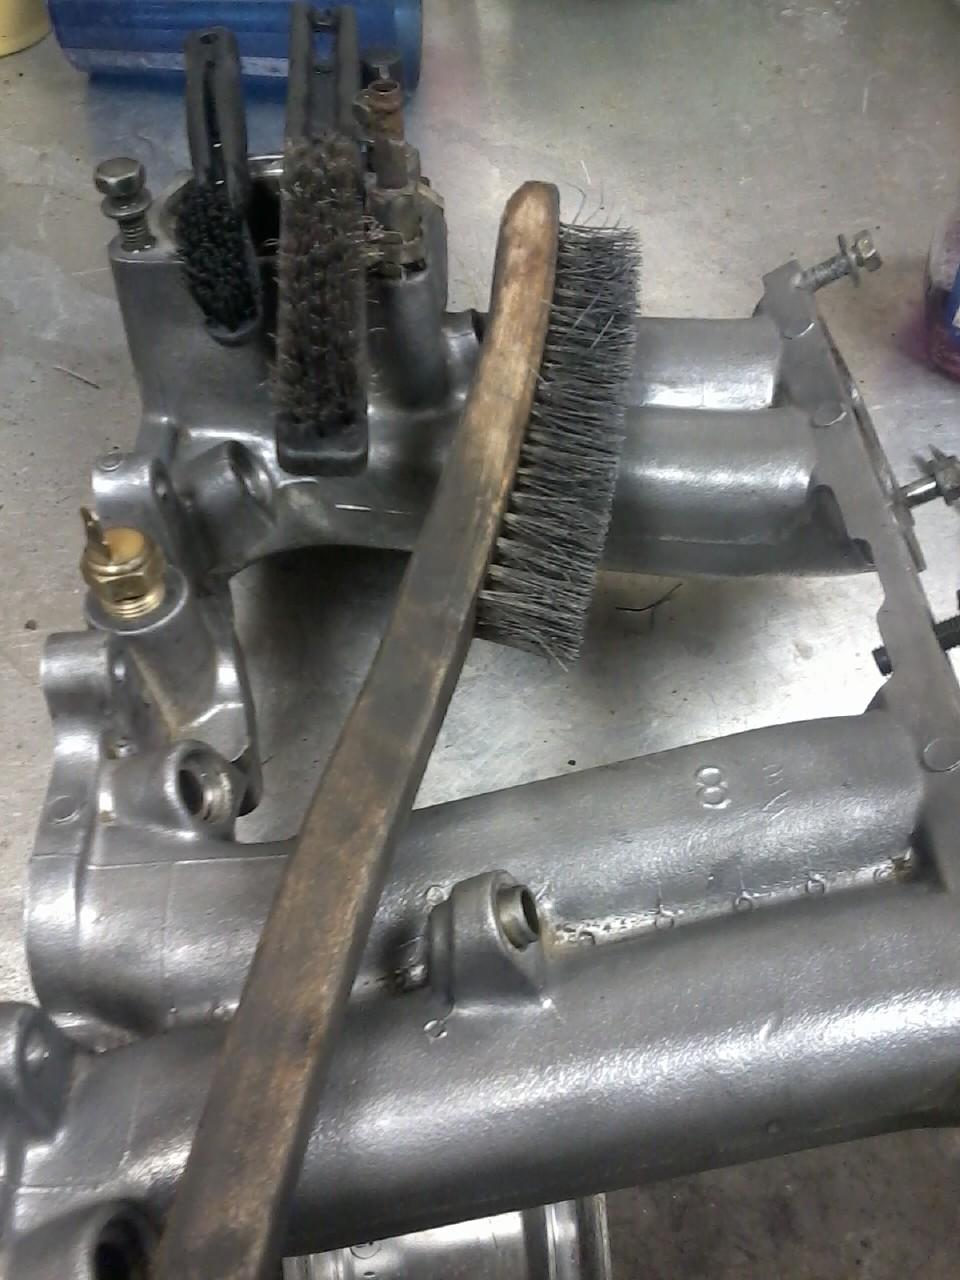
It is not showing but the sensors are in place. The one sensor you can see on the left is to your temp guage. The big brown brush is what I use to get the shine to it.
This is your Cold Start Injector Time Switch. It controls the Cold Start Injector. From my experience, I have never had a Cold Start Injector to fail but have had three CSI Timing Switches to fail. One just needed cleaning. This one camoe off of my 86Runner and I know it is bad. Truck will start when it is warm but not when cold. Right now I am just using it to keep from water leaking until I can get one. Summer time wont be a problem but cooler weather (50s, I think) I will need to use Starting Fluid but will get one before I put it on the road.
In Haynes page 4-10, the CSI Time Switch Failed all test.
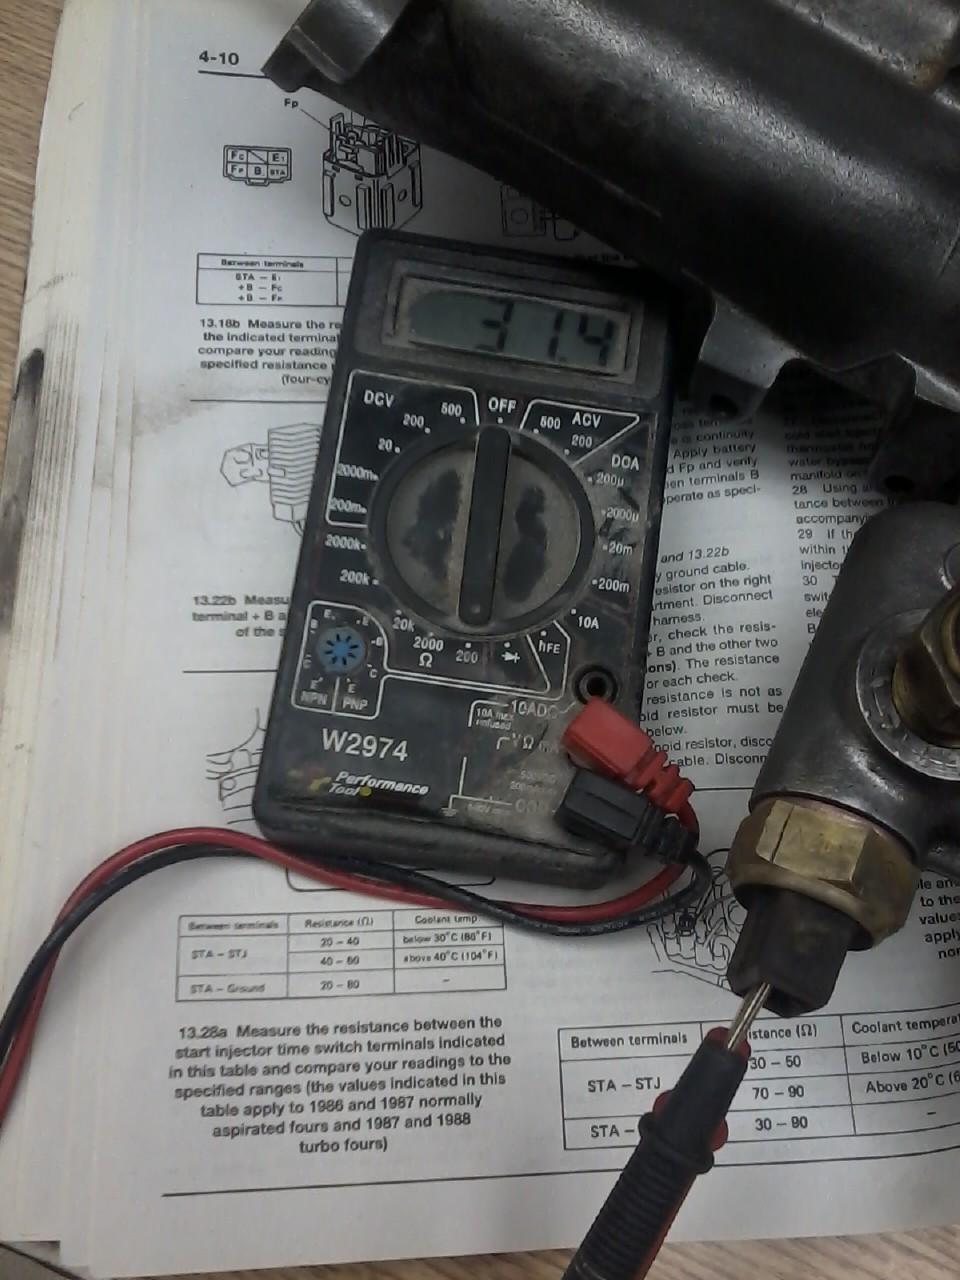
On the home page there is a debate about how the EGr is a good thing. Maybe so but from my experience it wil plug up all of the vacuum lines on your Plenum.I removed them and ever had any problems or pinging. Here it has the pipe full of rock solid carbon. I use a drill bit to get it cleaned out. If you get an EGR code, it is usually the hoses not hooked up right or just needs carbon cleaned out. Messsy.
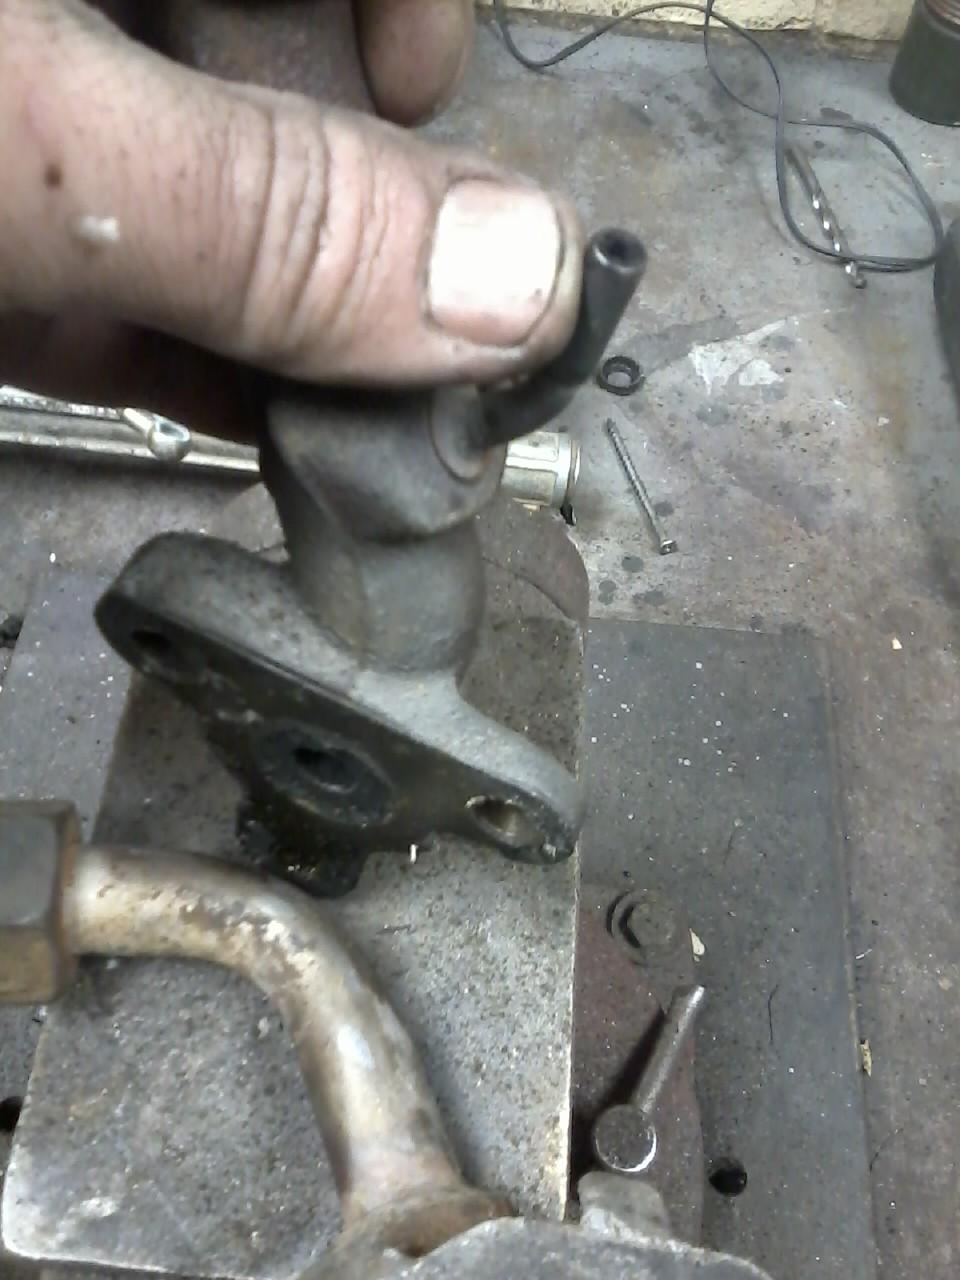
Here is me using a drill bit. I have never gotten as screw out with a Phillips screwdriver. Ususally rusted to bad. I use vise grips, then getting the pipe out is another job in itself. Take your time, you have to get this out to get all the carbon out.
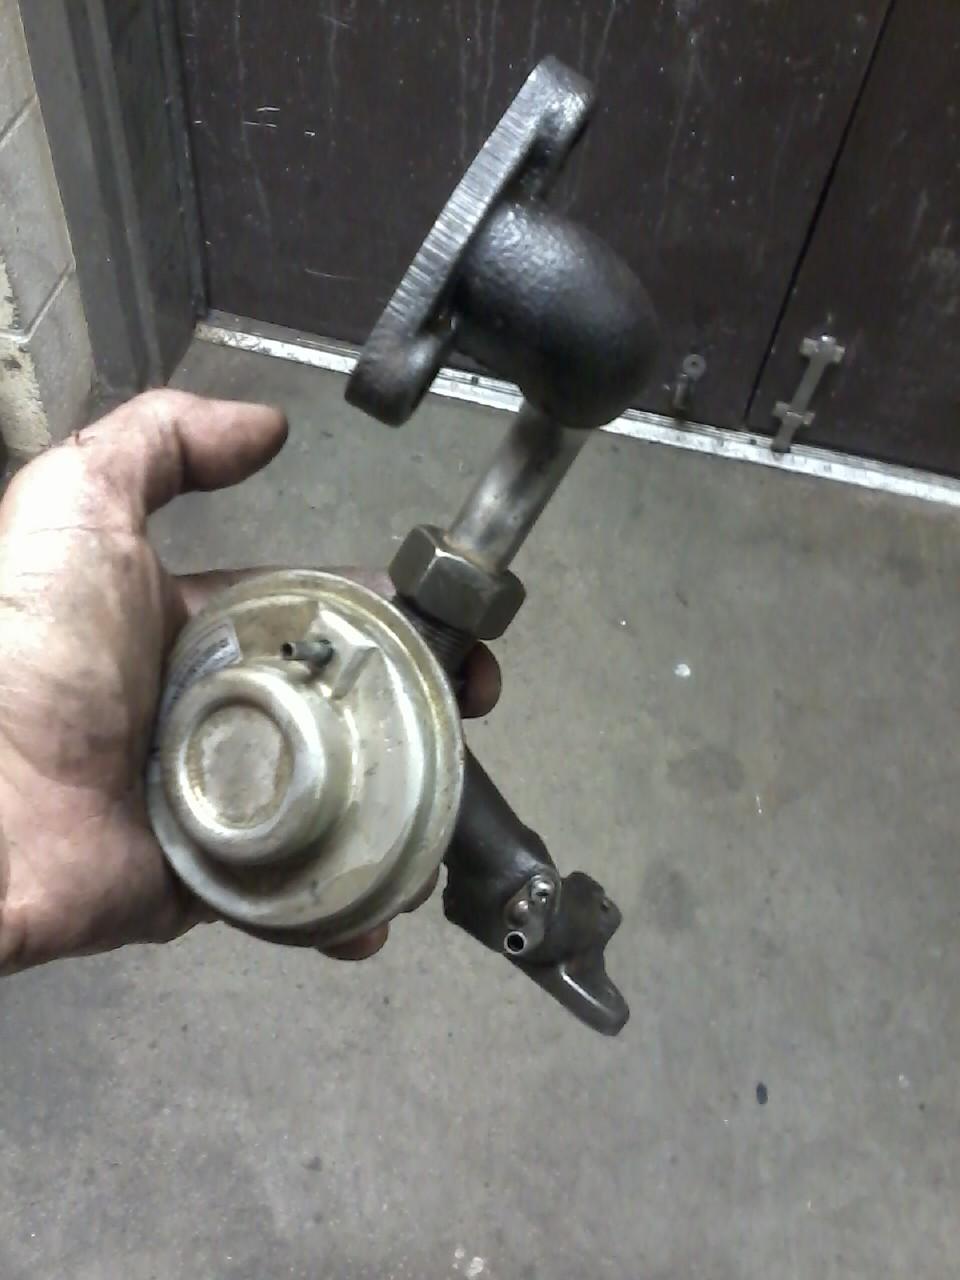
Here it is all back together. I coated it with WD40 to stop the rust and give it the pretty factor. They want alot on ebay for these. I have never sold anything on ebay and might try this one just to see how hard it is. I will sell it for $25, just to see if I can do my part to drive cost down. We have a guy in my area that sells Toyota parts are ridiculously high prices. If I have a spare or something I wont be needing, I have posted the exact same part for alot less then he has. I have seen his prices come down instantly.
A machine shop can fix it but a new head can be had for about $250 so if it is more then $180 I will replace it. I made the mistake of spending $210 when I could of had a new one for forty more. The ground strap that goes from the head to the body is what stops the corrosion from happening as far as I understand it. Alot of times I see this strap not hooked or missing.
Only one water jacket has a little corrosion on it but looks to be in great shape otherwise. Usually it is the longer slots that are bad.
I had to take two intakes and make one. Here are the dirty sensors. Cleaning temp guage one in between #2 and #3 cylinders has helped my temp guage to be more stable then jumping around.(Top Right).
Here they are cleaned. I just use a brass tooth brush and water to get them cleaned. The manual says to wrap the Cold Start Injector Time Switch (Sensor with Brown top)with plumbers tape. I do them all. I haven done it yet but will when I put the motor together.
It is not showing but the sensors are in place. The one sensor you can see on the left is to your temp guage. The big brown brush is what I use to get the shine to it.
This is your Cold Start Injector Time Switch. It controls the Cold Start Injector. From my experience, I have never had a Cold Start Injector to fail but have had three CSI Timing Switches to fail. One just needed cleaning. This one camoe off of my 86Runner and I know it is bad. Truck will start when it is warm but not when cold. Right now I am just using it to keep from water leaking until I can get one. Summer time wont be a problem but cooler weather (50s, I think) I will need to use Starting Fluid but will get one before I put it on the road.
In Haynes page 4-10, the CSI Time Switch Failed all test.
On the home page there is a debate about how the EGr is a good thing. Maybe so but from my experience it wil plug up all of the vacuum lines on your Plenum.I removed them and ever had any problems or pinging. Here it has the pipe full of rock solid carbon. I use a drill bit to get it cleaned out. If you get an EGR code, it is usually the hoses not hooked up right or just needs carbon cleaned out. Messsy.
Here is me using a drill bit. I have never gotten as screw out with a Phillips screwdriver. Ususally rusted to bad. I use vise grips, then getting the pipe out is another job in itself. Take your time, you have to get this out to get all the carbon out.
Here it is all back together. I coated it with WD40 to stop the rust and give it the pretty factor. They want alot on ebay for these. I have never sold anything on ebay and might try this one just to see how hard it is. I will sell it for $25, just to see if I can do my part to drive cost down. We have a guy in my area that sells Toyota parts are ridiculously high prices. If I have a spare or something I wont be needing, I have posted the exact same part for alot less then he has. I have seen his prices come down instantly.
Last edited by Terrys87; Jan 26, 2016 at 10:49 PM.
Feb 21, 2013 | 10:17 AM
#25
Thread Starter
Super Moderator
iTrader: (1)
Joined: Aug 2008
Posts: 11,787
Likes: 28
From: Anderson Missouri
I just teted the IACV valve that Coryc85 worte up. I copied it from his thread as he has better pictures and write up on his.
Copied from Coryc85... Mine tested 50.2
[QUOTE=coryc85;51856443].
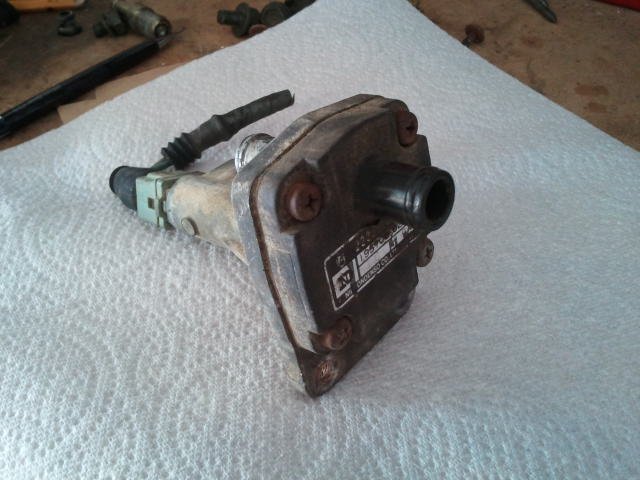
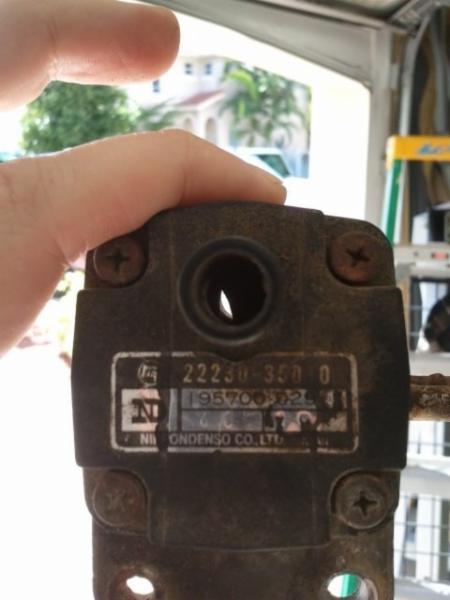
First order of business, I wire brushed it and used a scotchbrite pad to clean it up a bit. Then I checked the resistance of the coil. The FSM says 39 to 59 Ohms, this replacement one measured around 51.
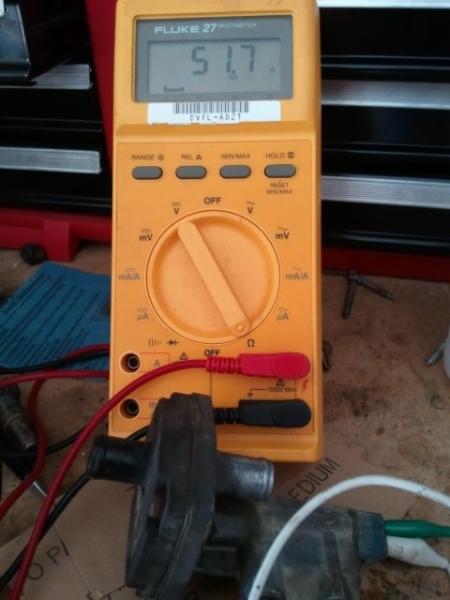
Then I thought I would check it's operation before installing it, so I threw it into the freezer for a couple of hours. Took it out and saw the air passage was opened up more:

Next I let it warm up and checked that the air passage closed up. The FSM says it should be slightly open at 68 deg. It was a tad warmer than that here today, passage looks slightly open:
Copied from Coryc85... Mine tested 50.2
[QUOTE=coryc85;51856443].
First order of business, I wire brushed it and used a scotchbrite pad to clean it up a bit. Then I checked the resistance of the coil. The FSM says 39 to 59 Ohms, this replacement one measured around 51.
Then I thought I would check it's operation before installing it, so I threw it into the freezer for a couple of hours. Took it out and saw the air passage was opened up more:
Next I let it warm up and checked that the air passage closed up. The FSM says it should be slightly open at 68 deg. It was a tad warmer than that here today, passage looks slightly open:
Last edited by Terrys87; Feb 21, 2013 at 10:34 AM.
Feb 22, 2013 | 04:27 PM
#26
Thread Starter
Super Moderator
iTrader: (1)
Joined: Aug 2008
Posts: 11,787
Likes: 28
From: Anderson Missouri
I am determined to get something done on a daily basis as much as possible. It was just to cold to be out side so I brought a small project inside.
To read resistance on a meter when the leads arent touching it is considered an Open or infinite resistance. Each meter is a little different but on this one I know this is Open. Meter is on lowest setting of 200 with the dot of the knob facing straight down. The little horseshoe is the Ohm symbol.
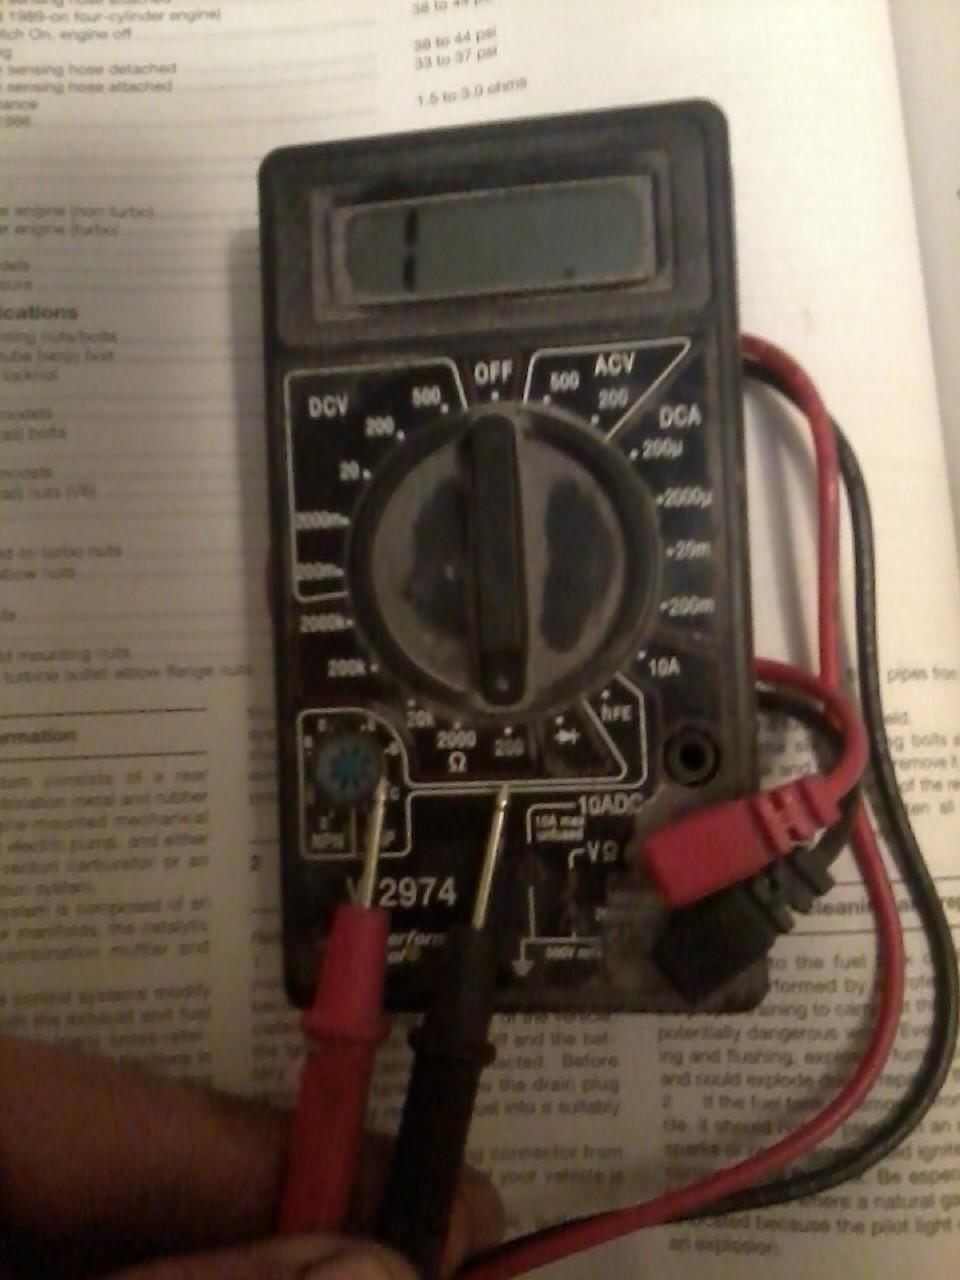
When there is a Short, the least resistance as possible, it is like the leads are touching. This is how to make sure your meter is working. Mine usually reads .5- 6 when testing the meter.
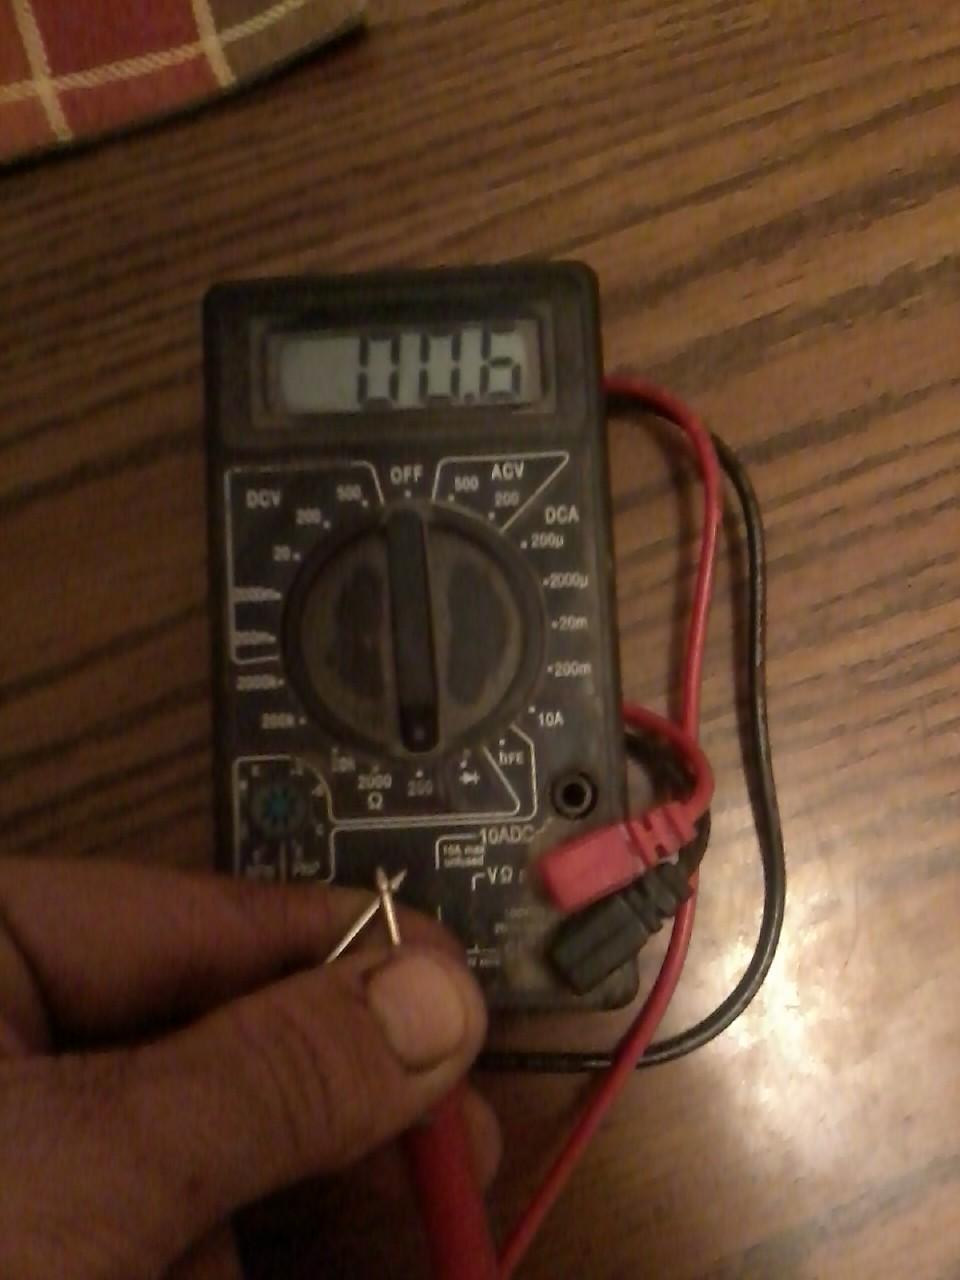
On page 4-2 in the Haynes manual, it says resistance also known as Ohms, that the resistance should be between 1.5-3.0 Ohms for the 84-86 trucks. Picture is not the best for showing the resistance on the screen but it is 2.8. I would like it to be more int he middle like 2.0 Ohms but this is passing.
Make sure each lead is only touching the pins to the injector and not to each other. All 4 of my injectors tested between the 1.5-3.0. Doesnt mean they are absolutley good it only means the electrical connection is good. If some reason it had some rust or something clogging the injector it still wouldnt be able to fire. I was asked about this and hope this helps some.

To read resistance on a meter when the leads arent touching it is considered an Open or infinite resistance. Each meter is a little different but on this one I know this is Open. Meter is on lowest setting of 200 with the dot of the knob facing straight down. The little horseshoe is the Ohm symbol.
When there is a Short, the least resistance as possible, it is like the leads are touching. This is how to make sure your meter is working. Mine usually reads .5- 6 when testing the meter.
On page 4-2 in the Haynes manual, it says resistance also known as Ohms, that the resistance should be between 1.5-3.0 Ohms for the 84-86 trucks. Picture is not the best for showing the resistance on the screen but it is 2.8. I would like it to be more int he middle like 2.0 Ohms but this is passing.
Make sure each lead is only touching the pins to the injector and not to each other. All 4 of my injectors tested between the 1.5-3.0. Doesnt mean they are absolutley good it only means the electrical connection is good. If some reason it had some rust or something clogging the injector it still wouldnt be able to fire. I was asked about this and hope this helps some.
Last edited by Terrys87; Feb 22, 2013 at 04:33 PM.
Feb 22, 2013 | 04:28 PM
#27
Thread Starter
Super Moderator
iTrader: (1)
Joined: Aug 2008
Posts: 11,787
Likes: 28
From: Anderson Missouri
Here is where I get some parts. Trying to add to as I find better sources.
Great thread for parts OEM parts https://www.yotatech.com/forums/f123...-parts-258178/
204- FF.. is a part number for the Power Steering Pulley. $22
Niachi Throwout Bearing... http://www.ebay.com/itm/NACHI-JAPAN-CLUTCH-RELEASE-BEARING-1987-1988-TOYOTA-4RUNNER-SUV-PICKUP-SR5-2-4L-/400464865868?pt=Motors_Car_Truck_Parts_Accessories&hash=item5d3d90ea4c&vxp=mtr
www.sparkplugs.com (with a "s" on plugs) has been great for O2 sensors. I have a California Emissions truck and got 2 sensors for the price of one that I would of paid from a parts store. Price varies
On ebay "BackseatAuto" Part Number 76689 is good replacement latches for the sliding back glass on pickups. It is for the 1 1/2" wide latch. Around $6 and $3 shipping. My 2WD has the 3/4" wide latch and I havent had to replace it. There are 2 different sizes on these trucks.
Another site for the backglass latch http://www.dkhardware.com/product-29...ta-trucks.html
Amazon for backlatch..
"carpartswholesale" ebay seller for fuel pumps. http://api.viglink.com/api/click?for...13464420007671
Part # 90916-03070 for Dual Stage Themostat. 4Runners with back heater can have this problem.
For your valves yes noisy is normal with the 22re...So usually what we all do is .007 and .011 COLD. Then they quite down but aren't too tight to cause issues. If you ask around most of the toyota gurus run 7-11 for valve clearance.
Hood Prop Stay Clip.... http://www.clipsandfasteners.com/Toy...s_p/a17611.htm
Hood Prop Stay Clip.... http://www.lowrangeoffroad.com/index...stay-clip.html
Hood Prop Stay Clip.. http://www.ebay.com/itm/Toyota-Pickup-Truck-Tacoma-4Runner-Etc-HOOD-PROP-ROD-HOLDER-CLIP-/160873043964?hash=item2574c7d7fc&item=160873043964&pt=Motors_Car_Truck_Parts_Accessories&vxp=mtr
Hood Grommet PN 53430B http://www.utoyot8.com/Picture.aspx?...ccode=&ppName=
Where to buy http://www.villagetoyotaparts.com/sh...ssembly=332649
http://www.ebay.com/itm/84-88-Toyota-4Runner-Truck-Door-Weatherstrip-Seal-New-/310400136509?pt=Motors_Car_Truck_Parts_Accessories&hash=item48454a353d&vxp=mtr
Front Bumper on Ebay ... http://www.ebay.com/itm/New-Bumper-Front-Center-Chrome-Truck-4-Runner-Toyota-Pickup-TO1002118-5211189146-/230805198080?pt=Motors_Car_Truck_Parts_Accessories&hash=item35bd0fd500&vxp=mtr
Denso O2 Sensor 234-1056 85/86 Trucks.
Denso O2 Sensor 234-4152 88 Runner. Check ebay (Denso 234-xxxx)
Denso Plug Wire PN# 671-4003.
Denso Plug Wires ... http://www.ebay.com/itm/250854901322...84.m1438.l2649
Front Valance .... http://www.ebay.com/itm/New-Valance-Front-Primered-Truck-4-Runner-Toyota-Pickup-TO1095163-5391189113-/230797981225?pt=Motors_Car_Truck_Parts_Accessories&hash=item35bca1b629&vxp=mtr
These are prices I have paid. If you know of a place that you are happy with and think would be a good deal or hard to find part let me know.
Last edited by Terrys87; Apr 24, 2013 at 07:09 AM.
Feb 23, 2013 | 06:58 PM
#29
Contributing Member
Joined: Mar 2003
Posts: 11,334
Likes: 0
From: COTKU,Ontario,Canada
Thanks for the slider latch link terry I need one for the front window on my bed cap.
Can't use the stock 89-on toyota rear slider latch... the side to side attachment spread is too great. but the metal type latch from the 84-88 might work...
Can't use the stock 89-on toyota rear slider latch... the side to side attachment spread is too great. but the metal type latch from the 84-88 might work...
Feb 24, 2013 | 02:12 PM
#30
Thread Starter
Super Moderator
iTrader: (1)
Joined: Aug 2008
Posts: 11,787
Likes: 28
From: Anderson Missouri
Thanks Cyberhorn.. I have plans to have it running within a month. The weather is warming up and I and I am getting anxious to get started on it. This has been a long winter and I am ready to get out side again. Have some more snow a coming but hope this is the last.
Thank aviator.. Glad it worked for you. Since they have changed ebay, I am having a hard time finding Backseat Auto, they have the best prices on the latches. I am going to start learning about Amazon website and when I can find a place to get the parts I will keep up dating this page. I got a link from Chef and alot of times I have been able to find factory parts on ebay, but it isnt always consistent.
Thank aviator.. Glad it worked for you. Since they have changed ebay, I am having a hard time finding Backseat Auto, they have the best prices on the latches. I am going to start learning about Amazon website and when I can find a place to get the parts I will keep up dating this page. I got a link from Chef and alot of times I have been able to find factory parts on ebay, but it isnt always consistent.
Feb 24, 2013 | 02:37 PM
#31
Thread Starter
Super Moderator
iTrader: (1)
Joined: Aug 2008
Posts: 11,787
Likes: 28
From: Anderson Missouri
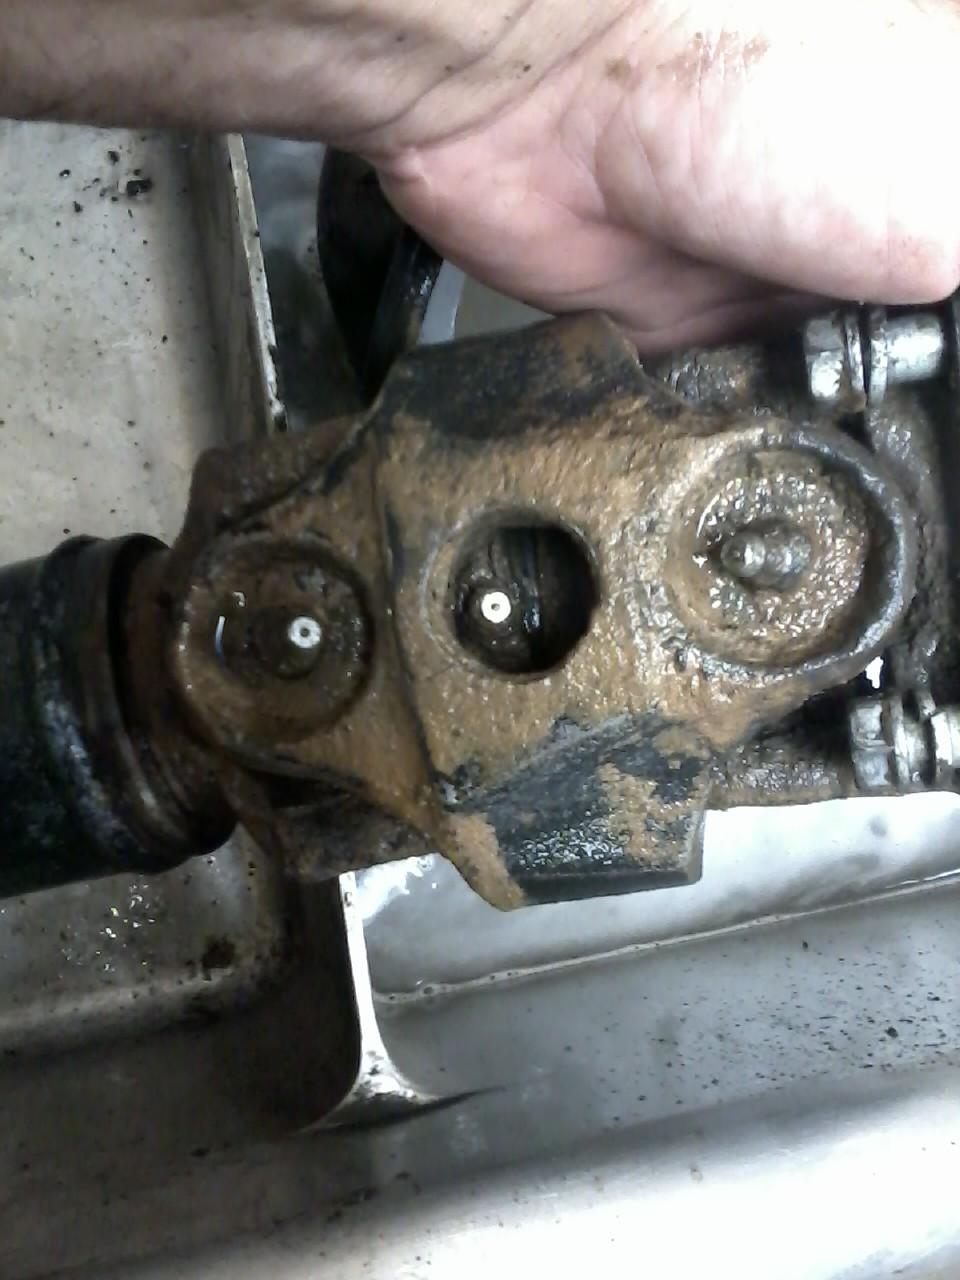
I cleaned and painted the front drive shaft. While having it out, I got all of the gunk out and greased up the zerk fittings. This can be easily overlooked and especially the one in the middle. It is painted an looking alot nicer.
I was fixing up this truck for myself when I came across my Extra cab. 88 build>>https://www.yotatech.com/forums/f199...-build-253985/ being 6 foot tall and this being a rarer truck, I was going to sell it and my brother wanted it. It ran great for him for about 5 months and then on a cold day it blew the head gasket. So he had it swapped out and then it apparently put to much pressure on number one cylinder and started smoking real bad. He just replaced the motor from www.unitedengine.com and got a motor on special.
He doesnt blame me for the motor going bad and with the exception of buying 2 new motors for 2 different trucks, every 22re I have had has blown a head gasket. Once I replace them I have never had a problem with one blowing.
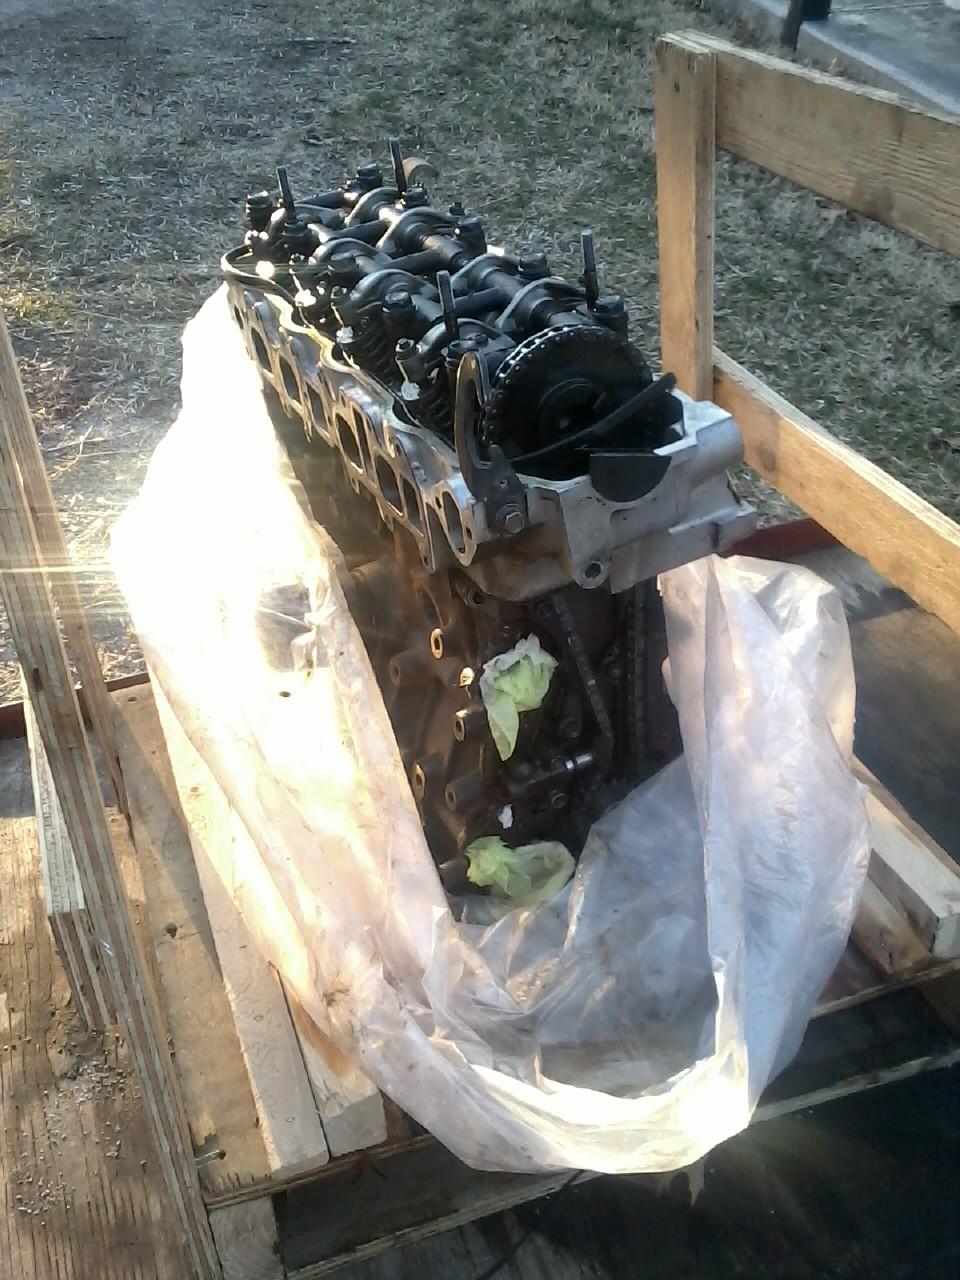
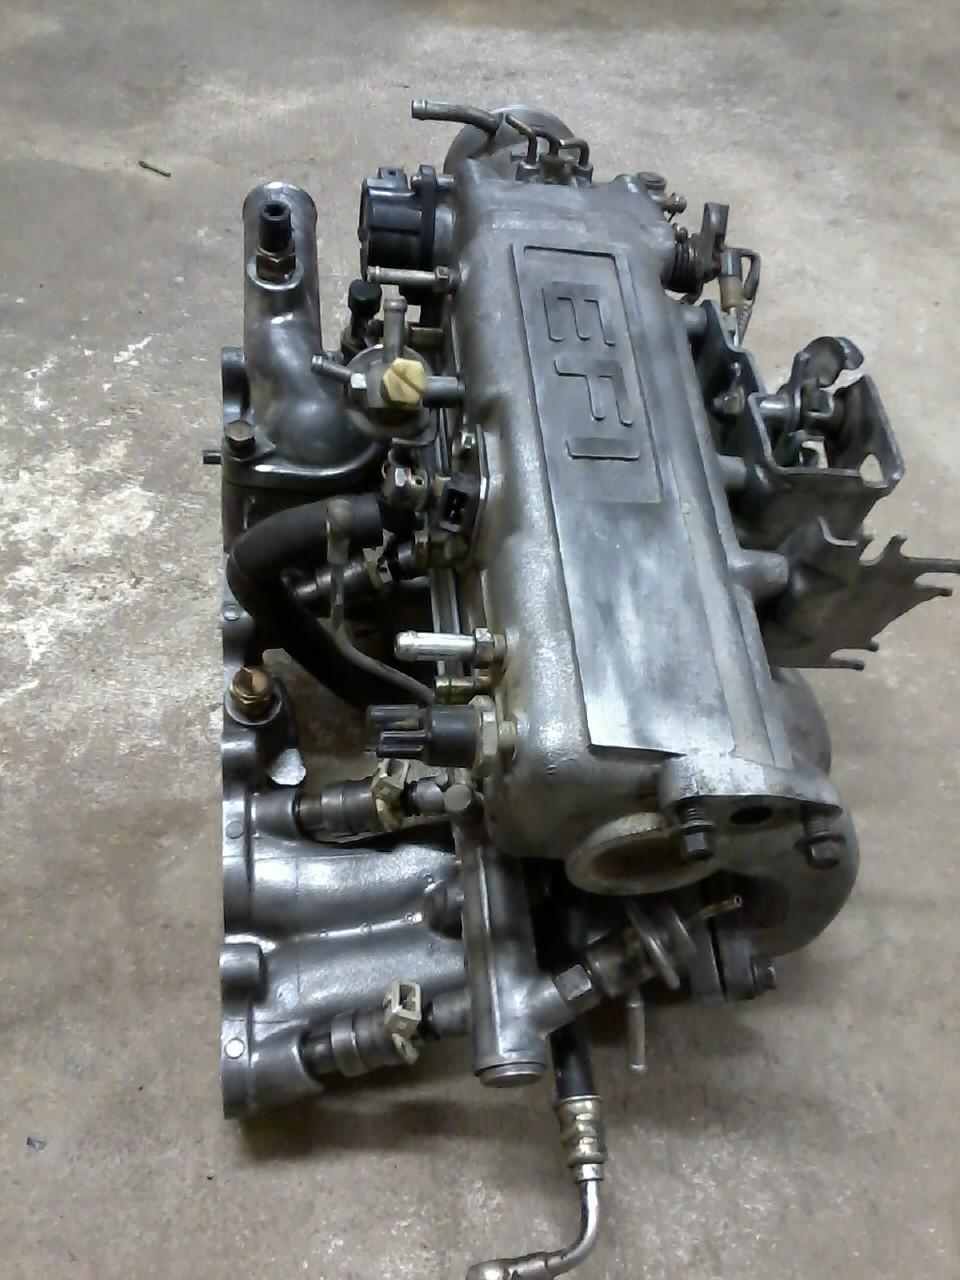
He doesnt want the motor at his house as Unitd Engine didnt want the core back so he asked if I wanted it. Well... ok, I will take it. I just plan on honing it, new rings and bearings just to put into my 85. I am eventually going to save up and buy me a motor as well, but this will get the truck running and the wife can have something to haul stuff around as I am to get deplyed to Afgahnistan from this summer til next summer, I still have a few monthts at home.
When I get home, the truck will go thru a complete tear down as I like to have my trucks looking as new as possible. I am doing some small things on my wifes 88 but I am hoping to start tearing this motor down in the next couple of days and getting the parts on order here Tuesday or Wednesday to make sure if there is anything else I might need.
Temporary motor. The biggest problem I am going to have is getting my fuel injector harness all in one piece. I am on the hunt for one but do have 2 harnesses that I can take two and make one if I need to.
I was fixing up this truck for myself when I came across my Extra cab. 88 build>>https://www.yotatech.com/forums/f199...-build-253985/ being 6 foot tall and this being a rarer truck, I was going to sell it and my brother wanted it. It ran great for him for about 5 months and then on a cold day it blew the head gasket. So he had it swapped out and then it apparently put to much pressure on number one cylinder and started smoking real bad. He just replaced the motor from www.unitedengine.com and got a motor on special.
He doesnt blame me for the motor going bad and with the exception of buying 2 new motors for 2 different trucks, every 22re I have had has blown a head gasket. Once I replace them I have never had a problem with one blowing.
He doesnt want the motor at his house as Unitd Engine didnt want the core back so he asked if I wanted it. Well... ok, I will take it. I just plan on honing it, new rings and bearings just to put into my 85. I am eventually going to save up and buy me a motor as well, but this will get the truck running and the wife can have something to haul stuff around as I am to get deplyed to Afgahnistan from this summer til next summer, I still have a few monthts at home.
When I get home, the truck will go thru a complete tear down as I like to have my trucks looking as new as possible. I am doing some small things on my wifes 88 but I am hoping to start tearing this motor down in the next couple of days and getting the parts on order here Tuesday or Wednesday to make sure if there is anything else I might need.
Temporary motor. The biggest problem I am going to have is getting my fuel injector harness all in one piece. I am on the hunt for one but do have 2 harnesses that I can take two and make one if I need to.
Last edited by Terrys87; Feb 24, 2013 at 03:09 PM.
Feb 24, 2013 | 03:08 PM
#32
Thread Starter
Super Moderator
iTrader: (1)
Joined: Aug 2008
Posts: 11,787
Likes: 28
From: Anderson Missouri
I had a friend over yesterday and he always lets me know that my trucks are junk when I get them but when I get them done is always wanting to buy one off of me. I did several trucks before finding Yotatech and all but the 91 exteded cab were in bad shape. I painted all of the trucks below.
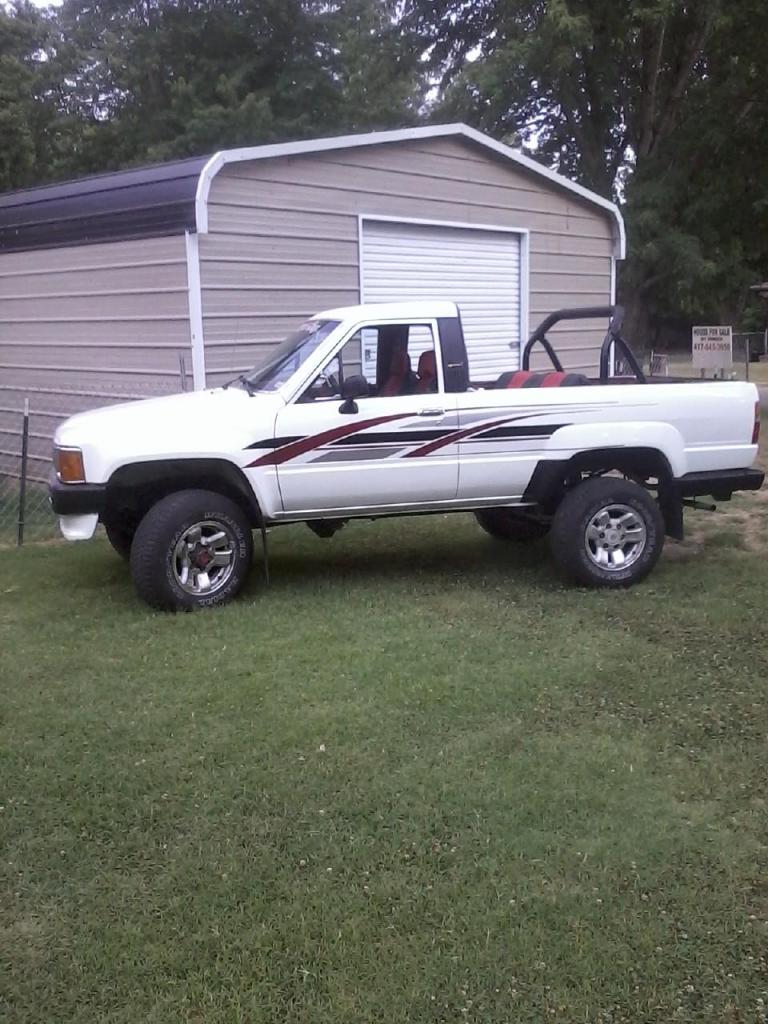
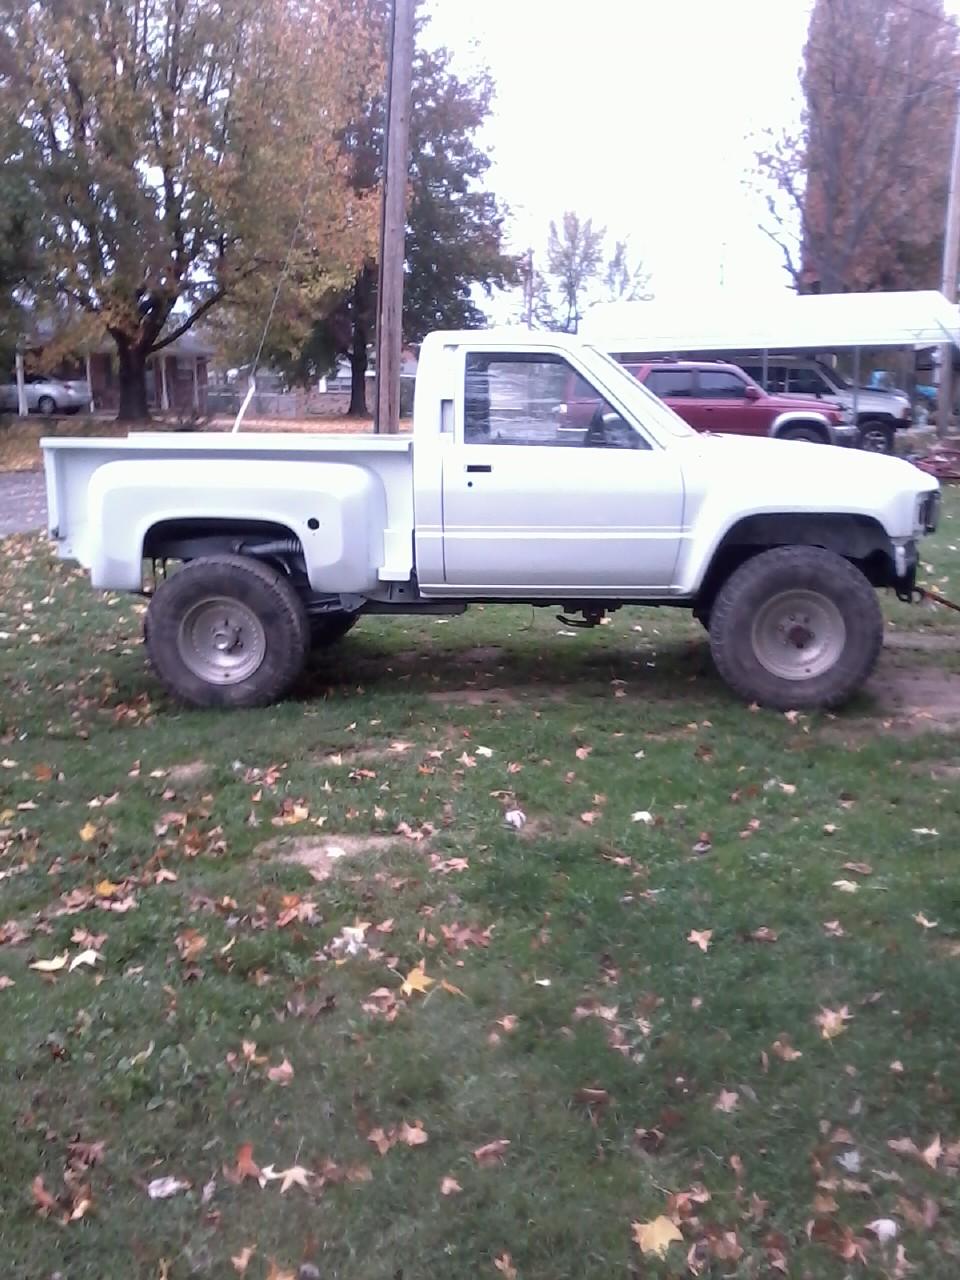
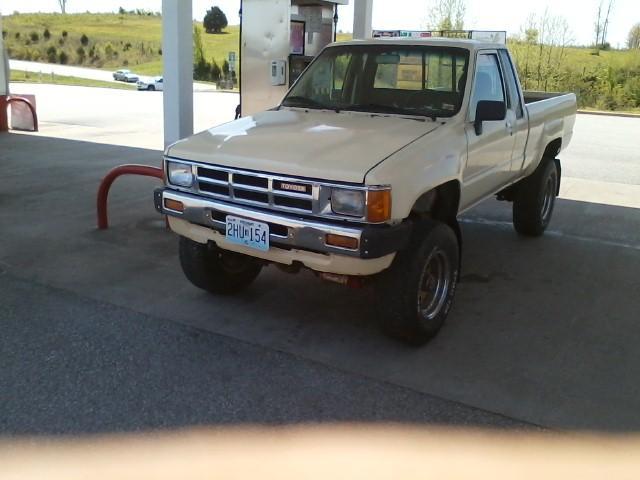
The 86 Runner and this 85 are my keepers and the wifes 88 Runner is her keeper. Just took me awhile to figure out which trucks I wanted to keep. This may look like a junk truck now, but give me time and I will have it in a good clean condition.
I also helped Jason in tn on a 3 day thrash getting his bodywork and paint on which turned out real nice. I dont have any pics of it in photobucket but he has a build thread on it. I could buy a nice truck, but like to see what I can build. All but the 91 Extended cab was JUNK!!!
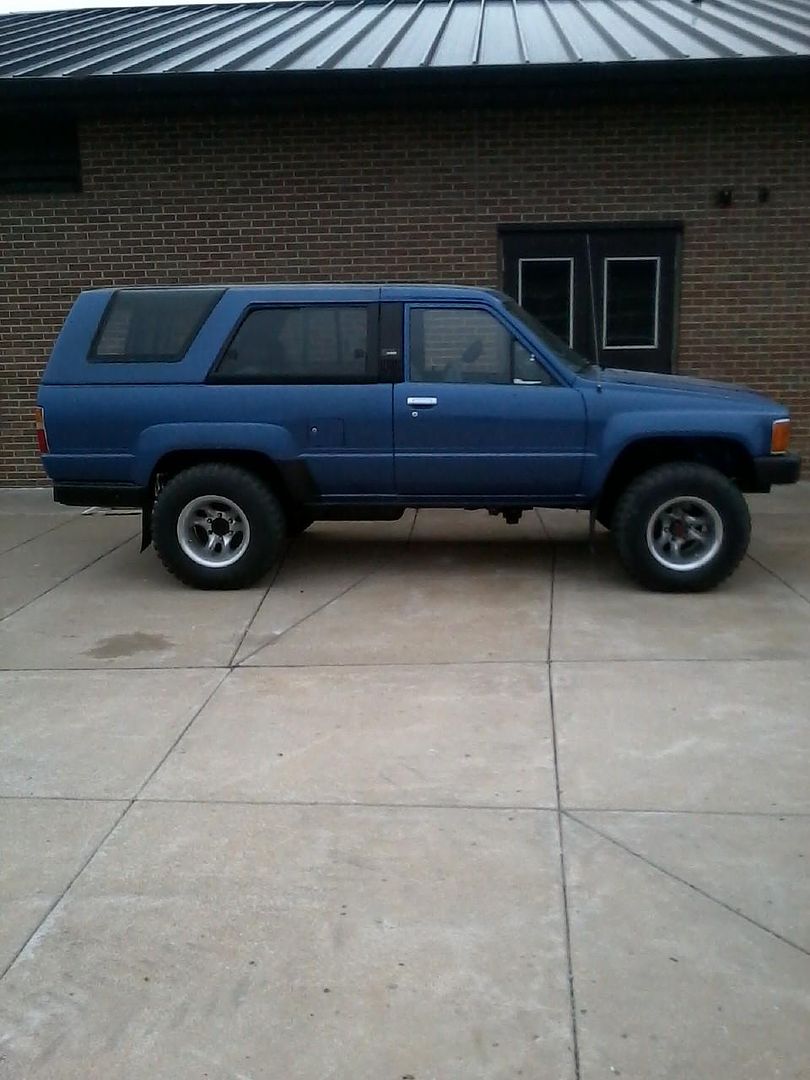
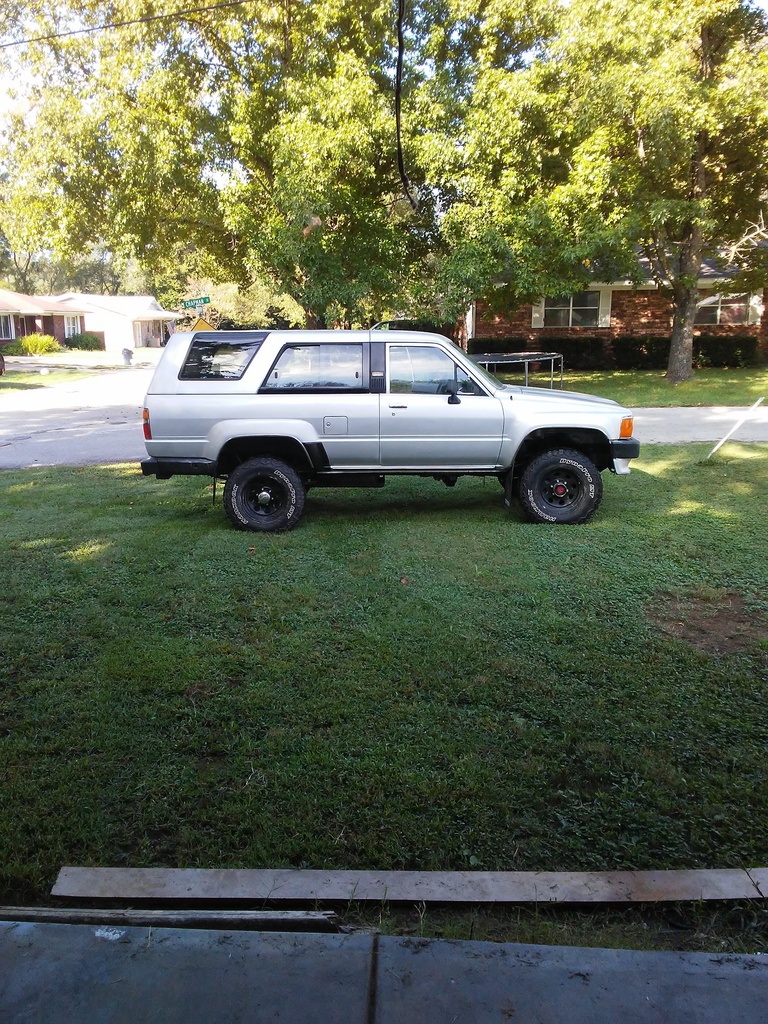
Wifes truck. Was advertised as parts truck or crawler. Worse then what build thread shows it to be. Right now is my all time favorite of my trucks or any car I have owned and I have a nice 3rd gen. The 88 Runner has alot more future plans.
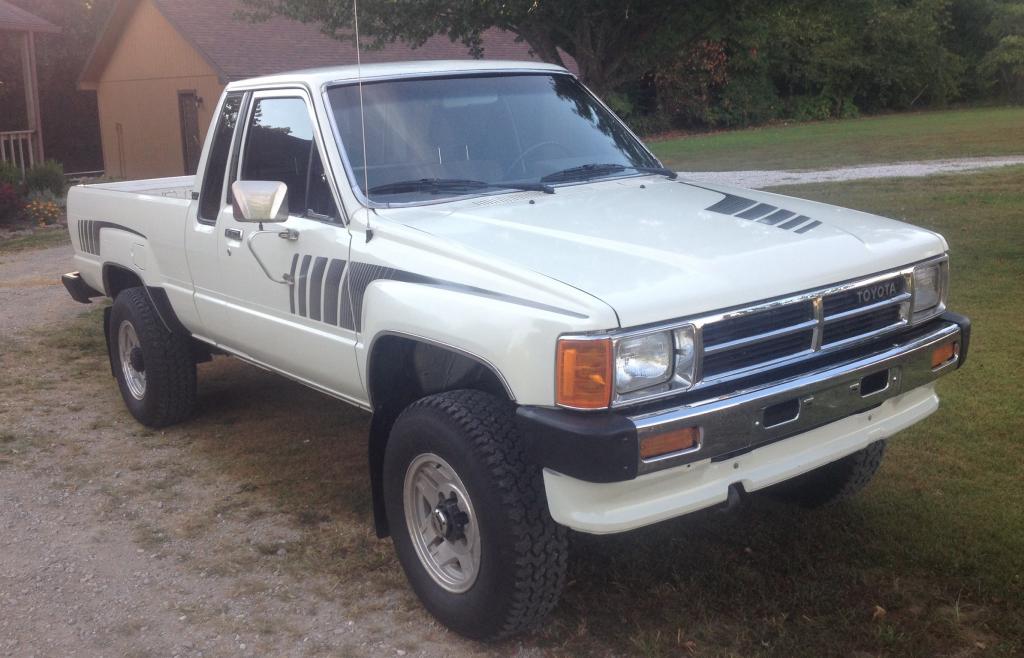
3rd truck I did. Motor, SR5 guage, seats, paint.

2nd truck. Was abused and beaten. Motor and body work.

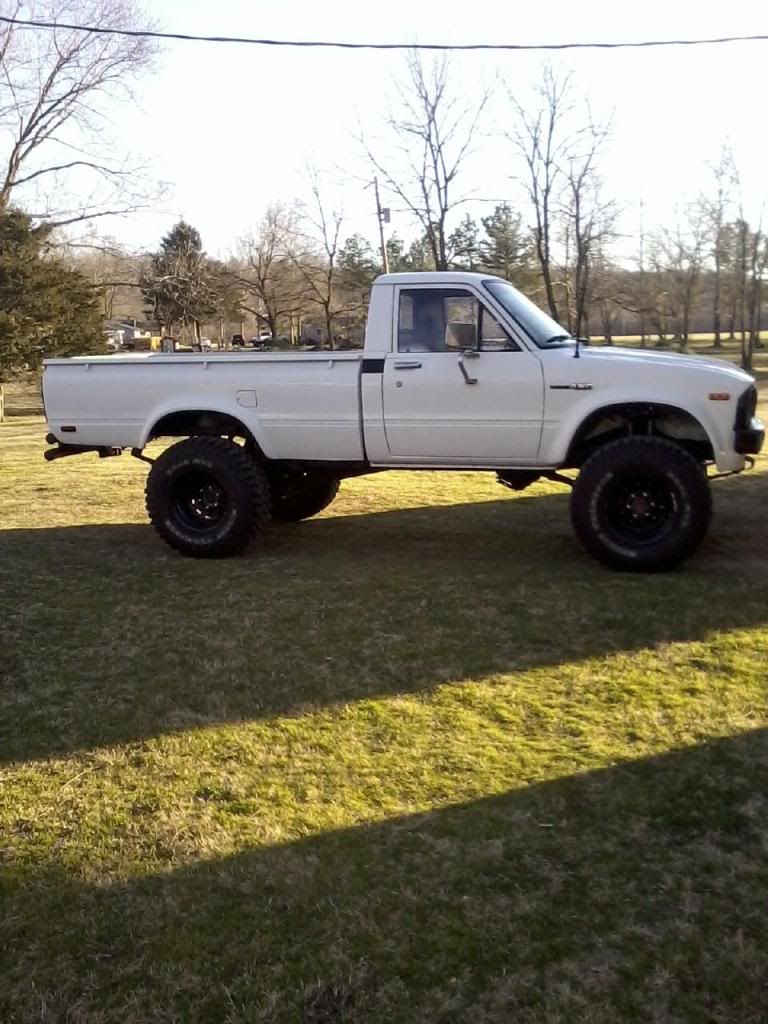
Did the body work for a friend. It was rough. It was going to the crusher as well. I found it for a friend and a rollover truck and he took the two and made one.
1st truck. Frame swap, motor,paint, and SR5 guage. Wife was PO'd when I brought this one home. hehehe

My 86 Runner build thread.
My 88 truck build thread.
86 Extra Cab
Jasons
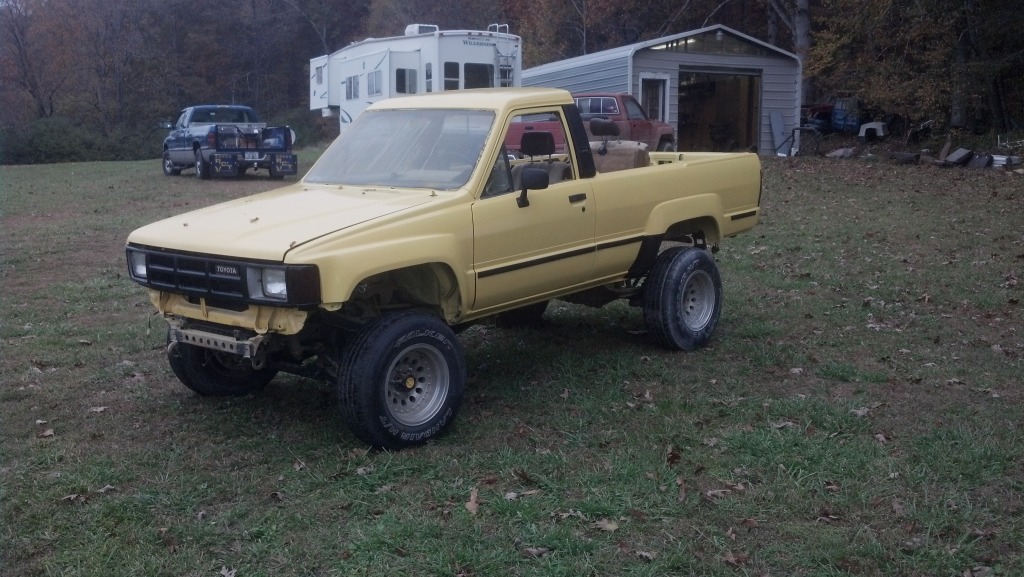
My 85 Truck.
The 86 Runner and this 85 are my keepers and the wifes 88 Runner is her keeper. Just took me awhile to figure out which trucks I wanted to keep. This may look like a junk truck now, but give me time and I will have it in a good clean condition.
I also helped Jason in tn on a 3 day thrash getting his bodywork and paint on which turned out real nice. I dont have any pics of it in photobucket but he has a build thread on it. I could buy a nice truck, but like to see what I can build. All but the 91 Extended cab was JUNK!!!
Wifes truck. Was advertised as parts truck or crawler. Worse then what build thread shows it to be. Right now is my all time favorite of my trucks or any car I have owned and I have a nice 3rd gen. The 88 Runner has alot more future plans.
3rd truck I did. Motor, SR5 guage, seats, paint.
2nd truck. Was abused and beaten. Motor and body work.
Did the body work for a friend. It was rough. It was going to the crusher as well. I found it for a friend and a rollover truck and he took the two and made one.
1st truck. Frame swap, motor,paint, and SR5 guage. Wife was PO'd when I brought this one home. hehehe
My 86 Runner build thread.
My 88 truck build thread.
86 Extra Cab

Jasons
My 85 Truck.


Last edited by Terrys87; Dec 26, 2016 at 10:42 AM.
Feb 24, 2013 | 11:51 PM
#34
Thread Starter
Super Moderator
iTrader: (1)
Joined: Aug 2008
Posts: 11,787
Likes: 28
From: Anderson Missouri
Hello Cyberhorn.. The rims are what they call the Tri Spoke rims. I may be a year or so off and not 100% correct but they do come in two different sizes. The ones on hers are the 15 inch and I am almost positive that is only on two wheel drives but could be wrong. The rims were produced somewhere around '96 and I think they went all the way to the 2000 models. I have a 2001 Runner and it has what is called the 5 spokes. I dont know if they offered both that year or if 2000 was the last year of them. They were also on the same years Tacomas.
I am not as familar with the newer models, but on the older Toyotas, the 2 wheel drive is 5 lug and 4 wheel drives were 6 lugs, so the above information may not absolutely correct. The guy I got them from told me they were from a 96 or 97 Runner.
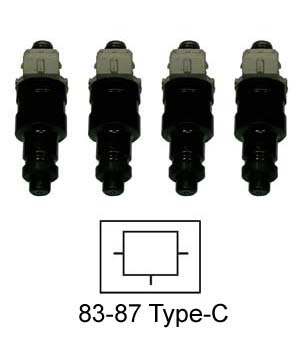
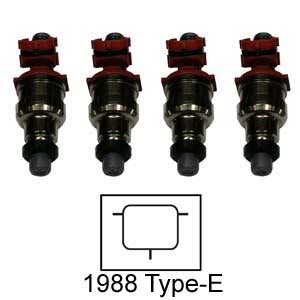
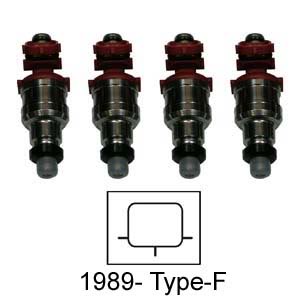
I meant to ask you, how do you go about changing the screens on the injectors? Is that an easy job and something that could/should be done? I know I can send them to somebody like Witchhunter or several other places, but I am doing this on a budget so will have to skip that cost for now.
I am not as familar with the newer models, but on the older Toyotas, the 2 wheel drive is 5 lug and 4 wheel drives were 6 lugs, so the above information may not absolutely correct. The guy I got them from told me they were from a 96 or 97 Runner.
I meant to ask you, how do you go about changing the screens on the injectors? Is that an easy job and something that could/should be done? I know I can send them to somebody like Witchhunter or several other places, but I am doing this on a budget so will have to skip that cost for now.
Feb 25, 2013 | 12:14 AM
#35
Thread Starter
Super Moderator
iTrader: (1)
Joined: Aug 2008
Posts: 11,787
Likes: 28
From: Anderson Missouri
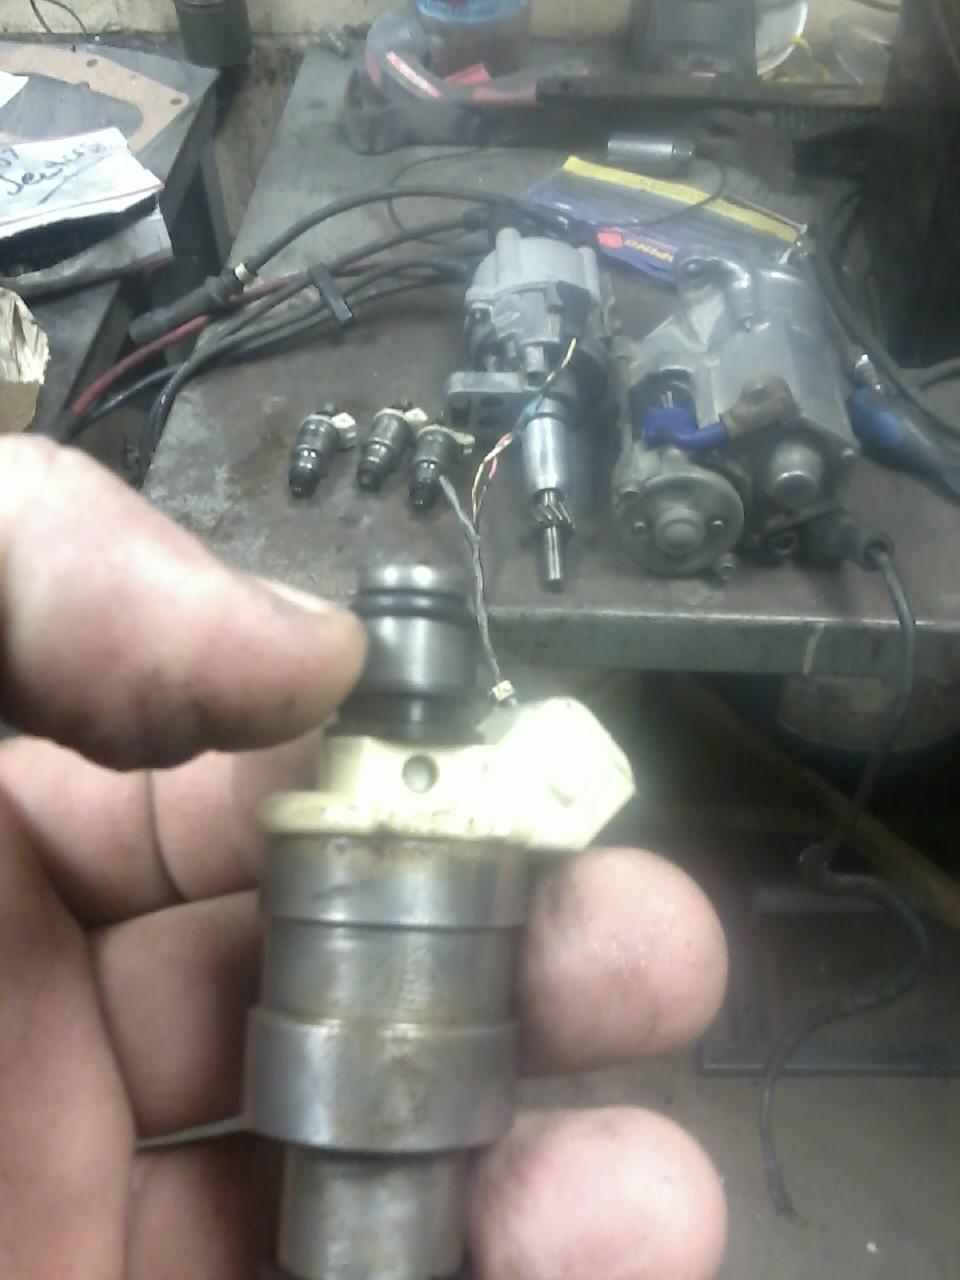
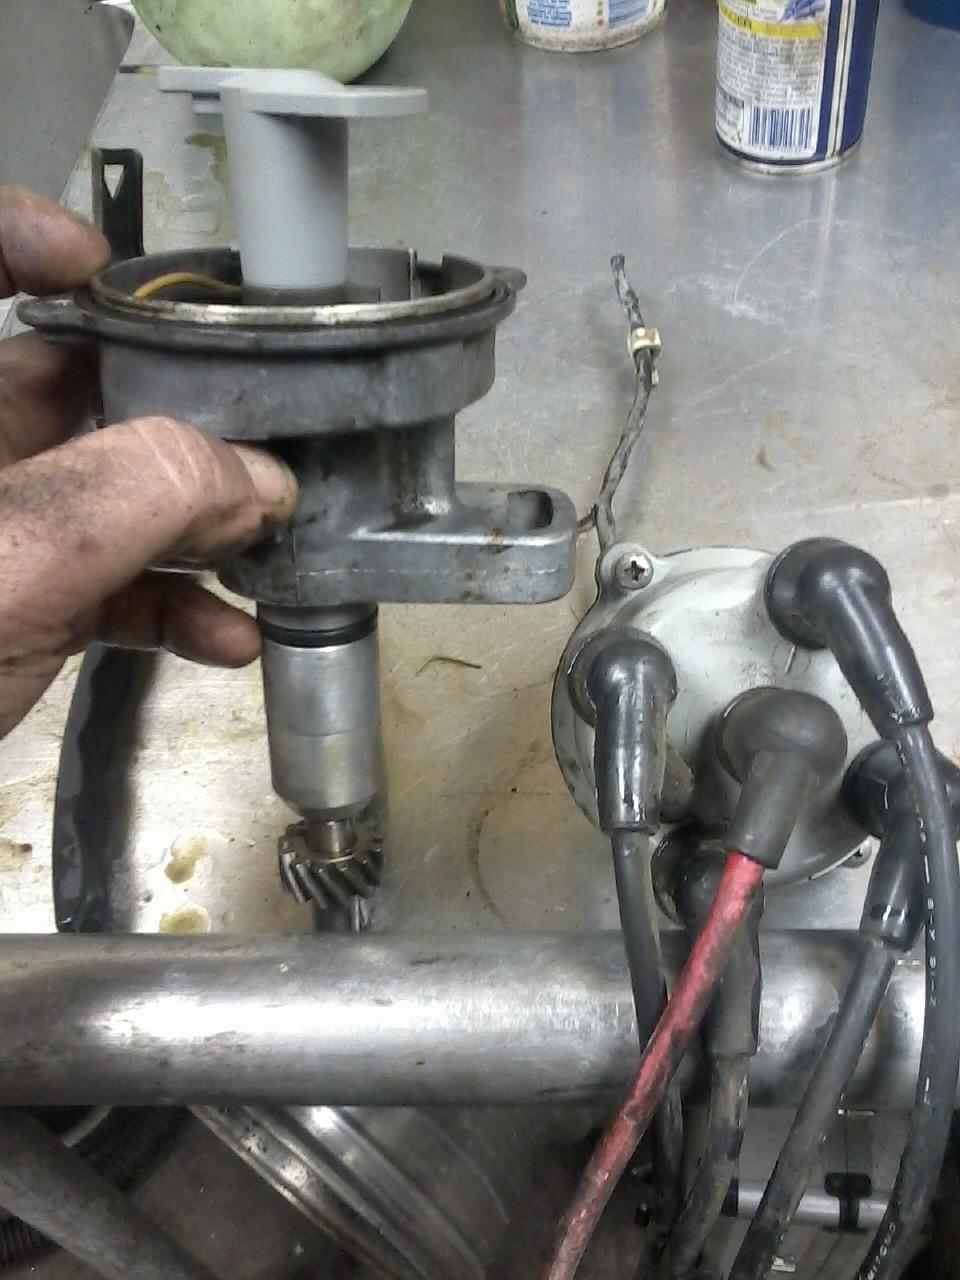
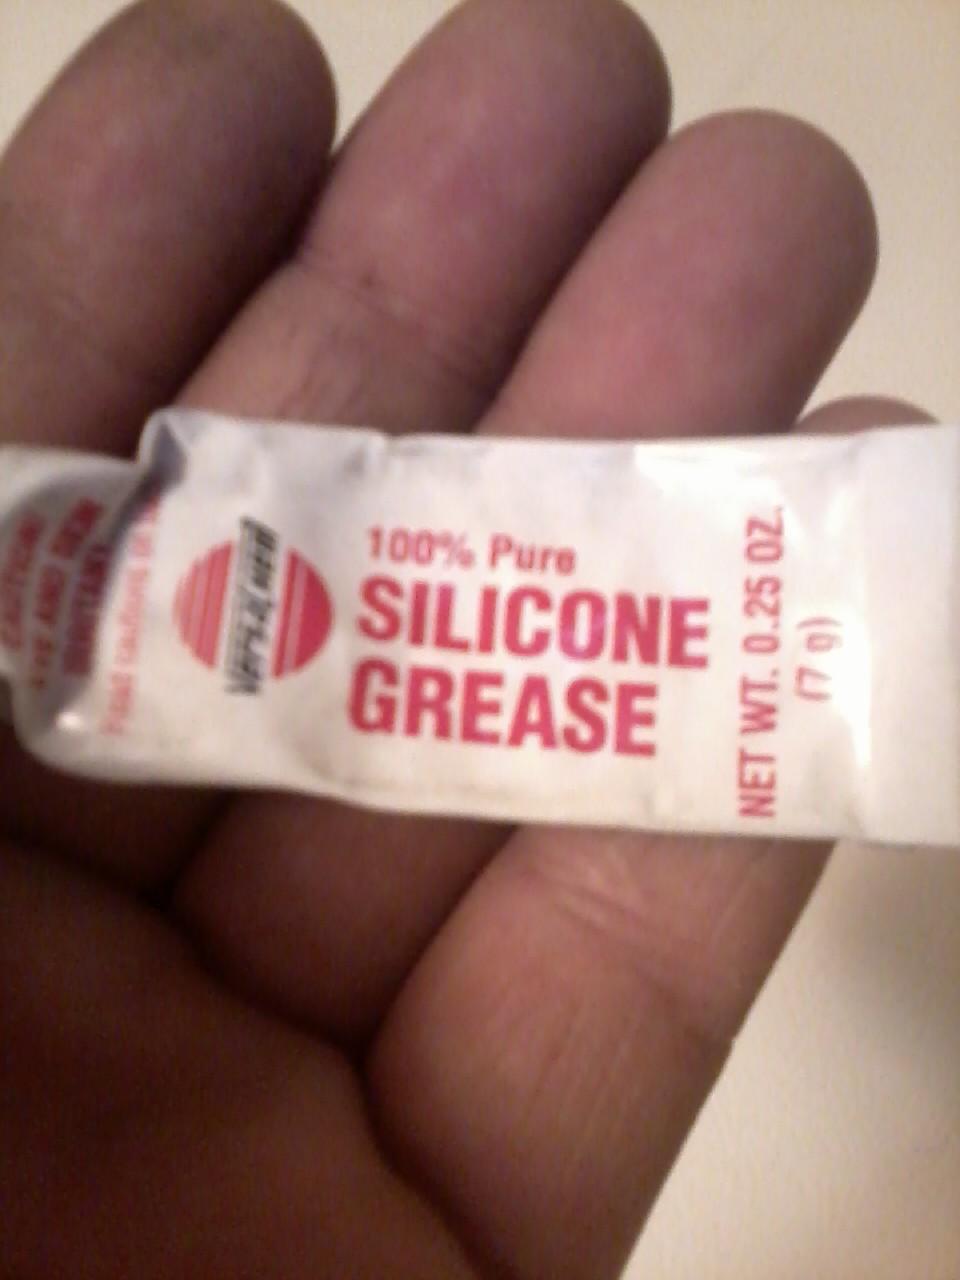
I cleaned up my injectors and where my thumb is at, this Oring nearly cost me a fire on my 88 Runner. The FSM says to lube it up with gasoline when installing it the fuel rail. I missed that part and when I put it in, it got a knick in it and caused a bad leak. Make sure to use gasoline or WD 40 or something when installing it. It will go in a lot easier as well. Started cleaning my distributor and starter as well. I will take the starter to a parts store and have them to check it out and make sure it is working.
each diagram shows orientation of the plug connections.[/quote]
Here is a Starter Rebuild Video if needed for later.
When I go to install the distributor, the bottom O-ring is usually brittle. You can get the O-ring from a parts store from a kit they have available. Where my top finger is that one I get from Toyota and it helps keep the distributor from getting moisture when cleaning or I cross a lot of low water bridges and occasionally the fan will dip into some water and get it everywhere. From Toyota it isnt to bad of a price if I recall right.
I get to replace the end of the distributor as it was removed when it was a parts truck. You can get Denso plug wires from ebay for about $25 that I have listed above. I checked the dealer and I think it was $83 if I recall right. Parts stores top brands are more expensive and are an inferior product in my opinion. Parts store plug wires keep wanting to come off of the cap, where the Densos are a much better fit and quality. A lesson I learned the hard way.
Part number for the Distributor O-Ring.
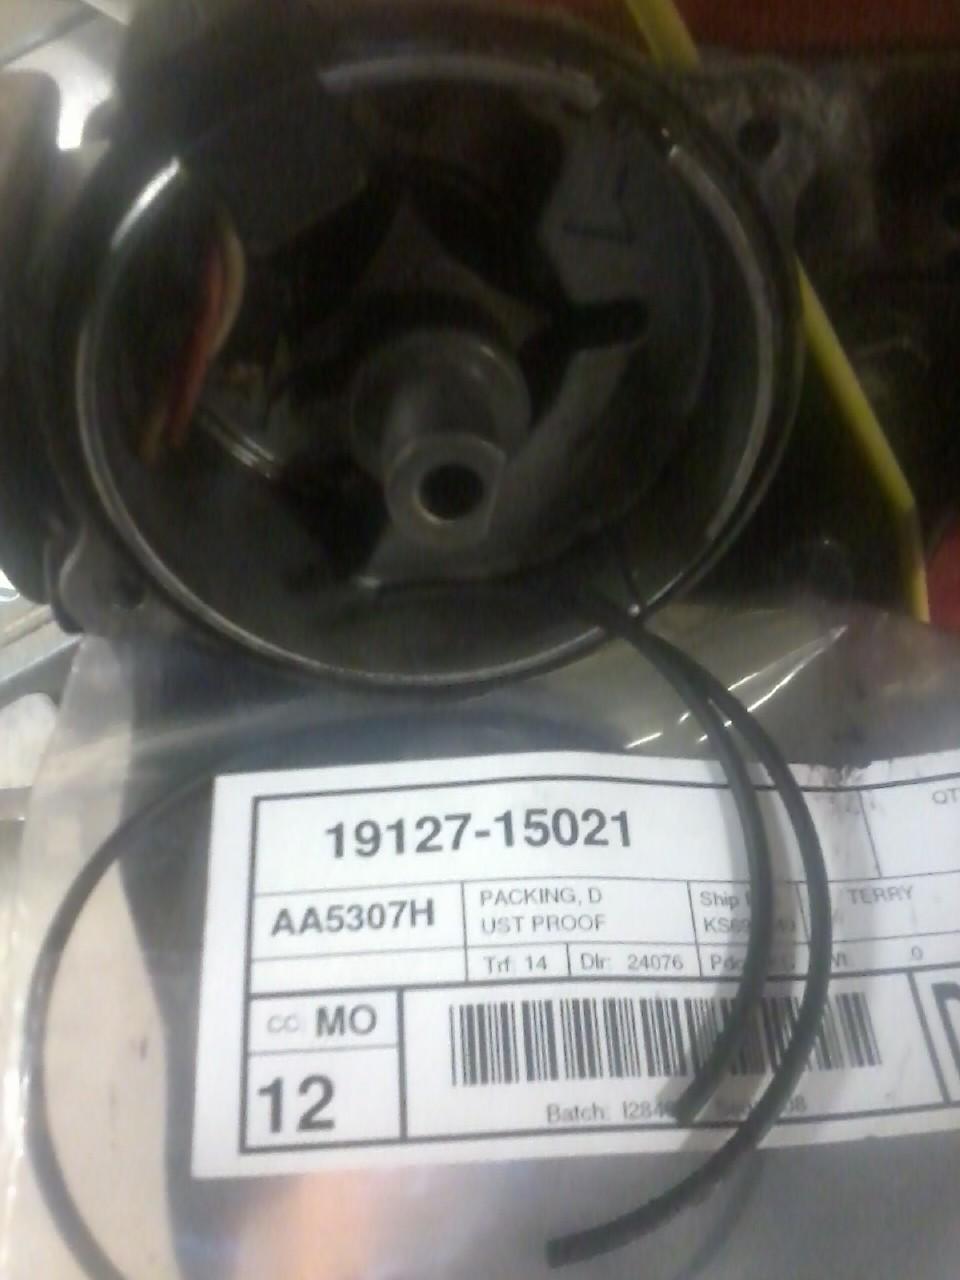
When I go and assemble any electrical connections/plugs, I try to clean the contacts with a nail file, pick, brass brush or what I need to get the contacts clean and add a little grease to them. Saves some headaches and actually seems to help a truck run a little better.
I got my intake all cleaned and tested with the exception of the TPS. I need to look it up and see how to do it. I have a spare, but I have never had a problem with one of these, but will test it just to see how it test out and to learn something. I coated the injectors with WD 40 and everything is together. I will get an injector seal kit and will install them when I go and put it on the motor, but for now everything is back together and just waiting to be painted with all its nuts and bolts. I wont paint til I get it together and figure out a color scheme for it.
each diagram shows orientation of the plug connections.[/quote]
Here is a Starter Rebuild Video if needed for later.
When I go to install the distributor, the bottom O-ring is usually brittle. You can get the O-ring from a parts store from a kit they have available. Where my top finger is that one I get from Toyota and it helps keep the distributor from getting moisture when cleaning or I cross a lot of low water bridges and occasionally the fan will dip into some water and get it everywhere. From Toyota it isnt to bad of a price if I recall right.
I get to replace the end of the distributor as it was removed when it was a parts truck. You can get Denso plug wires from ebay for about $25 that I have listed above. I checked the dealer and I think it was $83 if I recall right. Parts stores top brands are more expensive and are an inferior product in my opinion. Parts store plug wires keep wanting to come off of the cap, where the Densos are a much better fit and quality. A lesson I learned the hard way.
Part number for the Distributor O-Ring.
When I go and assemble any electrical connections/plugs, I try to clean the contacts with a nail file, pick, brass brush or what I need to get the contacts clean and add a little grease to them. Saves some headaches and actually seems to help a truck run a little better.
I got my intake all cleaned and tested with the exception of the TPS. I need to look it up and see how to do it. I have a spare, but I have never had a problem with one of these, but will test it just to see how it test out and to learn something. I coated the injectors with WD 40 and everything is together. I will get an injector seal kit and will install them when I go and put it on the motor, but for now everything is back together and just waiting to be painted with all its nuts and bolts. I wont paint til I get it together and figure out a color scheme for it.
Last edited by Terrys87; Jan 21, 2016 at 02:06 PM.
Feb 25, 2013 | 12:31 AM
#36
Thread Starter
Super Moderator
iTrader: (1)
Joined: Aug 2008
Posts: 11,787
Likes: 28
From: Anderson Missouri
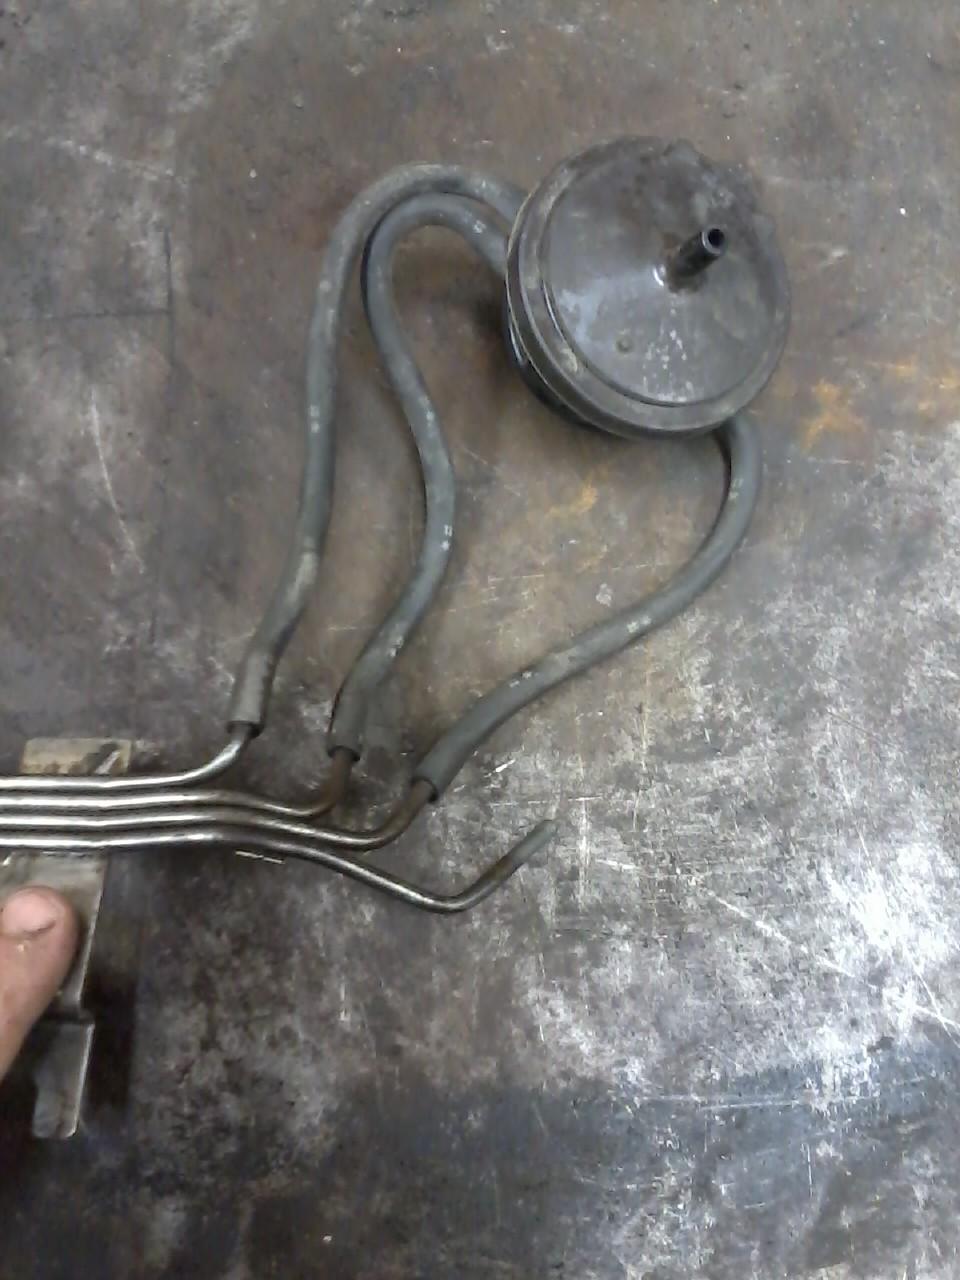
Today I was looking at the truck to see what some other things I need to be looking at and thought I would check the fuel lines. Every project that I have done has had gas tank issues. This is no exception. The return lines are clogged. I am betting alot of yours that are reading this have some return lines plugged. If you look at the 4runner builds I have, you will see what I am talking about. I was hoping not to have to pull the tank but now I get to. I try and go thru every system when doing a restore.
I will start soaking the bed bolts in PB Blaster and I pull the tank from the top. For me it is easier then dropping the tank as the fuel lines just dont have that much slack in them. I would rather work on a tank in the cooler weather anyways as working on gas tanks does scare me. If you start seeing fumes it is not a good time to work on them so maybe it is a good thing that it is still winter weather here. Just waiting for a warmer day to get out in the shop to pull it.
I try and show how to keep a project at a low cost. I can usually build one for a lot cheaper then I can buy one and will eventually show what I expect to spend on this restore. It would be nice to send my injectors off to a rebuild shop and stick all new U joints in and so forth, but that would run cost up. If I have problems, since this is a project, and all of the nuts and bolts have been removed and put back in, it doesnt take long to remove the part and repair what is needed.
This is mostly a reminder for me so as I know what to start thinking about ahead of time, but a list really makes a huge difference for me when doing a project and to show where my next steps are going to be.
Clean and lube rear driveshaft. Check carrier bearing.
Clean tranny and replace seals.
Pull tank and get lines flowing.
Start tearing down motor.
Repair injector harness.
Feb 25, 2013 | 06:31 AM
#37
Thread Starter
Super Moderator
iTrader: (1)
Joined: Aug 2008
Posts: 11,787
Likes: 28
From: Anderson Missouri
This is a reference picture for me. I have a tough time trying to remeber how all of the vacuum lines go back on. I have diagrams and the label on the hood, but that can still be a little confusing on reading some of them as the black lines on the diagrams or the picture on the hood.
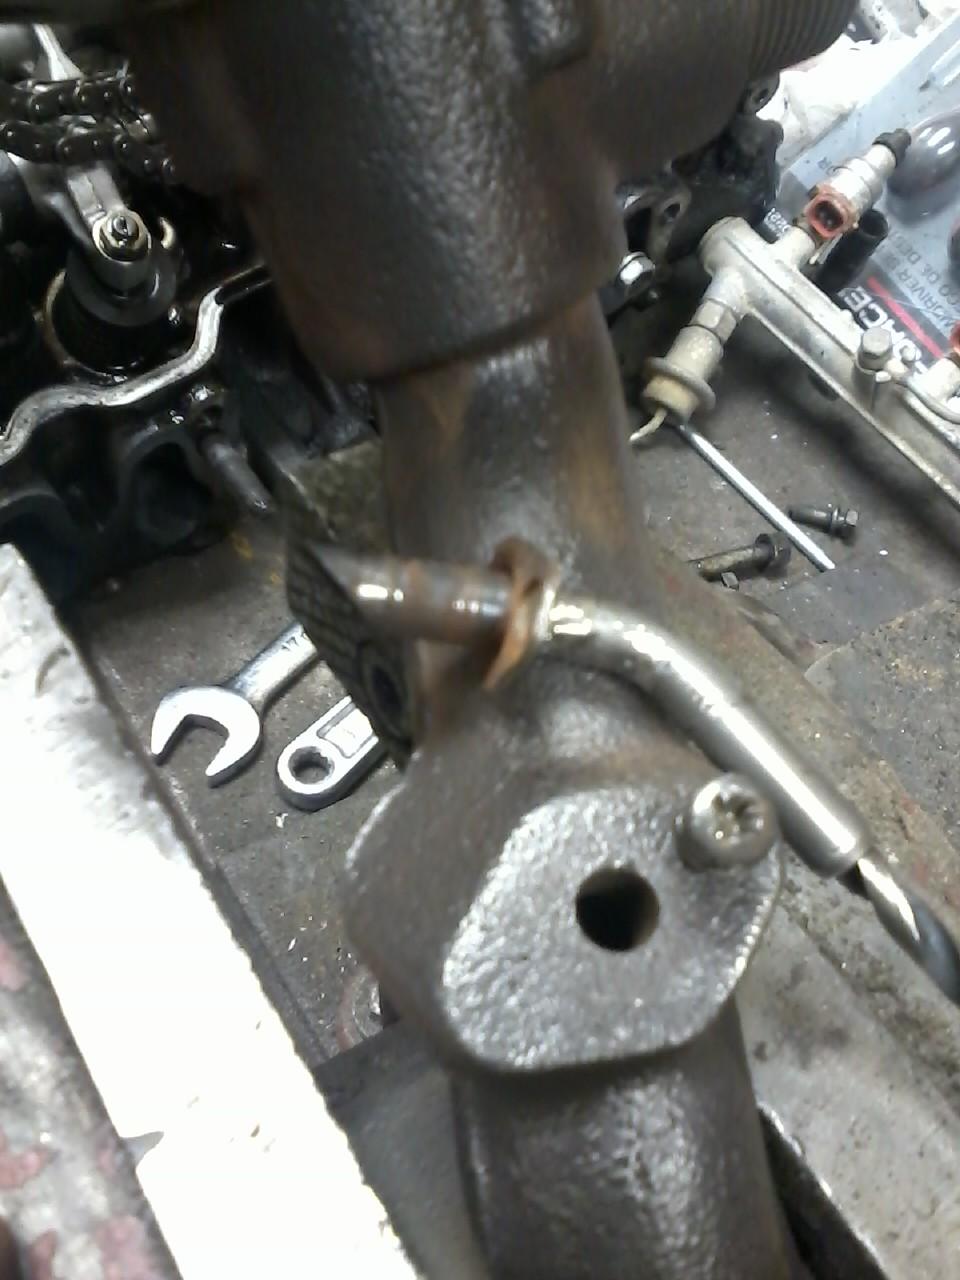
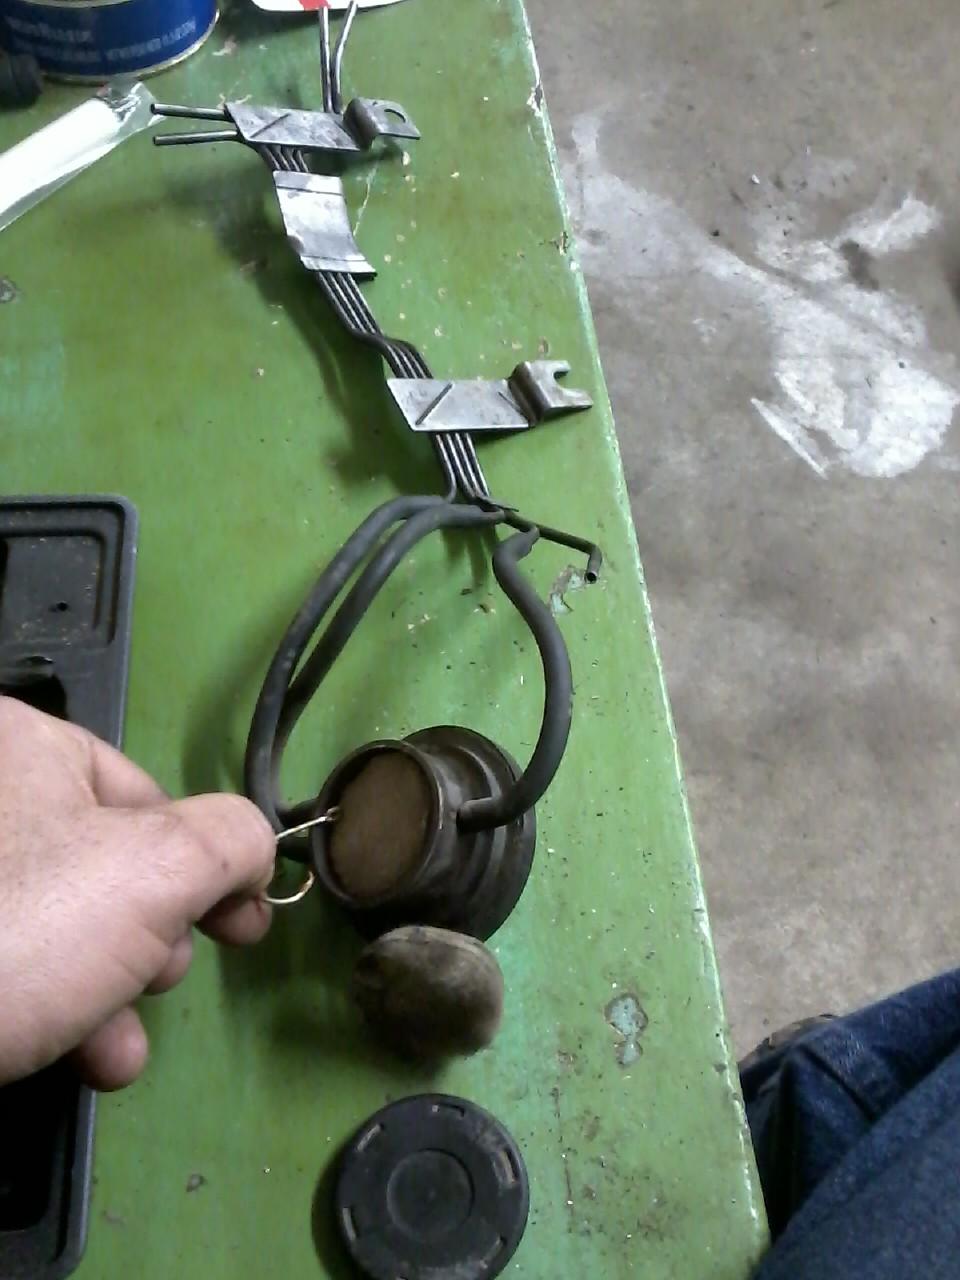
Here is how I pulled the EGR Modulator off. I am not 100% sure that these are correct. When I find out I will edit this page and show it as correct. I want to get some pictures that even a Terry could understand.
The Modulator can get a little dusty. The black cap just pops off and pay attention to how the filter element comes apart and go easy on it as the foam can seperate in layers. Use a screw driver to lift the edge out, ( a fish hook works too if you are not ambitious enough to get a screw driver) and I used a air hose to blow the dust out.
Also I had the 2 center lines of the metal rail hoses clogged. I used some WD 40 to soften the clog and after letting it soak about 30 minutes I was able to clear the clog out of the metal lines. The rubber hoses were not clogged. Checking all of the items in a system is easily over looked as well. Just trying to cover all of my bases while I got it apart.
Last edited by Terrys87; Dec 1, 2014 at 12:06 AM.
Feb 25, 2013 | 11:08 AM
#38
Registered User
Joined: Jul 2012
Posts: 2,365
Likes: 4
From: Idaho
Hello Cyberhorn.. The rims are what they call the Tri Spoke rims. I may be a year or so off and not 100% correct but they do come in two different sizes. The ones on hers are the 15 inch and I am almost positive that is only on two wheel drives but could be wrong. The rims were produced somewhere around '96 and I think they went all the way to the 2000 models. I have a 2001 Runner and it has what is called the 5 spokes. I dont know if they offered both that year or if 2000 was the last year of them. They were also on the same years Tacomas.
I am not as familar with the newer models, but on the older Toyotas, the 2 wheel drive is 5 lug and 4 wheel drives were 6 lugs, so the above information may not absolutely correct. The guy I got them from told me they were from a 96 or 97 Runner.
I meant to ask you, how do you go about changing the screens on the injectors? Is that an easy job and something that could/should be done? I know I can send them to somebody like Witchhunter or several other places, but I am doing this on a budget so will have to skip that cost for now.
as for the injector kit it came with detailed instructions on how to use a stainless steel screw they included in the kit the screens are just a friction fit but i can see where dirt an gas additives ect can clog them robbing performance an econ
we had the injectors on the 90 professionally flushed an rebuilt it was 75 for all 6 but for the 88 im going to do it since im in there an dont want to have to do it in a few years its not hard from what ive read
you use the screw to pull the screen out (ive done this on a carb for a lawnmower before) then gently tap the screen in with a soft face hammer while holding it as bracing it on a bench will damage the tip
Feb 27, 2013 | 02:28 AM
#39
Thread Starter
Super Moderator
iTrader: (1)
Joined: Aug 2008
Posts: 11,787
Likes: 28
From: Anderson Missouri
Hello Cyberhorn..When you do your injectors, can you do a write up of it? I might try and do the same and will be looking into it and seeing what is involved. If it is one of them that can be done by yourself and no special equipment that is something I am really into. Thanks for the info.
Feb 27, 2013 | 02:34 AM
#40
Thread Starter
Super Moderator
iTrader: (1)
Joined: Aug 2008
Posts: 11,787
Likes: 28
From: Anderson Missouri
We got hit with a bunch of snow and so I really havent done much. But I wanted to get something done so I cleaned a few parts. Something always needs cleaning. The oil pan I used came off of a junk motor that a friend was going to scrap. It had a rod thru the side. I can see why. It had so much sludge built up in it was probably starving for oil. Finally got that part cleaned. When I come across a motor like that, that has been badly neglected, I drian about half of the oil out and fill it back up with diesel and let it idle for about 15 minutes at a time and then drain, use the other old oil and do the same thing.
If it has build up on the head, I try and knock what I can loose and vacuum the rest off and then do the diesel flush. An old timer taught me that and I have never had a problem doing it that way. Just have to do your oil changes alot more frequent until you get the motor cleaned up and can take some time if you dont want to pull the motor and clean it right. It was to late for this motor.
If it has build up on the head, I try and knock what I can loose and vacuum the rest off and then do the diesel flush. An old timer taught me that and I have never had a problem doing it that way. Just have to do your oil changes alot more frequent until you get the motor cleaned up and can take some time if you dont want to pull the motor and clean it right. It was to late for this motor.


