
1993 4Runner revamp
 Dec 25, 2014 | 11:37 PM
#1

Thread Starter
Registered User
Joined: Jul 2007
Posts: 149
Likes: 1
1993 4Runner revamp
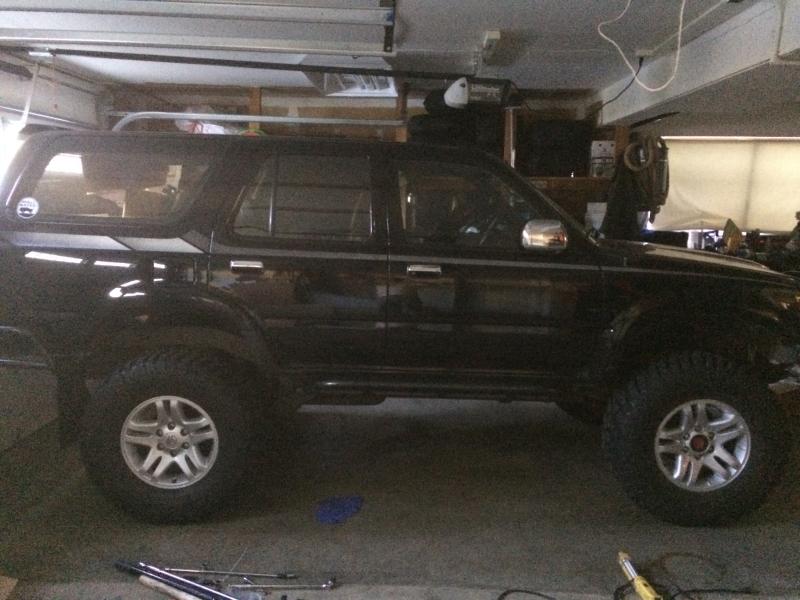
Ok so here's the deal. Looking for a pic of the rig and all I come up is this which is recent.
So for years I have gone this way. Specs on the rig are:
-1993 4Runner V6 5-Speed
-2004 3.4 Motor w/ TRD supercharger. Fuel mods as well as water injection.
-Viaair OBA w/5 gallon air tank
-TRD E-Locker rear w/4:88 gears
-ARB locker front w/4:88 gears
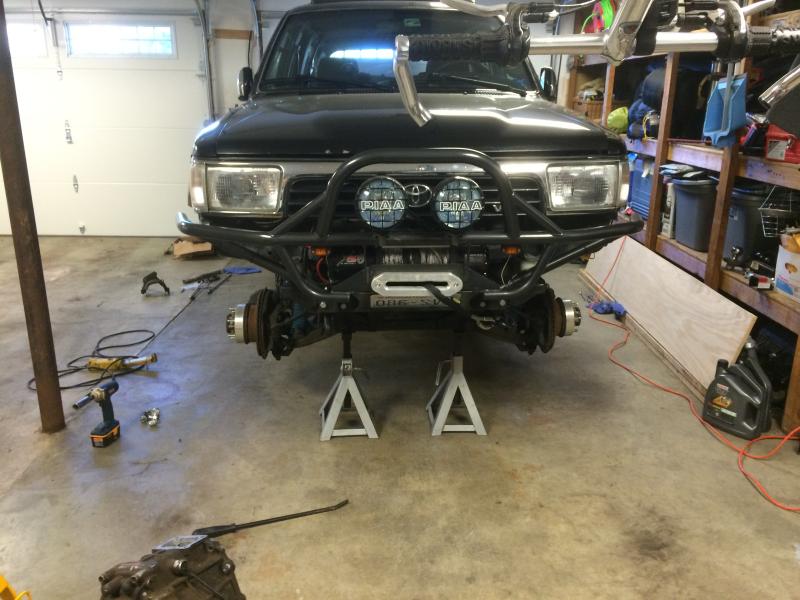
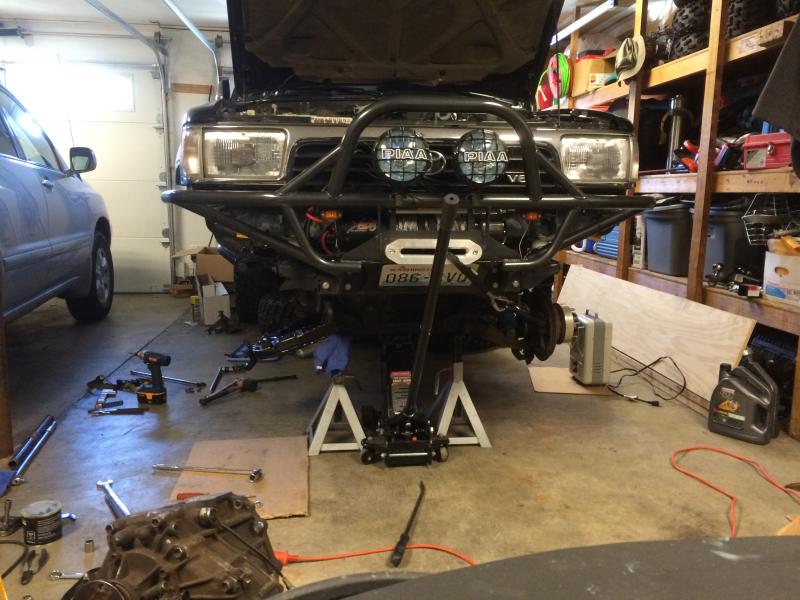
-addicted off road front bumper w/ smittybilt xrc-8 winch + PIAA 520 lights.
-Marlin Crawler rear bumper.
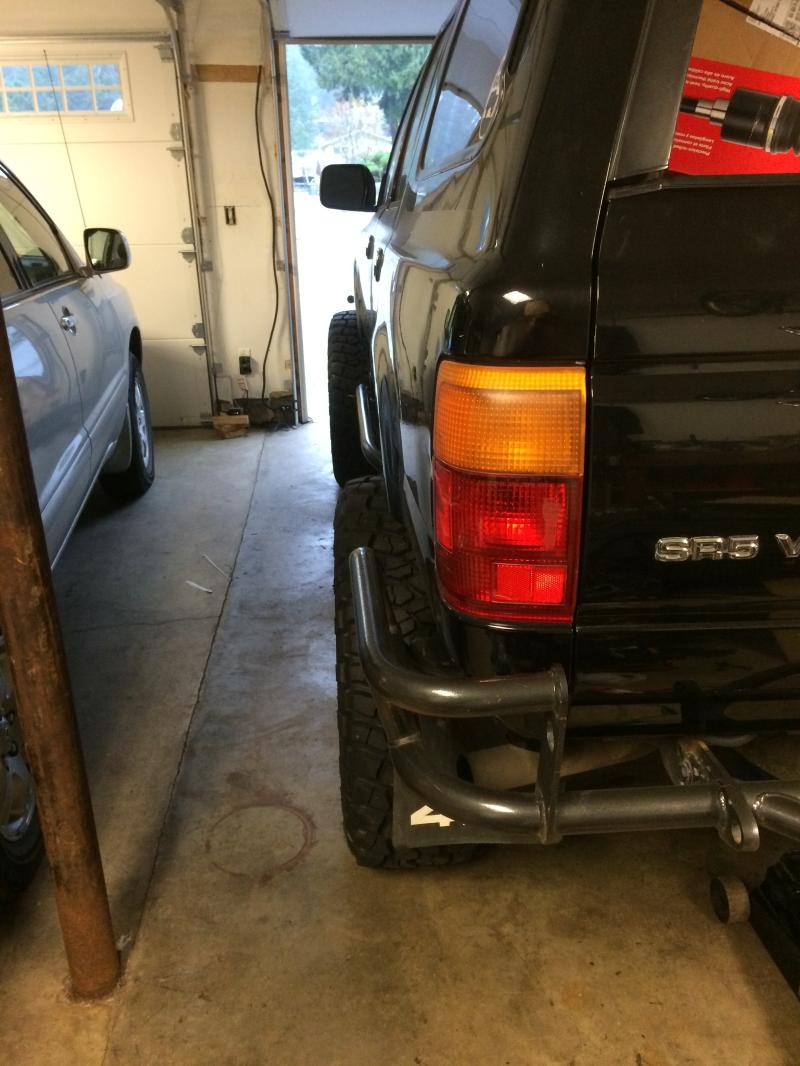
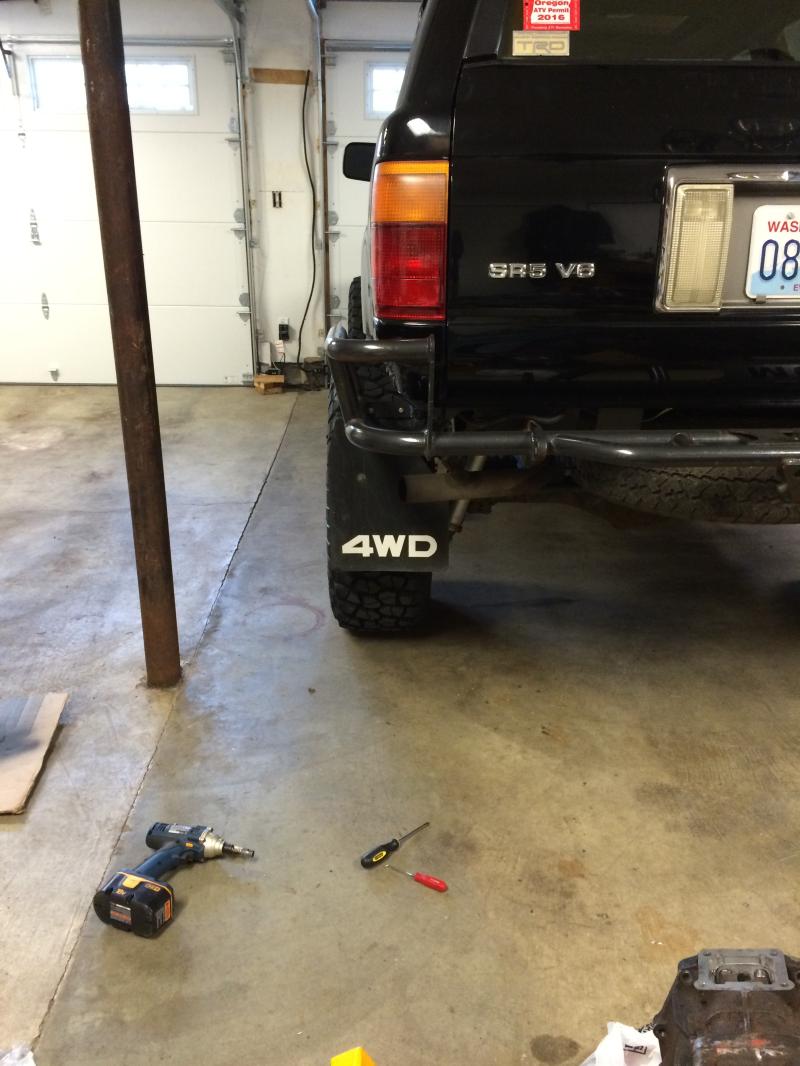
-Tundra limited/Sequoia Wheels on BFG 35x12.5 KM'2's
Started out this way years ago. Had a blast. This is on Procomp mud terrains equal to about 33"

So I get inspired recently to do LT. Blazeland has been calling my name for years and I finally heard it. The 4Runner is not my daily driver so I decide my job and time are amenible to this transformation.
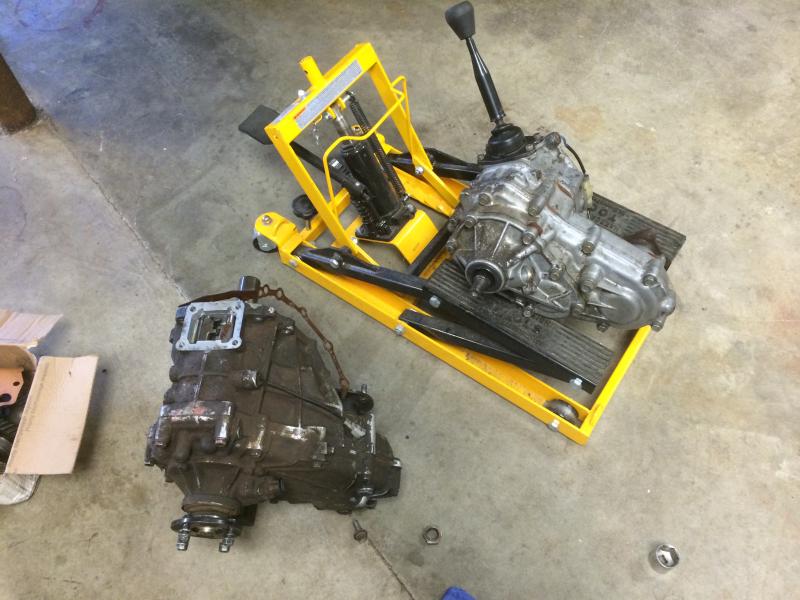
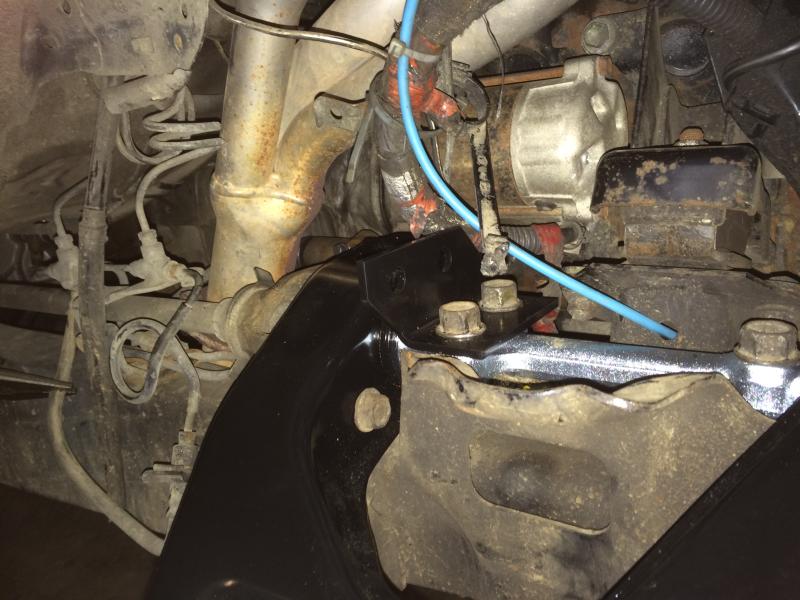
I've had a gear driven, 4.7 case plus adapter at the ready for a long time so I decide now's the time to install said device. There's not much out there on this fabulous internet if you do a search on this topic. Turns out even though I had all the correct parts, I was still missing a bunch. First of all was the flanges. The stock flanges did not line up with my '93 drivelines. I tried swapping yokes but they are a different spline count.
Here's a few images of what I found.
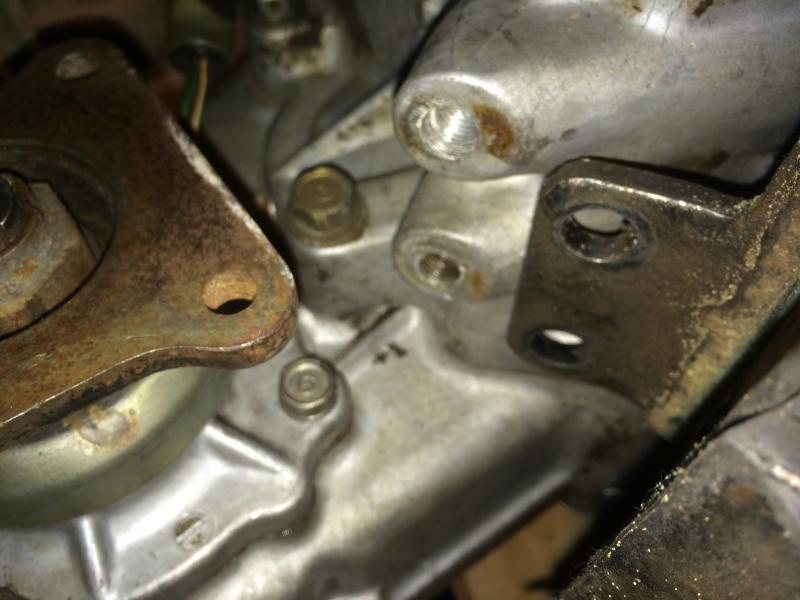
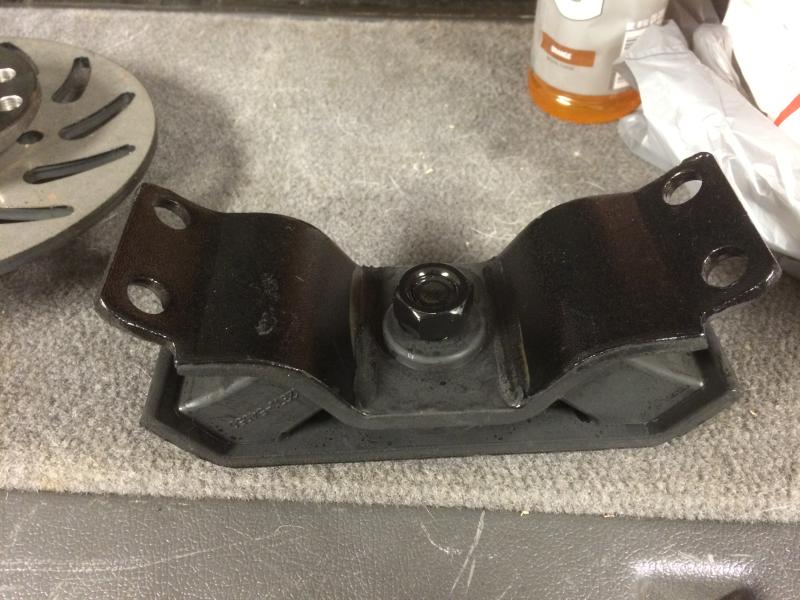
The tranny mount is NOT the same between the 3.0 V^ and the top shift gear-driven case. Here are the differences.

So for years I have gone this way. Specs on the rig are:
-1993 4Runner V6 5-Speed
-2004 3.4 Motor w/ TRD supercharger. Fuel mods as well as water injection.
-Viaair OBA w/5 gallon air tank
-TRD E-Locker rear w/4:88 gears
-ARB locker front w/4:88 gears
-addicted off road front bumper w/ smittybilt xrc-8 winch + PIAA 520 lights.
-Marlin Crawler rear bumper.
-Tundra limited/Sequoia Wheels on BFG 35x12.5 KM'2's
Started out this way years ago. Had a blast. This is on Procomp mud terrains equal to about 33"

So I get inspired recently to do LT. Blazeland has been calling my name for years and I finally heard it. The 4Runner is not my daily driver so I decide my job and time are amenible to this transformation.
I've had a gear driven, 4.7 case plus adapter at the ready for a long time so I decide now's the time to install said device. There's not much out there on this fabulous internet if you do a search on this topic. Turns out even though I had all the correct parts, I was still missing a bunch. First of all was the flanges. The stock flanges did not line up with my '93 drivelines. I tried swapping yokes but they are a different spline count.
Here's a few images of what I found.


The tranny mount is NOT the same between the 3.0 V^ and the top shift gear-driven case. Here are the differences.


 Dec 25, 2014 | 11:48 PM
#2
Thread Starter
Registered User
Joined: Jul 2007
Posts: 149
Likes: 1
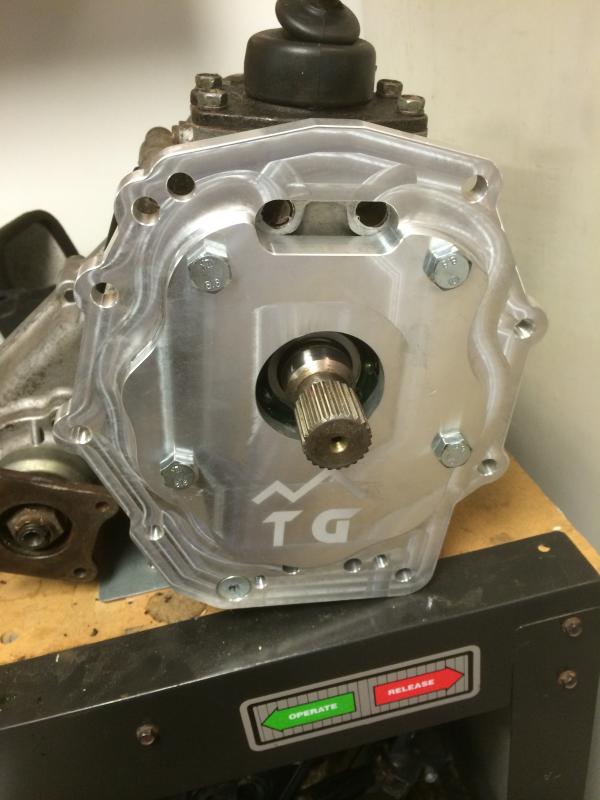
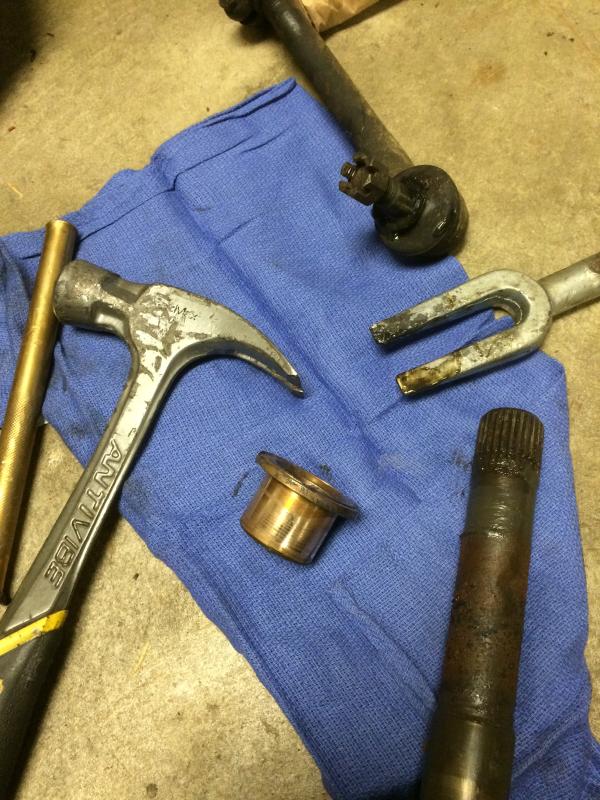
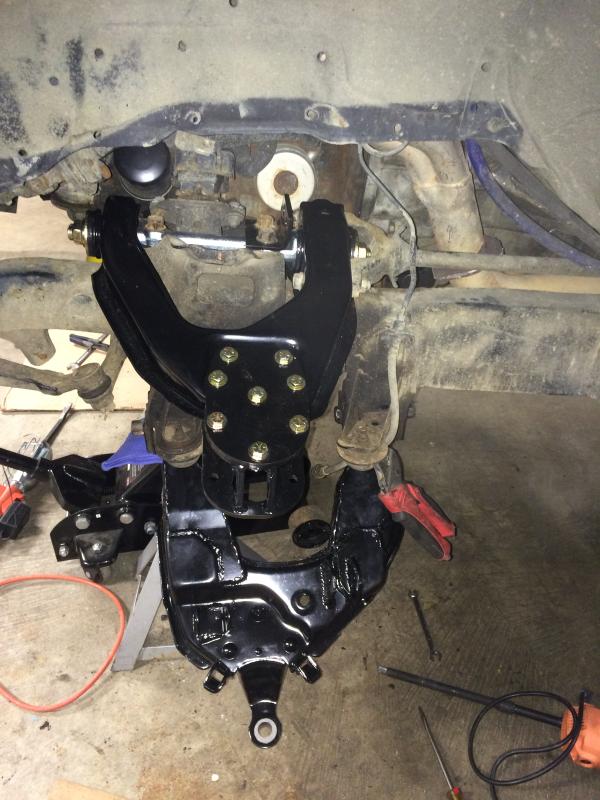
So this is how I handled it. TG flanges F/R as well as a tranny mount for an '87 4Runner or something along those lines. Seemed to work.
I shold mention that at the time I was looking to install my "All pro off road" parking brake it that I've had for 3+ years also. Here we go.
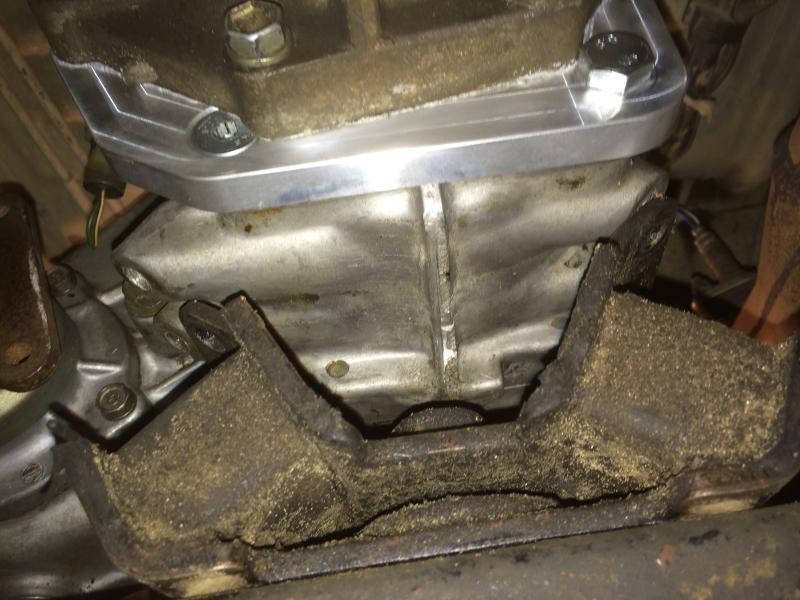
The new tranny mount.
And it all installed under my rig. Looks sexy.
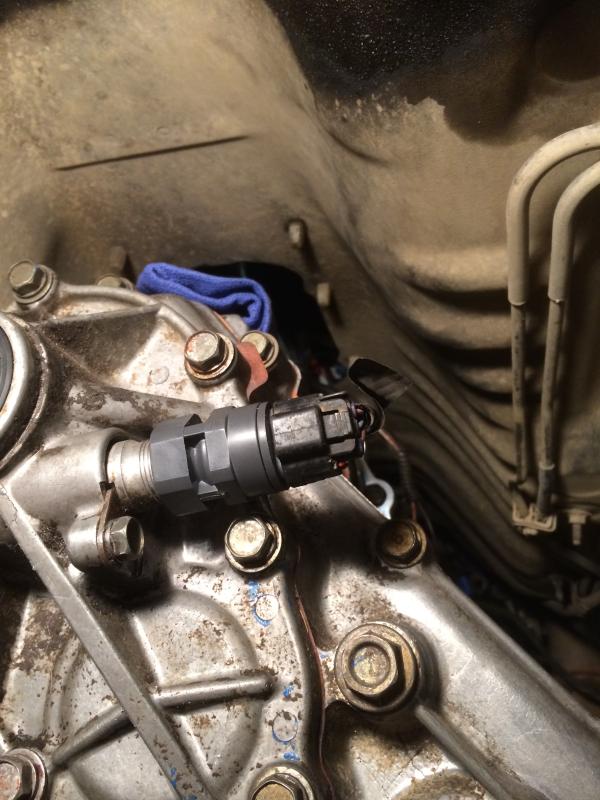
The marlin crawler adapter because I have an electrical sender.
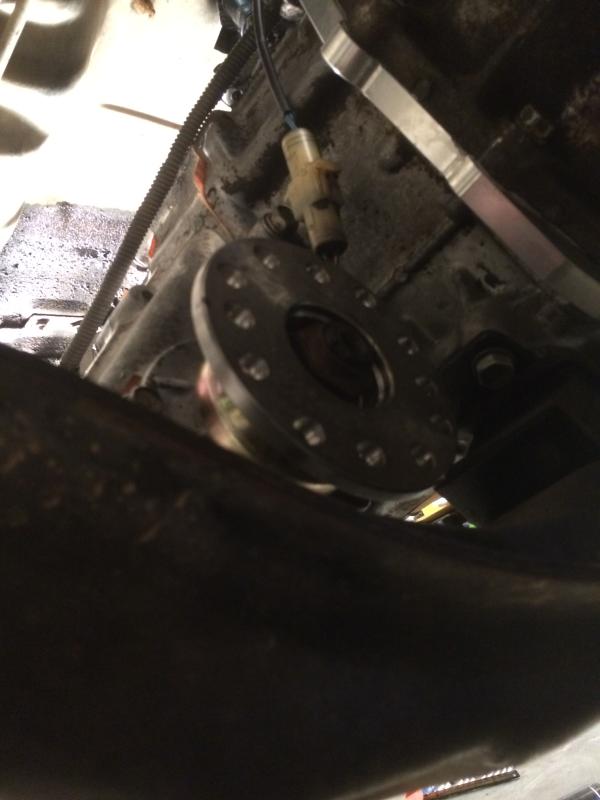
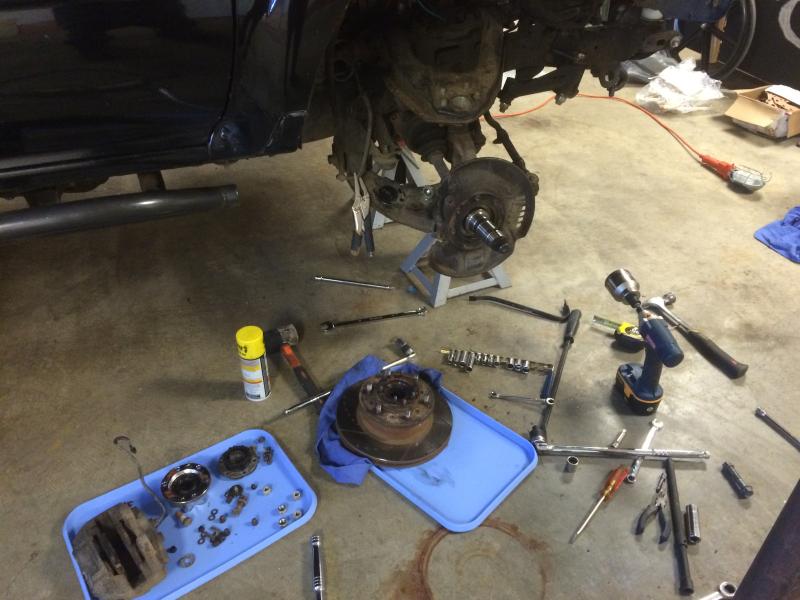
Crappy pic of the flanges.
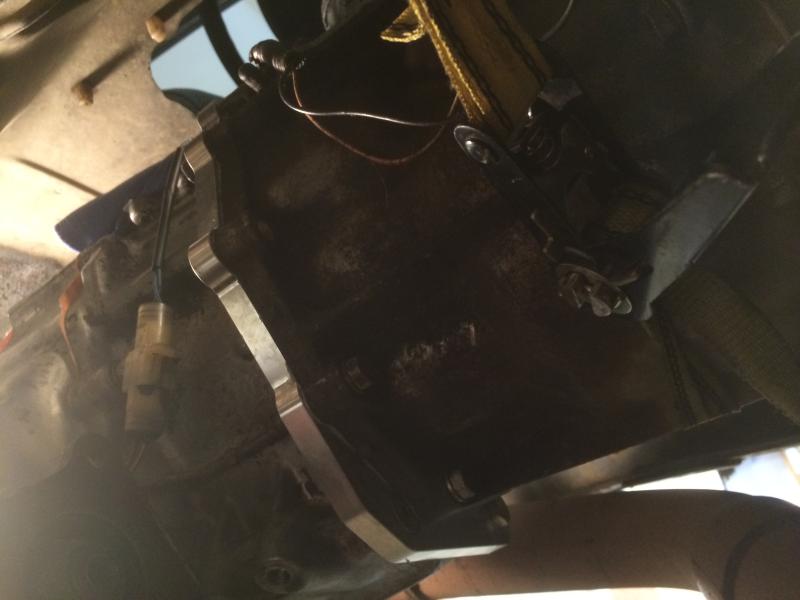
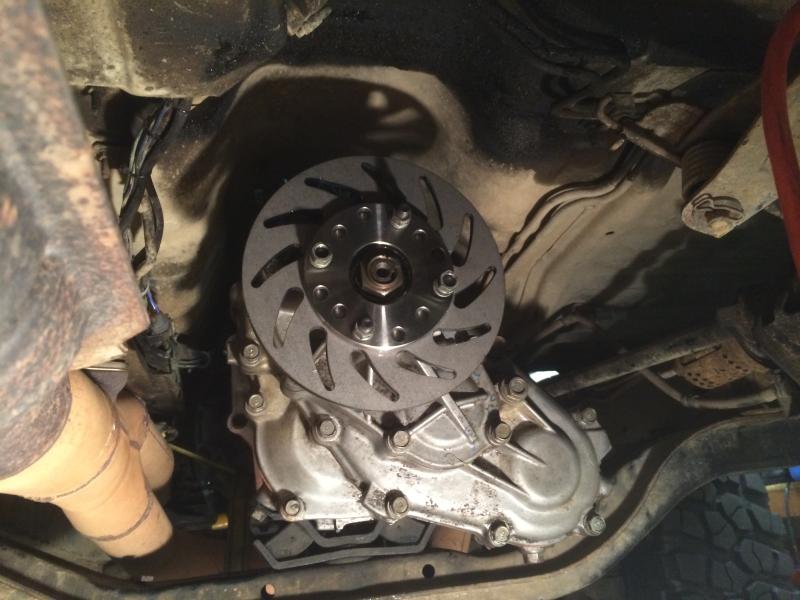
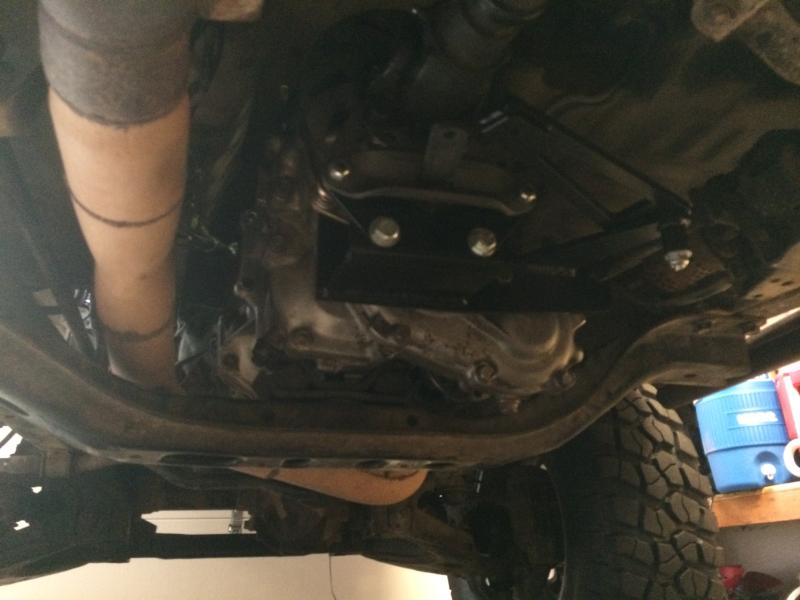
So what I have yet to find on this beautiful internet is a clear writeup of a single case 4.7 install behind a R150. I found there was floor metal modifications required and here's a pic.
I shold mention that at the time I was looking to install my "All pro off road" parking brake it that I've had for 3+ years also. Here we go.

The new tranny mount.

And it all installed under my rig. Looks sexy.

The marlin crawler adapter because I have an electrical sender.

Crappy pic of the flanges.

So what I have yet to find on this beautiful internet is a clear writeup of a single case 4.7 install behind a R150. I found there was floor metal modifications required and here's a pic.
 Dec 25, 2014 | 11:53 PM
#3
Thread Starter
Registered User
Joined: Jul 2007
Posts: 149
Likes: 1
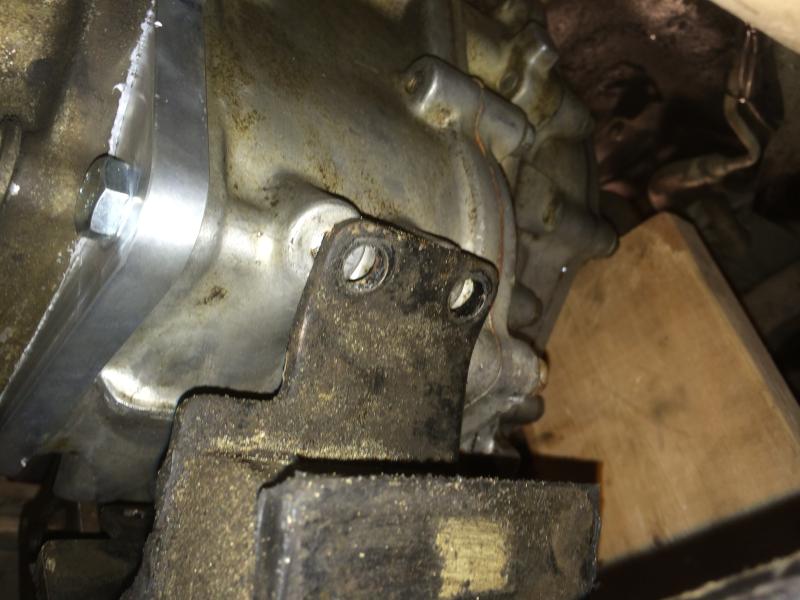
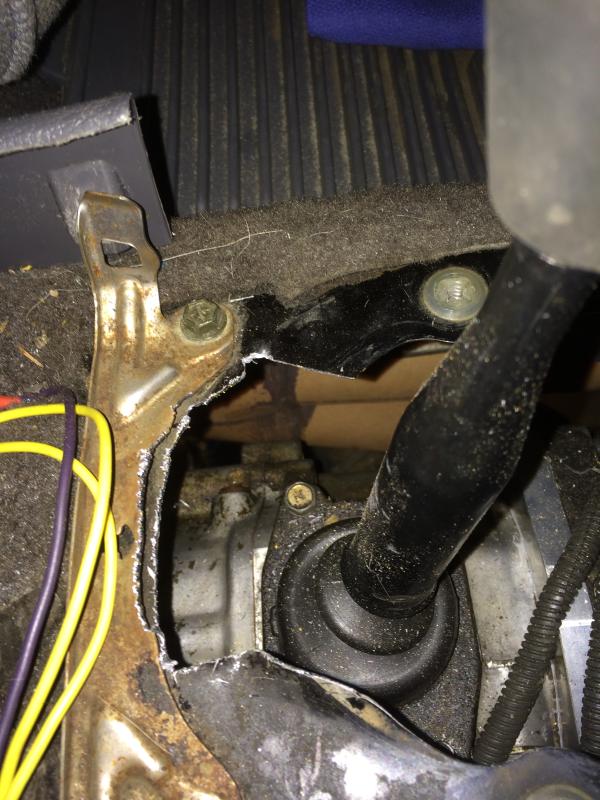
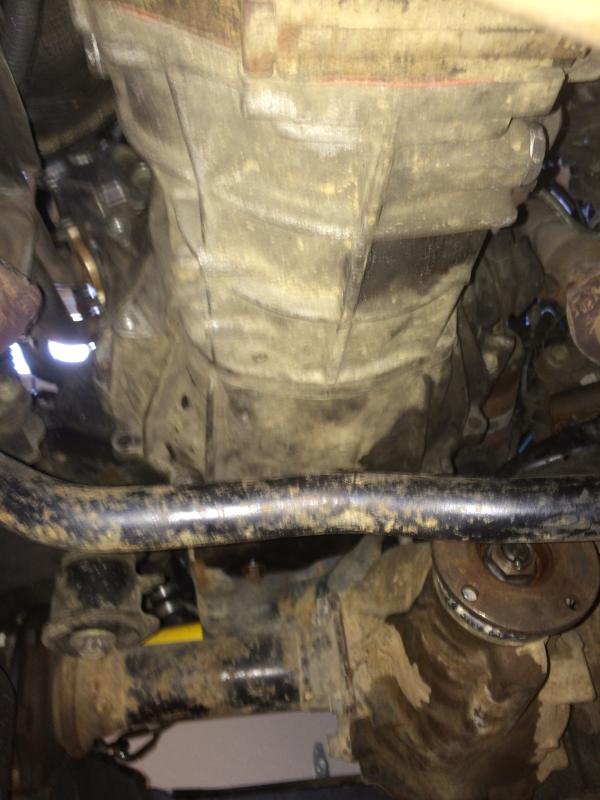
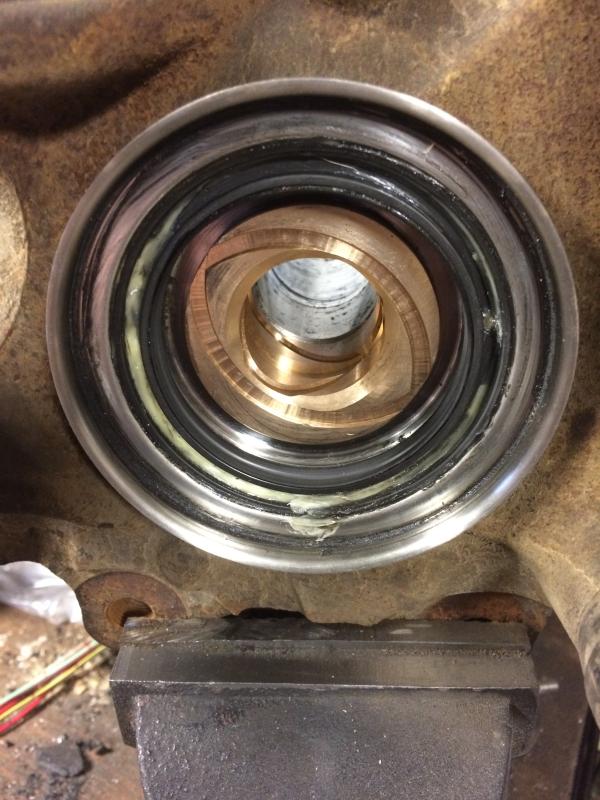
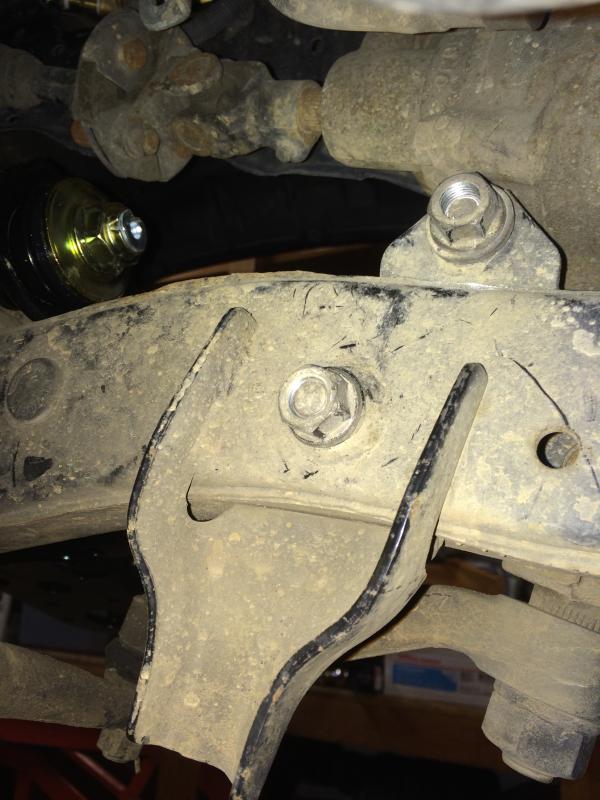
And here's what it looks like from below. All-pro mentions that it doesn't work with a stock chain case so I thought it would work with a swapped-gear driven case. Not even close.
I'm disappointed. Can't imagine why, only have thousands in this.

I'm disappointed. Can't imagine why, only have thousands in this.
Dec 26, 2014 | 08:47 AM
#6
Thread Starter
Registered User
Joined: Jul 2007
Posts: 149
Likes: 1
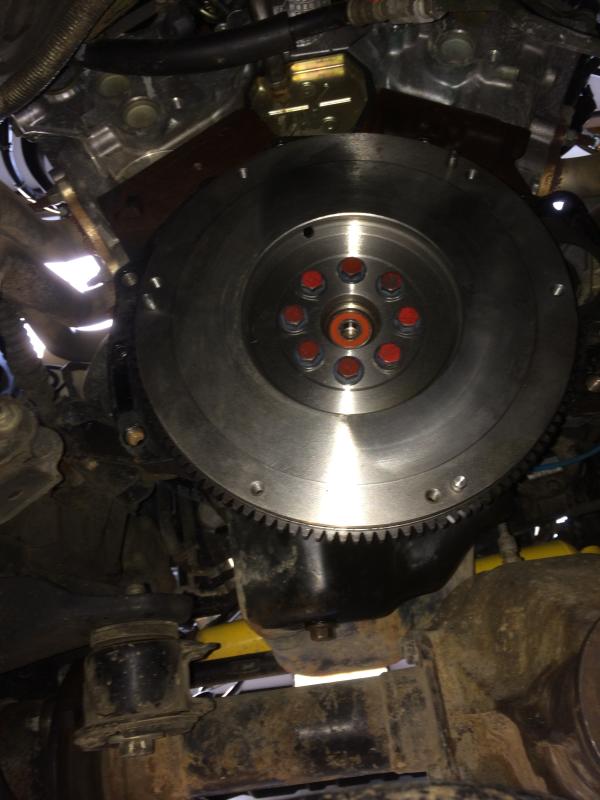
So as I'm wrapping up the transfer case install I notice that I have an oil leak. Doesn't look bad at first but as the week goes on it looks worse.
Great.
Looks to be the rear main seal. I just had the transfer case out, would have been much nicer to swap cases with the transmission out. I can't stand leaking items so just as I get it back together I pull it apart again. So glad this is not a DD and that I have a garage. I used to be able to pull a transmission in a Toyota in about an hour. But I'm old now (almost 40), so it took me about 2 hours.
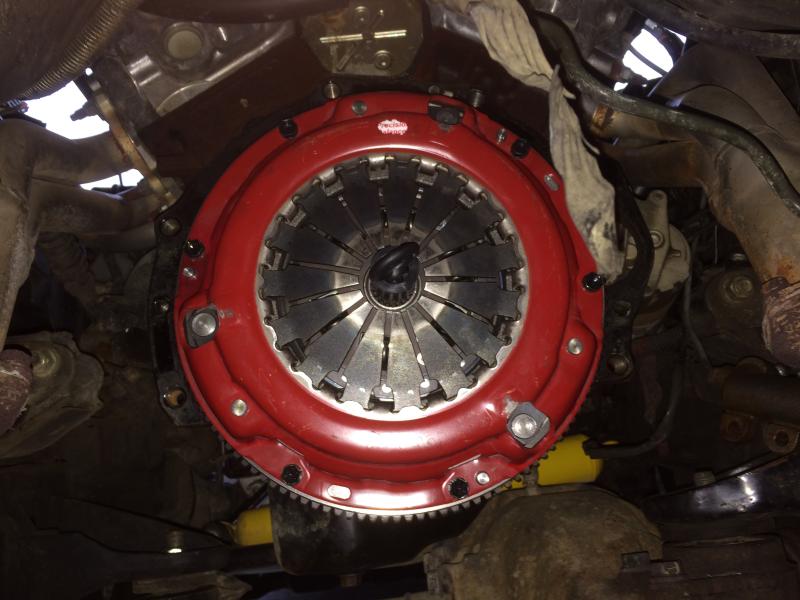
I figure I better replace the clutch while I fix the RMS. I read great things about the Marlin clutch but they are out of stock. Other option is the LC engineering clutch. Marlin is rated to 1200#s, vs the LCE clutch which is 2100#s. I was worried about the pedal feel on the LCE but after talking with them they assure me it's not bad so I place the order, along with a new RMS and seal saver.
Cha-ching!
Great.
Looks to be the rear main seal. I just had the transfer case out, would have been much nicer to swap cases with the transmission out. I can't stand leaking items so just as I get it back together I pull it apart again. So glad this is not a DD and that I have a garage. I used to be able to pull a transmission in a Toyota in about an hour. But I'm old now (almost 40), so it took me about 2 hours.
I figure I better replace the clutch while I fix the RMS. I read great things about the Marlin clutch but they are out of stock. Other option is the LC engineering clutch. Marlin is rated to 1200#s, vs the LCE clutch which is 2100#s. I was worried about the pedal feel on the LCE but after talking with them they assure me it's not bad so I place the order, along with a new RMS and seal saver.
Cha-ching!
Dec 26, 2014 | 08:58 AM
#7
Thread Starter
Registered User
Joined: Jul 2007
Posts: 149
Likes: 1
So I wait for parts to arrive. I get a new flywheel locally, as well as experiment with a few techniques to pull the pilot bearing. Parts show up and I crawl under the rig to get at it.
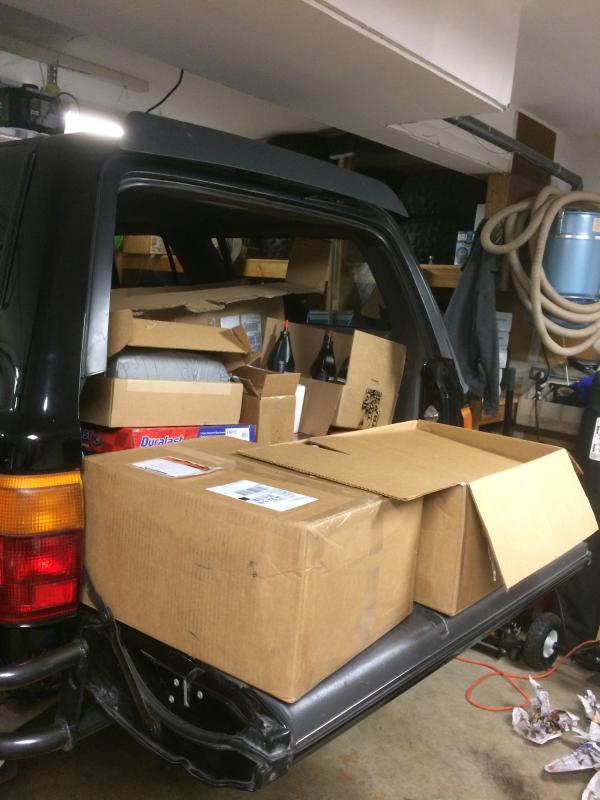
Boxes of parts start piling up.
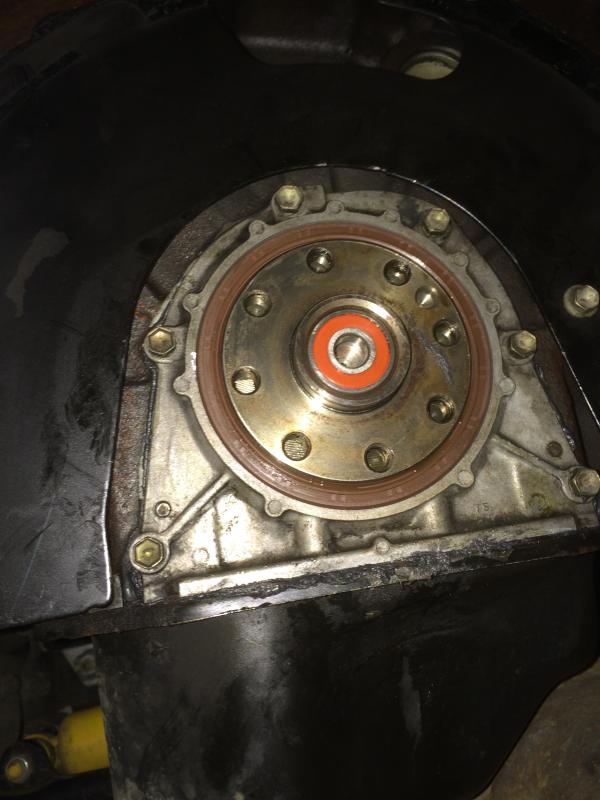
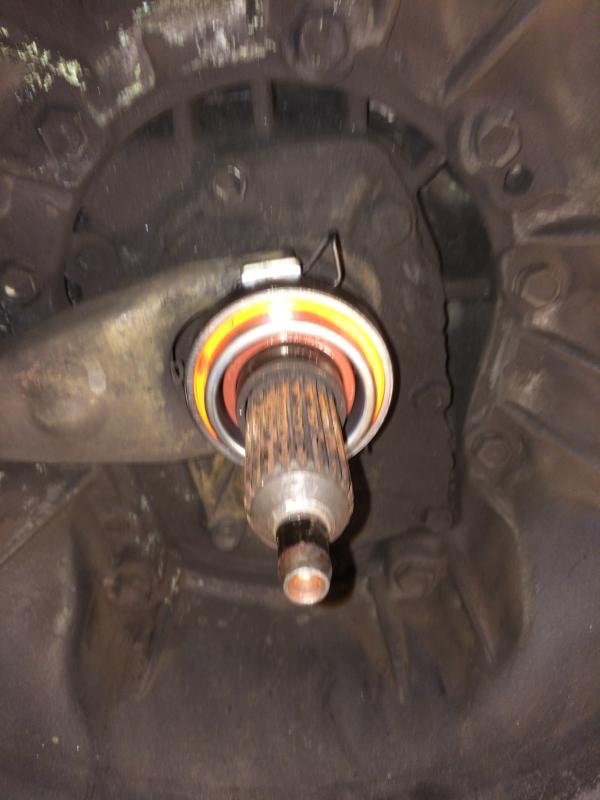
RMS replacement. I tried to be careful about not tearing the oil pan gasket but it did tear off. I swear by the gasket sealer "right stuff" so I applied a bead of that before I put the new seal in.
LCE clutch installed.
And then throw it back together.
Boxes of parts start piling up.

RMS replacement. I tried to be careful about not tearing the oil pan gasket but it did tear off. I swear by the gasket sealer "right stuff" so I applied a bead of that before I put the new seal in.

LCE clutch installed.


And then throw it back together.


Trending Topics
Dec 26, 2014 | 09:11 AM
#8
Thread Starter
Registered User
Joined: Jul 2007
Posts: 149
Likes: 1
So I have a 2" body lift for the motor swap. A few years ago I put in short throw shifters for the trans and transfer case to make things easier. The gear driven top shift case that I was swapping in has a different lever than the chain case I was replacing. Crap. So now more money. Good thing I have an understanding wife who not only doesn't ask me what I'm spending money on, but also is accustomed to packages showing up at the house. Marlin just released a set of short throw shifters but I have to say 4crawler does as well. I have bought a lot through both in the last few years, but I prefer to give the money to 4crawler. He's a great resource and is fast. Here is his kit.
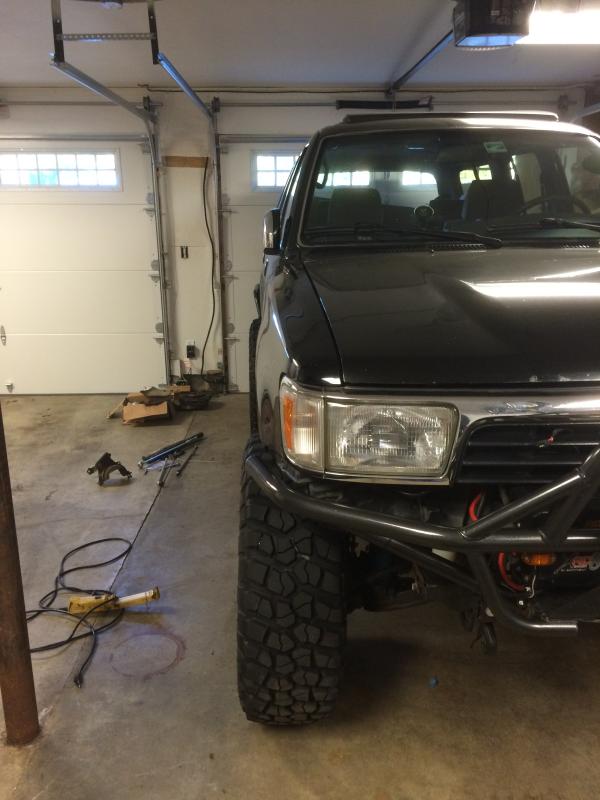
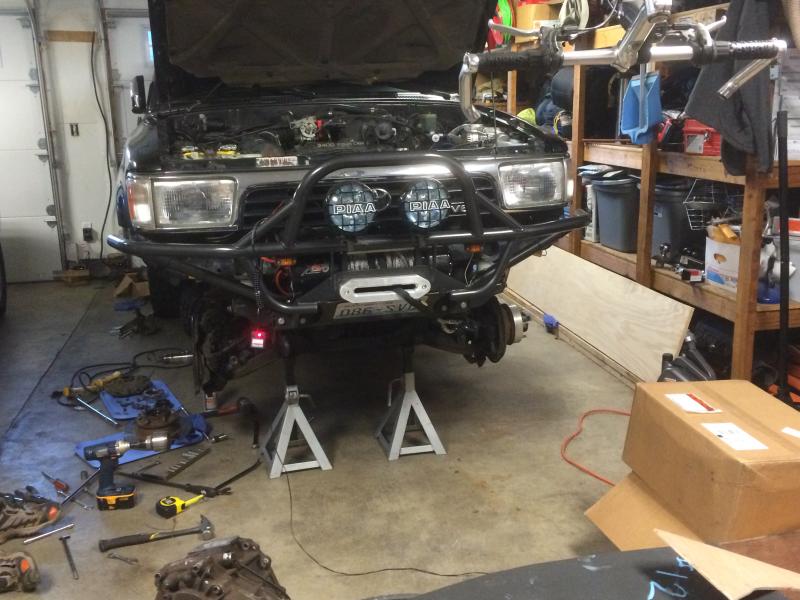
So it's all back together now. Just in time to tear it apart for the LT install. Took a few before pics.
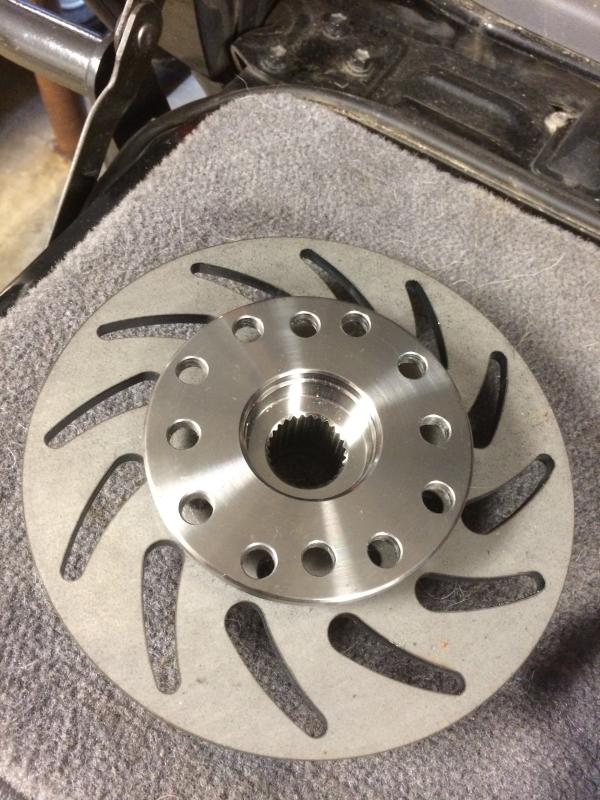
I was running 1.5" spacers to prevent rubbing against the fender because of the toyota offset rims. Along with some bling LCE drilled and slotted rotors.
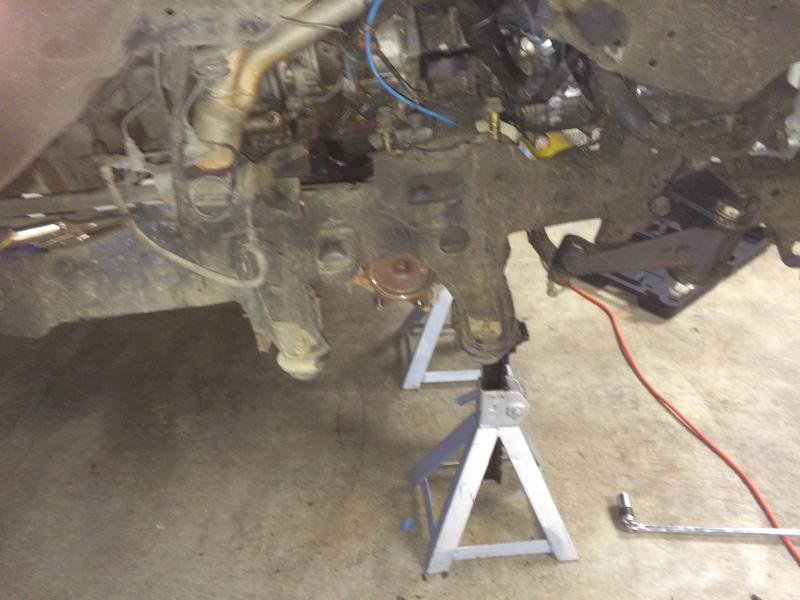
And now the tear down begins. I've never messed with torsion bars before and ended up breaking the bolt on the passenger side. Luckily it was after the tension was already released. LCE to the rescue again. Good thing my wife doesn't mind packages showing up.
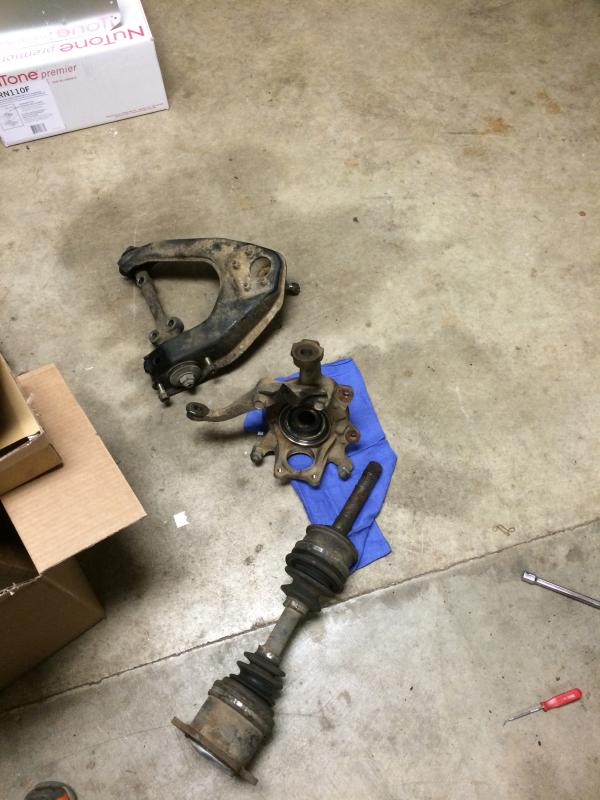
Decided to ditch my front backing plates. Mostly to show off my rotors, but you can hardly see them even with the plates removed.
Out with the old.

So it's all back together now. Just in time to tear it apart for the LT install. Took a few before pics.

I was running 1.5" spacers to prevent rubbing against the fender because of the toyota offset rims. Along with some bling LCE drilled and slotted rotors.


And now the tear down begins. I've never messed with torsion bars before and ended up breaking the bolt on the passenger side. Luckily it was after the tension was already released. LCE to the rescue again. Good thing my wife doesn't mind packages showing up.


Decided to ditch my front backing plates. Mostly to show off my rotors, but you can hardly see them even with the plates removed.

Out with the old.


 Dec 26, 2014 | 09:36 AM
#9
Thread Starter
Registered User
Joined: Jul 2007
Posts: 149
Likes: 1
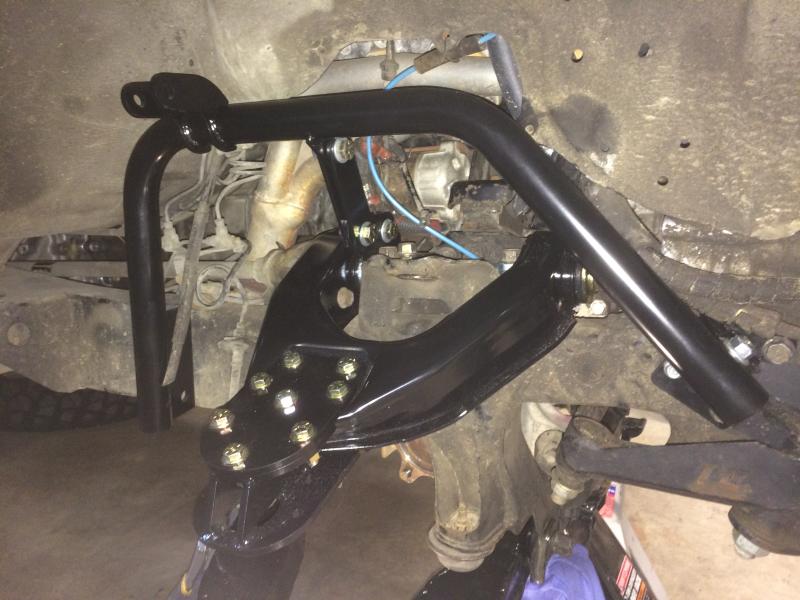
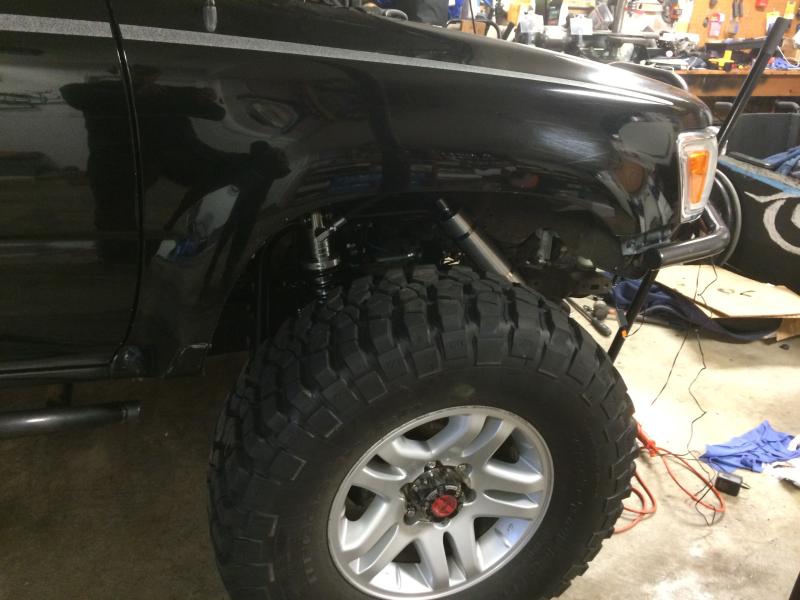
Along with the blazeland LT kit I ordered up the coilover kit. Nate is a great guy to deal with. Here's the install pics, I would go over it in more detail if it hadn't been done before. A member on here (andersej) was a great help and I bothered him a few times throughout this. I love this forum and how helpful everyone is.
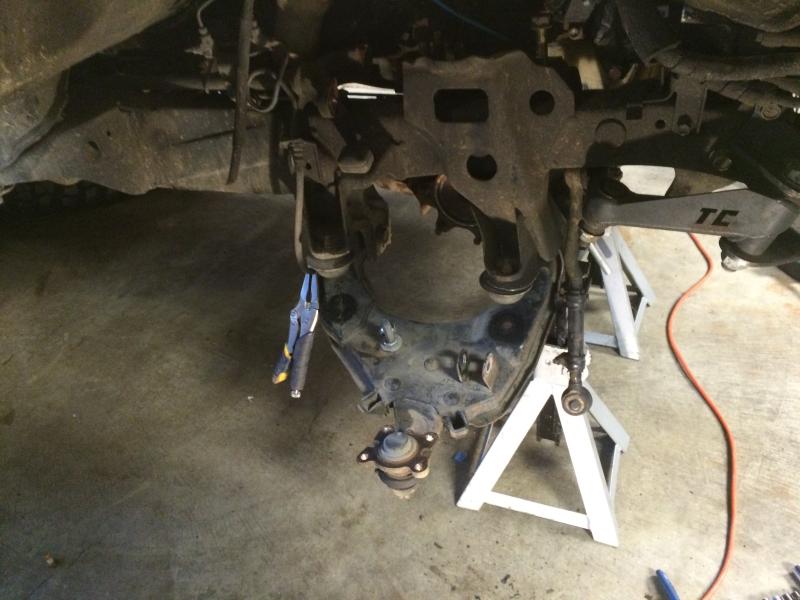
As you can see I have the total chaos idler arm. Wish they had powdercoated it, but it has held up to whatever I have thrown at it.
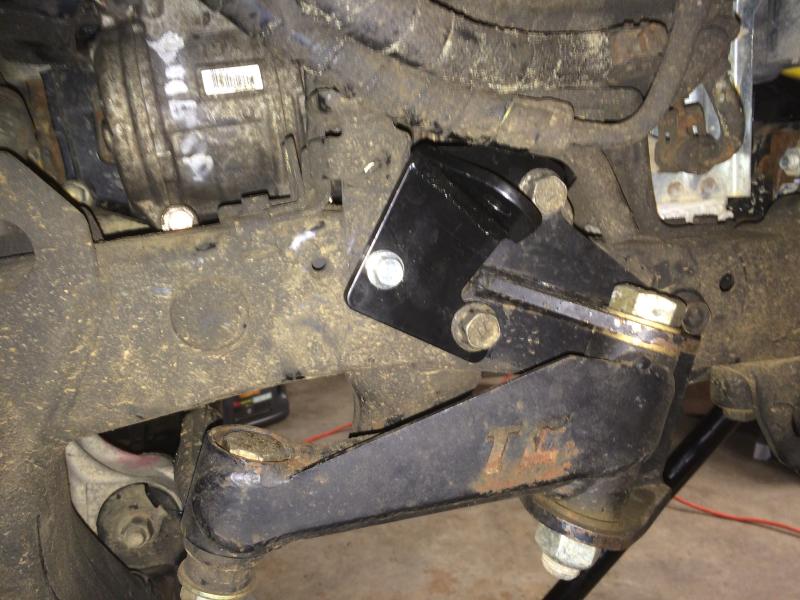


Beautiful and ugly at the same time.
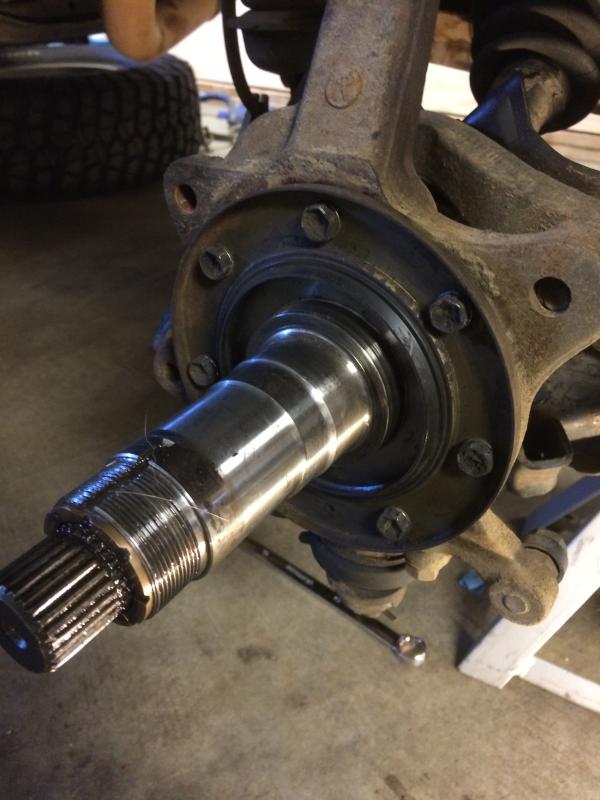
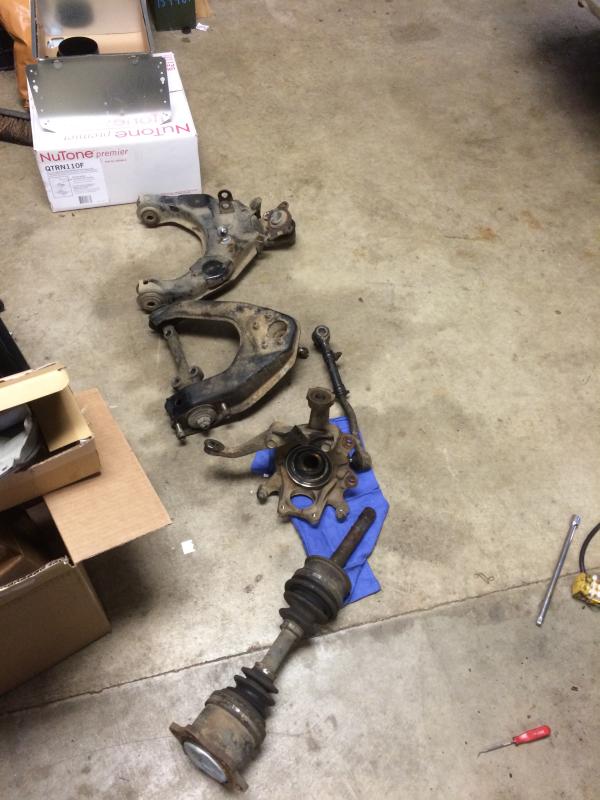
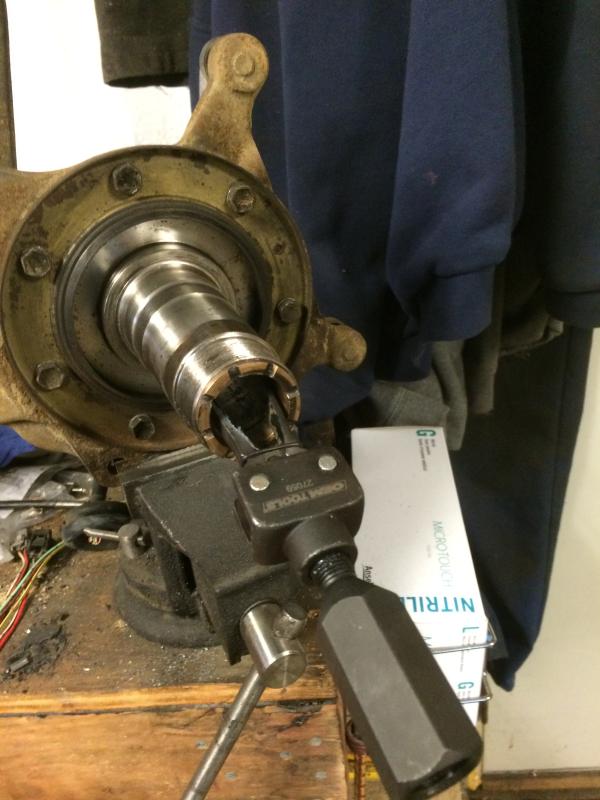
My 4runner has had manual hubs for a long time. But I was always getting a grinding noise when I had the hubs locked so I decided to replace the spindle bushings while I was doing everything. More packages!
The outer ones come out easily enough, but I wanted to use my new pilot bearing removal tool.
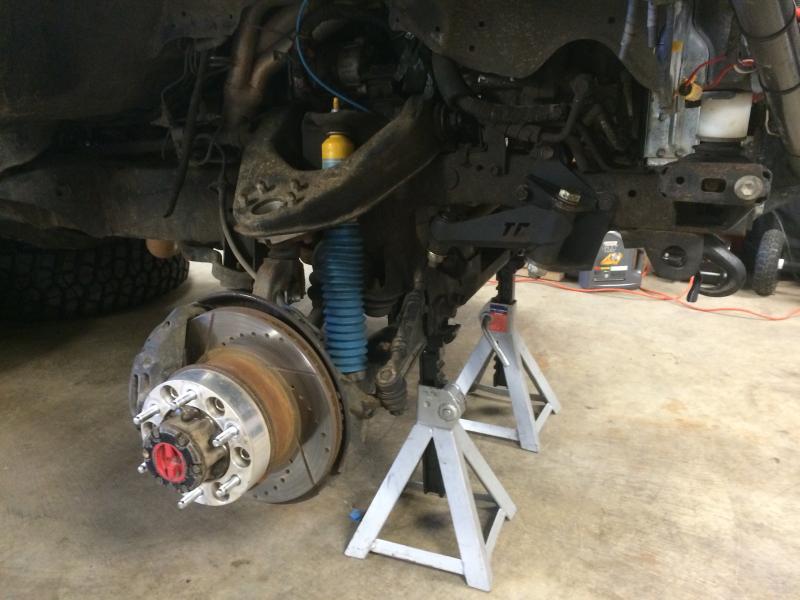
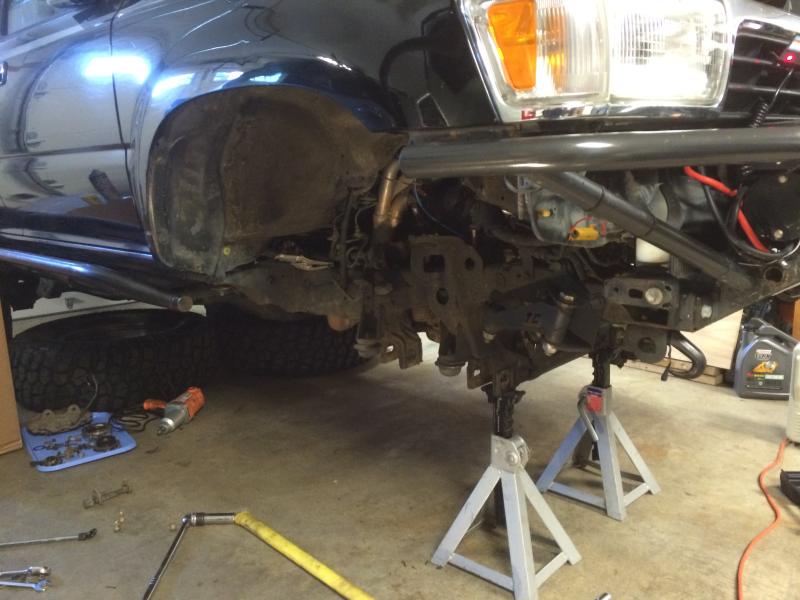
Blazeland kit mostly installed, minus welding the shock tabs to the frame.
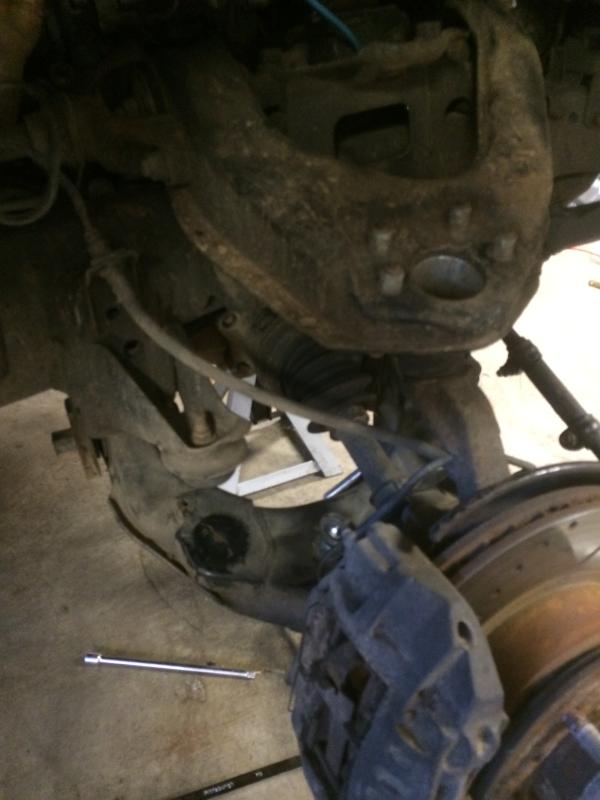
Went with all new ball joints and tie rod ends. I would avoid using autozone ball joints. The lower does not fit correctly in the spindle, as you can see in this picture. It had washers in the jit and I was hopeful they should be the spacer that fills in the gap as I have them here but it is incorrect. I found some moog lower ball joints locally and they fit how they should.
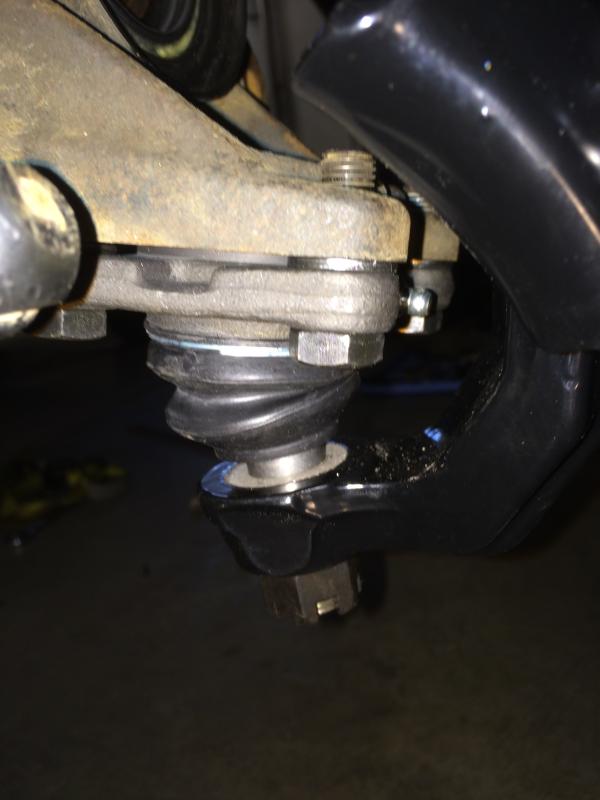
I used the autozone upper ball joints as well and I don't care for them either. The hardware included with them is junk.
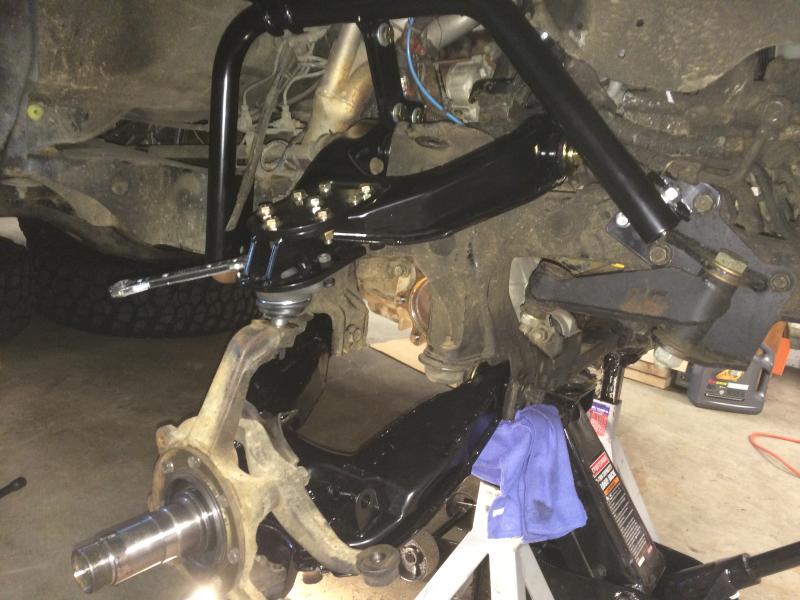
Drivers side mostly done.
One issue I ran into with installing the hoops on the drivers side was the bolt length with the pitman arm after the hoop bracket was installed. Nate was on point as usual and helped me get through it. A trip to the local screw shop and a 1/2" bit made easy work of that.
The issue.
After.
I didn't realize the bolts were different lengths so I got the same. I don't see anything that will come into contact with the longer bolt so I'll leave it.
Just getting into my stride and find out the family is on the way over. I'll add more when I can. Merry Christmas YT.
As you can see I have the total chaos idler arm. Wish they had powdercoated it, but it has held up to whatever I have thrown at it.


Beautiful and ugly at the same time.

My 4runner has had manual hubs for a long time. But I was always getting a grinding noise when I had the hubs locked so I decided to replace the spindle bushings while I was doing everything. More packages!

The outer ones come out easily enough, but I wanted to use my new pilot bearing removal tool.


Blazeland kit mostly installed, minus welding the shock tabs to the frame.


Went with all new ball joints and tie rod ends. I would avoid using autozone ball joints. The lower does not fit correctly in the spindle, as you can see in this picture. It had washers in the jit and I was hopeful they should be the spacer that fills in the gap as I have them here but it is incorrect. I found some moog lower ball joints locally and they fit how they should.

I used the autozone upper ball joints as well and I don't care for them either. The hardware included with them is junk.
Drivers side mostly done.

One issue I ran into with installing the hoops on the drivers side was the bolt length with the pitman arm after the hoop bracket was installed. Nate was on point as usual and helped me get through it. A trip to the local screw shop and a 1/2" bit made easy work of that.
The issue.


After.

I didn't realize the bolts were different lengths so I got the same. I don't see anything that will come into contact with the longer bolt so I'll leave it.

Just getting into my stride and find out the family is on the way over. I'll add more when I can. Merry Christmas YT.


 Dec 29, 2014 | 08:25 AM
#11
Thread Starter
Registered User
Joined: Jul 2007
Posts: 149
Likes: 1
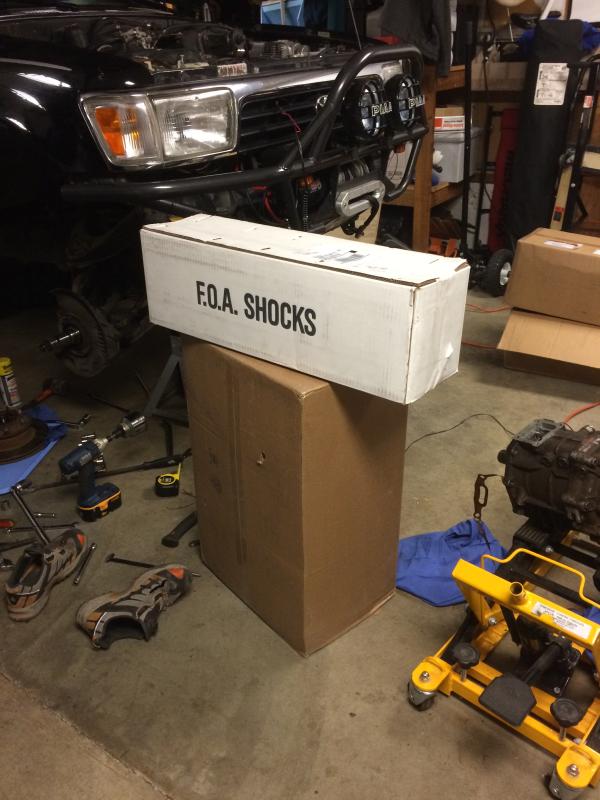
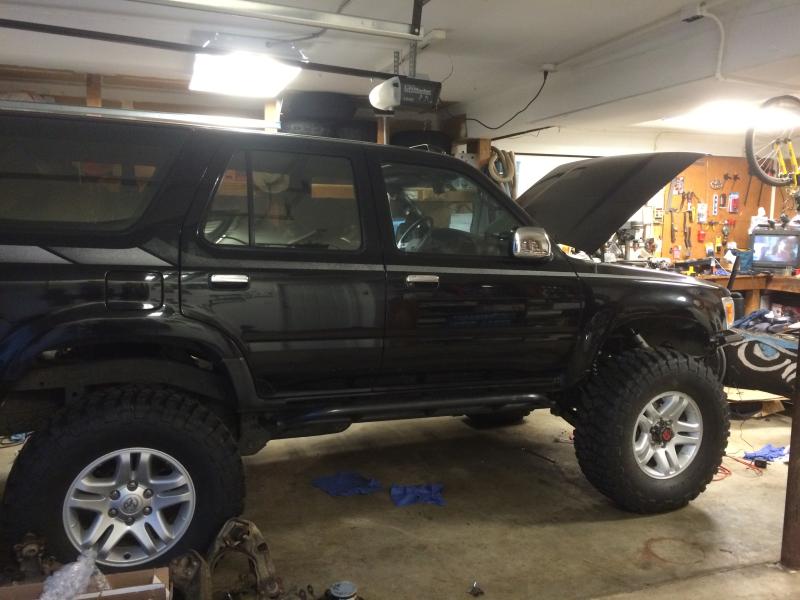
I went with 2" FOA RR coilovers. From what I have heard, the 2.5" can rub and I didn't want to do any clearancing.

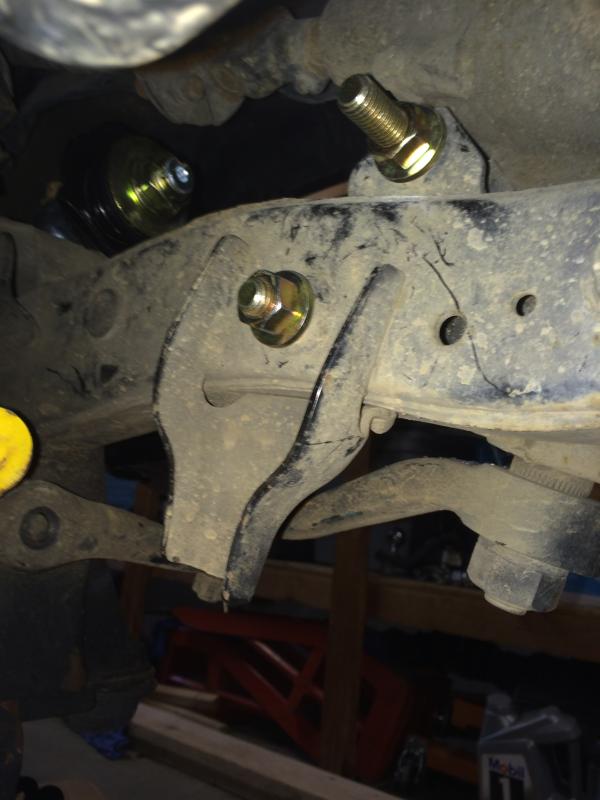
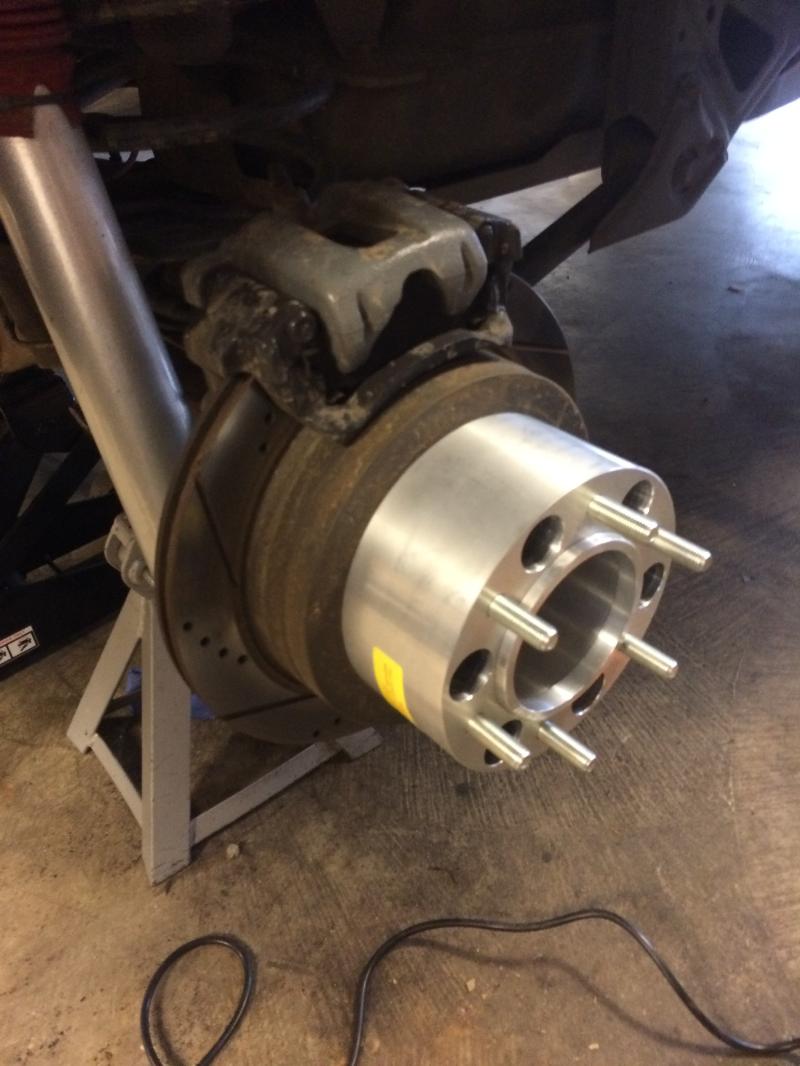
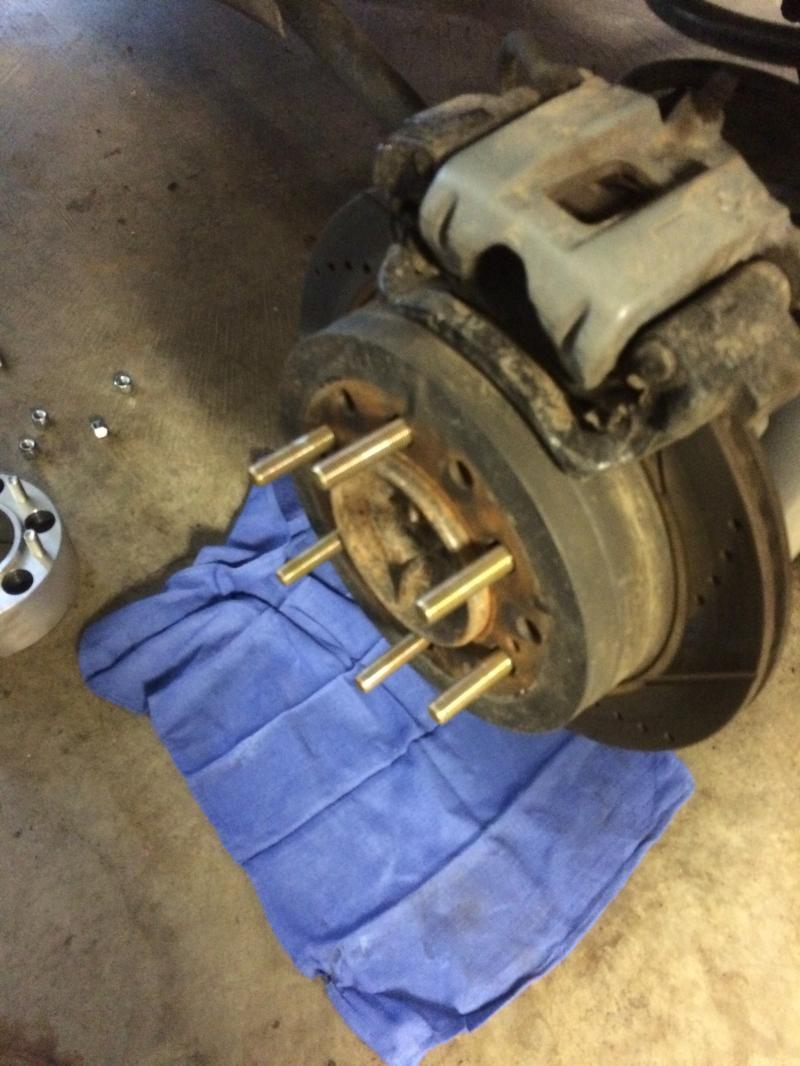
I wanted the rear width to match the front. But a 3" spacer is monstrous, and I was worried about safety. Couldn't find anyone that sold a 3" hub-centric spacer so I had a set made. They were not cheap, but I feel better knowing that the wheel is not solely resting on the studs.
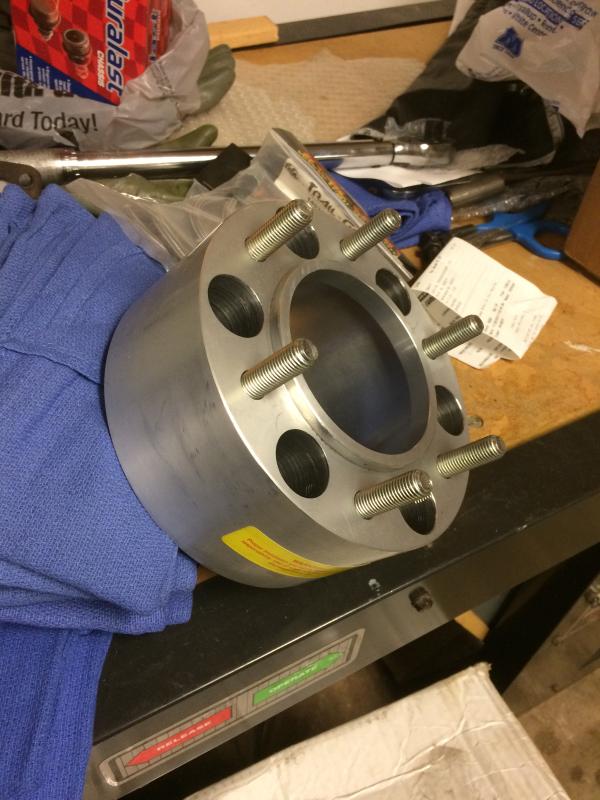
For additional safety I orederd and installed ARP wheel studs for the rear. They make the correct thread and pitch but are sold labeled for the lexus. They are longer than the original, but with this monstrous spacer there was plenty of room. Not sure how I feel about a spacer this big....just feels wrong. Here is the spacer installed. I am running the Golden State rear disc conversion that uses 4th gen 4Runner calipers and rotors. Again I hit up LCE for the blingin' rotors.
Made another mount for my rear flaps to try and keep the tire somewhat covered.
Here's where I have my front ride height right now. I like that it's lower than it was before, hopefully I can keep it this way. It does have a pretty steep rake F-R but as I add more weight to the rear (new bumper w/ swingout) I'm hoping it will bring it down some.
Firestone was able to get it aligned within specs. Took them a while but it was the day after their Black Friday special so they were swamped.
Initial impressions.....There is increased body roll while on the street. It's not scary by any means but more than before now that I don't have a sway bar. Driving over rough terrain like rutted out Forest Service roads is amazing. Can't feel it and steering wheel doesn't even move.

I wanted the rear width to match the front. But a 3" spacer is monstrous, and I was worried about safety. Couldn't find anyone that sold a 3" hub-centric spacer so I had a set made. They were not cheap, but I feel better knowing that the wheel is not solely resting on the studs.

For additional safety I orederd and installed ARP wheel studs for the rear. They make the correct thread and pitch but are sold labeled for the lexus. They are longer than the original, but with this monstrous spacer there was plenty of room. Not sure how I feel about a spacer this big....just feels wrong. Here is the spacer installed. I am running the Golden State rear disc conversion that uses 4th gen 4Runner calipers and rotors. Again I hit up LCE for the blingin' rotors.


Made another mount for my rear flaps to try and keep the tire somewhat covered.

Here's where I have my front ride height right now. I like that it's lower than it was before, hopefully I can keep it this way. It does have a pretty steep rake F-R but as I add more weight to the rear (new bumper w/ swingout) I'm hoping it will bring it down some.


Firestone was able to get it aligned within specs. Took them a while but it was the day after their Black Friday special so they were swamped.
Initial impressions.....There is increased body roll while on the street. It's not scary by any means but more than before now that I don't have a sway bar. Driving over rough terrain like rutted out Forest Service roads is amazing. Can't feel it and steering wheel doesn't even move.
Dec 29, 2014 | 10:06 PM
#12
Registered User
Joined: May 2009
Posts: 216
Likes: 0
From: Sierra Foothills
Wow! Your truck is awesome!
Does the rear disc conversion have a parking brake?
Maybe you could switch to a firmer spring rate on the coil overs and lift the truck up a little while making the cornering a little better?
Does the rear disc conversion have a parking brake?
Maybe you could switch to a firmer spring rate on the coil overs and lift the truck up a little while making the cornering a little better?
Dec 30, 2014 | 06:57 PM
#13
Thread Starter
Registered User
Joined: Jul 2007
Posts: 149
Likes: 1
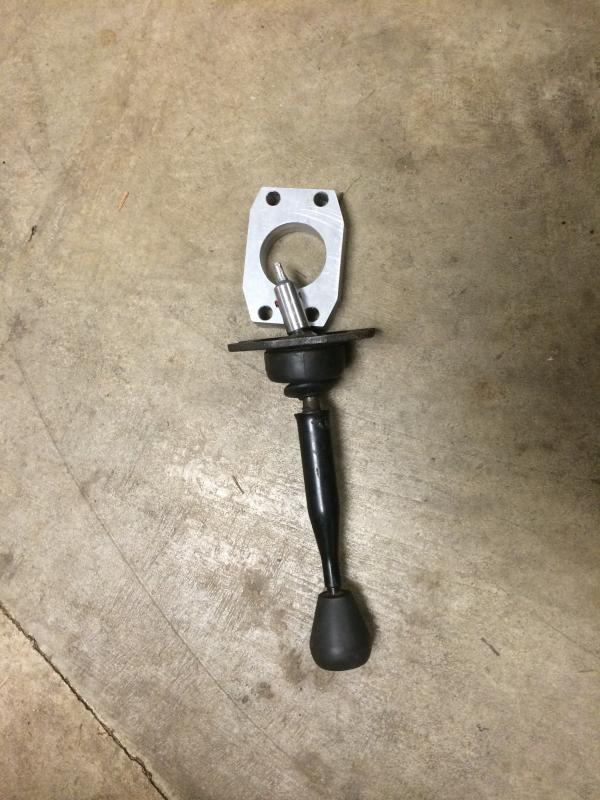
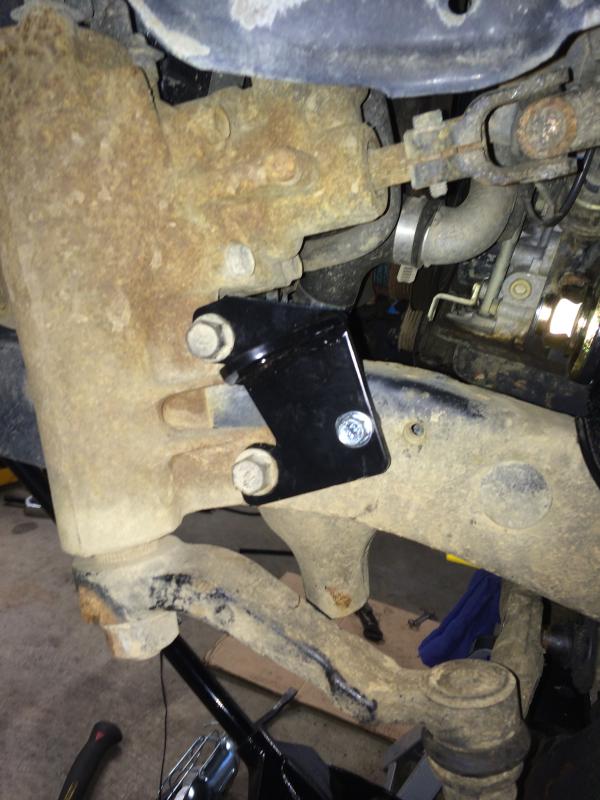
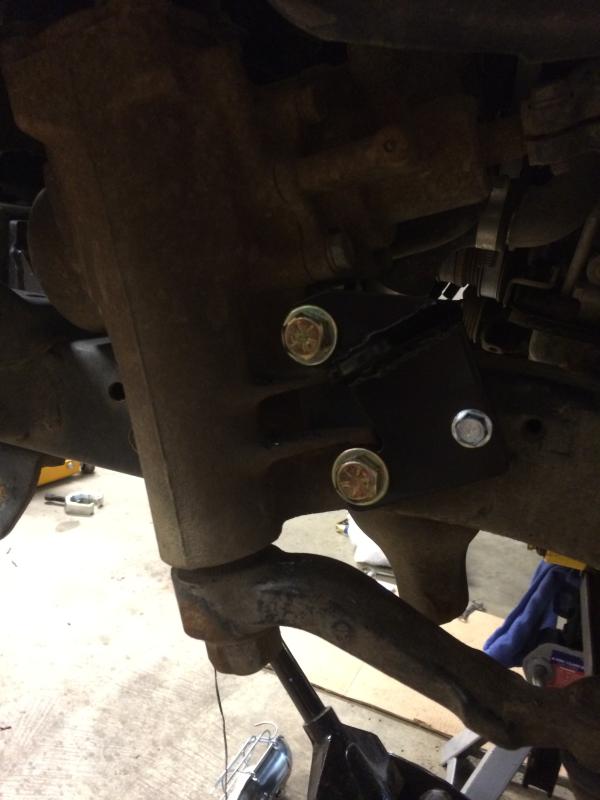
The hype was that the rear disc kit had a working parking brake kit that would be released shortly after. It's been a couple years and nothing yet. I've had the all-pro kit for a while when I knew I was going to switch to a gear drive case. But I was disappointed to see the lever does not line up with my cable. The rear torsion bar mount is in the way.
I've thought about increasing spring rate or maybe even higher pressure in the coilovers but honestly I have maybe 200 miles on my setup. It doesn't drive bad by any means. The setup I had before had sway bar disconnects, and to be honest I probably had those too tight after install because on a spirited take off turning I lifted my drivers front tire about a foot and a half!
So having a suspension that is tune able is a new deal for me. Definitely open to feedback from others. I pretty much saw what a couple did and split the difference.

Thread
Thread Starter
Forum
Replies
Last Post
XtraCab
Solid Axle Swaps, All Years
18
Apr 12, 2020 05:25 AM
BeMiceElf
Misc Stuff (Vehicle Related)
7
Oct 10, 2015 09:40 PM


