
1989 ext cab "blue beauty" build
 May 8, 2016 | 12:19 PM
#1
Thread Starter
Registered User
Joined: Jan 2016
Posts: 60
Likes: 0
1989 ext cab "blue beauty" build
Hey guys! Totaled one of my rigs due to hitting a water shutoff line that stuck exactly 1 1/8" up. Oops. Time to start the 4x4 thread
 waiting to see if state is going to compensate even though it was totally my fault.
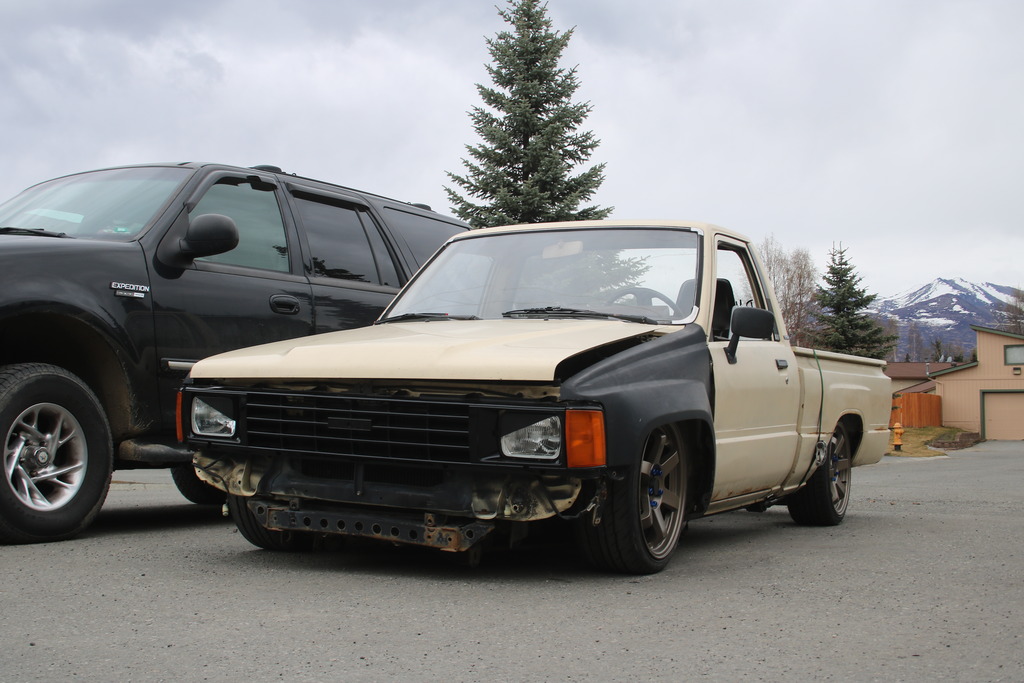
Here she is, the blue beauty (back when I got her)
Got er for 2400$ as my first truck/Toyota. 1989 extend cab bought with 196k miles and bone stock. Had a gnarly oil leak, changed front seal, did the typical daily stereo system right away. Two weeks later went modding with a friend with a sweet trail Tacoma, after getting stuck everywhere and not knowing much of off-roading, I knew the build had to start.

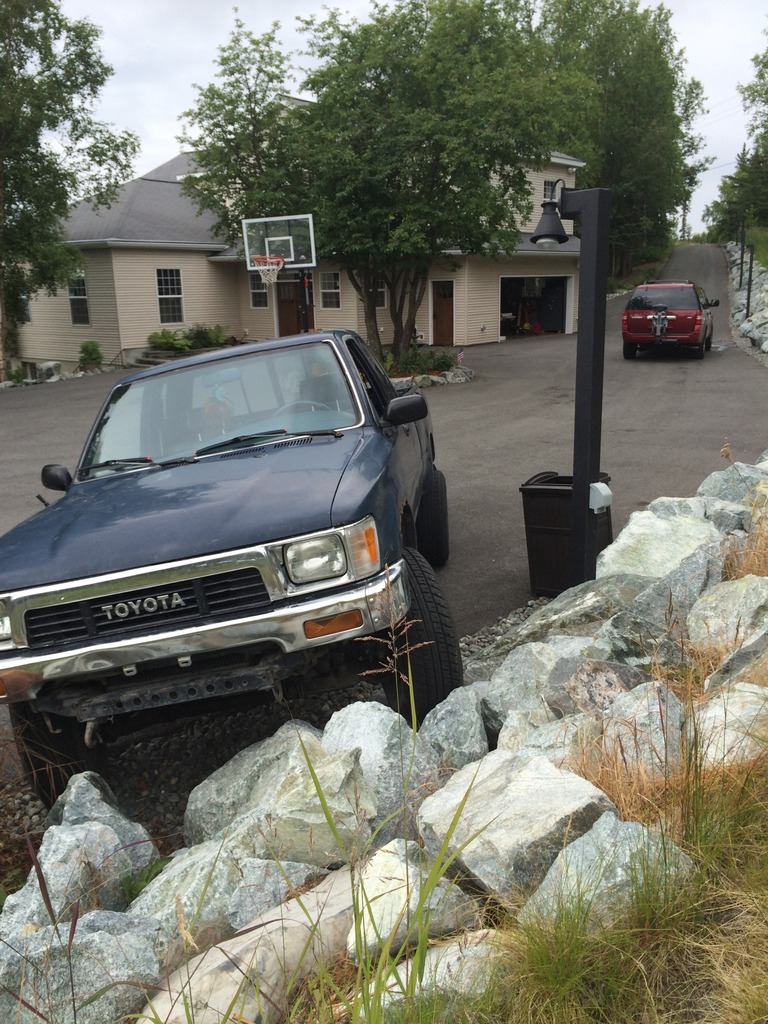
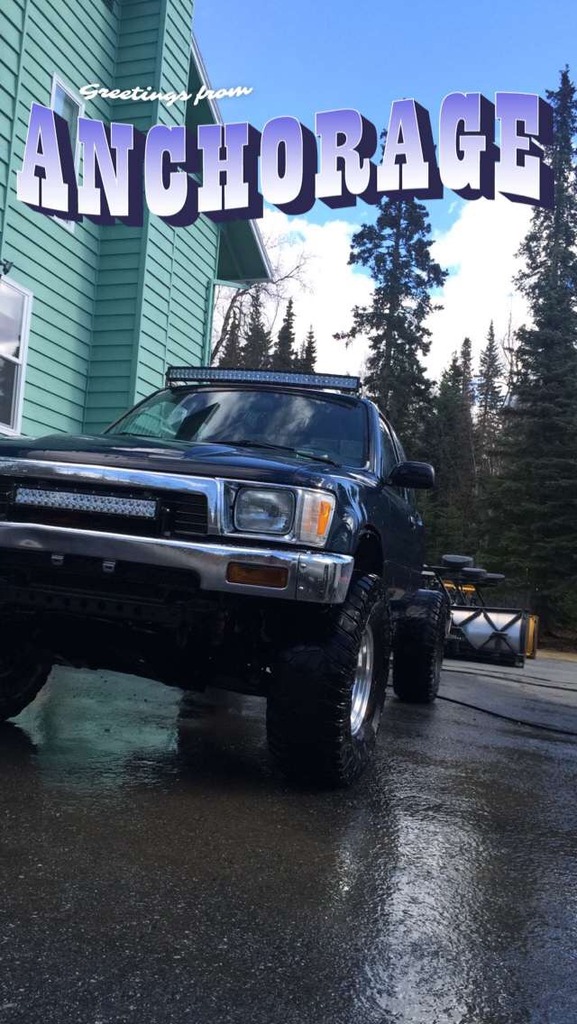
Year later, still running strong, fixing mishaps here and there, got used 33s, 2 years later got light bars, and bed bob. Got my 2wd and started DUMPING money into that and nothing to the 4wd but still Wanting to SAS badly. Here she is now (was still doing bed bob)
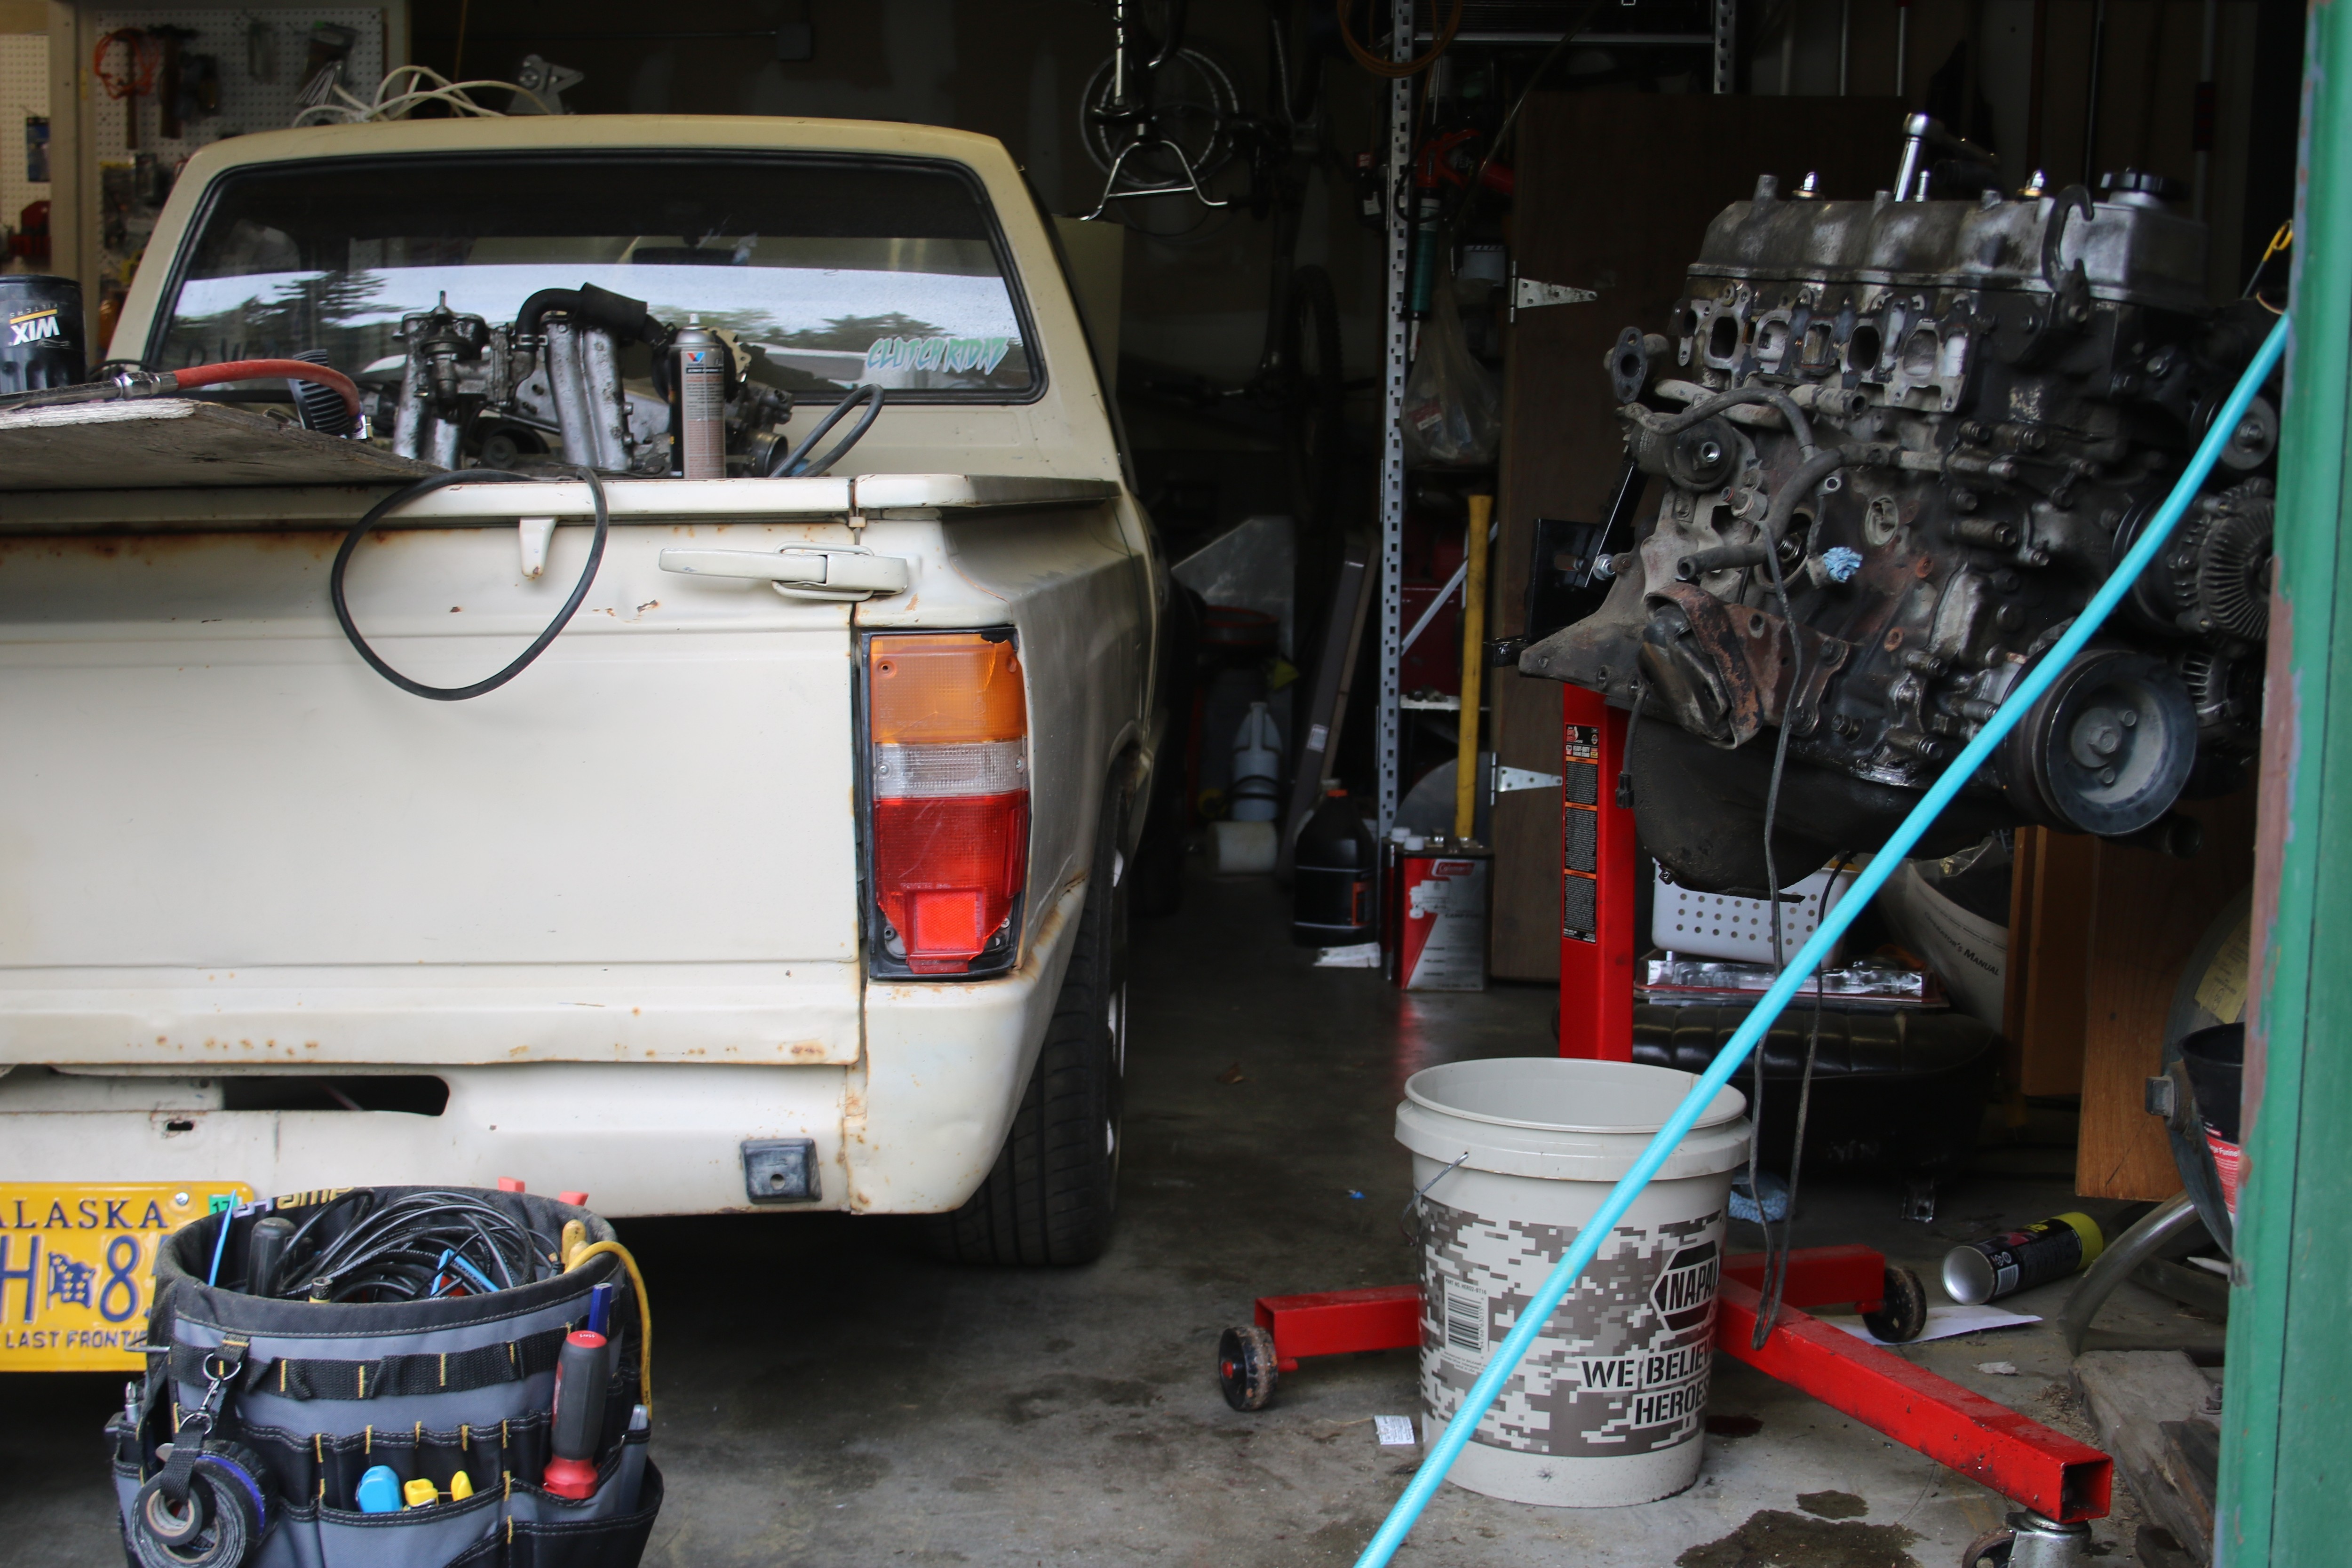
Engine finally died ad 202k. Timing chain skipped, and 20psi compression on #2 and 110 on 4. Yanking the engine and doing the rebuild now.
 waiting to see if state is going to compensate even though it was totally my fault.
Here she is, the blue beauty (back when I got her)

Got er for 2400$ as my first truck/Toyota. 1989 extend cab bought with 196k miles and bone stock. Had a gnarly oil leak, changed front seal, did the typical daily stereo system right away. Two weeks later went modding with a friend with a sweet trail Tacoma, after getting stuck everywhere and not knowing much of off-roading, I knew the build had to start.

Year later, still running strong, fixing mishaps here and there, got used 33s, 2 years later got light bars, and bed bob. Got my 2wd and started DUMPING money into that and nothing to the 4wd but still Wanting to SAS badly. Here she is now (was still doing bed bob)

Engine finally died ad 202k. Timing chain skipped, and 20psi compression on #2 and 110 on 4. Yanking the engine and doing the rebuild now.


 May 11, 2016 | 11:00 PM
#5
Thread Starter
Registered User
Joined: Jan 2016
Posts: 60
Likes: 0
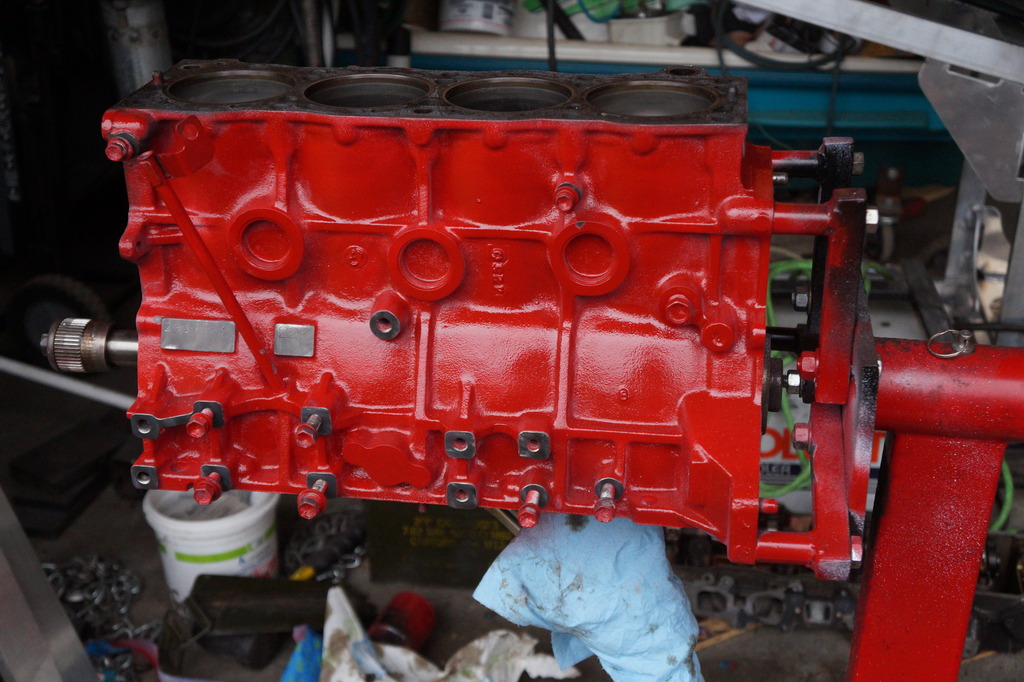
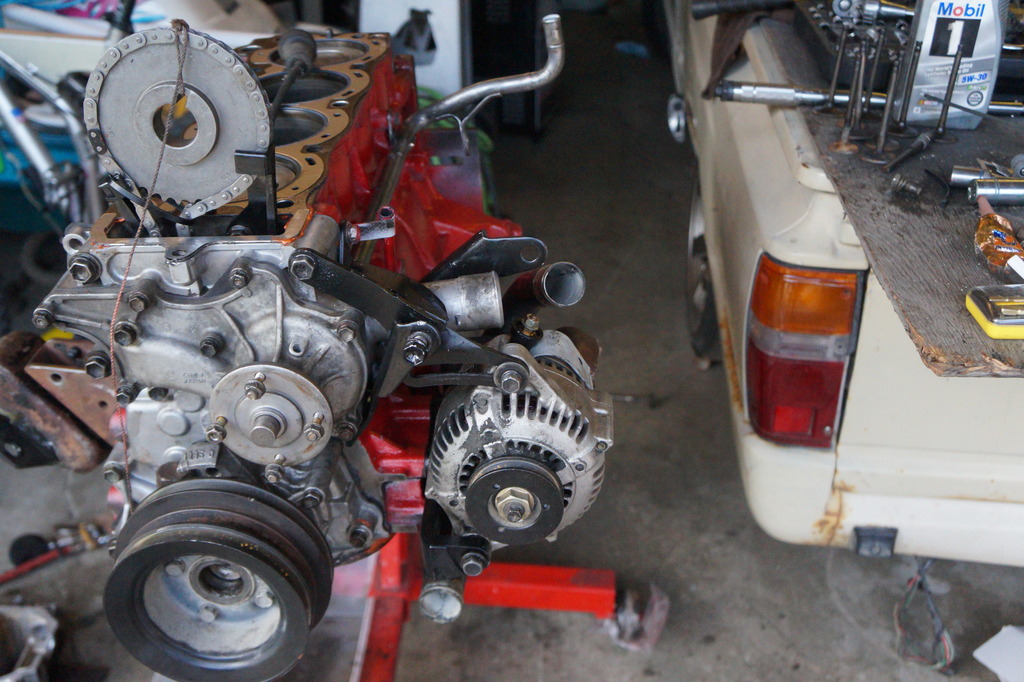
got my engine out, input shaft was stuck to the pilot bearing so after the bearing popped out it was good to go.
on the stand

so im pretty sure my rings are good, my head gasket just EXPLODED. I havent seen a gasket blow this hard before
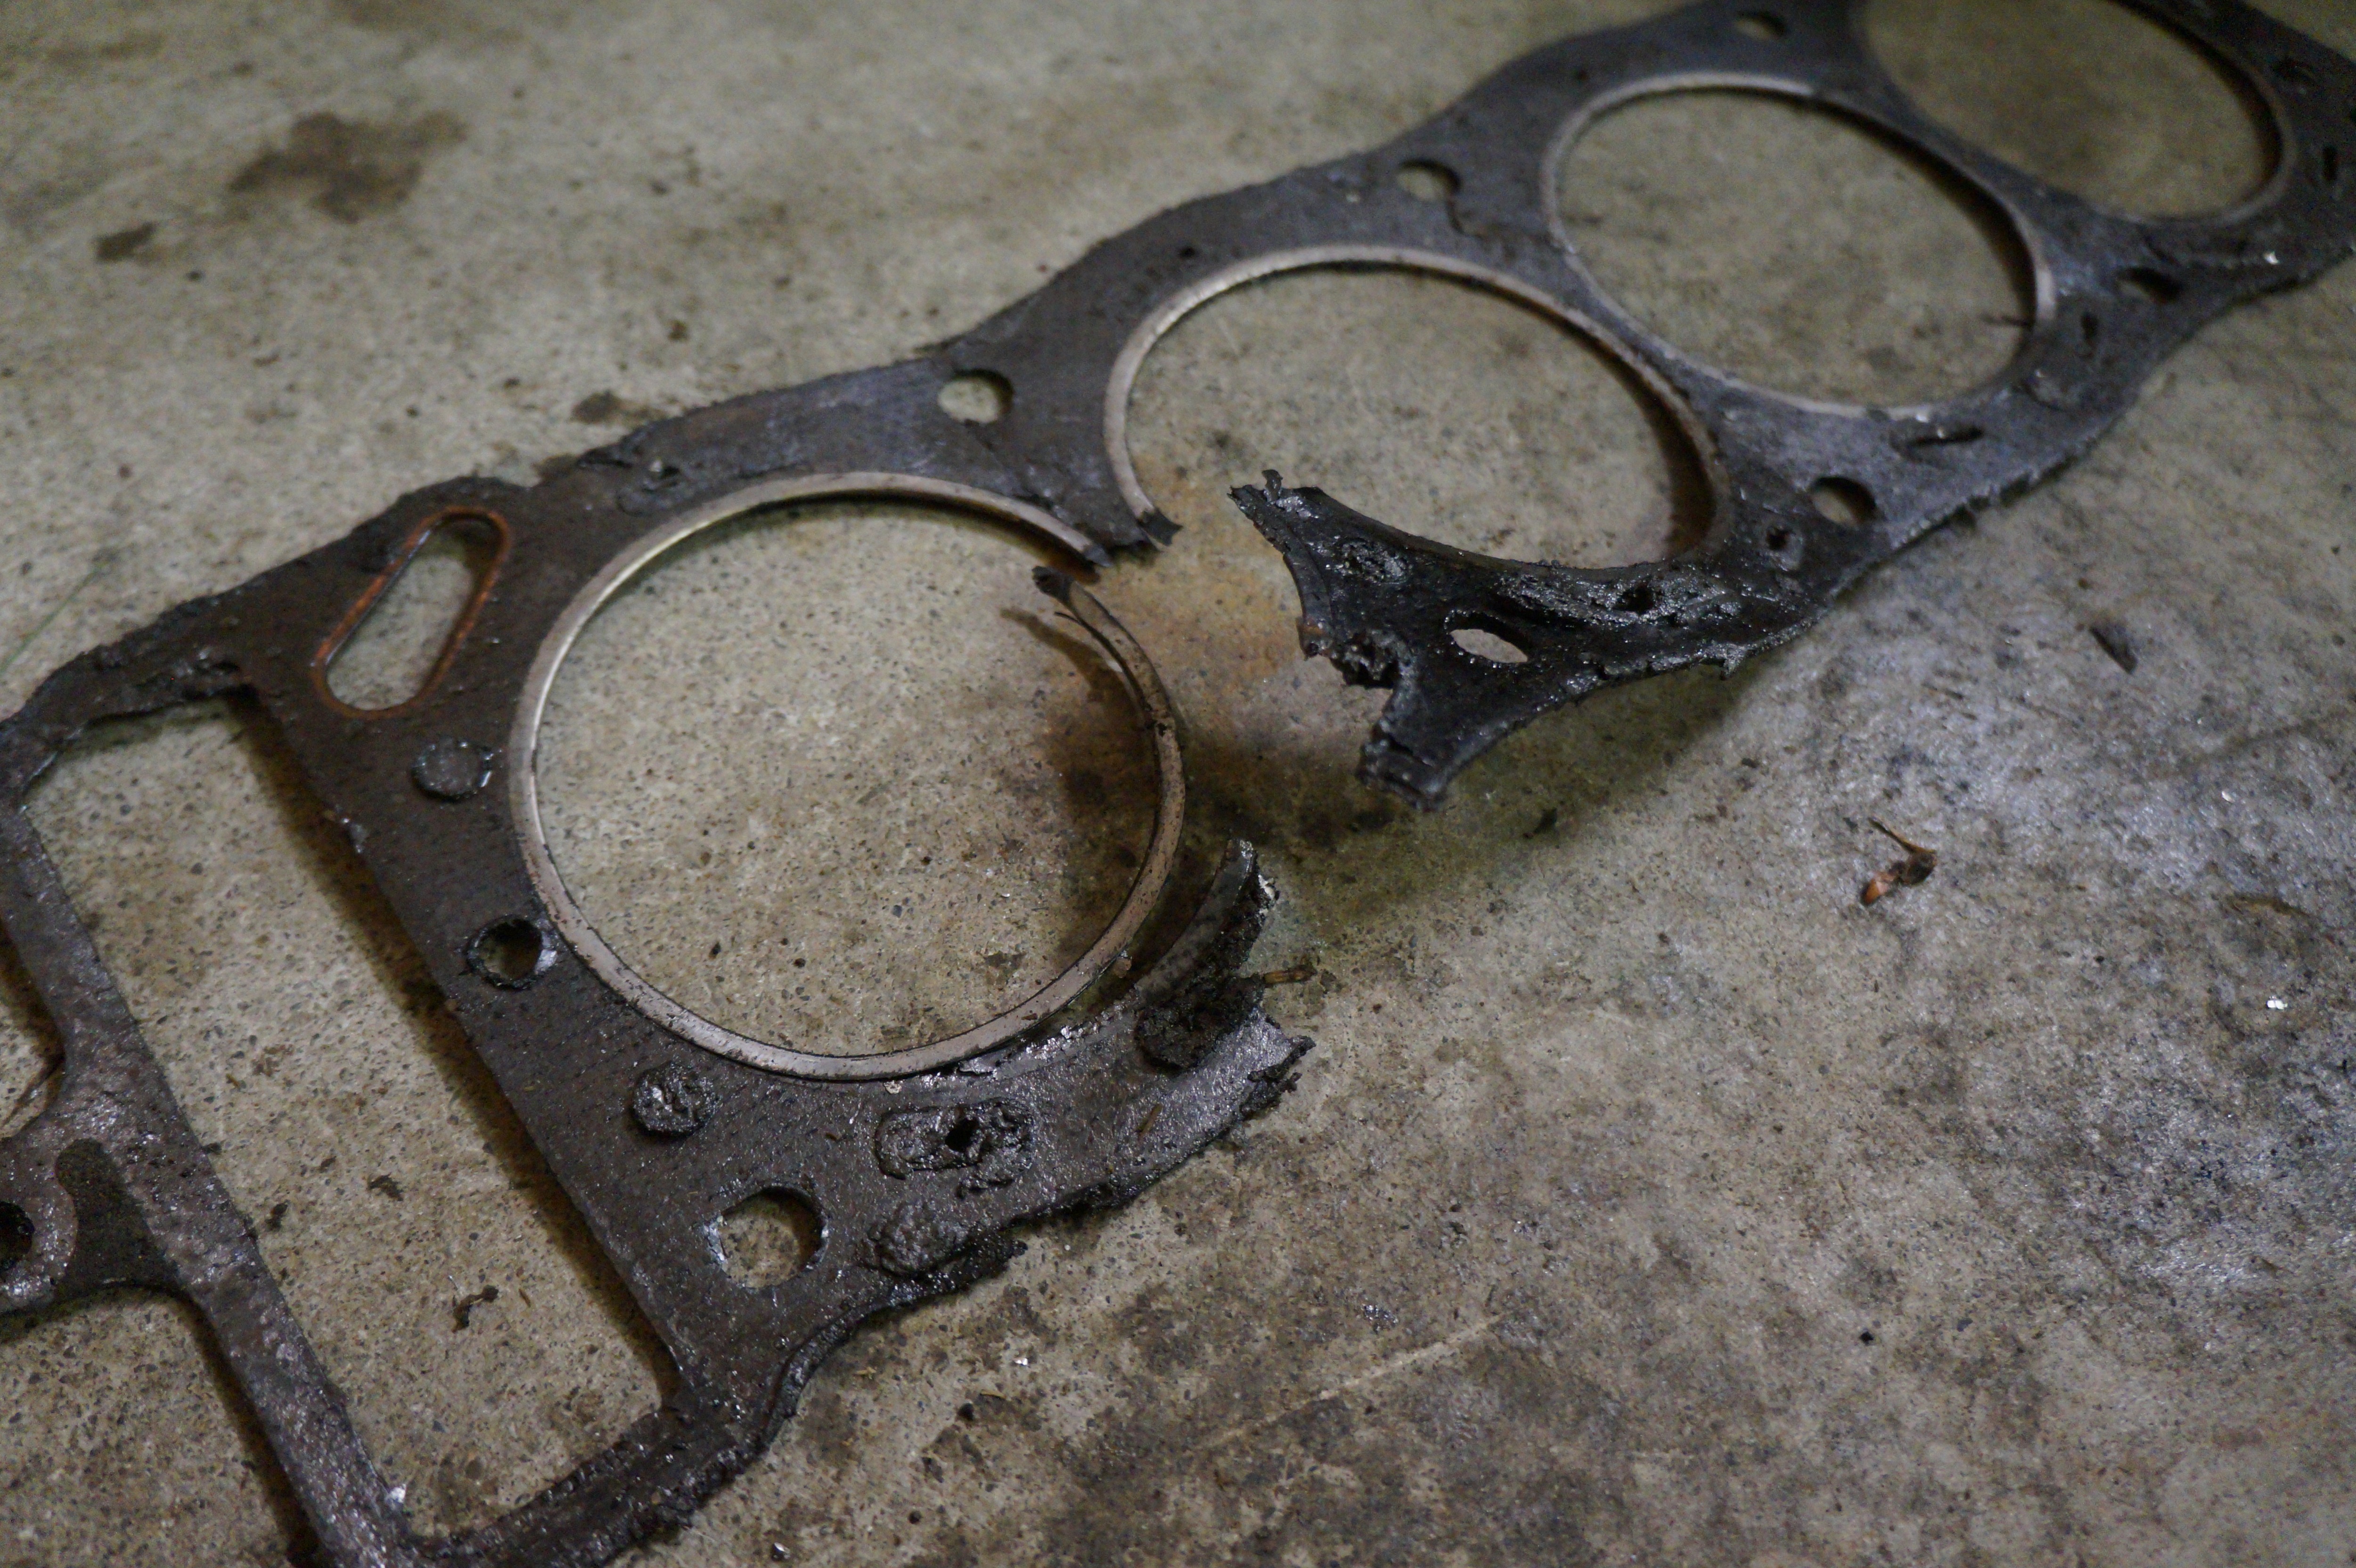
good thing my pistons and walls are in great shape for 201k!

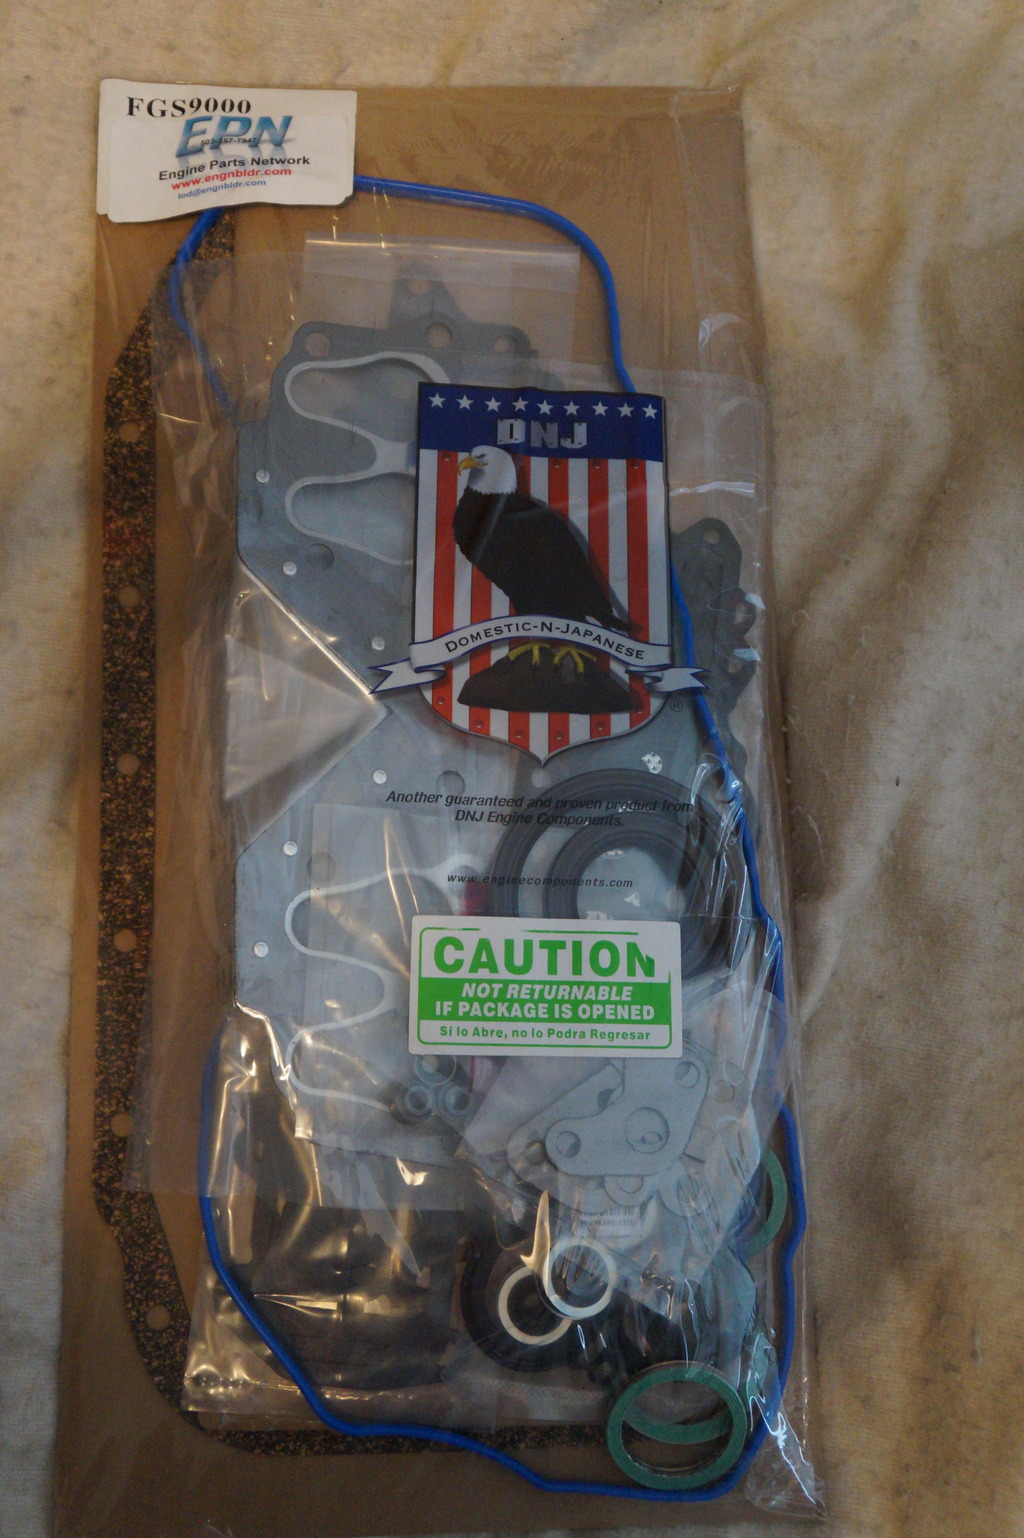
Does anyone know a thing or two of "engnbldr'? i might order a full gasket kit and head bolts if theyre reputable. also, does anyone daily marlin crawler clutches? possibly wanting a 1200 or 1600.
on the stand
so im pretty sure my rings are good, my head gasket just EXPLODED. I havent seen a gasket blow this hard before
good thing my pistons and walls are in great shape for 201k!
Does anyone know a thing or two of "engnbldr'? i might order a full gasket kit and head bolts if theyre reputable. also, does anyone daily marlin crawler clutches? possibly wanting a 1200 or 1600.
Last edited by Radchadtrinidad; May 11, 2016 at 11:39 PM.

 May 13, 2016 | 10:43 AM
#7

Registered User
Joined: Jan 2015
Posts: 652
Likes: 0
From: Hendersonville NC
I called and ordered from eng builder. I thought it was a good experience.
Gaskets seem like good quality.
My only complaint was the o ring that goes to the water pipe at the intake wasn't included or the csi injector seal.
I made my own csi seal and will have to buy the o ring and copper crush washers elsewhere
Gaskets seem like good quality.
My only complaint was the o ring that goes to the water pipe at the intake wasn't included or the csi injector seal.
I made my own csi seal and will have to buy the o ring and copper crush washers elsewhere
Trending Topics
May 21, 2016 | 12:22 AM
#8
Thread Starter
Registered User
Joined: Jan 2016
Posts: 60
Likes: 0
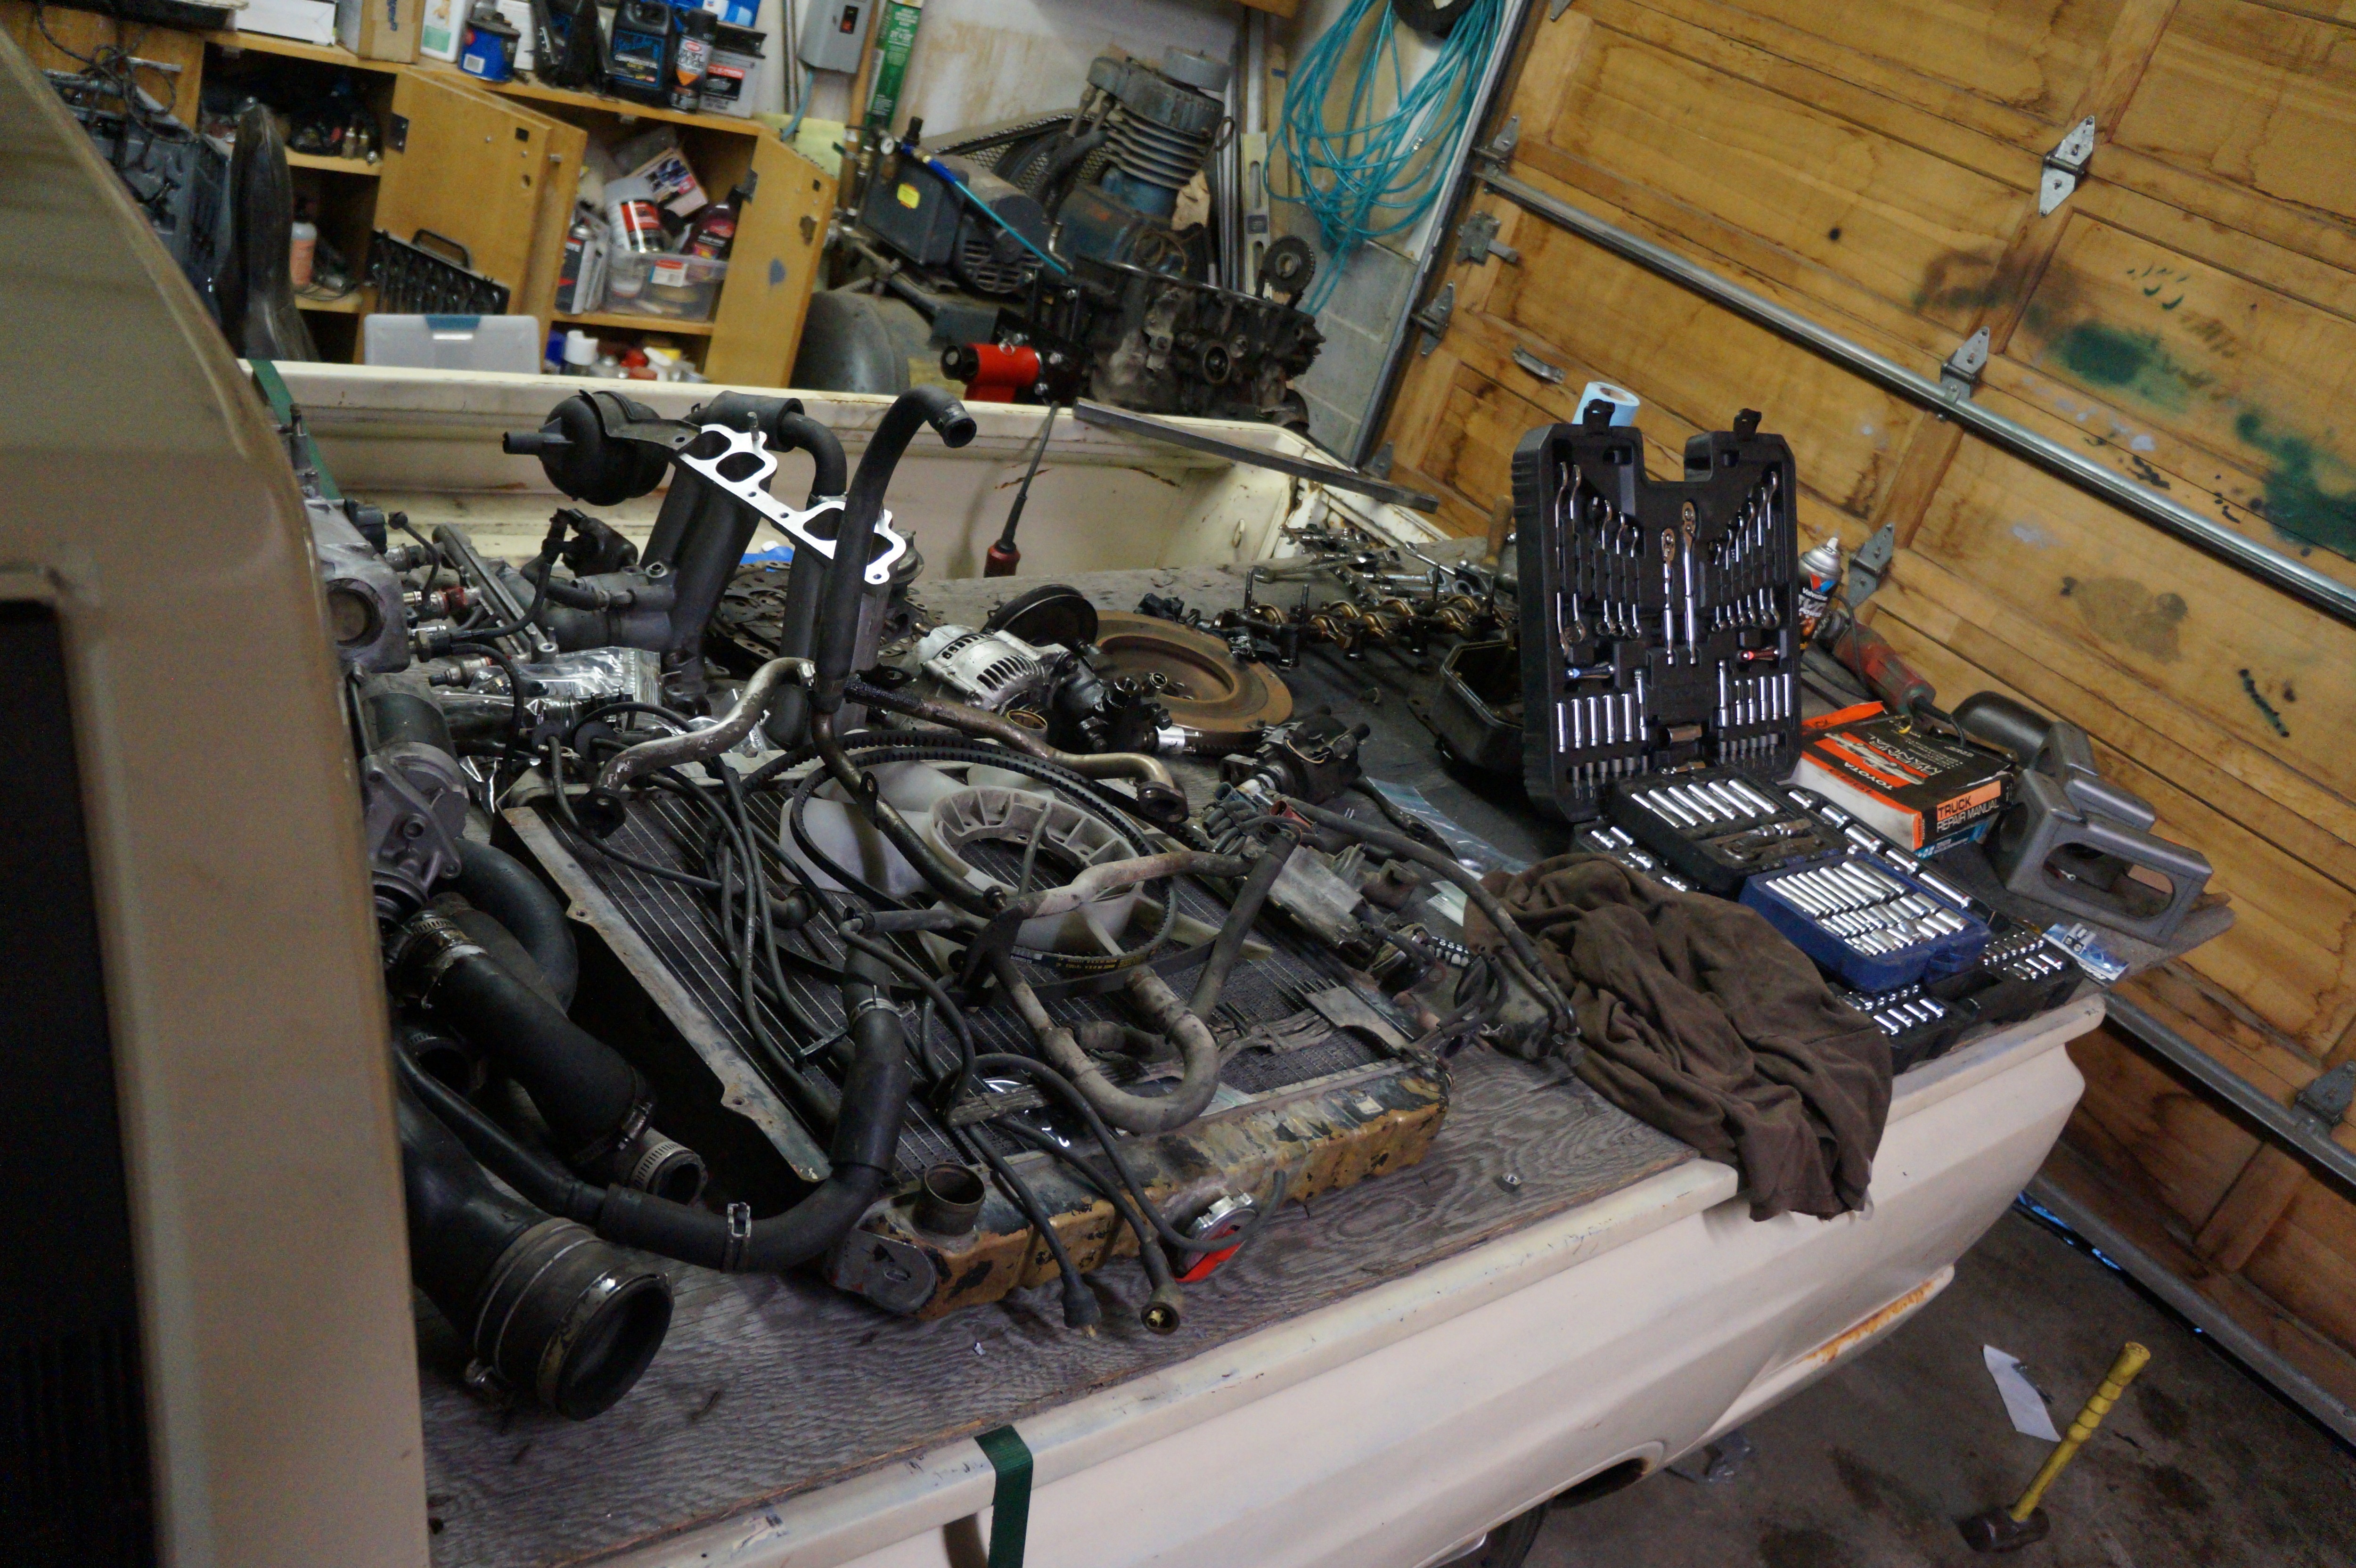
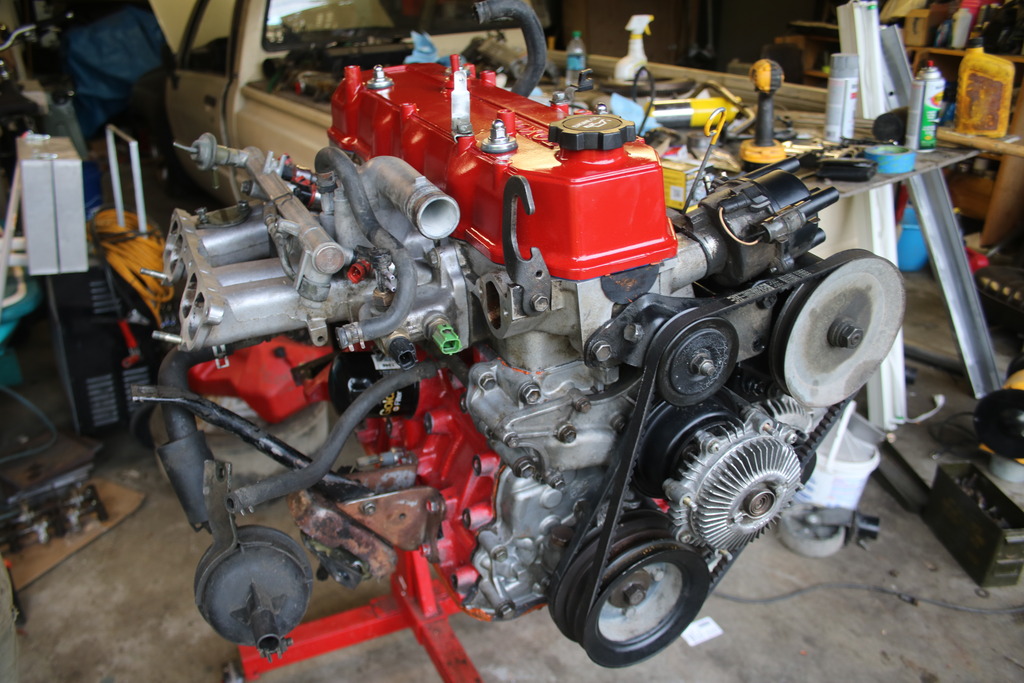
Parts came in!
Super eager to paint the block and to get it running again. My timing guides on both side blew so I got a new timing chain kit at Napa since I didn't want to wait for more time of ordering parts and waiting for them to get here.


Super eager to paint the block and to get it running again. My timing guides on both side blew so I got a new timing chain kit at Napa since I didn't want to wait for more time of ordering parts and waiting for them to get here.
May 27, 2016 | 04:19 PM
#9
Thread Starter
Registered User
Joined: Jan 2016
Posts: 60
Likes: 0
Rebuild is going alright. New timing kit, gaskets, and timing cover.
As of right now, waiting for valves. Whole intake side including guides bent so when they come in I'm having a yota fab shop press the guides in.


As of right now, waiting for valves. Whole intake side including guides bent so when they come in I'm having a yota fab shop press the guides in.
 May 27, 2016 | 10:48 PM
#12
The top right gasket should go in between the Plenum and the EGR pipe. Top center looks like it is the one that goes on the back of the head. 2nd row far right I may go to the exhaust manifold O2 sensor. One of the black rubber gaskets might be for the thermostat. Most gasket kits come with gaskets for the 22r and 22re motor and is not always used. You will have a few extras. Small black rubber o-ring might be for the water pipe that connects to the lower part of the intake manifold.
Been a while since I have rebuilt a motor so I might have a couple of them wrong and not actually having the seals in hand and in front of a motor.
Been a while since I have rebuilt a motor so I might have a couple of them wrong and not actually having the seals in hand and in front of a motor.
Jun 4, 2016 | 12:05 PM
#13
Thread Starter
Registered User
Joined: Jan 2016
Posts: 60
Likes: 0
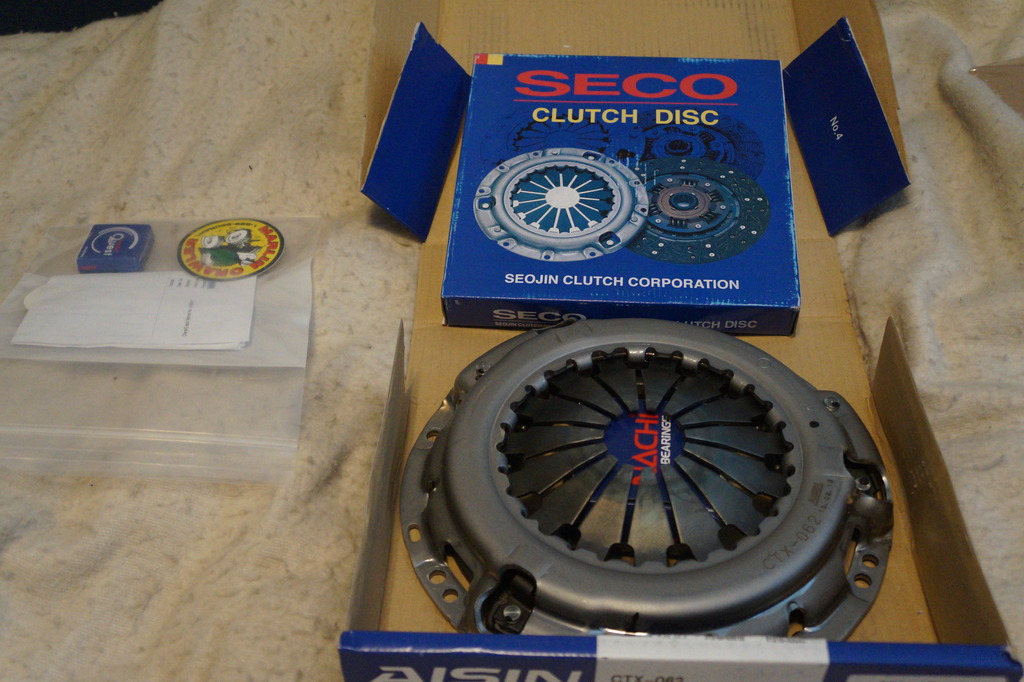
The engine is finished and on the hoist. Got the resurfaced flywheel in and new Marlin crawler clutch.
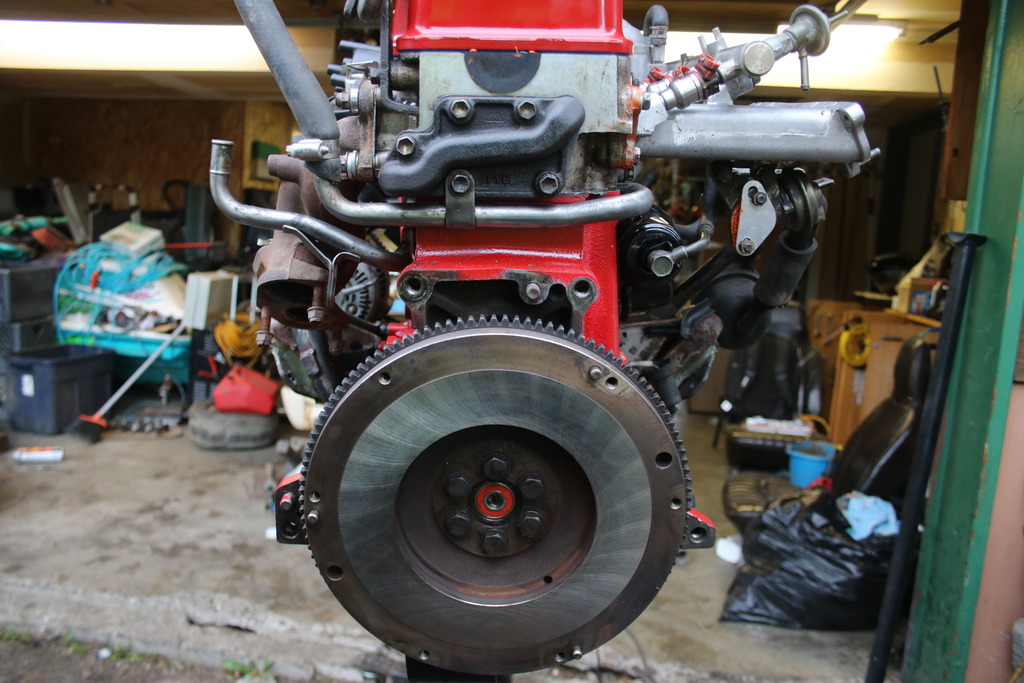

Question: is it possible to stab the engine with the manual trans in? If so, how? I tried with my pal for an hour and couldn't get it.
Question: where do my lines for my fuel regulator go?
Question: do I plug in the two egr harnesses on the intake manifold? Or can I leave them unplugged


Question: is it possible to stab the engine with the manual trans in? If so, how? I tried with my pal for an hour and couldn't get it.
Question: where do my lines for my fuel regulator go?
Question: do I plug in the two egr harnesses on the intake manifold? Or can I leave them unplugged
Jun 7, 2016 | 11:39 PM
#15
Thread Starter
Registered User
Joined: Jan 2016
Posts: 60
Likes: 0
okay so i got everything in and STARTED with starting fluid. wont run off its own. so this leads e to questions with my EGR delete. ive been trying to find a thread of an EGR delete with the same style plenum but cant find anything! i need help mostley with the charcol canister and fuel pressure regulator! I just need, EXAMPLE : red-capped or [orange to pink]
Pic 1

Pic 2
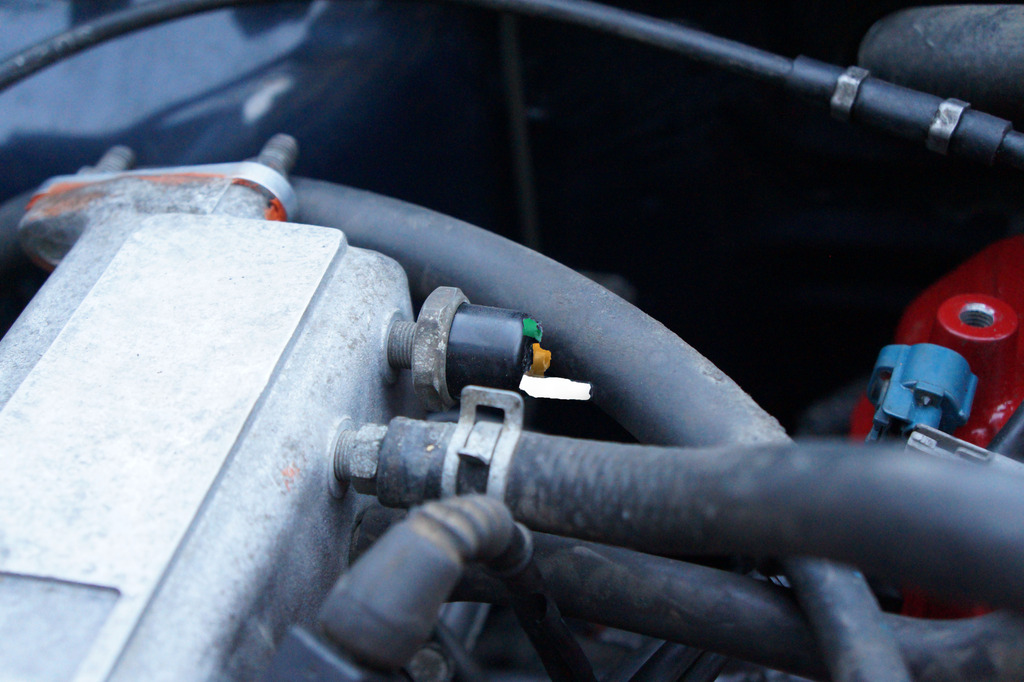
Pic 3
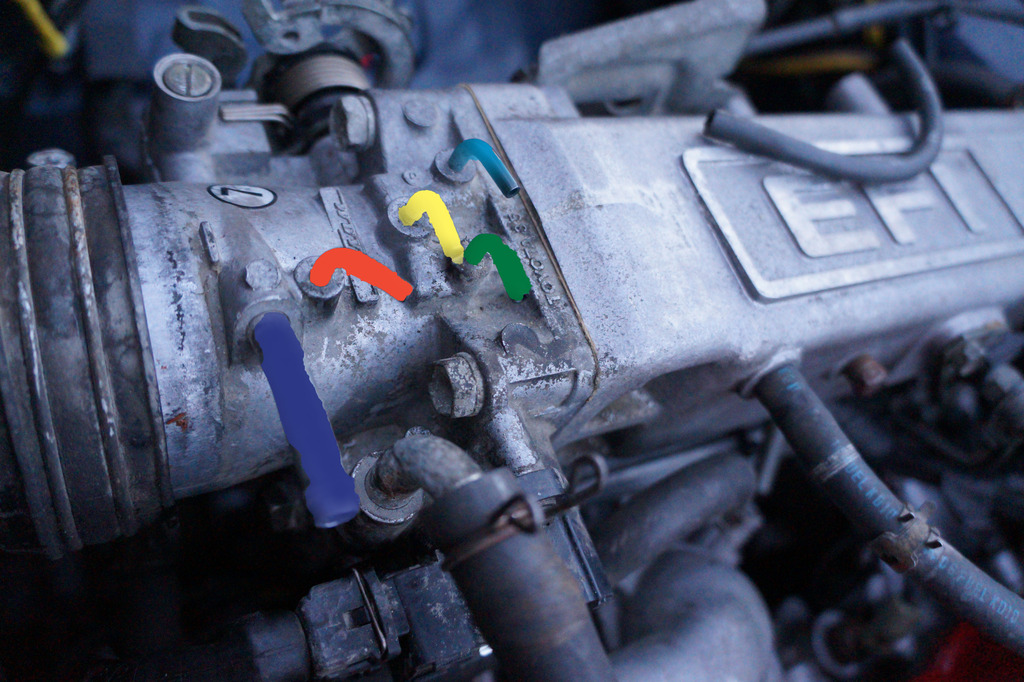
Pic 1

Pic 2

Pic 3
 Jun 9, 2016 | 12:13 AM
#17
Thread Starter
Registered User
Joined: Jan 2016
Posts: 60
Likes: 0
got it running! it runs rough though. timing is correct but sounds like its misfiring and having problems with vacuum lines still. got some done but still missing the one under the plenum and the fuel hose from the tank thats almost right infront of the fuel regulator
Jun 9, 2016 | 10:34 AM
#19

Registered User
Joined: Jul 2005
Posts: 196
Likes: 1
From: Co. Springs (ish)
If you think you've got all the vacuum lines and connections figured out and it's still doing this you might want to check/adjust your valve lash. I had a very similar experience.
Jun 9, 2016 | 07:00 PM
#20
Thread Starter
Registered User
Joined: Jan 2016
Posts: 60
Likes: 0


