
Xyphus42's 85 4Runner Build-Up Thread
 May 11, 2011 | 11:30 AM
#21
Thread Starter
Registered User
Joined: Mar 2011
Posts: 103
Likes: 0
From: New Castle, CO
Forgot to mention another pre existing part... My father had installed a Tri-Wye header not sure of the brand but it is actually quite nice. Large down tubes and of course the Tri-Wye configuration. Each intersection increases in pipe size by a small amount. The collector appears to be stock size at the cat. pipe. As well as the cat itself was "busted out" with a bar and a hammer for free flow. I think it is a flow master muffler on the back side, again not sure. My father had passed away a few years ago, so I can't ask him. Anyway, the exhaust is fairly well built up to what I would want.
May 11, 2011 | 11:44 AM
#22
Thread Starter
Registered User
Joined: Mar 2011
Posts: 103
Likes: 0
From: New Castle, CO
One other thing I forgot to mention. The polyurethane motor mount upgrade. I saw this https://www.yotatech.com/forums/f123.../#post51692775 and thought it was an excellent idea. Thank you CORAX!!!! Read that post, they cost only a couple dollars more then stock and you wont have to "chain em' down".

 May 13, 2011 | 05:15 PM
#26
Thread Starter
Registered User
Joined: Mar 2011
Posts: 103
Likes: 0
From: New Castle, CO
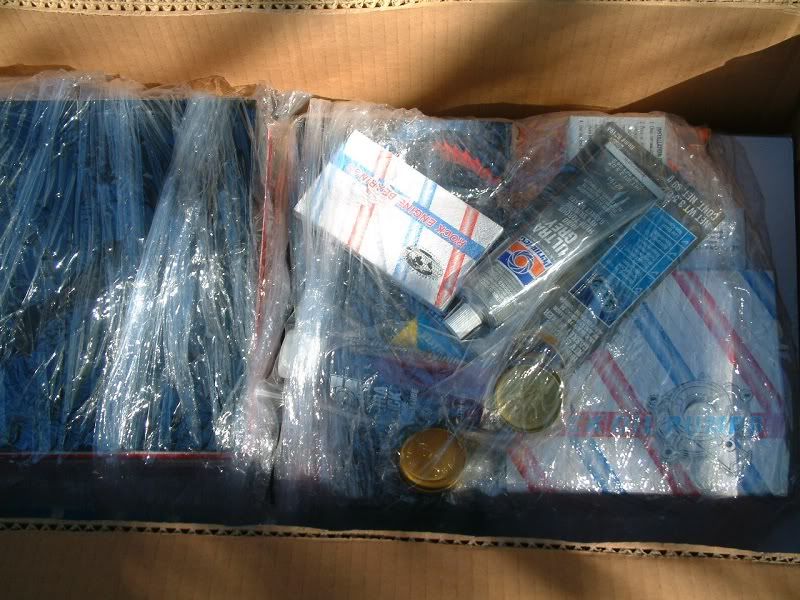
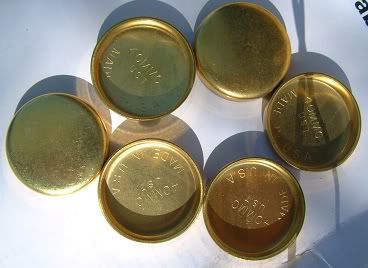
Ordered bearings.... ~$57 for rods and mains shipped from summit.
All King bearings. I like the idea of the King bearings... Bi-Metal. Should have a thicker "Bearing" material then the Tri-metal ones which have a very thin babbit layer. I like the idea behind that, plus they should last better then the three part ones I would think.
All King bearings. I like the idea of the King bearings... Bi-Metal. Should have a thicker "Bearing" material then the Tri-metal ones which have a very thin babbit layer. I like the idea behind that, plus they should last better then the three part ones I would think.
May 13, 2011 | 05:34 PM
#27
Thread Starter
Registered User
Joined: Mar 2011
Posts: 103
Likes: 0
From: New Castle, CO
I thought I would run this by the Tech guru's.
I am concerned about the oiling of the rockers and shafts and what have you. I looked over the assembly and noticed it is fed by the hole next to the right front head bolt, up around the bolt and then through the rocker assembly.
So here's the question... ?
Would it be an ok idea to polish up and remove some of that head bolt to allow more oil?
Just a few thousandth's 5-10? I know the polishing is ok, but the light removal of some of the material, including the Hump down by the threads.
I also haven't heard from any one or able to search out anyone who has "ported" the timing cover. I think this would gain some needed flow with out buying a "high" flow pump.
Anyway input is always appreciated.
May 13, 2011 | 06:48 PM
#28
Thread Starter
Registered User
Joined: Mar 2011
Posts: 103
Likes: 0
From: New Castle, CO
Just talked to my friend, He has a digital scale I can use to balance my pistons/rods.
So stoked. I will try to get them within .1-2 grams across the whole set. That should be really well balanced.
Well since I hear most only go to .5 gram balance, this should help out a little more.
Will be nice to get this thing moving, instead of just be a the purchasing agent, if you all know what I mean.
May 13, 2011 | 08:18 PM
#29
Why wouldn't you have just ordered the turbo oil pump in the first place? I thought they were about the same amount, I would think that if you port to much that the oil pressure might start to suffer maybe.
May 14, 2011 | 09:22 AM
#30
Thread Starter
Registered User
Joined: Mar 2011
Posts: 103
Likes: 0
From: New Castle, CO
That's why I was asking. 
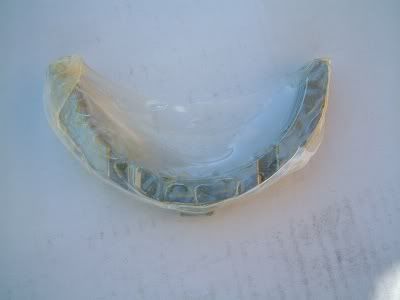
But what I am unsure of is this, doesn't the pressure start to build once the oil hits the end of the line or has back pressure? That's how some pumps work, from my experience, air/water pumps that is. Other wise it is just a free flow. I saw an analogy on the forums, for the valves. Put your thumb over the end of a garden hose, the pressure builds up behind your finger right? Let your thumb off and the pressure behind your thumb goes away to free flow. also you can go back a few feet on the hose and crimp it. And the flow is down to a dribble. Even if you have your thumb over the end. The porting I am thinking of is like the crimp in hose. Take away the crimp and you end up with more flow/pressure at the end of the line.
This is what I mean. (btw this is my old 22re cover un-cleaned):

See those lips and ridges? they create an eddy for the oil to flow backwards and essentially create a "kink in the hose"
But what I am unsure of is this, doesn't the pressure start to build once the oil hits the end of the line or has back pressure? That's how some pumps work, from my experience, air/water pumps that is. Other wise it is just a free flow. I saw an analogy on the forums, for the valves. Put your thumb over the end of a garden hose, the pressure builds up behind your finger right? Let your thumb off and the pressure behind your thumb goes away to free flow. also you can go back a few feet on the hose and crimp it. And the flow is down to a dribble. Even if you have your thumb over the end. The porting I am thinking of is like the crimp in hose. Take away the crimp and you end up with more flow/pressure at the end of the line.
This is what I mean. (btw this is my old 22re cover un-cleaned):
See those lips and ridges? they create an eddy for the oil to flow backwards and essentially create a "kink in the hose"
May 14, 2011 | 09:01 PM
#31
Yeah, I wasn't meaning that it would, I don't think that what you are considering taking off is going to dramatically change it where it would go in the opposite direction, I was just meaning that if you get carried away with it that your pressure would start to suffer. I was thinking like enlarging the hose but still applying the same area to build pressure as the smaller hose, would work, until you get to a certain point that the hose is too big, if you can follow my metaphor.
May 15, 2011 | 10:10 AM
#33
Thread Starter
Registered User
Joined: Mar 2011
Posts: 103
Likes: 0
From: New Castle, CO
Snorkel + BI swap + electric fan
While I have the engine out I will be doing a BI swap and snorkel. I bought some 3" pvc fitting's and rubber 3" couplers at the hardware store.
5' 3" pvc tube
2 45* 3" elbows
1 long sweep 3" elbow
2 3" rubber pipe couplers
total ~$22
The snorkel design I decided to go with is the in cab version. The pics are gone but this was the design thread. https://www.yotatech.com/forums/f123...-system-25167/
I will be picking up a longer positive battery cable, to go from the opposite side of the truck. And a new ground cable because the stock cable it so puny. I will route the new positive cable up over and in front of the radiator.
As well with the engine compartment things, I had removed my A/C compressor earlier. Now that the engine is out as well as the radiator, I have removed the A/C condenser radiator to improve the air flow over my coolant radiator.
I will also be doing an electric cooling fan mod. I have a fan out of a 91 V6 Grand AM. That is the perfect size to fit in the stock fan shroud. It is only a one speed fan but doing the wiring I will have a cut out switch to turn it off for water crossings. As it is no longer needed to be directly in front of the water pump I think I will try to flip the fan shroud during installation so the fan motor is off to the side of the pump pulley.
pics will be forth coming when I finally get the block/crank back and can start assembly.
May 15, 2011 | 07:21 PM
#34
Thread Starter
Registered User
Joined: Mar 2011
Posts: 103
Likes: 0
From: New Castle, CO
Ok I had a busy day today.
Installed the half link on the timing chain.
Cleaned a bunch of the motor/accessory mount parts.
Cleaned and painted the oil pan.
Cleaned the chambers on the head.
cc'd the chambers on the head.
Drilled through the oil return and head bolt holes in the head. 1/2" drill bit
While doing the head work I noticed some thing very bad. Cyl.'s 2 3 & 4 all had excessive amounts of carbon build up for only being ~300 miles. Took the better part of 2 1/2 hours to clean it up for the cc'ing. Earlier (I'm not sure if I posted ths or not) I noticed that pistons 2 3 & 4 were all way below deck height. That would cause low compression and carbon build up right? Anyway after the cc'ing they were:
#1 cyl. 56.0 cc's
#2 cyl. 56.1 cc's
#3 cyl. 55.9 cc's
#4 cyl. 56.2 cc's
Thats pretty close. I would be afraid to try and get them any closer to 56.2
Oh I did it the way I saw on HorsepowerTV used plexiglass and a syringe. I had the syringe (horses) it was only 10cc though. And the plexiglass 1/8" thick. Drilled holes for the head bolts and used the rocker assembly and some nuts. A hole in the center of the chamber area just big enough to fit the tip of the syringe. Fill the chamber with colored fluid keeping track of how much by the graduations on the syringe. when its full how ever much you used is how much your chamber is. .1 cc is a very small amount and does not take much to take out of the chamber if you are looking for absolute perfection. I used a dremel to clean up the casting and smooth things out.
Also while doing the head stuff with a dremel, I opened the oil passage route in the bottom side of the head and polished it smooth, with radii into the head bolt hole opening.
May 16, 2011 | 10:54 AM
#36
Thread Starter
Registered User
Joined: Mar 2011
Posts: 103
Likes: 0
From: New Castle, CO
Well I got some more done.
Gasket matched the head and cleaned all the head bolts, including chasing the threads.
Sent the rods and pistons in to be rebuilt/machined. Hopefully the bearings will come in soon enough, so I can send them in as well. Need the bearings to check the deck height and for balancing the crank/rods/pistons.
I decided against porting the head and figured a good gasket match will suffice. Want to keep the low end torque and all that.
May 16, 2011 | 09:46 PM
#37
Thread Starter
Registered User
Joined: Mar 2011
Posts: 103
Likes: 0
From: New Castle, CO
Reason I got the rods rebuilt is because I'm having ARP rod bolts installed and per the instructions they need to be rebuilt. If it weren't for that I would have had them just balanced and be done with it, they all checked out ok for roundness in the big end and they weren't twisted or bent that I could tell with a feeler gauge and plate glass.
Anyway it will only tack on another $48 to the machine bill. Which is getting pretty pricey.
so far:
block tanked $60
bored $115 "piston fitted"
turn crank $115
balance $185
flywheel turned/balanced - unknown should be cheap
harmonic balancer balanced - unknown but again should be cheap or included with crank balance.
pistons cut-down/valve reliefs cut $75/hour - estimate 2 hours
Last edited by Xyphus42; May 17, 2011 at 05:53 AM.
May 17, 2011 | 06:19 AM
#38
Thread Starter
Registered User
Joined: Mar 2011
Posts: 103
Likes: 0
From: New Castle, CO
Compression ratio calculation
I used this site:
http://kb-silvolite.com/calc.php?action=comp
I would think silvolite would be pretty accurate.
Cylinder Head Volume (cc) 56
Cylinder Head Vol (cubic in.) 3.416
Piston Head Volume (cc) 0
Piston Head Vol (cubic in.) 0.000
Gasket Thickness (in.) .047
Swept Volume (cubic in.) 36.905
Gasket Bore (in.) 3.740
T.D.C. Volume (cubic in.) 3.869
Cylinder Bore Diameter (in.) 3.662
Gasket Volume (cubic in.) 0.516
Deck Clearance (in.) -.006
Note: Neg. nubmer above deck, Pos. number below deck
Deck Volume (cubic in.) -0.063
Stroke (in.) 3.504
STATIC COMPRESSION RATIO
10.539
OPTIONAL DATA
Rod Length (in.) 5.827
Adjusted Stroke (in.) 3.499
Intake Closing Point (degrees)ABDC @ 0.050 lift plus 15 degrees 5
DYNAMIC EFFECTIVE COMPRESSION RATIO
10.525
The numbers in red are the ones I input into the calculator, after converting metric to standard of course.
May 17, 2011 | 07:38 AM
#39
Thread Starter
Registered User
Joined: Mar 2011
Posts: 103
Likes: 0
From: New Castle, CO
Just ordered the EGR block off plate kit from LCE.
My EGR hasn't been working for ages now. The Header blocks the flow at the exhaust side. As well as my EGR was snapped, thin cast at the tightening nut. So to clean things up I ordered the plates. 14.95 before shipping not to bad, plus it comes with the bolts.
My EGR hasn't been working for ages now. The Header blocks the flow at the exhaust side. As well as my EGR was snapped, thin cast at the tightening nut. So to clean things up I ordered the plates. 14.95 before shipping not to bad, plus it comes with the bolts.
May 18, 2011 | 03:23 AM
#40
Thread Starter
Registered User
Joined: Mar 2011
Posts: 103
Likes: 0
From: New Castle, CO
Went on over to Checker/O'Reilly and got some new vacuum hose. Just the standard dime store kind, black rubber. As well I picked up a tube of anti-seize and a tube of blue thread lock gel. Will work on gasket matching the upper/lower intake plenum's and installing the intake/exhaust studs, hence the thread lock. I don't want to have the studs come out every time I loosen the nuts for the manifolds or whatever. I went with the blue because I may have to replace them some day, and I don't want to have to torch the head to get them out. Will take some pics of the gasket matching I've done so far. I love my dremel. I have a die grinder but the dremel is sooooo much more versatile.


