
Chrishf12 85 4runner Build Thread
 Apr 14, 2016 | 07:30 AM
#61
Thread Starter
Registered User
Joined: Feb 2007
Posts: 521
Likes: 0
From: North Carolina
Calipers were pretty bad before hand. 2nd image shows half wire wheeled with pistons removed. Both were rebuilt with new seals and orings.
I did reuse all the pistons but one that was siezed. When I finally got it to freeup the top was pretty chewed by the vice grips. No problem, I just scavenged a piston from my old SFA calipers.


I did reuse all the pistons but one that was siezed. When I finally got it to freeup the top was pretty chewed by the vice grips. No problem, I just scavenged a piston from my old SFA calipers.
Last edited by chrishf12; Apr 14, 2016 at 07:33 AM.

 Apr 14, 2016 | 06:14 PM
#64

Registered User
Joined: Dec 2015
Posts: 23
Likes: 0
From: Charlotte, NC
 Apr 15, 2016 | 06:24 AM
#66
Just a heads up, the pads are definitely NOT THE SAME between 84-95. The early V6 pads are larger then the 4 cylinder pads and I believe at some point they all started using the larger pads.
Apr 17, 2016 | 09:28 AM
#67
Thread Starter
Registered User
Joined: Feb 2007
Posts: 521
Likes: 0
From: North Carolina
That's odd, The 2 versions i had were dimensionally the same. 1985 sfa set and a 1994 v6 set. Both brand new.
Last edited by chrishf12; Apr 17, 2016 at 05:49 PM.
Apr 25, 2016 | 04:36 PM
#69
Registered User
Joined: Dec 2015
Posts: 23
Likes: 0
From: Charlotte, NC
I can tell you this though, the pictures don't do it justice...he has put so much work into this thing looks like it's fresh out of the factory!
Last edited by jrpsaros@gmail.com; Apr 26, 2016 at 05:09 AM.
Apr 25, 2016 | 06:42 PM
#70

Registered User
Joined: Apr 2016
Posts: 8
Likes: 0
Looks amazing thus far!! diggin' the tire/ wheel combo.
Picked this up not too long ago and has been a solid project thus far. I too did some sound proofing. hopefully mine will look that good sometime in the future
Here's a link to my build thread if you are interested: http://www.toyota-4runner.org/classi...-el-chapo.html
Picked this up not too long ago and has been a solid project thus far. I too did some sound proofing. hopefully mine will look that good sometime in the future
Here's a link to my build thread if you are interested: http://www.toyota-4runner.org/classi...-el-chapo.html
 Apr 26, 2016 | 04:27 AM
#71
Thread Starter
Registered User
Joined: Feb 2007
Posts: 521
Likes: 0
From: North Carolina
Looks amazing thus far!! diggin' the tire/ wheel combo.
Picked this up not too long ago and has been a solid project thus far. I too did some sound proofing. hopefully mine will look that good sometime in the future
Here's a link to my build thread if you are interested: http://www.toyota-4runner.org/classi...-el-chapo.html
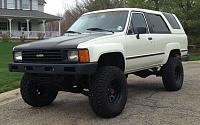
Attachment 104724
Picked this up not too long ago and has been a solid project thus far. I too did some sound proofing. hopefully mine will look that good sometime in the future
Here's a link to my build thread if you are interested: http://www.toyota-4runner.org/classi...-el-chapo.html
Attachment 104724
May 13, 2016 | 10:52 AM
#72
Thread Starter
Registered User
Joined: Feb 2007
Posts: 521
Likes: 0
From: North Carolina
Anyone have an extra clock plug and pigtail laying around? Mine was cannibalized for an aftermarket stereo. Now that I'm adding a clock I need to find the plug to wire back in.
Parts truck had all the wiring robbed before purchase, so no luck there.
Parts truck had all the wiring robbed before purchase, so no luck there.
May 18, 2016 | 10:44 AM
#73
Thread Starter
Registered User
Joined: Feb 2007
Posts: 521
Likes: 0
From: North Carolina
Lots to update on this thing. Been working on it more than updating here. Making steady progress, carpet installed and dash painted and reinstalled. Waiting on my seats so I can get this on the road and break in the motor. Hopefully this week!
I did run into a few issues after getting the interior in.
-Radio does not seem to pick up FM stations well.
-Horn only works at full lock even after the .22 shell casing trick.
Left to do.
-Rewire stereo to stock stereo wires. (PO had used the clock wires since this was originally a DLX with no clock.)
-Horn Spacer for the brass contact ring.
-Wire in rearview camera.
May 18, 2016 | 06:06 PM
#74
Thread Starter
Registered User
Joined: Feb 2007
Posts: 521
Likes: 0
From: North Carolina
Obligatory interior progress pics:
Bedliner DOWN!

Carpet install started. Now complete.

The only part of this truck I have not ventured into before now was the dash. Guess it was time.


The fan was still working blowing fine, even with an old mouse house.

Started Fiberglassing my dash pad to cover up the hardened vinyl.

Decided that was taking too long to build up for a base. So I went with a plastic coverlay instead. I have a spare dash pad if I need to change it back in the future.
Installed a clock and altimeter I sourced from Craigslist. Also the entire dash, console and trim were painted with SEM Color Coat "Bluebird Brown". It's not an exact match to the factory color but close. I actually like this shade a little better than factory.

Installed most of my stereo components while the dash was out. I found a deal for a Pyle double din stereo unit on amazon a while back, had a lot of features that really drew me to it. Navigation, bluetooth, dvr dash cam, backup camera all integrated. I almost put it in my 05 F150 but I decided to hang on to it for the runner. Kenwood 4" speakers in the dash, they may get upgraded to Polk 4" speakers in the future but they get me started for now.
GPS antenna location

All installed. Waiting on my seats.

Bedliner DOWN!
Carpet install started. Now complete.
The only part of this truck I have not ventured into before now was the dash. Guess it was time.
The fan was still working blowing fine, even with an old mouse house.
Started Fiberglassing my dash pad to cover up the hardened vinyl.
Decided that was taking too long to build up for a base. So I went with a plastic coverlay instead. I have a spare dash pad if I need to change it back in the future.
Installed a clock and altimeter I sourced from Craigslist. Also the entire dash, console and trim were painted with SEM Color Coat "Bluebird Brown". It's not an exact match to the factory color but close. I actually like this shade a little better than factory.
Installed most of my stereo components while the dash was out. I found a deal for a Pyle double din stereo unit on amazon a while back, had a lot of features that really drew me to it. Navigation, bluetooth, dvr dash cam, backup camera all integrated. I almost put it in my 05 F150 but I decided to hang on to it for the runner. Kenwood 4" speakers in the dash, they may get upgraded to Polk 4" speakers in the future but they get me started for now.
GPS antenna location
All installed. Waiting on my seats.
May 18, 2016 | 10:52 PM
#76

Registered User
Joined: Mar 2013
Posts: 1,060
Likes: 48
Is this the coverlay you used? Except a different year obviously.
http://www.ebay.com/itm/1987-88-TOYO...FWv7bR&vxp=mtr
http://www.ebay.com/itm/1987-88-TOYO...FWv7bR&vxp=mtr
May 19, 2016 | 06:58 AM
#77
Thread Starter
Registered User
Joined: Feb 2007
Posts: 521
Likes: 0
From: North Carolina
Is this the coverlay you used? Except a different year obviously.
http://www.ebay.com/itm/1987-88-TOYO...FWv7bR&vxp=mtr
http://www.ebay.com/itm/1987-88-TOYO...FWv7bR&vxp=mtr
Fit and finish is acceptable, but still noticeable that its a coverlay if you pay much attention. Since I installed this off the vehicle, my vents were out. To install them back I had to touch the corners of the vent buckets to the grinder. No big deal it will never be noticed.
Last edited by chrishf12; May 19, 2016 at 07:02 AM.
May 19, 2016 | 12:29 PM
#78
My rear cargo panels are very brittle from the sun, I bet once the Monstaliner dries it adds some rigidity and strength to back to them!
Last edited by rustED; May 19, 2016 at 12:44 PM.
May 20, 2016 | 09:57 AM
#79
Thread Starter
Registered User
Joined: Feb 2007
Posts: 521
Likes: 0
From: North Carolina
Your interior looks great, nice work! I'm in the process of working on my interior, and have looked at Monstaliner (and plan to use it to do the exterior) but wondered if it could be used on the interior plastic as well. Did you have to do any special prep to the cargo area side panels before applying it. Did you have to use any adhesion promoter?
My rear cargo panels are very brittle from the sun, I bet once the Monstaliner dries it adds some rigidity and strength to back to them!
My rear cargo panels are very brittle from the sun, I bet once the Monstaliner dries it adds some rigidity and strength to back to them!
Pretty much my standard prep for any plastic work. I sanded with 400 grit or a red scotch brite sanding pad to rough up the surface then wiped down with lacquer thinner before application.
I have never used an adhesion promoter before and have not had any issues with pieces holding up. Then again I am not rough on my vehicles.
I would recommend some form of prep. I was cleaning up the shop last week and the leftover monstaliner peeled out of my mixing bucket very easily.


