When you click on links to various merchants on this site and make a purchase, this can result in this site earning a commission. Affiliate programs and affiliations include, but are not limited to, the eBay Partner Network.
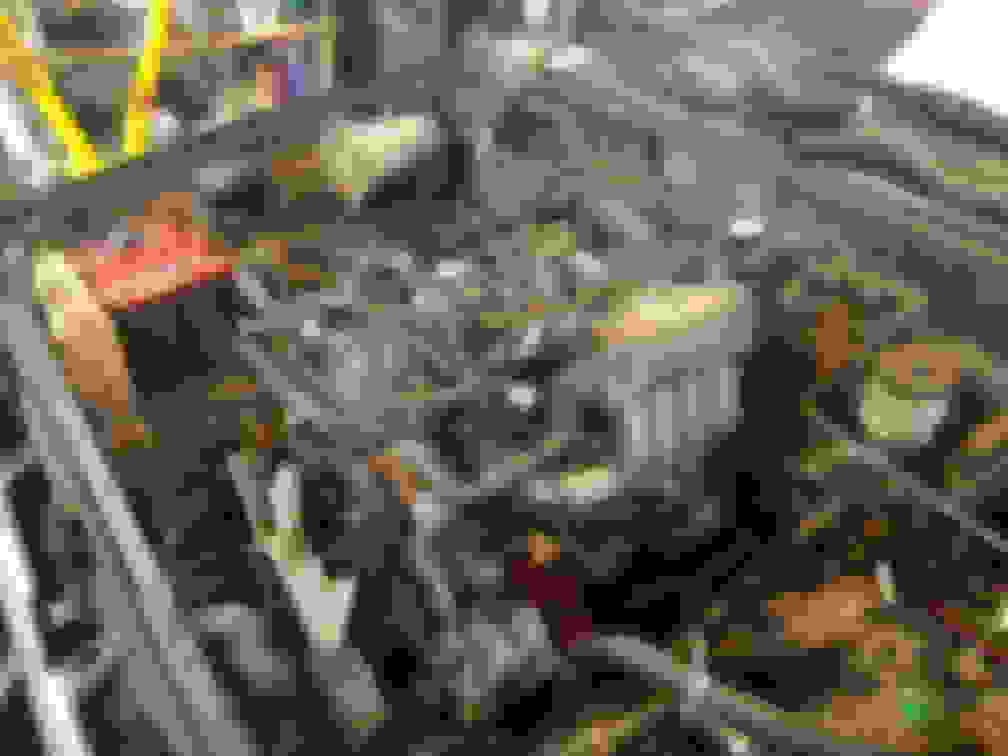
Partway through a 3RZ swap into my 84, so figured I'd post some pics and info here. Engine is in as of a week ago, now taking care of all the other stuff. 22R started blowing blue smoke about a month ago, had 0 compression on #2 cylinder, and I've already tore into this thing twice before in the 10 years I've owned it so figured what the heck, gonna dive into a 3RZ swap since I've read so many good things about it. A few words of advice here from the mistakes I've already made, and I'm sure I'll make a bunch more. #1 FIND A DONOR VEHICLE, THE WHOLE FRICKIN THING!. I looked for a few weeks, couldn't find anything totaled with a good engine in my area so I bought a JDM engine. (Japan Domestic Market). They put 50-60K on the vehicles, than part em out due to registration fees climbing so high the older a vehicle gets, at least that's how I understand it to work. Engine arrived with computer and wiring harness and every dang hose cut as well as the header, chopped up, don't know why they cut the header up. Computer had no legible label so have no idea what it is. Ended up sourcing a 2003 Tacoma harness, did a pin out on both harnesses and they seem identical as far as where they go on the jacks that plug into the computer, although the JDM harness has quite a few extra plugs. Also sourced a used computer so I know what I have to work with. Got some motor mounts from Chilkat designs, work like a champ, bellhousing from a junkyard in CA, and all the flywheel/clutch stuff from Marlin Crawler. Engine is also missing the power steering reservoir, MAF housing/sensor, and air box/pipe. Since my truck was carbureted and the fuel tank is in pretty rough shape I sourced a tank from a local junkyard also for a 2003 Tacoma. It's about 8 inches longer than my stock one so I had to fab up some mounts but doesn't fit half bad. Ground clearance is good, although I am concerned about the height to the bottom of the bed but I'll worry about that later. Did some measuring and it is going to be tight, the Tacoma tank bulges up on top a bit higher than the stock one did. Here is a pic of the engine installed, I'll post some more up later.
Here is a pic of the gas tank and how I extended the rear mount. Was surprised at how things hadn't changed much from 84 to 03 as far as mounting holes. The 3 mounting holes as well as angle of the mounting bracket matched up so I was able to re-use the rear bracket, just cut if off the crossmember, extended it with some angle iron and welded it into position. For the front I was able to cut the front mounting bracket into a small strip and use it to pinch mount the lip of the front of the tank to the original location, one of the holes lined up so was able to integrate that into the bracket.
Worked on routing the wiring harness to the inside of the cab tonight. There isn't a whole lot of room and you have to stay clear of the exhaust manifold. Pulled the fender off and followed the existing wiring through the firewall by cutting a hole in the side of the inner fender. It's going to be tight, not much wiggle room but I should be able to mount the computer where the existing computer is once I pull it out. The existing hole as well as rubber grommet work, plenty of room, just had to trim the inner portion of the grommet and feed things through.
Sweet build! Is that a big PA speaker I see under the hood?
It is! my CB has a PA switch, my kids hate it when I drive up and yell at them through the PA! "Move those bikes out of the driveway!" Also good for getting the attention of people who are not paying attention at stop lights!
Got my FSM's today.....not impressed. They show the end of one hose, but don't show where it goes, no overall diagram of vacuum hoses or water hoses, once again here is one end of it but we're not going to show you where it goes! Drawings aren't very accurate as to where things are and some things are completely missing. And to top it off, they are of such low quality that pages continually pop out of the binding, and these were brand new. So, a few questions if anyone can help me out, I'll even use pictures!
1 for sure and 2 99.9% sure water hoses that go to the heater, sooooo, which one goes where? Looking in the engine bay, can anyone tell me which one goes to the passenger side connector and which goes to the drivers side one. And number 3 I'm guessing goes to the brake booster but the drawing in the FSM shows it about 8 inches further back and coming from below the intake. Ok, edit #1, looked again and above hose 3 coming off the intake is a nipple for a hose that looks more appropriate for the brake booster, nothing I can find in the FSM about it though. If someone had a pic that showed the hoses and where they hook up that would be awesome. Maybe we could forward it to Toyota for inclusion in the next FSM!
Update: 1 and 2 are heater lines. Line 1 hooked to the passenger side port of the heater and line 2 had that line that branched off to the passenger side, still don't know what that was for. Ended up pulling pipe 2 off to where it connects to the rear of the engine as well as the portion that branched off to the passenger side and hooked the heater hose there and that goes to the drivers side port of the heater. (side with the heater valve)
This is the other end of that pipe that I believe is for the brake booster, where the heck does this hook to? I don't have the air box, I'm thinking it goes to the air box. FSM doesn't show this pipe at all. Any help is appreciated!
Ended up just taking this pipe off, doesn't appear to be needed for anything.
Last edited by 84YotaBuck; Sep 7, 2016 at 07:54 PM.
Moved the battery to the Drivers side, and installed the new Air Cleaner setup after I was able to finally find a MAF housing, bonus it came with a sensor, here's to hoping it's still good.
Did have to remove the windshield washer fluid container to get the air cleaner to fit, but I can find a new place for that later.
so just curious. a lot of guys move the gas tank to the driver's side on 2/3RZ swaps since the exhaust manifold is on the passenger side.
What are your exhaust plans?
Thought of moving the gas tank to the drivers side so I could just straight shot the exhaust down the passenger side but a lot of work involved with that. Have to relocate the drivers side rear shock, and the cab isn't designed to have the fuel tank sit under it on the drivers side. On the passenger side if you look at one of the earlier pictures you can see it's shaped to allow the gas tank to fit under the rear part of the cab. Soooo, going to do a crossover with the exhaust and run it down the drivers side. Seen a few guys do it that way, that way I can re-use the existing hangers, just need to route the fuel lines away from it.
Will trim the hoses to fit once I get everything hooked up and am ready to put the bed back on, in the meantime just leaving em long.
This is the base I made for the Evap Canister, needs to be close to the tank due to that corrugated tube, just need to come up with a way to secure it.
Anyone help with where these final 3 connections go? Believe one goes to the VSV, one to the intake and the large one is a drain which can be left open.
Update: Went to the dealership and they had a V6 Tacoma up on the lift, had the same evap canister and the mechanic let me look at it. Far left port goes to silver thing on top of gas tank (had the port to the right of it hooked to that) mechanic said it's a rollover shutoff valve he suspects. The next 2 ports to the right head up to the engine bay to some valve setup that I don't have. (he suggested just plugging them off) the one next to the large port (air drain) goes to the airbox to clear out the canister when it gets the signal from the valve setup in the engine bay. More research is needed.
Think this is the VSV with that open port, since the engine is a JDM things seem to be in weird locations. According to the FSM this is on the firewall.
Annnnnd, it runs, fired it up yesterday!!! I'll post up a short video once I figure that out. This thing has been a chore and cost way more than I anticipated. Once again, if you plan on doing this get a donor vehicle with ALL the parts and pieces. Engine sounds great, good oil pressure, fires right up. Last big thing is to get the exhaust done. Bought the LCE header and that's currently all that's on there.
Last edited by 84YotaBuck; Sep 7, 2016 at 08:08 PM.
Put the bed back on this weekend. Had to trim some of the crossmembers for the bed that sit right over the tank, but other than that everything fit up pretty good. Did some shade tree mechanic adapting to get the fuel filler hose to work, no pics of it here but I used the original filler neck from my 84 with a 2003 Tacoma filler neck that I cut the first inch off of and about a 6 inch section out of the middle and used fuel line in between all the pieces, actually worked pretty good.
Here is the evap canister with the bed on.
Here is a shot of the gas tank, you can see where I trimmed the cross member as it goes over the tank. Another shot of the whole tank and evap.
Time to get rid of the old parts, I'll post more pics in the For Sale section but all this needs to go. Prefer the engine goes all together so I don't have to spend the time tearing it down. Roughly 35000 miles on rebuild, was at 210000ish if I remember correctly and now I'm at 247000. Head is darn near new, probably less than 20000 on it. After the rebuild the rings didn't seat so I tore it down again and used cast iron rings, had the old head tested and it leaked and couldn't be milled any more so ended up buying a new one. Weber 32/36 Carb, LCE spiral spacer, Engnbldr 268 Cam. LCE Air cleaner (With a hole put in it and adapter so I didn't use a breather cap and just piped any blow by back into the air cleaner like the stock setup. Starter, Emissions module, Voltage Regulator, Power Steering reservoir and Throttle Cable. Intake box from the 3RZ that I'm not using. Marlin Crawler heavy duty clutch and pressure plate. Not pictured, because I forgot about it until now is the coil and ignition, have probably less than 10000 miles on them. Things are pretty oily since when #2 lost compression shot oil everywhere. Guessing the rings went on the piston. No ugly noises, didn't run half bad when I parked it after she got me home, still had good oil pressure and no overheating. I'm guessing a re-ring would probably get it going again. Shoot me a PM if you're interested in anything, I'm in Washington State, due West of Seattle about 5 miles as the crow flies. Getting the exhaust done on the 3RZ this Thursday, than it's time for a test run!
Got the exhaust done today, noticed by idle was running high, other than that the truck runs great. Played around with it and ended up pulling the throttle body off to clean the Idle Air Control valve, was pretty rusty inside so bought a new one, and now I have a new problem. Idle was running around 1500, now it's running around 850 but I have this funky thumping sound coming from the air tube like something is cycling back and forth. The only thing I did was clean up the throttle body and change that Idle Air Control valve could the IAC be cycling back and forth and why? That's what I'm leaning towards, any input?
whats the overall cost of the swap running you? does the 3rz use the same motor mounts and tranny as the 22r? just got done with a 3.4l swap in my 85 cost around 3k. i used a tranny and t case off of a 3.0 and had to fab my own motor mounts
Overall cost is way too damn much, but that's my fault, way over the 3K you've spent, luckily the OT is kicking in at work. I bought a JDM engine so all I had to start with was the engine, wiring harness and computer. Motor mounts, bought the Chilkat Design mounts, worked fine, no issues like I've read on other posts. Still using my G52 Tranny, had to source a bellhousing though and the clutch, pressure plate, throwout bearing, pilot bearing for a 3RZ, got all those through Marlin Crawler.
Took a video of my idle problems. Runs fine but idled high so I replaced the IAC and that's when the problem started. With the IAC hooked up I idle at around 800-850 but engine stumbles and has this weird thumping/burping noise. Unhook the IAC and runs fine but idles too high, appreciate it if you could take a look at the video and provide any input. Thanks.
Terry was asking how the motor works over the 22R.....OMG, unplugged the IAC to alleviate the funky idle/sound issue I'm having so I just have a high idle and took it out for a drive around town. To quote my father, "Damn this thing runs like a raped ape!". I LOVE it! Was tearing around town with absolutely no issues, tons of power and the smooth operation of the EFI. Once I get this idle issue figured out, finally broke down and made an appointment at the local Toyota stealership to have them take a look at it, I will be totally happy with the new engine and highly recommend it to anybody thinking about doing it. Like I said before, don't make the mistakes I made, be sure to find a wrecked/junkyard vehicle with all the parts.

 Jul 26, 2016 | 08:06 PM