
203Cree's 1985 4Runner Build-Up Thread - Project "Hellrunner"
 Nov 11, 2009 | 05:09 PM
#1
Thread Starter
Registered User
Joined: Jan 2009
Posts: 121
Likes: 0
From: Olathe, KS
203Cree's 1985 4Runner Build-Up Thread - Project "Hellrunner"
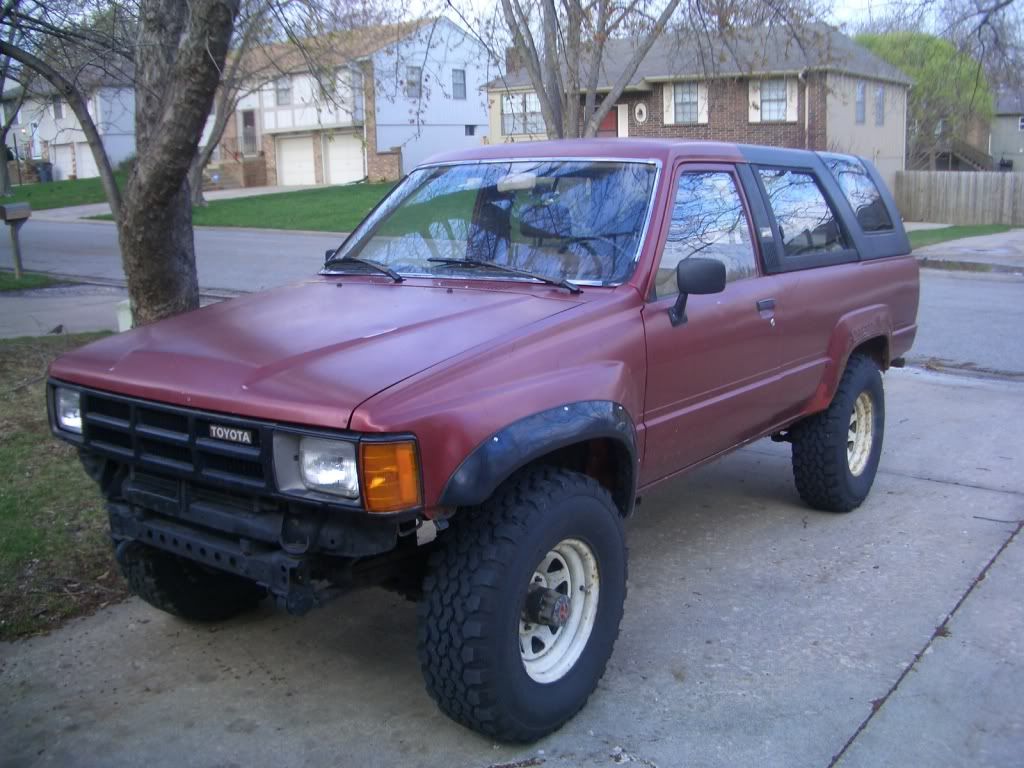
So I picked this thing up in Dec 08. Got it cheap because the guy had to get rid of some toys and since it didn't run, he thought it best to let it go. Brought it home, tossed in a battery and sprayed some ether and it fired right up. It took a bit more than that to make it road worthy, lol, but that was the start of it.
Previous thread with some "build" related stuff in it...
Part one of the problem fixin
Mostly been doing just general maintenance to it thus far, but I'm getting ready to do some more serious stuff in the near future. Like, as in now, lol.
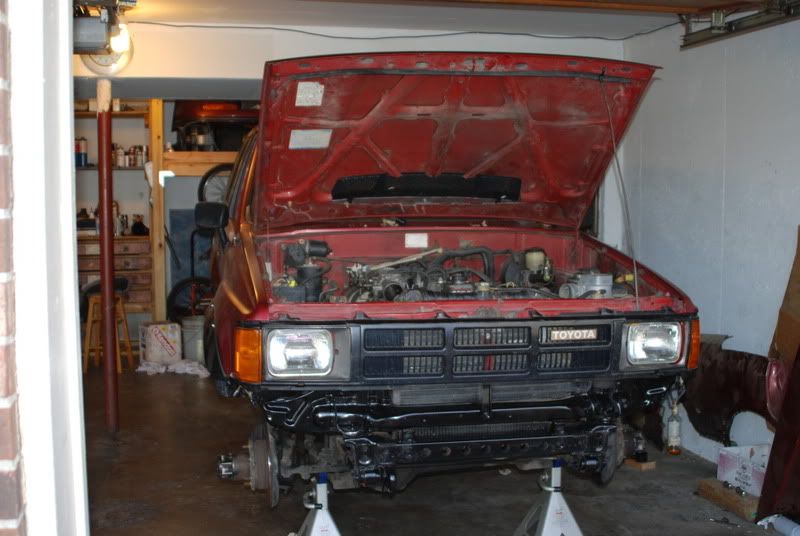
Just got home with a new truck. 88 22RE/W56 truck. It's trashed but it's heart will live on. This should also fix the driveability issue I have not been able to track down.
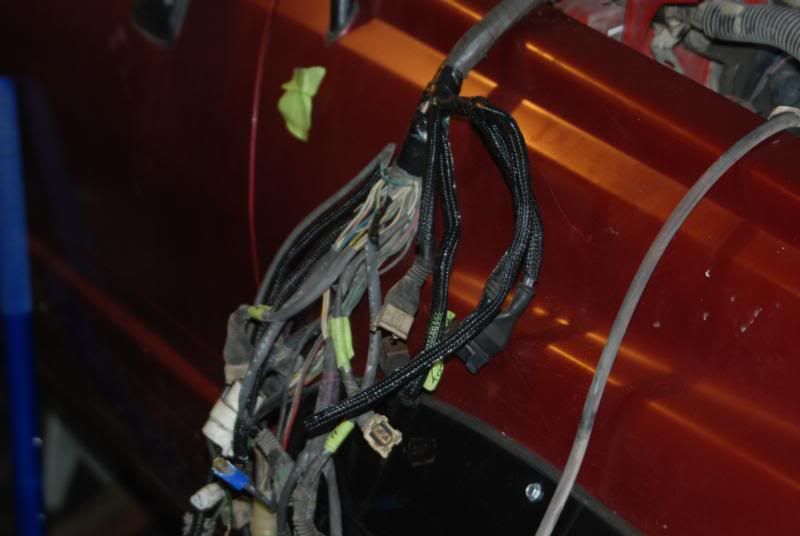
I got about an hours worth of work in on the trucks tonight, started getting the wire harness out of the way for the swap. There's going to be some time spent on cleaning it up, lol. Not sure if it was routed bad from the factory or if someone else beat me to it, but I'm going to extend some of it and reroute some things away from the engine. Probably replace most of the sheathing as well. If there's one thing I'm anal about it's wire harnesses, lol. Drives me bonkers when they're messy.

(Gotta have a list of things done/to do and parts needed, lol)
Anyway, that's that for now, I'll update as I go.
Previous thread with some "build" related stuff in it...
Part one of the problem fixin
Mostly been doing just general maintenance to it thus far, but I'm getting ready to do some more serious stuff in the near future. Like, as in now, lol.
Just got home with a new truck. 88 22RE/W56 truck. It's trashed but it's heart will live on. This should also fix the driveability issue I have not been able to track down.
I got about an hours worth of work in on the trucks tonight, started getting the wire harness out of the way for the swap. There's going to be some time spent on cleaning it up, lol. Not sure if it was routed bad from the factory or if someone else beat me to it, but I'm going to extend some of it and reroute some things away from the engine. Probably replace most of the sheathing as well. If there's one thing I'm anal about it's wire harnesses, lol. Drives me bonkers when they're messy.
(Gotta have a list of things done/to do and parts needed, lol)
Anyway, that's that for now, I'll update as I go.
Jan 7, 2010 | 07:19 AM
#2
Thread Starter
Registered User
Joined: Jan 2009
Posts: 121
Likes: 0
From: Olathe, KS
Some quick update pictures. Due to the Holidays I'm not done yet, although I should be in the next week or so.
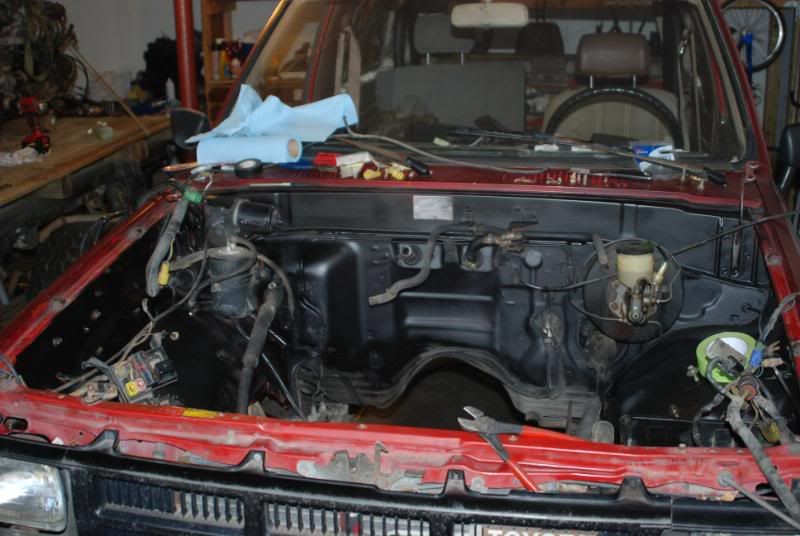
Cleaning up the harness...
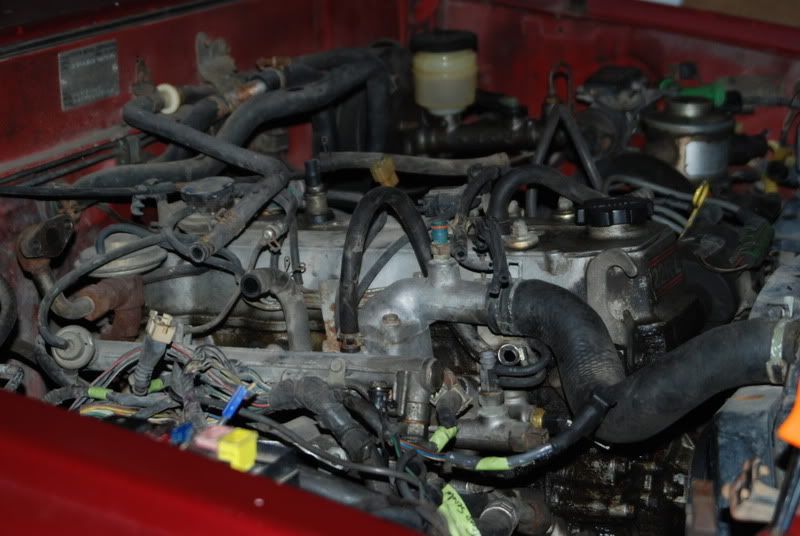
Cleaning up the rest of the engine bay...
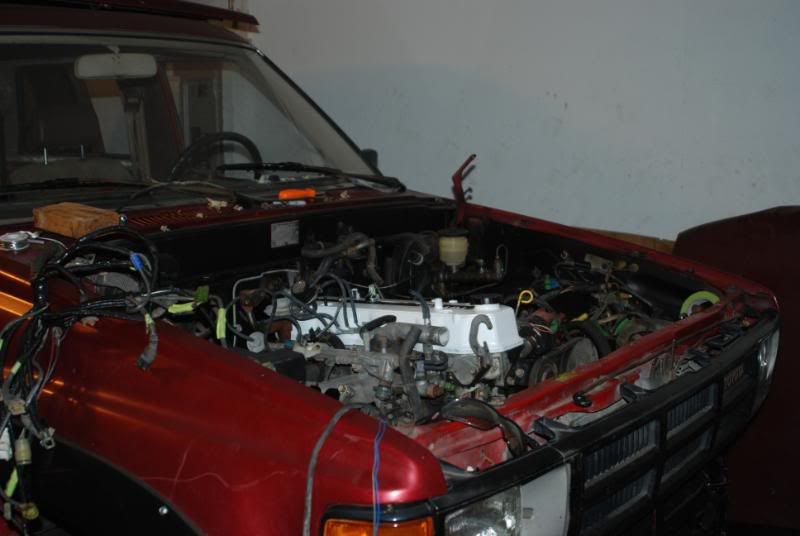
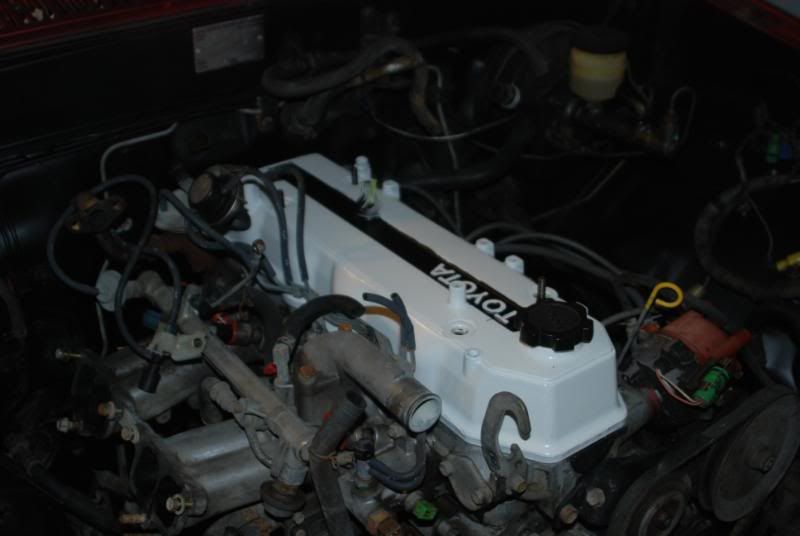
Oh hey, the new motor found a home....
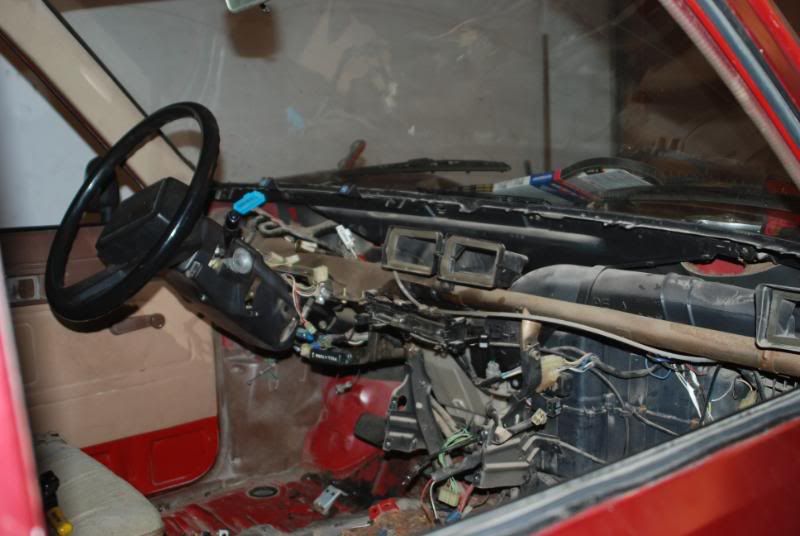
Pulled the dash to drill the firewall for the clutch MC. Nice of Toyota to use the same pedal boxes...
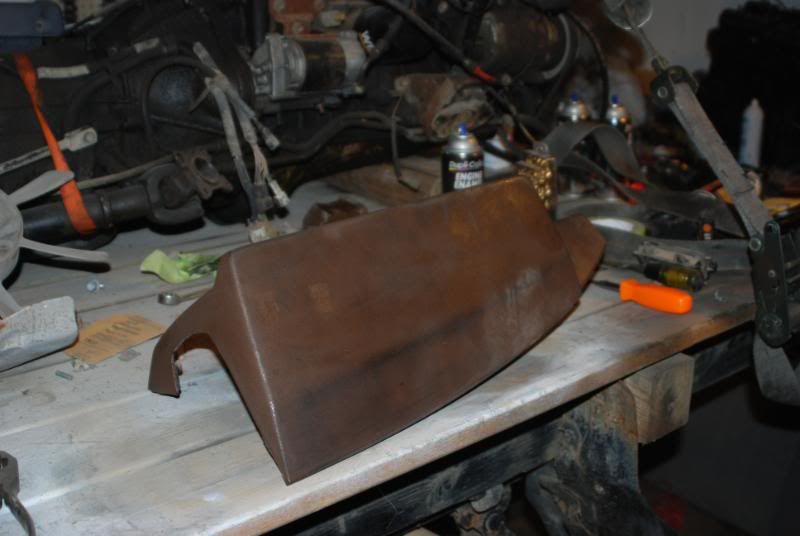
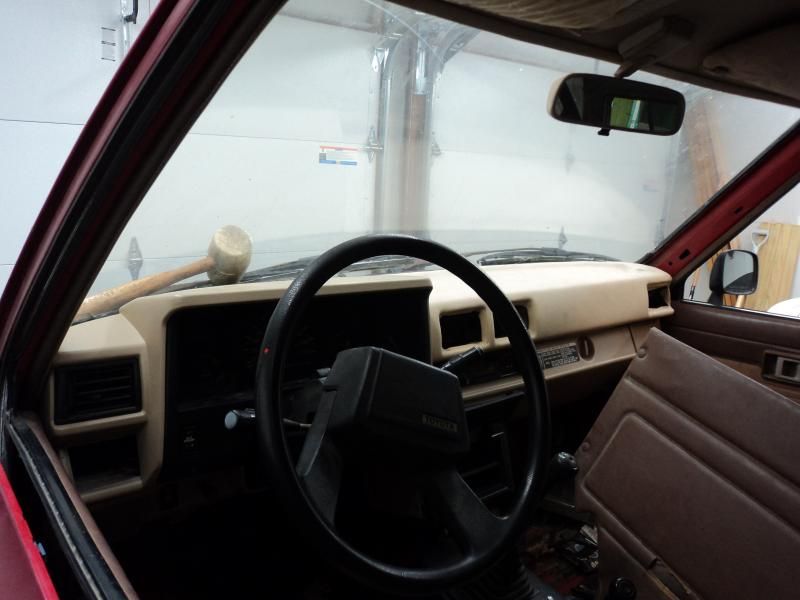
Decided I'm going to do a color change on the truck. As such, I'm going to do a color change in the interior. Old dash color...
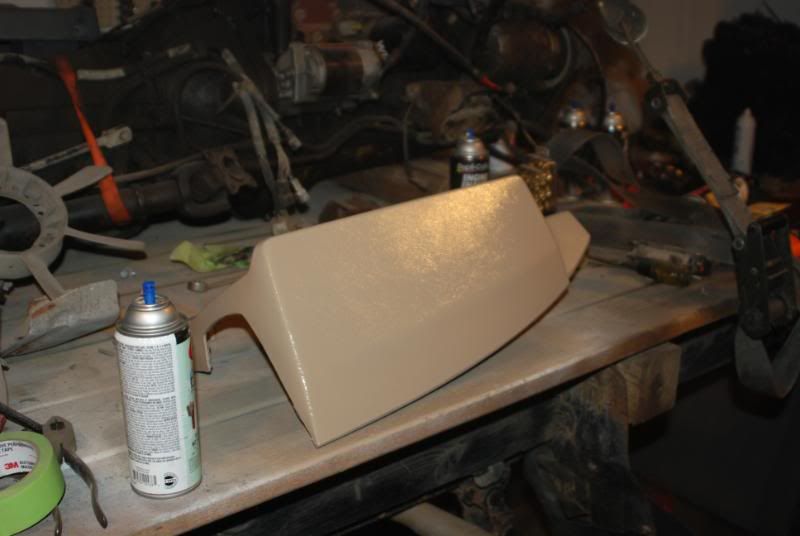
New Color....
So yeah, I'm going to get it finished up for driving till this summer, probably after I get back from my honeymoon. Then I'll tear it back down and hopefully get some more stuff done, like rebuilding the front end, gears and lockers front and rear, and a paint job.
Cleaning up the harness...
Cleaning up the rest of the engine bay...
Oh hey, the new motor found a home....
Pulled the dash to drill the firewall for the clutch MC. Nice of Toyota to use the same pedal boxes...
Decided I'm going to do a color change on the truck. As such, I'm going to do a color change in the interior. Old dash color...
New Color....
So yeah, I'm going to get it finished up for driving till this summer, probably after I get back from my honeymoon. Then I'll tear it back down and hopefully get some more stuff done, like rebuilding the front end, gears and lockers front and rear, and a paint job.
 Jan 7, 2010 | 07:34 AM
#5
Registered User
Joined: Mar 2008
Posts: 6,059
Likes: 101
From: Sacramento, CA
If you have a Warehouse Paint located near you, and it has an Automotive section ( some dont ) you can buy 3M interior restoration paint. I highly recommend it. I used the black and it seriously came out with factory quality. Its a Dye based paint and holds up to some abuse. Be sure to heat gun it, and let it sit for awhile though. With it being a Dye based, it does take some time to dry.

 Jan 7, 2010 | 07:49 AM
#7
Thread Starter
Registered User
Joined: Jan 2009
Posts: 121
Likes: 0
From: Olathe, KS
If you have a Warehouse Paint located near you, and it has an Automotive section ( some dont ) you can buy 3M interior restoration paint. I highly recommend it. I used the black and it seriously came out with factory quality. Its a Dye based paint and holds up to some abuse. Be sure to heat gun it, and let it sit for awhile though. With it being a Dye based, it does take some time to dry.
Trending Topics
Mar 31, 2012 | 05:37 PM
#9
Thread Starter
Registered User
Joined: Jan 2009
Posts: 121
Likes: 0
From: Olathe, KS
Wow, been awhile since I updated this. Here goes....
I finished the motor and 5spd swap, drove it for about 7 months and the motor out of the 88 went south. Timing guides broke and I lost patience with it. Sat for a few months before I finally had a balanced/blueprinted RE built for it. Sadly, it wasn't ready until Feb of 11, at which time I was prepping for a deployment to Afghanistan.
Got motor number 3, for those counting, assembled and installed the weekend before I was to leave. Everything went without a hitch right up to the water pipe that connects to the bottom of the intake manifold. Bolt broke. Like a dummy, in a hurry, I tried to drill it out on my back with the manifold installed. Like I said...... Dumb. Ended up with a snapped bolt and an extra hole.
SOOOO, that's pretty much how it has sat for the last year. Today, I went to the yards and scored a perfect lower intake off a 91 pickup AND all the seats out of a 94 SR5. Tan to boot. Soon as I can manage to haul the truck back down here (stored it at my parents so my wife could put both cars in the garage while I was absent) it's on like donkey kong.

 Dec 23, 2012 | 02:27 PM
#11
Thread Starter
Registered User
Joined: Jan 2009
Posts: 121
Likes: 0
From: Olathe, KS
Second Gen front seats are in. Drivers direct bolt in, Passenger is going to require a new hole. Oh well.
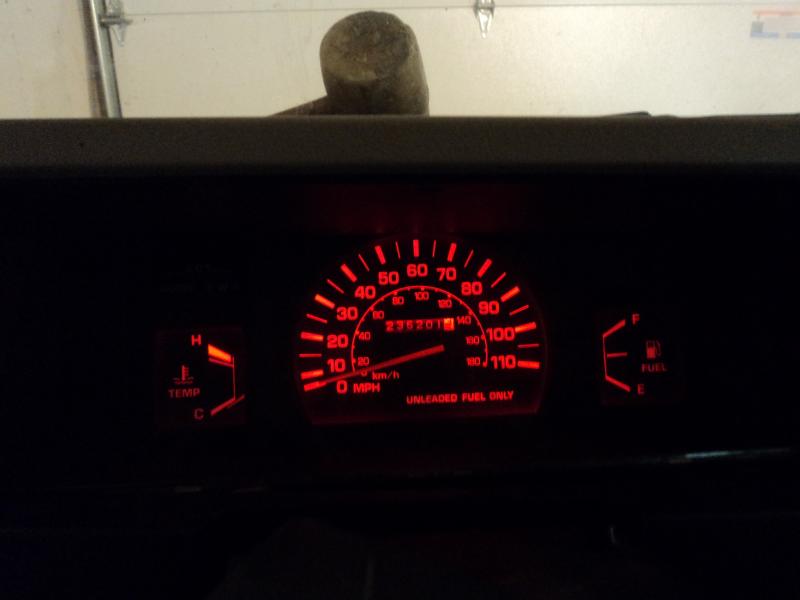
Changed out the dash cluster lights for Red LED's. Very happy with how that turned out.
New intake is in place, everything is back together. However, I'm either off a tooth or I have a fuel pressure regulator going bad. Take 3 or 4 tries to get it to fire. I hadn't dialed it all in after the rebuild tho, so it's probably just the timing off.
Waiting for some money Uncle Sam owes me, then I'll be tearing the front end apart and doing the vented rotors/bigger calipers/bigger MC and probably a new booster. Also thinking about deleting the LSPV in the back and just going with a prop valve under the hood.
I'll get some pics up of the dash here soon.
Dec 28, 2012 | 02:05 PM
#13
Thread Starter
Registered User
Joined: Jan 2009
Posts: 121
Likes: 0
From: Olathe, KS
Popped of the valve cover this afternoon, checked the timing. I was off a tooth. However, I also have a bad FPR. The good news is that if I trick the fuel pump, she fires up like she should and idles nice and smooth, even with 2 year old gas in her tank. So, one more hurdle down I suppose.
Mar 18, 2013 | 06:19 PM
#14
Thread Starter
Registered User
Joined: Jan 2009
Posts: 121
Likes: 0
From: Olathe, KS
Went through the entire fuel and EFI systems. Circuit open relay was corroded, cleaned that up and it's working great. EFI thermo time switch was bad, picked one of those up at the yards for 5 bucks. Got that installed, and FINALLY motor number 3 is doing all she should be doing. Starts great, idle circuit works like it should, everything is good to go.
However.
Noticed while I was moving it around that the throwout bearing is making some odd noises, so I'm wondering if I got something out of whack in there during the motor install. So, I'll drop the trans this weekend and see what's going on.
While I was at the yards, I also scored the tailgate trim piece I have been looking everywhere for. Even had both tag lights in it. Have one lens for it, so have to track down another.
Back window is doing something odd. Direct power runs the motor fine, but get nothing at the switch. I'm guessing it's that stupid relay box. I'll probably just bypass that all together since I plan on running a soft top down the road.
Haven't had time to order front end parts yet. Been crazy at work, and now they're talking about cutting me 8hrs a week, so it might be even longer before I get to it. Good news is that I don't really have to do all those upgrades to get it back on the road, just really wanted to.
Mar 24, 2013 | 05:06 PM
#15
Thread Starter
Registered User
Joined: Jan 2009
Posts: 121
Likes: 0
From: Olathe, KS
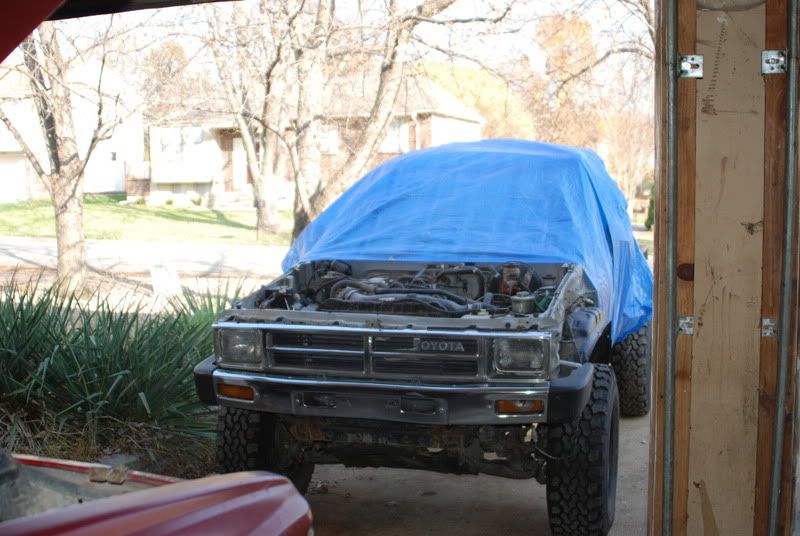
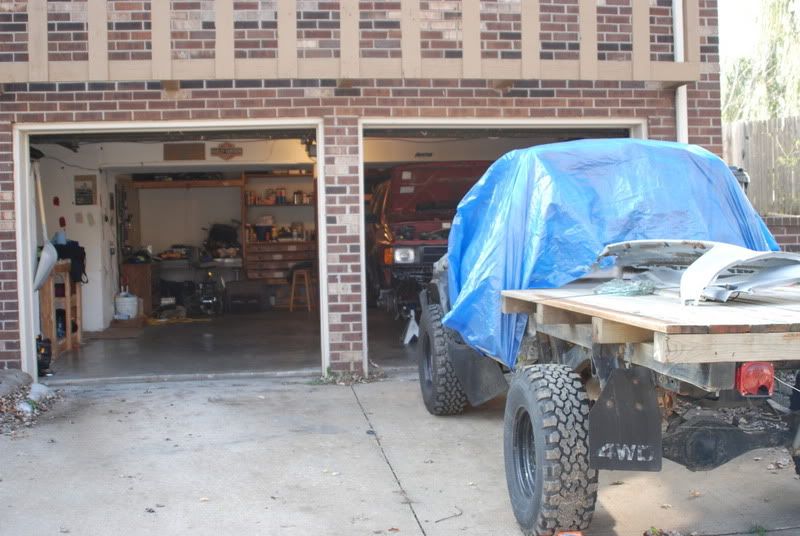
Finally got around to taking a camera in the garage with me. Here's some pics of things as they sit. This project is taking way longer than it should, but this isn't a DD at the moment, and with Uncle keeping me busy here and there....
Anyway.
Guages with the Red LED....
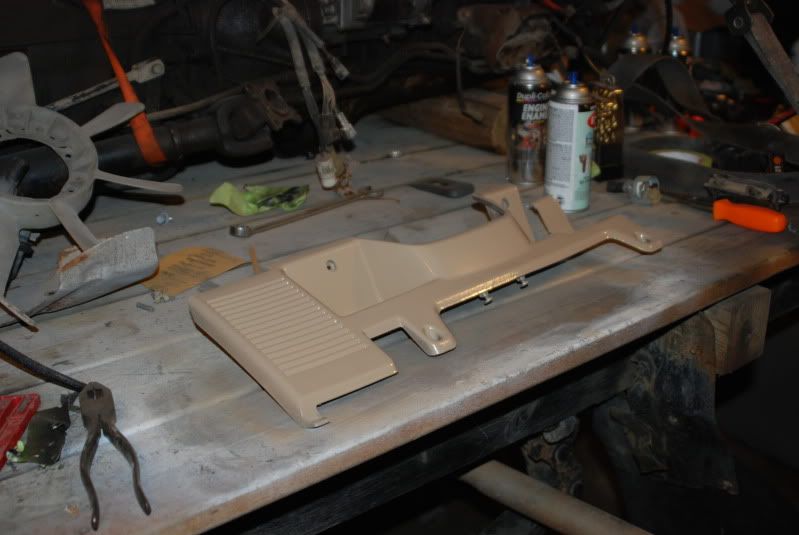
Dash color change. Not fully assembled here but you can get the idea....

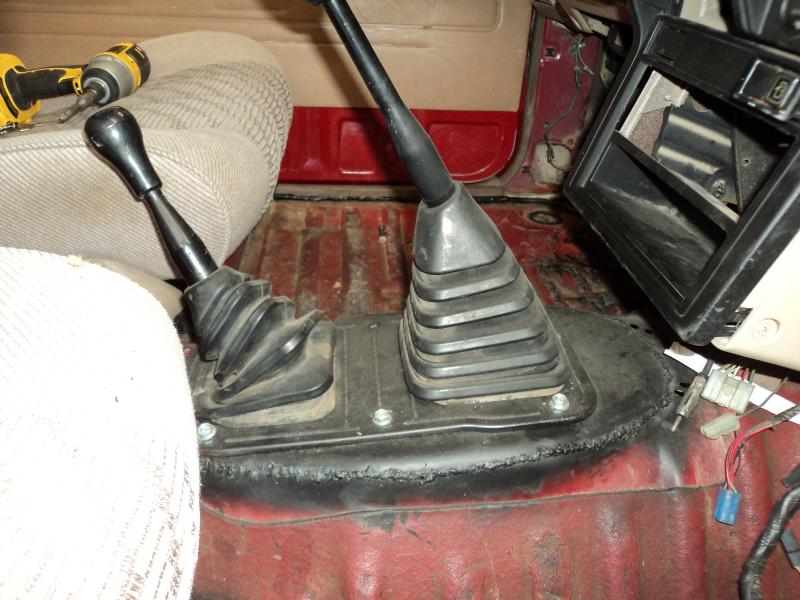
Pic of the floor panel work after the 5 Spd swap.
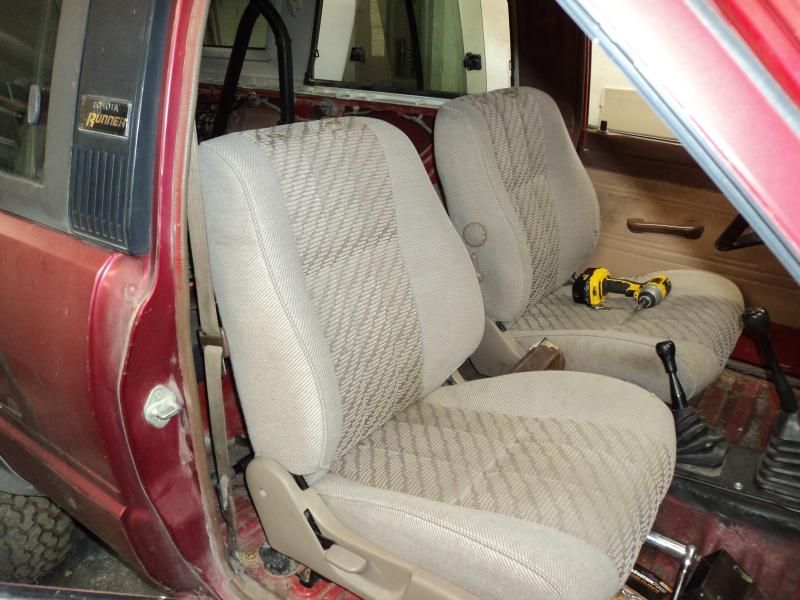
Second Gen fronts in place. Haven't got to the rears just yet.
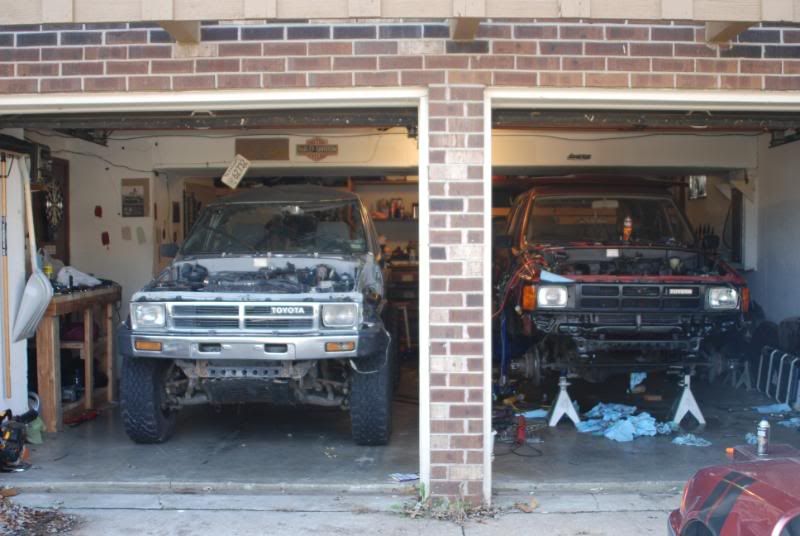
Upgraded the digs as well since the last time I posted pictures. As you can see, I now have plenty of light and a proper work area, albeit cluttered...

This is no flash.....


Back to transmission work.
Anyway.
Guages with the Red LED....
Dash color change. Not fully assembled here but you can get the idea....
Pic of the floor panel work after the 5 Spd swap.
Second Gen fronts in place. Haven't got to the rears just yet.
Upgraded the digs as well since the last time I posted pictures. As you can see, I now have plenty of light and a proper work area, albeit cluttered...
This is no flash.....
Back to transmission work.

 Mar 24, 2013 | 11:36 PM
#17
Thread Starter
Registered User
Joined: Jan 2009
Posts: 121
Likes: 0
From: Olathe, KS
Apr 1, 2013 | 08:14 AM
#18
Thread Starter
Registered User
Joined: Jan 2009
Posts: 121
Likes: 0
From: Olathe, KS
Transmission is out. Junk throwout bearing. When I pulled the trans down, I noticed that the bottom hole for the starter is stripped. Thought it felt a bit odd last time I put the starter on.
Anyway, turns out a helicoil kit for 10x1.25 bolts is 54 bucks. Go either side of that, to either a 1.00 or 1.5 and you save 20 bucks, but I don't think I want two different bolts holding things together. Makes it a pain should I ever have to get in there again.
In the mean time, been working on interior. Got all of the side panels out to respray/dye. Pulled the seat belts so I can put in new ones. Yanked the seat back frames out of the old seats, probably go out today and swap the new ones onto the frames. Went back to the yards the other day and scored more tailgate parts as well. For the first time since I've owned it, the tailgate opens and shuts as it should! Found a mint second gen dome light as well. That required a little cab trimming to fit, but nothing major.
Anyway, just tossing that in there.
Apr 1, 2013 | 04:27 PM
#19
Thread Starter
Registered User
Joined: Jan 2009
Posts: 121
Likes: 0
From: Olathe, KS
Well, it WAS a productive day. I say that because now I'm at a stopping point on just about everything until I get back from my Annual Training. Let's start at the top, shall we?
Pulled the "original" rear seats out. Looked like someone had dumped about 4 quarts of gear oil under the rear seat somewhere in the early 90's and left it. Just absolute filth. No before pictures, but 1 can of Engine De-greaser, 2 cans of Brake Kleen and a roll of shop towels later and I"m left with this....

You can still see a lot of gunk on the sound deadener. I'm going to try and get that up with some isoprophyl alcohol, but it'll do for now. The deadener is actually in very good shape, just dirty still. I realize that's factory primer, but I hate leaving things "bare", so I hit it with some rattle can just to keep it sealed up. I'll be doing Lizard Skin over the whole interior, so it doesn't really matter.
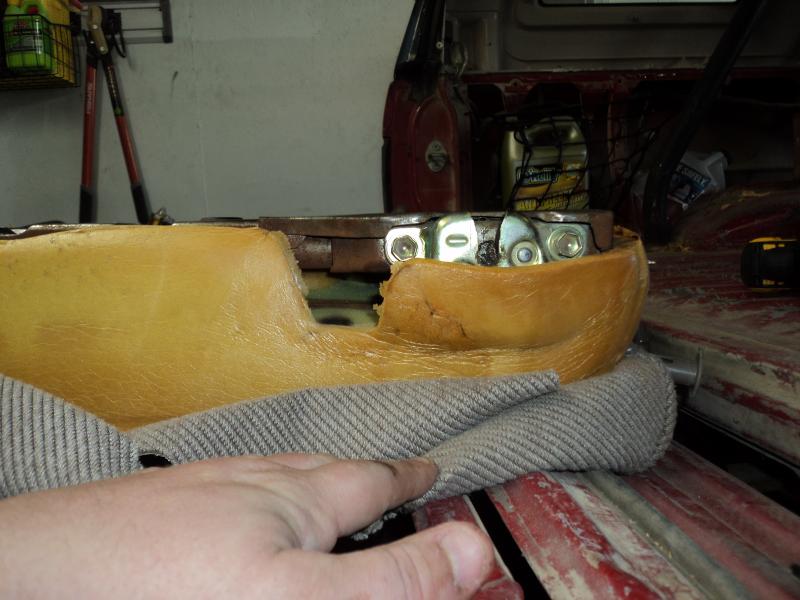
Moving on, I started tearing apart my rear seats. Started with the seat backs. No pics of tearing the old seats down. Here's the new seat backs going onto the old frames.
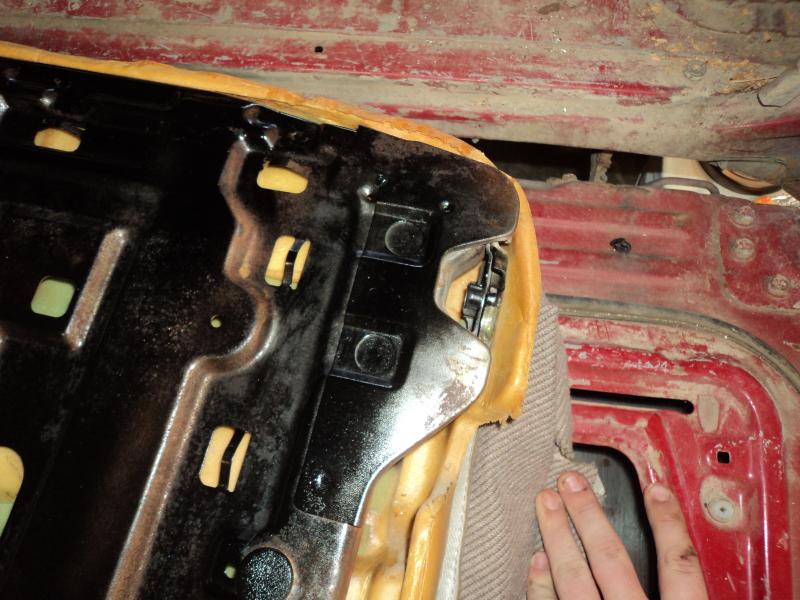
You can see where the latch plate for the 2nd gen is, and what is going to need cut down for the 1st gen frame to fit....

Give her a little trim, slap in some new hog rings and blamo, you have a new seat back...
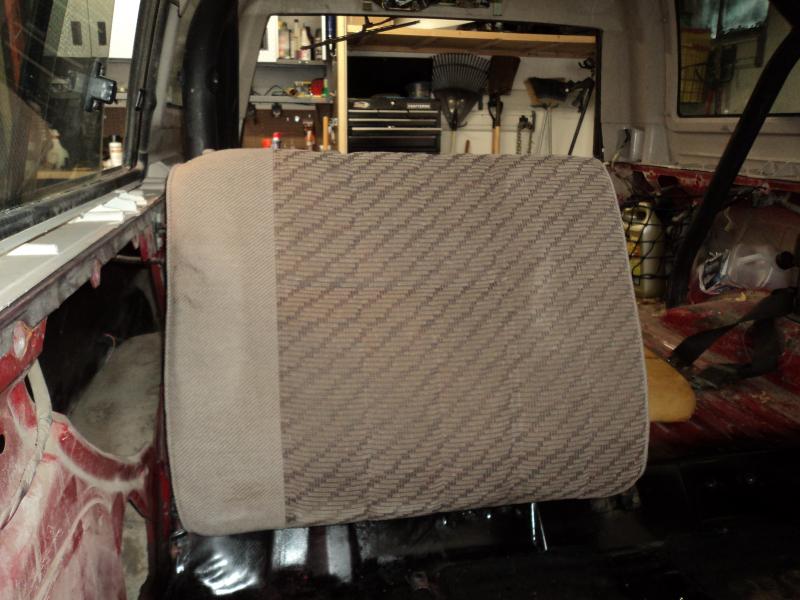
Yes, I know the alignment horizontally is off a little bit. You can't really notice it without the flash, so I'm good with it.
From here, it's onto the bottoms. This is where my day stopped. Turns out, unlike what I've read here on the boards, the seat bottoms are nowhere close to an easy swap. Few pics with the 85 frame on top, 94 frame on the bottom....
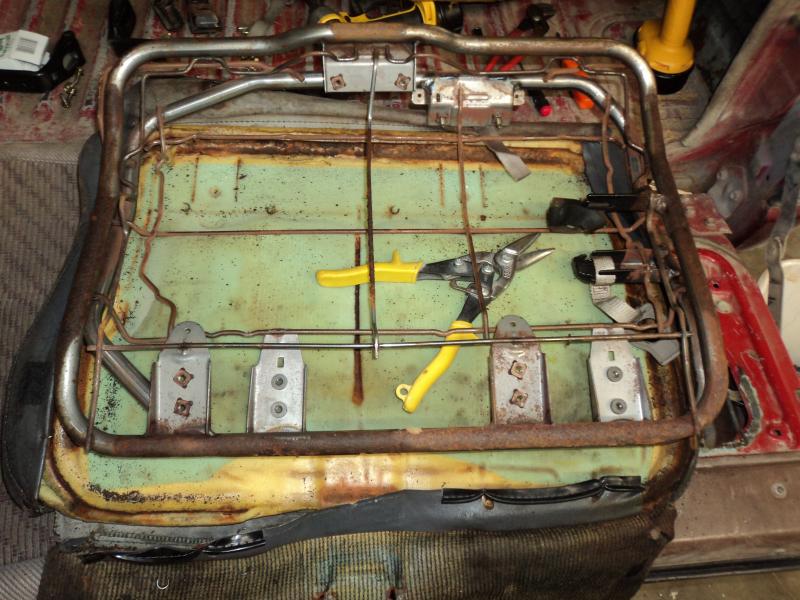


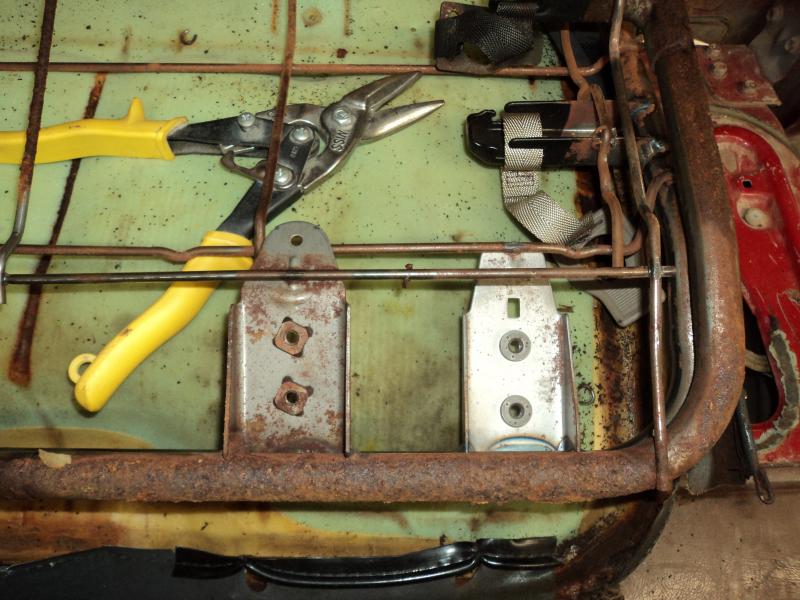
Some pretty serious differences there. Uncle Sam has me going out of town this weekend, so I'm done until I get back. It's a simple cut and weld job, but I don't have any round stock and won't have time to pick any up this week. Kind of bummed too, thought I'd get to see it with all the seats in it before I left. Oh well.
Pulled the "original" rear seats out. Looked like someone had dumped about 4 quarts of gear oil under the rear seat somewhere in the early 90's and left it. Just absolute filth. No before pictures, but 1 can of Engine De-greaser, 2 cans of Brake Kleen and a roll of shop towels later and I"m left with this....
You can still see a lot of gunk on the sound deadener. I'm going to try and get that up with some isoprophyl alcohol, but it'll do for now. The deadener is actually in very good shape, just dirty still. I realize that's factory primer, but I hate leaving things "bare", so I hit it with some rattle can just to keep it sealed up. I'll be doing Lizard Skin over the whole interior, so it doesn't really matter.
Moving on, I started tearing apart my rear seats. Started with the seat backs. No pics of tearing the old seats down. Here's the new seat backs going onto the old frames.
You can see where the latch plate for the 2nd gen is, and what is going to need cut down for the 1st gen frame to fit....
Give her a little trim, slap in some new hog rings and blamo, you have a new seat back...
Yes, I know the alignment horizontally is off a little bit. You can't really notice it without the flash, so I'm good with it.
From here, it's onto the bottoms. This is where my day stopped. Turns out, unlike what I've read here on the boards, the seat bottoms are nowhere close to an easy swap. Few pics with the 85 frame on top, 94 frame on the bottom....
Some pretty serious differences there. Uncle Sam has me going out of town this weekend, so I'm done until I get back. It's a simple cut and weld job, but I don't have any round stock and won't have time to pick any up this week. Kind of bummed too, thought I'd get to see it with all the seats in it before I left. Oh well.


