-Yoda-'s '82 SR5 Build thread
 08-12-2013, 09:51 PM
#1
Registered User
Thread Starter
Join Date: Oct 2009
Posts: 52
Likes: 0
Received 0 Likes
on
0 Posts
-Yoda-'s '82 SR5 Build thread
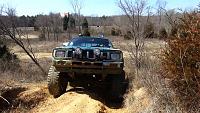
I've been a lurker for a long time and am just now getting to the point where I'm doing enough to my truck for a build thread.
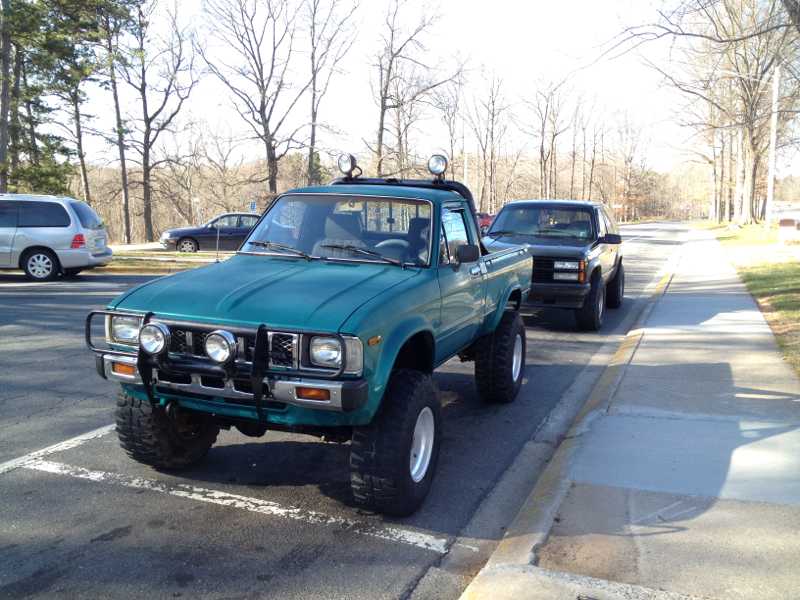
Here's a quick pic from the day I brought her home(along with the gf's 93 blazer):

My friends have dubbed it the teletubbie machine because after I bought it I installed my cb and put my antenna on top of the rollbar......they also call it dipsy....so I guess we'll stick with that lol
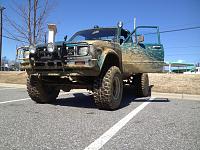
It's an 82 SR5 with all the goodies (ps, a/c, etc...)
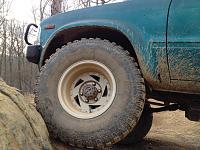
I bought it as it is in the pic with a 3" rough country lift and 33x12.50s.
I've done some small things in the last few months of owning it....
---I've had it in some water and mud and killed the alternator...so I did the next best thing and went ahead and did the 2nd gen IR alt. upgrade. ---It had some vibrations around 55 so I got some new u-joints and got rid of that.
---Parking brake was loose, tightened the shoes up and adjusted the cable.
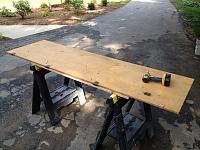
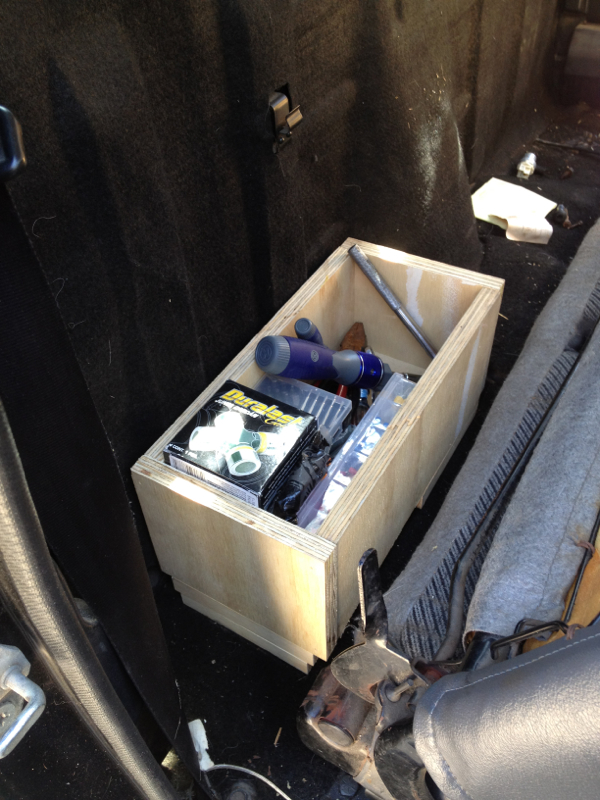
---Installed a radio, CB, floormats, and also made a small tool/parts box that sits behind the seat
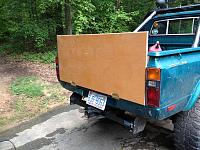
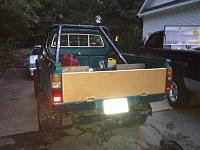
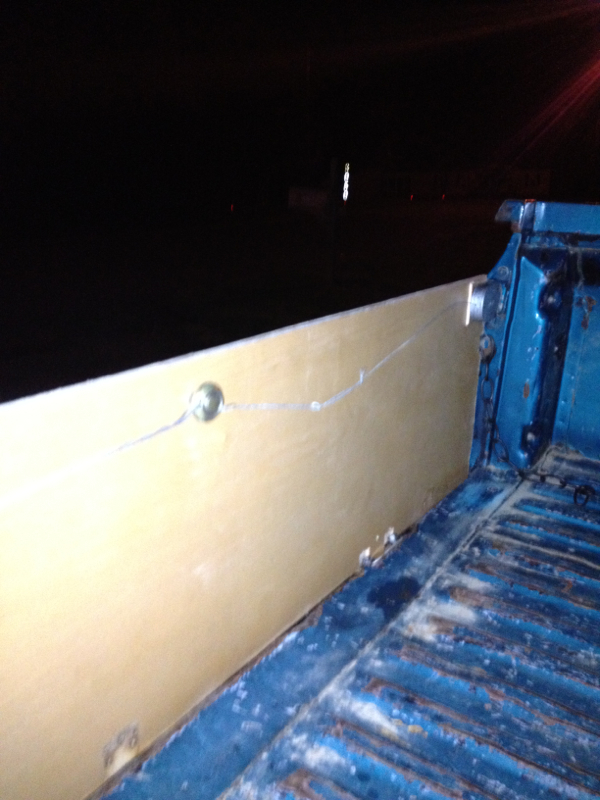
---Made my own locking tailgate out of wood since It didnt have one when I bought it
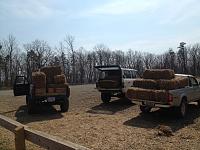
Some pics of that stuff:


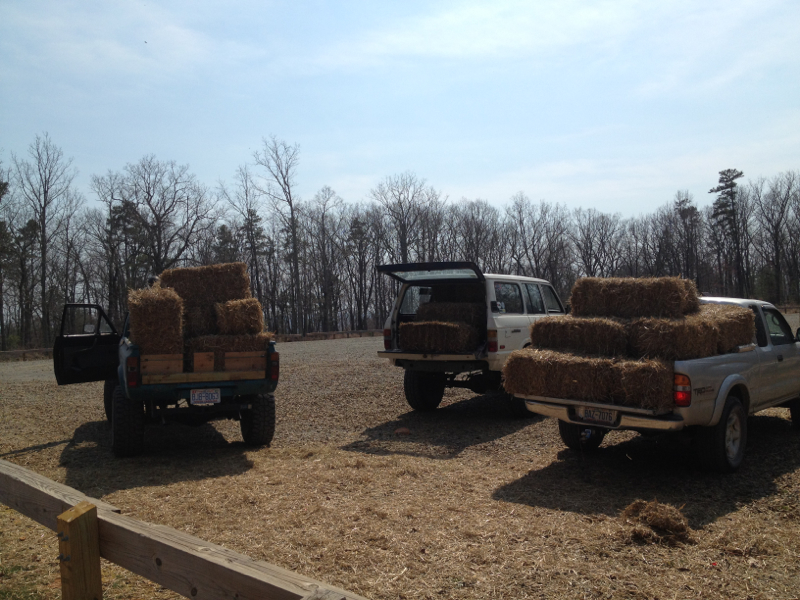
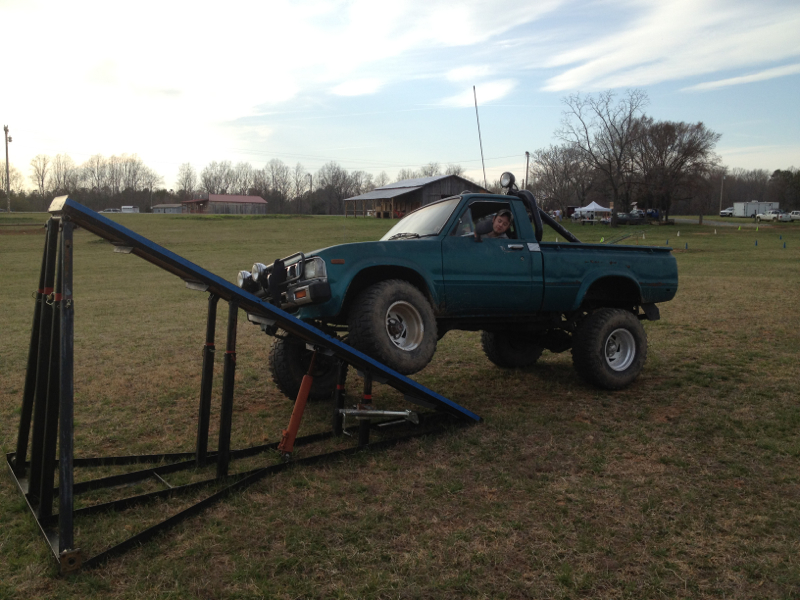
Some play pics:

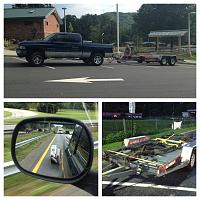
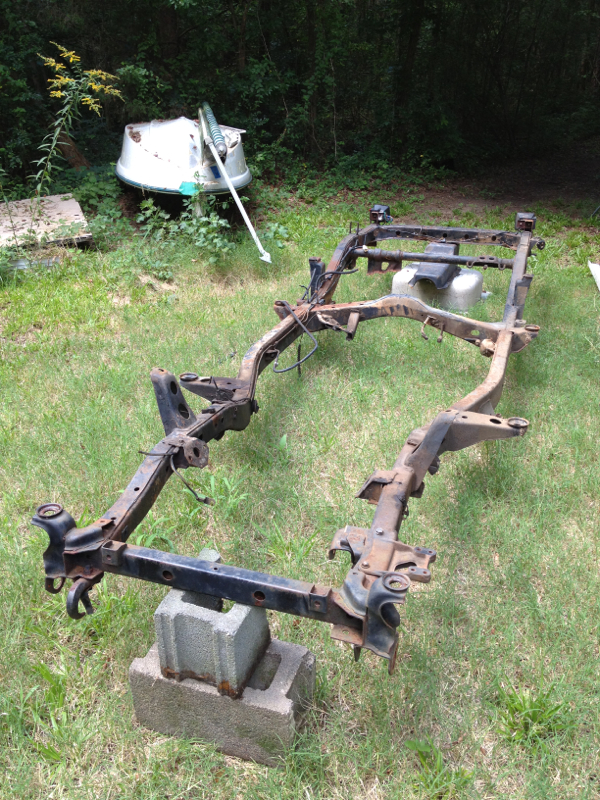
Now that everyone got their pic fix, haha.....I started this build thread because a few days ago i went through some bad road construction and when i got to work i noticed that the bed looked like it was touching the cab. I found a crack on each side of the frame right behind the cab where they all rust. I decided since I daily this truck and I also take it around here and up to uwharrie frequently to trail, that I didn't want to try and sleeve it or plate it or anything. I wanted something that i didnt have to worry about its integrity. So yesterday I went and picked up a solid 82 frame off of CL up in Asheville. It was about a 2 1/2 hour drive for me up into the mountains, (I live just east of Charlotte, NC) but it was worth it. This is the best Toyota frame I've seen in a while, nothing but minor surface rust and straight as an arrow. I'd say how much I payed for it but you wouldnt believe me my only mistake was using dads dodge 1500 to go get it. It's a 360, and going up the mountain it was averaging less than 10 mpg's.
So I will be undergoing a frame swap starting here in the next few days, so keep an eye out for me. I'm sure i'll have some questions along the way. I'm pretty mechanically inclined and have been working on cars as long as I was old enough to turn a wrench, but I've never done a frame swap.
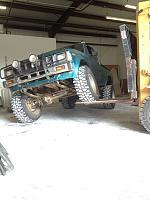
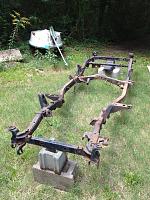
Don't have any pics of the cracks and rust but I will get some, but I do have a pic of my new frame in its temporary home. Enjoy!
Here's a quick pic from the day I brought her home(along with the gf's 93 blazer):
My friends have dubbed it the teletubbie machine because after I bought it I installed my cb and put my antenna on top of the rollbar......they also call it dipsy....so I guess we'll stick with that lol
It's an 82 SR5 with all the goodies (ps, a/c, etc...)
I bought it as it is in the pic with a 3" rough country lift and 33x12.50s.
I've done some small things in the last few months of owning it....
---I've had it in some water and mud and killed the alternator...so I did the next best thing and went ahead and did the 2nd gen IR alt. upgrade. ---It had some vibrations around 55 so I got some new u-joints and got rid of that.
---Parking brake was loose, tightened the shoes up and adjusted the cable.
---Installed a radio, CB, floormats, and also made a small tool/parts box that sits behind the seat
---Made my own locking tailgate out of wood since It didnt have one when I bought it
Some pics of that stuff:
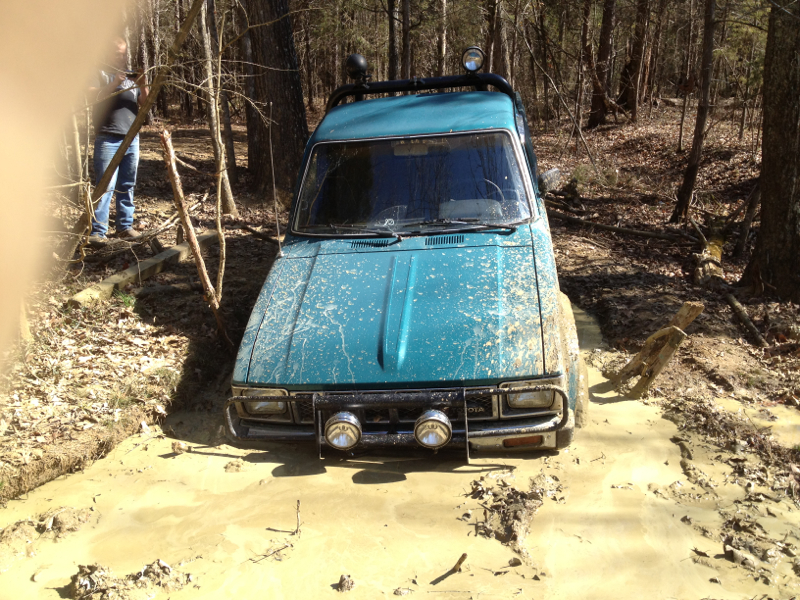


Some play pics:


Now that everyone got their pic fix, haha.....I started this build thread because a few days ago i went through some bad road construction and when i got to work i noticed that the bed looked like it was touching the cab. I found a crack on each side of the frame right behind the cab where they all rust. I decided since I daily this truck and I also take it around here and up to uwharrie frequently to trail, that I didn't want to try and sleeve it or plate it or anything. I wanted something that i didnt have to worry about its integrity. So yesterday I went and picked up a solid 82 frame off of CL up in Asheville. It was about a 2 1/2 hour drive for me up into the mountains, (I live just east of Charlotte, NC) but it was worth it. This is the best Toyota frame I've seen in a while, nothing but minor surface rust and straight as an arrow. I'd say how much I payed for it but you wouldnt believe me
my only mistake was using dads dodge 1500 to go get it. It's a 360, and going up the mountain it was averaging less than 10 mpg's.
So I will be undergoing a frame swap starting here in the next few days, so keep an eye out for me. I'm sure i'll have some questions along the way. I'm pretty mechanically inclined and have been working on cars as long as I was old enough to turn a wrench, but I've never done a frame swap.
Don't have any pics of the cracks and rust but I will get some, but I do have a pic of my new frame in its temporary home. Enjoy!
Last edited by -Yoda-; 08-12-2013 at 09:58 PM. Reason: Messed up thread title
 08-12-2013, 11:28 PM
#2
Registered User
Join Date: Sep 2008
Posts: 522
Likes: 0
Received 0 Likes
on
0 Posts
You lucked out even finding a good frame.... It won't be difficult to swap everything over. I would strip and CLEAN the frame real good first and prep it. You should have a truck that will last another 30 some odd years...
08-13-2013, 06:30 AM
#3
Registered User
Thread Starter
Join Date: Oct 2009
Posts: 52
Likes: 0
Received 0 Likes
on
0 Posts
Yeah I know it man, they aren't a dime a dozen anymore. And I plan on sanding all the surface rust and everything off of it then probably turning the frame up in the air and make sure I get anything that's inside of it knocked out. After that it will get a few coats of paint or maybe some por15. I'm going to make sure this one is gunna last.
08-13-2013, 06:56 PM
#5
Very nice find on the frame! I'd go with the POR-15, it's rather expensive, but it goes a long way. I brushed on 3 coats on my frame and axles using less 1 qt. It lays pretty flat when brushed on. I then knocked it down slightly with some 220 sandpaper and sprayed 2 coats of POR-15 Chassis Coat. I would definitely recommend sandblasting the frame before applying the POR-15 - I did and it helped suck up paint. The stuff is tough as nails too! Check out my build thread if you want to see how it went for me.
08-14-2013, 08:50 PM
#6
Registered User
Thread Starter
Join Date: Oct 2009
Posts: 52
Likes: 0
Received 0 Likes
on
0 Posts
Very nice find on the frame! I'd go with the POR-15, it's rather expensive, but it goes a long way. I brushed on 3 coats on my frame and axles using less 1 qt. It lays pretty flat when brushed on. I then knocked it down slightly with some 220 sandpaper and sprayed 2 coats of POR-15 Chassis Coat. I would definitely recommend sandblasting the frame before applying the POR-15 - I did and it helped suck up paint. The stuff is tough as nails too! Check out my build thread if you want to see how it went for me.
And I'm trying to hunt down a sandblaster right now. I could buy one brand new from harbor freight right now....but their stuff doesn't last long and usually doesn't always perform the best. I could spend the money and go buy something reputable, but I don't see myself using it often.....so I'm looking for a used one or someone to let me borrow one.
08-14-2013, 08:53 PM
#7
Registered User
Thread Starter
Join Date: Oct 2009
Posts: 52
Likes: 0
Received 0 Likes
on
0 Posts
I did some work on the frame today. The guy I bought it from buys all kinds of toyotas and parts them out if they aren't worth saving. He told me he had bought mine in SC and had parted the whole thing and I was the last person to buy what was left of it.
At first i got pops and we stood it on end and took a hammer to it and knocked any loose trash out of it. While i was hammering i didnt find any suprises and its all really solid so that was a major plus. I also sifted through the dirt that i knocked out of the frame and found almost no rust flakes. <<<<Awesome!! I guess the PO didn't have a bed on the truck because they had welded some brackets and put trailer lights on the back. So I got the grinder with a cut off wheel and cut through the welds then knocked them off with a hammer then got a grinding wheel and got everything smooth. Did a bit of sanding on some of the questionable pieces of rust and it was nothing out of the normal small pits.
So now I know the frames all good (thank goodness) I'm ready to get this thing going!
Trending Topics
08-15-2013, 08:04 AM
#8
I buy my POR-15 from Eastwood - primarily because they are almost the cheapest source and they ship to me super quick (I usually get packages within 2 days from them). I have yet to coat the inside of my frame, but I am planning on it. I have a shutz gun (you can get one from Eastwood fairly cheap) with several different length attachments to do the job.
As far as the sandblaster. I did my frame with my co-worker's old school 120lb Lindsay Blaster. It did a kickass job but it was a PITA to setup and use for smaller jobs so I went out and got the 20lb blaster from Harbor Freight for $50. I know that HF can sell some shoddy stuff, but this was definitely worth the investment. I used play sand from Lowe's that I sifted with a cheap kitchen strainer and had no problems. My only recommendation to you would be to buy a deadman valve for it since the nozzle valve is a cheap ball valve that eventually leaks pretty badly. Make sure you buy some extra ceramic nozzles too - they tend to wear fairly quickly using play sand. For $50 you can't beat the price and it is far better than any siphon kit out there. Had I not had that big 120lb Lindsay Blaster, I would have still been able to do my frame with the one from Harbor Freight without too much more hassle. Scope out my build thread to see the work that it does - I blasted the tank and tank shield in about 2 hours two weeks ago and did my driveshafts in about 1 hour yesterday.
As far as the sandblaster. I did my frame with my co-worker's old school 120lb Lindsay Blaster. It did a kickass job but it was a PITA to setup and use for smaller jobs so I went out and got the 20lb blaster from Harbor Freight for $50. I know that HF can sell some shoddy stuff, but this was definitely worth the investment. I used play sand from Lowe's that I sifted with a cheap kitchen strainer and had no problems. My only recommendation to you would be to buy a deadman valve for it since the nozzle valve is a cheap ball valve that eventually leaks pretty badly. Make sure you buy some extra ceramic nozzles too - they tend to wear fairly quickly using play sand. For $50 you can't beat the price and it is far better than any siphon kit out there. Had I not had that big 120lb Lindsay Blaster, I would have still been able to do my frame with the one from Harbor Freight without too much more hassle. Scope out my build thread to see the work that it does - I blasted the tank and tank shield in about 2 hours two weeks ago and did my driveshafts in about 1 hour yesterday.
08-15-2013, 07:52 PM
#9
Registered User
Thread Starter
Join Date: Oct 2009
Posts: 52
Likes: 0
Received 0 Likes
on
0 Posts
I get payed tomorrow so I may go pick up a blaster. Either Harbor freight or I found 2 on Craigslist close to work. I've still got to use some stripper and get some of that pesky rubberized undercoating off like you did -___-
So I've got a few days till I'm ready to do some blasting. I've been doing a lot of sanding and still have about 3/4 of the frame left to go over. Going to do as much as I can and do the rest with a blaster then probably go over the whole thing with it too.
Anxious to get the frame done and start swapping everything over, but I have a feeling I might be doing a lot more than that. After looking through your thread KAWA, I might go buy me a powder-coating gun
08-16-2013, 05:33 AM
#10
I would hold off on the stripper (unless you're talking about the kind that swings around poles...LOL) and sanding - you may be wasting your time and money since your frame doesn't look like it has too much rubberized undercoating on it. I would try to hit it with the sandblaster first. I was able to sandblast about 80% of my frame without any prior work on it. And the other 20% was some SEVERELY caked on undercoat that I was able to chip off with a paint scraper and then sandblast. The paint stripper will just turn it to goop and cause your sand to stick to it.
As far as the powdercoating gun, DO IT! I live by mine
As far as the powdercoating gun, DO IT! I live by mine
08-16-2013, 05:54 AM
#11
Registered User
Thread Starter
Join Date: Oct 2009
Posts: 52
Likes: 0
Received 0 Likes
on
0 Posts
I would hold off on the stripper (unless you're talking about the kind that swings around poles...LOL) and sanding - you may be wasting your time and money since your frame doesn't look like it has too much rubberized undercoating on it. I would try to hit it with the sandblaster first. I was able to sandblast about 80% of my frame without any prior work on it. And the other 20% was some SEVERELY caked on undercoat that I was able to chip off with a paint scraper and then sandblast. The paint stripper will just turn it to goop and cause your sand to stick to it.
As far as the powdercoating gun, DO IT! I live by mine
As far as the powdercoating gun, DO IT! I live by mine
What powdercoating system do you have?
08-18-2013, 09:15 PM
#13
Registered User
Thread Starter
Join Date: Oct 2009
Posts: 52
Likes: 0
Received 0 Likes
on
0 Posts
I'm shopping around for one....seems like a good idea after looking at all your stuff kawa. I like the clean look and i know how durable it is. Me and a buddy of mine were talking about tires tonight and i mentioned a few I was looking at and he was like, "oh man those are horrible in the mud!" I said, "Mud? What's that? This truck wont be seeing anymore mud after this it will be to clean!" Lol. I might go play around in some puddles but I think this thing is going to be strictly set on trails now.
On another note, I went ahead and ordered the sandblaster from harbor freight tonight. Should be here before the end of the week. Friday is payday so I will probably order my POR-15 then. No progress on the truck in the past few days. My compressor is to small to do anything but I just borrowed my cousins big portable craftsman tonight so I will probably start taking the truck apart tomorrow. Plans are to have it on jack stands with the bed off and the axles and tires out from under it by the time the blaster makes its way here. I'll check in tomorrow night with some progress and maybe a few pics.
On another note, I went ahead and ordered the sandblaster from harbor freight tonight. Should be here before the end of the week. Friday is payday so I will probably order my POR-15 then. No progress on the truck in the past few days. My compressor is to small to do anything but I just borrowed my cousins big portable craftsman tonight so I will probably start taking the truck apart tomorrow. Plans are to have it on jack stands with the bed off and the axles and tires out from under it by the time the blaster makes its way here. I'll check in tomorrow night with some progress and maybe a few pics.
08-18-2013, 10:24 PM
#15
Registered User
Thread Starter
Join Date: Oct 2009
Posts: 52
Likes: 0
Received 0 Likes
on
0 Posts
I hope not, I'm ready to drive my truck again! Lol
I'm stuck driving a 93 accord at the moment. Believe me, I can't complain about the gas mileage, but I every time I drive it, it feels like I'm sitting on the ground. Much different than being on 3 inches of lift and 33's, haha.
I'm sure it will take longer to get this frame prepped than it will to strip down the truck. I didn't plan on doing so much to the frame but kawa has got me wanting to do more! It's all his fault......lol
08-18-2013, 10:31 PM
#16
Registered User
Thread Starter
Join Date: Oct 2009
Posts: 52
Likes: 0
Received 0 Likes
on
0 Posts
On another note gmack, what brand of paint did you use for your truck? And what kind of prep did you do? I'm wanting to paint mine here soon. I'm thinking a blue, or something off the wall you don't usually see.....my friend pointed out a citrus green tonight that I kinda liked.
08-19-2013, 12:18 PM
#20
Stripping the truck down takes no time. I had a completely assembled truck (minus the motor) and I was able to get it broken down to a rolling chassis in an afternoon. Make sure you grab some masking tape, a sharpie and a HUGE box of ziploc bags so that you can organize and label everything you remove. I labeled all of my cables, wires and hoses attached to that cab prior to stripping the truck so I knew where everything went - this is especially important if you are like me and storing you cab somewhere else while you are building the frame and motor (I actually haven't seen my cab in over 6 months so at this point I am not very familiar with components on it by now). All the nuts and bolts went into appropriately labeled ziploc bags and I took A LOT of pictures as I took things apart. I put all of my hardware in 4 boxes labeled Engine, Frame, Axles/Suspension and Body so that I could store aside whichever aspect of the truck that I am not currently working on. Even though I have replaced a lot of parts and hardware, I have yet to lose a single nut, bolt, screw, part, etc since I have started my build because everything was well labeled and cataloged. You want to keep everything you plan on replacing so that you know exactly what size/type to replace it with when you get to it. I also have a 50 gallon trash can that I toss all the old parts and hardware into as I replace them so that they aren't gone forever in the event that I still need them later. Anybody who has done a restoration will tell you that organization is key and you shouldn't throw anything away until you are done the build or that part of the build.
As far as paint goes, that is up to you; however, rattle can paint jobs are not meant to last forever. It will coat and somewhat protect the truck, but if you want a long lasting paint job or a high quality paint job you are going to want to go with professional grade products or a professional paint job. I'm not knocking the rattle can guys - most of them use their trucks for trail rigs or mud trucks. But for a daily driver who cares more about appearance then you may want to look towards a more professional route. Personally, I plan doing my body work as if it were a standard restoration. Once all metal work is done it will be stripped and smoothed to bare metal and sealed with epoxy primer. Then any body filler will be applied over the sealer (typically body filler is applied prior to sealer primer in collision repairs or quick flip restorations). Then sanded and primed and sanded and primed and sanded and primed (you get the picture) prior to the color coat. I've still not decided if I want to get a single stage black or a metallic gray with a clear coat. Rant over - just wanted to give you an idea of possible routes that would best suit your build's needs.
As far as paint goes, that is up to you; however, rattle can paint jobs are not meant to last forever. It will coat and somewhat protect the truck, but if you want a long lasting paint job or a high quality paint job you are going to want to go with professional grade products or a professional paint job. I'm not knocking the rattle can guys - most of them use their trucks for trail rigs or mud trucks. But for a daily driver who cares more about appearance then you may want to look towards a more professional route. Personally, I plan doing my body work as if it were a standard restoration. Once all metal work is done it will be stripped and smoothed to bare metal and sealed with epoxy primer. Then any body filler will be applied over the sealer (typically body filler is applied prior to sealer primer in collision repairs or quick flip restorations). Then sanded and primed and sanded and primed and sanded and primed (you get the picture) prior to the color coat. I've still not decided if I want to get a single stage black or a metallic gray with a clear coat. Rant over - just wanted to give you an idea of possible routes that would best suit your build's needs.


