
Killer B's 12" Narrowed 1983 shortbed hilux build up thread
 Aug 5, 2011 | 05:20 PM
#1
Thread Starter
Registered User
Joined: Aug 2011
Posts: 148
Likes: 0
Killer B's 12" Narrowed 1983 shortbed hilux build up thread
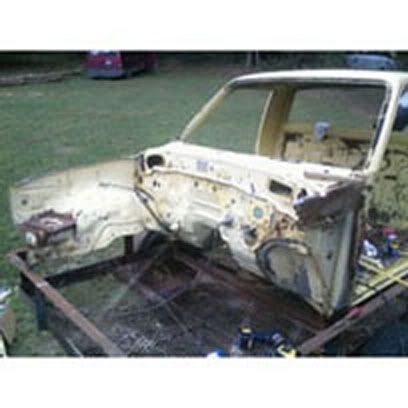
I wont bore every1 with too many detals but recently after doing a chop top on a customers truck it got me to thinking about a rust free arizona cab that I had and to what benifit if any a serious body mod would make.
I already have a 1983 trail truck with anything you could add but had some serious rust issues in the floor (midwest snow, salt, you do the math)
So the project became much easier to strip down to a bare cab then just transfer everthing over.
1. narrowing the cab 12 inches allowed me to keep a factory looking grill as each grill section is 6" so from 6 section to 4 (original 79-81 trucks have 4 sections but larger) as well as making it a bit more stable as well as more nimble(less side overhang)
2. I can move the cab on the frame to shift weight (handling) and allow for a larger tire as well.
3. Stretching the wheel base and repairng a rusty frame @ the same time, again stability
4.FJ80 axle up front and a 98 4runner axle housing in the rear should really emphasize the small cab with wider axles, again for stability and handling.
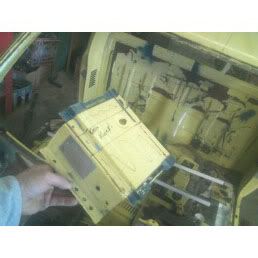
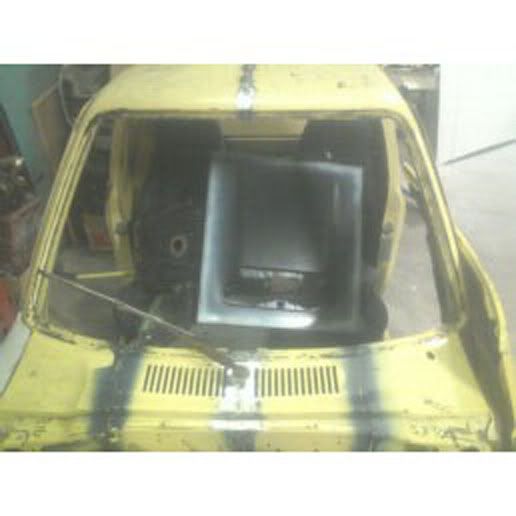
here is the cab after I cut the area where it rolled down a hill an hit a tree (no one got to enjoy the ride, it did it on its own)
I already have a 1983 trail truck with anything you could add but had some serious rust issues in the floor (midwest snow, salt, you do the math)
So the project became much easier to strip down to a bare cab then just transfer everthing over.
1. narrowing the cab 12 inches allowed me to keep a factory looking grill as each grill section is 6" so from 6 section to 4 (original 79-81 trucks have 4 sections but larger) as well as making it a bit more stable as well as more nimble(less side overhang)
2. I can move the cab on the frame to shift weight (handling) and allow for a larger tire as well.
3. Stretching the wheel base and repairng a rusty frame @ the same time, again stability
4.FJ80 axle up front and a 98 4runner axle housing in the rear should really emphasize the small cab with wider axles, again for stability and handling.
here is the cab after I cut the area where it rolled down a hill an hit a tree (no one got to enjoy the ride, it did it on its own)
Last edited by Killer B; Aug 16, 2011 at 08:28 AM.
 Aug 5, 2011 | 05:36 PM
#4
Thread Starter
Registered User
Joined: Aug 2011
Posts: 148
Likes: 0
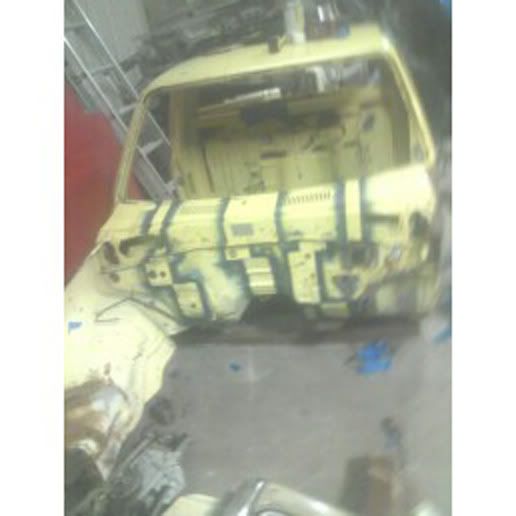
The cab after hours of measuring and marking, it was a bitch to find 12, 6, 4, 3,2 inch increments/sections to cut to add up to 12.
You cant just cut 12 out of any place except the roof.
You cant just cut 12 out of any place except the roof.
Last edited by Killer B; Aug 9, 2011 at 09:24 PM.
Aug 5, 2011 | 06:09 PM
#7
Thread Starter
Registered User
Joined: Aug 2011
Posts: 148
Likes: 0
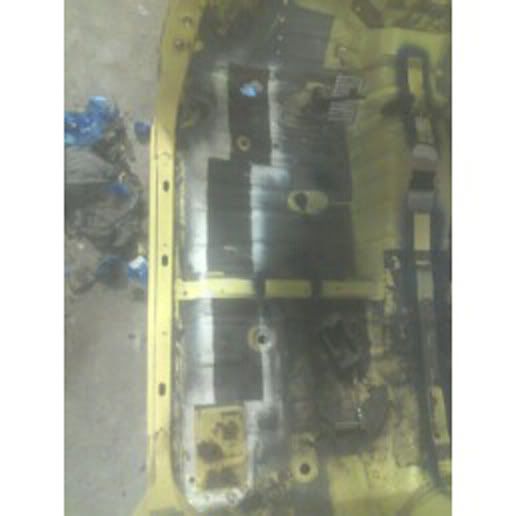
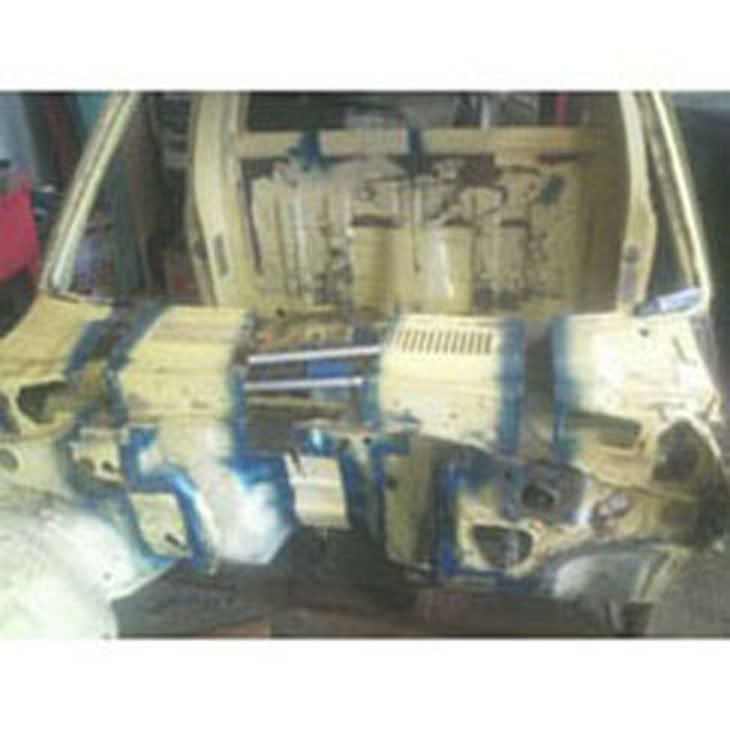
Floorboard drivers side, you can see the transmission tunnel as well. this is after the cuts were made and slid togetther
5 inches out of floor area and 2 at the trans hump and of course 5 more on pass. side floor
What kind of seats will I use? for now Mazda miata seats will work fine as they were the most narrow I could find, I can tie them into the rollcage.
I would like to put mastercraft baja suspension seats in later.
Last edited by Killer B; Aug 9, 2011 at 09:27 PM.
Trending Topics
Aug 5, 2011 | 06:13 PM
#8
Thread Starter
Registered User
Joined: Aug 2011
Posts: 148
Likes: 0
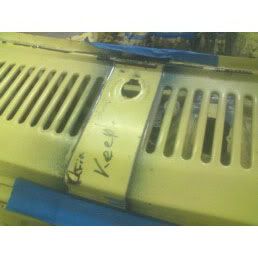
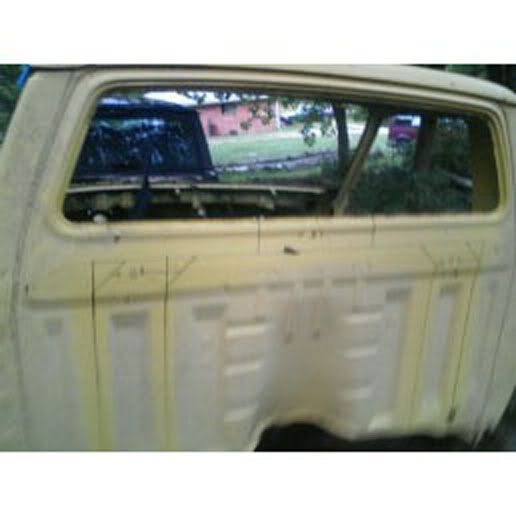
I will be using 1 wiper as it covers the whole windsheild in 1 swipe, I have to modify the stroke radius at the wiper motor arm a bit to get it right.
here is a pic of the center wiper bit, the marker lines are what I am cutting out.
oh yeah and that VIN plate will go back, yeah I know blah blah illegal blah blah
here is a pic of the center wiper bit, the marker lines are what I am cutting out.
oh yeah and that VIN plate will go back, yeah I know blah blah illegal blah blah
Last edited by Killer B; Aug 9, 2011 at 09:30 PM.
Aug 5, 2011 | 06:16 PM
#9
Thread Starter
Registered User
Joined: Aug 2011
Posts: 148
Likes: 0
the three peices together.
I hate body work so I try to fit most all my metal tight, sand the paint off and tig weld the sheet metal then grind. it hardly needed any bondo at all.
bondo is your friend.
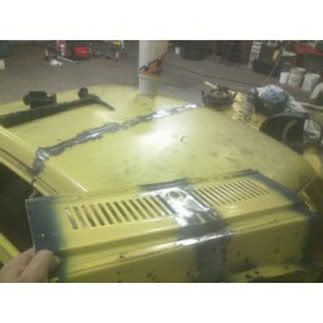
I hate body work so I try to fit most all my metal tight, sand the paint off and tig weld the sheet metal then grind. it hardly needed any bondo at all.
bondo is your friend.
Last edited by Killer B; Aug 9, 2011 at 09:31 PM.
 Aug 5, 2011 | 06:25 PM
#11
Thread Starter
Registered User
Joined: Aug 2011
Posts: 148
Likes: 0
this is gonna be cool...consider uploading your pics to photobucket...and using the [img]https://www.yotatech.com/forums/f197/killer-bs-12-narrowed-1983-shortbed-hilux-build-up-thread-239253/ code in your posts...attachments are small...
what are your plans for the Transmission tunnel?
what are your plans for the Transmission tunnel?
Thanks for the compliment.
I will fit the tunnel as needed, I am also moving engine back with cab and down an inch or 2 so the tunnl shouldnt be an issue.
The tunnel was only narrowed 2 inchs. 5 on each side floor board, see the method to my madness?!
Last edited by Killer B; Aug 5, 2011 at 07:13 PM.
Aug 5, 2011 | 07:14 PM
#12
Thread Starter
Registered User
Joined: Aug 2011
Posts: 148
Likes: 0
Here is a shot of some of the peices together and the original wiper. a 2 inch longer blade insert and it swipes from side to side fine.
The windsheild is going to be a polycarbonate (like what bulletproof security glassis made out of) from polysheilds. they make replacement winsheilds with many different coatings and hardened surfaces to reduce wiper scratchs.
The windsheild is going to be a polycarbonate (like what bulletproof security glassis made out of) from polysheilds. they make replacement winsheilds with many different coatings and hardened surfaces to reduce wiper scratchs.
Last edited by Killer B; Aug 9, 2011 at 09:34 PM.
Aug 5, 2011 | 08:22 PM
#13
Registered User
Joined: Oct 2009
Posts: 1,560
Likes: 1
From: Santa Cruz, CA
Pretty awesome, been said before, but you should use photobucket to embed your images with the [IMG]blahdeedah[IMG] or whatever. Just click the little picture button and paste the link in. Photos will come in looking a whole lot better 
Aug 5, 2011 | 09:23 PM
#14
Thread Starter
Registered User
Joined: Aug 2011
Posts: 148
Likes: 0
and if you look carefully at the above pic you can see both seats. there is room for a shifter and transfer case lever.
I was hoping to use 2 landcruiser Ebraker handles/pull and cables (already have) for rear cutting brakes but I found the previa vans have a sweet set up as well so when the tubes get bent for the cage I will ad bracketry for the Ebrake levers.
If you are wondering about the cutting brakes they are awsome to have and the way I will be running them is to use the brake light switch on both Ebrake levers to wire my air locker/elocker so if locked when pulled it will unlock locker (right now I have a detroit so its either electric or air locker with 5.29s) and allow for that tire to be dragged to help with the turn.
Last edited by Killer B; Aug 9, 2011 at 09:35 PM.
Aug 5, 2011 | 11:04 PM
#16
Thread Starter
Registered User
Joined: Aug 2011
Posts: 148
Likes: 0
80 series axle sans bracketry ground out n sanded where ground almost ready for primer
is that pic any better guys? used a link to photobucket.....I fabricate not computercate!!
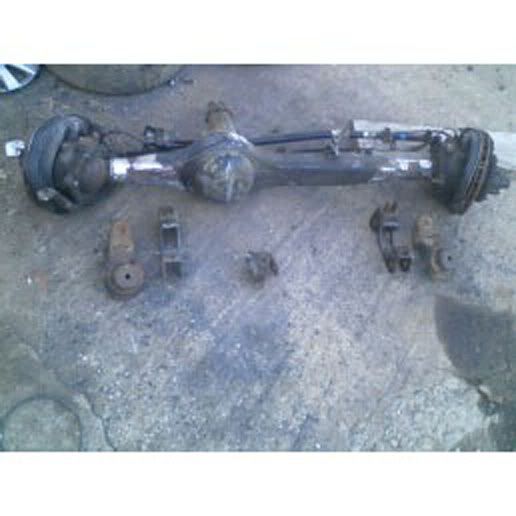
is that pic any better guys? used a link to photobucket.....I fabricate not computercate!!
Last edited by Killer B; Aug 9, 2011 at 09:37 PM.
Aug 5, 2011 | 11:11 PM
#17
Thread Starter
Registered User
Joined: Aug 2011
Posts: 148
Likes: 0
primed to keep it from rusting up- will sand blast later pic.
I made a jig to hold the axle centered to be able to weld on the spring pads and it can be rotated for different caster/degrees before welding spring pads, pics later
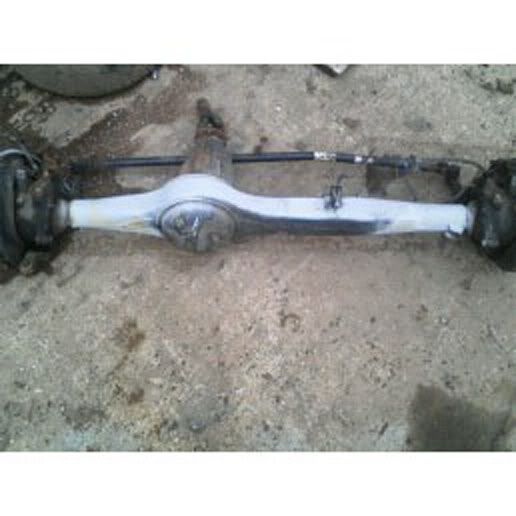
I made a jig to hold the axle centered to be able to weld on the spring pads and it can be rotated for different caster/degrees before welding spring pads, pics later
Last edited by Killer B; Aug 9, 2011 at 09:39 PM.
 Aug 6, 2011 | 04:31 PM
#20
Thread Starter
Registered User
Joined: Aug 2011
Posts: 148
Likes: 0
Thanx SC, I hope the pics are better? using photobucket.
I will change out the first group of pics to photoB.


