KawaZX636's 1983 Toyota Pickup Restoration
 09-25-2013, 06:15 PM
#301
Thanks Corey!
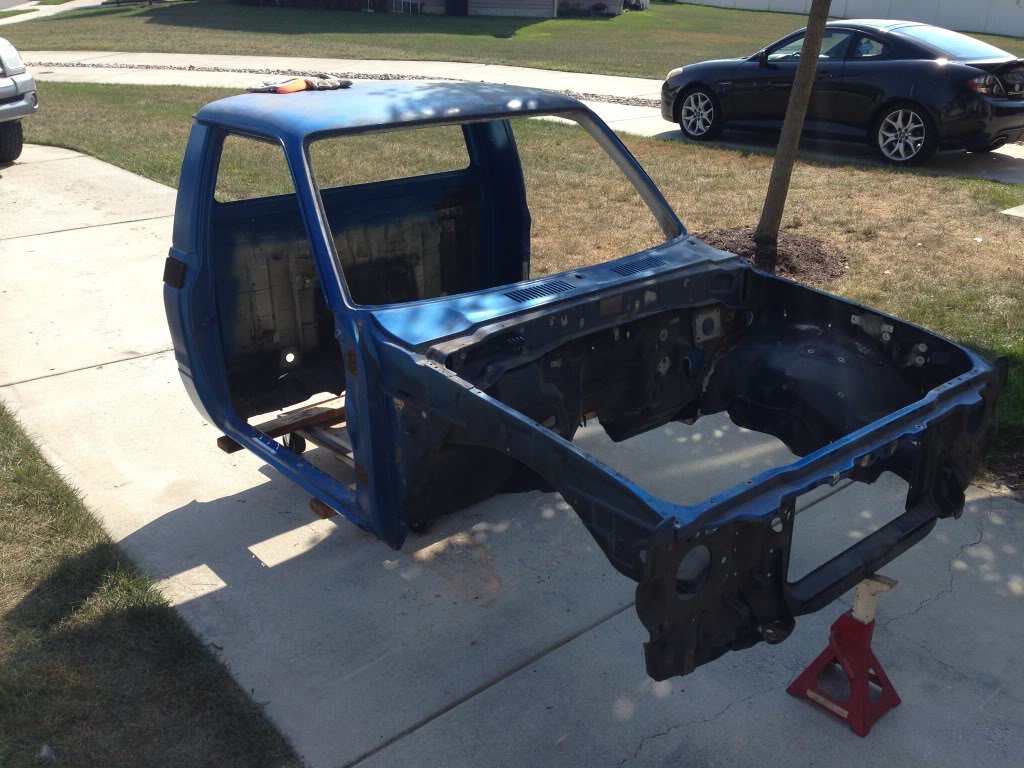
I took my foam core tranny tunnel over to where I'm storing my chassis to check for fitment over and around the transmission and transfer case. The front, wider portion fit fine, but the shorter and more narrow section was riding a little too close to the rear of the transfer case. I modified the design to extend the slope (above the shifters) toward the rear by 1" and made the narrow portion about 3/4" higher. That should do the trick. I'll do a final mock up once I get the floors tacked in.
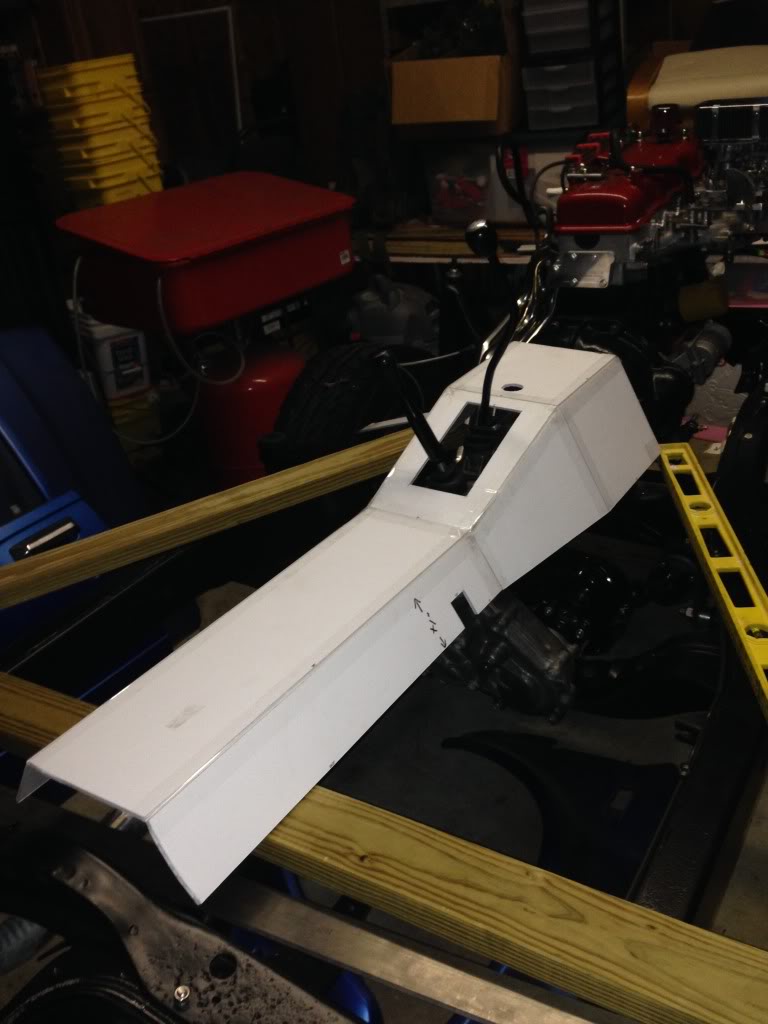
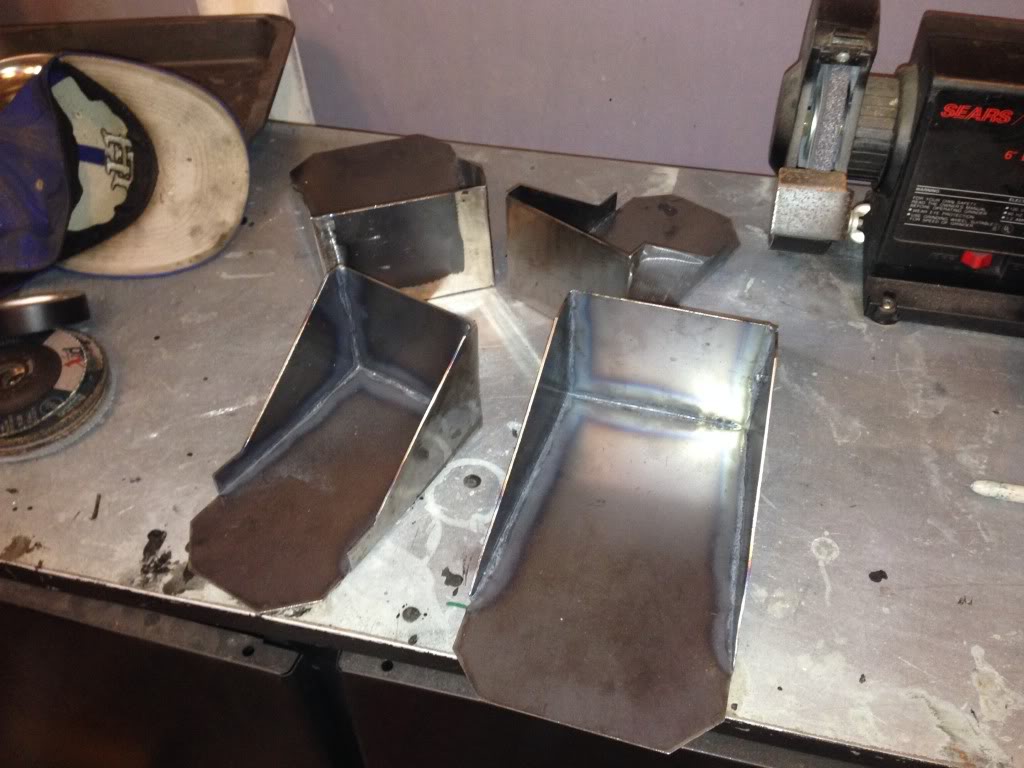
I also finished welding up the body mount brackets tonight. I got about two and a half of them done before I ran out of gas AGAIN! I think I got a light fill on my tank. It's a 80 CF tank which should give me over 6.5 hours of trigger time at 12 CFH. I MIGHT have had about 45 minutes on this tank. I'm certainly going to AirGas tomorrow to speak my peace about this issue. I ended up finishing them up without gas so I have a little more cleaning up and grinding work to do now.
I took my foam core tranny tunnel over to where I'm storing my chassis to check for fitment over and around the transmission and transfer case. The front, wider portion fit fine, but the shorter and more narrow section was riding a little too close to the rear of the transfer case. I modified the design to extend the slope (above the shifters) toward the rear by 1" and made the narrow portion about 3/4" higher. That should do the trick. I'll do a final mock up once I get the floors tacked in.

I also finished welding up the body mount brackets tonight. I got about two and a half of them done before I ran out of gas AGAIN! I think I got a light fill on my tank. It's a 80 CF tank which should give me over 6.5 hours of trigger time at 12 CFH. I MIGHT have had about 45 minutes on this tank. I'm certainly going to AirGas tomorrow to speak my peace about this issue. I ended up finishing them up without gas so I have a little more cleaning up and grinding work to do now.
 09-26-2013, 04:58 PM
#302
Hey Corey, what did you do or use to make that ledge on the inside of your rockers for the floor pan to sit on and weld to in your picture below?
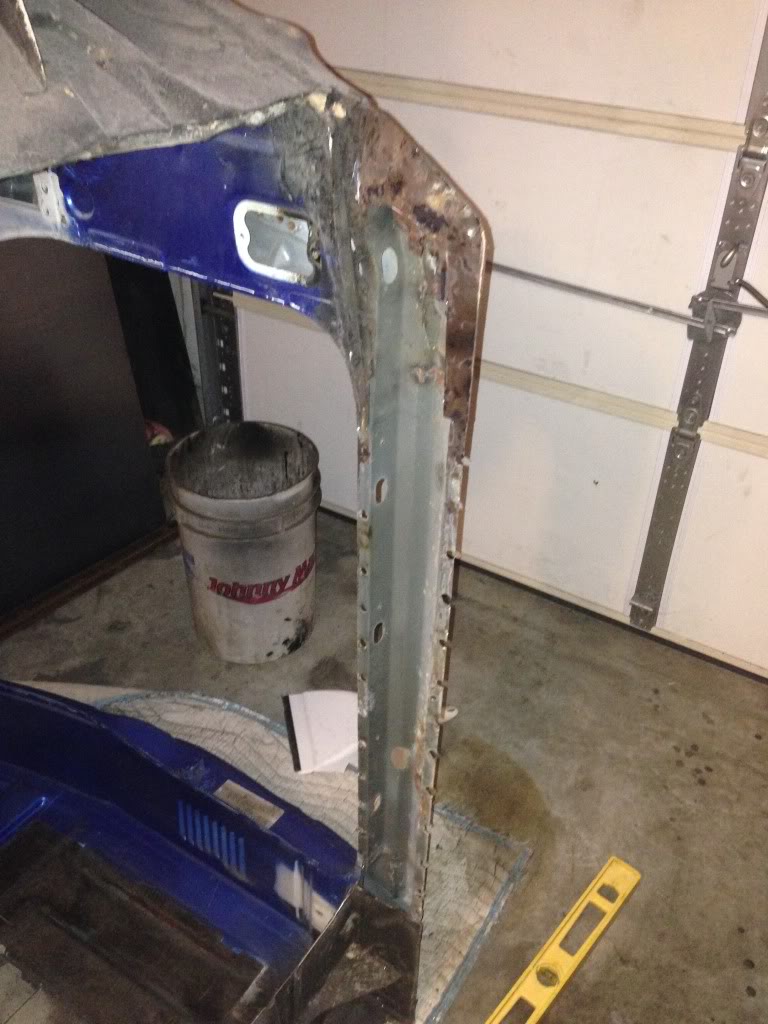
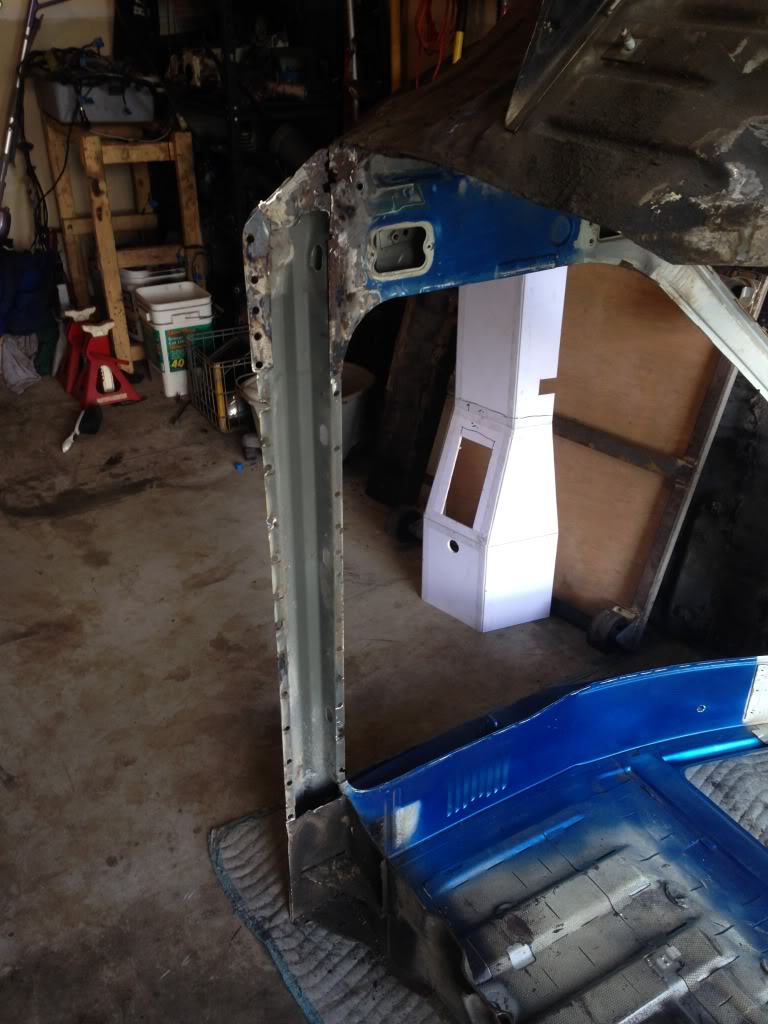
Looks like the back side of my rockers are the only bad metal left. I started cutting out the back side of the rocker panels tonight so I'm trying to get a game plan together. I was just going to weld some 14ga steel to replace what I removed, but I wanted to make sure that I have something solid for the floor pan to rest on and weld to. I could quite see exactly what you did in your thread.

Looks like the back side of my rockers are the only bad metal left. I started cutting out the back side of the rocker panels tonight so I'm trying to get a game plan. I was just going to weld some 14ga steel to replace what I removed, but I wanted to make sure that I have something solid for the floor pan to rest on and weld to.
Looks like the back side of my rockers are the only bad metal left. I started cutting out the back side of the rocker panels tonight so I'm trying to get a game plan together. I was just going to weld some 14ga steel to replace what I removed, but I wanted to make sure that I have something solid for the floor pan to rest on and weld to. I could quite see exactly what you did in your thread.
Looks like the back side of my rockers are the only bad metal left. I started cutting out the back side of the rocker panels tonight so I'm trying to get a game plan. I was just going to weld some 14ga steel to replace what I removed, but I wanted to make sure that I have something solid for the floor pan to rest on and weld to.
09-27-2013, 09:08 AM
#304
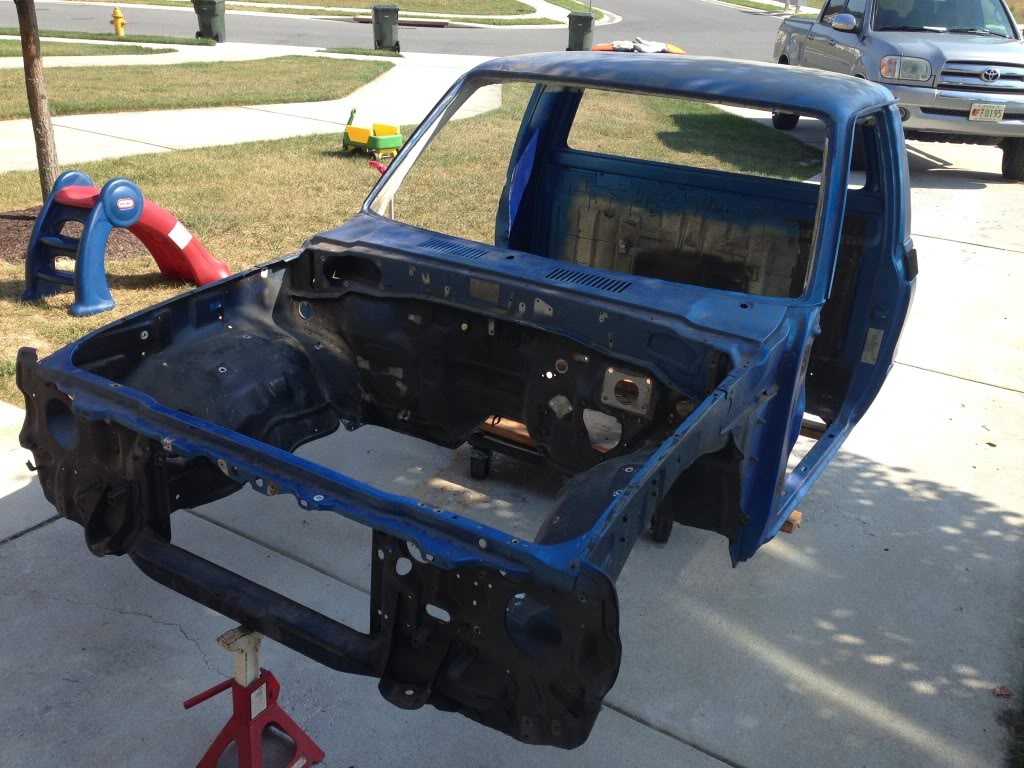
I finished cleaning up the welds on the body mount brackets today. They turned out fairly well despite not having gas for half the welds.
Also got most of the cancer cut out along the back of the rocker panels. I was surprised that it went as well as it did with the gobs of bondo on there - only took about 3 hours to do this morning. I might start cutting up some sheet metal next week to mock it up, but I want to sandblast it and spray on some weldable primer before I get too far.
Now I'm off to get my hair did and some stuff done before my friend's wedding rehersal dinner tonight.

Also got most of the cancer cut out along the back of the rocker panels. I was surprised that it went as well as it did with the gobs of bondo on there - only took about 3 hours to do this morning. I might start cutting up some sheet metal next week to mock it up, but I want to sandblast it and spray on some weldable primer before I get too far.


Now I'm off to get my hair did and some stuff done before my friend's wedding rehersal dinner tonight.

The following users liked this post:
SMG (09-24-2020)
10-07-2013, 12:34 PM
#307
I rolled the cab out of the garage for some sandblasting this weekend. I just sandblasted the inside and outside of the rocker panels and any portion of the cab that I will be welding the floor to soon. I didn't want to sandblast the whole thing until I'm ready to throw on some sealer to protect the metal. Here's what its started like:
And after:
No major surprises other than the driver side rocker panel having a couple of spots rusted through about mid way back on the rocker panel. The PO actually didn't do a bad job on the filler in that area, but I blasted it off anyway to repair again. It's not bad enough to have to replace the actual rocker panel though. My primary areas of concern are the rusted out areas around the front cab corner where it meets up with the kick panel. I'm going to end up cutting that section out and replace it with new sheet metal that runs about 2 inches up the kick panel and down to the bottom of the rocker panel. Shouldn't be too bad (famous last words).


And after:


No major surprises other than the driver side rocker panel having a couple of spots rusted through about mid way back on the rocker panel. The PO actually didn't do a bad job on the filler in that area, but I blasted it off anyway to repair again. It's not bad enough to have to replace the actual rocker panel though. My primary areas of concern are the rusted out areas around the front cab corner where it meets up with the kick panel. I'm going to end up cutting that section out and replace it with new sheet metal that runs about 2 inches up the kick panel and down to the bottom of the rocker panel. Shouldn't be too bad (famous last words).
Last edited by kawazx636; 10-07-2013 at 12:35 PM.
 10-08-2013, 10:14 AM
#309
I've seen replacement rocker panels out there before, but I don't know how good they are. I think Corey (Slacker) with ToyotaFiberglass.com sells some fiberglass rocker panels. Check with him to see what he has or recommends.
10-11-2013, 09:01 PM
#311
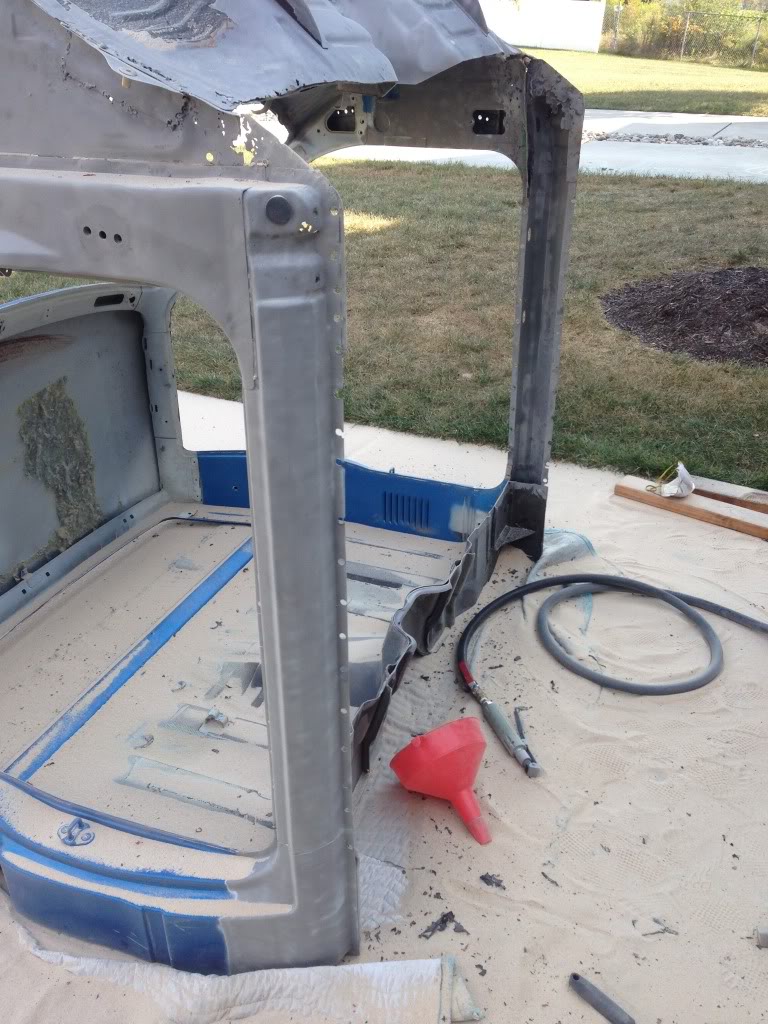
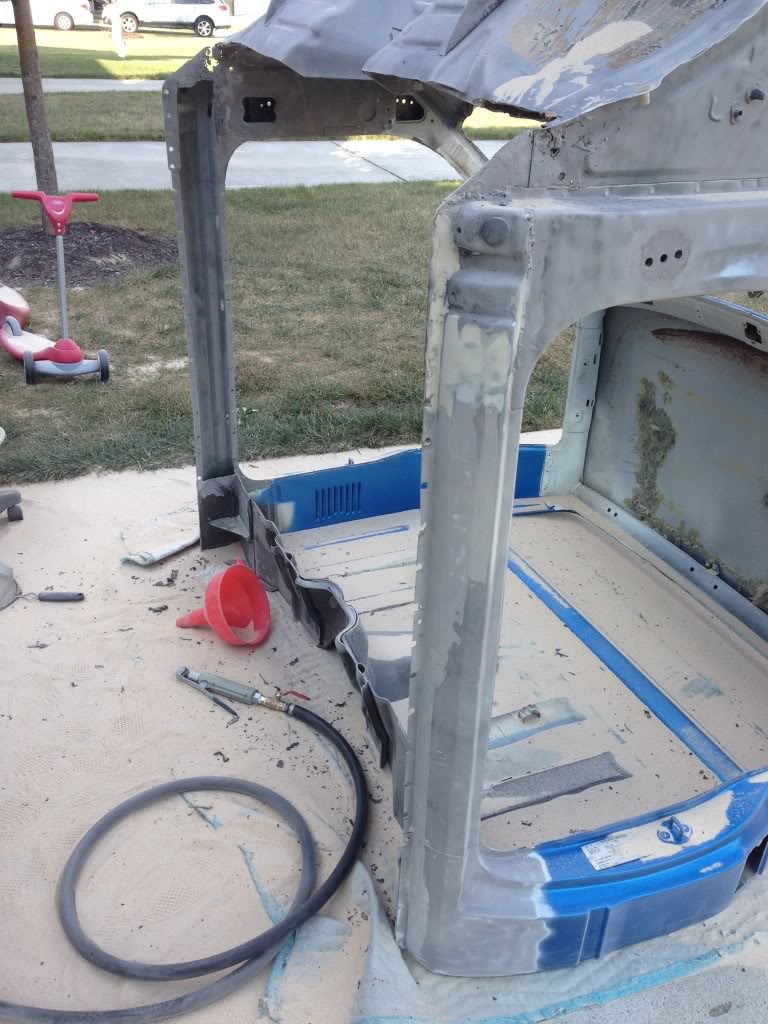
Well as expected, the surprises keep coming. I left the rear of the floorpan attached so that I could keep the rigidity of the cab until I was closer to installing the new floor pan. Today I was looking at it and noticed some bondo on the rear cab wall. Soooo... after cutting out the last section of the floor pan I ended up cutting a small section out of the rear cab wall on both sides.
Here's the before with the floor pan stil intact:

Here it is after cutting it out:
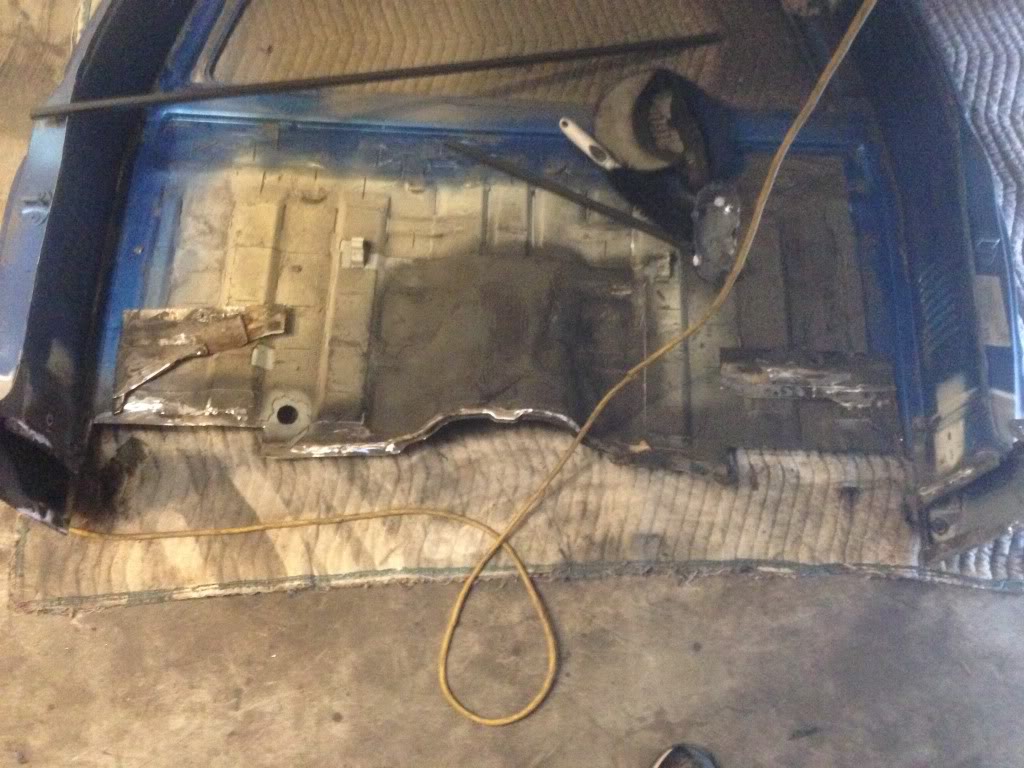
You can kind of see the bondo on the passenger side (left in the photo). The driver side wasn't as bad as the passenger side. The PO sure did like slapping some bondo down. All of his "repairs" consisted of welding in a sheet of 14ga steel with what appears to be stick work and then covering it with a handful of bondo. He didn't even bother cleaning up his patch work. What amazes me is that the sheet of steel that he welded in was somehow inserted between the rear cab wall and the rear passenger side body mount. I have no clue how he did it unless the factory spot welds failed. Nonetheless, I made some templates so that I can cut some patches out of 16ga steel to weld in.
My son went to bed early tonight so I had to do some quiet work. I decided to do some light cosmetic work with the welder. I fixed some small rust holes on the driverside rocker panel. There were 4 of them about 2-4 mm in diameter. The rust was very localized so I was able to build up a weld around the holes from the inside and outside of the rocker panel so I could build my welds inward until the holes were closed without blowing through the metal. I also welded up the seems where the rocker panels meet the rear of the cab near the back of the doors. I'm just going for a nice seemless look where ever possible. I'll get some pictures after I grind the welds down
Next on the list I plan on cutting and welding in the back side of the rocker panels and the ledge that the floor will sit on in order to get the rocker panels more rigid so I can flip the cab down and move it around without worrying about bending up the rocker panels.
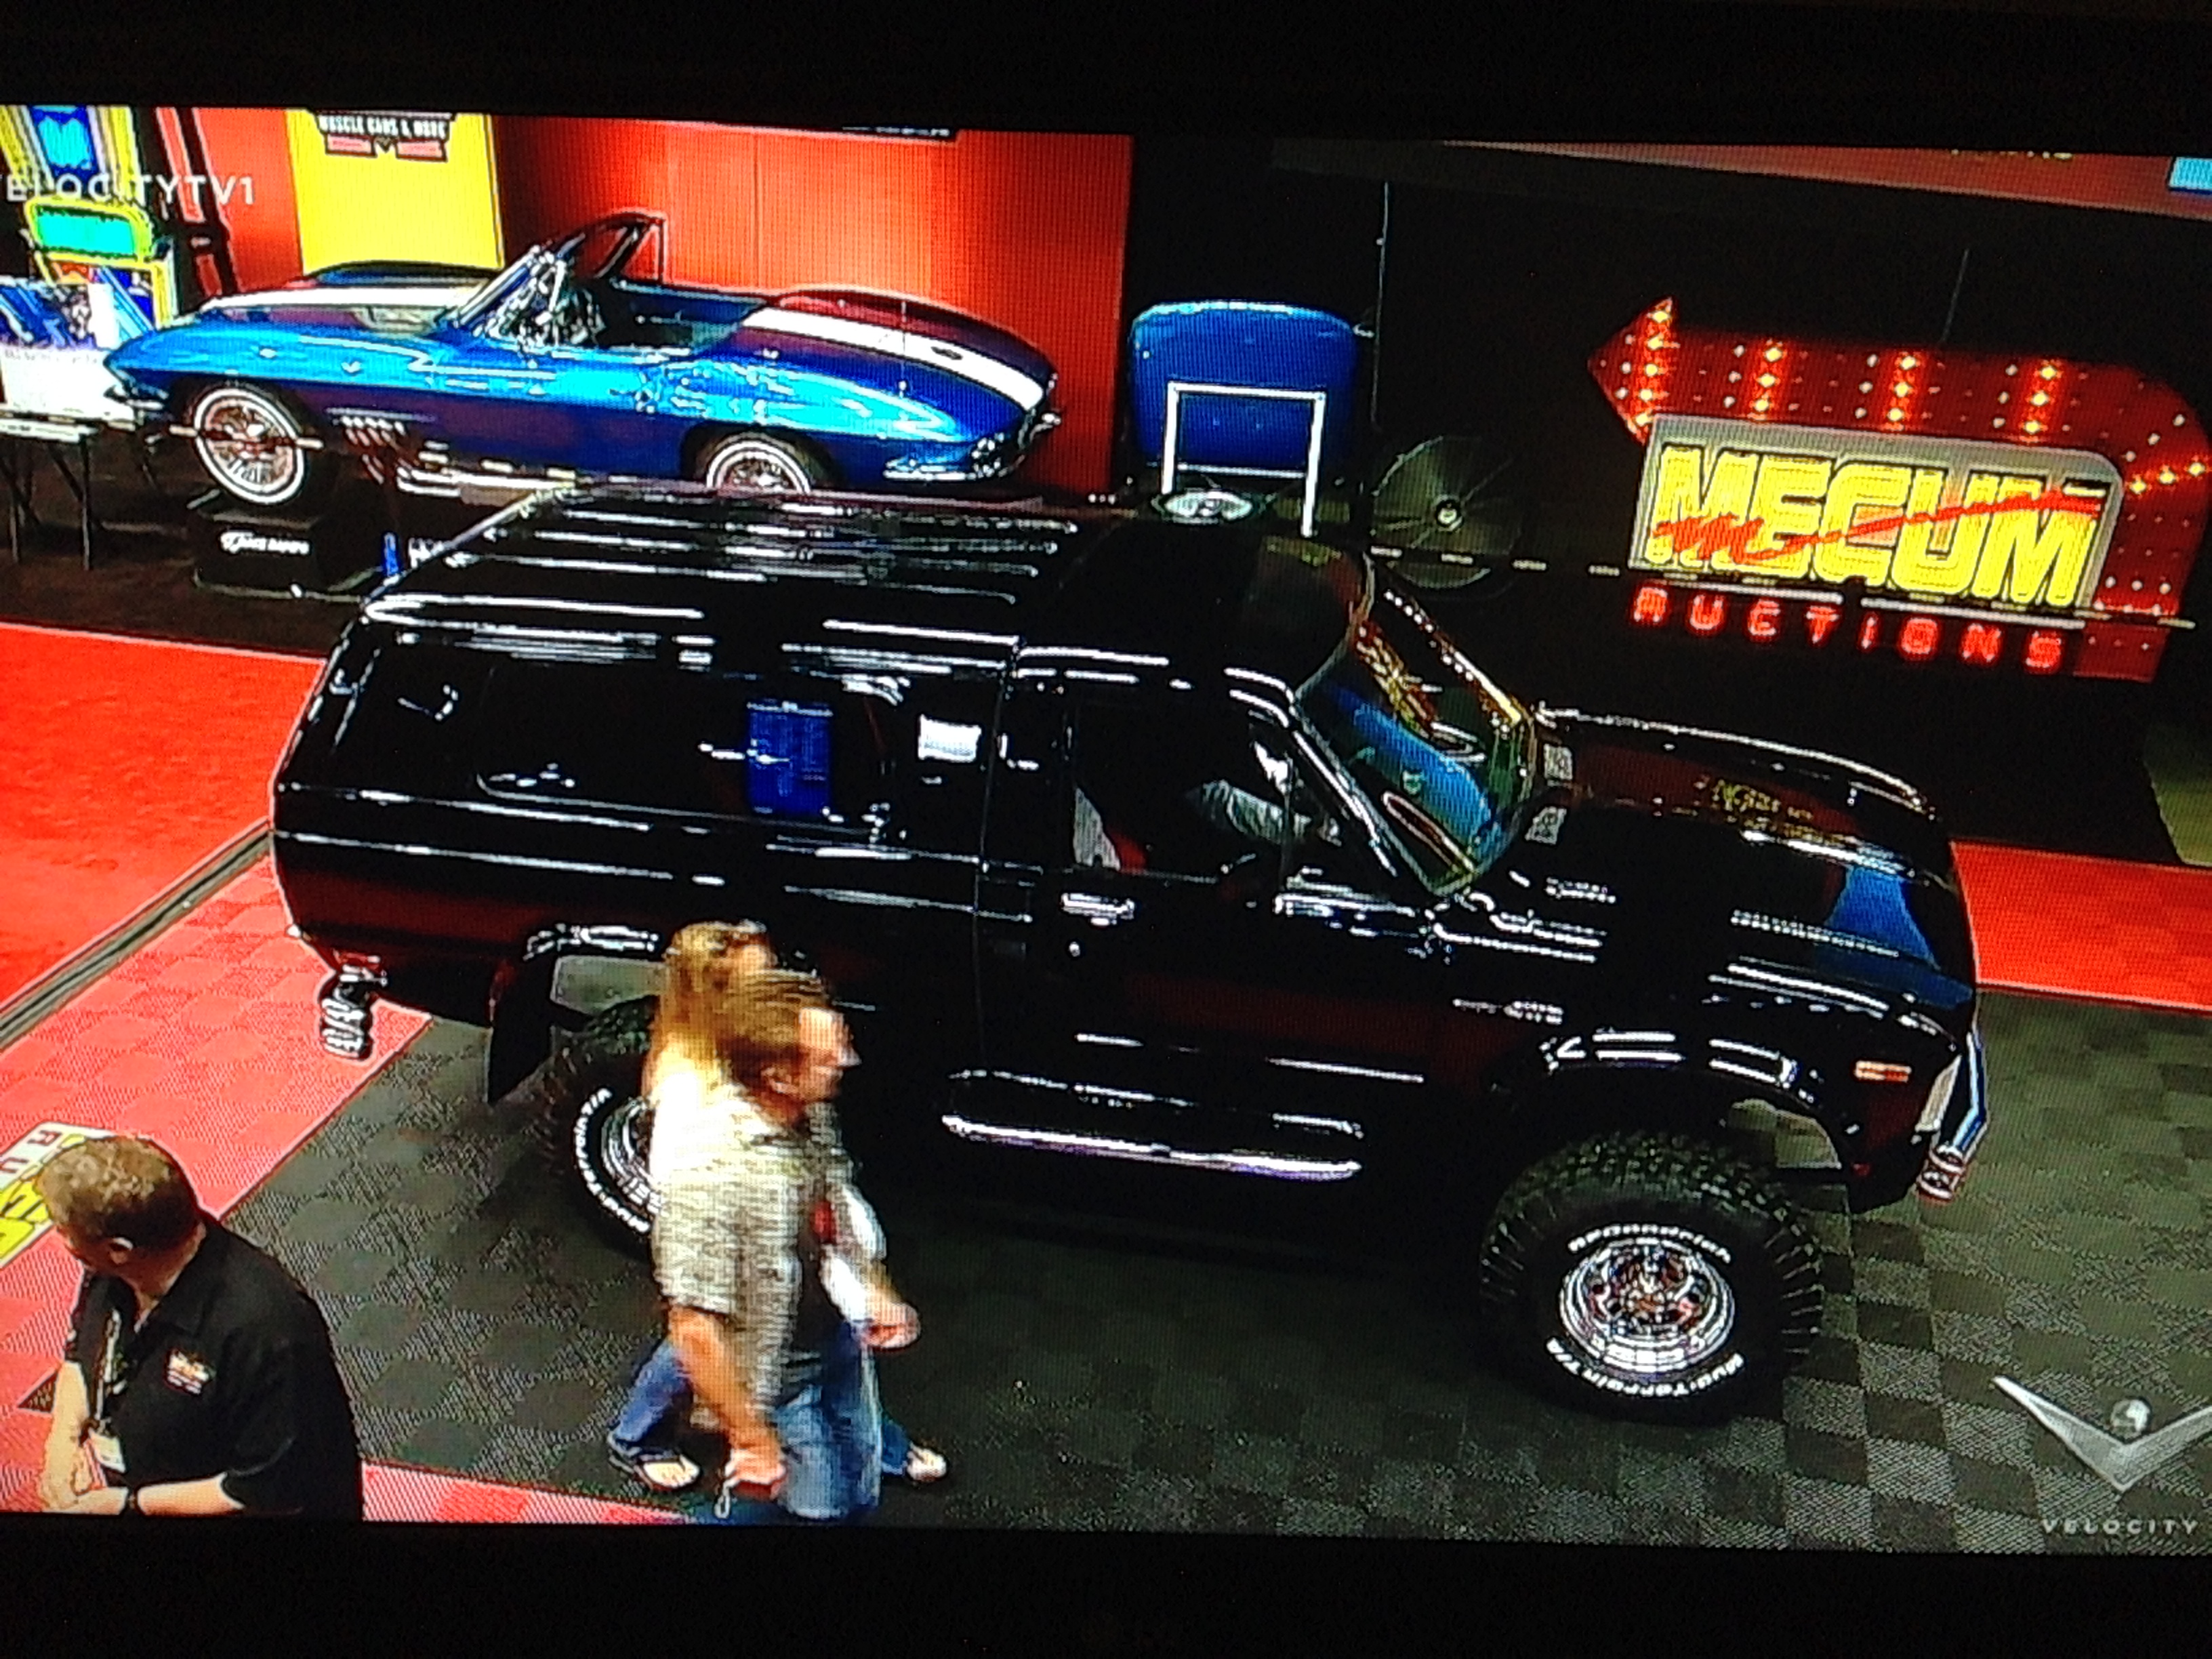
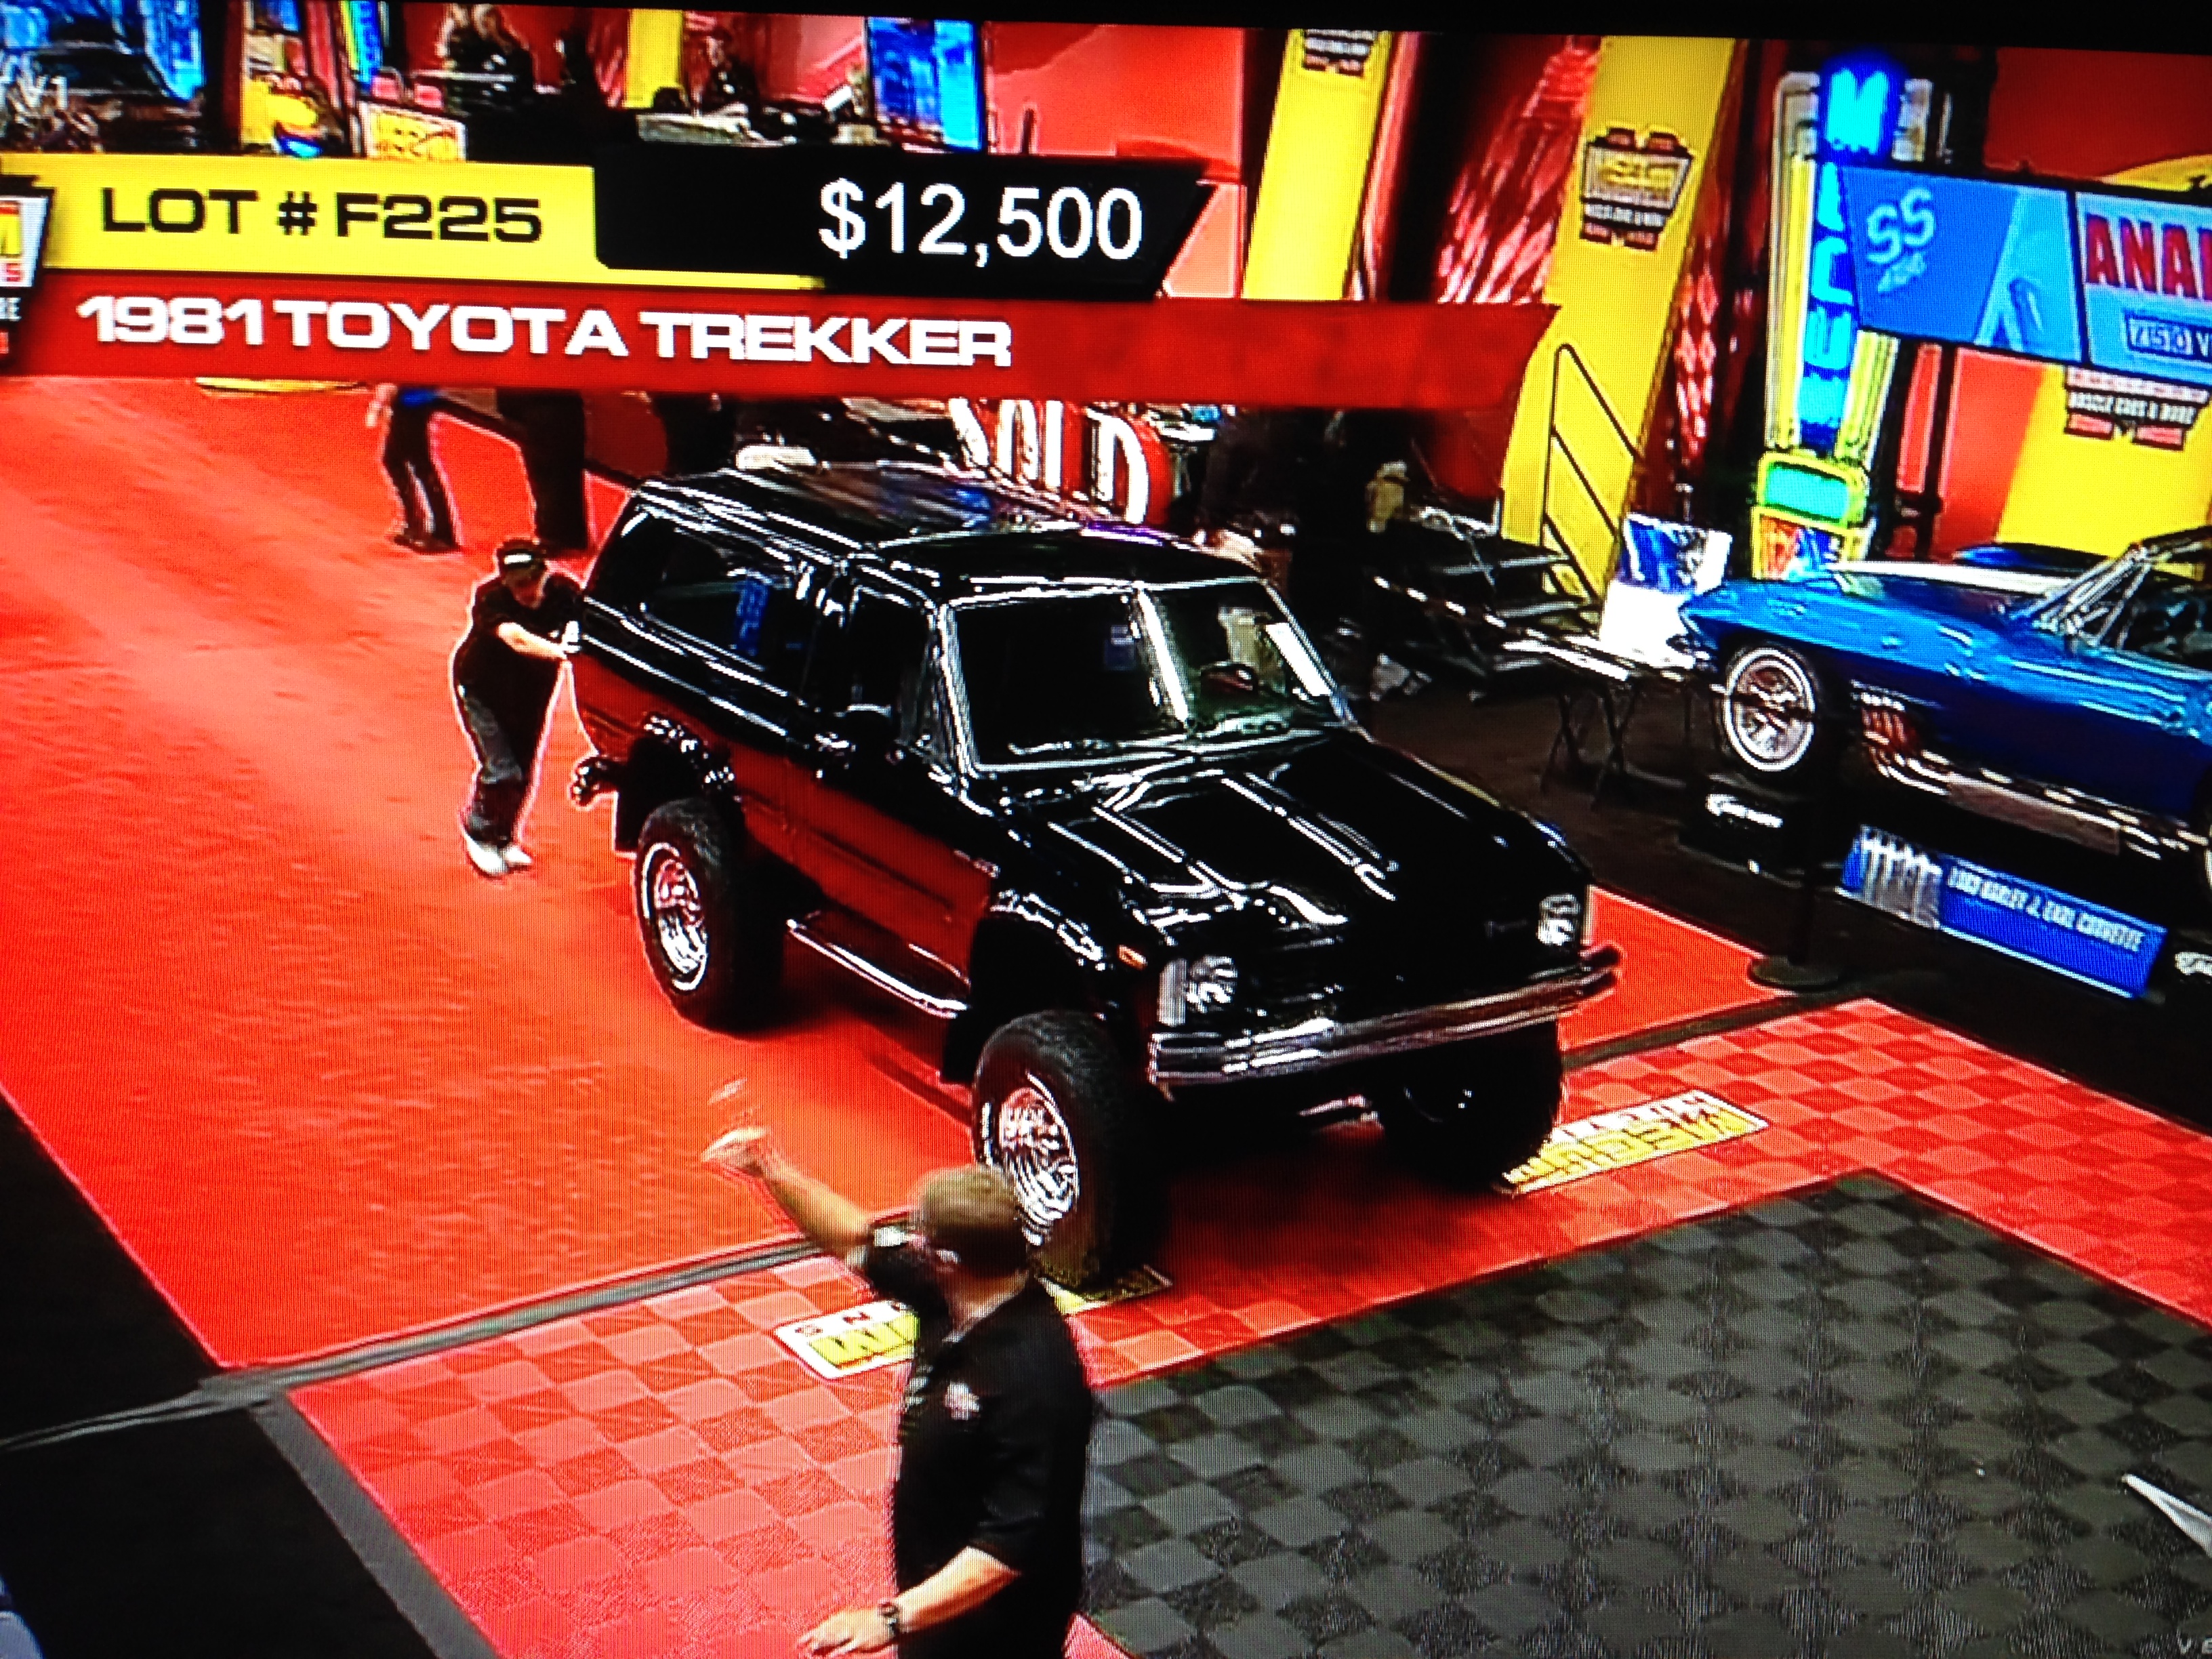
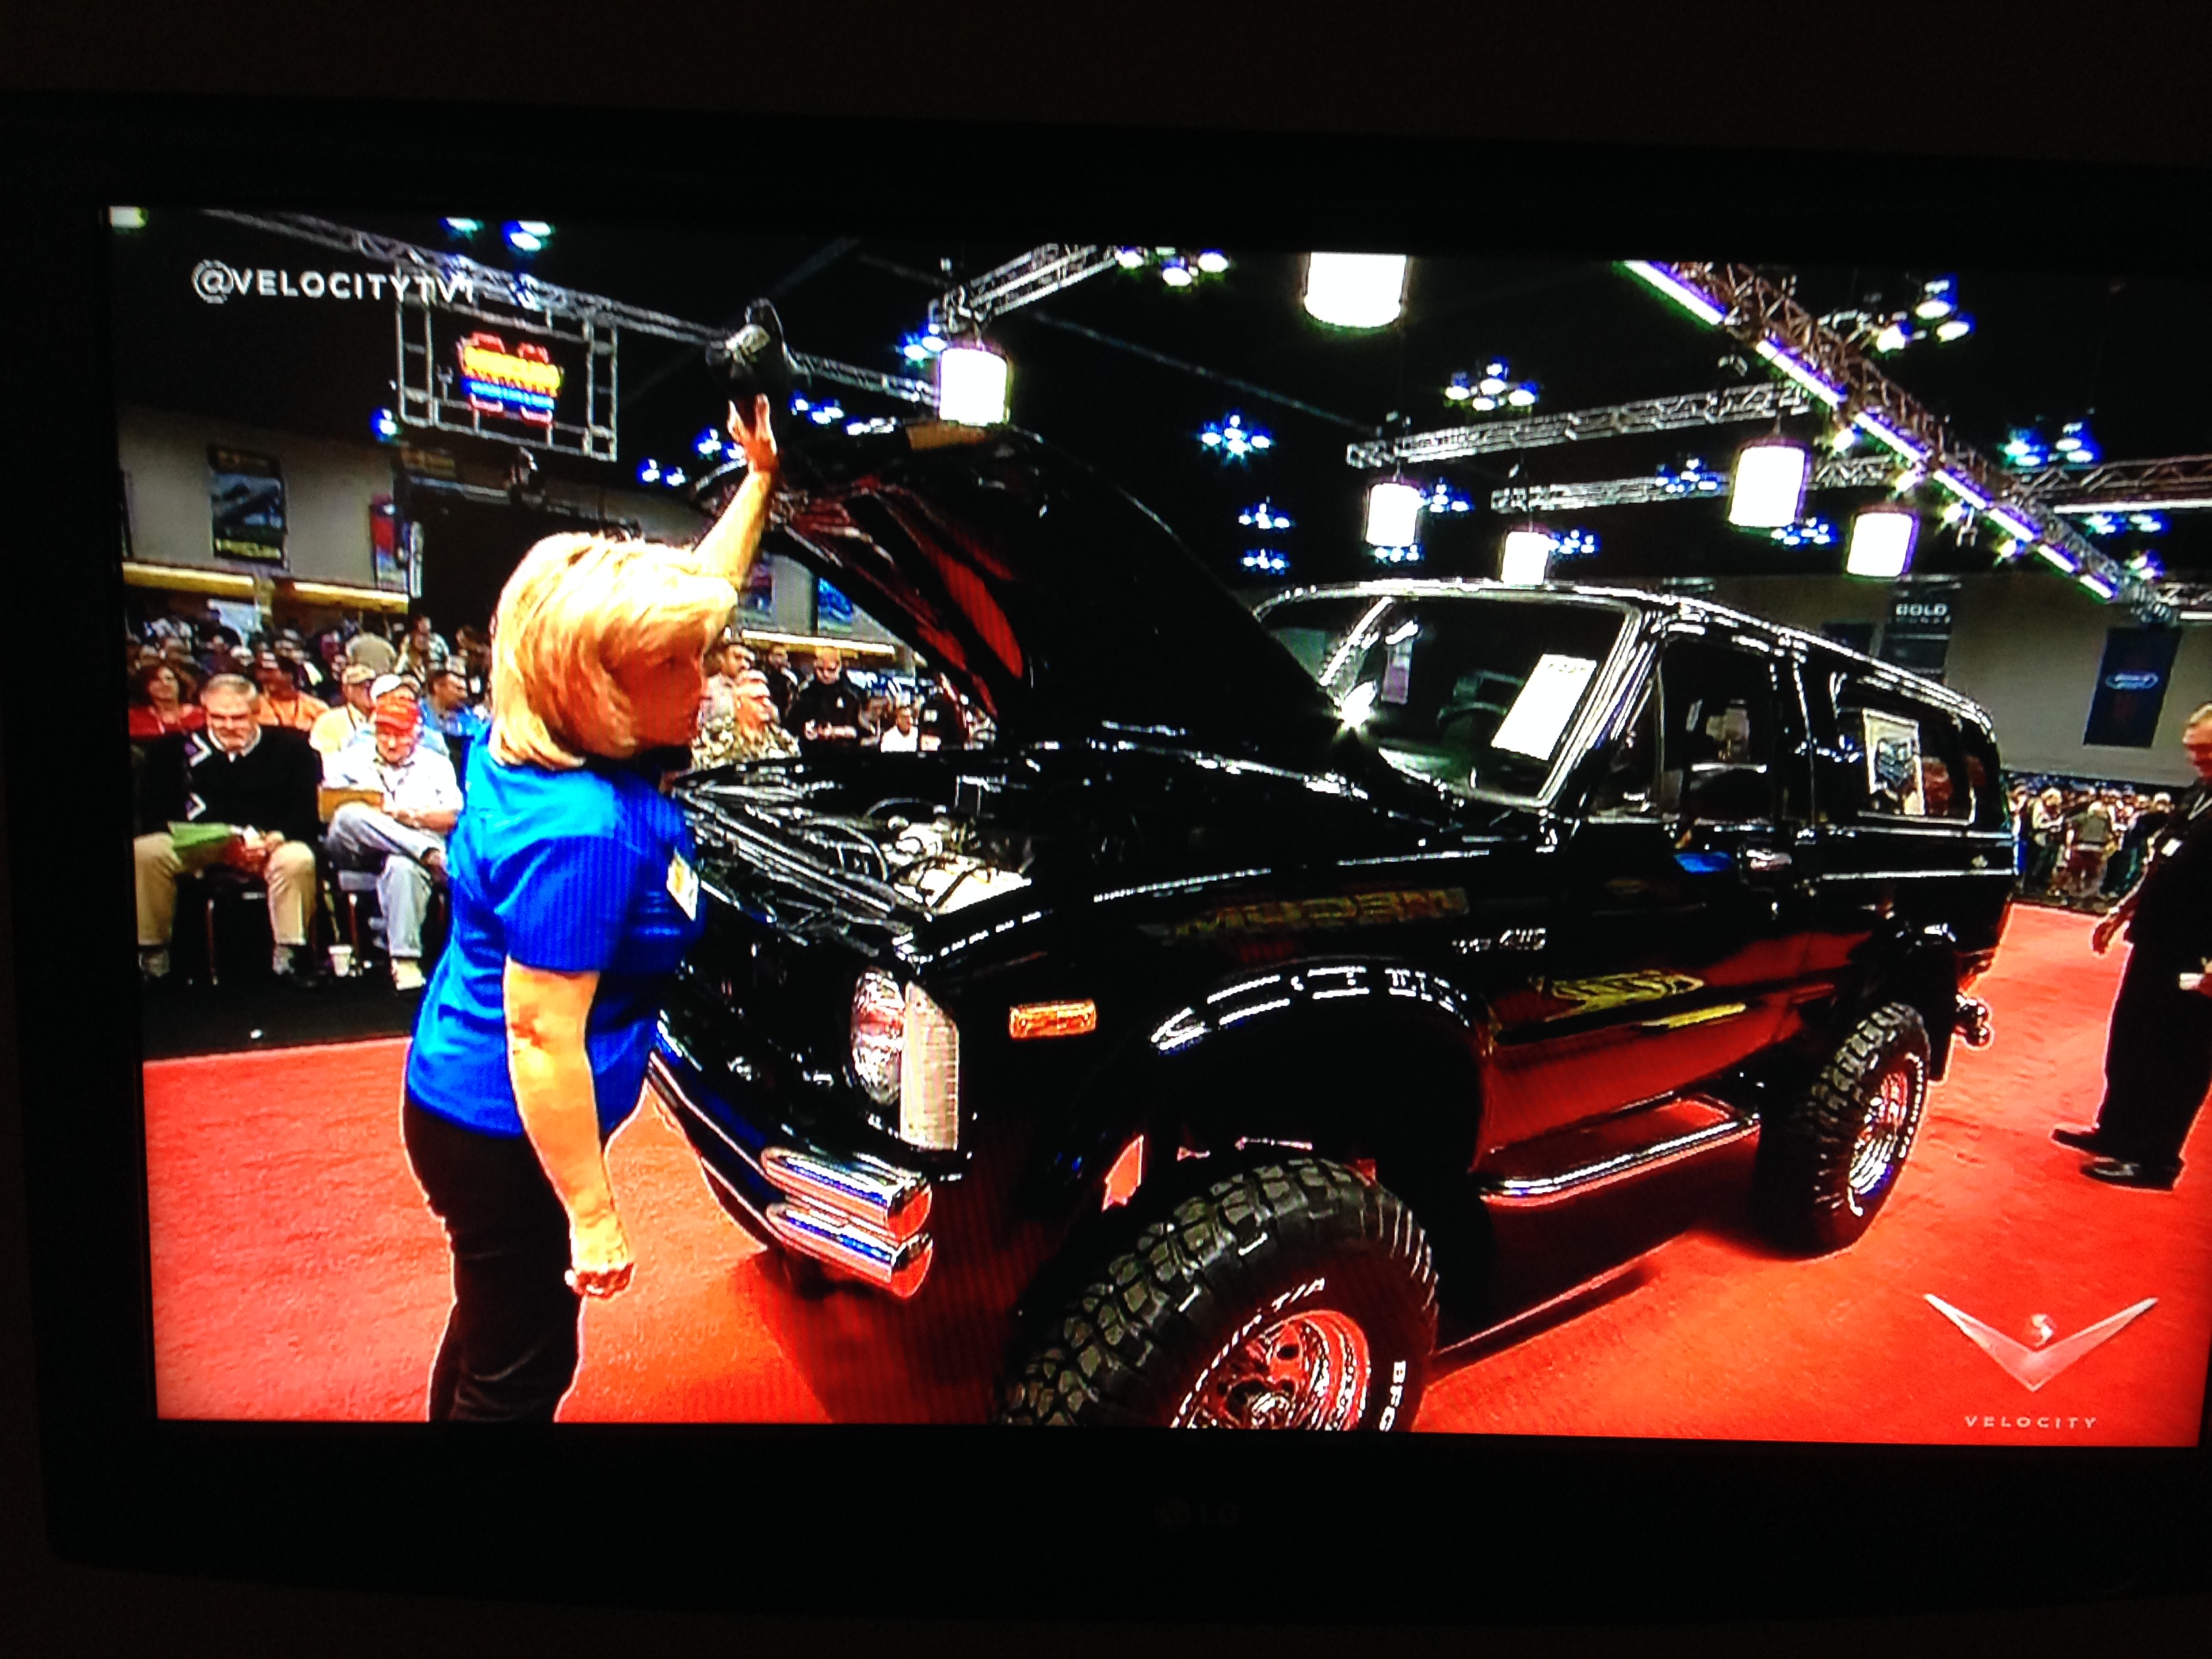
In other news, as I was sitting here typing this post, a 1981Trekker went across the block at the Mecum auction in Chicago! The bid got up to $13,500 but it didn't sell. Check this thing out (of course I took pictures of the TV), it's really well done:
Here's the before with the floor pan stil intact:

Here it is after cutting it out:

You can kind of see the bondo on the passenger side (left in the photo). The driver side wasn't as bad as the passenger side. The PO sure did like slapping some bondo down. All of his "repairs" consisted of welding in a sheet of 14ga steel with what appears to be stick work and then covering it with a handful of bondo. He didn't even bother cleaning up his patch work. What amazes me is that the sheet of steel that he welded in was somehow inserted between the rear cab wall and the rear passenger side body mount. I have no clue how he did it unless the factory spot welds failed. Nonetheless, I made some templates so that I can cut some patches out of 16ga steel to weld in.
My son went to bed early tonight so I had to do some quiet work. I decided to do some light cosmetic work with the welder. I fixed some small rust holes on the driverside rocker panel. There were 4 of them about 2-4 mm in diameter. The rust was very localized so I was able to build up a weld around the holes from the inside and outside of the rocker panel so I could build my welds inward until the holes were closed without blowing through the metal. I also welded up the seems where the rocker panels meet the rear of the cab near the back of the doors. I'm just going for a nice seemless look where ever possible. I'll get some pictures after I grind the welds down
Next on the list I plan on cutting and welding in the back side of the rocker panels and the ledge that the floor will sit on in order to get the rocker panels more rigid so I can flip the cab down and move it around without worrying about bending up the rocker panels.
In other news, as I was sitting here typing this post, a 1981Trekker went across the block at the Mecum auction in Chicago! The bid got up to $13,500 but it didn't sell. Check this thing out (of course I took pictures of the TV), it's really well done:


 10-13-2013, 08:11 AM
#312
Registered User
Join Date: Sep 2013
Posts: 69
Likes: 0
Received 0 Likes
on
0 Posts
I can imagine your truck looking just as awesome as that trekker when your done. I wish I had all that DIY skills. My truck has its share of bondo and rust and ugly patches. At least you can't tell unless inspected a little close. What do you estimate your final restoration cost will total? I know doing fab and repairs yourself is a big $$$ saver but just wanna get a ball park figure on a resto like yours.
 10-17-2013, 10:31 AM
#316
Got some great news today!! My Ma and stepfather thought it would be a great idea to take my 19 month old son on their camping trip this weekend - they are far more brave than I! I thought, "hey, this is great! Now how do I get rid of my wife for the weekend?" Ironically, there's a wine festival nearby this weekend so I bought my wife and a couple of her friends tickets to go booze it up for the weekend (beer fest was last weekend).
Sooooo.... what shall I do will all my free, undistracted time to be as loud as I want and dirty as I want this weekend?? Oh yeah, that's right, I have some floor pans to build for my truck! BOOYAH! Best $75 I have spent on my wife!
I have to run up the road tomorrow to pick up another sheet of 14ga steel. Hopefully between tonight and tomorrow night I can finish trimming out the rough spots, creating templates and cutting out patches so that I can weld in the back side of the rockers early Saturday morning. From there, the floor mock up should go pretty easy.
10-18-2013, 05:26 AM
#318
I can imagine your truck looking just as awesome as that trekker when your done. I wish I had all that DIY skills. My truck has its share of bondo and rust and ugly patches. At least you can't tell unless inspected a little close. What do you estimate your final restoration cost will total? I know doing fab and repairs yourself is a big $$$ saver but just wanna get a ball park figure on a resto like yours.
If I had to put a number to the progress so far, I would say that I'm in it for about $9,000 right now. That's for the rebuilding the engine, building the chassis and my current progress on the bodywork. If you go back to my first post ( https://www.yotatech.com/forums/f197.../#post52029292 ) I have a list of all the parts that I have purchased so far and where I purchased them from. I do save a tremendous amount of money by doing everything myself - the only thing that I have outsourced was the machine work on my engine rebuild.
10-18-2013, 05:33 AM
#319
On another note, did you get my email that I sent you a while back? It was around the first of August regarding a quote for the bed. I want to work on getting the ball rolling on the bed so let me know if I need to shoot the email off to you again. Thanks!


