KawaZX636's 1983 Toyota Pickup Restoration
 01-19-2013, 08:43 PM
#1
KawaZX636's 1983 Toyota Pickup Restoration
Here's my thread on my 1983 Toyota Pickup Restoration
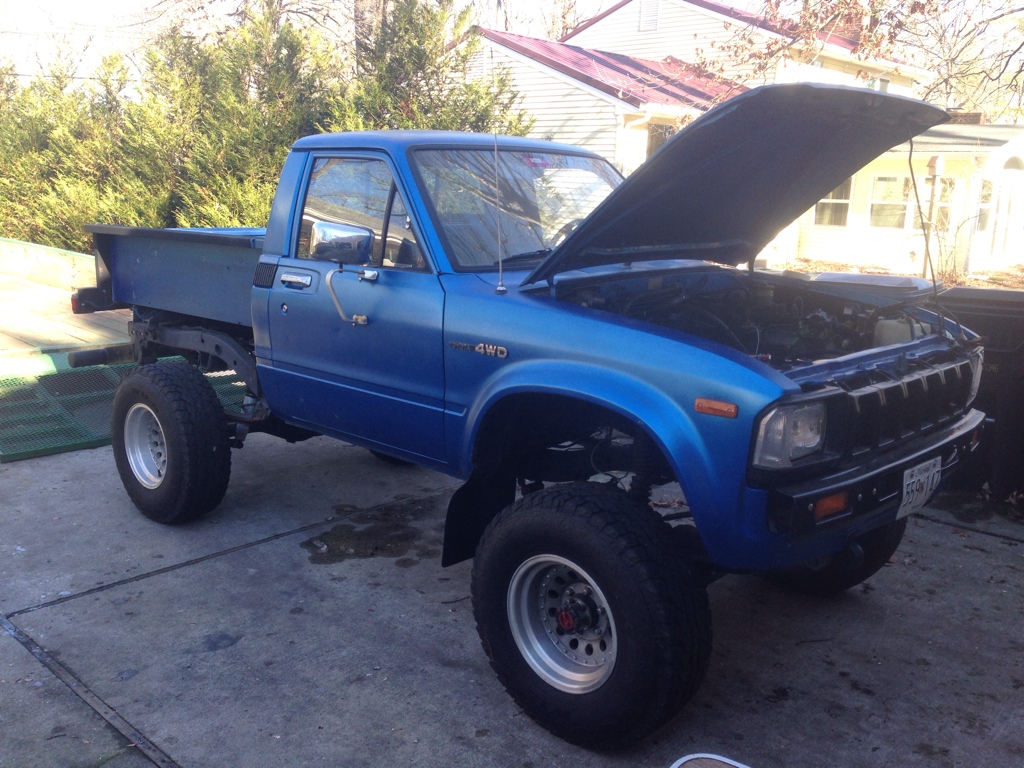
BEFORE:
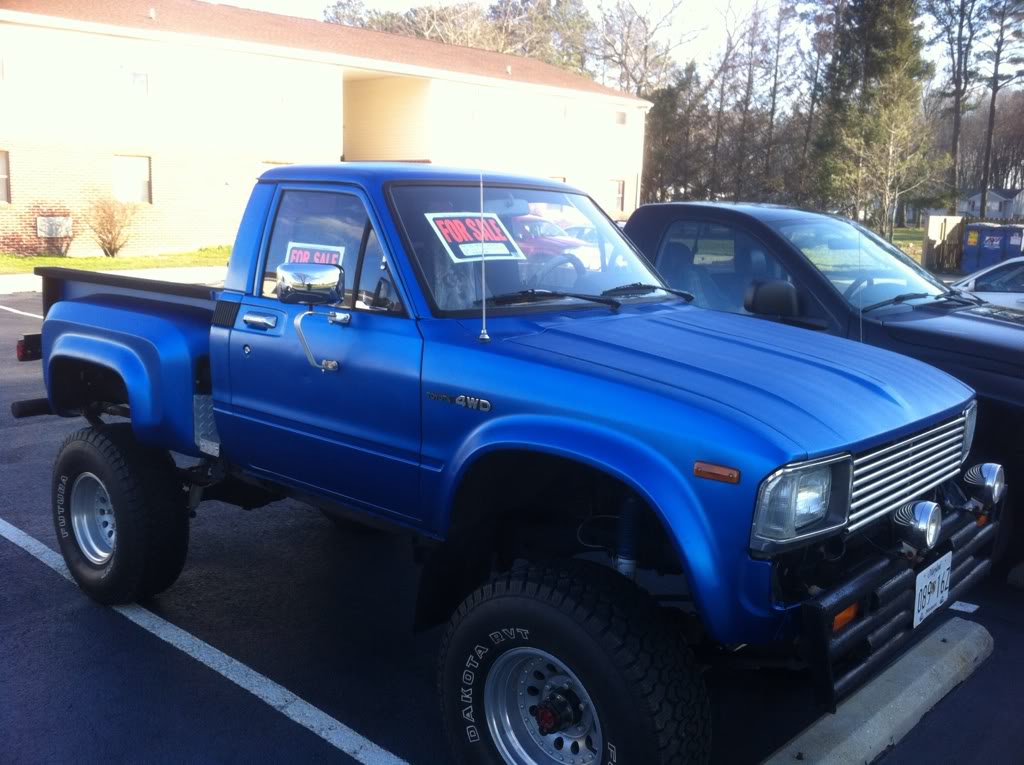
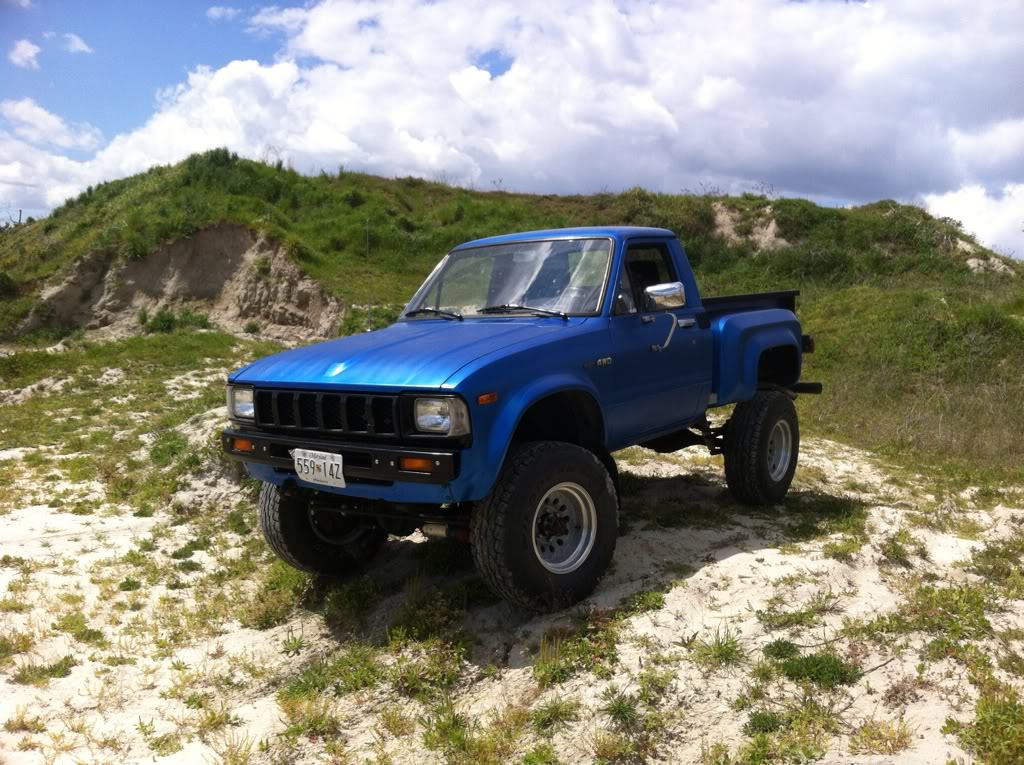
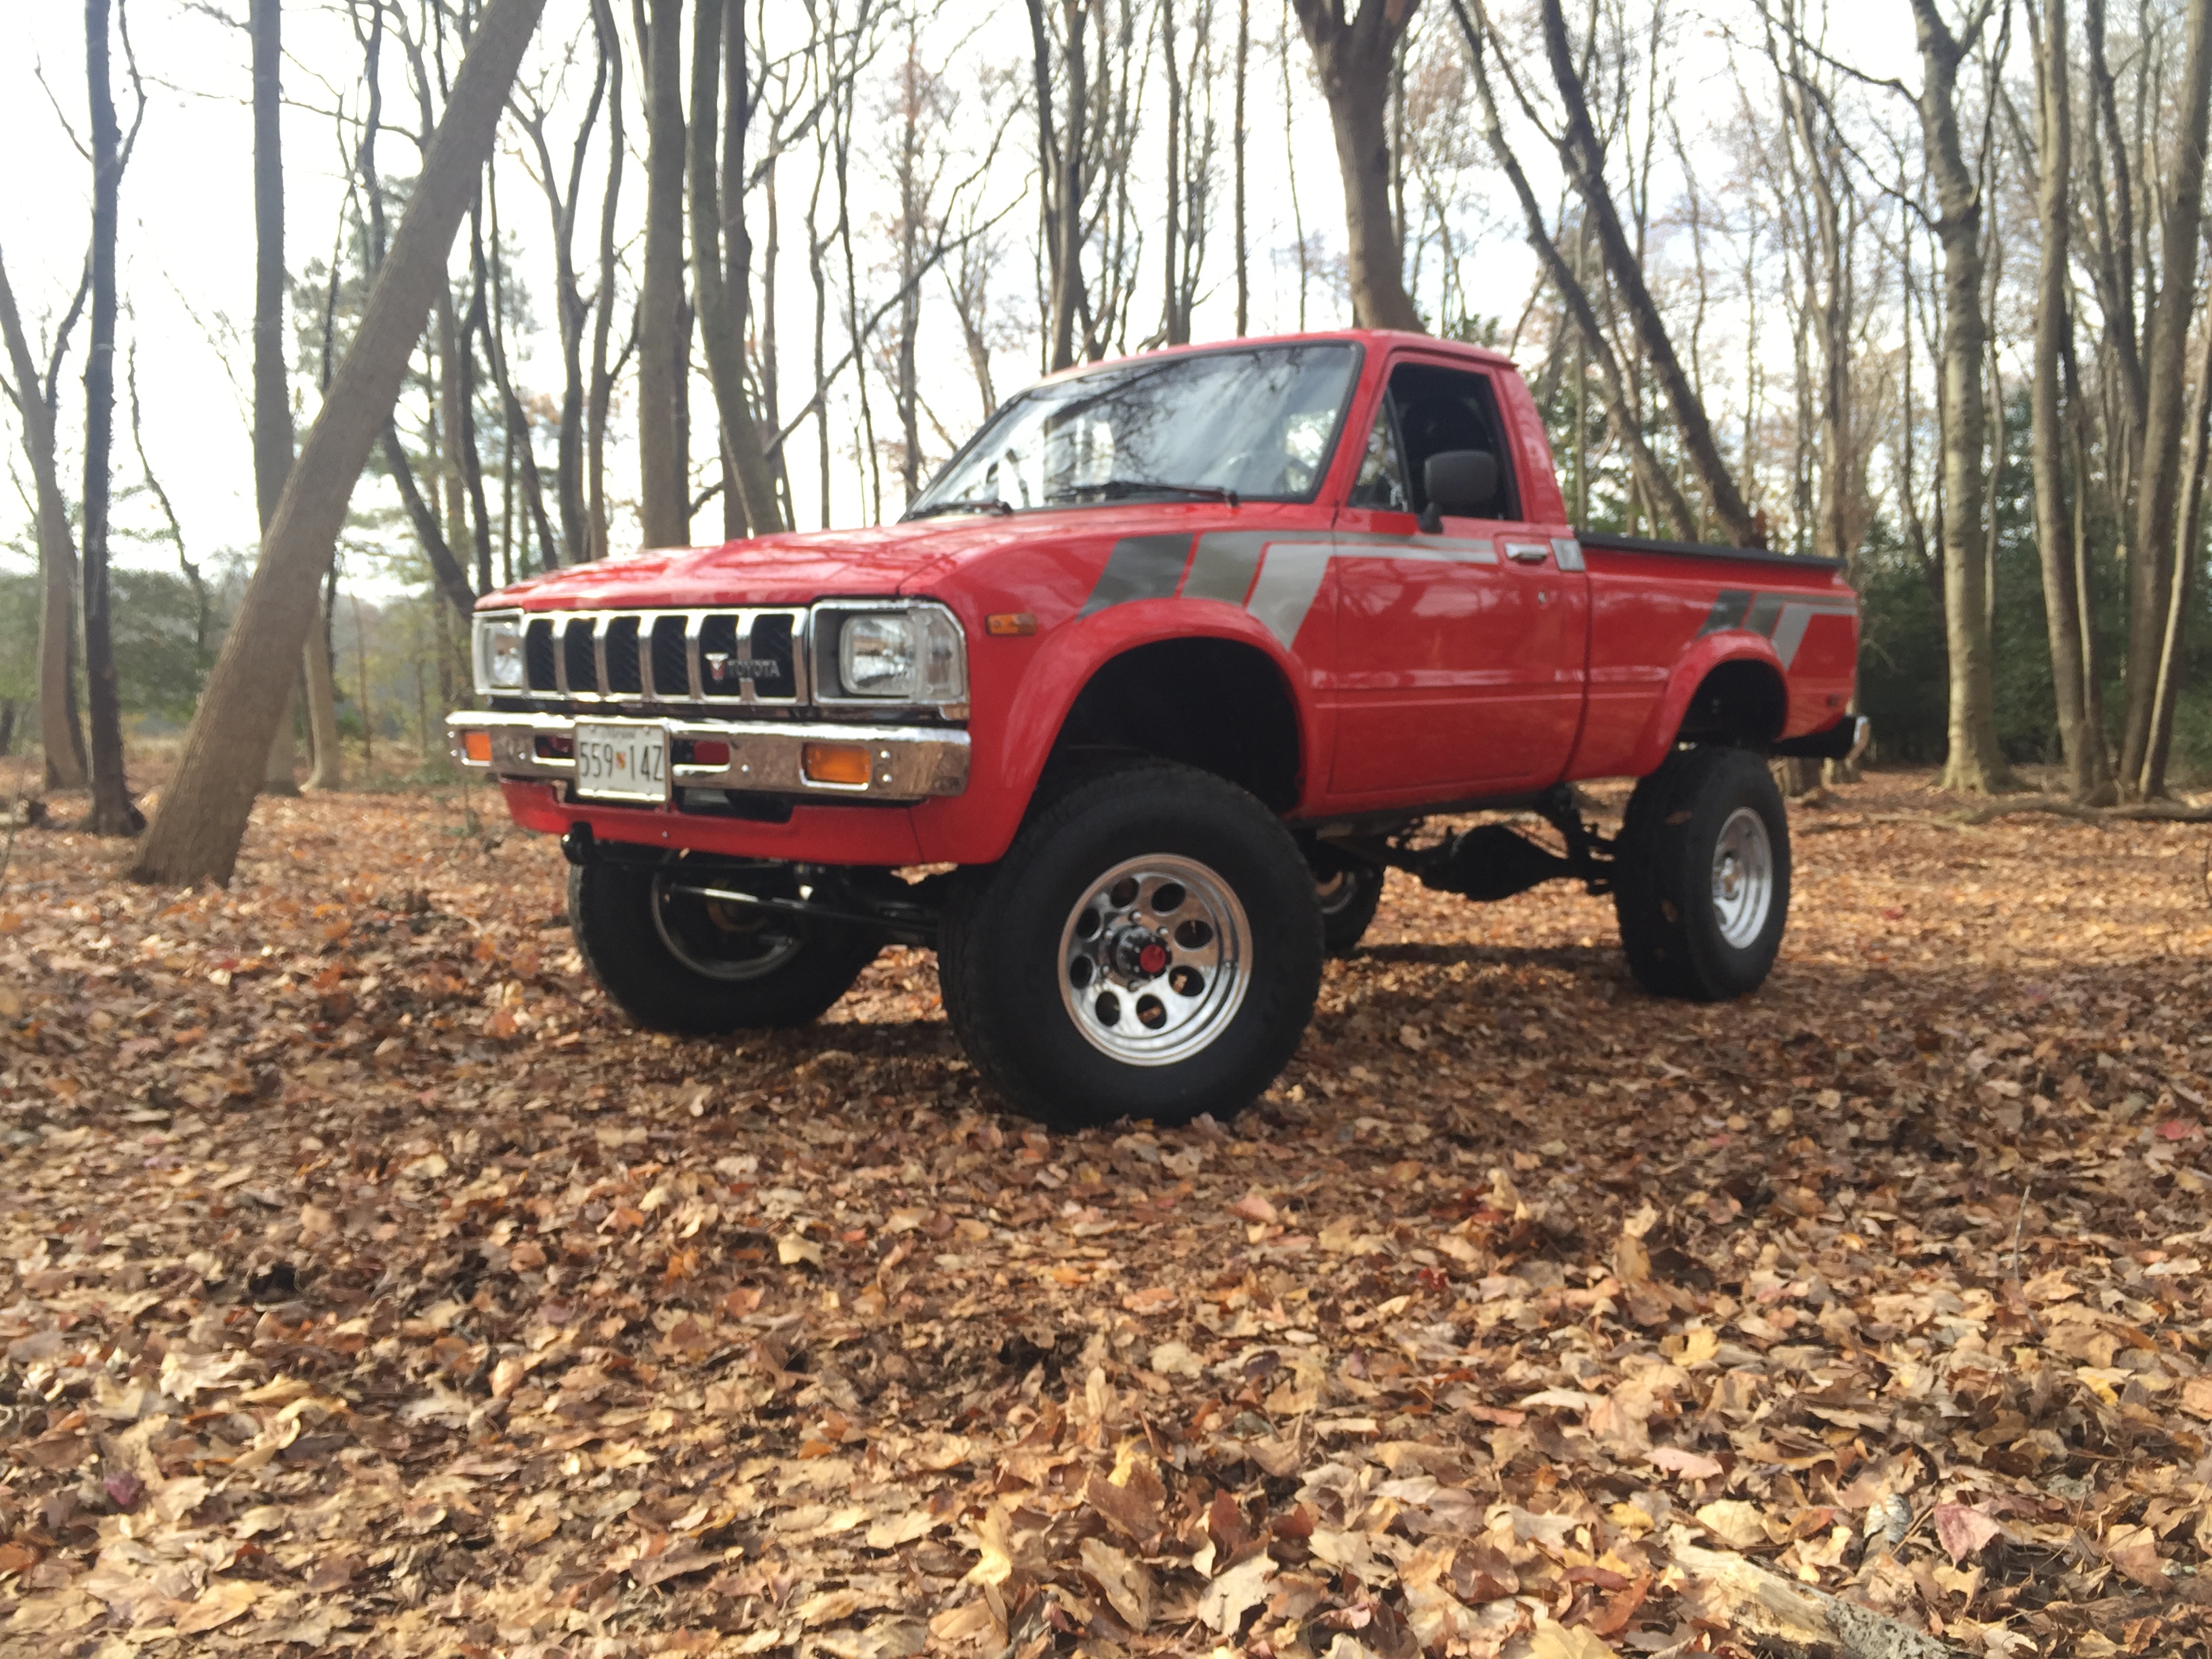
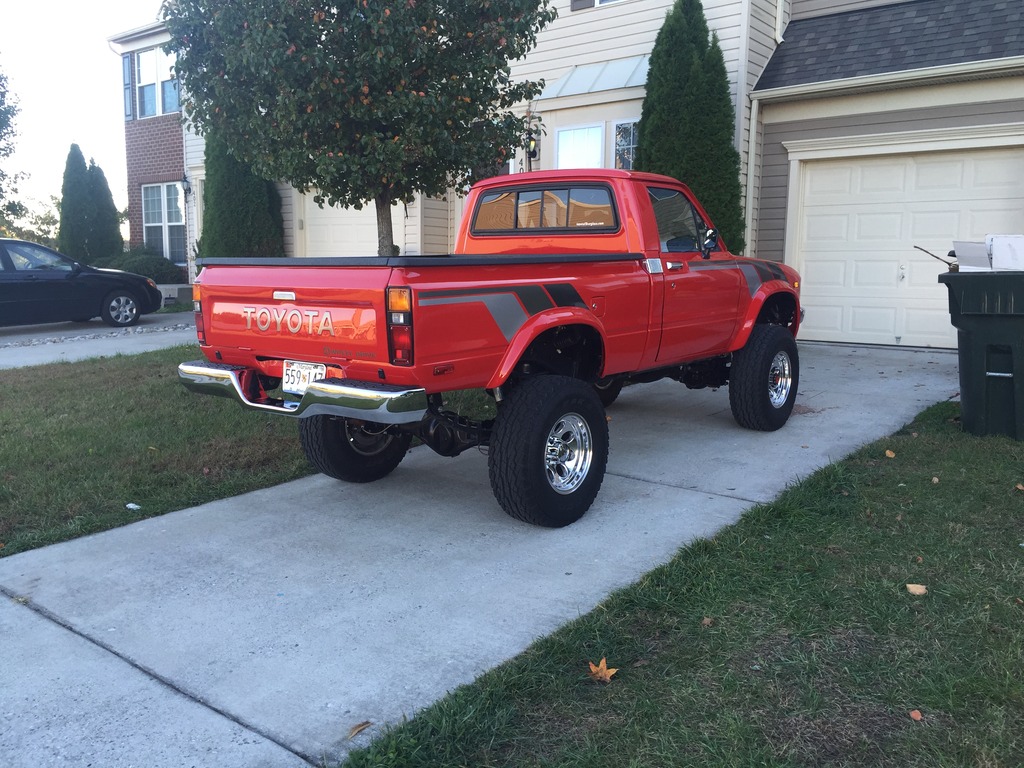
AFTER:


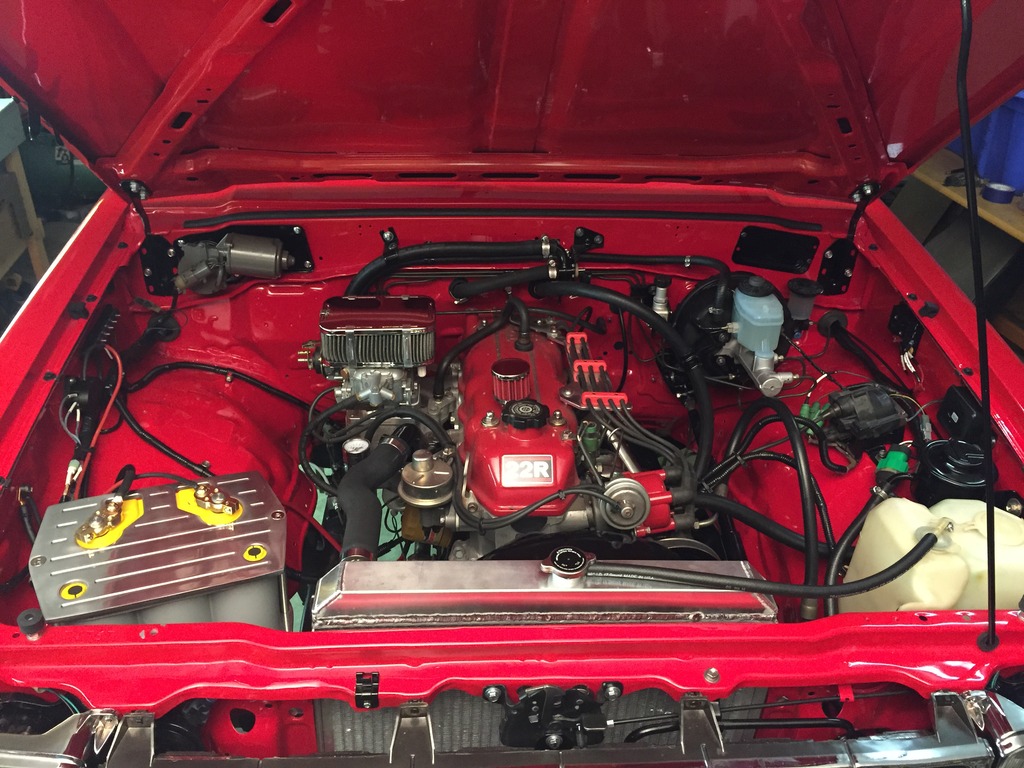
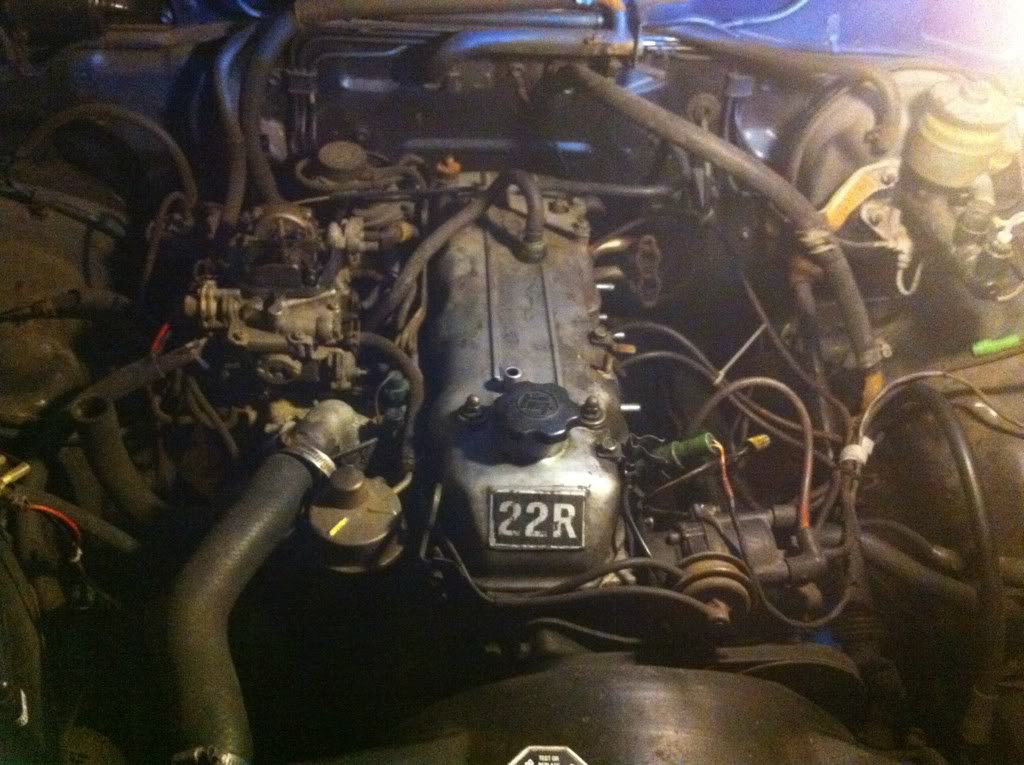
The engine rebuild and process was documented in the following thread:
https://www.yotatech.com/forums/f114...azx636-261494/
You can also learn more about desmogging a 22R engine my visiting my desmogging tutorial thread located here:
https://www.yotatech.com/forums/f114...torial-264405/
Parts purchased and sources (I will be regularly updating the parts list - sources are typically the best and/or cheapest source available at that time):
*Weber 32/36 (LCE) NOTE: I ordered my first carb from Weber Carbs Direct - It was not genuine, Do not order from them!
*Oil Pan (Rock Auto)
*Oil Pan Gasket (Napa)
*EGR Block of Plates (LCE)
*Air Injection Block of Plates (LCE)
*Distributor, Distributor Cap, Distributor Rotor (Advance Auto Parts)
*Fuel Pump (Advance Auto)
*Spark Plug Wires (Advance Auto)
*Fuel Pressure Regulator (Advance Auto)
*Fuel Pressure Gauge (Advance Auto)
*Grille (Parts Geek)
*Lower Valance (Parts Bin)
*Volt Gauge (Advance Auto)
*Oil Pressure Gauge (Advance Auto)
*Water Temperature Gauge (Advance Auto)
*Tachometer (Advance Auto)
*Tires (Discount Tires Direct)
*Suspension Bushing Kit (CarParts Wholesale)
*Spark Plugs (DAX Autoworks)
*Rear Main Seal Saver (LCE)
*Clutch set (Advance Auto)
*Clutch master cylinder (Advance Auto)
*U-Joints (Advance Auto)
*Clutch Slave Cylinder (Advance Auto)
*Starter (Advance Auto)
*Starter Ground Cable (Advance Auto)
*Valves (Engnbldr)
*Valve Guides (Engnbldr)
*Valve Seals (Engnbldr)
*Valve Seals (Engnbldr)
*Head Job (Accubilt Machine Shop - Salisbury, MD)
*Engine Rebuild Kit (Engine Builder)
*Block Machine Work (Accubilt Machine Shop - Salisbury, MD)
*EGR Crossover Plate (LCE)
*Water Block-Off Plate Kit (LCE)
*Manifold Water Block-Off Plate Kit (LCE)
*Wire Loom (LCE)
*Weber Spiral Adapter (LCE)
*Intake Manifold Plug Kit (LCE)
*Head Bolt Set (LCE)
*Timing Cover Hardware Kit (LCE)
*Crank Case Breather Filter (Summit Racing)
*Valve Cover 22R Decal (Low Range Off Road)
*Timing Cover (eBay)
*Fan Clutch (Advance Auto)
*Thermostat (Advance Auto)
*Alternator (AutoZone)
*Fan/Alternator Belt (AutoZone)
*Power Steering Belt (AutoZone)
*Exhaust Manifold Studs (Napa)
*Miscellaneous Fittings and Hardware (Ace Hardware)
*Front Brake Rotors (Advance Auto)
*Front Brake Pads (Advance Auto)
*Motor Mounts (Advance Auto)
*Vacuum Hose (AutoZone)
*Fuel Hose (PepBoys)
*Transfer Case Rubber Shift Boot (Marlin Crawler)
*Transmission Rubber Shift Boot (Marlin Crawler)
*Clutch Fork Rubber Boot (Marlin Crawler)
*Crank Case Breather Filter (Summit Racing)
*Turbo Thrush Welder Muffler (Summit Racing)
*Exhaust Flex Pipe (Advance Auto)
*POR-15 (Eastwood)
*Chassis Coat (Eastwood)
*Marine Clean (Eastwood)
*Metal Ready (Eastwood)
*POR-15 Solvent (Eastwood)
*Miscellaneous Grinding Wheels, Cutting Discs, Sanding Supplies (Lowe's)
*Knuckle Rebuild Kit (Trail-Gear)
*Front Wheel Bearing Kit (Trail-Gear)
*Hub Stud Kit (Low Range Off Road)
*Front Wheel Studs (Low Range Off Road)
*Birfield Snap Rings (Low Range Off Road)
*Flywheel (Low Range Off Road)
*Transmission Mount (???)
*Powder Coating Kit & Powder (Eastwood)
*Hub Lock O-Rings & Detent Ball (Dealership)
*Marlin Crawler Eco Seal Inner Axle Seals (Low Range Off Road)
*Rear Wheel Bearing Kit (Low Range Off Road)
*Leaf Spring Hanger Pins (Auto Zone)
*Front/Rear Old Man Emu Leaf Springs (4WheelOnline)
*Rear Wheel Studs (NAPA)
*Trail-Gear Front/Rear Shackles (Roadless Gear)
*Front Brake Calipers (Advance Auto)
*Front Brake Pads (Advance Auto)
*Rear Brake Calipers-1982 Monte Carlo (Advance Auto)
*Rear Brake Calipers-1982 Monte Carlo (Advance Auto)
*Heavy Duty Tie Rod (Sky Manufacturing)
*Rear Disc Brake Rotors-GM (Low Range Off Road)
*Rear Disc Brake Conversion Brackets (Low Range off Road)
*Front Brake Hard Lines (Low Range Off Road)
*Rear Braided Stainless Steel Toyota to GM Conversion Brake Lines (Low Range Off Road)
*Trail Gear Rock Ripper Headers (Low Range Off Road)
*Front/Rear Bilstein 5125 Shocks (eBay)
*Ion Style 171 Wheels (Rimz One Online)
*Drag Link Repair Kit (eBay)
*Brake Lines and Fittings (Napa Auto Parts)
*Fuel Lines and Fittings (Napa Auto Parts)
*Trail Gear Front and Rear Braided Steel Extended Brake Lines (LCE)
*Brake Line Retaining Clips (LCE)
*Skyjacker 9000 Steering Stabilizer (Anything Auto)
*Driveshaft End Yoke (Driveshaftparts.com)
*Moog CV Self Centering Bearing - (eBay)
*U-Joints (Advance Auto)
*Double Cardan Self Centering Bearing (eBay)
*OEM Fuel Sending Unit - NOS (eBay)
*OEM Fuel Pickup Sump Filter (Dealership)
*14ga Sheet Steel - (Local Steel Yard)
*Steering Shaft U-joints (RockAuto)
*Original Tranny Shifter (YotaTech
*Grille Clips - NOS (eBay)
*Original Defrost Vents (eBay)
*Side Mirrors - NOS (eBay)
*Hurst Shifter Boots (Summit Racing)
*Headliner Corner Trim - NOS (eBay)
*Headlight Doors (eBay)
*Vent Window Seals - NOS (eBay)
*Window Run Channels - NOS (eBay)
*Window Reveal Molding - NOS (eBay)
*Marker Lenses - NOS (eBay)
*Fiberglass Bed (Toyota Fiberglass/Precision 4x4)
*Evercoat Rage Ultra Bodyfiller (Local Jobber - National Coatings & Supplies)
*Evercoat Everglass Bodyfiller (Local Jobber - National Coatings & Supplies)
*Dash Bezel (YotaTech)
*Tail Lamp Assemblies (Low Range Off Road)
*Rear Corner Markers (Low Range Off Road)
*Chrome Headlight Doors (National Parts Depot)
*Chrome Grille (National Parts Depot)
*Bumper Brackets (National Parts Depot)
*Chrome Tail Light Lenses (National Parts Depot)
*Rear Fender Flares (eBay)
*Fuel Chrome Bumper (YotaTech)
*Door Lock Cylinder Pads - NOS (eBay)
*Hood Adjusters - NOS (eBay)
*Tail Gate Bumpers - NOS (eBay)
*Chrome Cab Vents (YotaTech)
*Fuel Filler Neck (eBay)
*Tail Light Wiring Harness (YotaTech)
*Raptor Liner (TP Tools)
*Paint & Primer (Local Jobber - National Coatings & Supplies)
*Fenders (Car Parts Wholesale)
*Hood Latch - NOS (eBay)
*Hood Bumpers - NOS (eBay)
*Bumper Bolts - NOS (eBay)
*Fuel Cap - NOS (eBay)
*Door Hinge Bushings (National Bronze)
*Aisin Clutch Master Cylinder (Amazon)
*Aisin Brake Master Cylinder (BMA Parts via Amazon)
*Bed Liner (Line-X)
*Norton Liquid Ice Polishing System (Eastwood)
*Silla Aluminum Radiator (eBay)
*Clutch Slave Cylinder Hose (eBay)
*Wilwood Brake Proportioning Valve (Jeg's)
*Brake Lines (Napa Auto Parts)
*Radiator and Heater Hoses (Pep Boys)
*Corbeau Moab Seats (Morris 4x4 Center)
*Gauge Wiring Plugs (E.D. Supply)
*Optima 34/78 Yellow Top Battery (Advance Auto)
*Door Seals (eBay)
*Wiper Motor (Summit Racing)
*Blower Motor Resistor (Summit Racing)
*Fuse Block (Napa Auto Parts)
*Bus Bar - Ground (Jeg's)
*Power Terminal Distribution Block (Jeg's)
*Front Right Turn Signal (eBay)
*Billet Battery Box (eBay)
*Clutch/Brake Pedal Pads - NOS (eBay)
*Dash Bezel - NOS (eBay)
*Side Mirrors - NOS (eBay)
*Hood Release Cable (eBay)
*Front Left Turn Signal (National Parts Depot)
*Rain-X Wiper Blades (Pep Boys)
*Door Locks (Advance Auto)
*RetroSound Zuma Radio (Friend/Jegs)
*RetroSound Radio Bezel/Knobs (Crutchfield)
*Pioneer 6.5" Door Speakers (Best Buy)
*Pinion and Carrier Bearings (Advance Auto)
*Pinion EcoSeals (Marlin Crawler)
*Shifter Seat (Marlin Crawler)
*Transfer Case E-Brake (Sky Off Road Designs)
*Round Eye Headlights (YotaTech)
*Grille emblem (YotaTech)
*Dash Pocket (YotaTech)
*Ashtray (YotaTech)
*Body Stripping Decals (Toyota Fiberglass)
*Weber 38 DGES (Carbs Unlimited)
*89-95 Toyota Pickup Chrome Rear Bumper (eBay)
Note - "NOS" = Factory Original New Old Stock
I'll be updating this parts list as I go. (Last updated: October 26, 2015)
BEFORE:


AFTER:


The engine rebuild and process was documented in the following thread:
https://www.yotatech.com/forums/f114...azx636-261494/
You can also learn more about desmogging a 22R engine my visiting my desmogging tutorial thread located here:
https://www.yotatech.com/forums/f114...torial-264405/
Parts purchased and sources (I will be regularly updating the parts list - sources are typically the best and/or cheapest source available at that time):
*Weber 32/36 (LCE) NOTE: I ordered my first carb from Weber Carbs Direct - It was not genuine, Do not order from them!
*Oil Pan (Rock Auto)
*Oil Pan Gasket (Napa)
*EGR Block of Plates (LCE)
*Air Injection Block of Plates (LCE)
*Distributor, Distributor Cap, Distributor Rotor (Advance Auto Parts)
*Fuel Pump (Advance Auto)
*Spark Plug Wires (Advance Auto)
*Fuel Pressure Regulator (Advance Auto)
*Fuel Pressure Gauge (Advance Auto)
*Grille (Parts Geek)
*Lower Valance (Parts Bin)
*Volt Gauge (Advance Auto)
*Oil Pressure Gauge (Advance Auto)
*Water Temperature Gauge (Advance Auto)
*Tachometer (Advance Auto)
*Tires (Discount Tires Direct)
*Suspension Bushing Kit (CarParts Wholesale)
*Spark Plugs (DAX Autoworks)
*Rear Main Seal Saver (LCE)
*Clutch set (Advance Auto)
*Clutch master cylinder (Advance Auto)
*U-Joints (Advance Auto)
*Clutch Slave Cylinder (Advance Auto)
*Starter (Advance Auto)
*Starter Ground Cable (Advance Auto)
*Valves (Engnbldr)
*Valve Guides (Engnbldr)
*Valve Seals (Engnbldr)
*Valve Seals (Engnbldr)
*Head Job (Accubilt Machine Shop - Salisbury, MD)
*Engine Rebuild Kit (Engine Builder)
*Block Machine Work (Accubilt Machine Shop - Salisbury, MD)
*EGR Crossover Plate (LCE)
*Water Block-Off Plate Kit (LCE)
*Manifold Water Block-Off Plate Kit (LCE)
*Wire Loom (LCE)
*Weber Spiral Adapter (LCE)
*Intake Manifold Plug Kit (LCE)
*Head Bolt Set (LCE)
*Timing Cover Hardware Kit (LCE)
*Crank Case Breather Filter (Summit Racing)
*Valve Cover 22R Decal (Low Range Off Road)
*Timing Cover (eBay)
*Fan Clutch (Advance Auto)
*Thermostat (Advance Auto)
*Alternator (AutoZone)
*Fan/Alternator Belt (AutoZone)
*Power Steering Belt (AutoZone)
*Exhaust Manifold Studs (Napa)
*Miscellaneous Fittings and Hardware (Ace Hardware)
*Front Brake Rotors (Advance Auto)
*Front Brake Pads (Advance Auto)
*Motor Mounts (Advance Auto)
*Vacuum Hose (AutoZone)
*Fuel Hose (PepBoys)
*Transfer Case Rubber Shift Boot (Marlin Crawler)
*Transmission Rubber Shift Boot (Marlin Crawler)
*Clutch Fork Rubber Boot (Marlin Crawler)
*Crank Case Breather Filter (Summit Racing)
*Turbo Thrush Welder Muffler (Summit Racing)
*Exhaust Flex Pipe (Advance Auto)
*POR-15 (Eastwood)
*Chassis Coat (Eastwood)
*Marine Clean (Eastwood)
*Metal Ready (Eastwood)
*POR-15 Solvent (Eastwood)
*Miscellaneous Grinding Wheels, Cutting Discs, Sanding Supplies (Lowe's)
*Knuckle Rebuild Kit (Trail-Gear)
*Front Wheel Bearing Kit (Trail-Gear)
*Hub Stud Kit (Low Range Off Road)
*Front Wheel Studs (Low Range Off Road)
*Birfield Snap Rings (Low Range Off Road)
*Flywheel (Low Range Off Road)
*Transmission Mount (???)
*Powder Coating Kit & Powder (Eastwood)
*Hub Lock O-Rings & Detent Ball (Dealership)
*Marlin Crawler Eco Seal Inner Axle Seals (Low Range Off Road)
*Rear Wheel Bearing Kit (Low Range Off Road)
*Leaf Spring Hanger Pins (Auto Zone)
*Front/Rear Old Man Emu Leaf Springs (4WheelOnline)
*Rear Wheel Studs (NAPA)
*Trail-Gear Front/Rear Shackles (Roadless Gear)
*Front Brake Calipers (Advance Auto)
*Front Brake Pads (Advance Auto)
*Rear Brake Calipers-1982 Monte Carlo (Advance Auto)
*Rear Brake Calipers-1982 Monte Carlo (Advance Auto)
*Heavy Duty Tie Rod (Sky Manufacturing)
*Rear Disc Brake Rotors-GM (Low Range Off Road)
*Rear Disc Brake Conversion Brackets (Low Range off Road)
*Front Brake Hard Lines (Low Range Off Road)
*Rear Braided Stainless Steel Toyota to GM Conversion Brake Lines (Low Range Off Road)
*Trail Gear Rock Ripper Headers (Low Range Off Road)
*Front/Rear Bilstein 5125 Shocks (eBay)
*Ion Style 171 Wheels (Rimz One Online)
*Drag Link Repair Kit (eBay)
*Brake Lines and Fittings (Napa Auto Parts)
*Fuel Lines and Fittings (Napa Auto Parts)
*Trail Gear Front and Rear Braided Steel Extended Brake Lines (LCE)
*Brake Line Retaining Clips (LCE)
*Skyjacker 9000 Steering Stabilizer (Anything Auto)
*Driveshaft End Yoke (Driveshaftparts.com)
*Moog CV Self Centering Bearing - (eBay)
*U-Joints (Advance Auto)
*Double Cardan Self Centering Bearing (eBay)
*OEM Fuel Sending Unit - NOS (eBay)
*OEM Fuel Pickup Sump Filter (Dealership)
*14ga Sheet Steel - (Local Steel Yard)
*Steering Shaft U-joints (RockAuto)
*Original Tranny Shifter (YotaTech
*Grille Clips - NOS (eBay)
*Original Defrost Vents (eBay)
*Side Mirrors - NOS (eBay)
*Hurst Shifter Boots (Summit Racing)
*Headliner Corner Trim - NOS (eBay)
*Headlight Doors (eBay)
*Vent Window Seals - NOS (eBay)
*Window Run Channels - NOS (eBay)
*Window Reveal Molding - NOS (eBay)
*Marker Lenses - NOS (eBay)
*Fiberglass Bed (Toyota Fiberglass/Precision 4x4)
*Evercoat Rage Ultra Bodyfiller (Local Jobber - National Coatings & Supplies)
*Evercoat Everglass Bodyfiller (Local Jobber - National Coatings & Supplies)
*Dash Bezel (YotaTech)
*Tail Lamp Assemblies (Low Range Off Road)
*Rear Corner Markers (Low Range Off Road)
*Chrome Headlight Doors (National Parts Depot)
*Chrome Grille (National Parts Depot)
*Bumper Brackets (National Parts Depot)
*Chrome Tail Light Lenses (National Parts Depot)
*Rear Fender Flares (eBay)
*Fuel Chrome Bumper (YotaTech)
*Door Lock Cylinder Pads - NOS (eBay)
*Hood Adjusters - NOS (eBay)
*Tail Gate Bumpers - NOS (eBay)
*Chrome Cab Vents (YotaTech)
*Fuel Filler Neck (eBay)
*Tail Light Wiring Harness (YotaTech)
*Raptor Liner (TP Tools)
*Paint & Primer (Local Jobber - National Coatings & Supplies)
*Fenders (Car Parts Wholesale)
*Hood Latch - NOS (eBay)
*Hood Bumpers - NOS (eBay)
*Bumper Bolts - NOS (eBay)
*Fuel Cap - NOS (eBay)
*Door Hinge Bushings (National Bronze)
*Aisin Clutch Master Cylinder (Amazon)
*Aisin Brake Master Cylinder (BMA Parts via Amazon)
*Bed Liner (Line-X)
*Norton Liquid Ice Polishing System (Eastwood)
*Silla Aluminum Radiator (eBay)
*Clutch Slave Cylinder Hose (eBay)
*Wilwood Brake Proportioning Valve (Jeg's)
*Brake Lines (Napa Auto Parts)
*Radiator and Heater Hoses (Pep Boys)
*Corbeau Moab Seats (Morris 4x4 Center)
*Gauge Wiring Plugs (E.D. Supply)
*Optima 34/78 Yellow Top Battery (Advance Auto)
*Door Seals (eBay)
*Wiper Motor (Summit Racing)
*Blower Motor Resistor (Summit Racing)
*Fuse Block (Napa Auto Parts)
*Bus Bar - Ground (Jeg's)
*Power Terminal Distribution Block (Jeg's)
*Front Right Turn Signal (eBay)
*Billet Battery Box (eBay)
*Clutch/Brake Pedal Pads - NOS (eBay)
*Dash Bezel - NOS (eBay)
*Side Mirrors - NOS (eBay)
*Hood Release Cable (eBay)
*Front Left Turn Signal (National Parts Depot)
*Rain-X Wiper Blades (Pep Boys)
*Door Locks (Advance Auto)
*RetroSound Zuma Radio (Friend/Jegs)
*RetroSound Radio Bezel/Knobs (Crutchfield)
*Pioneer 6.5" Door Speakers (Best Buy)
*Pinion and Carrier Bearings (Advance Auto)
*Pinion EcoSeals (Marlin Crawler)
*Shifter Seat (Marlin Crawler)
*Transfer Case E-Brake (Sky Off Road Designs)
*Round Eye Headlights (YotaTech)
*Grille emblem (YotaTech)
*Dash Pocket (YotaTech)
*Ashtray (YotaTech)
*Body Stripping Decals (Toyota Fiberglass)
*Weber 38 DGES (Carbs Unlimited)
*89-95 Toyota Pickup Chrome Rear Bumper (eBay)
Note - "NOS" = Factory Original New Old Stock
I'll be updating this parts list as I go. (Last updated: October 26, 2015)
Last edited by kawazx636; 12-31-2015 at 10:09 AM. Reason: Updated parts list
 01-19-2013, 08:53 PM
#2
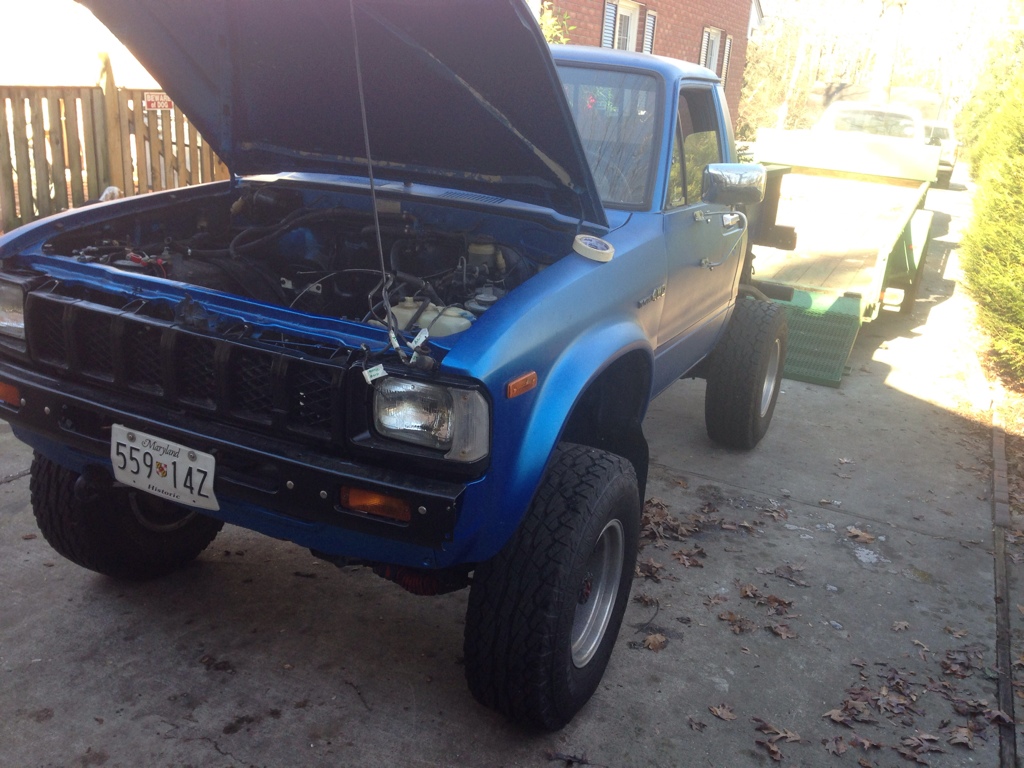
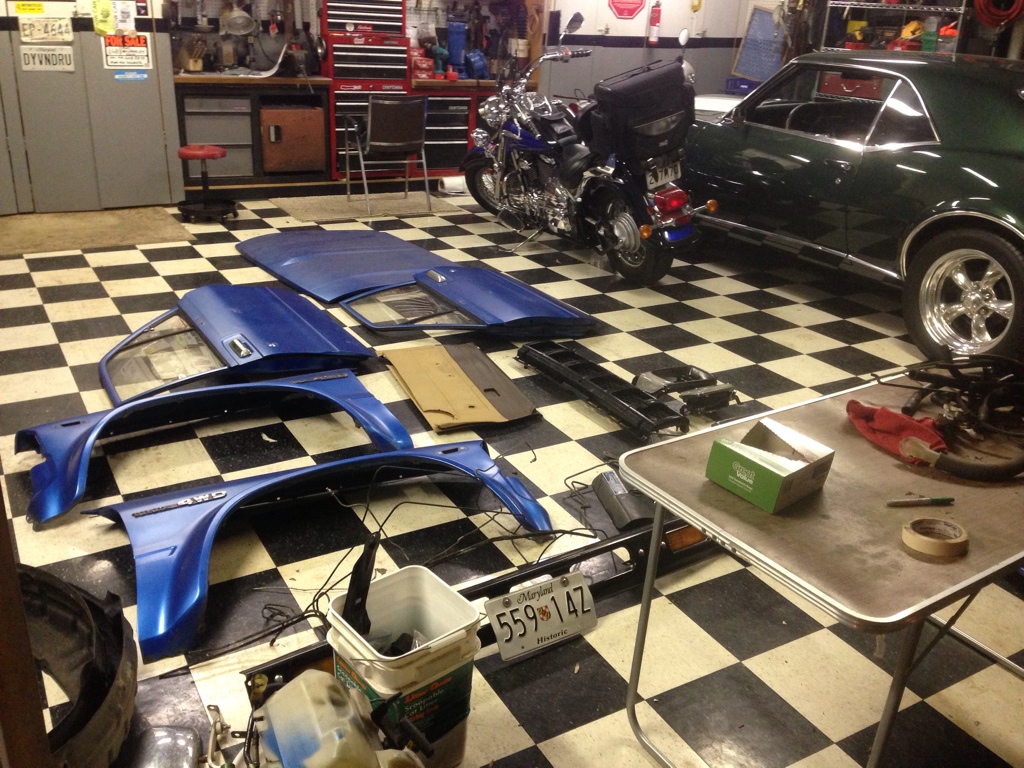
Here's what I'm starting with:

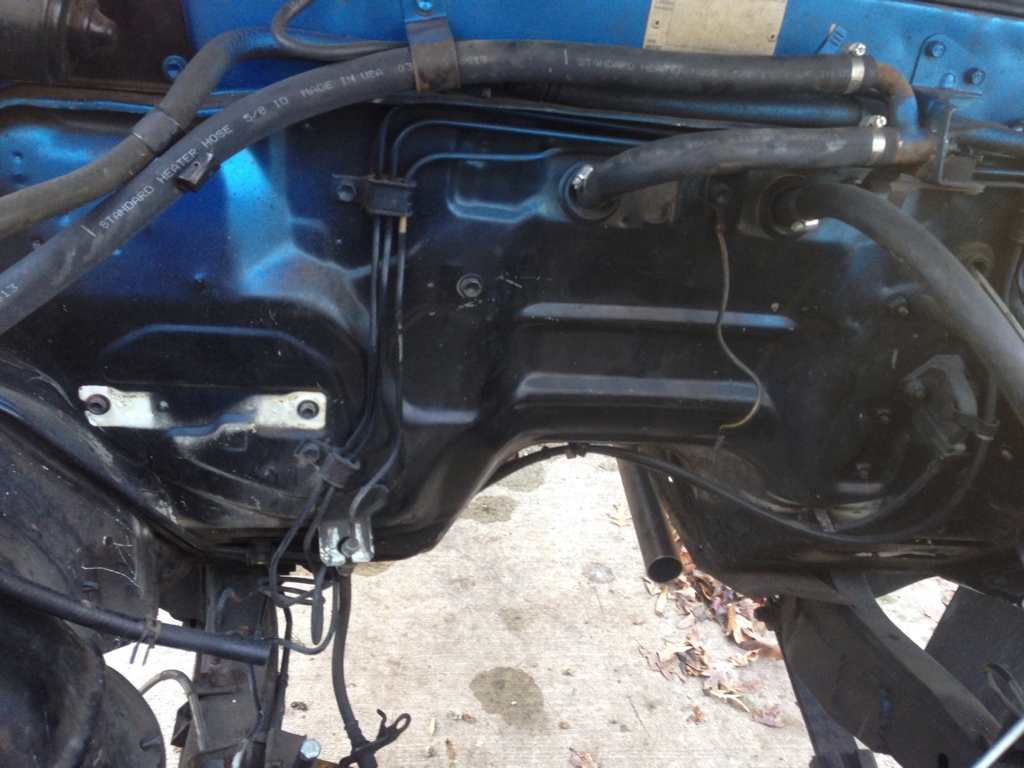
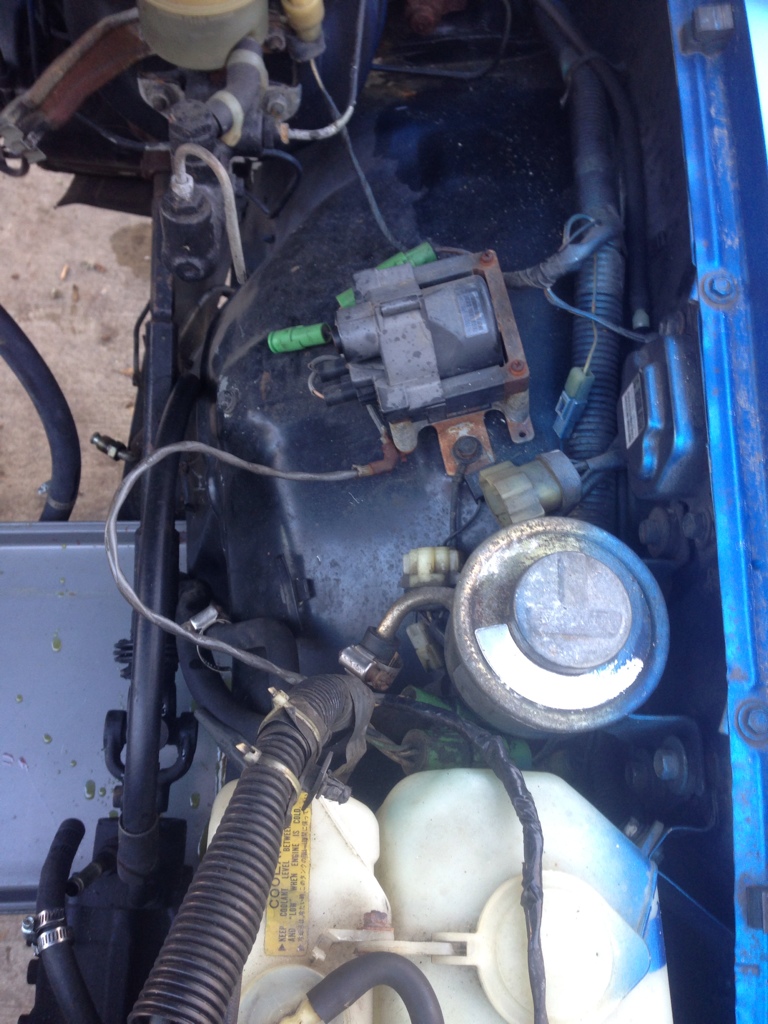
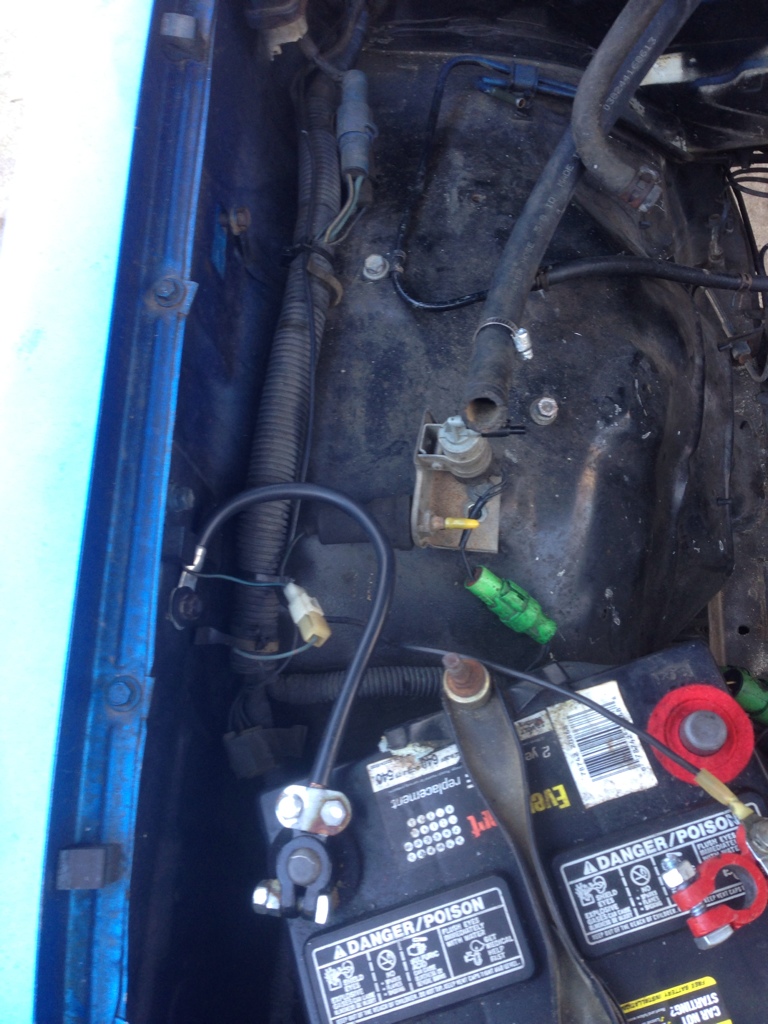
Everything will be removed from the cab for cleaning and painting or replacement. The engine bay will get blasted and painted and I will be removing all the unneccessary wiring (IE Smog wires) from the wiring harness.
Everything will be removed from the cab for cleaning and painting or replacement. The engine bay will get blasted and painted and I will be removing all the unneccessary wiring (IE Smog wires) from the wiring harness.
01-19-2013, 09:12 PM
#3
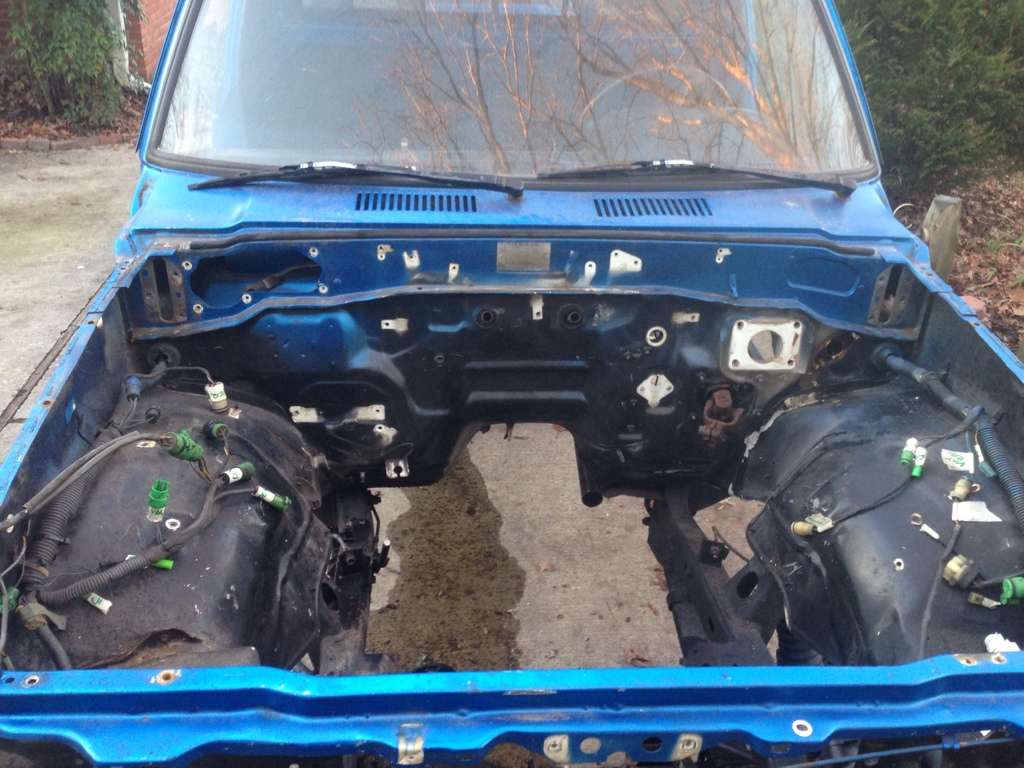
Everything under the hood has been removed, just wiring left for now:
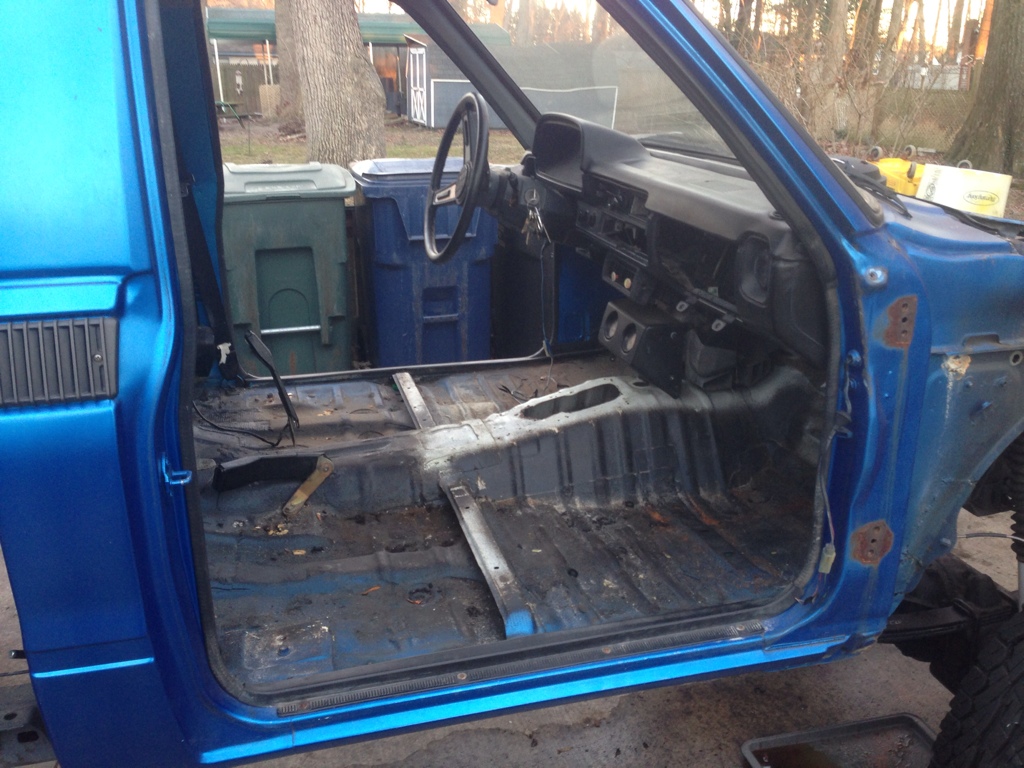
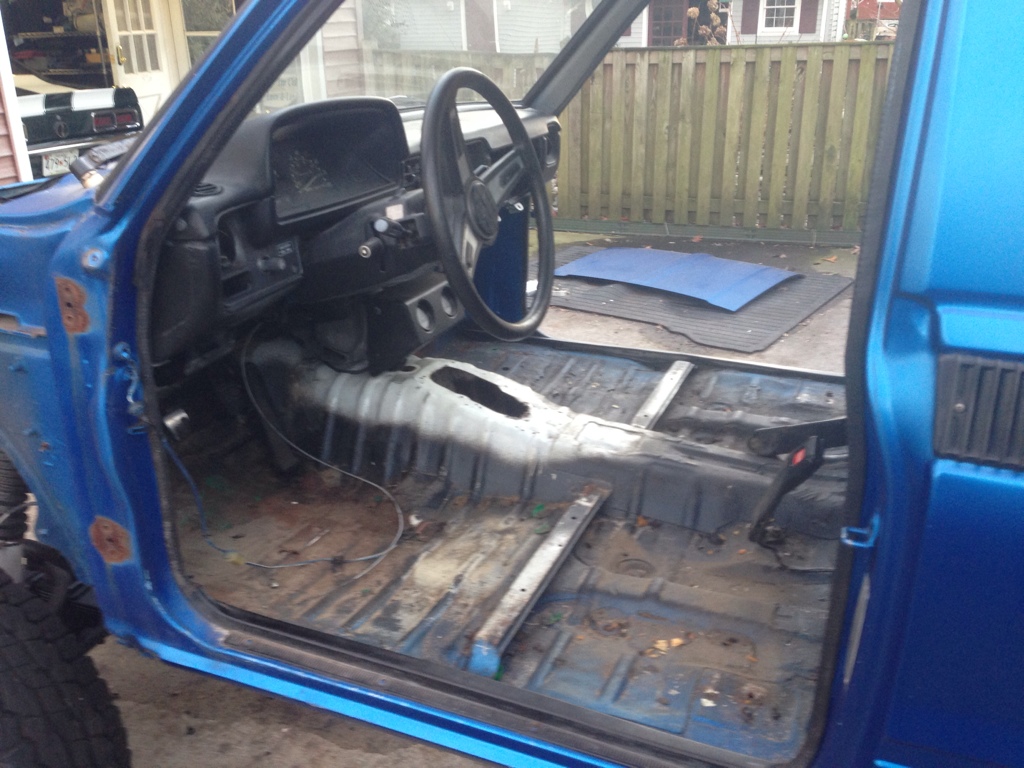
Interior stripped (still contemplating on removing all the dash componets):
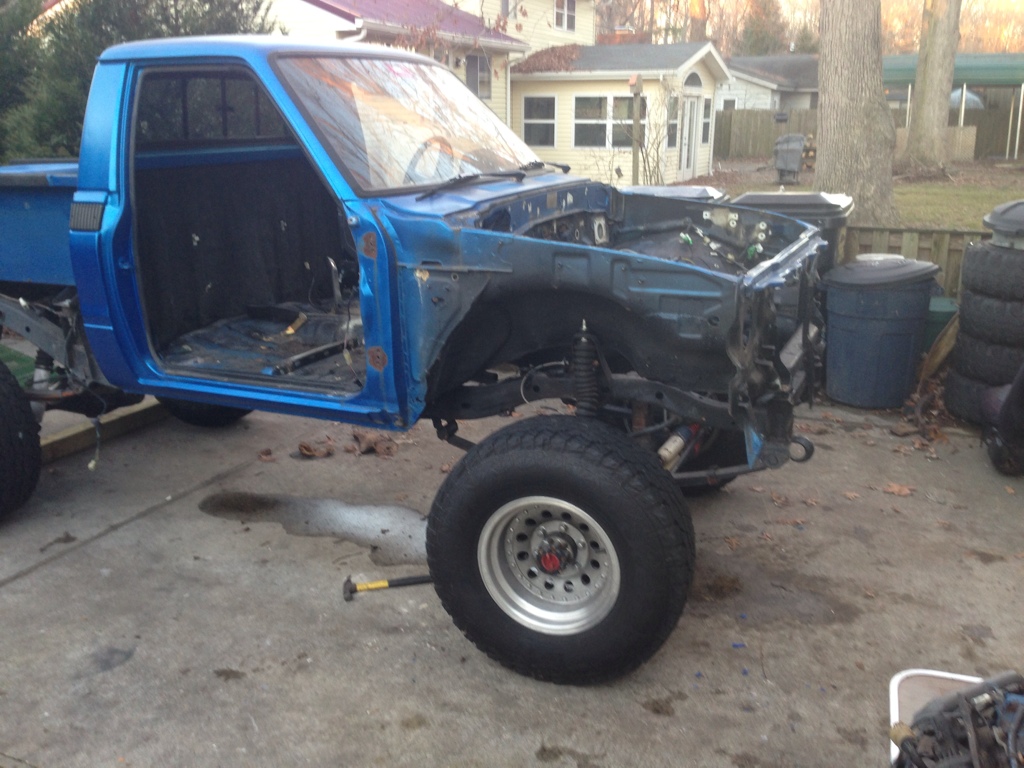
Cab stripped of fenders, hood, headling housings, grille, doors, etc:
The parts cache:
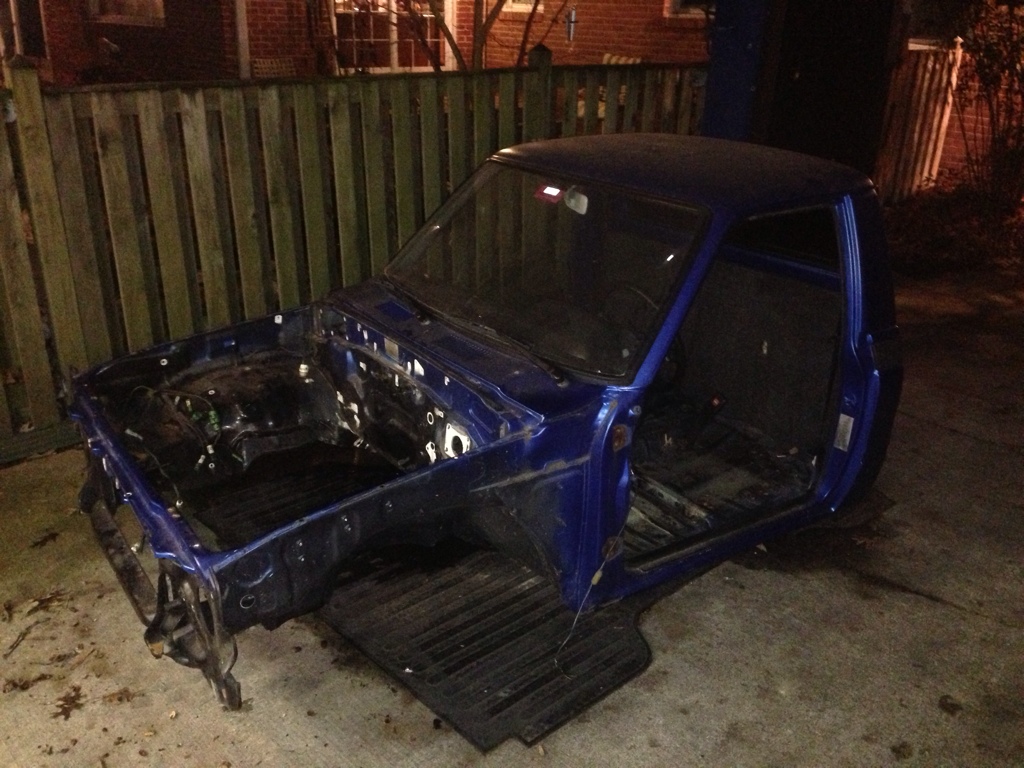
Called a friend and got the cab removed:
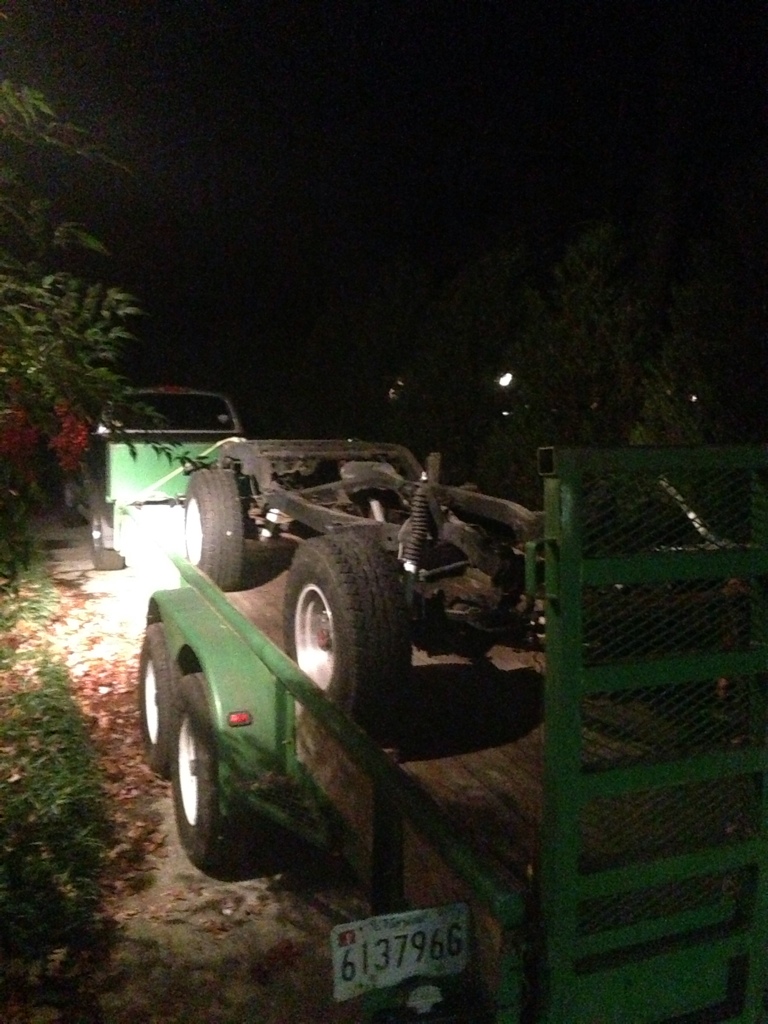
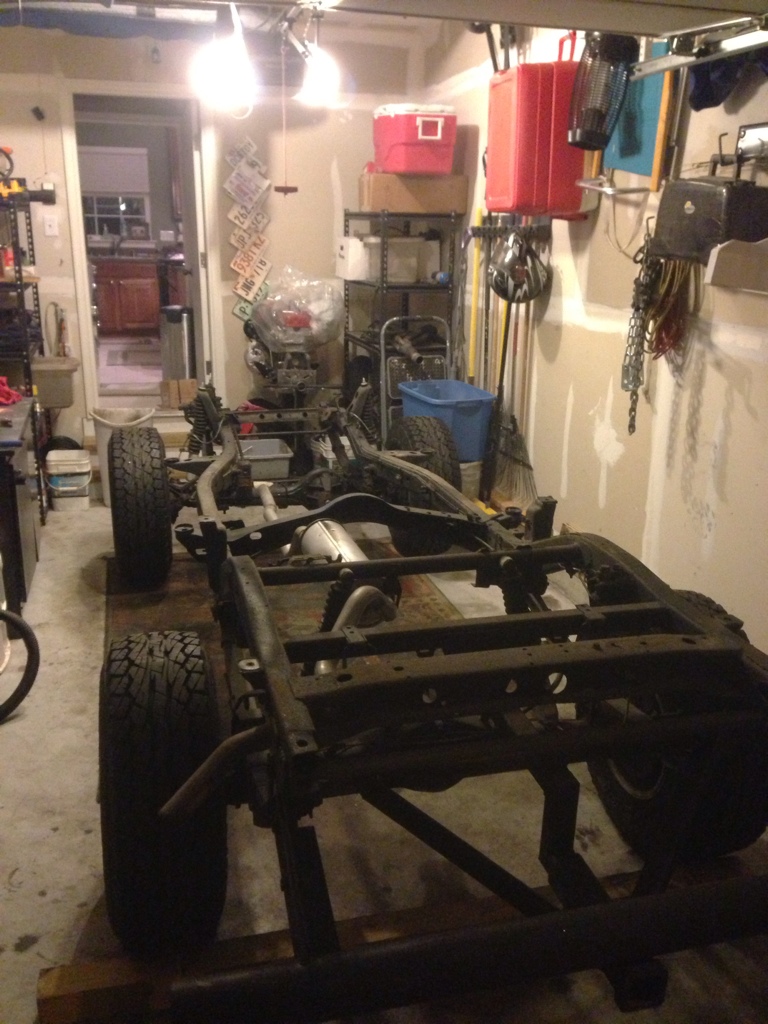
Rolling chasis loaded up and ready to tow back to my home garage:
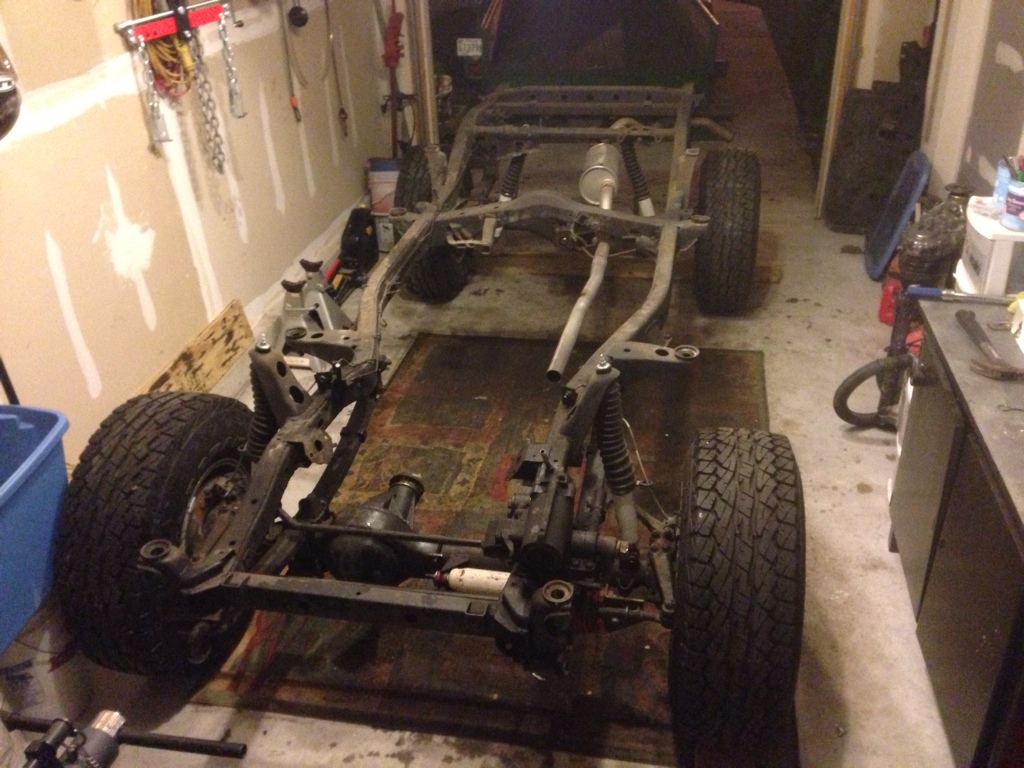
Got the chasis home and ready for some extensive cleaning, grinding and welding:
Interior stripped (still contemplating on removing all the dash componets):
Cab stripped of fenders, hood, headling housings, grille, doors, etc:
The parts cache:
Called a friend and got the cab removed:
Rolling chasis loaded up and ready to tow back to my home garage:
Got the chasis home and ready for some extensive cleaning, grinding and welding:
01-21-2013, 09:52 AM
#6
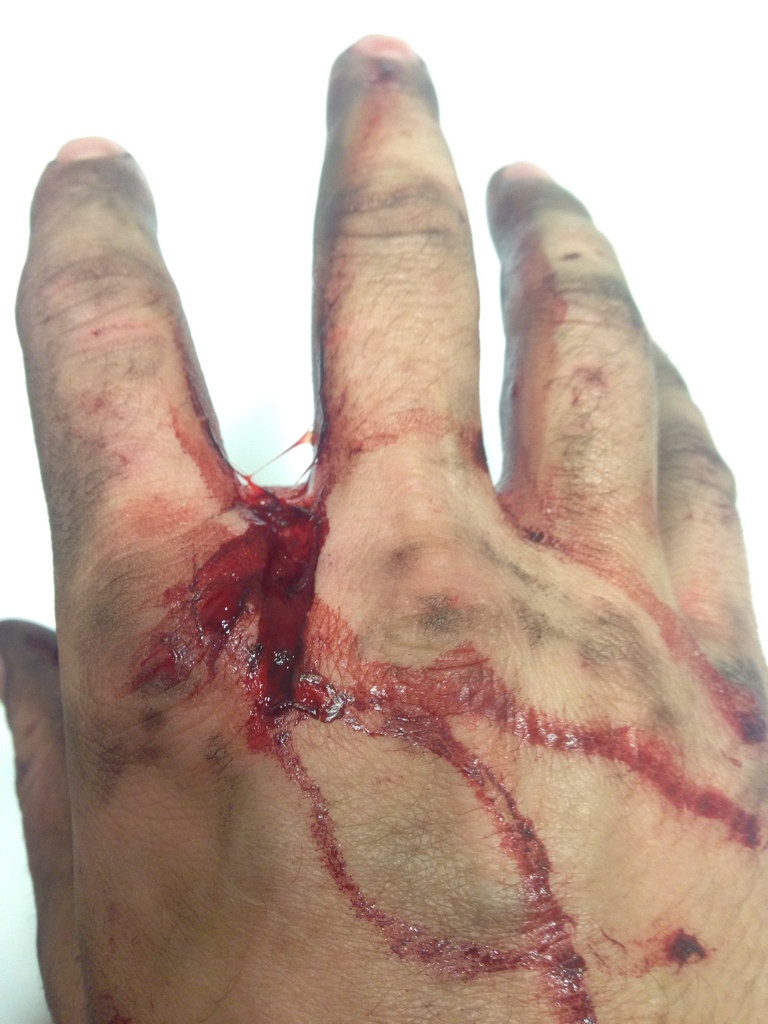
Well.... I was cutting out a section of the frame where the PO had tried to "fix" so frame rot and had my first little battle wound today. My right angle grinder kicked back on me and knicked my hand:
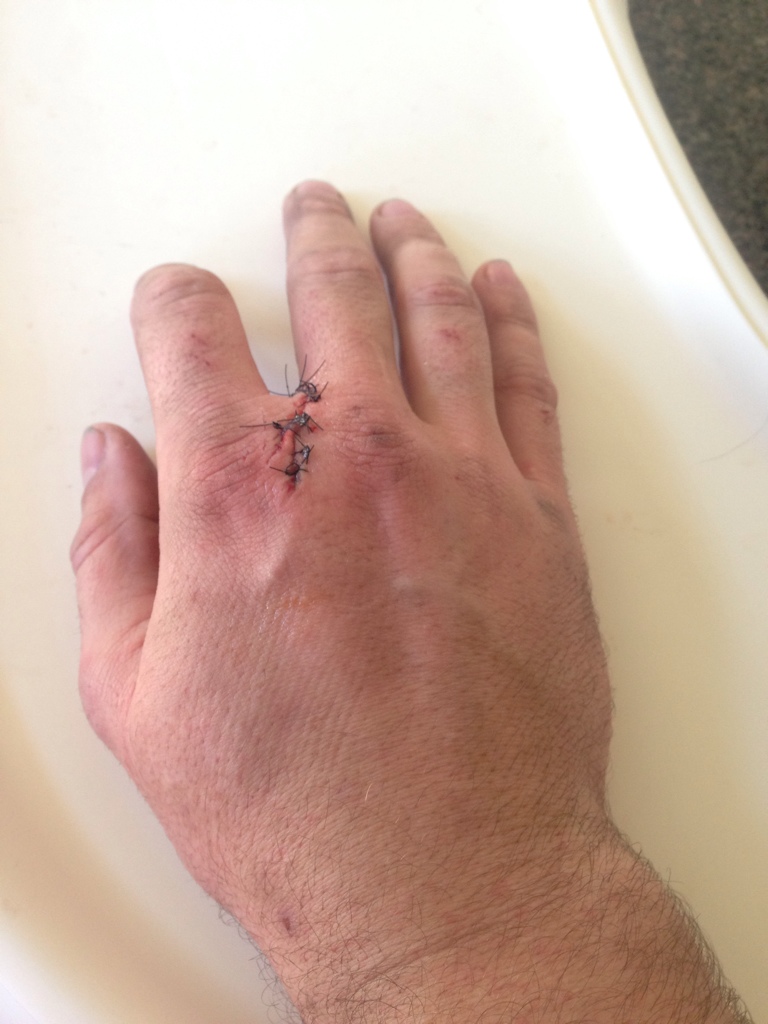
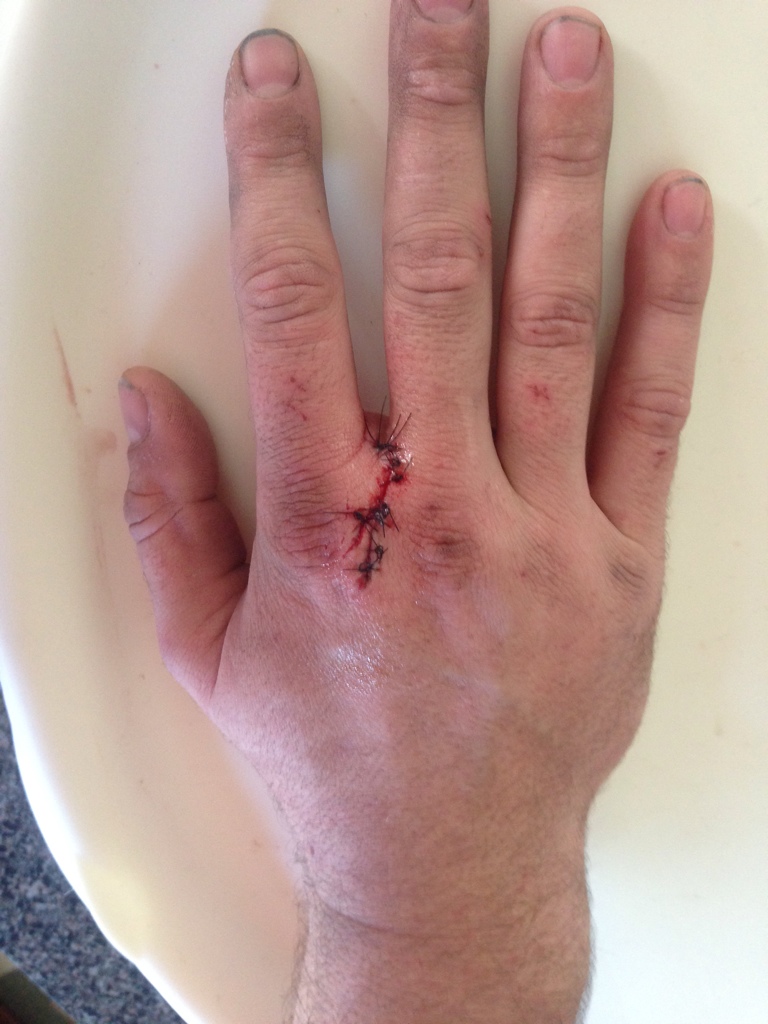
After a couple hours in the ER and 13 stitches later:
I'm about to call the PO and bitch at him for such a crappy repair job on that frame rot!
After a couple hours in the ER and 13 stitches later:
I'm about to call the PO and bitch at him for such a crappy repair job on that frame rot!
The following users liked this post:
faber (07-18-2020)
02-07-2013, 09:03 PM
#11
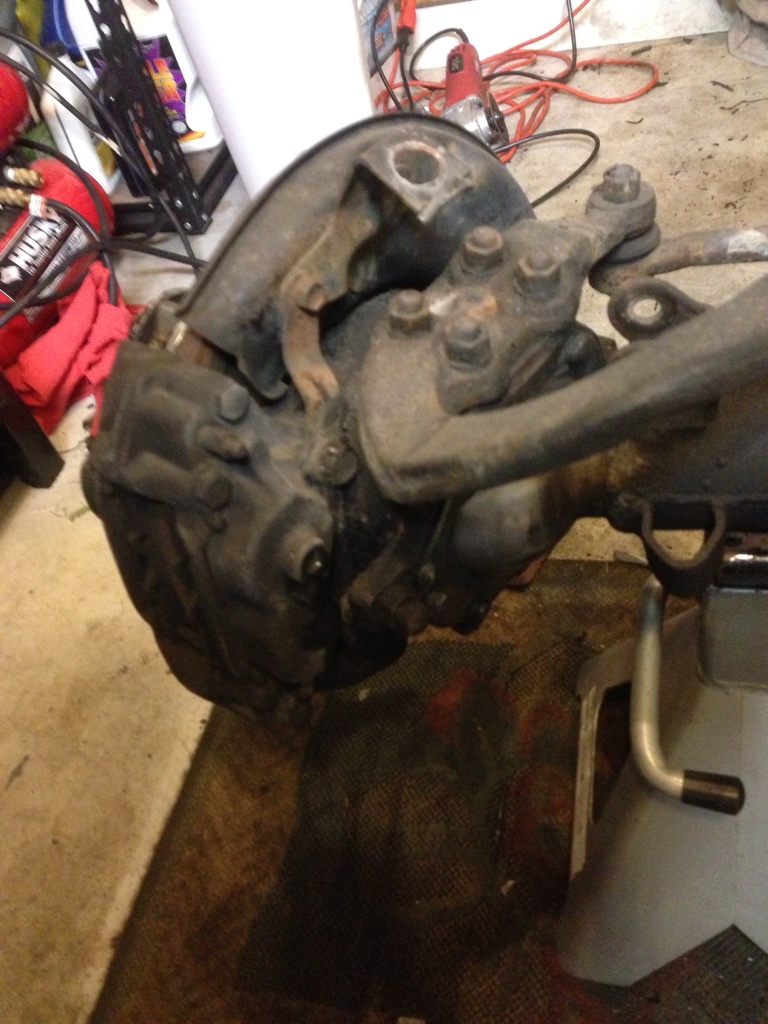
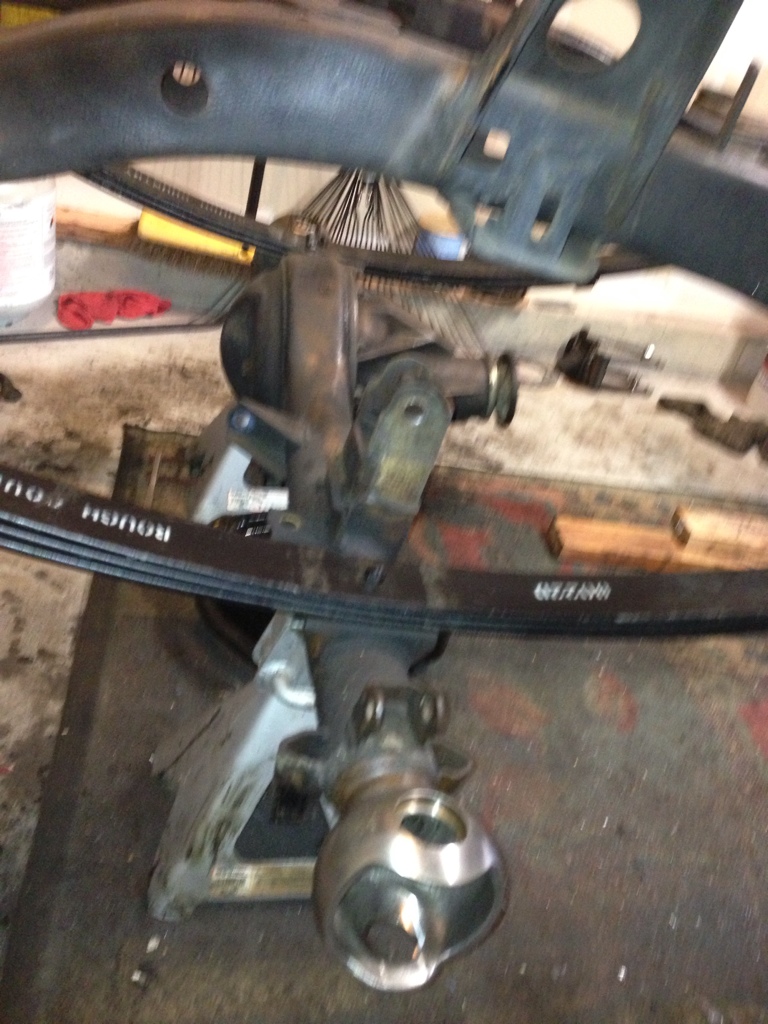
After sacrificing my flesh working on patching a section of frame rot, I have been reluctant to pick up the grinder so I decided to start working on the steering knuckles. I order the Trail Gear knuckle rebuild kit (with the wheel bearings). Since the kit is supposed to be here tomorrow I decided to start disassembling the knuckles and cleaning up parts. I only got the driver side done tonight and I'll hopefully have the passenger side done tomorrow.
Here's what 30 year old steering knuckles look like:

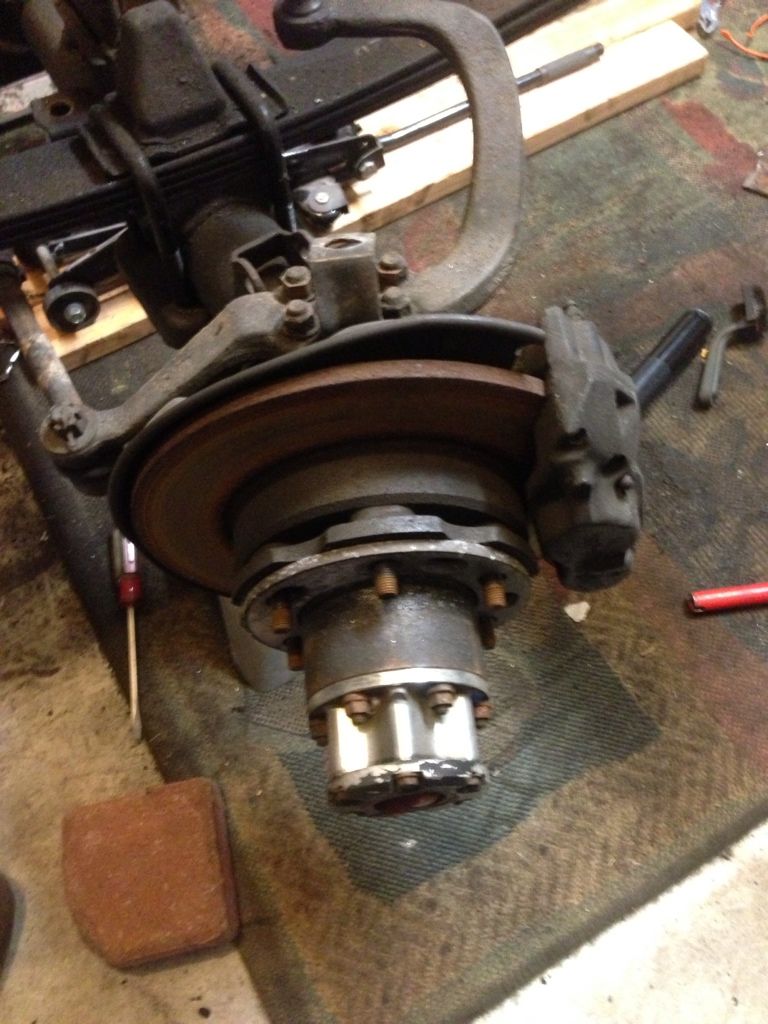
Things really didn't go that bad EXCEPT for removing the cone washers on the hub locks. After about 2 hours of yelling a variety of choice words, I finally got them to pop. The typical tricks didn't work - tapping the stud, driving a tapered put in the washer slit, backing two nuts against each other to remove the stud...ALL FAILED! Finally I was able to use a sharp chisle to wedge under the edge of the cones to remove them. I've NEVER had this much of a problem removing cone washers, but I guess that's the nature of the beast when working on hardware that hasn't been removed in 30 years. I could tell that it was all original because the gaskets on the bearing caps had the factory TEQ Toyota logo on them. From there it was smooth sailing - removed the hub, spindle, trunoin bearings, birf, etc with no problem. Cleaned off the grease and gear oil (that's right, gear oil! The seals were complete shot and my knuckles were filled with more gear oil than grease!) out of the axle ball and knuckles. I'll do the other side and then drop the axle down for paining - I have found in the past that it's easier to disassemble the knuckles on the truck than off.
I still need to punch out all the races and pull the seals, but for the most part everything is ready to go back together (but you all know me well enough by now that every part will be meticulously cleaned and painted before everything is assembled).


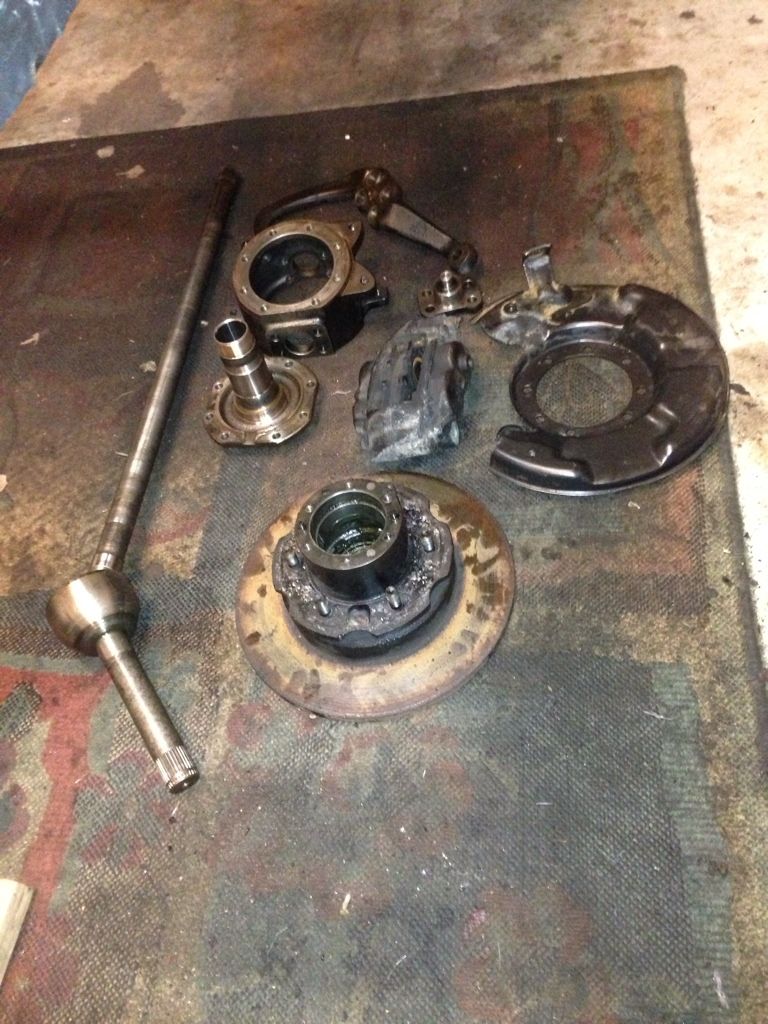
Birf, calipers, dust shield, hub and rotors:

The rotors really aren't that bad, but I'm going to order new rotors while I have everything apart. Probably buy new calipers too since the piston seals are looking a little rough. The majority of the hardware is still in good shape, but I'm going to make a trip to the hardware store to get new cone washers since I practically destroyed the original ones, new hub studs/nuts, new stainless bolts for the hub lock and new stainless bolts for the ball wiper retainer.
On another note, a couple questions for you all:
1 - What are you all using to paint the knuckles and hub locks? Por 15, caliper paint, engine enamel??
2 - I saw on Sky Manufacturing that they make a beefy centerlink (tie rod) for first gens. I was originally going to just replace the tie rod ends, but I think I may do the tie rod as well. This truck will be a daily drive and won't see any extreme wheeling outside of hunting and beach ventures so I'm not going to go with crossover steering. The most I'll do is fabricate an adjustable torque rod to prevent axle warp. Does anybody know anywhere else I can find a factory tie rod?
Here's what 30 year old steering knuckles look like:
Things really didn't go that bad EXCEPT for removing the cone washers on the hub locks. After about 2 hours of yelling a variety of choice words, I finally got them to pop. The typical tricks didn't work - tapping the stud, driving a tapered put in the washer slit, backing two nuts against each other to remove the stud...ALL FAILED! Finally I was able to use a sharp chisle to wedge under the edge of the cones to remove them. I've NEVER had this much of a problem removing cone washers, but I guess that's the nature of the beast when working on hardware that hasn't been removed in 30 years. I could tell that it was all original because the gaskets on the bearing caps had the factory TEQ Toyota logo on them. From there it was smooth sailing - removed the hub, spindle, trunoin bearings, birf, etc with no problem. Cleaned off the grease and gear oil (that's right, gear oil! The seals were complete shot and my knuckles were filled with more gear oil than grease!) out of the axle ball and knuckles. I'll do the other side and then drop the axle down for paining - I have found in the past that it's easier to disassemble the knuckles on the truck than off.
I still need to punch out all the races and pull the seals, but for the most part everything is ready to go back together (but you all know me well enough by now that every part will be meticulously cleaned and painted before everything is assembled).
Birf, calipers, dust shield, hub and rotors:
The rotors really aren't that bad, but I'm going to order new rotors while I have everything apart. Probably buy new calipers too since the piston seals are looking a little rough. The majority of the hardware is still in good shape, but I'm going to make a trip to the hardware store to get new cone washers since I practically destroyed the original ones, new hub studs/nuts, new stainless bolts for the hub lock and new stainless bolts for the ball wiper retainer.
On another note, a couple questions for you all:
1 - What are you all using to paint the knuckles and hub locks? Por 15, caliper paint, engine enamel??
2 - I saw on Sky Manufacturing that they make a beefy centerlink (tie rod) for first gens. I was originally going to just replace the tie rod ends, but I think I may do the tie rod as well. This truck will be a daily drive and won't see any extreme wheeling outside of hunting and beach ventures so I'm not going to go with crossover steering. The most I'll do is fabricate an adjustable torque rod to prevent axle warp. Does anybody know anywhere else I can find a factory tie rod?
02-08-2013, 08:47 AM
#12
Registered User
After sacrificing my flesh working on patching a section of frame rot, I have been reluctant to pick up the grinder so I decided to start working on the steering knuckles. I order the Trail Gear knuckle rebuild kit (with the wheel bearings). Since the kit is supposed to be here tomorrow I decided to start disassembling the knuckles and cleaning up parts. I only got the driver side done tonight and I'll hopefully have the passenger side done tomorrow.
Here's what 30 year old steering knuckles look like:

Things really didn't go that bad EXCEPT for removing the cone washers on the hub locks. After about 2 hours of yelling a variety of choice words, I finally got them to pop. The typical tricks didn't work - tapping the stud, driving a tapered put in the washer slit, backing two nuts against each other to remove the stud...ALL FAILED! Finally I was able to use a sharp chisle to wedge under the edge of the cones to remove them. I've NEVER had this much of a problem removing cone washers, but I guess that's the nature of the beast when working on hardware that hasn't been removed in 30 years. I could tell that it was all original because the gaskets on the bearing caps had the factory TEQ Toyota logo on them. From there it was smooth sailing - removed the hub, spindle, trunoin bearings, birf, etc with no problem. Cleaned off the grease and gear oil (that's right, gear oil! The seals were complete shot and my knuckles were filled with more gear oil than grease!) out of the axle ball and knuckles. I'll do the other side and then drop the axle down for paining - I have found in the past that it's easier to disassemble the knuckles on the truck than off.
I still need to punch out all the races and pull the seals, but for the most part everything is ready to go back together (but you all know me well enough by now that every part will be meticulously cleaned and painted before everything is assembled).
Birf, calipers, dust shield, hub and rotors:
The rotors really aren't that bad, but I'm going to order new rotors while I have everything apart. Probably buy new calipers too since the piston seals are looking a little rough. The majority of the hardware is still in good shape, but I'm going to make a trip to the hardware store to get new cone washers since I practically destroyed the original ones, new hub studs/nuts, new stainless bolts for the hub lock and new stainless bolts for the ball wiper retainer.
On another note, a couple questions for you all:
1 - What are you all using to paint the knuckles and hub locks? Por 15, caliper paint, engine enamel??
2 - I saw on Sky Manufacturing that they make a beefy centerlink (tie rod) for first gens. I was originally going to just replace the tie rod ends, but I think I may do the tie rod as well. This truck will be a daily drive and won't see any extreme wheeling outside of hunting and beach ventures so I'm not going to go with crossover steering. The most I'll do is fabricate an adjustable torque rod to prevent axle warp. Does anybody know anywhere else I can find a factory tie rod?
Here's what 30 year old steering knuckles look like:
Things really didn't go that bad EXCEPT for removing the cone washers on the hub locks. After about 2 hours of yelling a variety of choice words, I finally got them to pop. The typical tricks didn't work - tapping the stud, driving a tapered put in the washer slit, backing two nuts against each other to remove the stud...ALL FAILED! Finally I was able to use a sharp chisle to wedge under the edge of the cones to remove them. I've NEVER had this much of a problem removing cone washers, but I guess that's the nature of the beast when working on hardware that hasn't been removed in 30 years. I could tell that it was all original because the gaskets on the bearing caps had the factory TEQ Toyota logo on them. From there it was smooth sailing - removed the hub, spindle, trunoin bearings, birf, etc with no problem. Cleaned off the grease and gear oil (that's right, gear oil! The seals were complete shot and my knuckles were filled with more gear oil than grease!) out of the axle ball and knuckles. I'll do the other side and then drop the axle down for paining - I have found in the past that it's easier to disassemble the knuckles on the truck than off.
I still need to punch out all the races and pull the seals, but for the most part everything is ready to go back together (but you all know me well enough by now that every part will be meticulously cleaned and painted before everything is assembled).
Birf, calipers, dust shield, hub and rotors:
The rotors really aren't that bad, but I'm going to order new rotors while I have everything apart. Probably buy new calipers too since the piston seals are looking a little rough. The majority of the hardware is still in good shape, but I'm going to make a trip to the hardware store to get new cone washers since I practically destroyed the original ones, new hub studs/nuts, new stainless bolts for the hub lock and new stainless bolts for the ball wiper retainer.
On another note, a couple questions for you all:
1 - What are you all using to paint the knuckles and hub locks? Por 15, caliper paint, engine enamel??
2 - I saw on Sky Manufacturing that they make a beefy centerlink (tie rod) for first gens. I was originally going to just replace the tie rod ends, but I think I may do the tie rod as well. This truck will be a daily drive and won't see any extreme wheeling outside of hunting and beach ventures so I'm not going to go with crossover steering. The most I'll do is fabricate an adjustable torque rod to prevent axle warp. Does anybody know anywhere else I can find a factory tie rod?
02-08-2013, 10:17 AM
#13
Registered User
Join Date: Jan 2010
Location: Sonora, CA (Central Sierra)
Posts: 447
Received 0 Likes
on
0 Posts
 02-08-2013, 11:11 AM
#14
Don, I've been to NWOR but their website sucks. No prices and you have to phone order. Not really worth my time. Sky does put out some good products though.
Pumkin, I wish I had the leather gloves on that were sitting right me when the grinder decided to bite me!
Pumkin, I wish I had the leather gloves on that were sitting right me when the grinder decided to bite me!
The following users liked this post:
Enzothehound (01-18-2021)
02-08-2013, 04:54 PM
#15
Registered User
iTrader: (1)
Join Date: Dec 2010
Location: new mexico
Posts: 393
Likes: 0
Received 0 Likes
on
0 Posts
I just ordered the sky one today!!!!
I called them up to ask about it, they said it just slips right on. you have to get there steering stablizer kit as well.
I called them up to ask about it, they said it just slips right on. you have to get there steering stablizer kit as well.
02-08-2013, 08:06 PM
#16
Josh, let me know how it works out. I'm assuming it comes with the rod ends, but I wasn't sure. Post some pictures after you install it. You can be my guinea pig...if it works for you then I'll order one too!! Haha!
I just ordered a few things from Low Range OffRoad
-Trail Gear Super Metal Hub Stud Kit (since I destroyed the studs and cone washers when removing the hubs AND these have a hex head on the stud so it'll be a cakewalk to remove the cones next time!)
-Wheel/lug studs (Old ones were ok, but I like shiny new stuff)
-Birf snap rings (I still don't understand why the knuckle rebuild kits don't come with these)
-Flywheel (the old one wasn't too bad, but I don't plan on dropping that tranny again for a while!)
-Knuckle stud kit (Those cones came off fine, but again...new and shiny!)
I meant to get 1" wheel spaces, but I forgot. Probably a good thing though - I should wait until I figure out what kind of wheels I want to get.
I will say this though, Low Range OffRoad has some damn good prices and they ship super quickly. I wouldn't doubt that I see these parts by Wednesday. I would highly recommend them, especial after my horrible experiences with Marlin Crawler.
I also stopped by the hardware store tonight. Grabbed some new stainless hardware for the felt plates and the hub locks. I was browsing through the solvent aisle and saw some marine cleaner solvent on clearance for $1.00!!! So I bought the last 4 quarts. That stuff is awsome for removing grease prepping the frame and parts for POR-15 and enamel.
I have baseball practice tomorrow morning but hopefully I can get the passenger side broken down in the afternoon... barring and cone washer drama
02-09-2013, 02:31 AM
#17
Registered User
Josh, let me know how it works out. I'm assuming it comes with the rod ends, but I wasn't sure. Post some pictures after you install it. You can be my guinea pig...if it works for you then I'll order one too!! Haha!
I just ordered a few things from Low Range OffRoad
-Trail Gear Super Metal Hub Stud Kit (since I destroyed the studs and cone washers when removing the hubs AND these have a hex head on the stud so it'll be a cakewalk to remove the cones next time!)
-Wheel/lug studs (Old ones were ok, but I like shiny new stuff
-Birf snap rings (I still don't understand why the knuckle rebuild kits don't come with these)
-Flywheel (the old one wasn't too bad, but I don't plan on dropping that tranny again for a while!)
-Knuckle stud kit (Those cones came off fine, but again...new and shiny!)
I meant to get 1" wheel spaces, but I forgot. Probably a good thing though - I should wait until I figure out what kind of wheels I want to get.
I will say this though, Low Range OffRoad has some damn good prices and they ship super quickly. I wouldn't doubt that I see these parts by Wednesday. I would highly recommend them, especial after my horrible experiences with Marlin Crawler.
I also stopped by the hardware store tonight. Grabbed some new stainless hardware for the felt plates and the hub locks. I was browsing through the solvent aisle and saw some marine cleaner solvent on clearance for $1.00!!! So I bought the last 4 quarts. That stuff is awsome for removing grease prepping the frame and parts for POR-15 and enamel.
I have baseball practice tomorrow morning but hopefully I can get the passenger side broken down in the afternoon... barring and cone washer drama
02-09-2013, 08:25 AM
#18
Registered User
iTrader: (1)
Join Date: Dec 2010
Location: new mexico
Posts: 393
Likes: 0
Received 0 Likes
on
0 Posts
Sounds good! Its not going to be processed untill the 11th because of KOH.
I will take some before and after pics.
My tie rod is all bent up so this will be great. It comes with FJ80 rod ends.
I will take some before and after pics.
My tie rod is all bent up so this will be great. It comes with FJ80 rod ends.
02-10-2013, 04:15 PM
#19
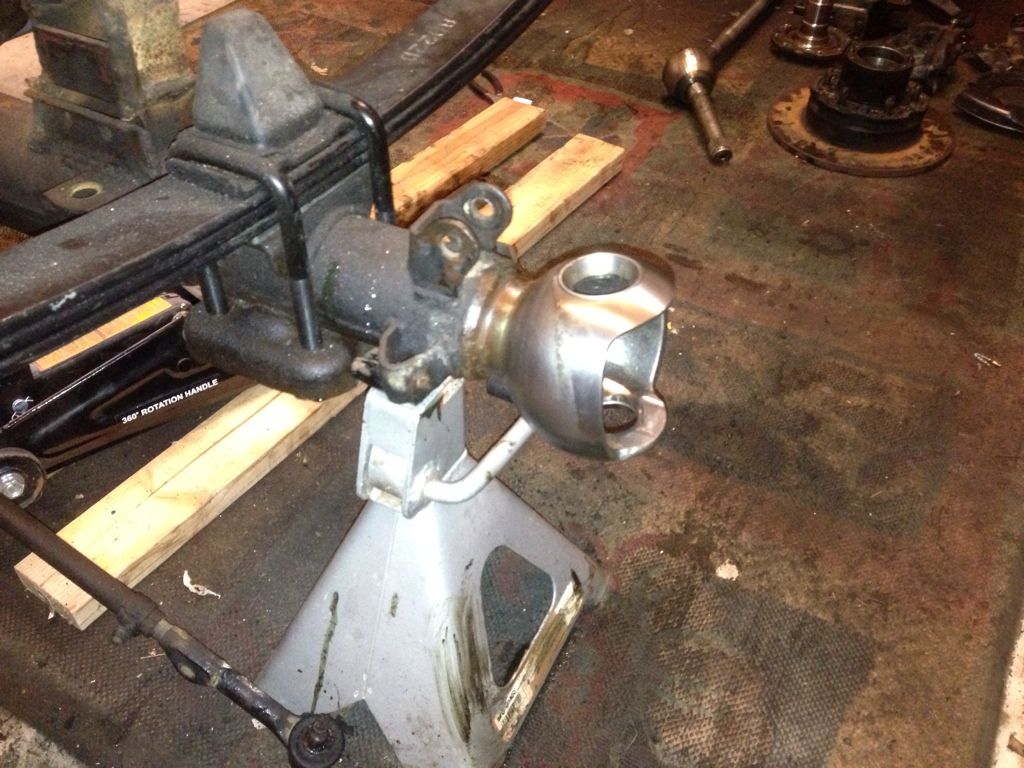
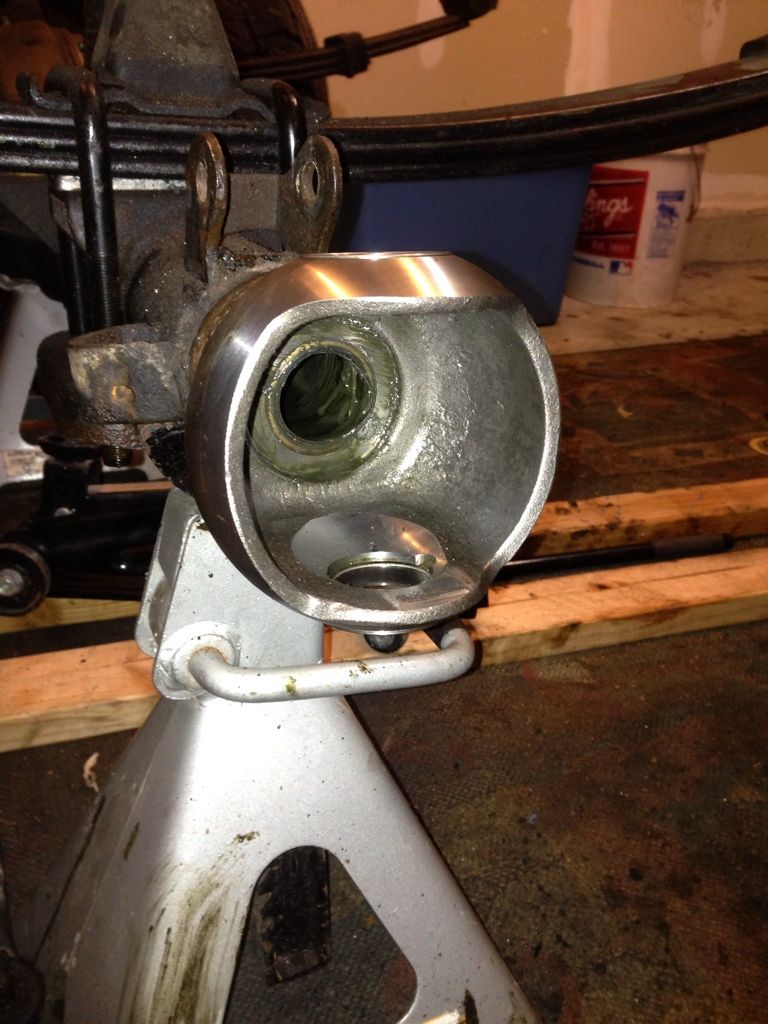
I got the passenger side knuckles broken down today. This side went a lot smoother since I wasn't concerned with saving the studs or cone washers - it was still a major PITA to get the hub lock cones off! The steering balls are fairly clean for a 30 year old axle.
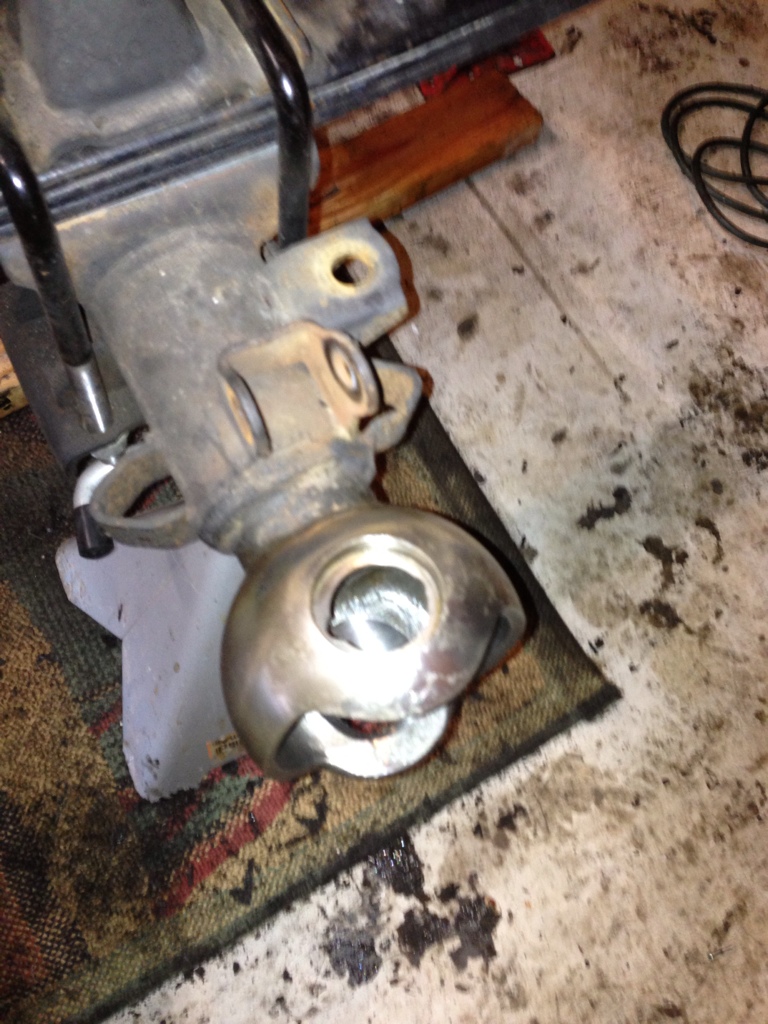
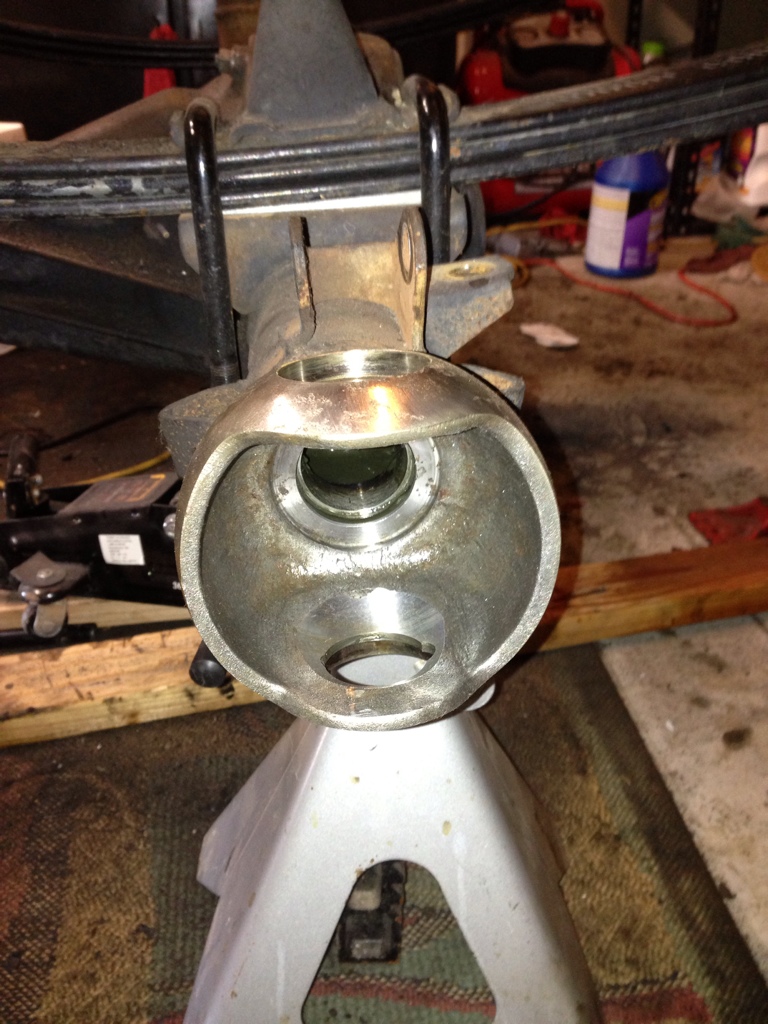
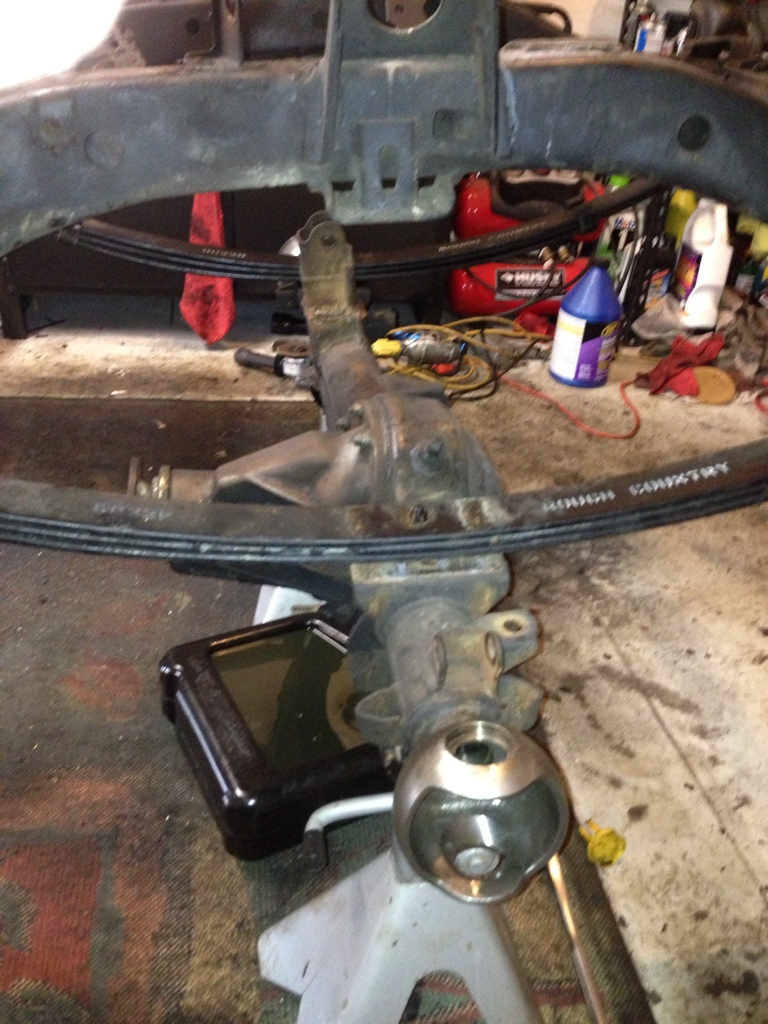

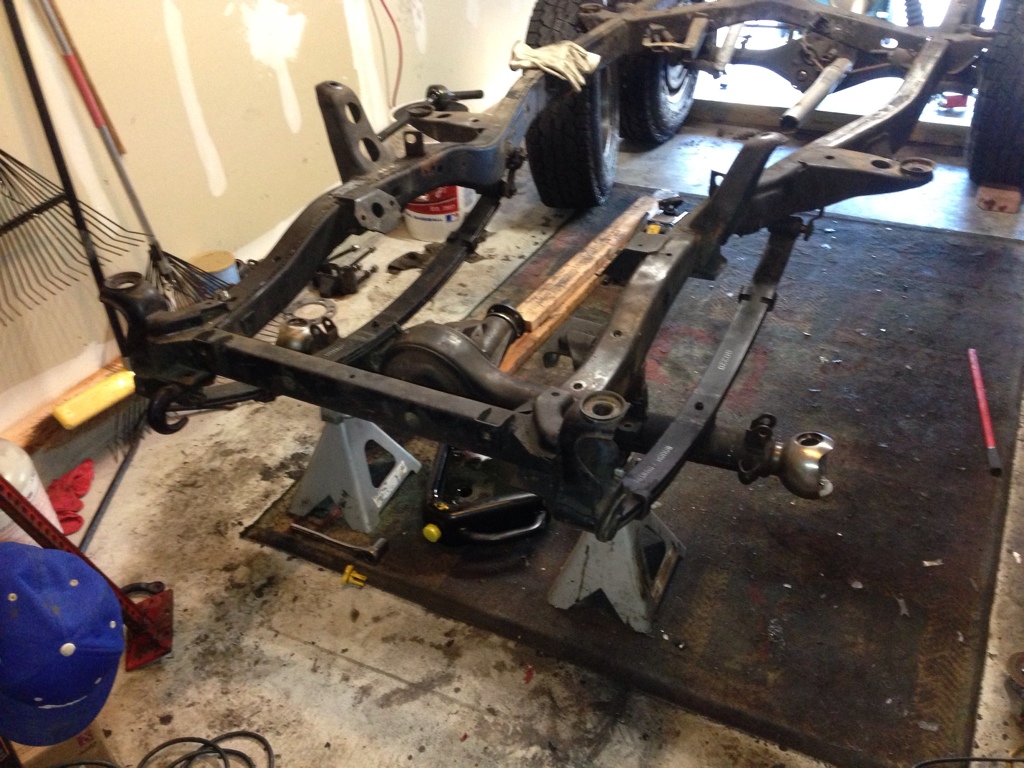
I also punched out all the races and seals from the axle and the knuckles. Unbolted the u-bolts so now the leafs are just sitting on the axle until I'm ready to move it to paint - I need to grab my other set of jack stands back from a friend who borrowed them before anything. For now, its just cleaning parts and prep for painting.
I also punched out all the races and seals from the axle and the knuckles. Unbolted the u-bolts so now the leafs are just sitting on the axle until I'm ready to move it to paint - I need to grab my other set of jack stands back from a friend who borrowed them before anything. For now, its just cleaning parts and prep for painting.


