
1981 toyota pickup DLX Project
 Apr 9, 2014 | 05:29 PM
#121

Haha yeah we all learn and find inspiration from one another. A trick for the stripper is to brush only once, not like paint where you will go over many times and you can lay it down thick. Once it is layed down you cover it with a plastic bag so that the chemicals don't escape as quickly. After about ten minutes you pass your hand over the plastic to agitate the product because it only does one layer at a time, by agitating it the stripper also gets to the other layer. After another ten minutes you remove the plastic bag and if the paint doesn't come with the plastic, it is easy to remove with a scraper, hope this helps.
I just bought primer, paint, foam brushes and roller, 44$. So I still have 109$ to buy paint thinner, masking tape, sand paper, floor rubberized coating and acetone, not bad.
I just bought primer, paint, foam brushes and roller, 44$. So I still have 109$ to buy paint thinner, masking tape, sand paper, floor rubberized coating and acetone, not bad.
Last edited by gillesdetrail; Apr 9, 2014 at 05:34 PM.
Apr 11, 2014 | 01:08 PM
#122
So yesterday I wanted to try the paint remover, I started by slightly sanding the area with 60 grit (40 or 80 would be fine)

I prepared my stuff before starting, a cheap disposable paint brush, a plastic bag torn on both sides, and a little container with the paint stripper.

I then applied a thick coat. I should have started from the bottom up but oh well. Don't be affraid to put a thick layer but what is important is to brush only once at one place, don't go over many times like you would if you were painting.

After that I put my plastic bag on it, this is to keep the fumes from espacing the product and to keep the fumes down in my (ventilated) garage.

I then agitated the plastic bag with my hand to move the paint remover around so that it would also get to the bottom layer, usually the paint remover only removes one coat at a time.

This is what it looks like after not even 10 mins

I then took my scrapper (body filler spreader) and removed the paint and primer easily.

I read about another method, which was to apply the paint stripper, then after a minute or two you take a brush and brush where the stripper was applied.

I wanted to know which works best so I made a comparison on my roof, on the right side I used plastic bags, on the left side I used the brush method. As you can see, plastic bags work a little better.

After using two layers

I also finished installing the seat mounts, they fit really nice and are solid and safe. They are also reclinable and have little pockets behind them (just found out).

I welded a piece of angle stock all along the bottom side of the rockers for a little protection and strength.

My to-do list slowly getting shorter
 Apr 18, 2014 | 11:31 AM
#124
So I've been doing a lot of sanding and stripping and here is where I am. After I removed the old body filler I noticed that this cab is pretty beat up, the roof, rear and sides have a lot of dents, but I don't really mind, the biggest ones will get worked on and the other ones will be part of its 33 years of hard life.


I put the cab on for the last time before paint to make sure everything fits perfect including the doors, wich I hadn't bolted on since I started the body work, and they close perfectly, so the cab is straight and solid and it feels great sitting in it with the seats in their tracks!


More sanding and prepping,


I still have a couple hours of prep to do, then it's body filler time, then primer, body sealer and paint! Should be painted in two weeks or less if all goes well.
Apr 18, 2014 | 02:51 PM
#125
Looking good! I did a bunch of sand blasting to mine today - I really wish the PO hadn't put so damn much rubberized undercoating on it!! We're about at the same point though. You going to get new seals and window channel for your doors?? I have a good source if you are.
Just a FYI, You should spray the epoxy sealer before the urethane primer.
Just a FYI, You should spray the epoxy sealer before the urethane primer.
Apr 18, 2014 | 09:11 PM
#126
Thanks dave! No I'm not taking apart the side windows or removing any weatherstrip or seal yet, these are the kinds of little things that will get taken care of in time once the truck runs and that everything mecanical is in perfect shape, so far it all looks good so I won't mess with it, I just really hope I don't have water infiltration but we'll see once it gets driven. About the sealer, I am not using epoxy or urethane primer (I think), I am just using the tremclad (rustoleum) primer, but I will lay that down before I use the body sealer.
Apr 19, 2014 | 02:43 PM
#127
Registered User
Joined: Feb 2014
Posts: 351
Likes: 0
Thanks dave! No I'm not taking apart the side windows or removing any weatherstrip or seal yet, these are the kinds of little things that will get taken care of in time once the truck runs and that everything mecanical is in perfect shape, so far it all looks good so I won't mess with it, I just really hope I don't have water infiltration but we'll see once it gets driven. About the sealer, I am not using epoxy or urethane primer (I think), I am just using the tremclad (rustoleum) primer, but I will lay that down before I use the body sealer.
Apr 19, 2014 | 07:01 PM
#128
I have removed the weatherstrip, inside panel and handle, I have removed the door handle and key barrel, and the hinges, but I won't remove anymore since I am afraid to rip the seal or to break something, right now the side widows seal well and work well so I won't touch them. The more I go along, the less time and money I want to spend on esthetics, that can be redone in time, plus if I come across another set of door I will probably buy them since mine are in pretty bad shape, there is lots of body filler, welded metal, a bit of rust around the frame too.
Apr 20, 2014 | 06:06 AM
#129
Registered User
Joined: Feb 2014
Posts: 351
Likes: 0
Didn't know your doors where in bad shape your cab is looking so good I'm getting ready to cut my floorboards free and make new ones for my paint I'm going with an aircraft paint desert tan and black plus stripes like the 82 sr5's here's the thing I hate body work and wouldn't be able to paint to save my life but I'm going to pluss I'm dreading what the seals will cost plus wiring
On the up side I've been building engines trannys and axels for 20+ yrs so mechanically my truck will be a gem
I think we need to start some yota clubs
So we all get that needed help and hands
On the up side I've been building engines trannys and axels for 20+ yrs so mechanically my truck will be a gem
I think we need to start some yota clubs
So we all get that needed help and hands
Apr 20, 2014 | 06:39 AM
#131
Yeah bodywork takes patience and/or beer, but it looks as good as the time you put on it so it depends what your goal is in the end. I've seen your engine setup it looks means I'm looking forward to seeing your updates.
Apr 20, 2014 | 07:30 AM
#132
Registered User
Joined: Feb 2014
Posts: 351
Likes: 0
Need to figure out why it won't let me download more pics
I have a lot in that engine way more than I wanted
Now in order to set the cage and rear bars I have to at least set up my cab and front rear shock towers to tie it all together
I could have driven that yota for years but I I have this problem leaving well enough alone
I have a lot in that engine way more than I wanted
Now in order to set the cage and rear bars I have to at least set up my cab and front rear shock towers to tie it all together
I could have driven that yota for years but I I have this problem leaving well enough alone
Apr 21, 2014 | 05:57 AM
#134
Thanks dave! No I'm not taking apart the side windows or removing any weatherstrip or seal yet, these are the kinds of little things that will get taken care of in time once the truck runs and that everything mecanical is in perfect shape, so far it all looks good so I won't mess with it, I just really hope I don't have water infiltration but we'll see once it gets driven. About the sealer, I am not using epoxy or urethane primer (I think), I am just using the tremclad (rustoleum) primer, but I will lay that down before I use the body sealer.
I would worry more about your paint pealing than your seals getting messed up if you try to paint around the seals, particularly the window channel guide seal and the outside reveal trim. I got all new seals for my truck, but the old ones came out in one piece and undamaged. They would still be useable, I just wanted to replace them with something new. If you decide to take out the old seals and damage them, you can have mine for whatever shipping costs.
May 4, 2014 | 06:05 PM
#135
Thanks for the offer on the seals, we'll see how this all goes, and yes the correct term seems to be seam sealer.
Applied the body filler on most of the dents, the roof is all banged up on all sides, just like most of the cab too.


More and more sanding..


The front fenders were stripped to bare metal, the doors are in horrible shape, with about 1/8th inch of bondo everywhere, the bottom 4'' have a riverted sheet metal and there is a big patch of metal right in the middle, I have left all the holes from previous and curret mirror setup :p I will slowly be looking for new doors maybe for next year.

Finally it's primer time, tremclad with foam roller


Meanwhile I received many parts I've been wanting to order for a while

Drop drag link, adjustable proportioning valve, 90 degree npt fitting, adjustable fuel pressure regualor with gauge, transdapt weberto 20r adapter, adjustable fan switch and a residual valve. The 90 degree fitting are the wrong ones (my fault), the hole is too big, but they were the only 90 degree 1/8 npt fitting I could find, I'll see what I can do.
More priming on the floor, then I sprayed zinc primer on all the areas I was to apply the seam sealer so that it would infiltrate


My lousy seam sealer application, it is like welding, it takes lots of practice not to be messy. I put that thing on almost all of the welds, and all overlapping panels, and sealing everywhere water could infiltrate.

Underneath, same process, much nicer seam sealer aplicationg but I forgot to take pics!

Fenders, I hammered out a lot of dents quite nicely, most of them don't show and they look pretty good

I brought the hood home, it was also in bad shape but the good news is since this engine was so beat and neglected, many oil leaks formed keeping the hood rustproof, there is no rust anywhere, good thing I had the pressure washer, what a great tool

Since then I have cleaned and primered the hood, painted the underside too, I still have more work to do on the top though.
Engine bay and front end painted semi-gloss black (bad pic)

And today I applied the first two coats of rubberized coating. It didn't give the texture I wanted so I will be buying some gravel guard or something tomorrow.


So that's where I'm at, tomorrow I will finish the coating, this stuff lays down thick and with the rubberguard it should be good for soundproofing, I don't ever expect taking this stuff off though! I will also do more priming and sanding and thursday I should be ready for paint, I'm pretty anxious to see this thing painted and finished!
Last edited by gillesdetrail; May 4, 2014 at 06:08 PM.
May 4, 2014 | 06:12 PM
#137
Thanks man yeah I've been putting about 15-18 hours a wheek into this thing, I'm really sick of body work and I want to start using my ratchet again! And yeah the floors are pretty nice my girlfriend had them done last year but the dog totally scrapped it and it's not getting better!
May 4, 2014 | 06:26 PM
#139
Registered User
Joined: May 2010
Posts: 2,587
Likes: 7
From: Ofallon Missouri
Thanks man yeah I've been putting about 15-18 hours a wheek into this thing, I'm really sick of body work and I want to start using my ratchet again! And yeah the floors are pretty nice my girlfriend had them done last year but the dog totally scrapped it and it's not getting better!
I cant wait till I can do some bodywork. I imagine Ill be a pro by the time the trekker is done. Still dont know if I will shoot the paint or not. Im watching to see how Kawasakis goes.
May 4, 2014 | 06:32 PM
#140
As far as colour goes, I will mix white and brown paint to give a nice beige colour, the hood will be semi-gloss black, all trims will be black, and it will have yellow fog lights or driving lights. Kind of like this without the decals.
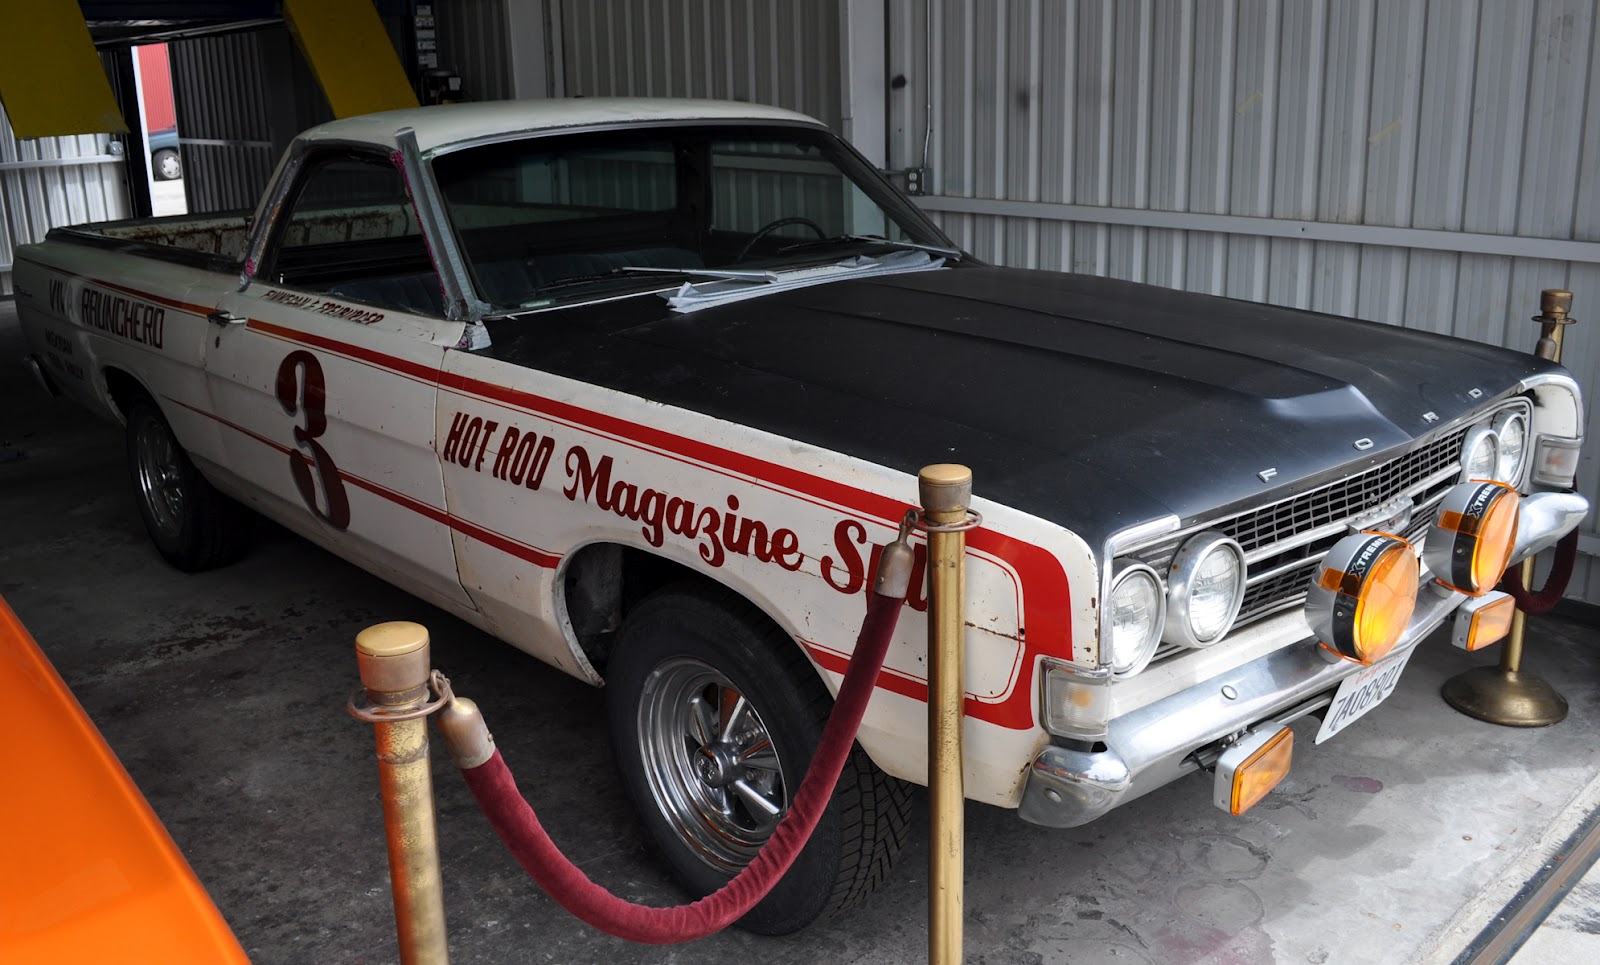

I think it gives it a nice retro look and it falls right in my tastes, plus when the truck came out the factory it was originally cream white/beige

I think it gives it a nice retro look and it falls right in my tastes, plus when the truck came out the factory it was originally cream white/beige
Last edited by gillesdetrail; May 4, 2014 at 06:34 PM.


