
89' Yota TBI350/4L60E/VF1A
 Dec 28, 2011 | 04:24 AM
#41

Thread Starter
Registered User
Joined: Jan 2011
Posts: 88
Likes: 0
From: Minneapolis, MN
Now that looks fun... lol I actually have a 1uz I am planning on putting in my 4runner but I decided to do the truck first lol... Sounded easier What kinda tape is that? I started using white duct tape. Got tired of blue masking tape falling off (i'm hard on stuff)
Here is my 2UZ for our shop's work truck, a SAS and 1UZ swap would be the way to go.
https://www.yotatech.com/forums/f161...z-swap-243136/
Dec 28, 2011 | 07:17 AM
#42

Registered User
Joined: Nov 2008
Posts: 302
Likes: 0
Ya I'm gonna start on the SAS for my truck tomorrow. The manifolds for the 4.3 won't fit with the upper a arms installed... oh well lol I was only bummed out prob 5 seconds untill that little light bulb went off in my head. lol SAS time
Mar 27, 2012 | 06:10 PM
#43
Thread Starter
Registered User
Joined: Jan 2011
Posts: 88
Likes: 0
From: Minneapolis, MN
Update.
Damn it's been a while, but I've been busy. Now the weather's nice so I have the bug again...
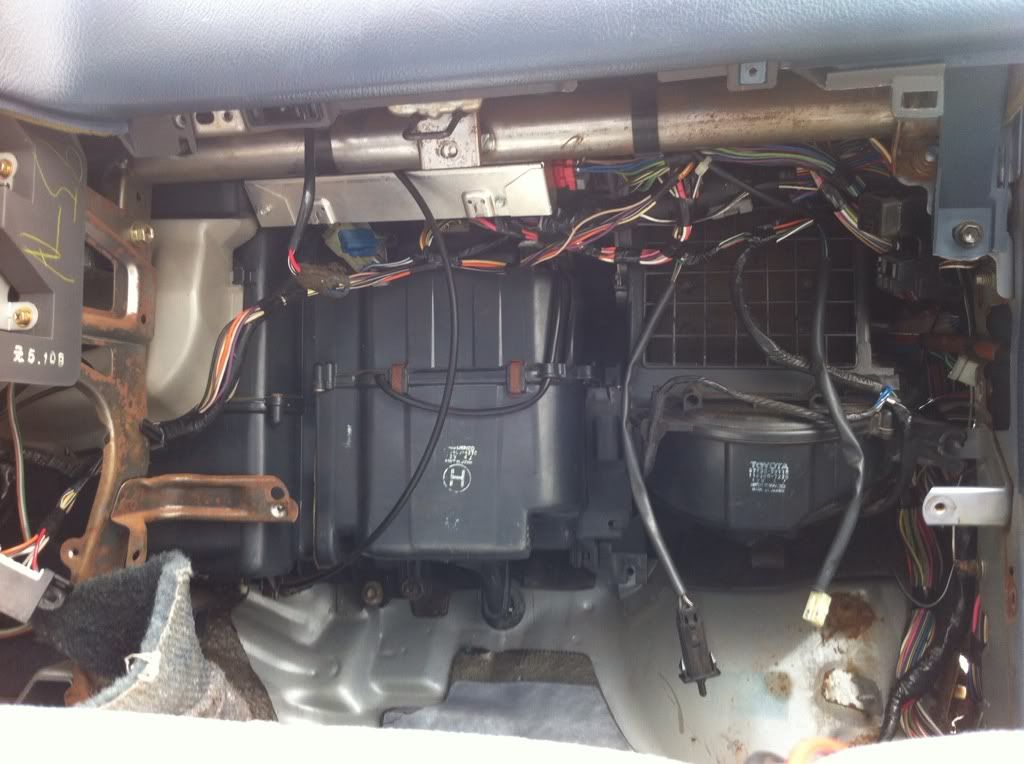
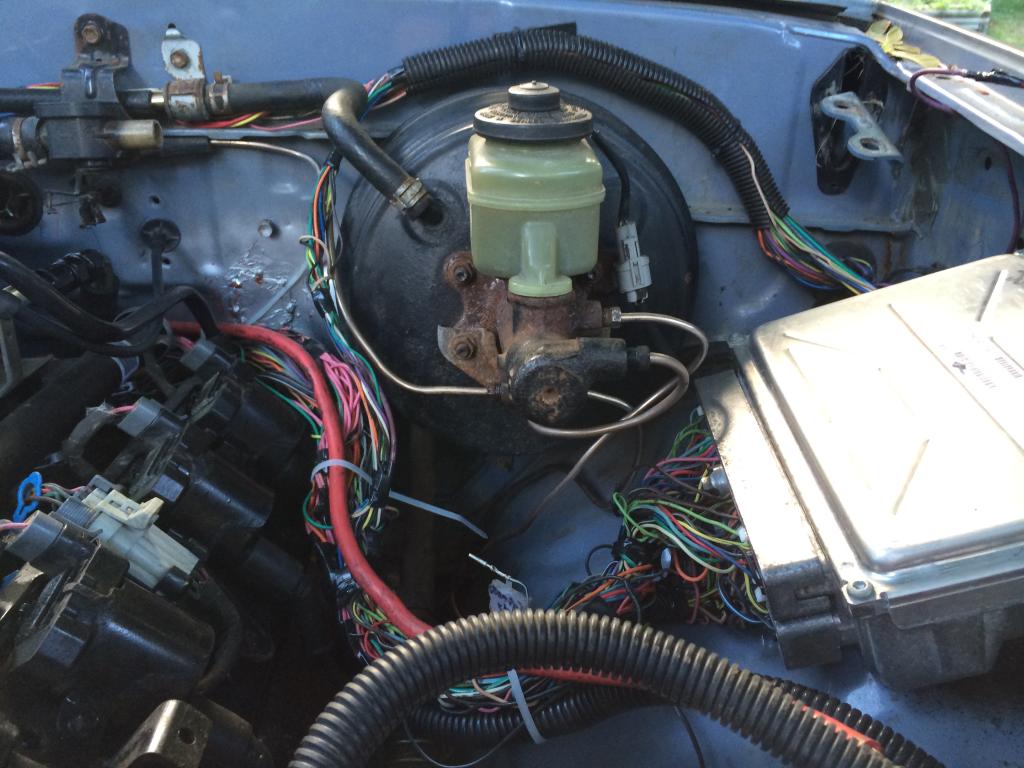
I've wired in the harness and ECU, I wanted the ECU as high as possible, and the wire harness wasn't long enough to reach the rear, so I shoved it under the dash like every other swap. I am trying my best to locate all my electronics up higher so I can submerge my truck if need be, and not have to fear of failure.
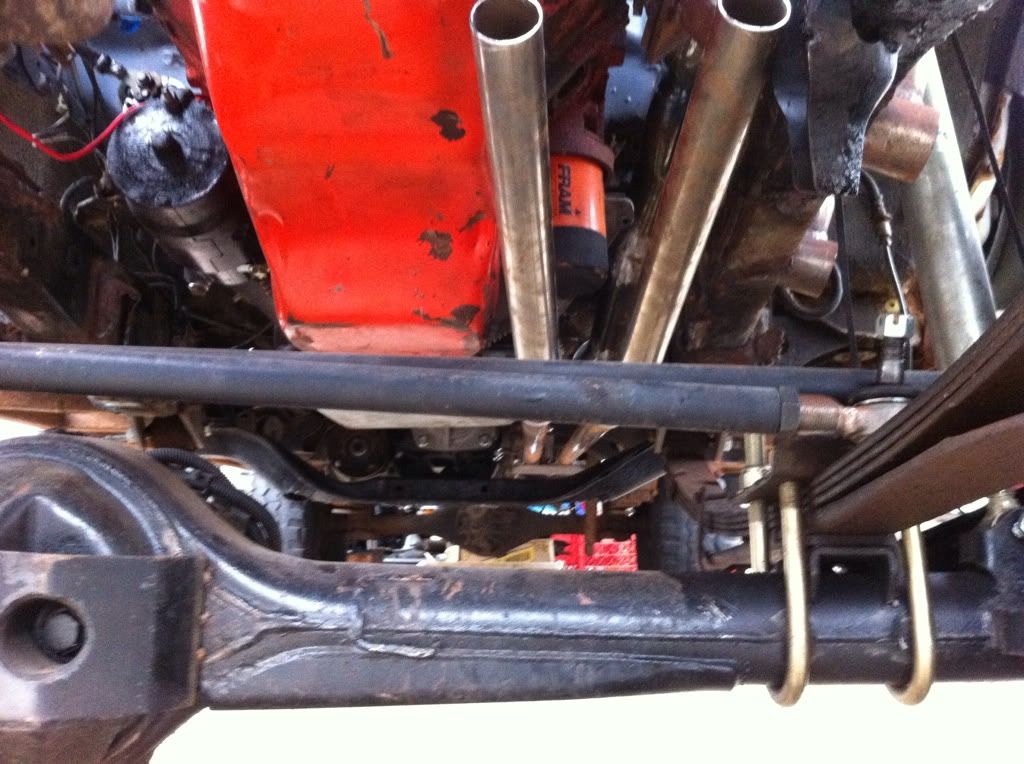
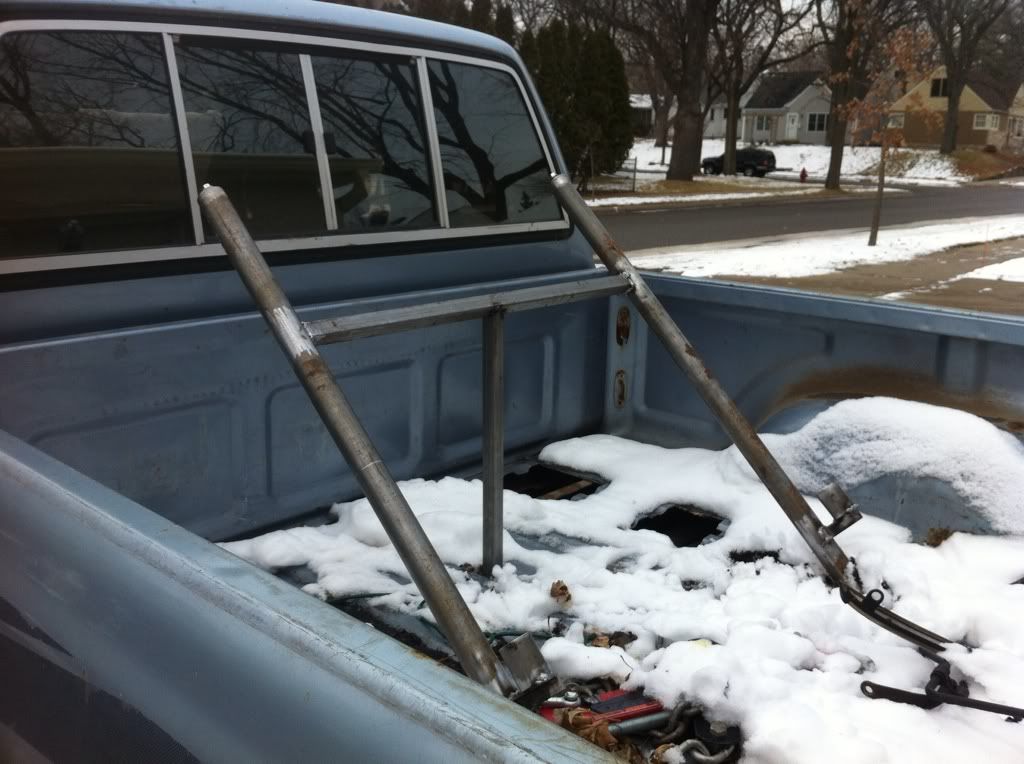
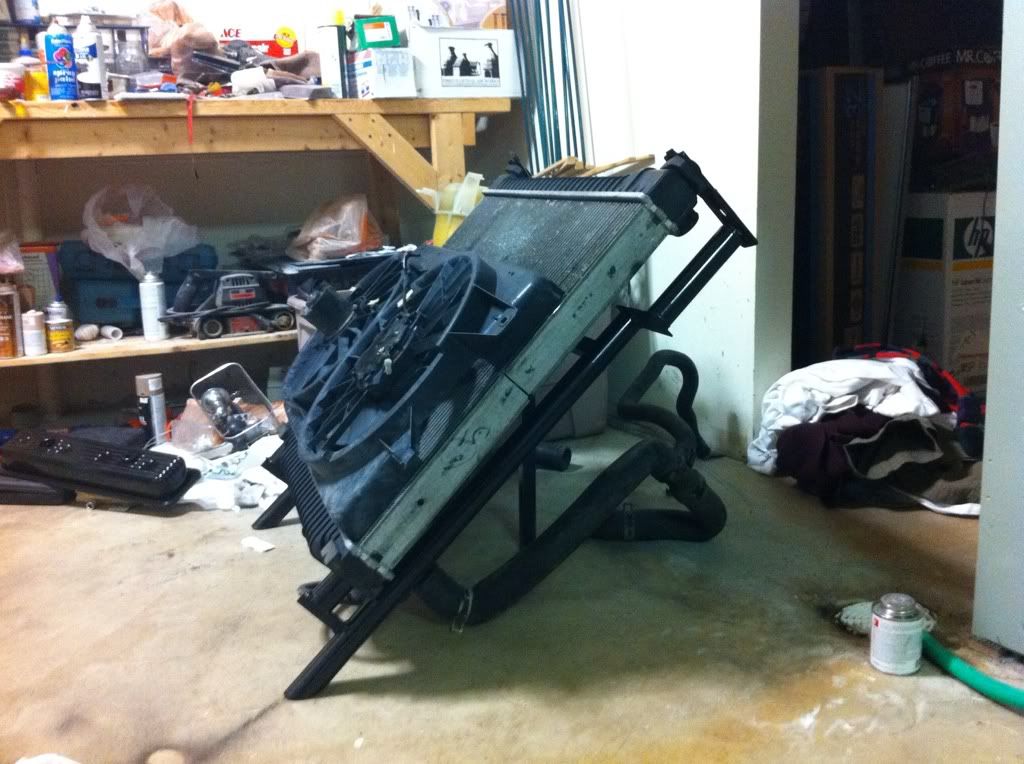
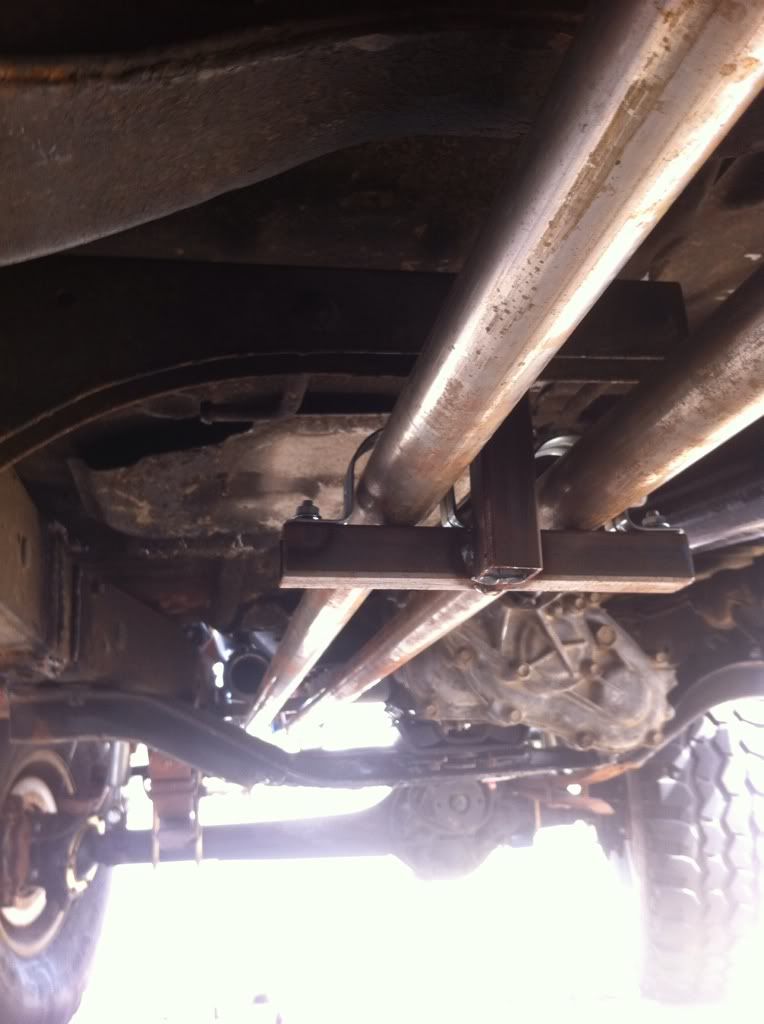
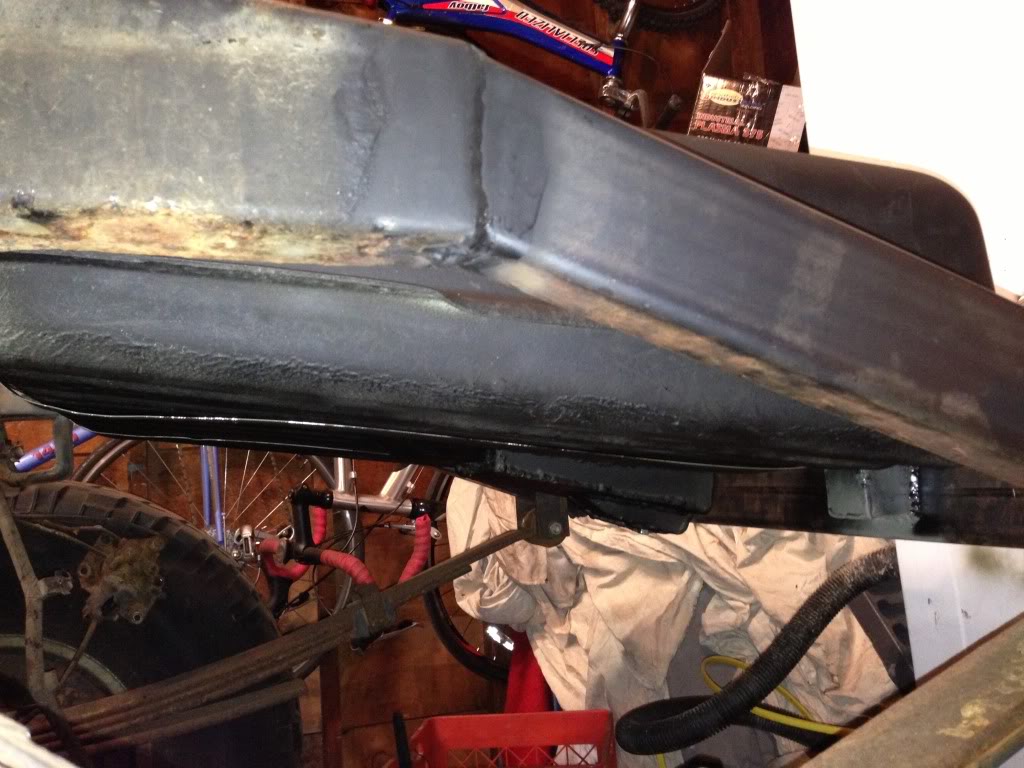
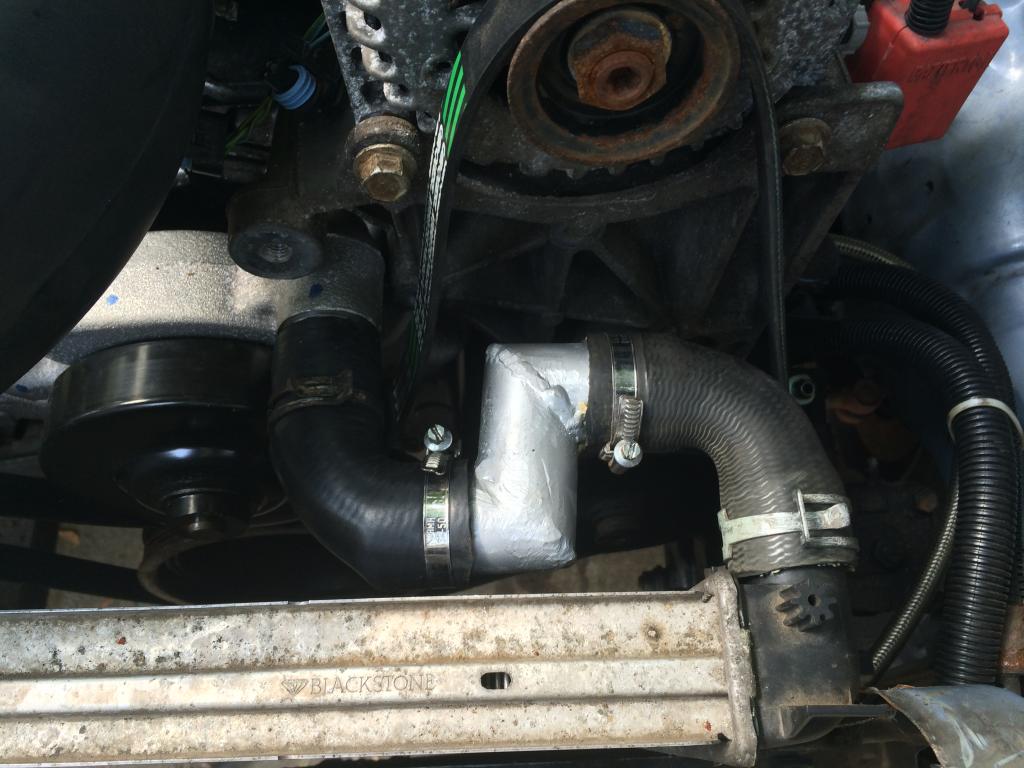
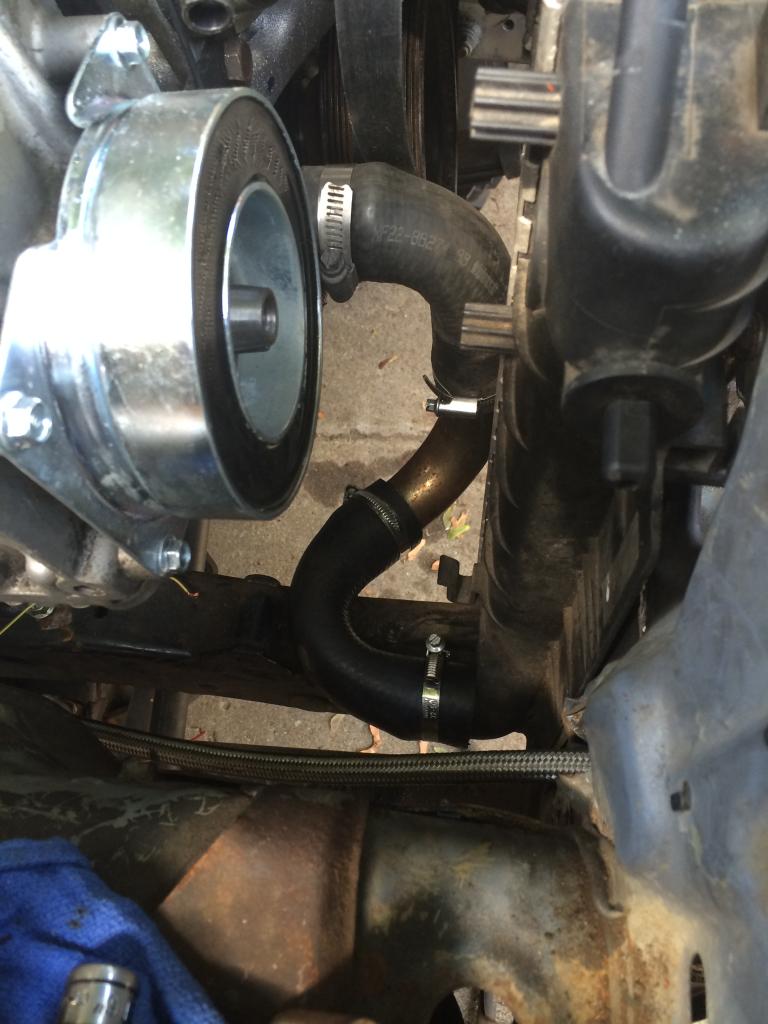
Since I am running a rear radiator, I have to transfer coolant safely to it, I came up with this setup. It should have enough clearance for the steering arm and axle.
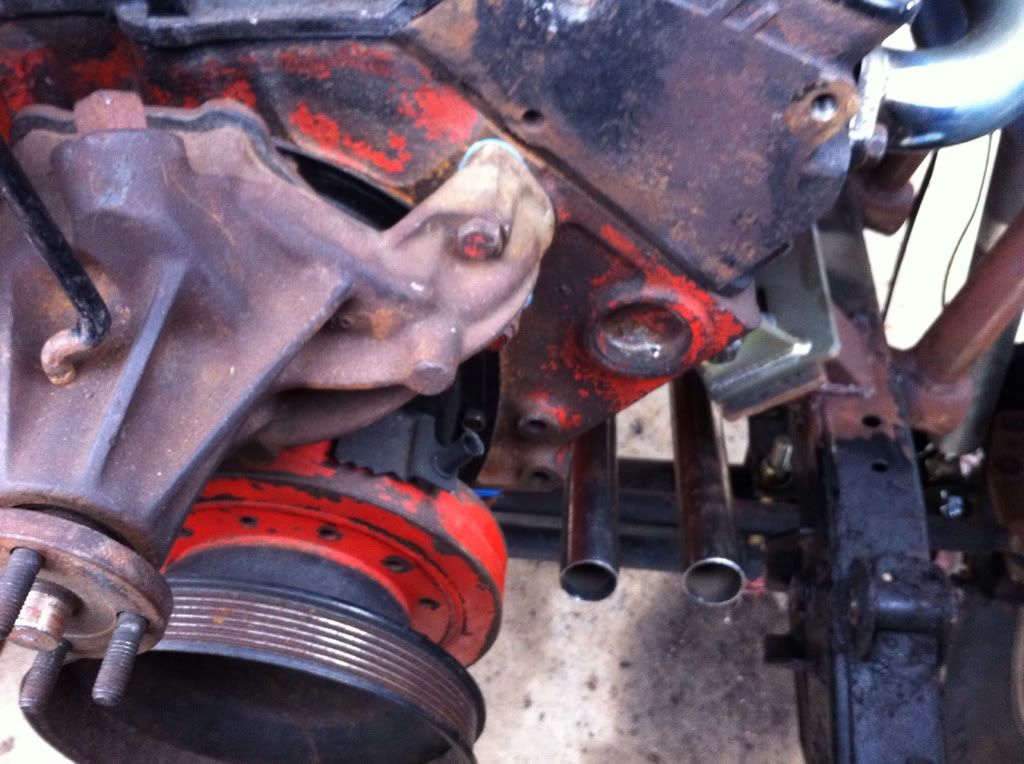
They travel down the frame rail, under the exhaust, over the crossmember, and through the woods.
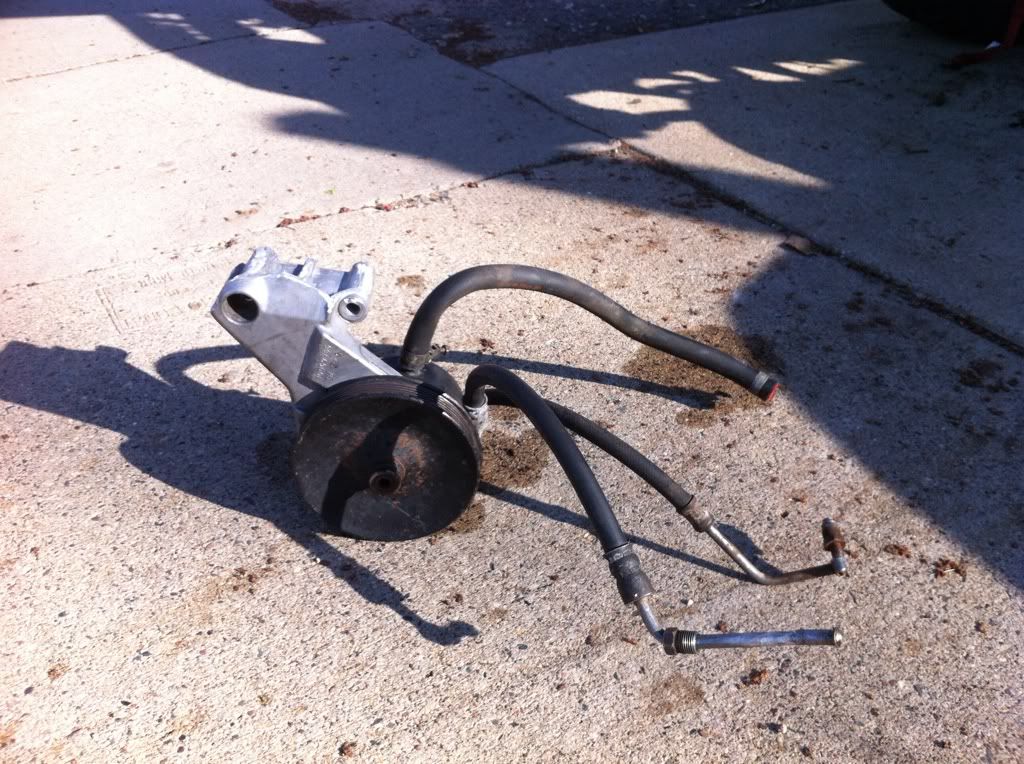
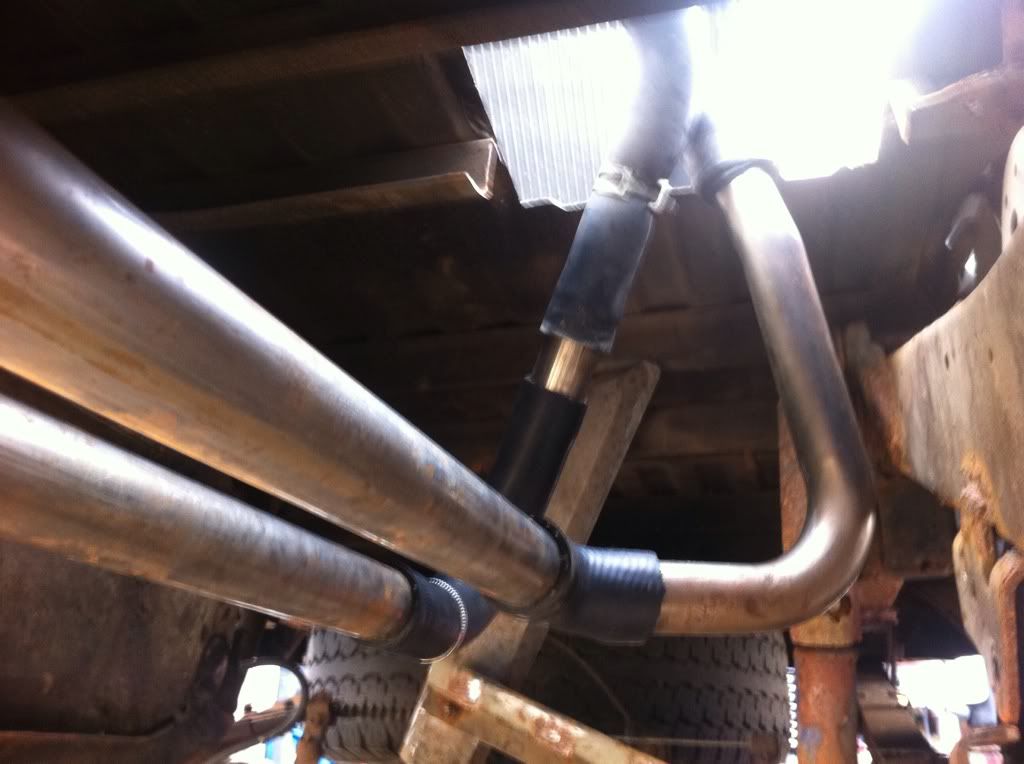
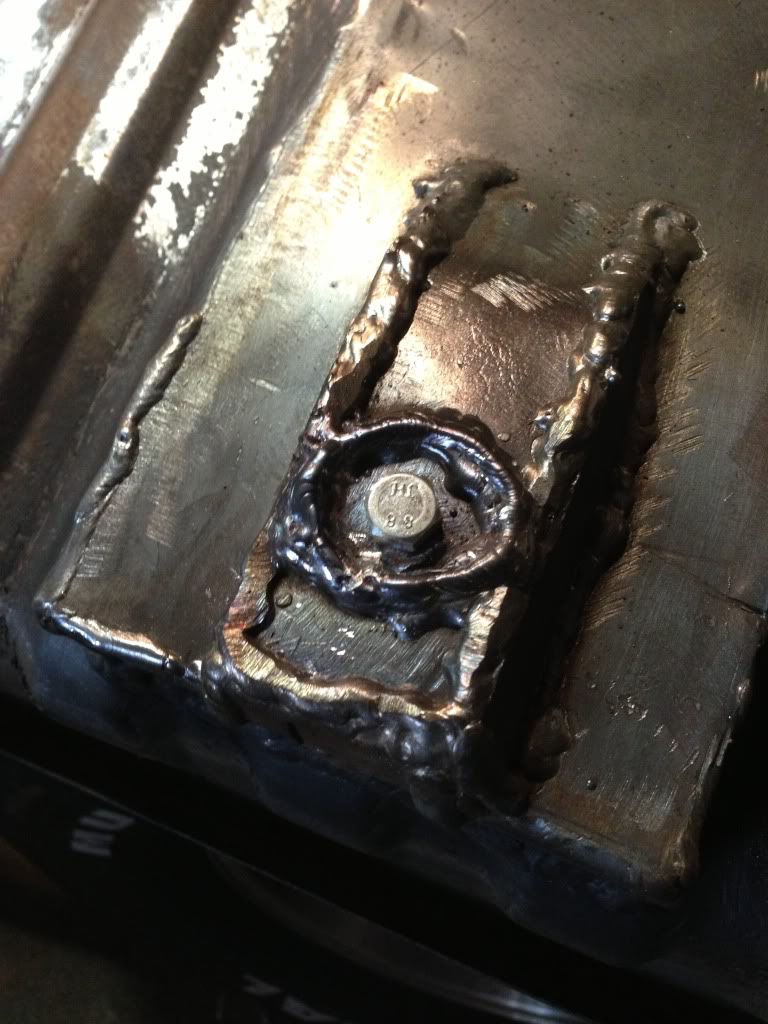
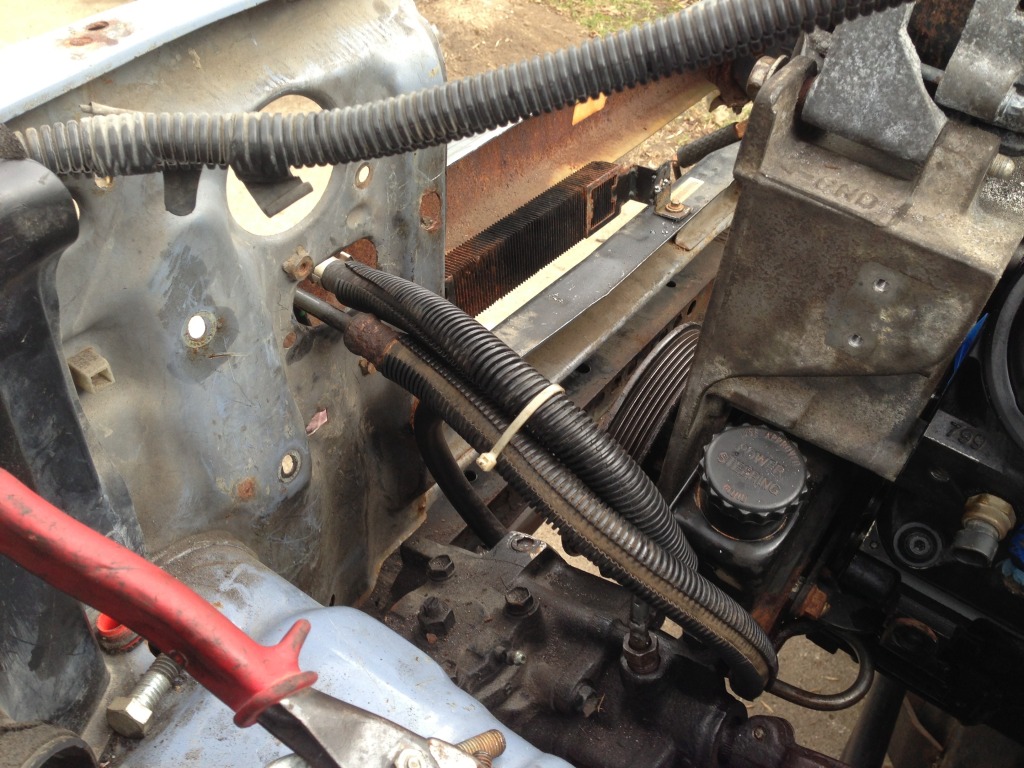
Newly sealed and painted PS gear.
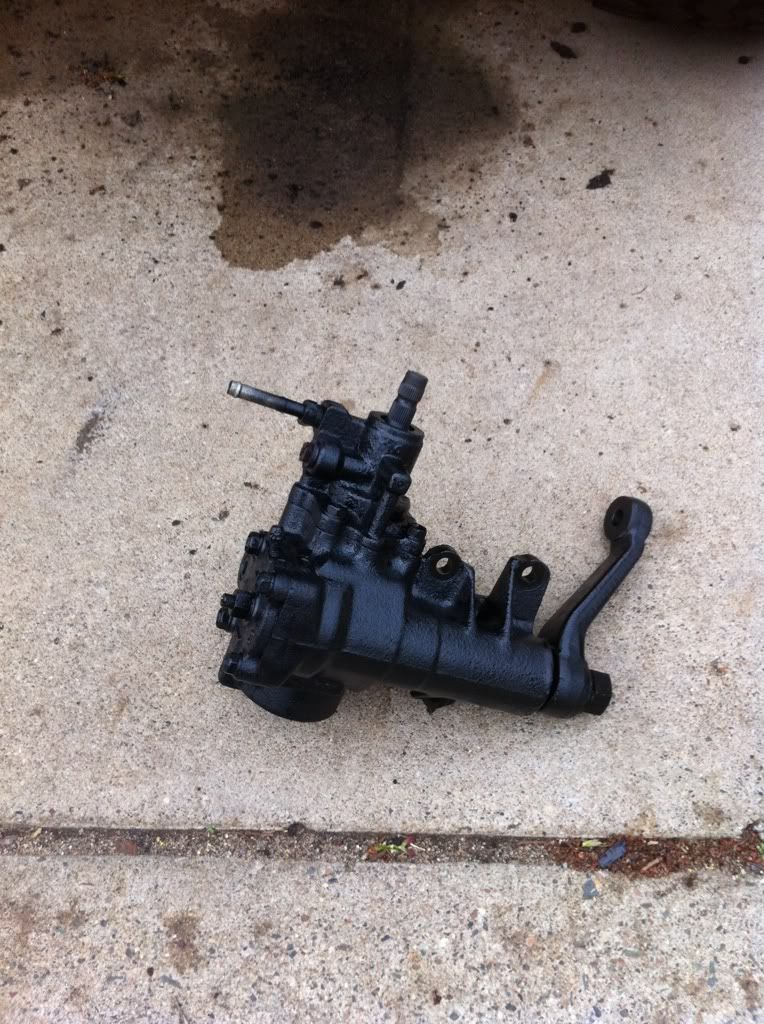
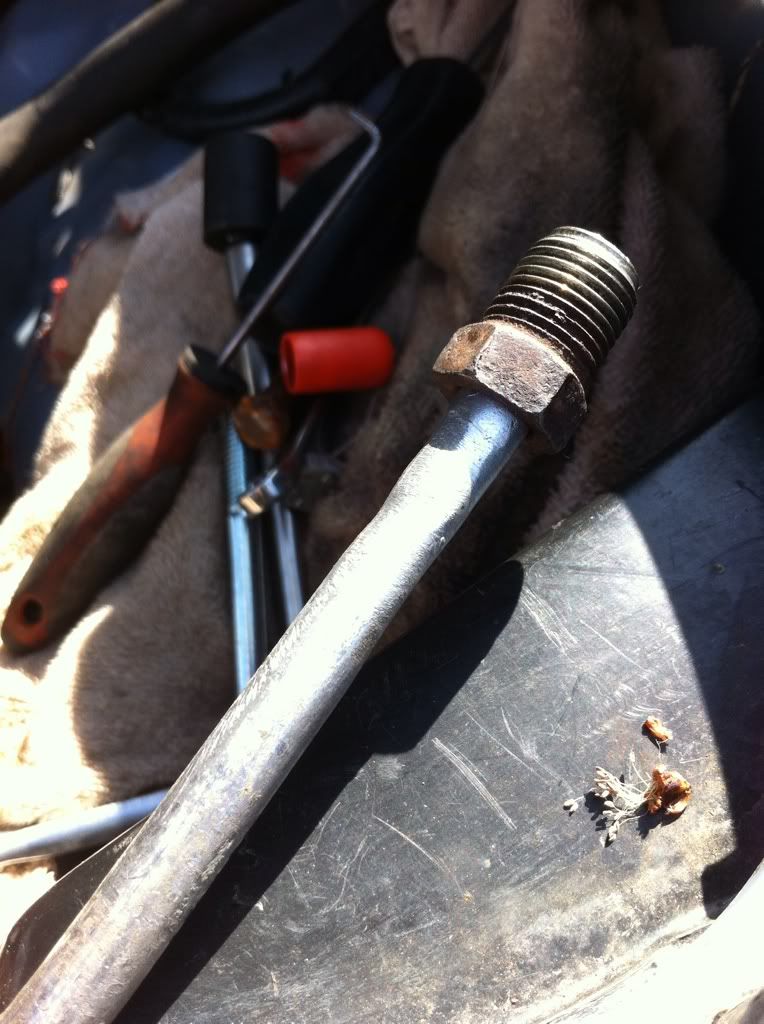
Cut the Toyota line for the flare and fitting, than cut the Chevy pressure line and welded the Toyota flare to it.
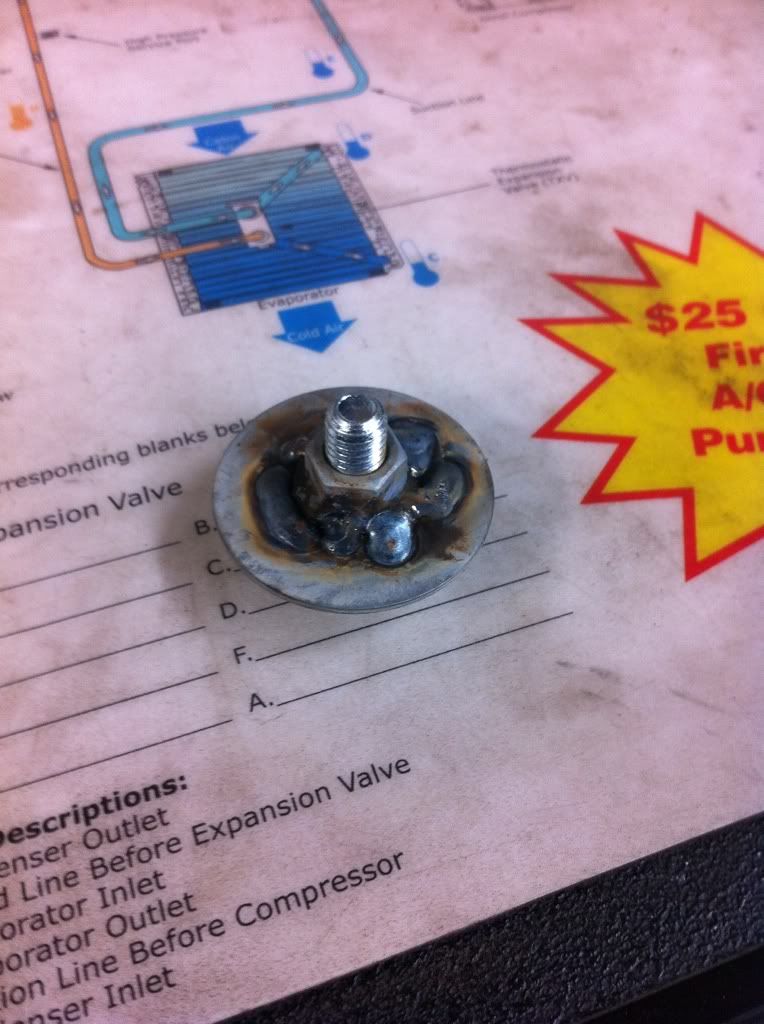
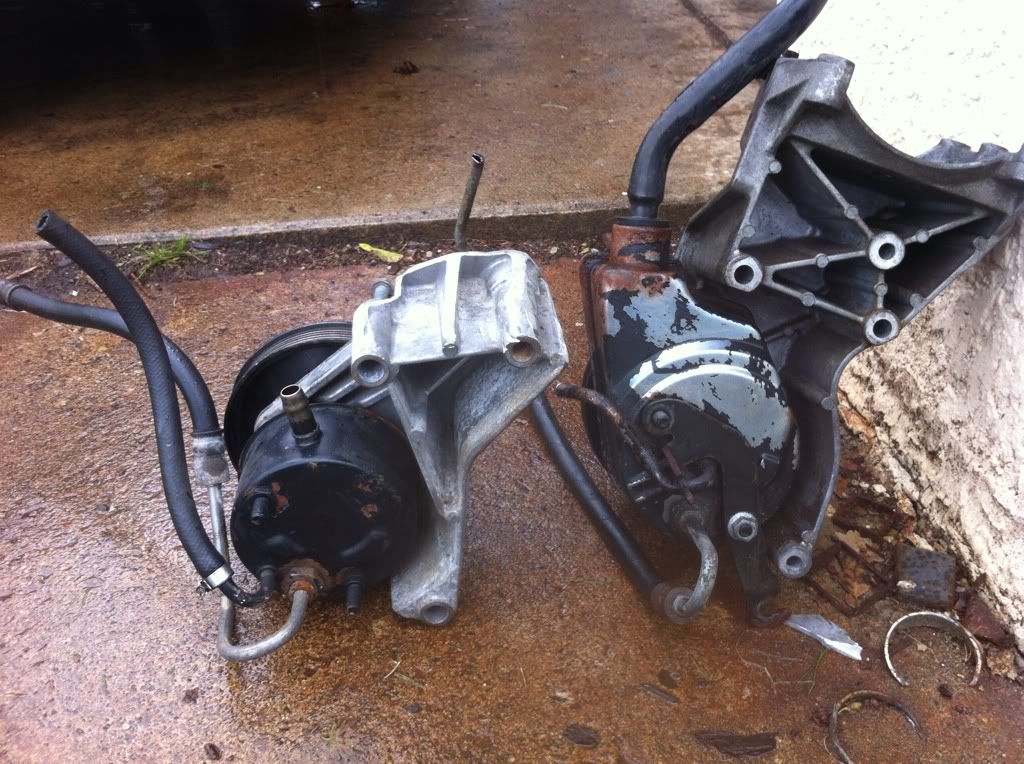
I did not want to run AC, and since the bracket was in the way of the hood closing, so it had to go.
I cut the fitting off the Chevy return line, and used a hose clamp like normal. The larger hose is for the resv.
Damn it's been a while, but I've been busy. Now the weather's nice so I have the bug again...
I've wired in the harness and ECU, I wanted the ECU as high as possible, and the wire harness wasn't long enough to reach the rear, so I shoved it under the dash like every other swap. I am trying my best to locate all my electronics up higher so I can submerge my truck if need be, and not have to fear of failure.
Since I am running a rear radiator, I have to transfer coolant safely to it, I came up with this setup. It should have enough clearance for the steering arm and axle.
They travel down the frame rail, under the exhaust, over the crossmember, and through the woods.
Newly sealed and painted PS gear.
Cut the Toyota line for the flare and fitting, than cut the Chevy pressure line and welded the Toyota flare to it.
I did not want to run AC, and since the bracket was in the way of the hood closing, so it had to go.
I cut the fitting off the Chevy return line, and used a hose clamp like normal. The larger hose is for the resv.
Last edited by 3uzfte; Mar 2, 2014 at 07:51 AM.
Apr 7, 2012 | 08:54 AM
#45
Thread Starter
Registered User
Joined: Jan 2011
Posts: 88
Likes: 0
From: Minneapolis, MN
I do, sorry for the delay.
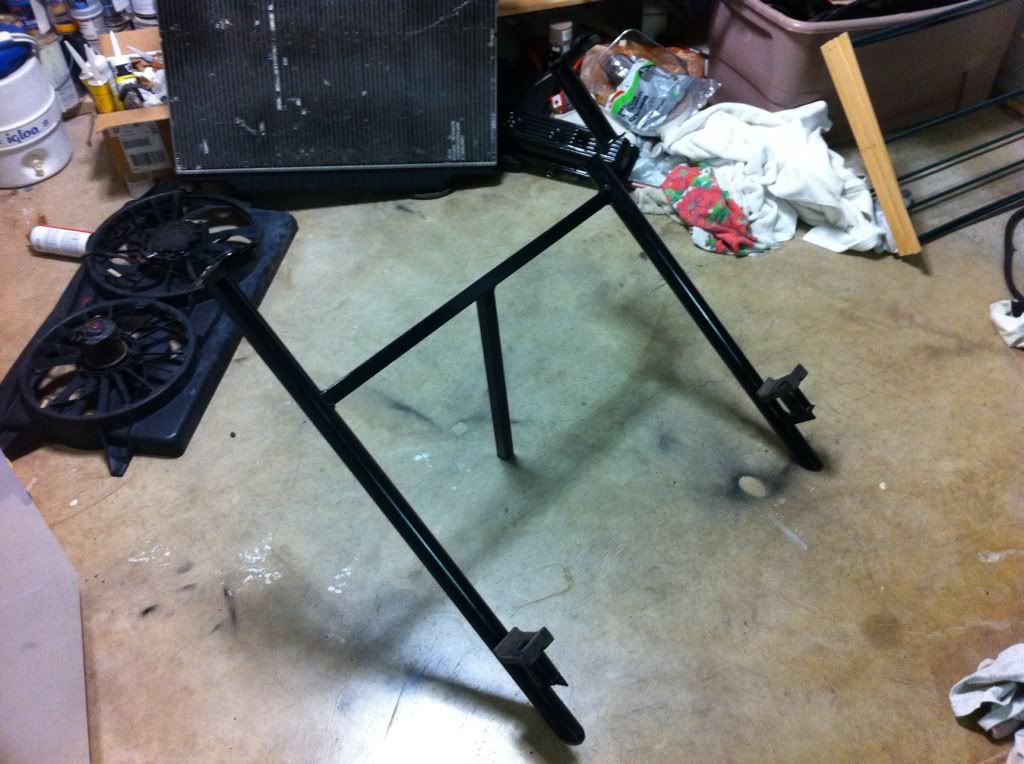
Started with 2" pipe, and angle iron to make the feet.
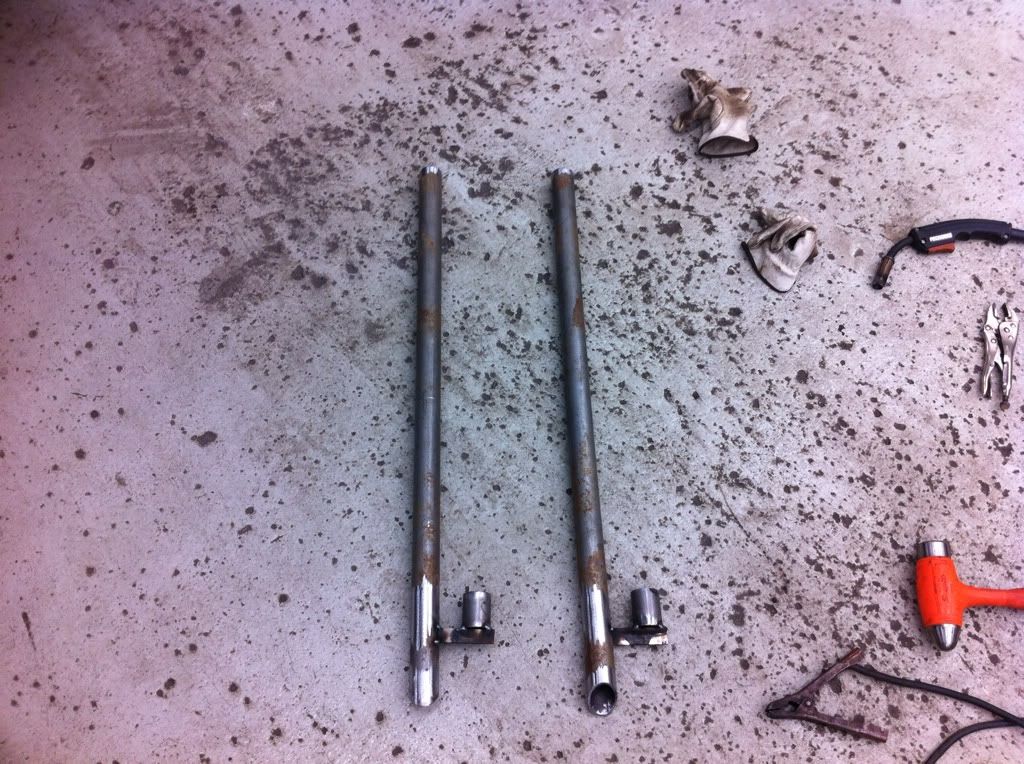
Took 2 fender washers and welded a nut on them, then welded these to the top.
Mock up.
I had to modify one of the uprights to accommodate for the upper rad hose.
Again, I'm running two tranny coolers, one internal to the radiator, and the other is obviously external, both came off a E-150.
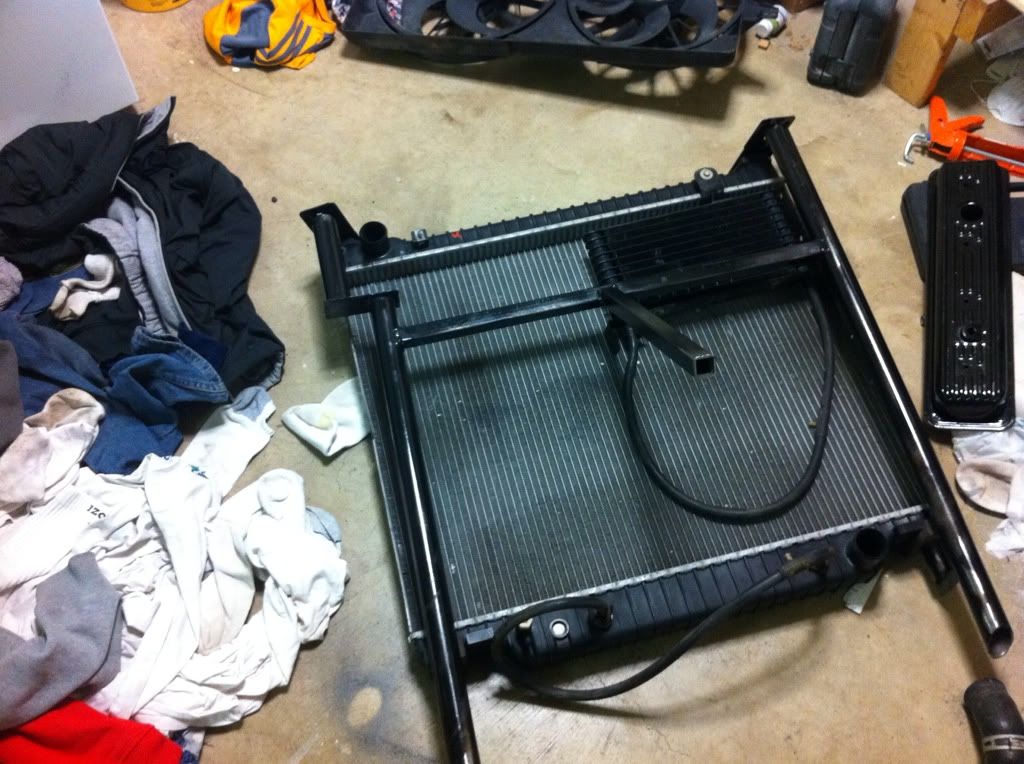
And my Mercury Villager eFan setup.
It is a bit too tall, as I can barely see out my back window. I am going to drop the radiator about 2" to help.
Started with 2" pipe, and angle iron to make the feet.
Took 2 fender washers and welded a nut on them, then welded these to the top.
Mock up.
I had to modify one of the uprights to accommodate for the upper rad hose.
Again, I'm running two tranny coolers, one internal to the radiator, and the other is obviously external, both came off a E-150.
And my Mercury Villager eFan setup.
It is a bit too tall, as I can barely see out my back window. I am going to drop the radiator about 2" to help.
Last edited by 3uzfte; Mar 2, 2014 at 07:54 AM.
Apr 13, 2012 | 09:58 AM
#46
Thread Starter
Registered User
Joined: Jan 2011
Posts: 88
Likes: 0
From: Minneapolis, MN
Update for my birthday.
I can't spend one more minute looking at this money pit sitting in my driveway sucking up the greenbacks. I spent some time fitting some lines to transfer coolant from engine to radiator. I did have to chop up a set of 302/5.0 headers to get the right bends and lengths.
From front to back, the upper radiator hose.
Lower radiator hose.
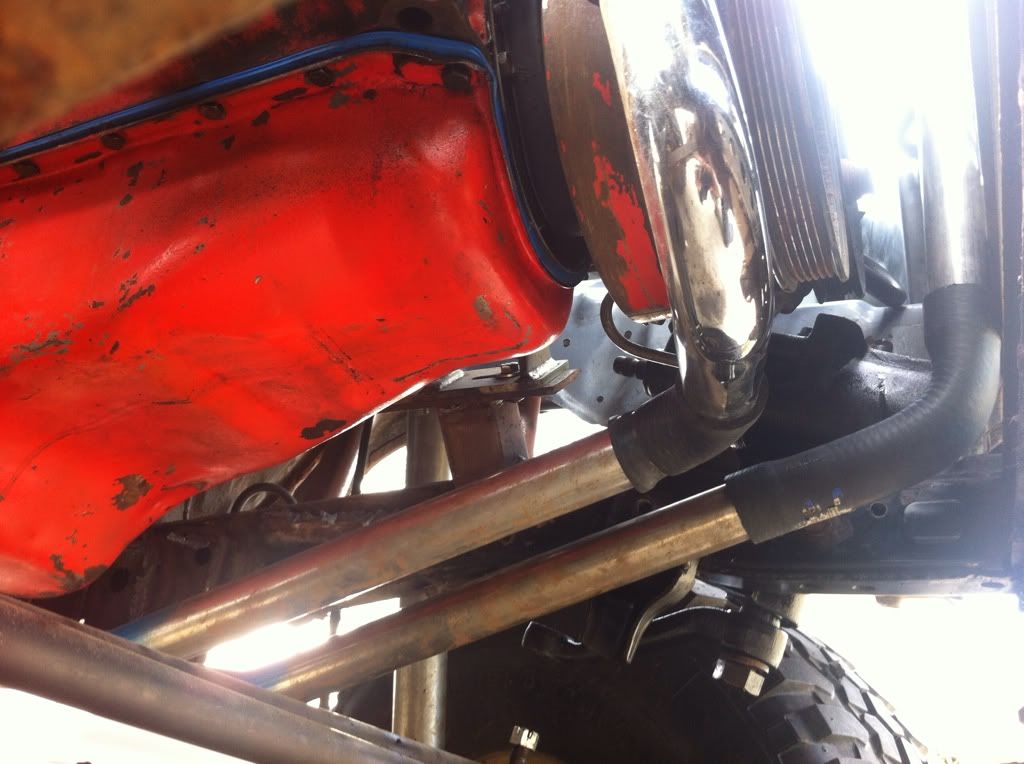
Hard steel lines to run from front to back.
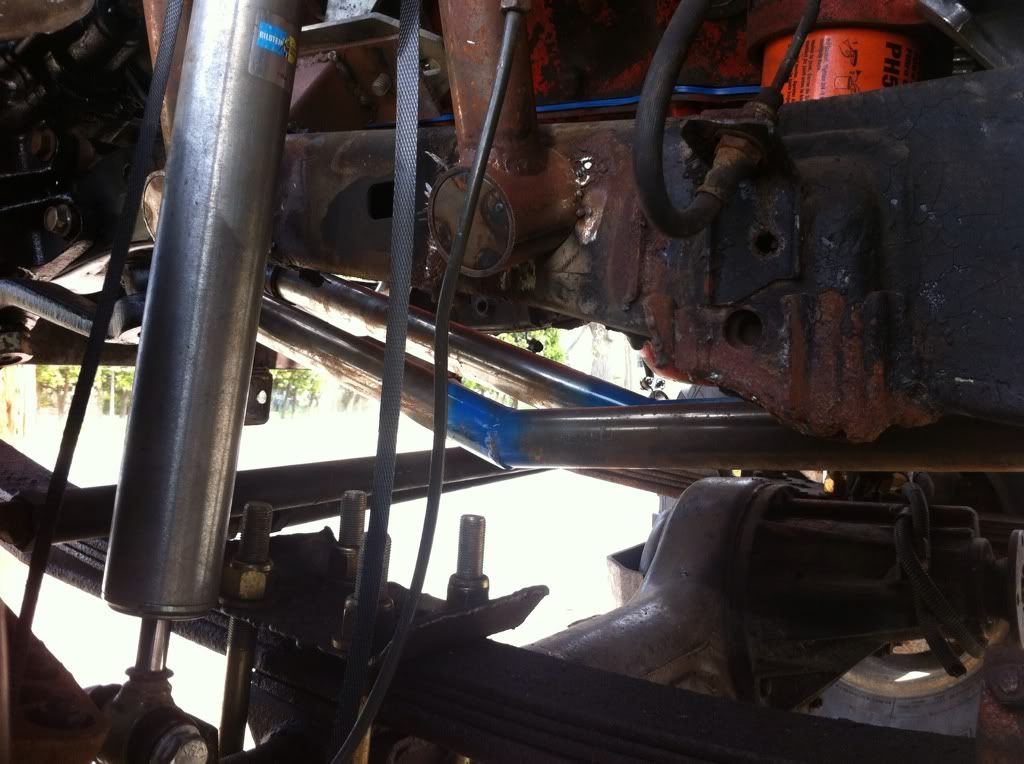
The steel line will be insulated with rubber hose, but this shot shows the length of the pipe.
It ain't pretty buy it'll work.
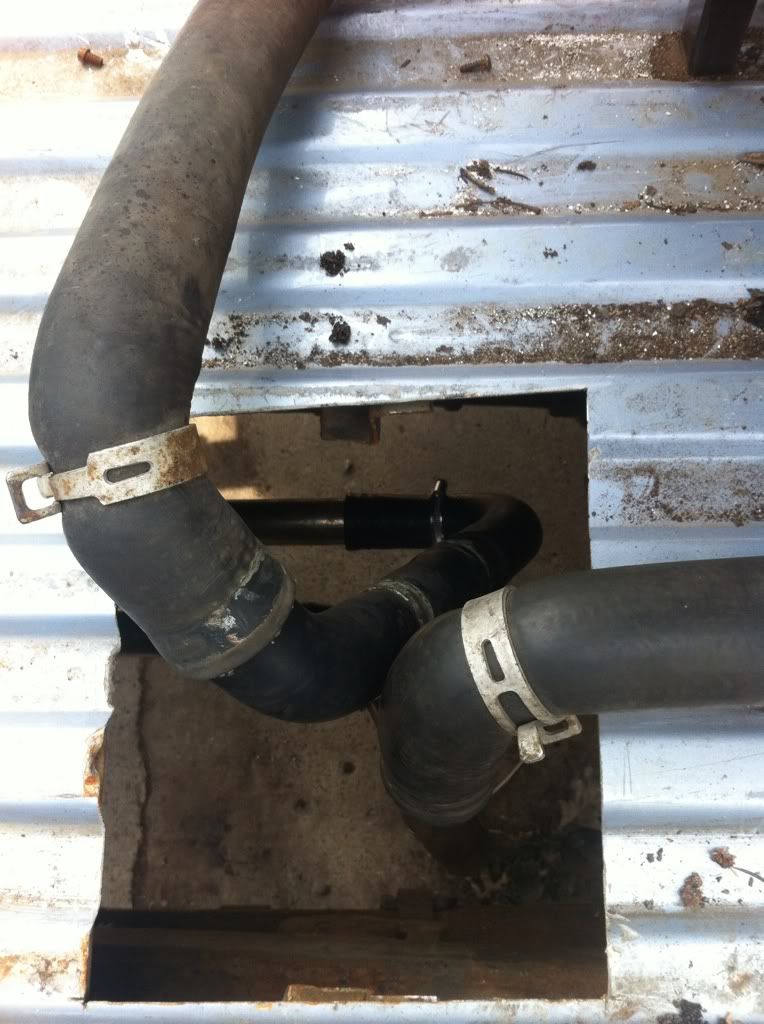
Top shot of the hoses coming through the bed.
Only thing left is to plumb the trans cooler and fill it with fluids.

I can't spend one more minute looking at this money pit sitting in my driveway sucking up the greenbacks. I spent some time fitting some lines to transfer coolant from engine to radiator. I did have to chop up a set of 302/5.0 headers to get the right bends and lengths.
From front to back, the upper radiator hose.
Lower radiator hose.
Hard steel lines to run from front to back.
The steel line will be insulated with rubber hose, but this shot shows the length of the pipe.
It ain't pretty buy it'll work.
Top shot of the hoses coming through the bed.
Only thing left is to plumb the trans cooler and fill it with fluids.
Last edited by 3uzfte; Mar 2, 2014 at 07:56 AM.
Apr 16, 2012 | 07:10 PM
#48
Thread Starter
Registered User
Joined: Jan 2011
Posts: 88
Likes: 0
From: Minneapolis, MN
Update. For the longest I have been very close to starting this thing up, but die to the last few things I just haven't been able to. Either I don't have enough time, or the right parts. But since I'm doing both a 2UZ and 350 swap I gain one thing to use on the other. So I still have the passion to finish my creation. Anyways, I've pretty much got most of it ironed out, except a few things.
1. VSS... I am aware of the mechanical gear with an electrical plug on the top, however I plan on running a Tundra cluster, which uses the final VSS at the TC output shaft. I'll need to figure out a tone ring and sensor to allow my 4L60E to shift or should I be able to make the existing one work the cluster and tranny?
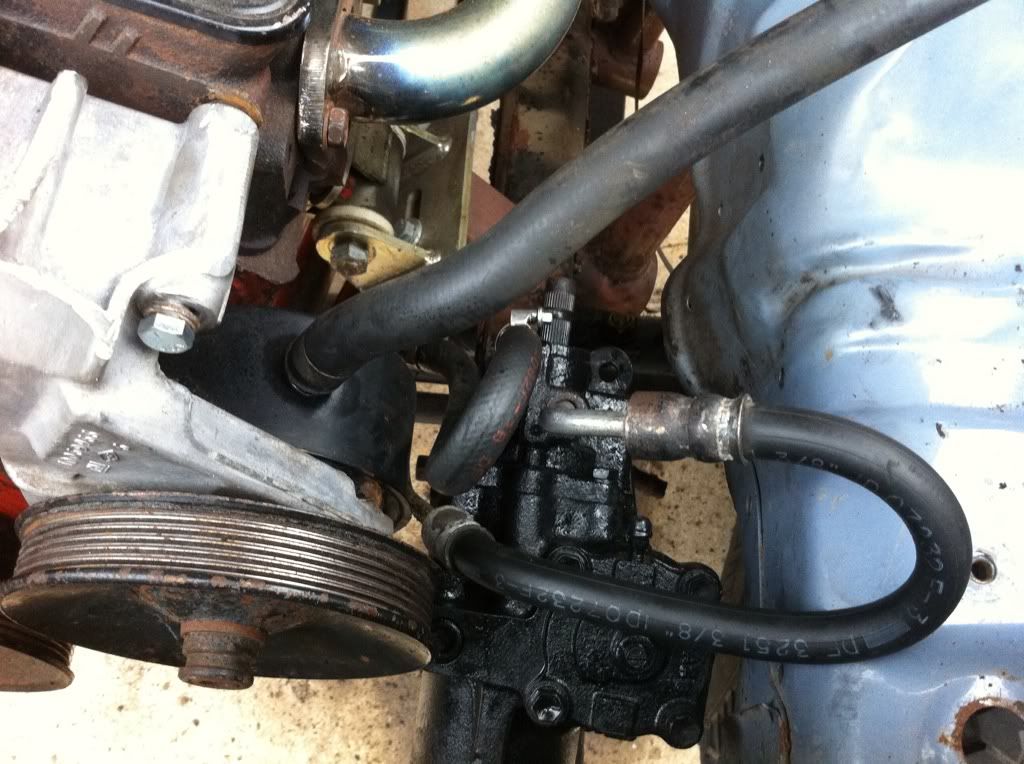
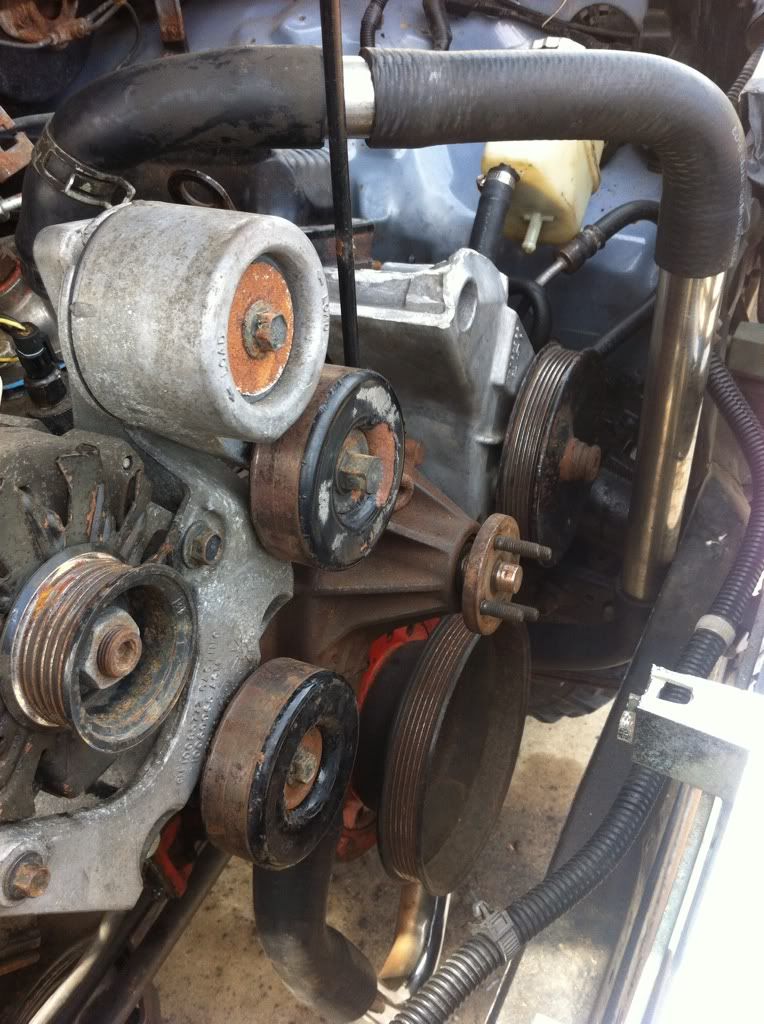
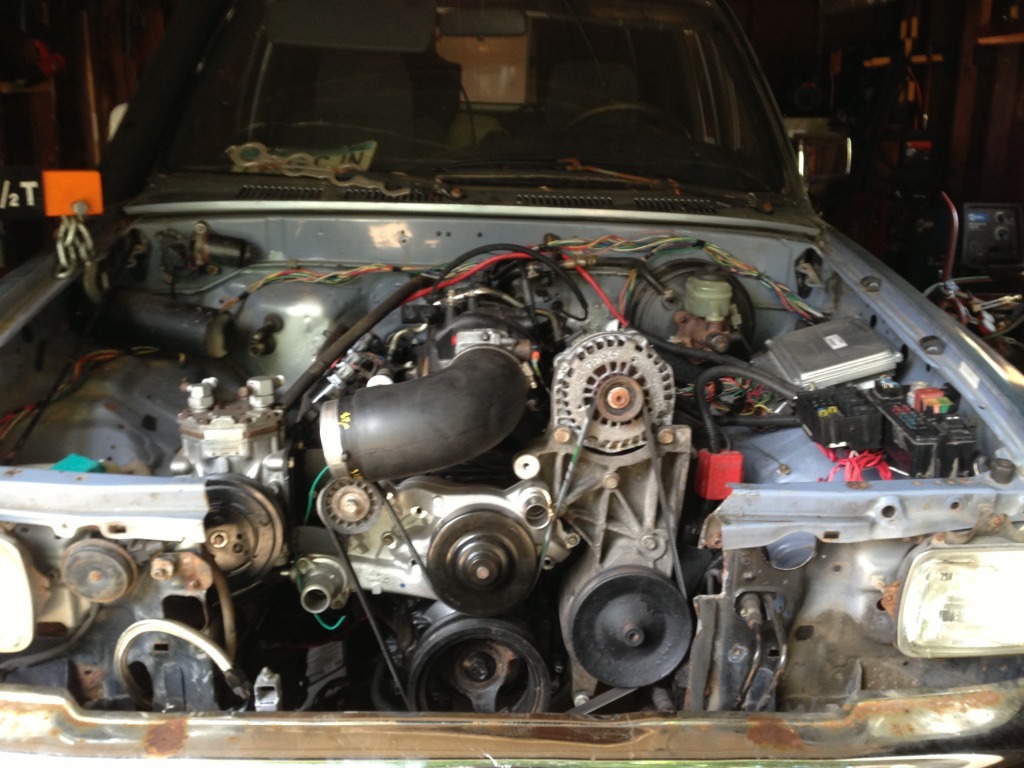
2. Power Steering... In previous pictures, you can see my Chevy to Toyota conversion, that's great, but I forgot I bought this eng/trans combo from a G30 van, which uses Hydro-Boost. This setup uses the power steering pump to operate the hydraulic assist to the brakes. Needless to say, the Toyota doesn't use Hy-Boost, so this setup won't won't, back at square 1. Went to the junk yard and found a PS pump w/ resv attached to housing from a 4.3 V6, mounting bolts are the same, lines mount the same, and it has a place for an idler bearing. This is important because it serves as a guide to keep the belt from touching the water pump after leaving the Alt going to the PS pump. I will have to modify the tube to clear the hood, I could ditch the tube but I want to keep fluid everything as high as possible.
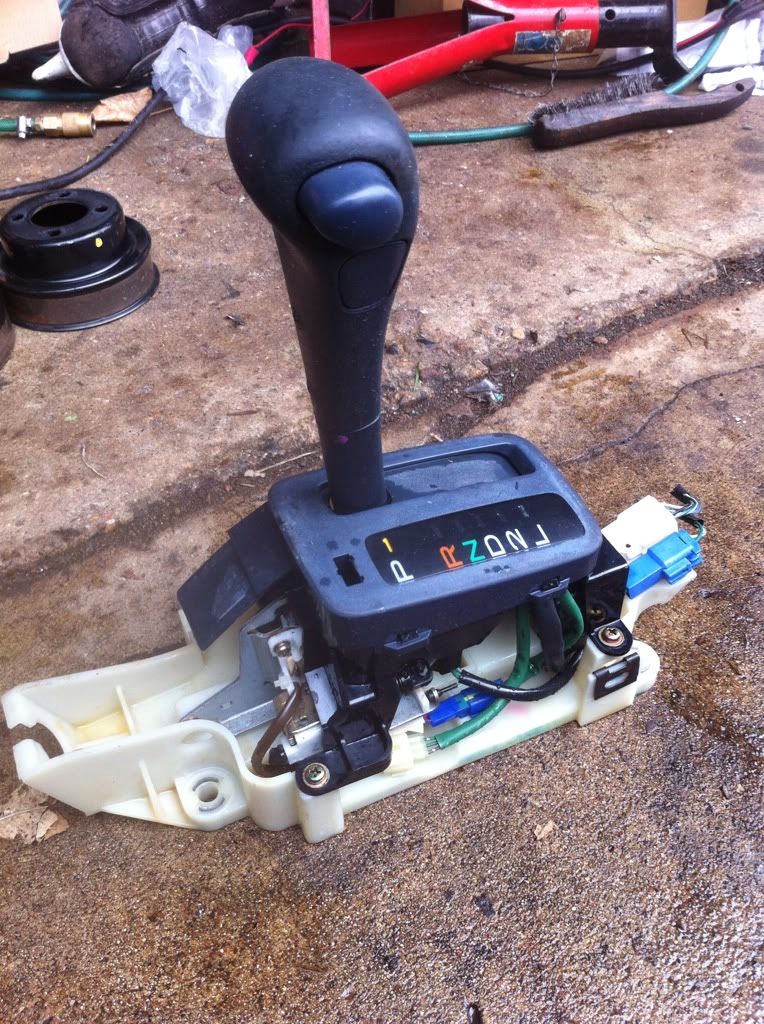
I stumbled upon this shifter, with some fabrication it'll do, keeping it in the Toyota fam.
I also found this pulley that has the same back spacing, but I will need to redrill or come up with an adapter to make it fit, but the thought is an under drive pulley.

That's pretty much it for now.
Last edited by 3uzfte; Mar 2, 2014 at 08:02 AM.
Apr 28, 2012 | 05:50 PM
#49
Thread Starter
Registered User
Joined: Jan 2011
Posts: 88
Likes: 0
From: Minneapolis, MN
Update.
I have done a bit of research on the VSS issue. As a refresher, what make this difficult is I am running the TBI350/4L60E with the Toyota transfer case. The TBI computer needs the VSS for idle/run strategy. I could've boughten an adapter, but thought that had to be a better way.
Cruising in the junk yard, I stumbled on a 96' Lexus LX470, and pulled the VSS. What I got was a mechanical to electrical converter. The reason why I post this is because most Pickup/4Runners have sensor and gear as a VSS assembly, this is a gear and sensor separate from each other.
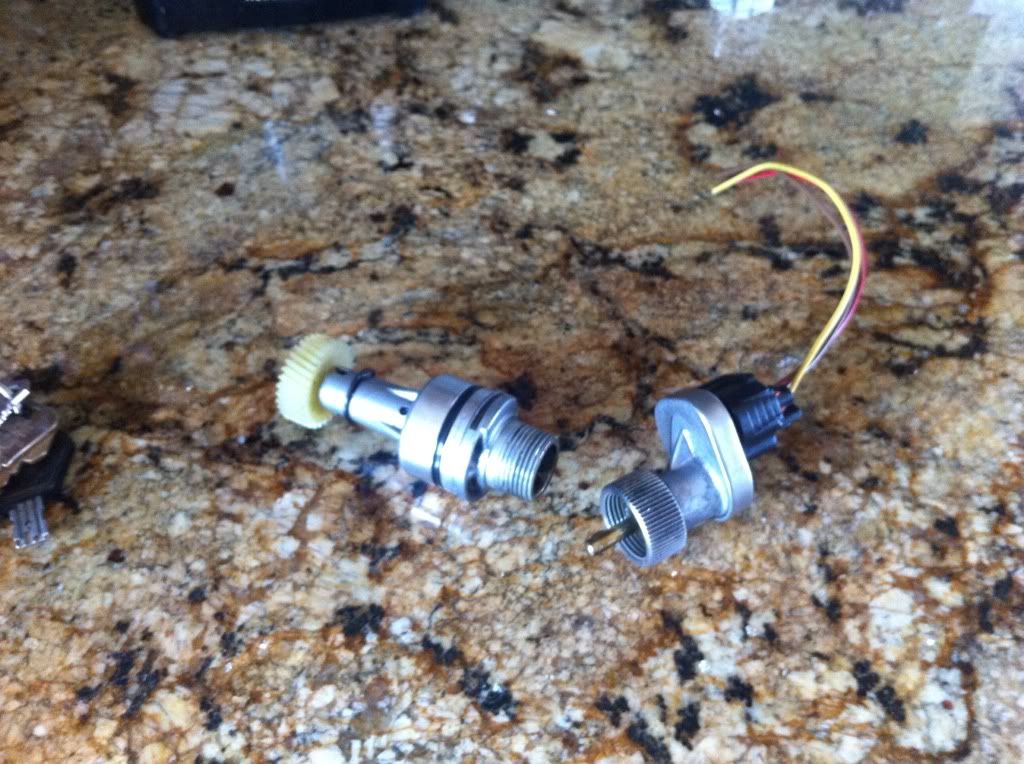
I was afraid of mixed signals or incompatible parts. Soooo here's what I found, first with Toyota. All of us with Toyota tranfer cases have a mechanical driven speedometer gear, however early in the 90's, Toyota did away with tge mechanical speedometer in faver of an electronic driven speedo. They kept the mechanical gear in the transfer case and added a sensor to transmit rotational speed. No secret right, but what I needed to know was the signal form the sensor produces and how it's received. Toyota says that the VSS produces 4 pulses every rotation of the rotor shaft, and is sent in wave form, on, off, on, off. What's strange is that Toyota send the VSS signal to the speedo cluster, than to the ECU to determine it's strategy.
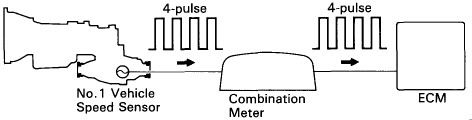
Now for GM, the monkey wrench in this whole equation. I wish I could make a cheap mod to us the GM VSS just to make things work, however it just seemed to be a bit difficult, using a Toyota transfer case and cluster. So I found out the two companies use similar strategies to run their vehicles. Of course it depends on the year of the VSS, but this for a 93' ECU. All of my reading said it requires a 40 pulses per rotation of the driveshaft. The VSS sends it signal to a DRAC/VSS Buffer Module to convert the signal to a square waveform for the ECU to determine the vehicle's speed. My goal would be to avoid the middle man, plus I'm not using the GM which uses a AC signal, which the DRAC/Buffer module converts to a square waveform.

So.... If the Toyota VSS already produces the square waveform, I think I might just get lucky. So my setup is a forward shift TC, 96' LX450 VSS feeding a 01' Tundra gauge cluster, than to the 93' TBI ECU. I doubt the ratios are right, but all I'm looking for is a usable signal that can be tweaked. Thanks for taking the time to read this.
I have done a bit of research on the VSS issue. As a refresher, what make this difficult is I am running the TBI350/4L60E with the Toyota transfer case. The TBI computer needs the VSS for idle/run strategy. I could've boughten an adapter, but thought that had to be a better way.
Cruising in the junk yard, I stumbled on a 96' Lexus LX470, and pulled the VSS. What I got was a mechanical to electrical converter. The reason why I post this is because most Pickup/4Runners have sensor and gear as a VSS assembly, this is a gear and sensor separate from each other.
I was afraid of mixed signals or incompatible parts. Soooo here's what I found, first with Toyota. All of us with Toyota tranfer cases have a mechanical driven speedometer gear, however early in the 90's, Toyota did away with tge mechanical speedometer in faver of an electronic driven speedo. They kept the mechanical gear in the transfer case and added a sensor to transmit rotational speed. No secret right, but what I needed to know was the signal form the sensor produces and how it's received. Toyota says that the VSS produces 4 pulses every rotation of the rotor shaft, and is sent in wave form, on, off, on, off. What's strange is that Toyota send the VSS signal to the speedo cluster, than to the ECU to determine it's strategy.
Now for GM, the monkey wrench in this whole equation. I wish I could make a cheap mod to us the GM VSS just to make things work, however it just seemed to be a bit difficult, using a Toyota transfer case and cluster. So I found out the two companies use similar strategies to run their vehicles. Of course it depends on the year of the VSS, but this for a 93' ECU. All of my reading said it requires a 40 pulses per rotation of the driveshaft. The VSS sends it signal to a DRAC/VSS Buffer Module to convert the signal to a square waveform for the ECU to determine the vehicle's speed. My goal would be to avoid the middle man, plus I'm not using the GM which uses a AC signal, which the DRAC/Buffer module converts to a square waveform.
So.... If the Toyota VSS already produces the square waveform, I think I might just get lucky. So my setup is a forward shift TC, 96' LX450 VSS feeding a 01' Tundra gauge cluster, than to the 93' TBI ECU. I doubt the ratios are right, but all I'm looking for is a usable signal that can be tweaked. Thanks for taking the time to read this.
Last edited by 3uzfte; Mar 2, 2014 at 08:03 AM.
Jul 23, 2012 | 03:43 PM
#50
Thread Starter
Registered User
Joined: Jan 2011
Posts: 88
Likes: 0
From: Minneapolis, MN
Update.
Too many projects right now, not enough time for this one.
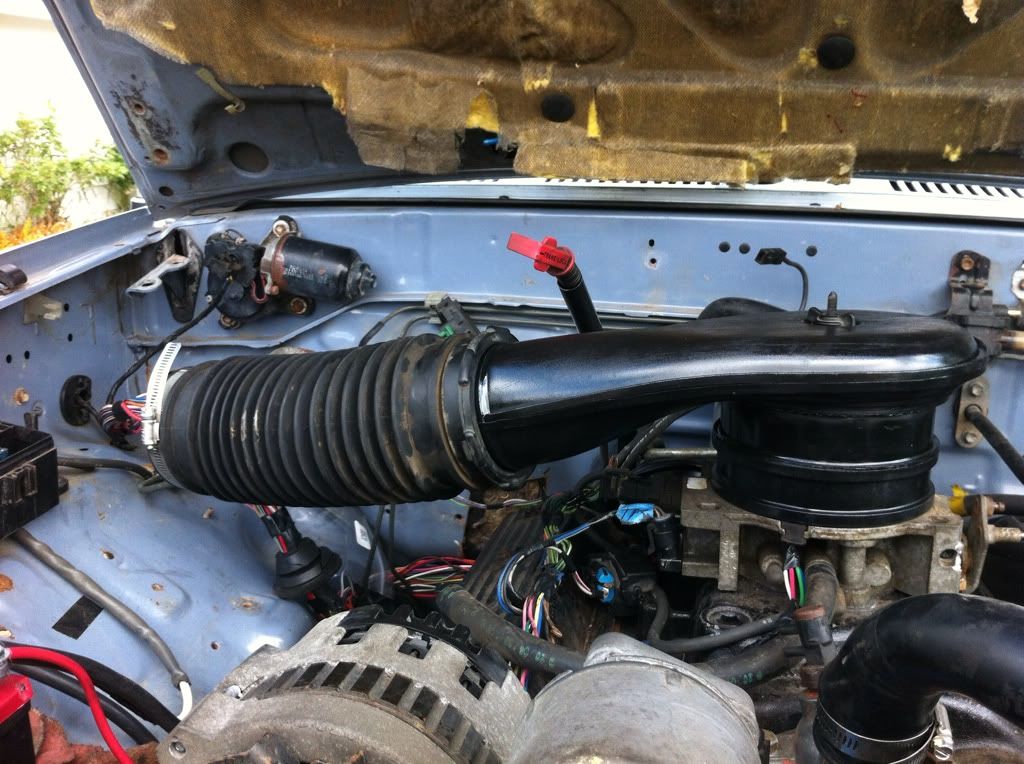
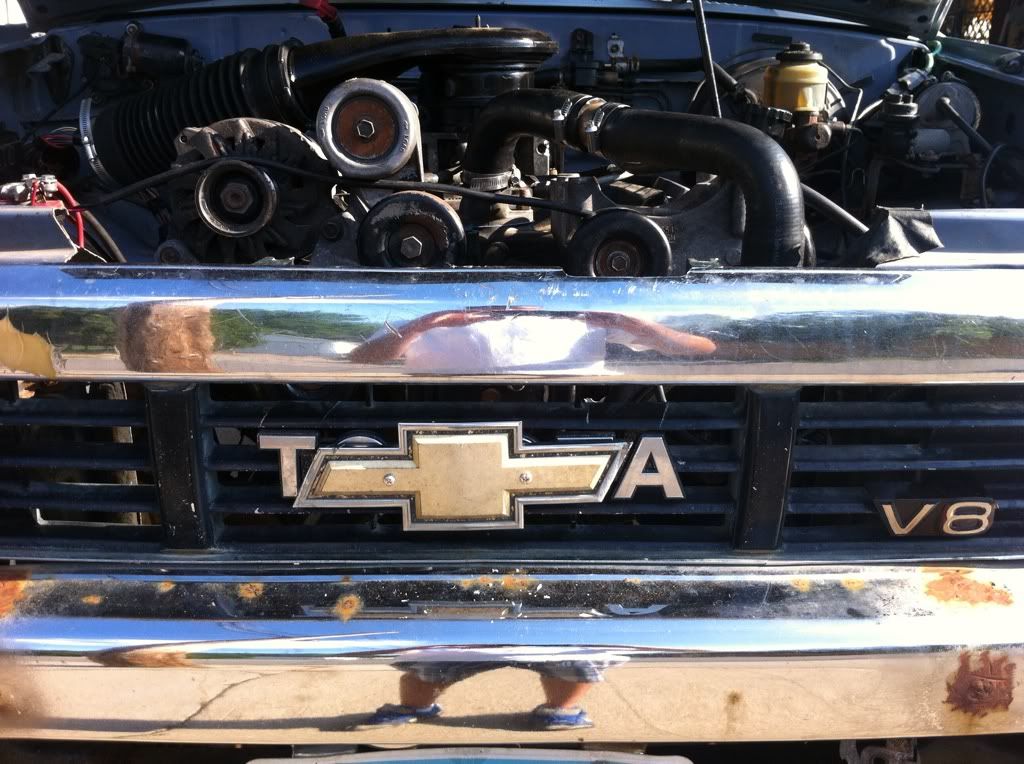
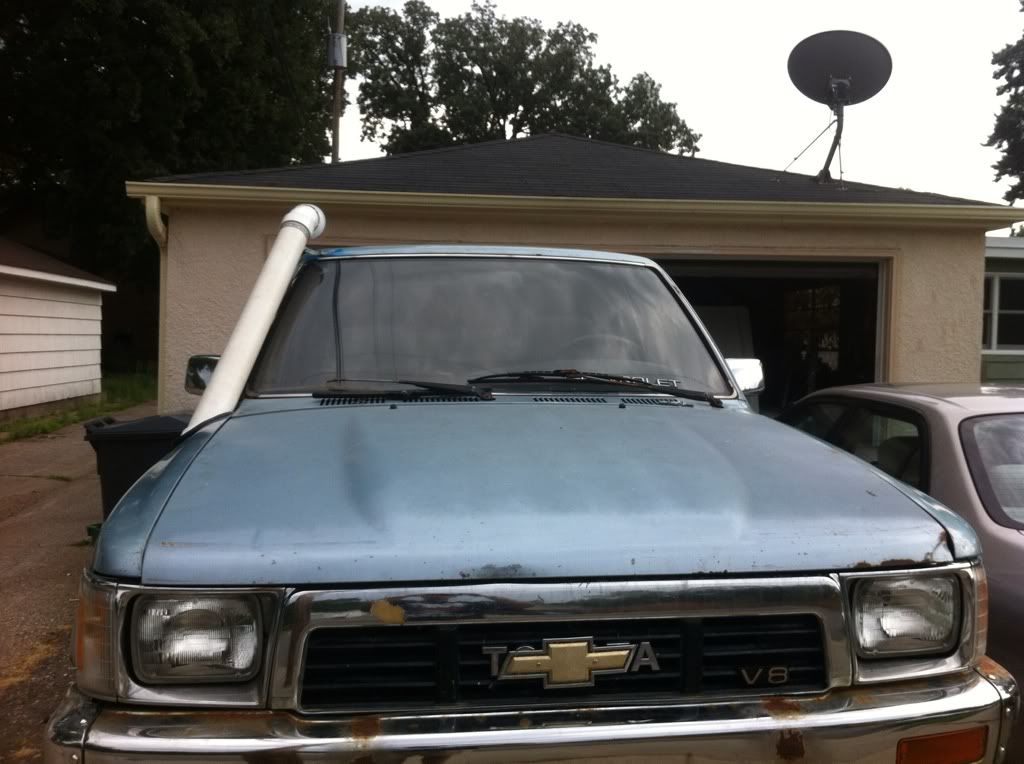
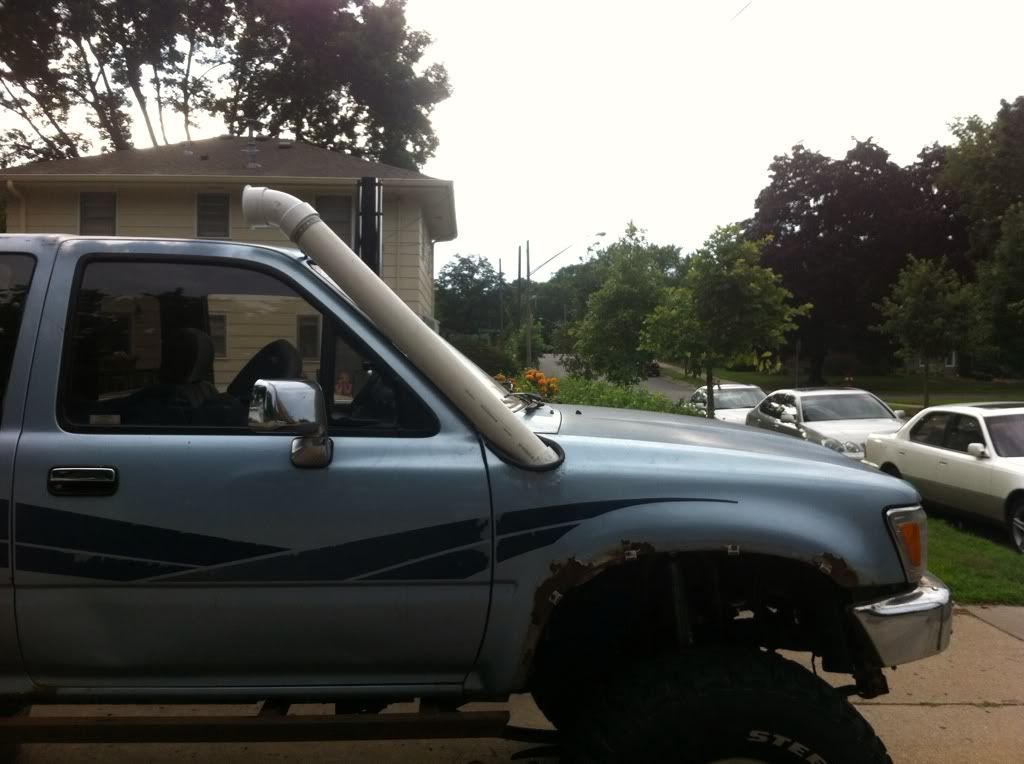
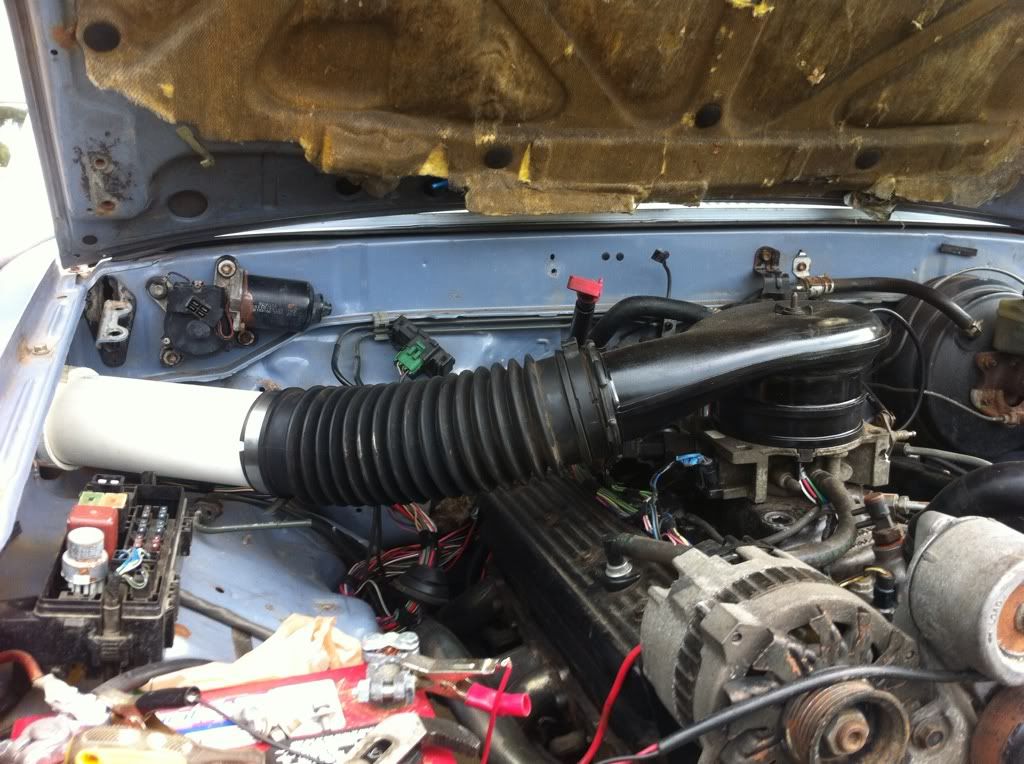
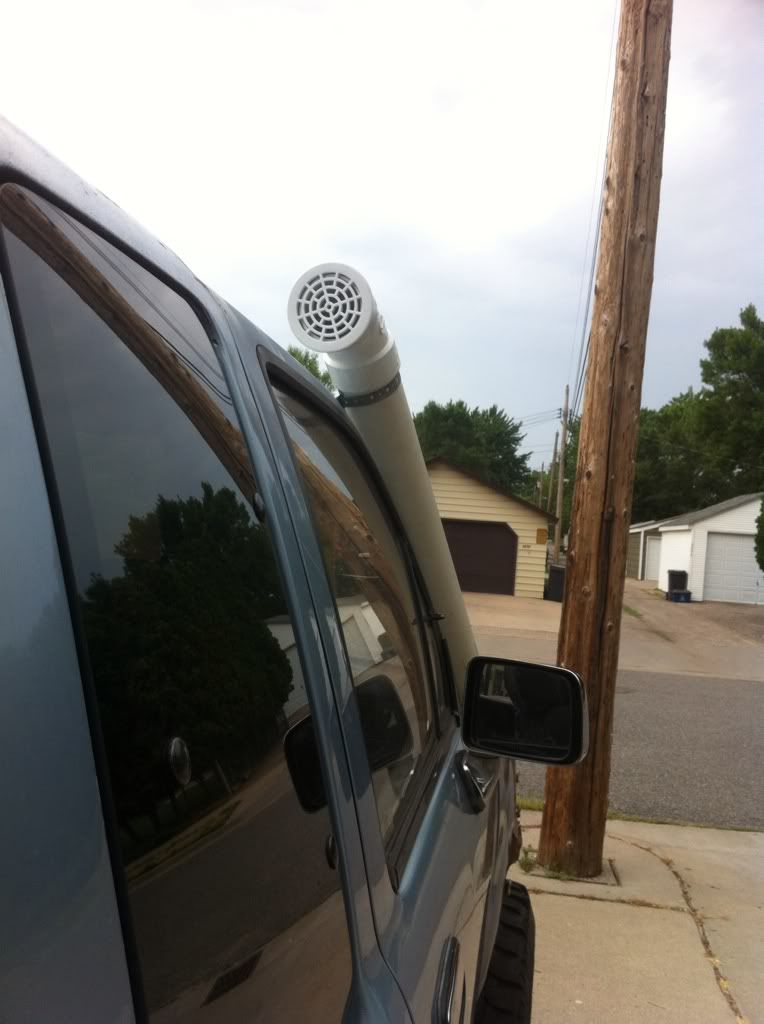
Homemade snorkel v1.0
2x GM TBI air cleaner spacers; 1x 00' Dodge Durango TB hat.
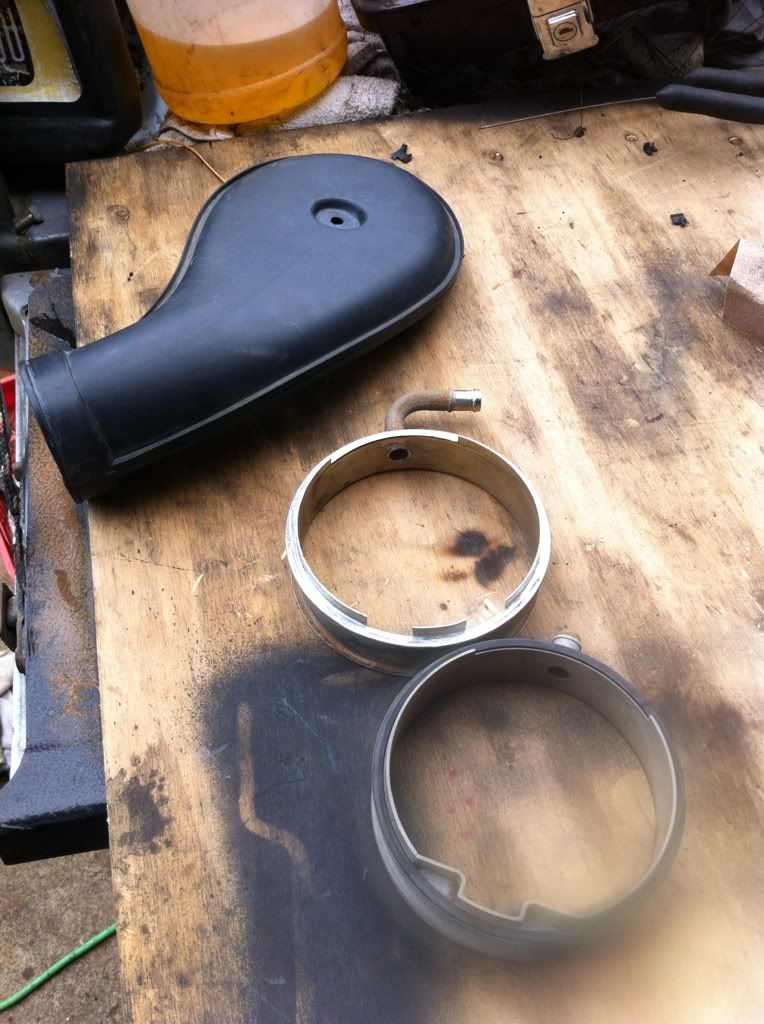
Painted black, silicone applied between surfaces to seal.
Front.
Side.
Underhood.
Back.
Just test fitting everything, I'll bring the air inlet a little closer to the roof and paint it all black.
Too many projects right now, not enough time for this one.
Homemade snorkel v1.0
2x GM TBI air cleaner spacers; 1x 00' Dodge Durango TB hat.
Painted black, silicone applied between surfaces to seal.
Front.
Side.
Underhood.
Back.
Just test fitting everything, I'll bring the air inlet a little closer to the roof and paint it all black.
Last edited by 3uzfte; Mar 2, 2014 at 08:05 AM.
Mar 2, 2014 | 08:30 AM
#51
Thread Starter
Registered User
Joined: Jan 2011
Posts: 88
Likes: 0
From: Minneapolis, MN
I was just cruising the domestic swaps, and saw my thread needs some updating.
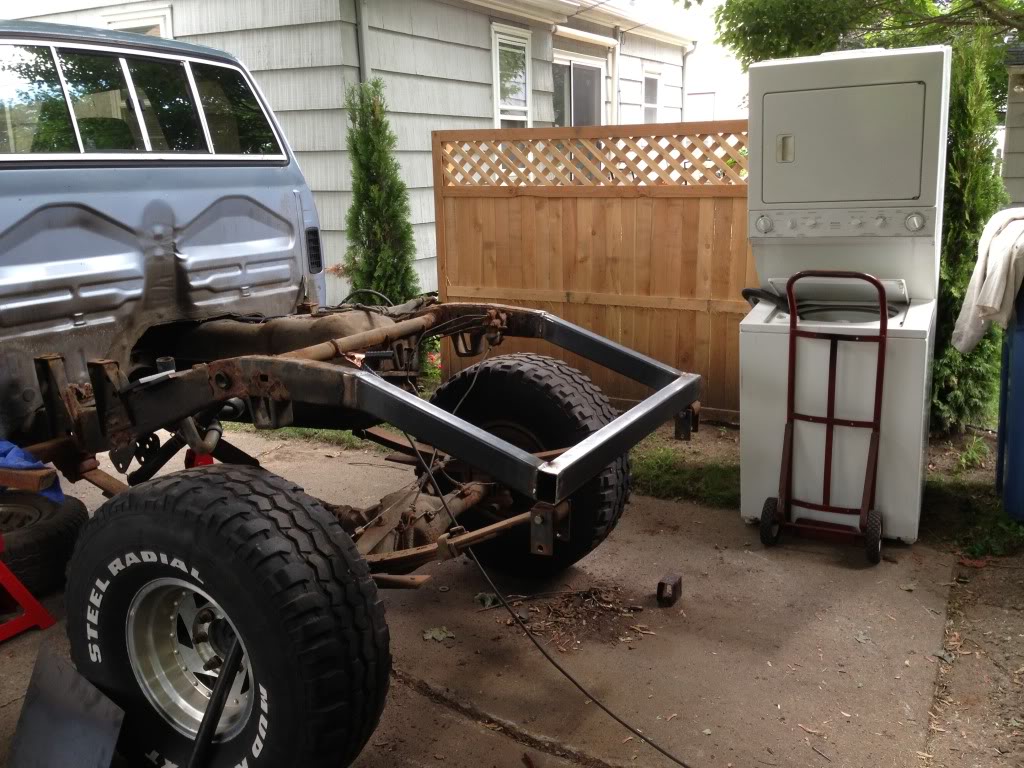
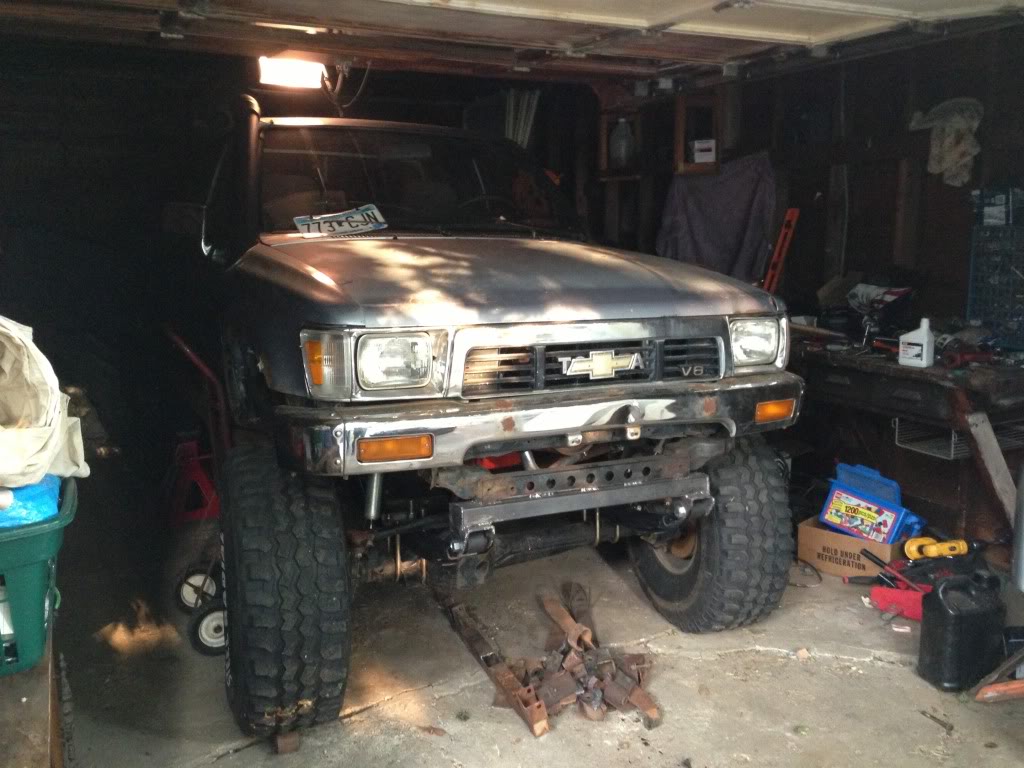
After sitting for a year do to some shady suspension work and a really rusty rear frame, I decided to try something else.
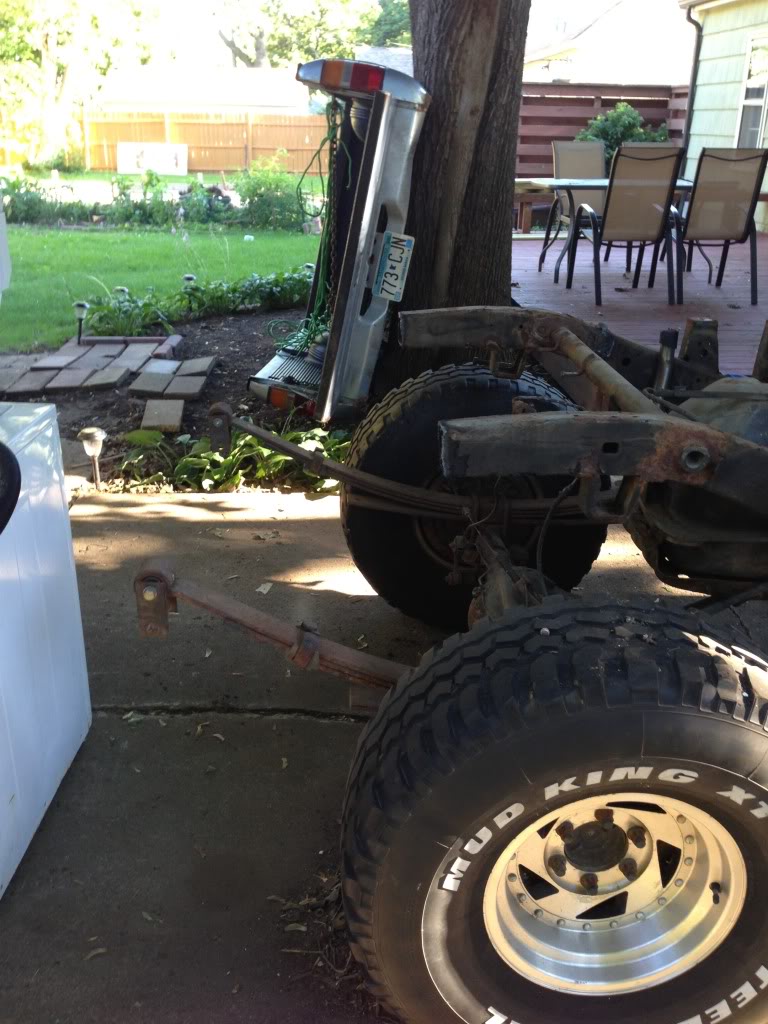
I wanted a rear frame drop, but after welding it all in realized it's only going to decrease my approach and release angle, Oh well..
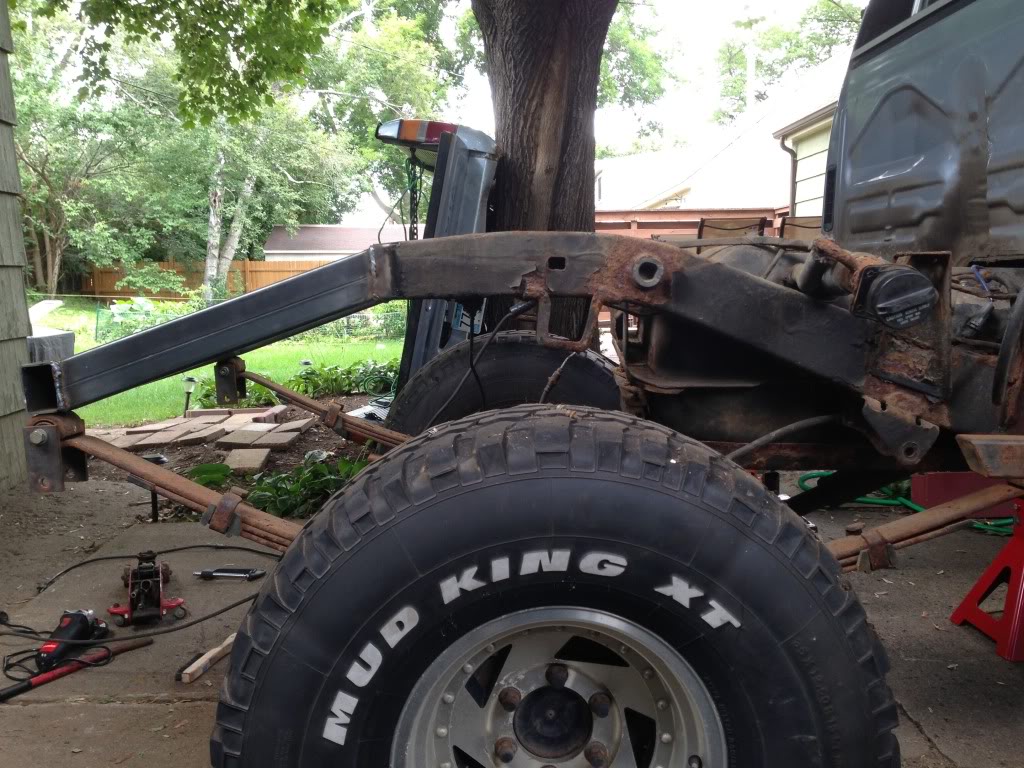
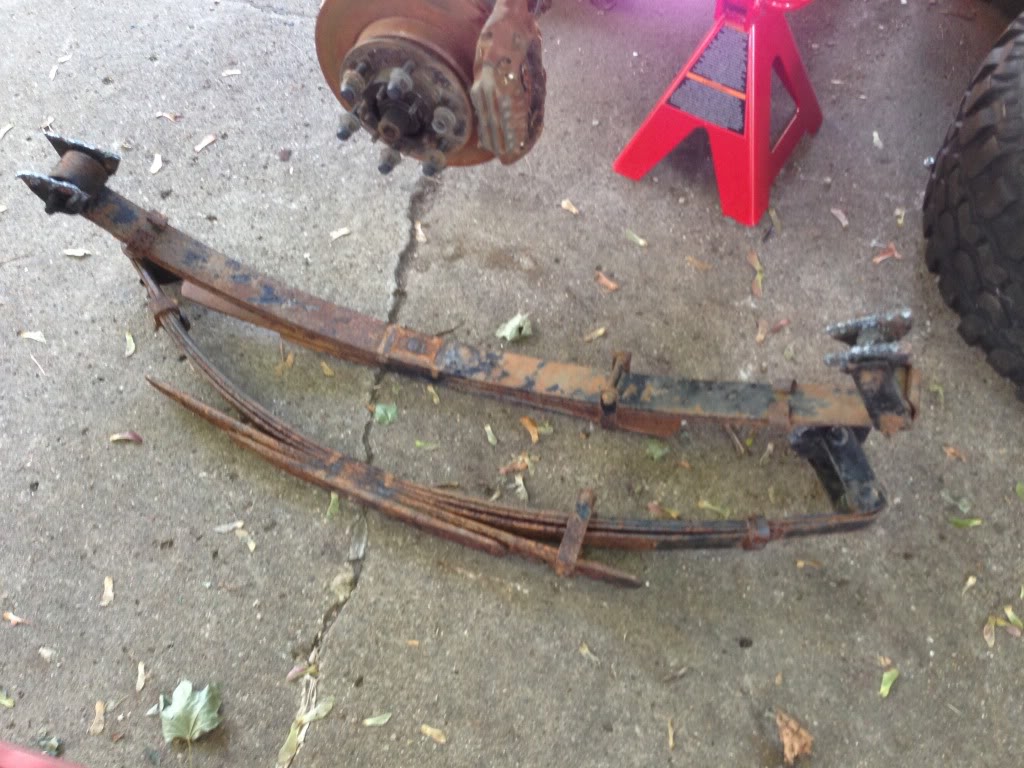
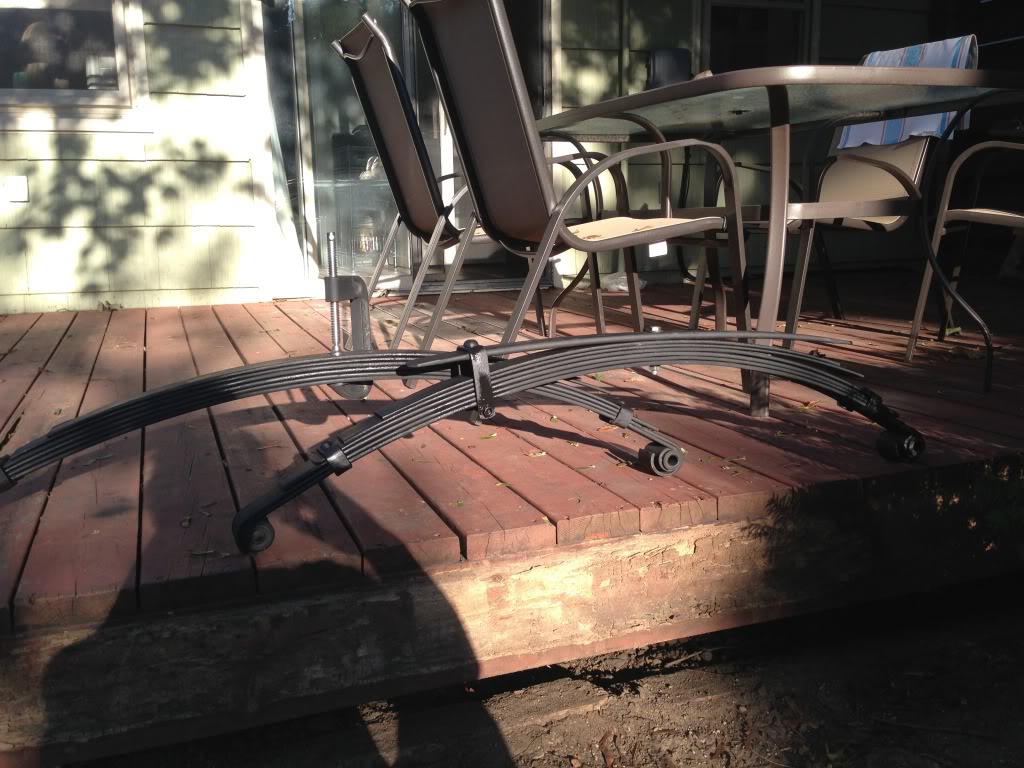
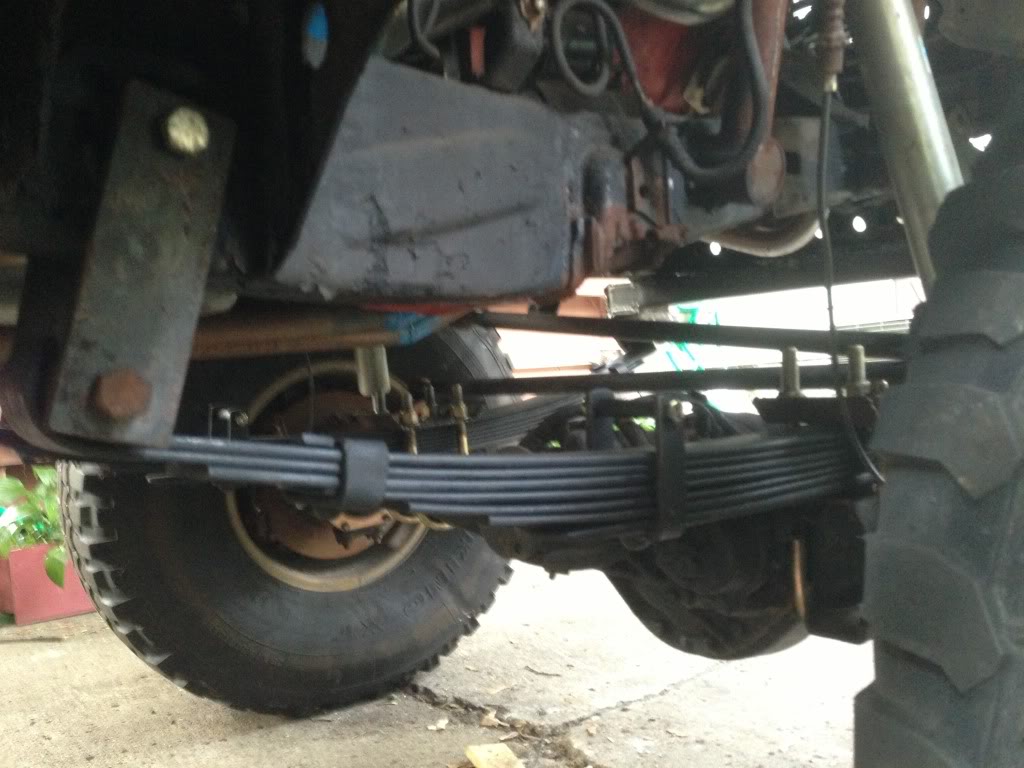
Picked up a set of 83' rear leafs for a hybrid set.. Cut down 89's, and mix in the 83's... or cut down the 83's and mix in the 89's...?
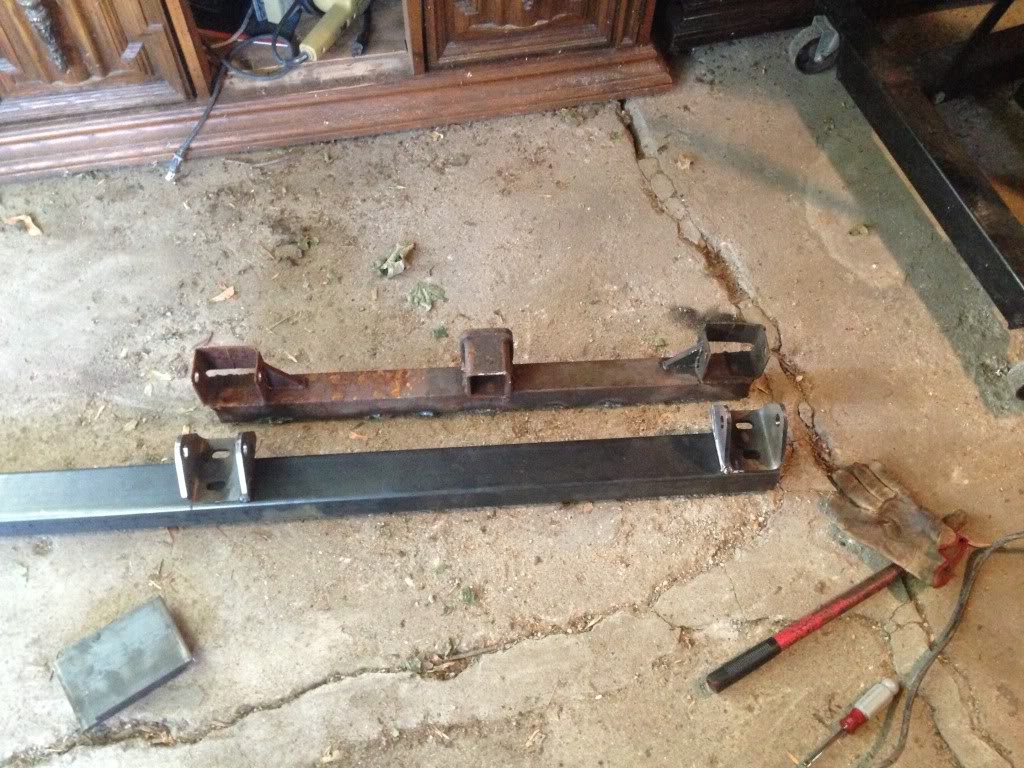
Remade my front spring hanger, made from 2x3 .250 wall and 2 rear hangers trimmed down, and boxed in.
Was told not to run overloads because they'll just catch rocks...
Hyrbid leafs...
83' main leaf 48"
83' military wrap leaf 48"
89' main leaf (cut down to ~45")
83' third leaf w/ clamps 41"
89' military wrap leaf (cut down to ~36")
89' third leaf (cut down ~31")
83' overload w/ clamp
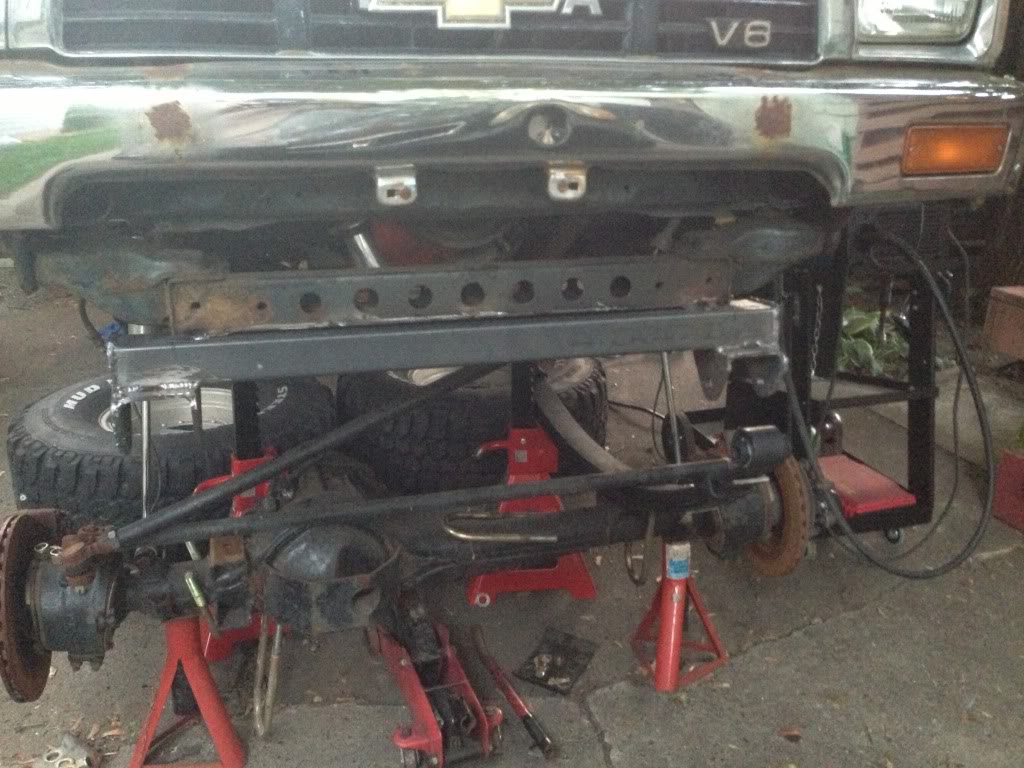
Old spring hanger cut off, new spring hanger hung and sprung.
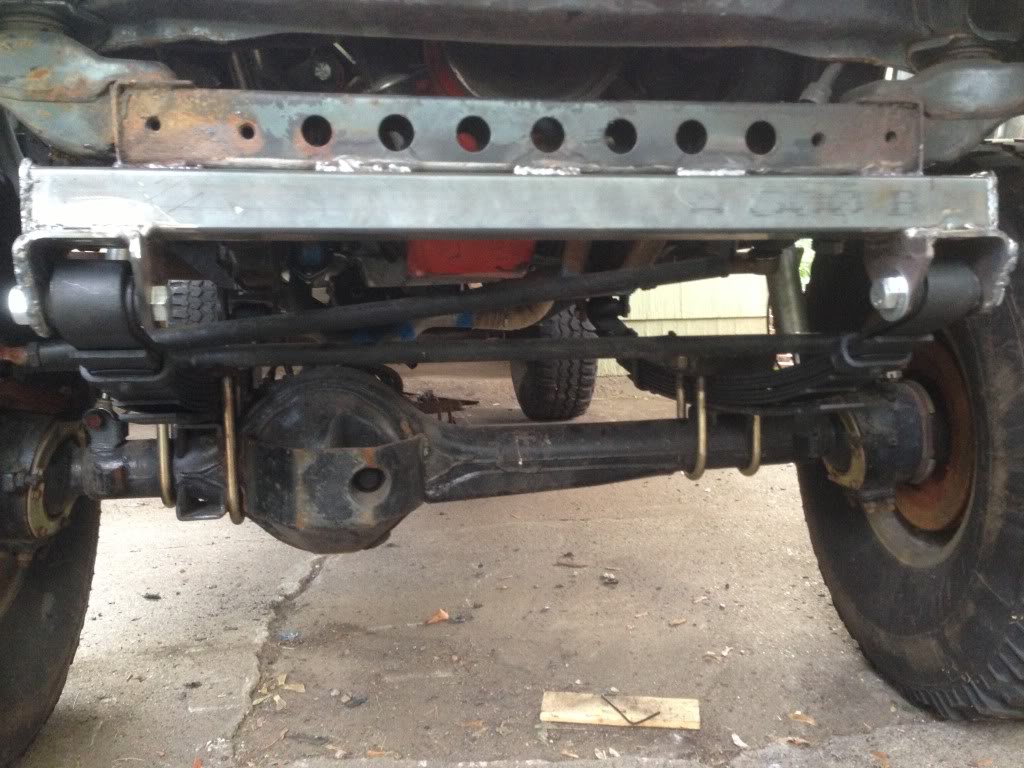
Rear shackle angle is pretty good with hybrid leafs and new hanger.
Cleaned up the snorkel, shortened it, and painted it black, added a filter in the rain cap, and it barely clears the garage door.
After sitting for a year do to some shady suspension work and a really rusty rear frame, I decided to try something else.
I wanted a rear frame drop, but after welding it all in realized it's only going to decrease my approach and release angle, Oh well..
Picked up a set of 83' rear leafs for a hybrid set.. Cut down 89's, and mix in the 83's... or cut down the 83's and mix in the 89's...?
Remade my front spring hanger, made from 2x3 .250 wall and 2 rear hangers trimmed down, and boxed in.
Was told not to run overloads because they'll just catch rocks...
Hyrbid leafs...
83' main leaf 48"
83' military wrap leaf 48"
89' main leaf (cut down to ~45")
83' third leaf w/ clamps 41"
89' military wrap leaf (cut down to ~36")
89' third leaf (cut down ~31")
83' overload w/ clamp
Old spring hanger cut off, new spring hanger hung and sprung.
Rear shackle angle is pretty good with hybrid leafs and new hanger.
Cleaned up the snorkel, shortened it, and painted it black, added a filter in the rain cap, and it barely clears the garage door.
Last edited by 3uzfte; Mar 2, 2014 at 09:13 AM.
Mar 2, 2014 | 09:10 AM
#52
Thread Starter
Registered User
Joined: Jan 2011
Posts: 88
Likes: 0
From: Minneapolis, MN
Picked up a F250 fuel tank, and proceeded to make some modifications...
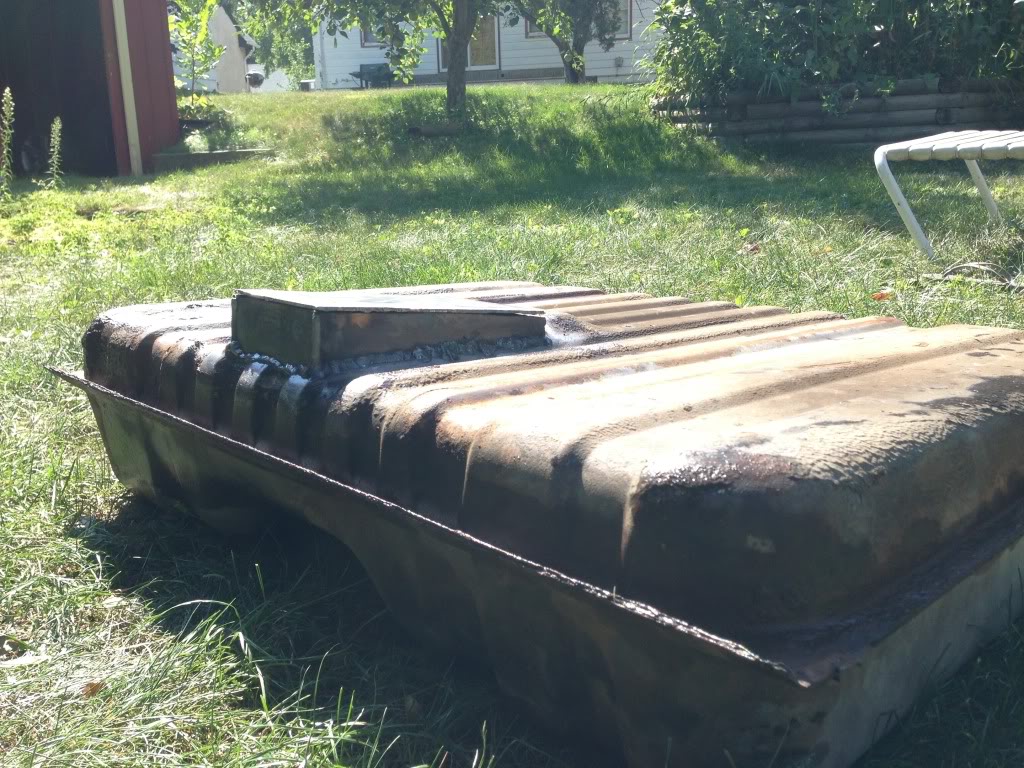
Sumped it..
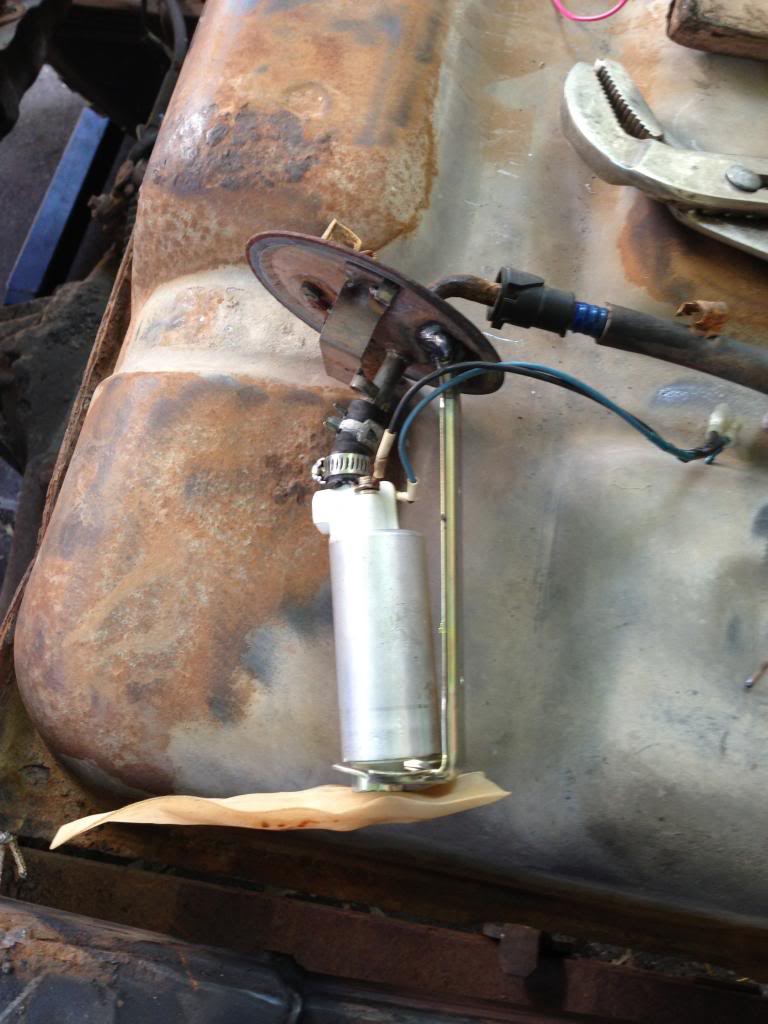
Modified TBI pump to fit Ford hanger.
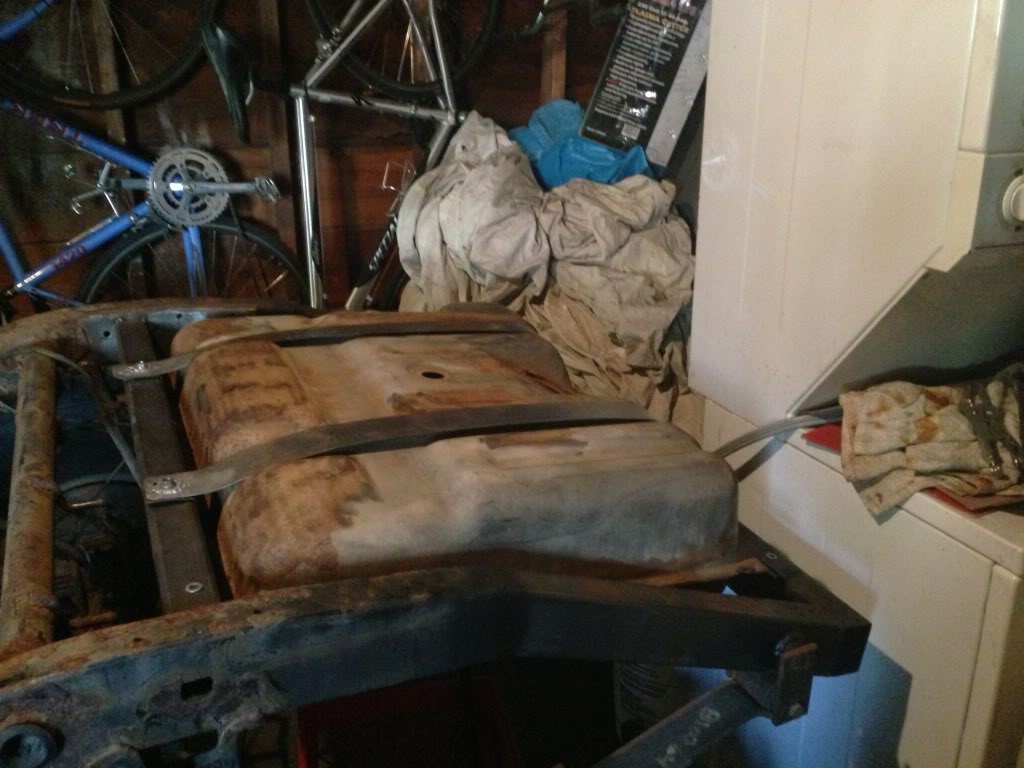
Roughed in some straps to the shock mount, and rear frame.
Sump wasn't quite deep enough, so I added some room and a drain plug.
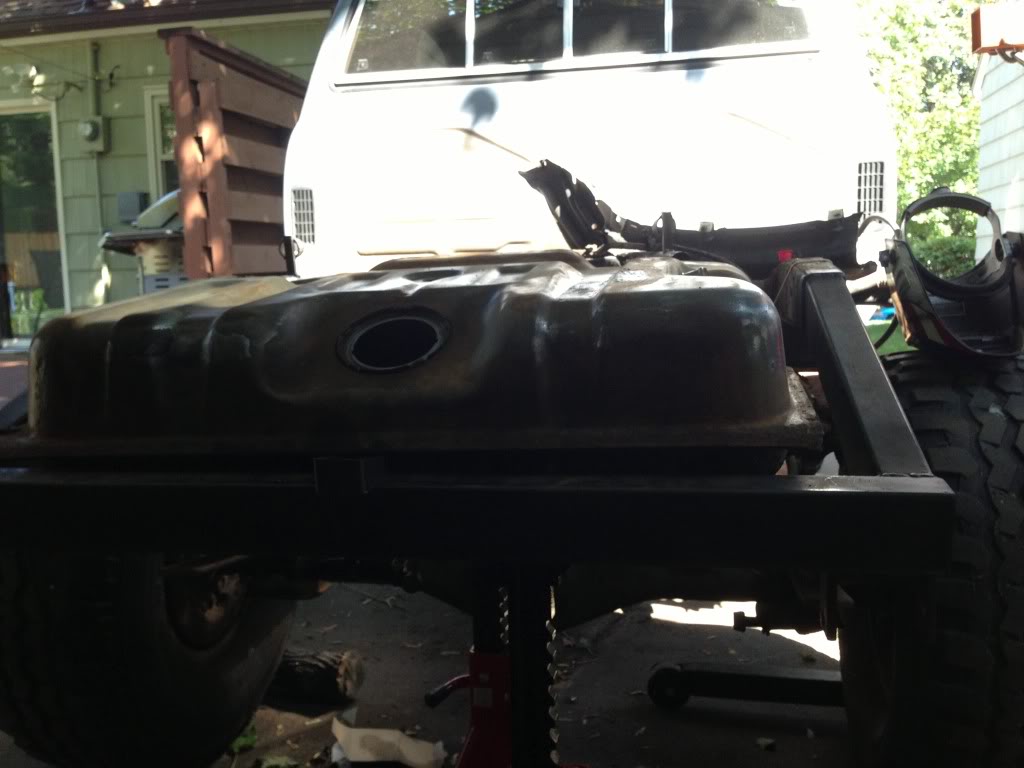
Final resting place, should be protected by the rear frame.
Sumped it..
Modified TBI pump to fit Ford hanger.
Roughed in some straps to the shock mount, and rear frame.
Sump wasn't quite deep enough, so I added some room and a drain plug.
Final resting place, should be protected by the rear frame.
Mar 2, 2014 | 09:11 AM
#53
Thread Starter
Registered User
Joined: Jan 2011
Posts: 88
Likes: 0
From: Minneapolis, MN
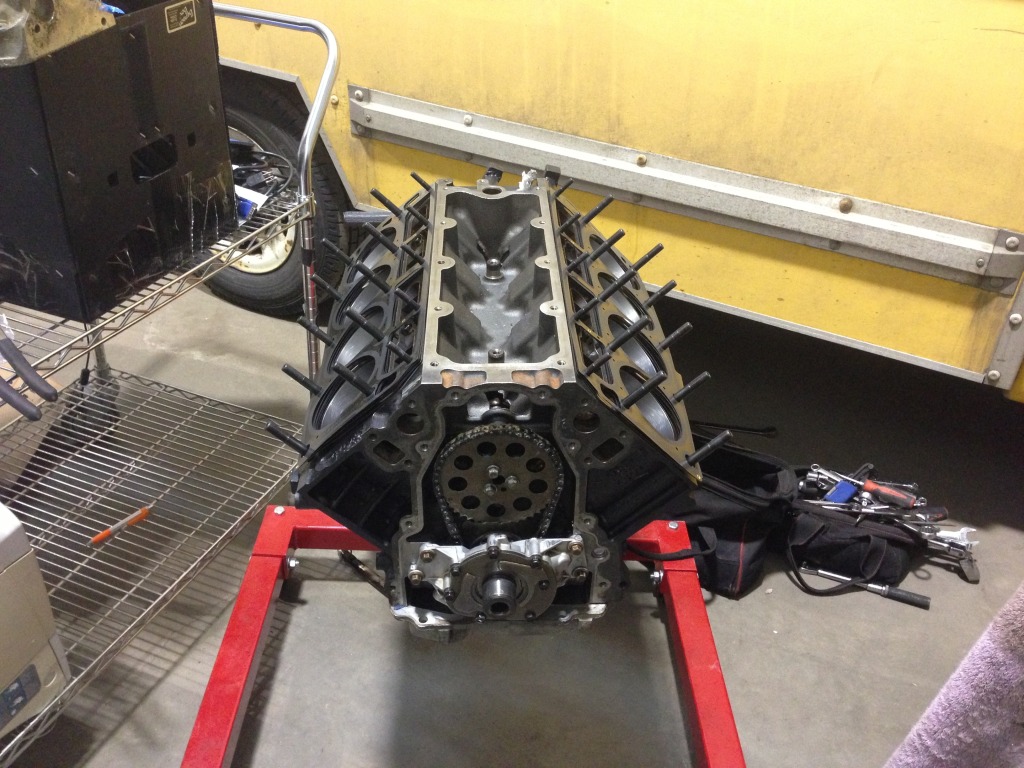
Decided to go with technology from this generation.. Picked up a 99' Suburban with a blown 350, with a plan to put a Gen 3 (LS) motor in it.. So I picked up a 5.3 for $200, but soon found out it needed rebuilding. Decided to spend more money on the motor, and basically build an iron block LS6, and put the 350 in the Suburban.
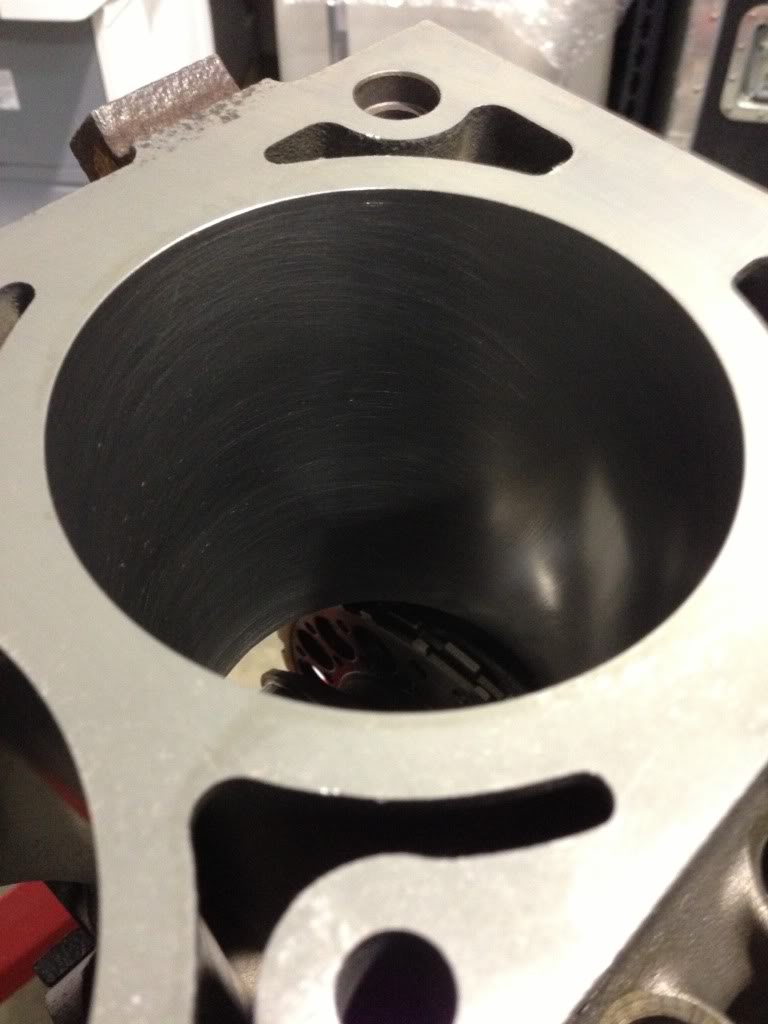
Machined blocked to 3.898, or LS1 bore.
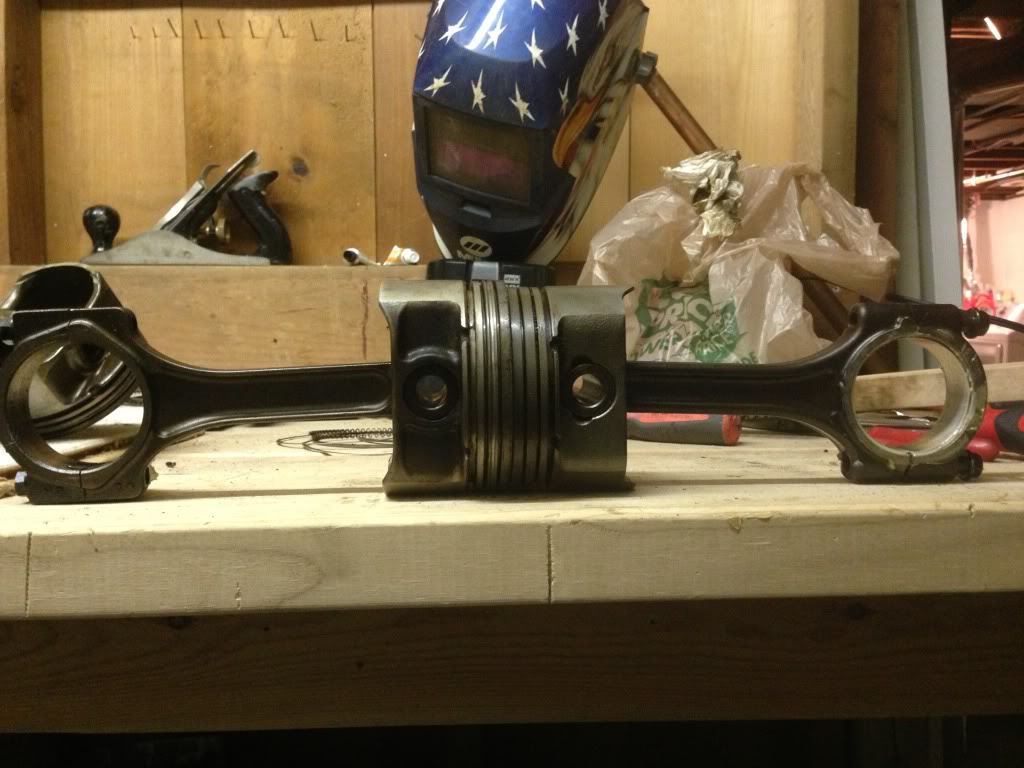
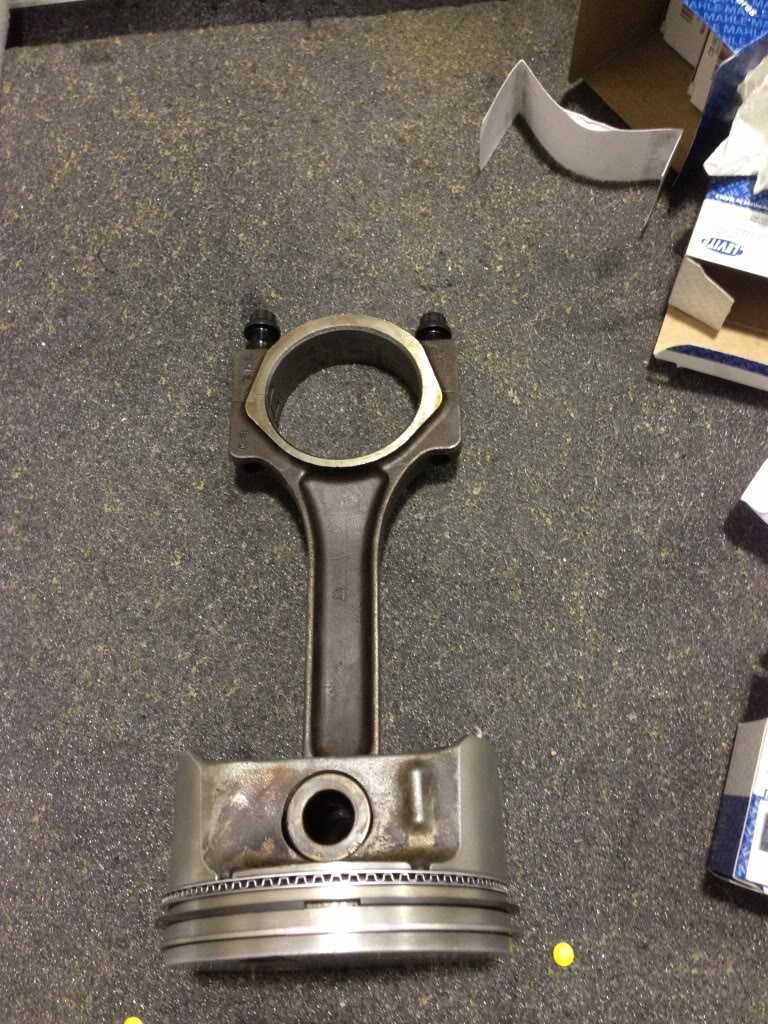
Got a set of LS1 crank and pistons, you can see the LS1 piston (left) compared to LM7 piston (right).
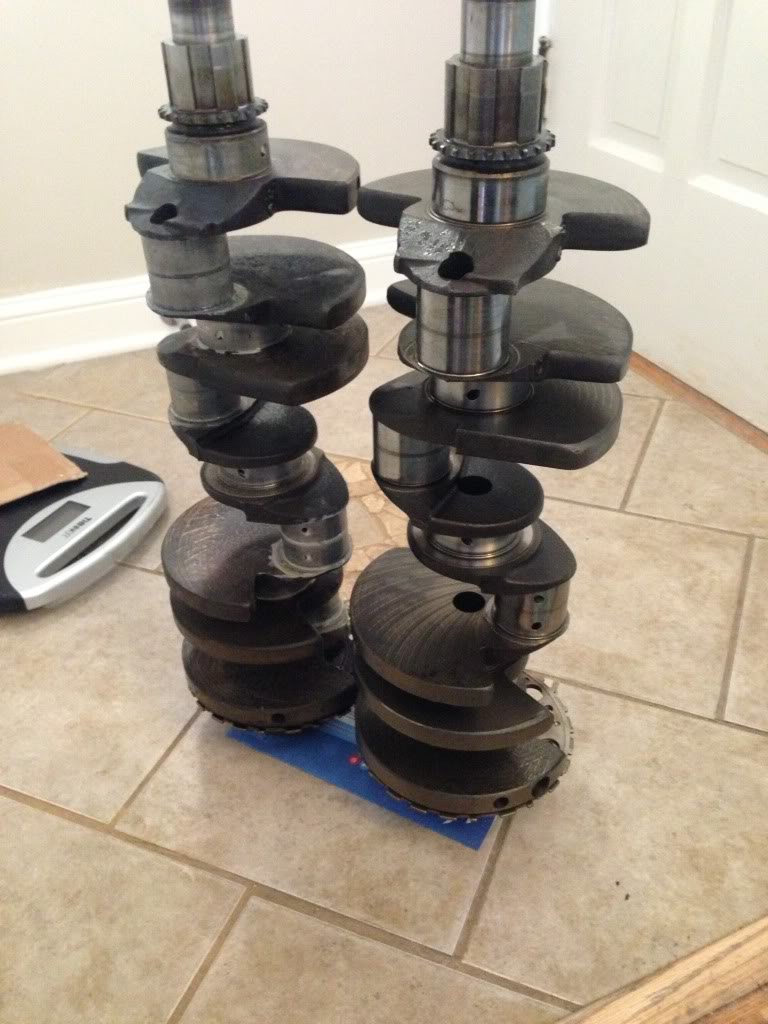
LM7 crank (left) and LS1 "Gun Drilled" crank (right)
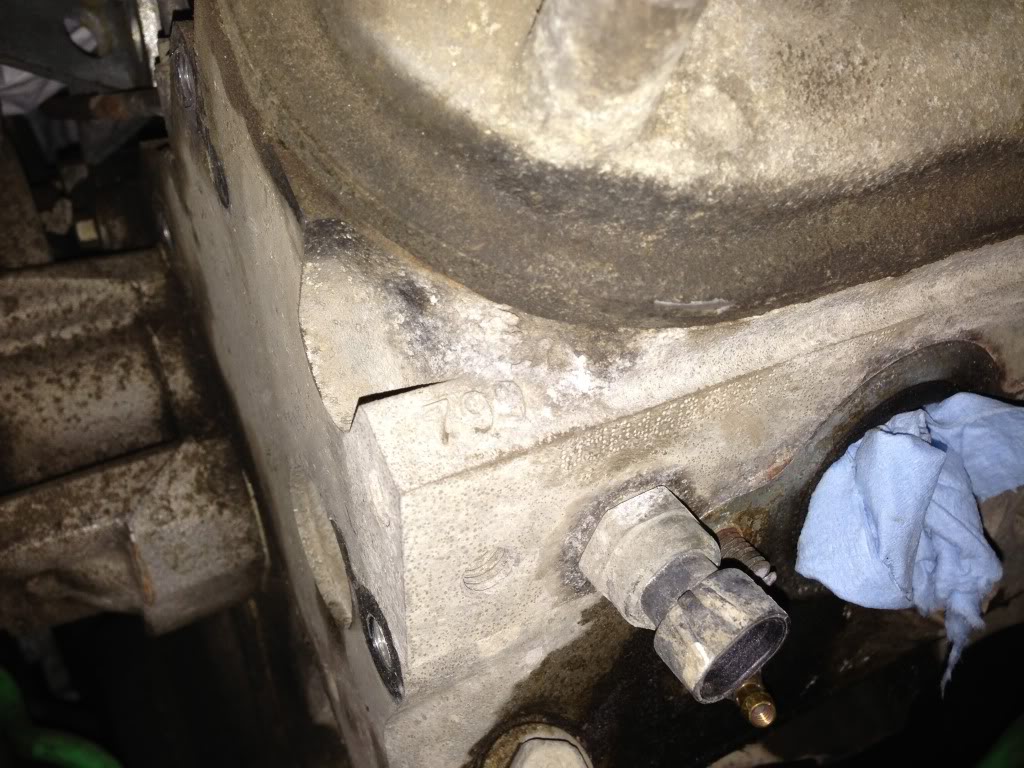
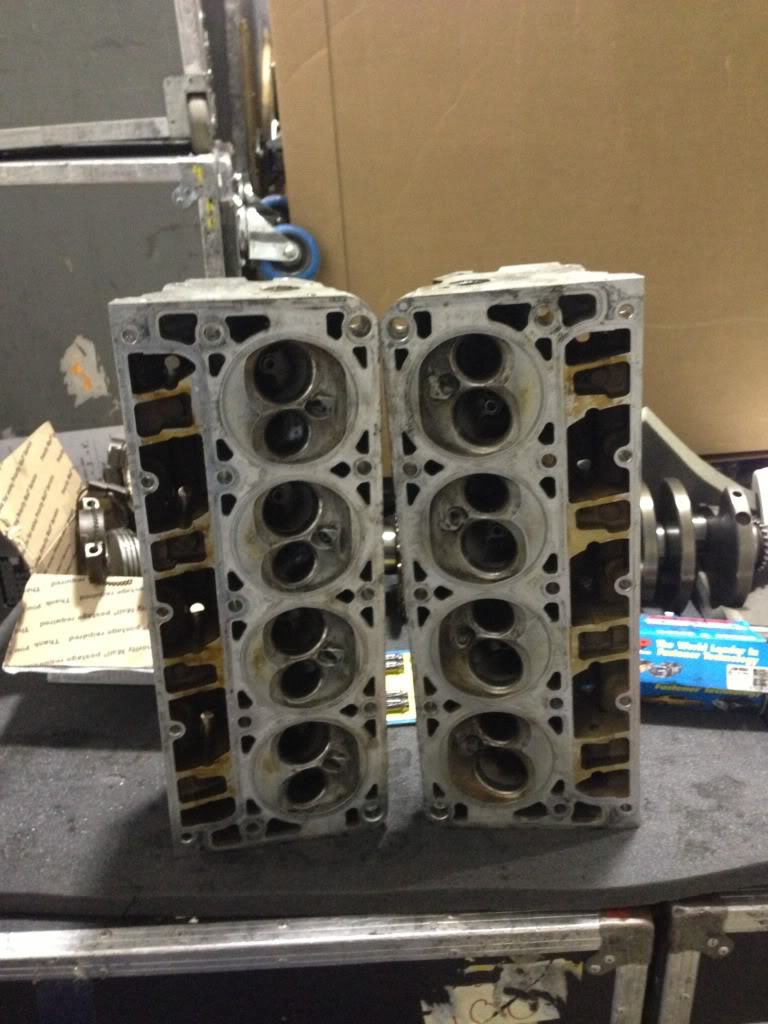
799 Heads picked up.
All disassembled.
LS1 piston with ARP bolts.
Wire harness disassembled, going to make my own standalone.

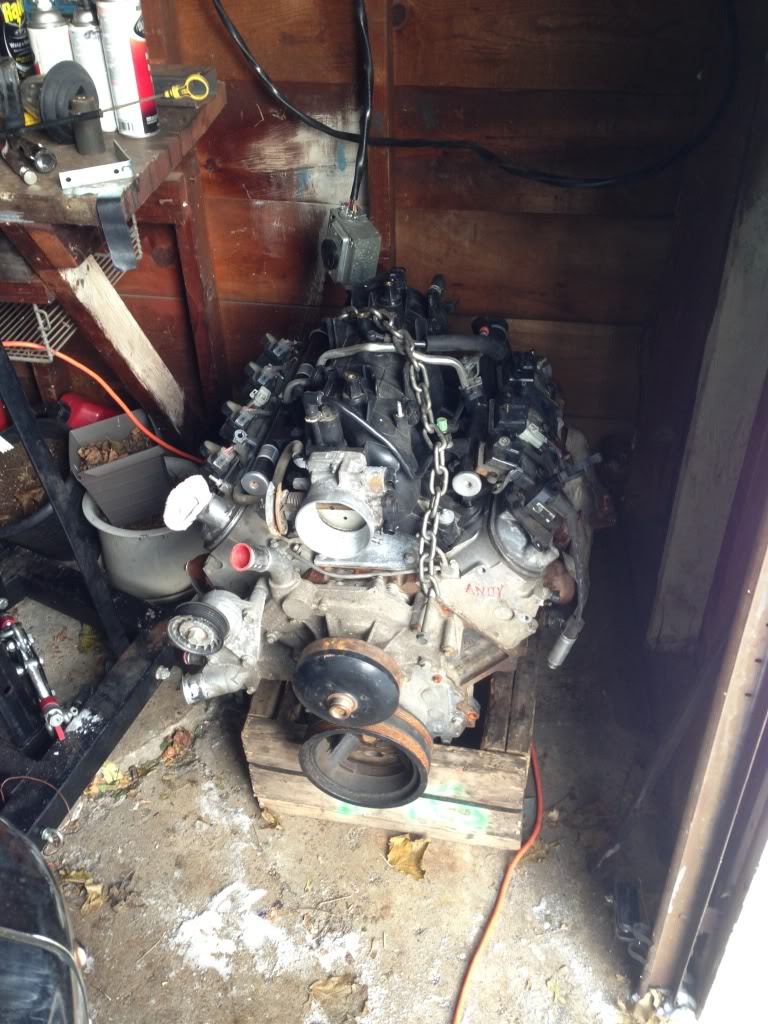
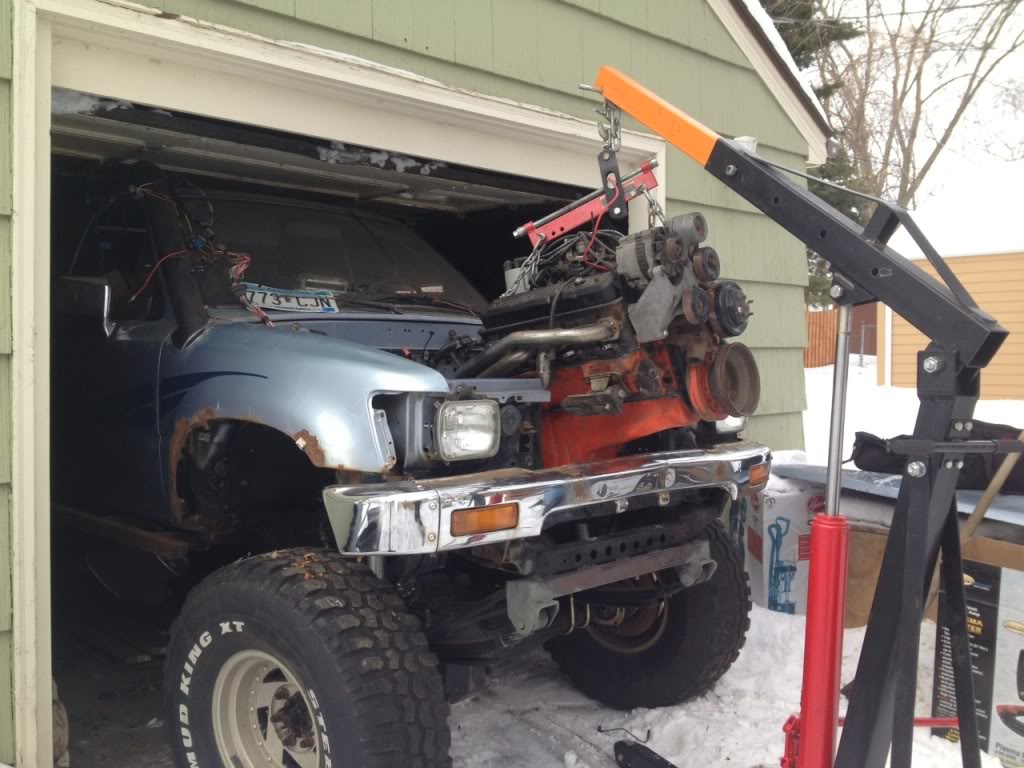
350 coming out in 10* weather, after all it is Minnesota.
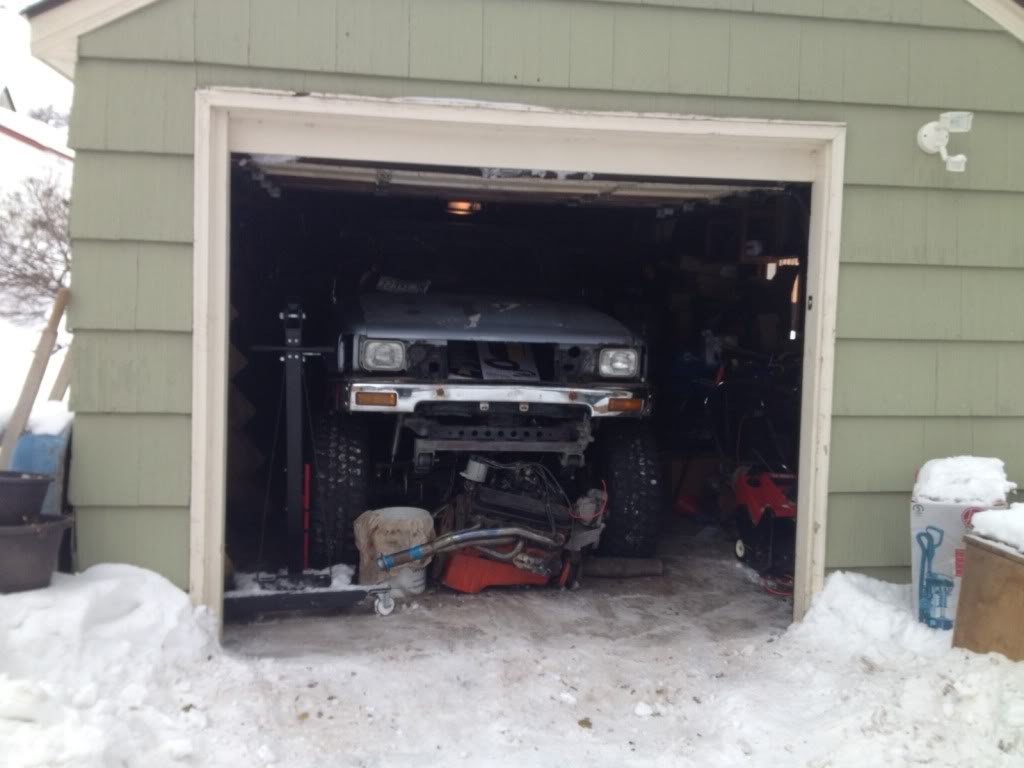
Tucked away, again, waiting for a heart transplant.
More on the way.
Machined blocked to 3.898, or LS1 bore.
Got a set of LS1 crank and pistons, you can see the LS1 piston (left) compared to LM7 piston (right).
LM7 crank (left) and LS1 "Gun Drilled" crank (right)
799 Heads picked up.
All disassembled.
LS1 piston with ARP bolts.
Wire harness disassembled, going to make my own standalone.
350 coming out in 10* weather, after all it is Minnesota.
Tucked away, again, waiting for a heart transplant.
More on the way.
Apr 15, 2014 | 10:41 AM
#54

Registered User
Joined: Jan 2011
Posts: 10
Likes: 0
good post i have a 91 pickup and after 3 used / rebuilt 3vze motors from japan so call used engines they were all trash and beat up laster about 30k mikes ive decided to put in a 350
how hard is it? what about adapters to the manual trans ???
how hard is it? what about adapters to the manual trans ???
Apr 16, 2014 | 09:57 AM
#55
Thread Starter
Registered User
Joined: Jan 2011
Posts: 88
Likes: 0
From: Minneapolis, MN
Let me know if you have any questions and I'd be happy to send you my email.
 Aug 15, 2014 | 11:26 AM
#57
Thread Starter
Registered User
Joined: Jan 2011
Posts: 88
Likes: 0
From: Minneapolis, MN
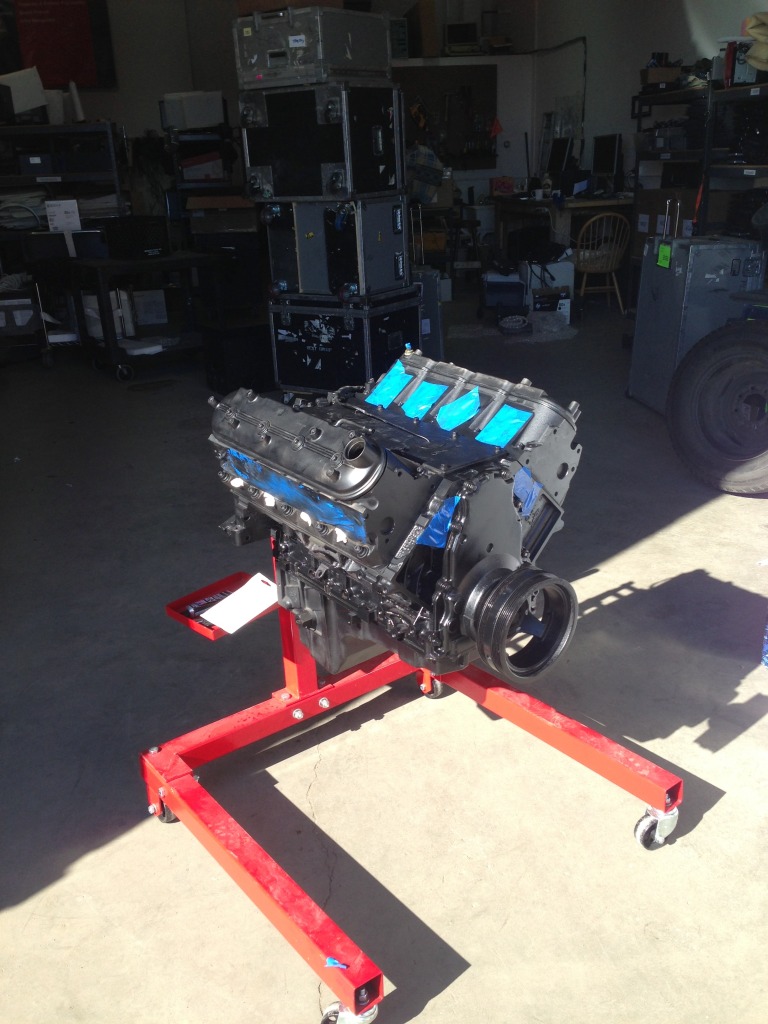
Iron block LS6, LM7 5.3L bored to 3.898, LS1 crank, LS1 pistons w/ arp rod bolts, 799 heads w/ arp studs, L33 cam, LS2 timing chain, ported LS6 oil pump...
Custom mounts, 2x4 .25" wall for mount base, 2x2 .25" wall welded to .25" plate for engine mount, with 82' Volvo turbo engine mounts.
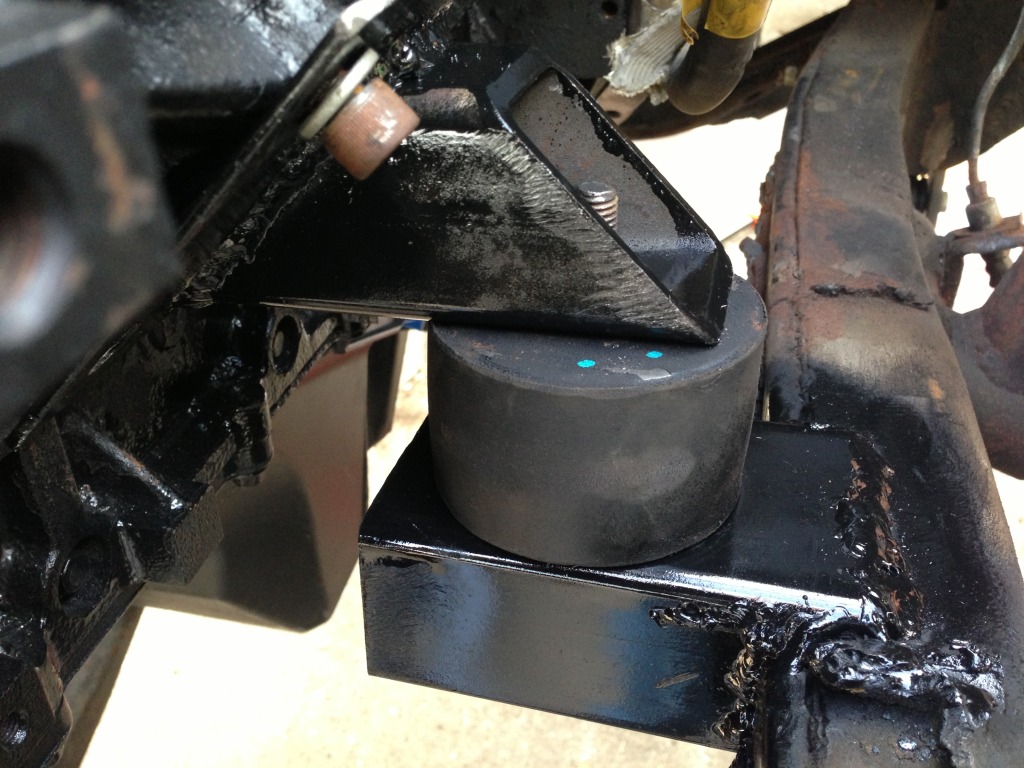
Fits rather nicely.
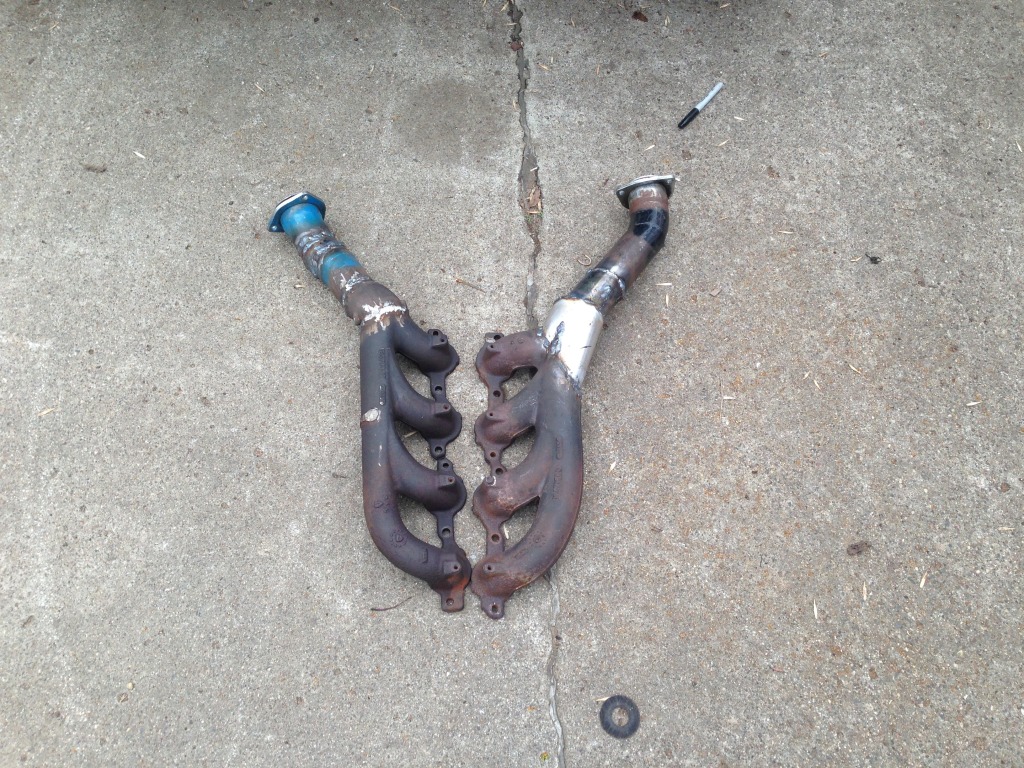
LM7 manifolds, chopped and welded...
Steering shaft fits just fine.

GM power steering pump, GM power steering cooler, and Toyota power steering box.
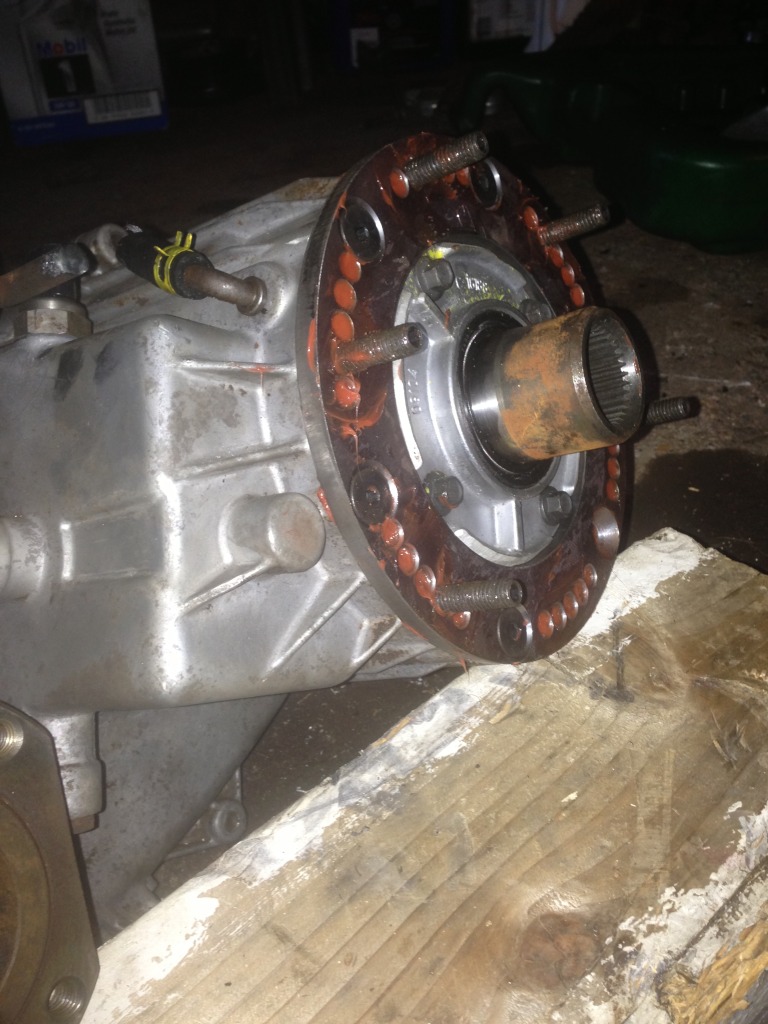
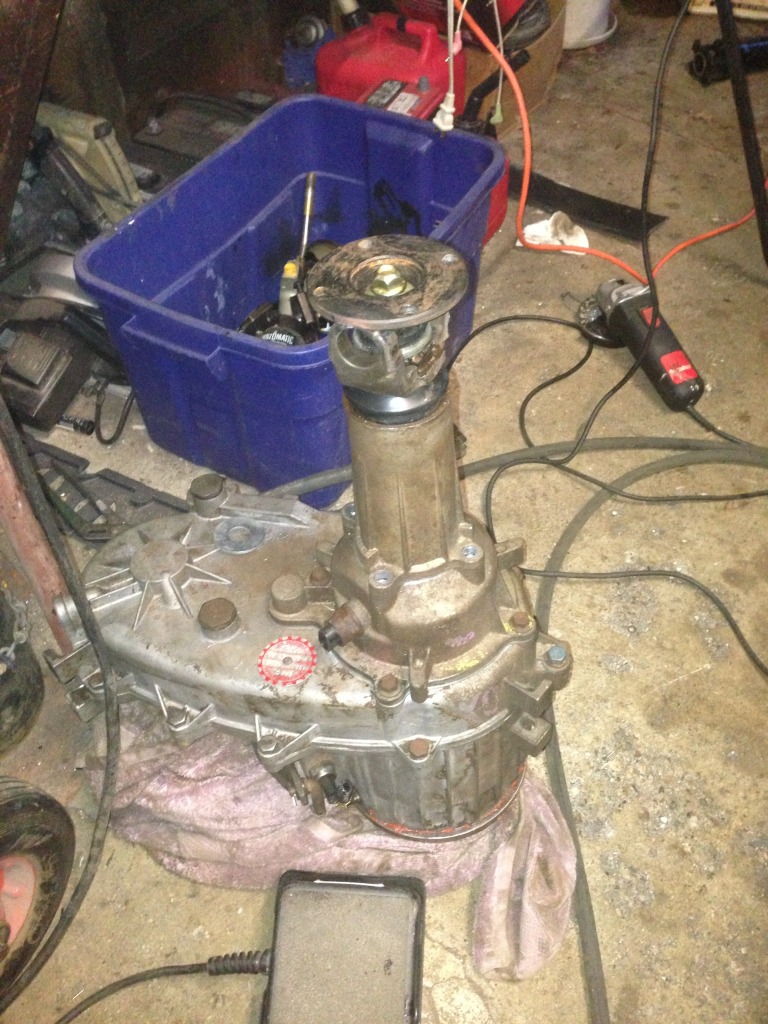
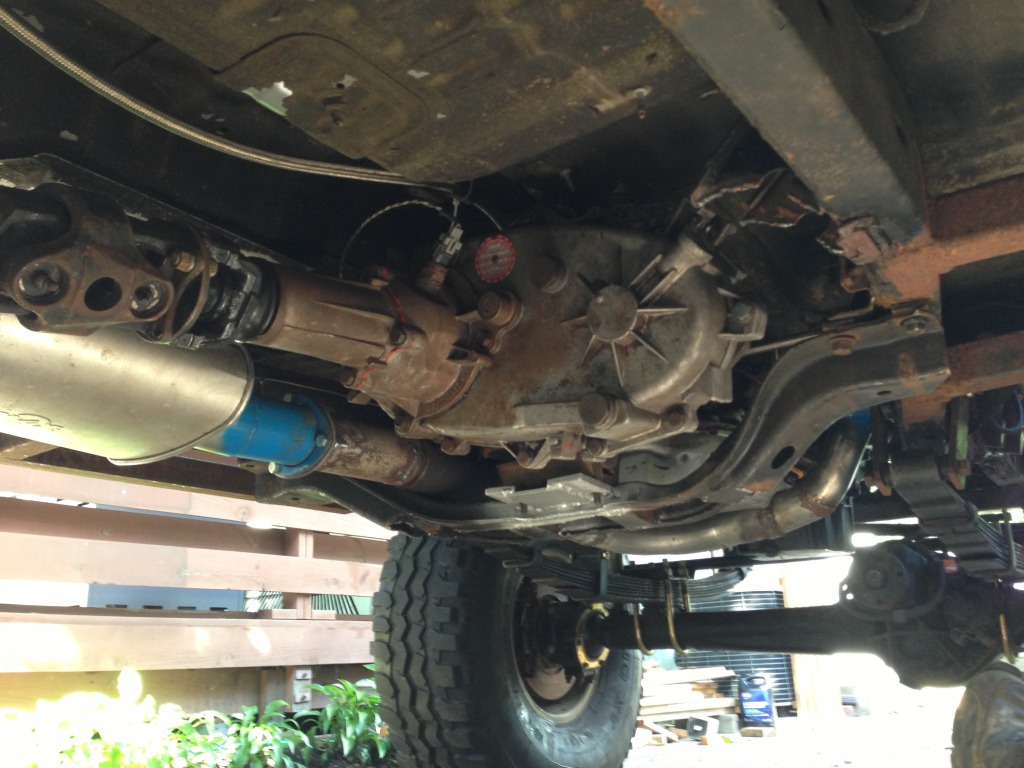
Tacoma e-Locker.
4L80E clocking ring.
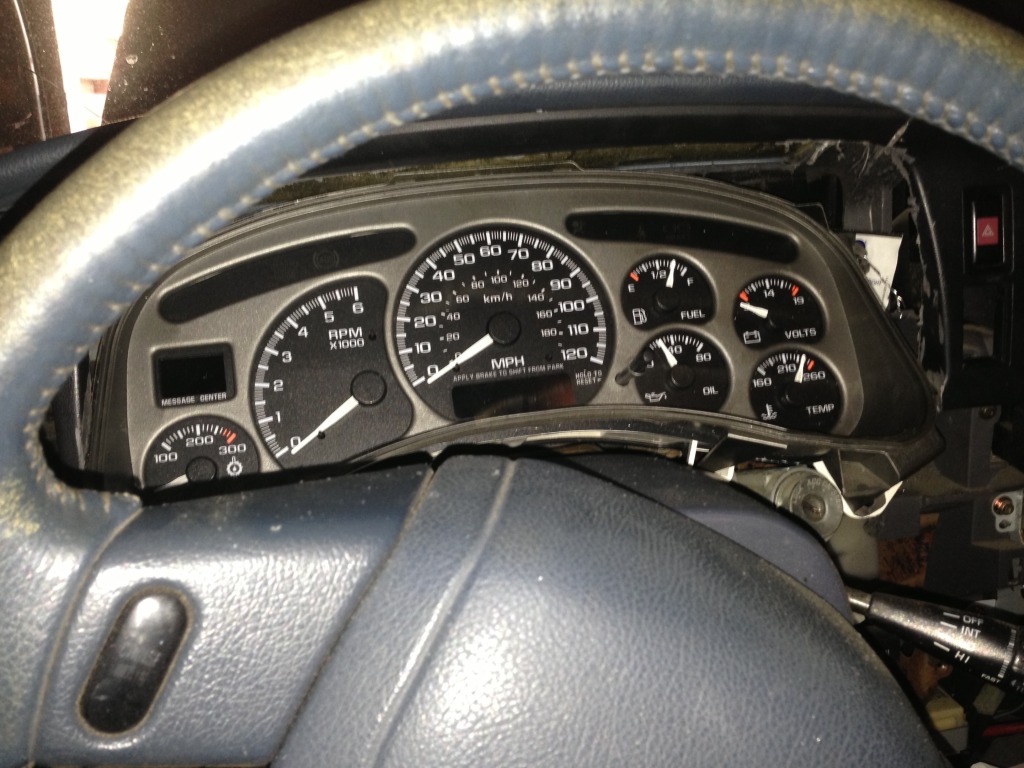
Denali cluster (IPC).
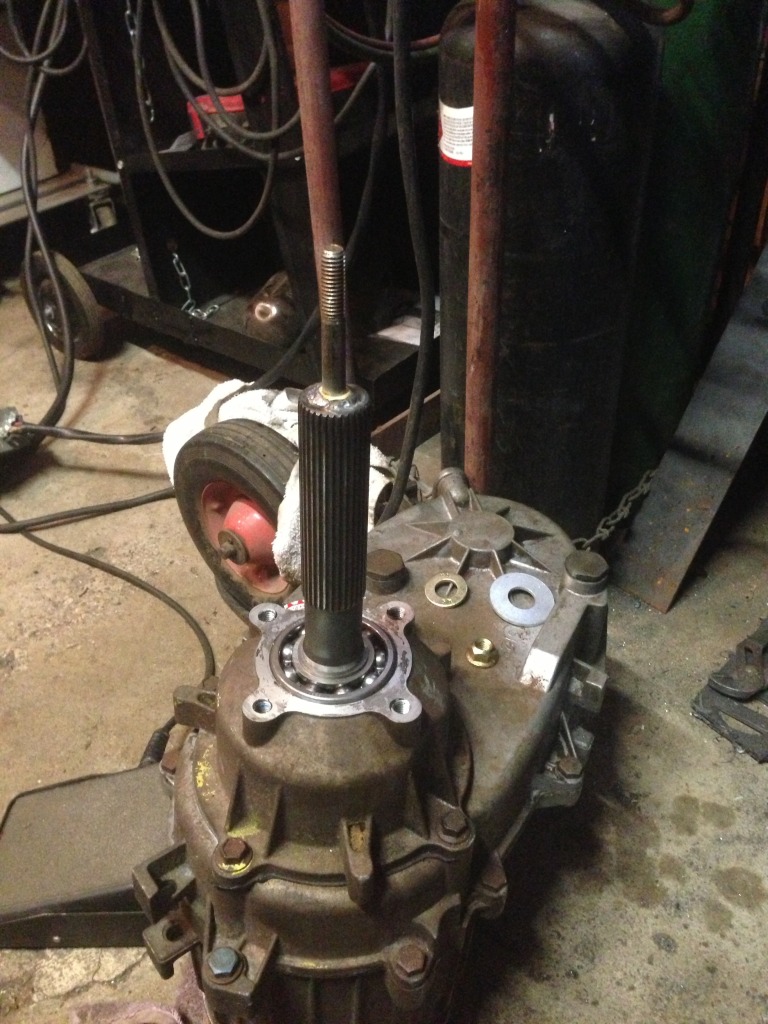
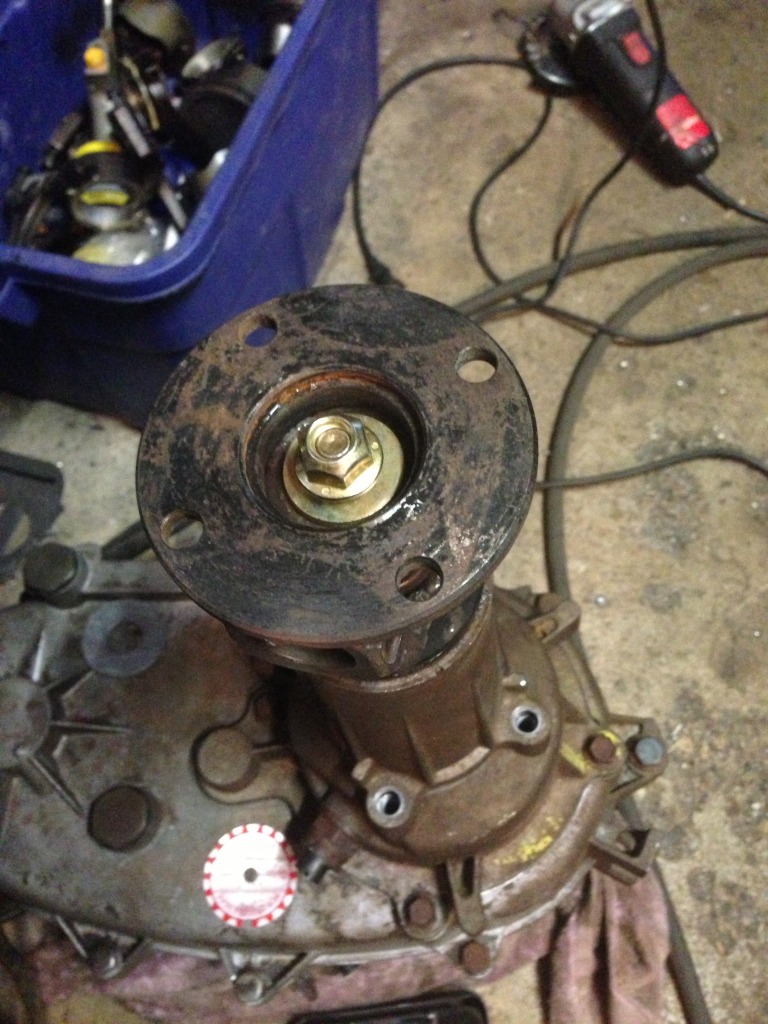
Drilled output shaft and welded bolt onto shaft.
Drilled the stock GM slip yoke, cut off out Toyota flange, and welded it to the GM yoke, and bolted it to the NP241.
Homebrew NP241 SYE
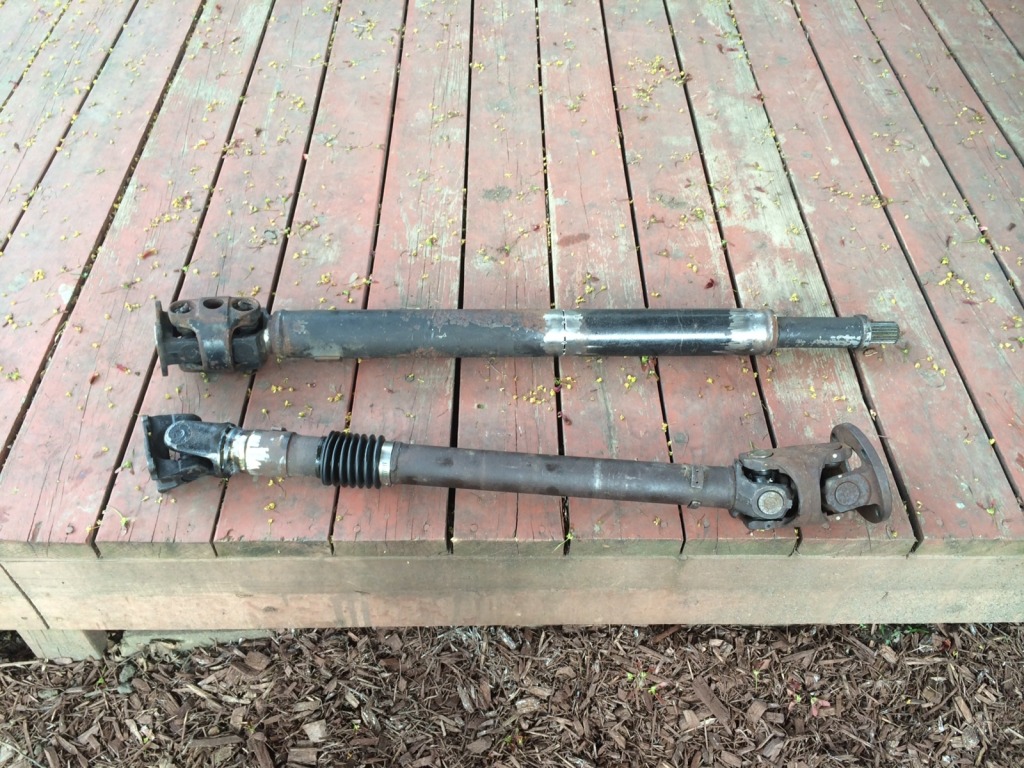
Combined 2-piece rear driveshaft into a 1-piece.
Hybrid shafts. Top is rear, Toyota 2-piece combined to make a single shaft using Toyota flanges. Bottom is stock front shaft from a K5 blazer, cut off the GM diff yoke, and welded on a Toyota yoke.
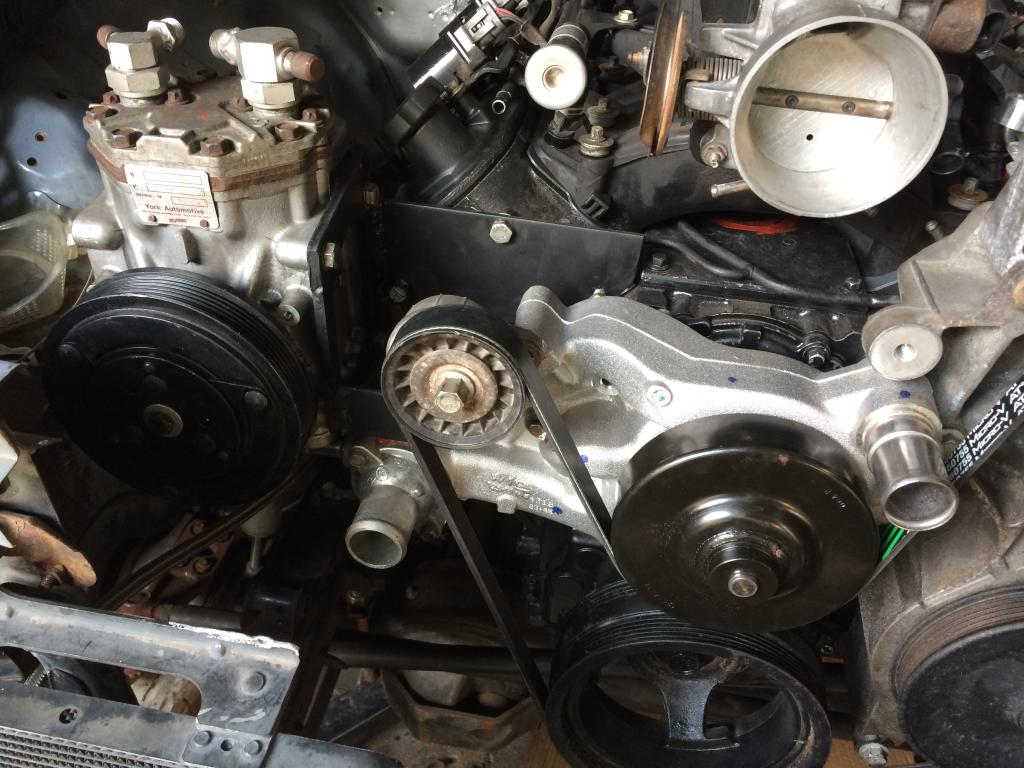
Modified truck accesories for L99 waterpump.
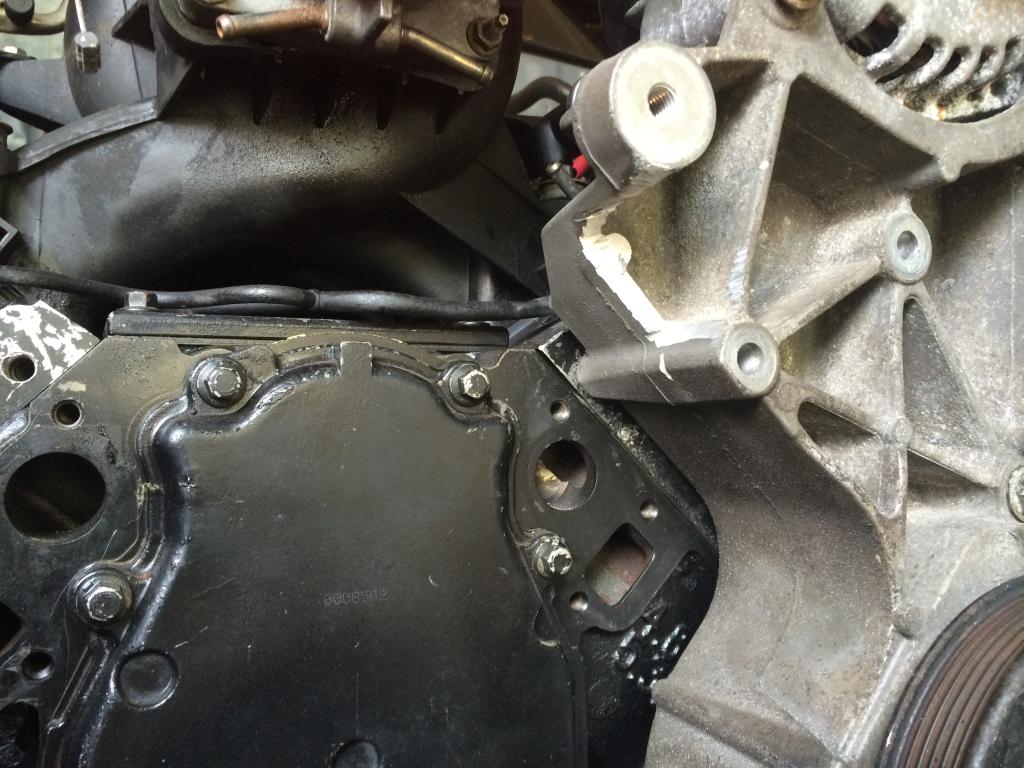
5.3 block and intake, 5.3 accessories (modified), 5.3 tensioner (modified), L99 waterpump, Windstar thermostat housing (modified).
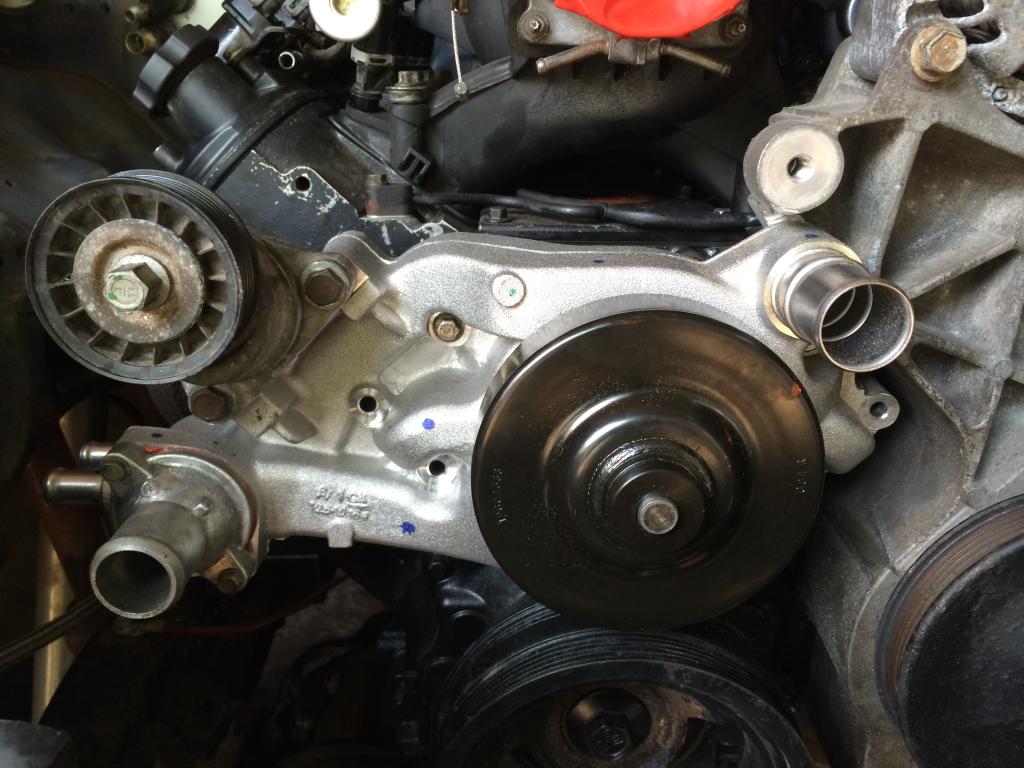
L99 waterpump sits differently, and uses a different mount for the tensioner so I had to scrap the old design, and built a new one from .25" plate, still need to figure out the tensioner now that the York is mounted, the current position is next to useless when the belt it run to the York.
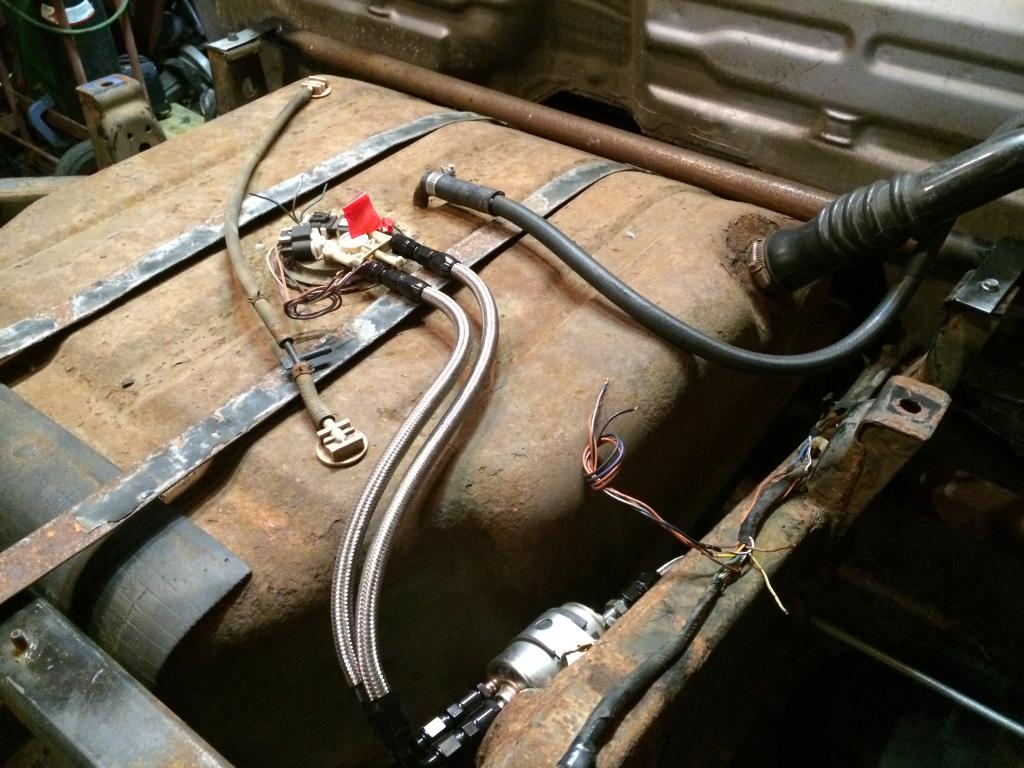
99' Suburban 40gal fuel tank w/ new pump, stainless lines, AN fittings, Corvette filter/regulator, Toyota filler neck and cap.
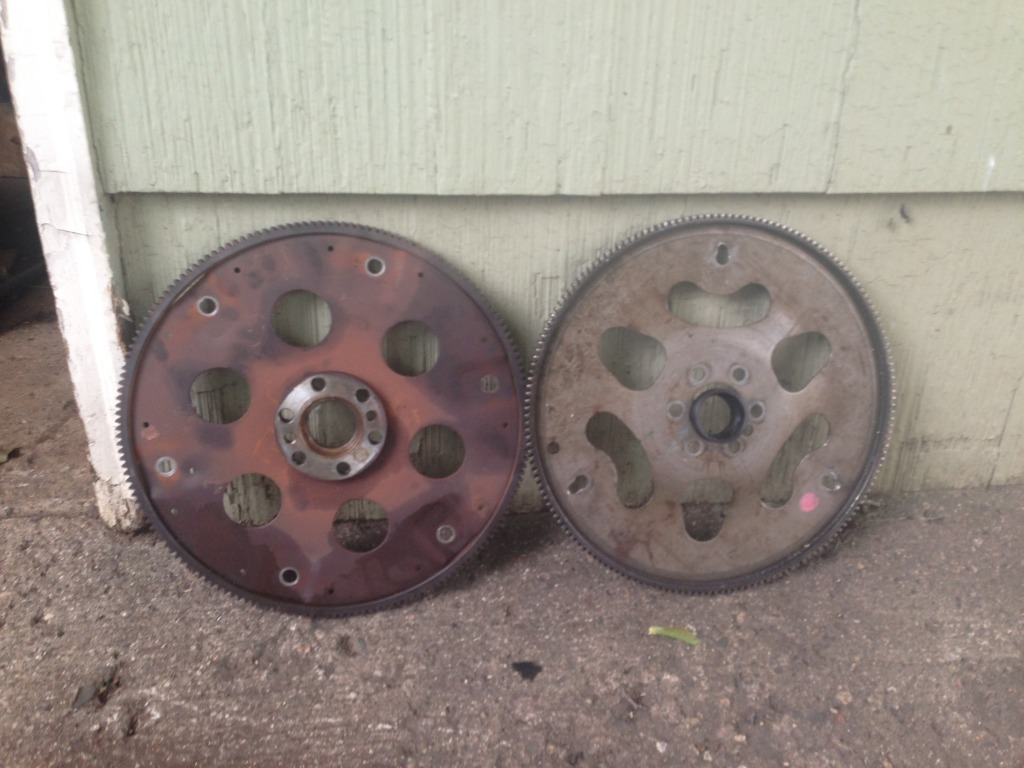
Left: 6.0 flexplate and crank spacer Right: curved 5.3 flexplate w/ hub support, went with the 6.0 as it fit a little better w/ my rebuilt converter.
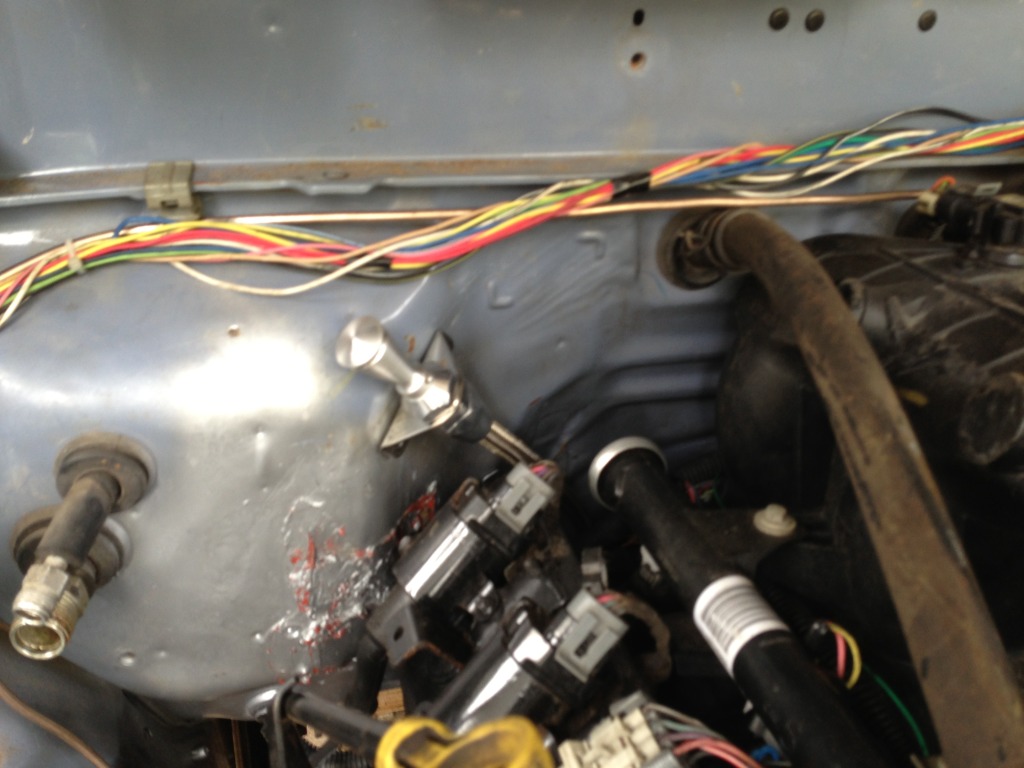
Relocated Toyota fusebox, cleared room for intake from snorkel and OBA setup.
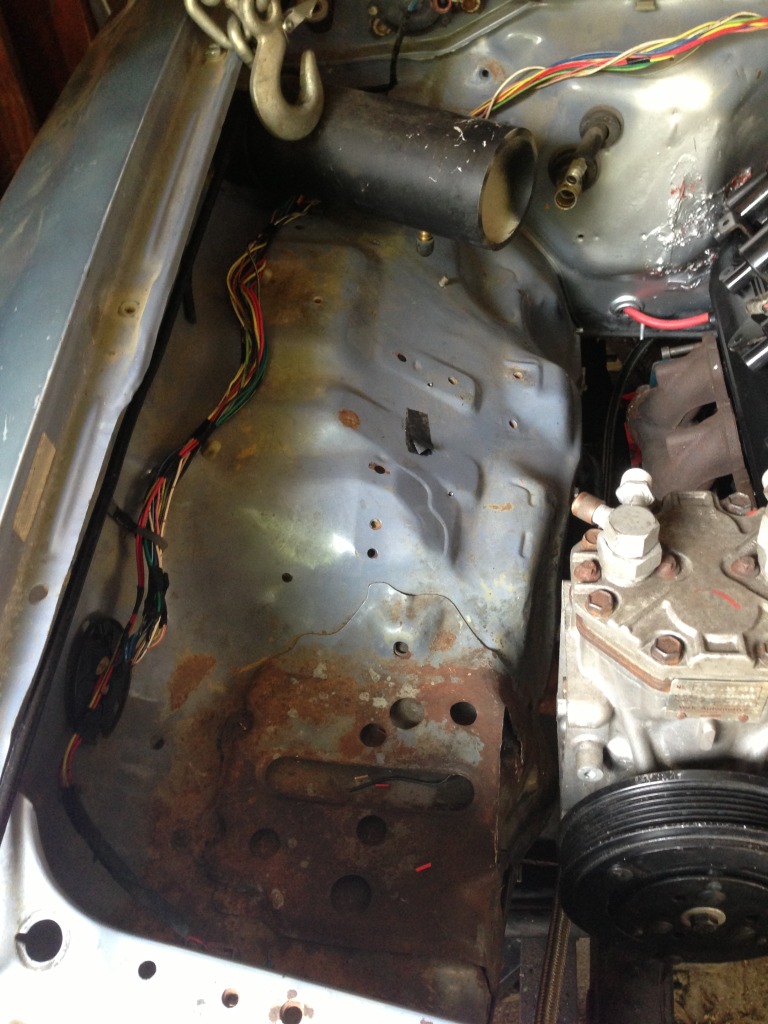
Toyota fusebox now resides on the driver's side along with the PCM and the standalone fusebox for the LS.

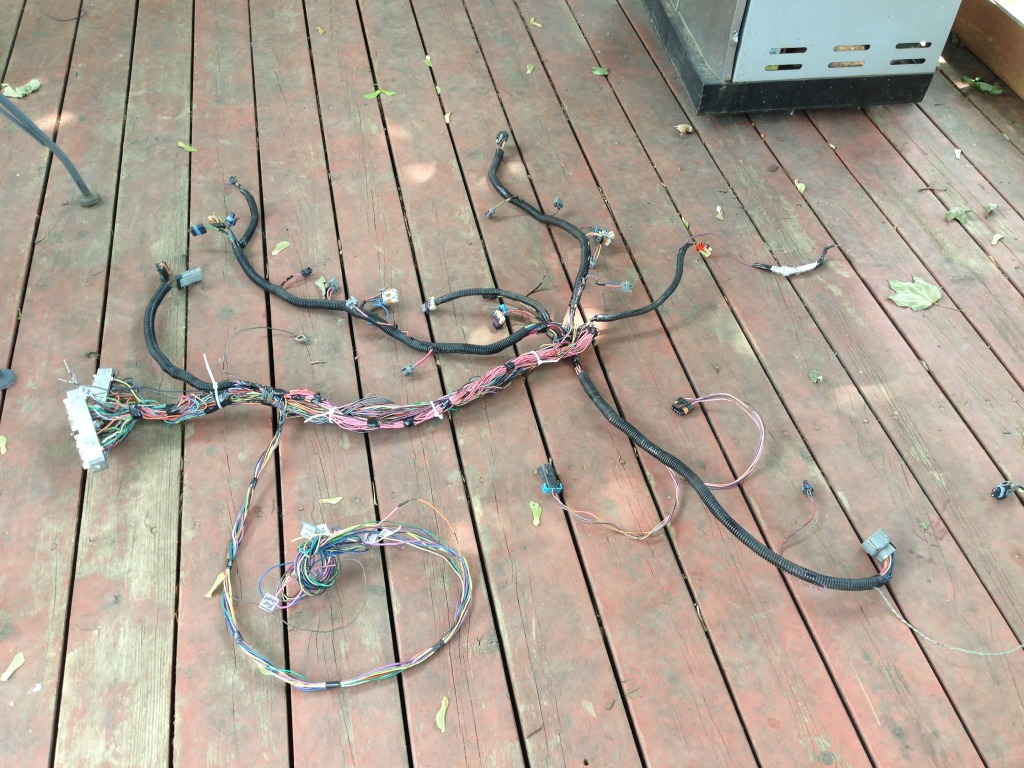
Not exactly a 3 or 4 wire swap, more like 10 wires, but it's half of those wires run the Denali cluster, so it's pretty straight forward.
The way it currently rests.
First start. Open headers.
Custom mounts, 2x4 .25" wall for mount base, 2x2 .25" wall welded to .25" plate for engine mount, with 82' Volvo turbo engine mounts.
Fits rather nicely.
LM7 manifolds, chopped and welded...
Steering shaft fits just fine.
GM power steering pump, GM power steering cooler, and Toyota power steering box.
Tacoma e-Locker.
4L80E clocking ring.
Denali cluster (IPC).
Drilled output shaft and welded bolt onto shaft.
Drilled the stock GM slip yoke, cut off out Toyota flange, and welded it to the GM yoke, and bolted it to the NP241.
Homebrew NP241 SYE
Combined 2-piece rear driveshaft into a 1-piece.
Hybrid shafts. Top is rear, Toyota 2-piece combined to make a single shaft using Toyota flanges. Bottom is stock front shaft from a K5 blazer, cut off the GM diff yoke, and welded on a Toyota yoke.
Modified truck accesories for L99 waterpump.
5.3 block and intake, 5.3 accessories (modified), 5.3 tensioner (modified), L99 waterpump, Windstar thermostat housing (modified).
L99 waterpump sits differently, and uses a different mount for the tensioner so I had to scrap the old design, and built a new one from .25" plate, still need to figure out the tensioner now that the York is mounted, the current position is next to useless when the belt it run to the York.
99' Suburban 40gal fuel tank w/ new pump, stainless lines, AN fittings, Corvette filter/regulator, Toyota filler neck and cap.
Left: 6.0 flexplate and crank spacer Right: curved 5.3 flexplate w/ hub support, went with the 6.0 as it fit a little better w/ my rebuilt converter.
Relocated Toyota fusebox, cleared room for intake from snorkel and OBA setup.
Toyota fusebox now resides on the driver's side along with the PCM and the standalone fusebox for the LS.
Not exactly a 3 or 4 wire swap, more like 10 wires, but it's half of those wires run the Denali cluster, so it's pretty straight forward.
The way it currently rests.
First start. Open headers.
 Sep 2, 2014 | 01:39 PM
#59
Thread Starter
Registered User
Joined: Jan 2011
Posts: 88
Likes: 0
From: Minneapolis, MN
Upper radiator hose.
Lower radiator hose.
New brake lines, waiting for my prop valve from summit.
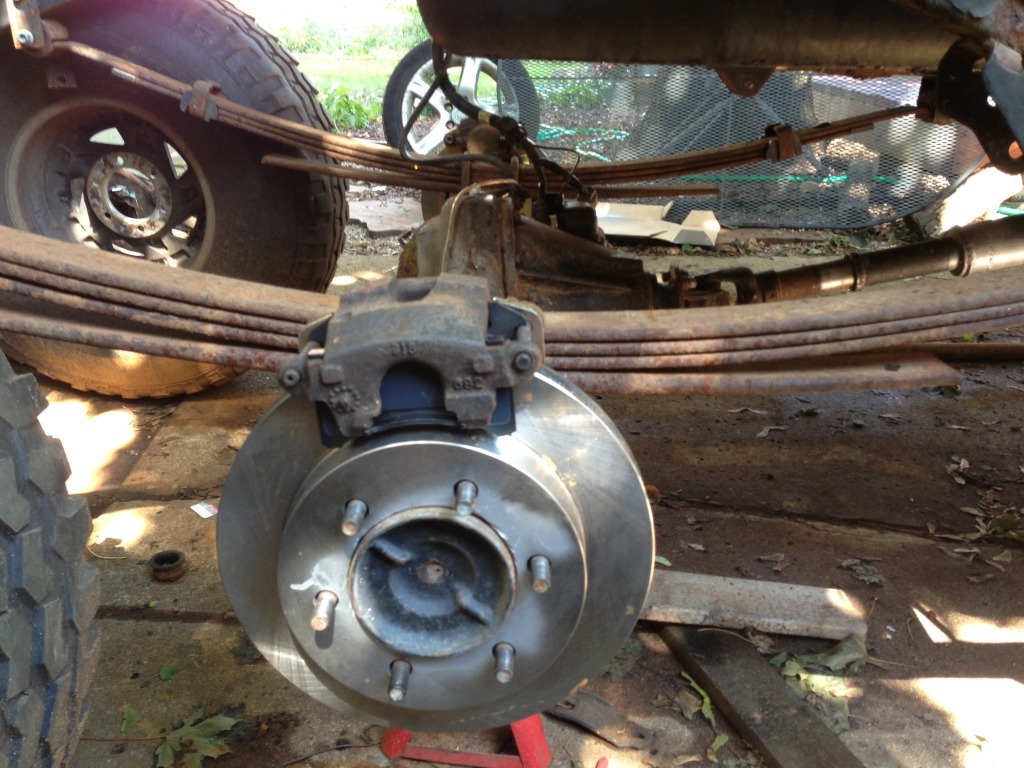
Rear disc brake conversion. JToutfitters brackets, 90' K1500 non-HD rotors w/ hub cut to 4.2", front calipers and pads from 97' S-10 Blazer 4x4, summit 2# prop valve.
Lokar 4L80E flexible dipstick.
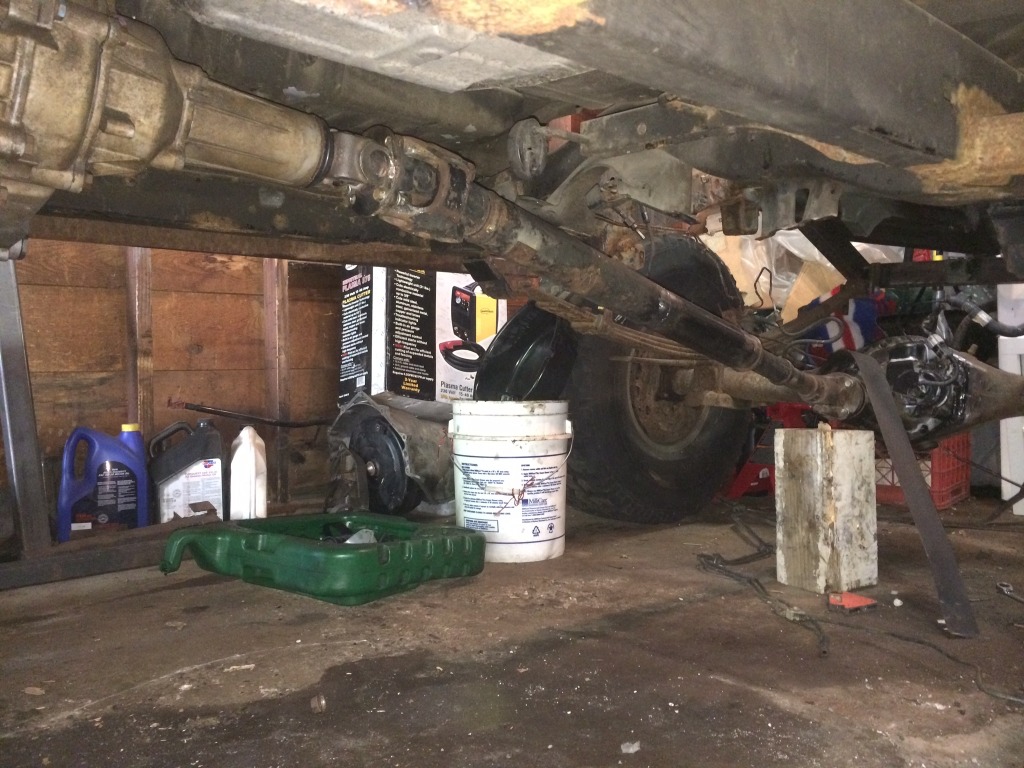
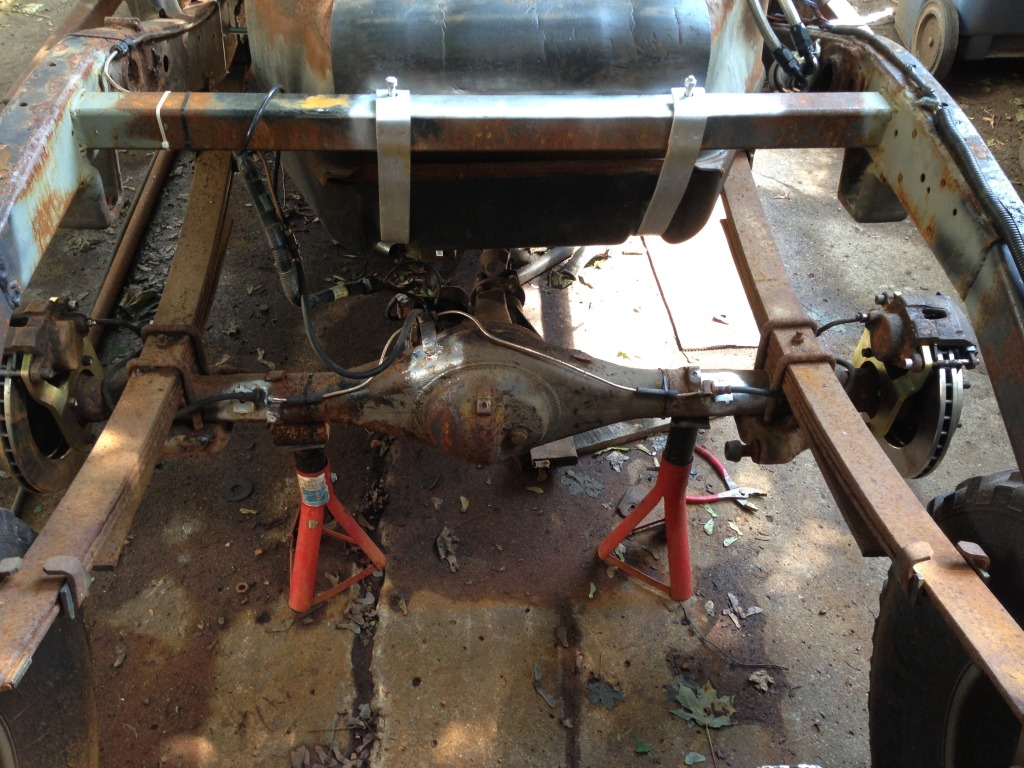
Toyota crossmember, GM trans mount, clocked NP241 so front driveshaft clears.
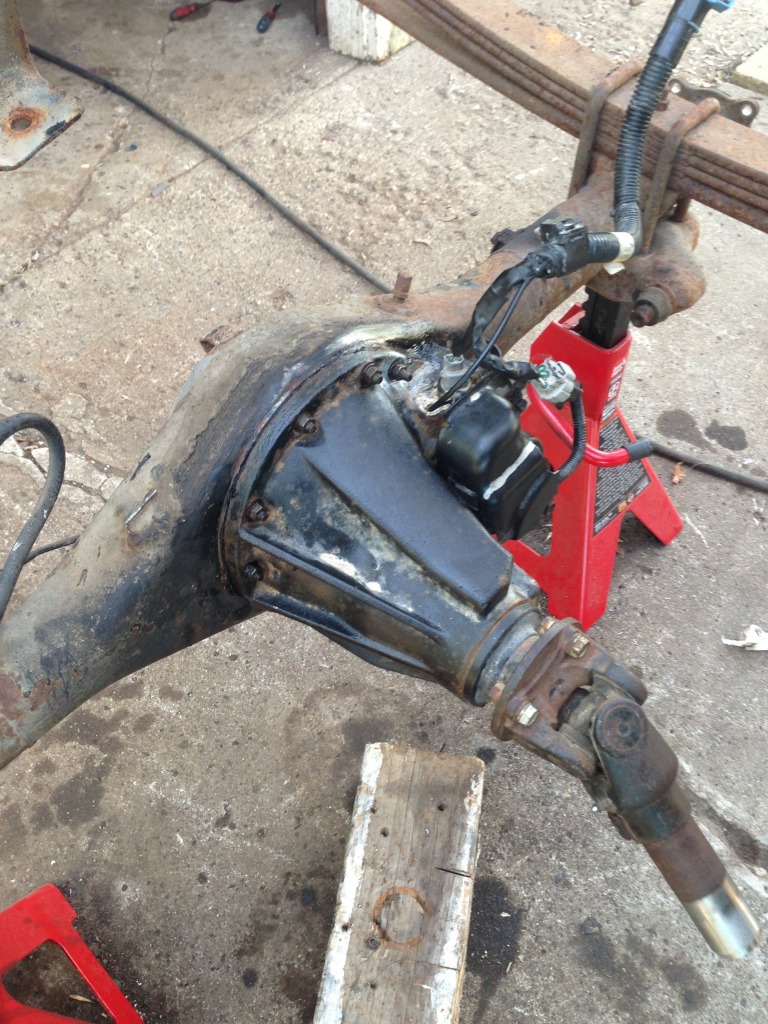
AN high pressure power steering line.

Lower radiator hose.
New brake lines, waiting for my prop valve from summit.
Rear disc brake conversion. JToutfitters brackets, 90' K1500 non-HD rotors w/ hub cut to 4.2", front calipers and pads from 97' S-10 Blazer 4x4, summit 2# prop valve.
Lokar 4L80E flexible dipstick.
Toyota crossmember, GM trans mount, clocked NP241 so front driveshaft clears.
AN high pressure power steering line.


