
89' Yota TBI350/4L60E/VF1A
 Feb 18, 2011 | 04:06 PM
#1

Thread Starter
Registered User
Joined: Jan 2011
Posts: 88
Likes: 0
From: Minneapolis, MN
89' Yota TBI350/4L60E/VF1A
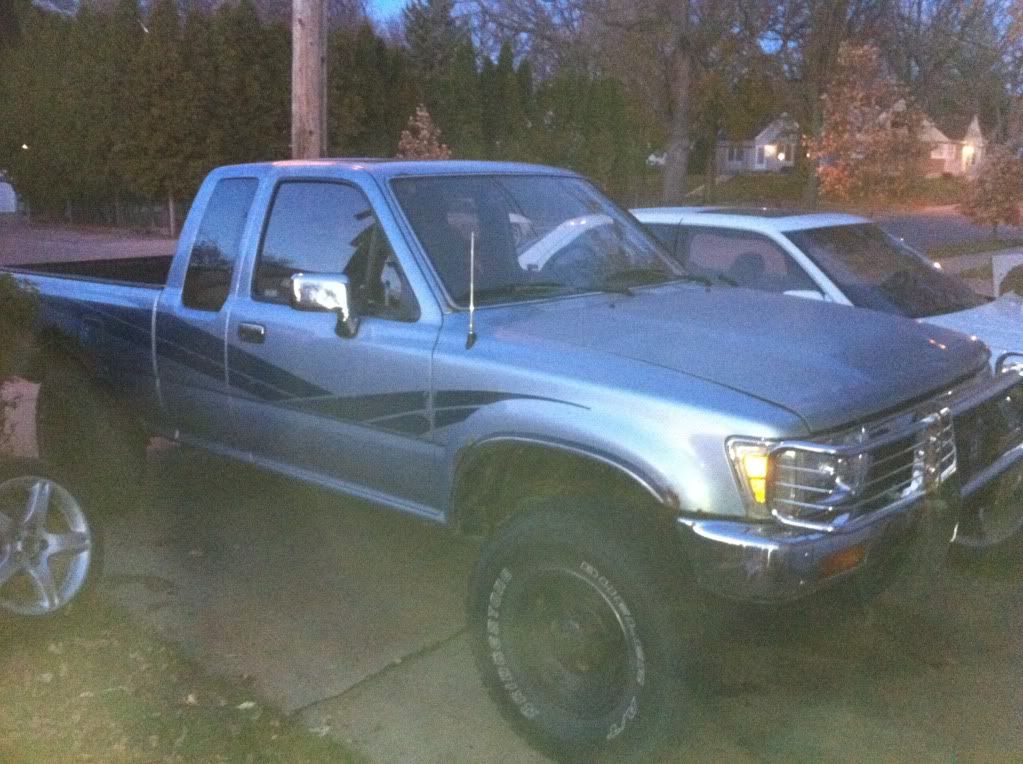
Hello YT'ers, let me first introduce myself and than I will get to the build. I first bought this 1989 Toyota Pickup from a guy about 1 hr away from me in the Twin Cities. I bought the truck for $700, knowing it needed a bit of work. I built some homebrew sliders, and than the bastard got a hold of me, and is taking me for a ride, and I'm holding on now....
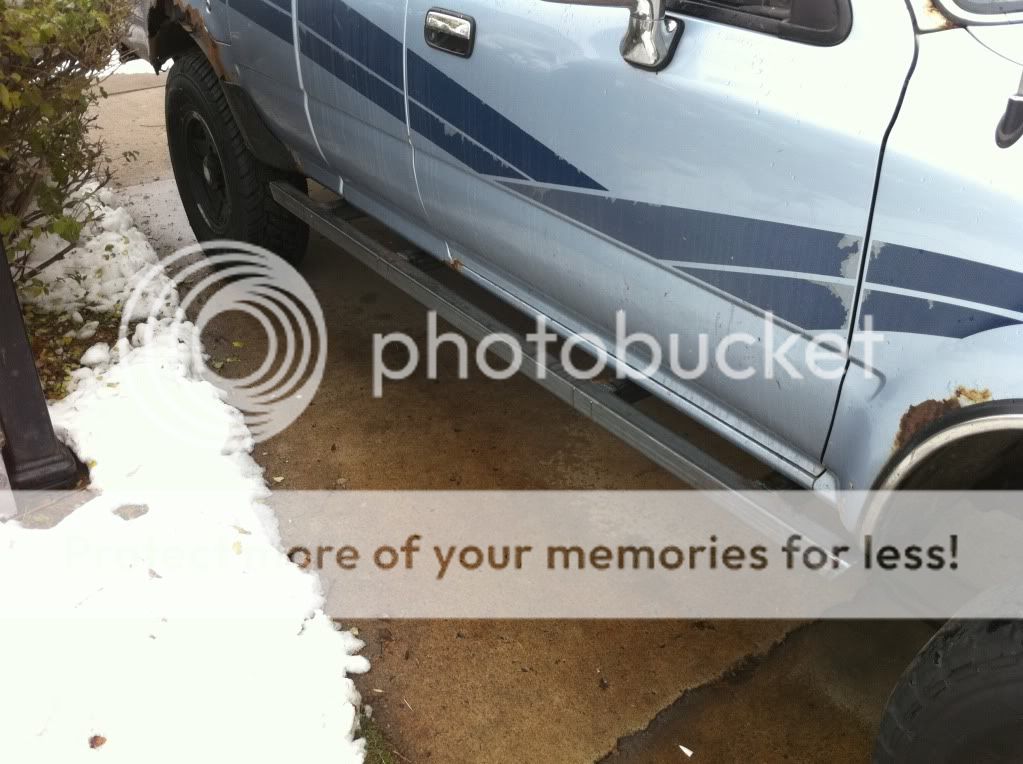
Sliders
Here we go, being an old-Toyota tech, it was almost a no-brainer to put in an 1UZ/A341E in there with little modifications. But that was too easy, I found a guy selling solid axles, which I bought one, he emails me a month later and tell me about his friend that's parting his rig. He is selling...
AA 11140 - TH350 to Toyota TC adapter w/ VF1A chain driven TC
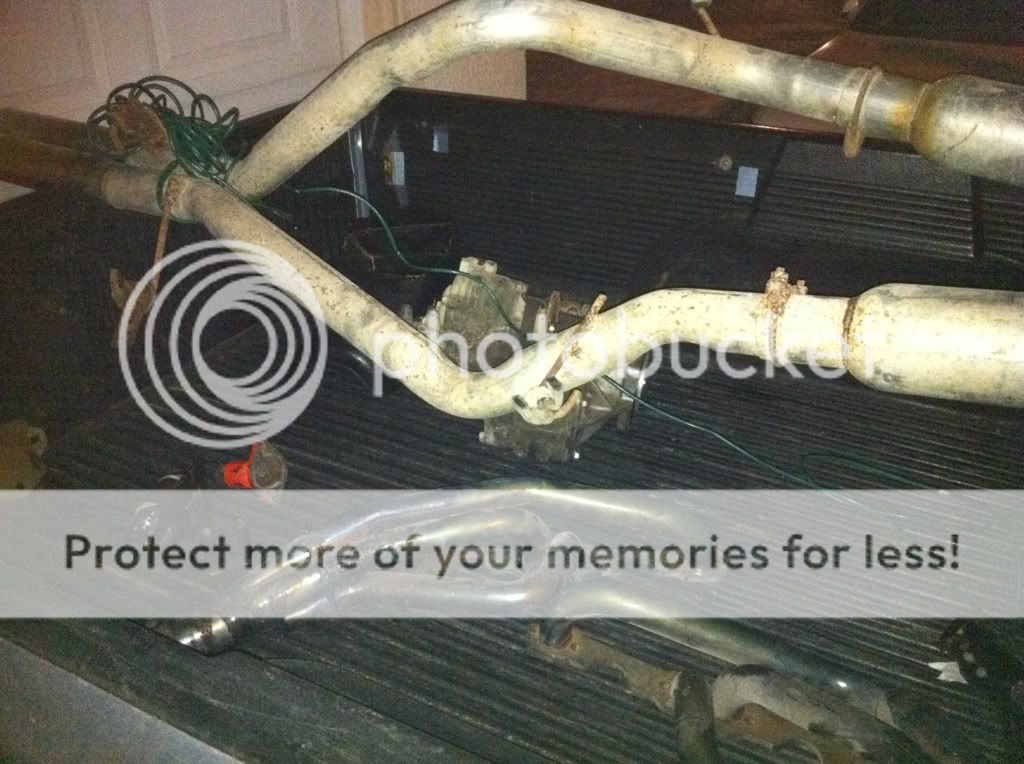
NWOR SBC swap headers, complete w/ Magnaflow glasspacks/tips
NWOR SBC engine mounts
SBC Notched oil pan for IFS
Adapter for Toyota P/S pump on SBC
And finally to sweeten the pot, he has a 4.10 rear w/ Aussie locker, but it has snowed so much out here, he doesn't really have the ability, or energy to try to pull it as it's sitting in his pasture. All this for $750, minus the rear end, we squared up at $700.
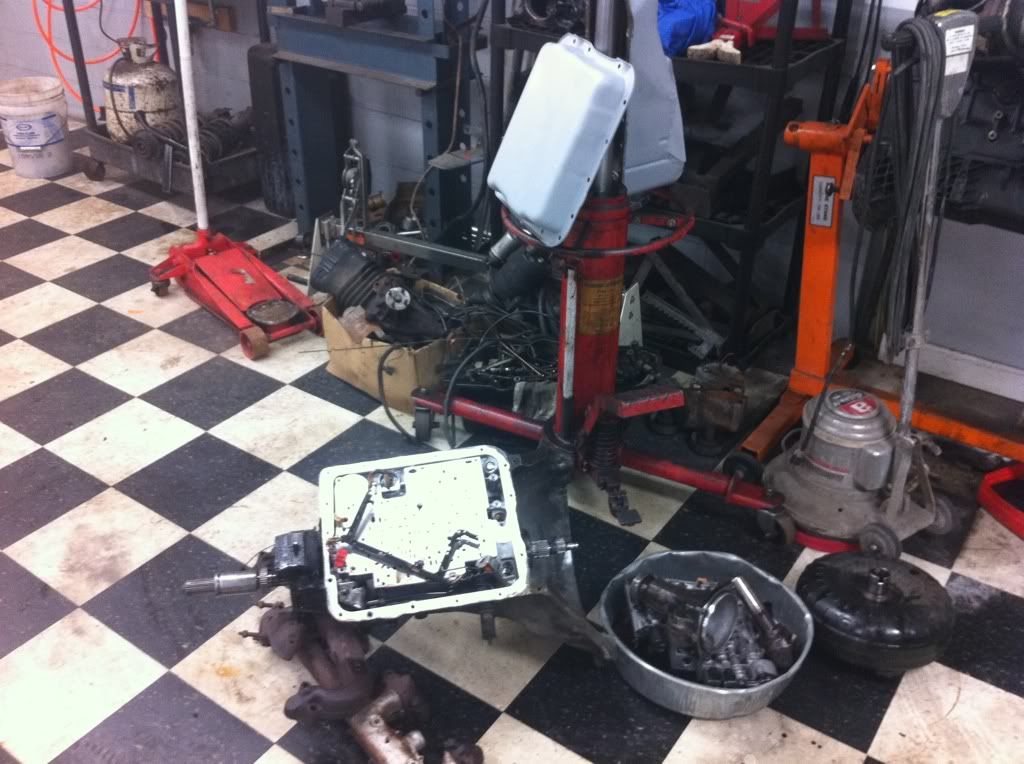
I found a guy selling a 93' 2500 Chevy Vandura, with no title, but was willing to pull the motor and trans. I squared up with him at $350 for pretty much the entire engine, TBI to pan, harness, ecu, manifolds, air intake, trans cooler lines, serp belt and accesories, starter, and I'm sure I'm missing somethings. The problem is that it was a workhorse motor, it's got some hard miles on it. The EGR was pretty much clogged, but that's been dealt with..
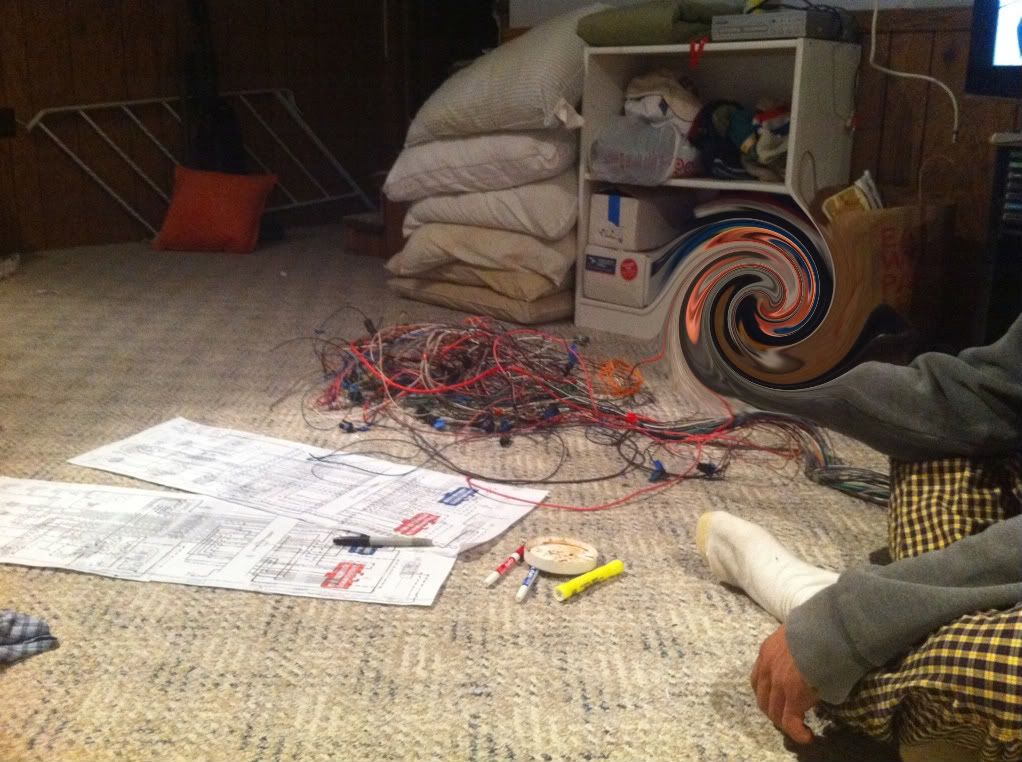
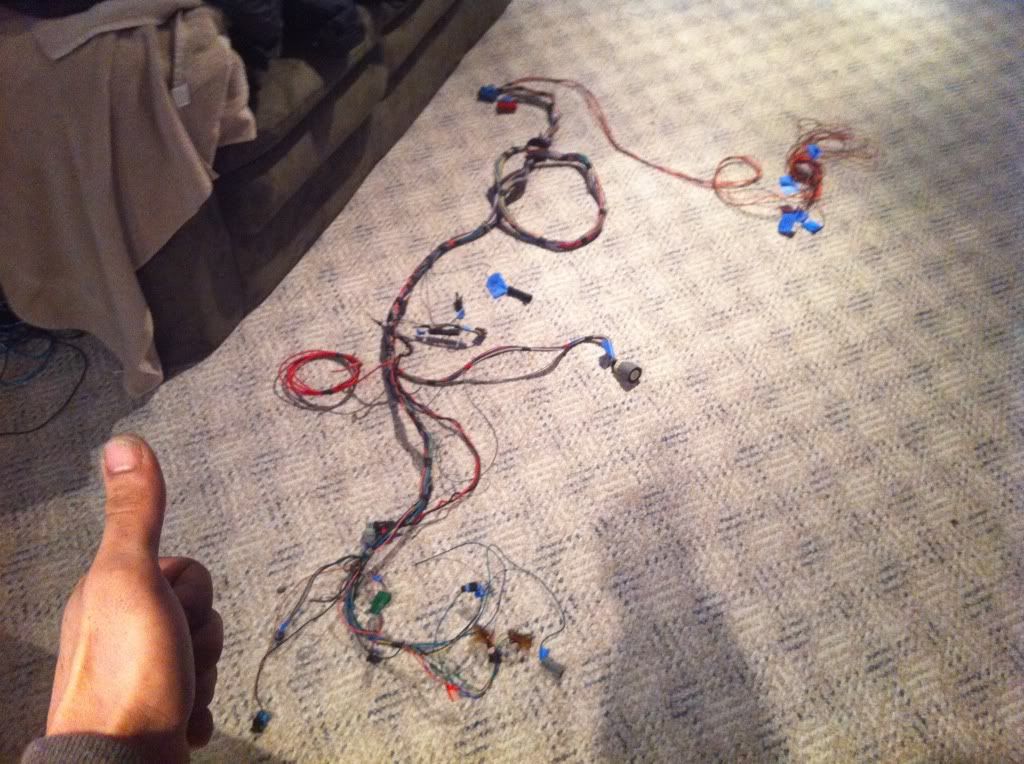
I am also building my own harness, but being that it's from a Van, it's about a mile long and it's a blast, but I don't really mind wiring at all, it's just really long.
So. I am going to be doing this swap at my shop over the next few weeks, but I am still trying to solve my Speedometer/VSS problem, without having to spend $100 for a stupid sensor. And since I have the motor in long block form, I am going to pull heads and do all the seals, except piston rings and bearings if I can help it. I would like to have it done in two weeks. Here's where I'm at now...
Like all of my other threads, comments and criticism is welcome, to a certain point.
Sliders
Here we go, being an old-Toyota tech, it was almost a no-brainer to put in an 1UZ/A341E in there with little modifications. But that was too easy, I found a guy selling solid axles, which I bought one, he emails me a month later and tell me about his friend that's parting his rig. He is selling...
AA 11140 - TH350 to Toyota TC adapter w/ VF1A chain driven TC
NWOR SBC swap headers, complete w/ Magnaflow glasspacks/tips
NWOR SBC engine mounts
SBC Notched oil pan for IFS
Adapter for Toyota P/S pump on SBC
And finally to sweeten the pot, he has a 4.10 rear w/ Aussie locker, but it has snowed so much out here, he doesn't really have the ability, or energy to try to pull it as it's sitting in his pasture. All this for $750, minus the rear end, we squared up at $700.
I found a guy selling a 93' 2500 Chevy Vandura, with no title, but was willing to pull the motor and trans. I squared up with him at $350 for pretty much the entire engine, TBI to pan, harness, ecu, manifolds, air intake, trans cooler lines, serp belt and accesories, starter, and I'm sure I'm missing somethings. The problem is that it was a workhorse motor, it's got some hard miles on it. The EGR was pretty much clogged, but that's been dealt with..
I am also building my own harness, but being that it's from a Van, it's about a mile long and it's a blast, but I don't really mind wiring at all, it's just really long.
So. I am going to be doing this swap at my shop over the next few weeks, but I am still trying to solve my Speedometer/VSS problem, without having to spend $100 for a stupid sensor. And since I have the motor in long block form, I am going to pull heads and do all the seals, except piston rings and bearings if I can help it. I would like to have it done in two weeks. Here's where I'm at now...
Like all of my other threads, comments and criticism is welcome, to a certain point.
Last edited by 3uzfte; Mar 2, 2014 at 07:17 AM. Reason: Parental Guidance
Mar 5, 2011 | 12:20 PM
#3
Thread Starter
Registered User
Joined: Jan 2011
Posts: 88
Likes: 0
From: Minneapolis, MN
Update. So I guess it's going to take me longer than 2 weeks as there's tons of variables to this build.
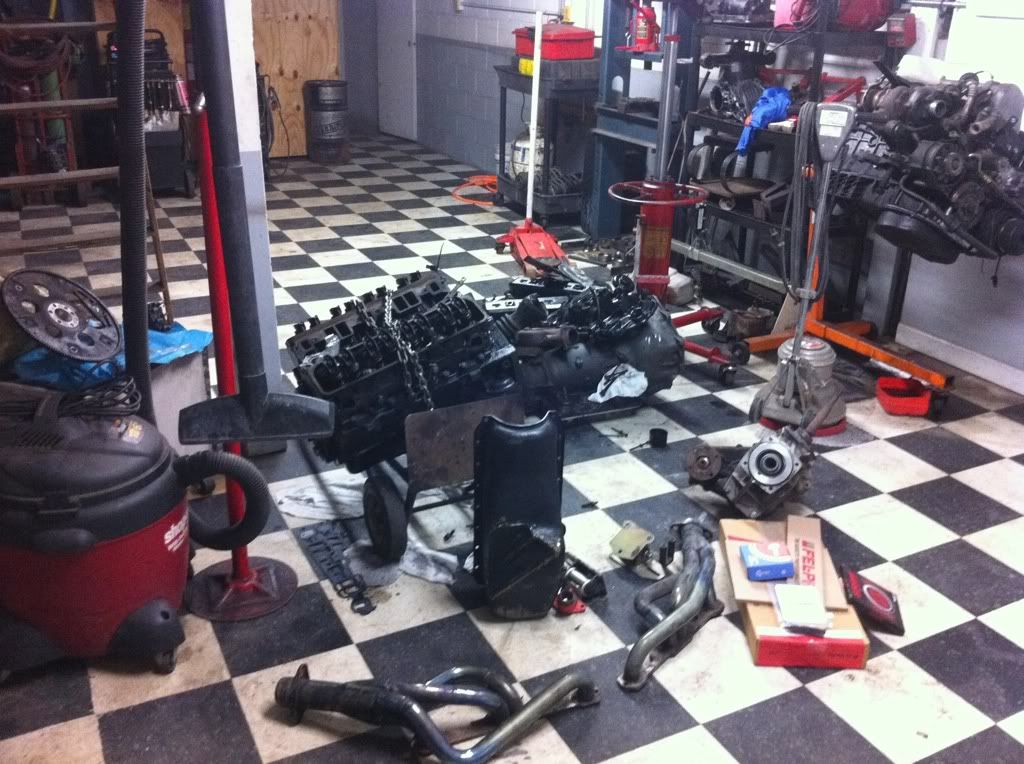
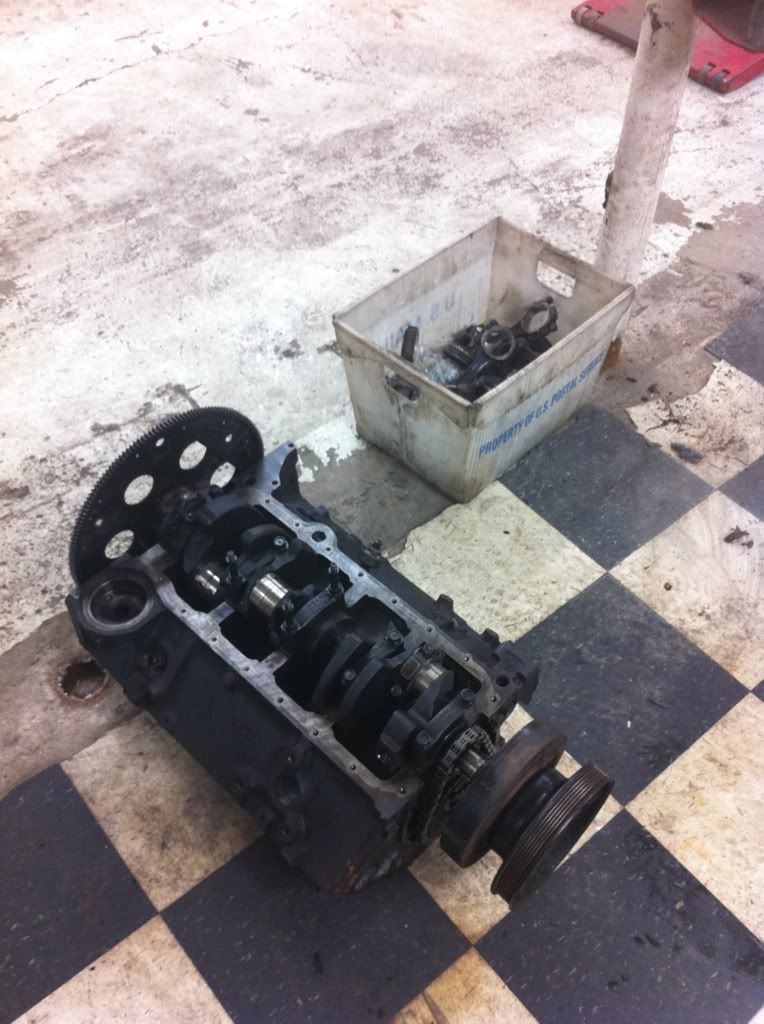
The block is going to machine shop because after I put in new rings and bearings, it's frigging so tight w/ 1 piston that I can't spin the crank, I'll let the machine shop figure it out.
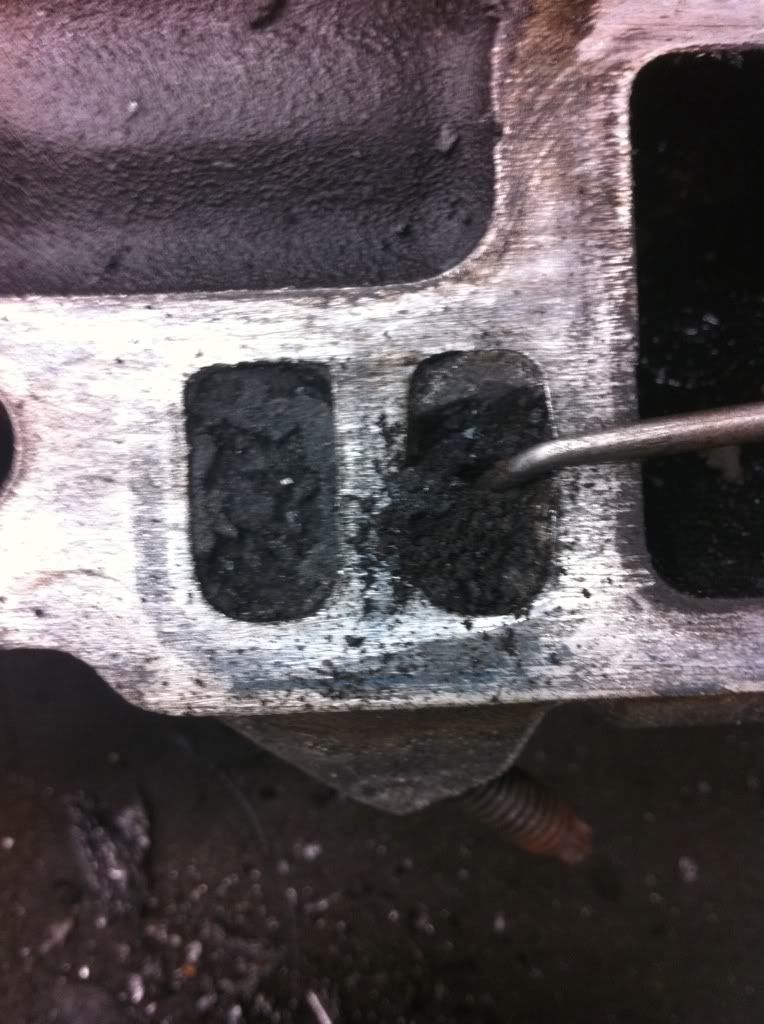
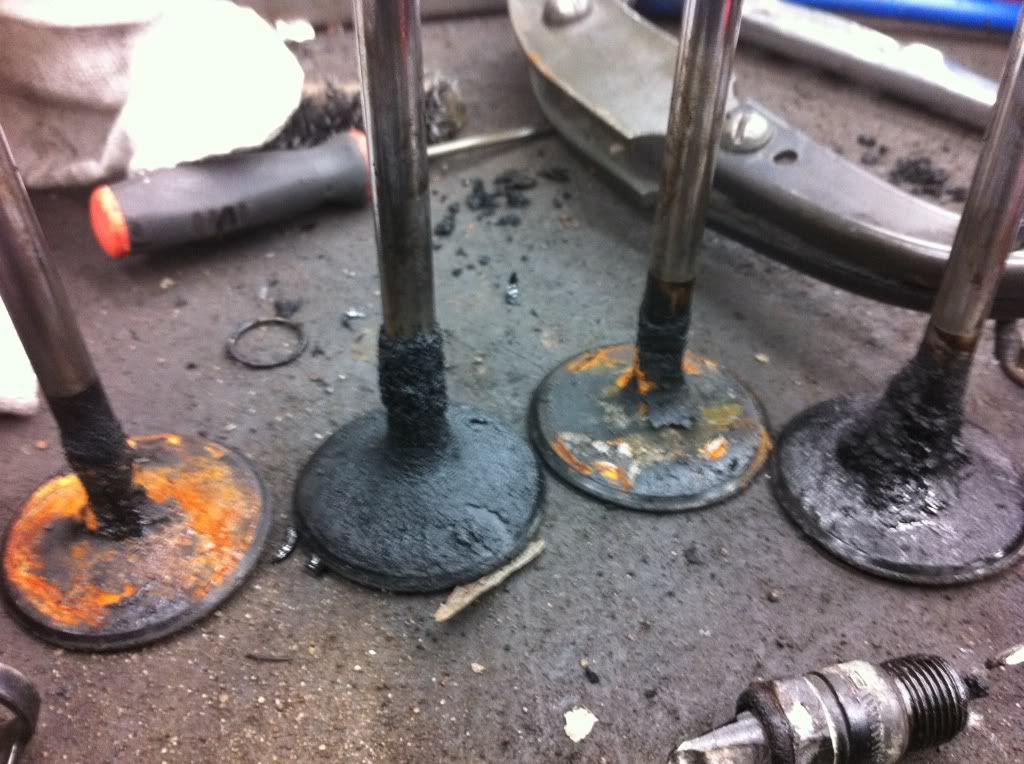
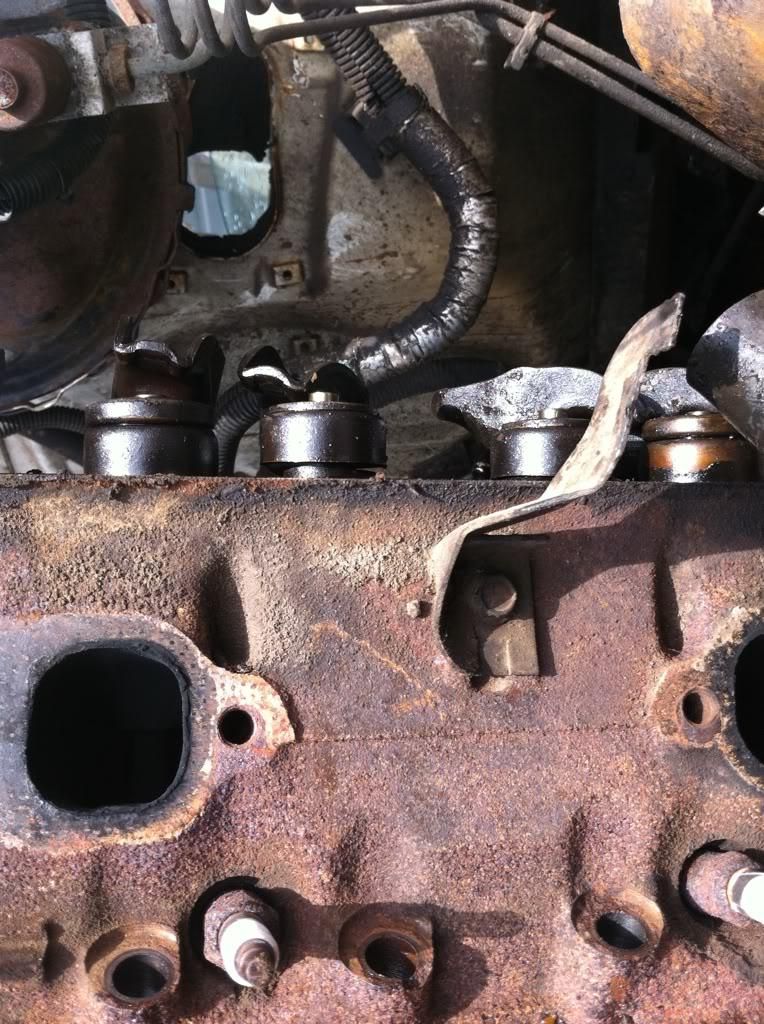
The heads seems to be ok, but there was tons of oil and carbon residue leftover from being a workhorse. 1 of the intake valves was deformed almost as if the valve was being sucked up. You can see if the valve in the pictures.

You can see the condition of the valves, pretty ugly. The bad valve is 2nd from the left, you can see it has a dome shape to it.
The tranny has to be disassembled partially to install a shorter output shaft as the 2wd is too long. I am also doing every gasket/seal I can touch, and could resist pulling the valve body as well.
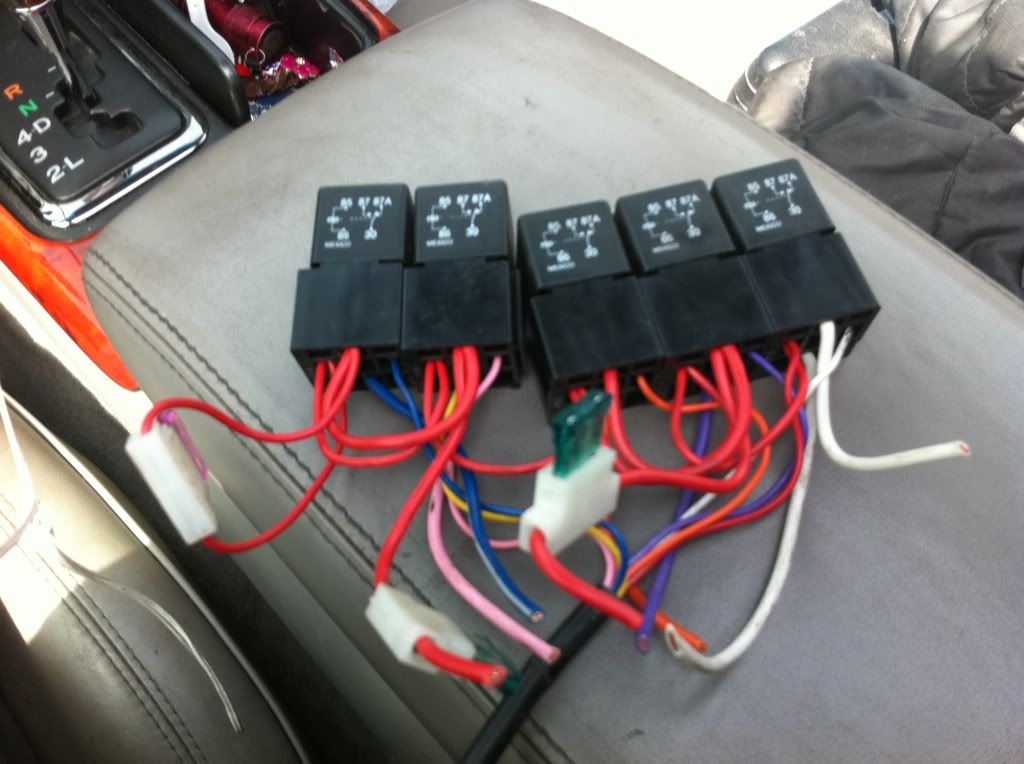
I am building the OE harness to save some money. Everything was restrung and labeled. I well try to reuse the Toyota fuse box, but could easily run some fuses and relays separate.
Issues.
#1 - I'm using the 4L60E, so I need a VSS signal so that the tranny will shift.
Solution - I'm going to have to buy a sensor for about $100 that has the Toyota mechanical speedo drive w/ a 4-pulse GM VSS sensor. Or I'm going to fabricate my own tone ring to provide the VSS signal separate from the speedo drive, and mount the sensor in the case.
#2 - Since I bought a 2WD 4L60E, I was under the impression I just had to cut the shaft down. That's not the case. The shaft is too long, and the splines don't run the length of the shaft, so it won't work.
Solution - I'm going to call some tranny shops Monday and check their inventory for a 4WD 4L60E/700R4 output shaft, or just buy one on eBay.
The block is going to machine shop because after I put in new rings and bearings, it's frigging so tight w/ 1 piston that I can't spin the crank, I'll let the machine shop figure it out.
The heads seems to be ok, but there was tons of oil and carbon residue leftover from being a workhorse. 1 of the intake valves was deformed almost as if the valve was being sucked up. You can see if the valve in the pictures.
You can see the condition of the valves, pretty ugly. The bad valve is 2nd from the left, you can see it has a dome shape to it.
The tranny has to be disassembled partially to install a shorter output shaft as the 2wd is too long. I am also doing every gasket/seal I can touch, and could resist pulling the valve body as well.
I am building the OE harness to save some money. Everything was restrung and labeled. I well try to reuse the Toyota fuse box, but could easily run some fuses and relays separate.
Issues.
#1 - I'm using the 4L60E, so I need a VSS signal so that the tranny will shift.
Solution - I'm going to have to buy a sensor for about $100 that has the Toyota mechanical speedo drive w/ a 4-pulse GM VSS sensor. Or I'm going to fabricate my own tone ring to provide the VSS signal separate from the speedo drive, and mount the sensor in the case.
#2 - Since I bought a 2WD 4L60E, I was under the impression I just had to cut the shaft down. That's not the case. The shaft is too long, and the splines don't run the length of the shaft, so it won't work.
Solution - I'm going to call some tranny shops Monday and check their inventory for a 4WD 4L60E/700R4 output shaft, or just buy one on eBay.
Last edited by 3uzfte; Mar 2, 2014 at 07:18 AM.
Mar 7, 2011 | 02:27 PM
#5

Registered User
Joined: Nov 2006
Posts: 580
Likes: 33
From: Saginaw, MN
I probably have the output shaft from my trans ('92 4WD 4L60 from an S-10 Blazer) if you want. Not sure if it'll help you though, as your adapter might use a different output shaft. My AA one did.
Mar 27, 2011 | 10:31 AM
#6
Thread Starter
Registered User
Joined: Jan 2011
Posts: 88
Likes: 0
From: Minneapolis, MN
I have been held up on this project due to time and funds. I'm doing a 350 and solid axle swaps simultaneously, so I'm having to account for much more than just the engine swap. It turns out the 350 block is close to junk, and so I'm searching for a good block for cheap. I am waiting to build my solid axle because I'm going to run 4.10 gears, so I needed to buy another 3rd member or ring and pinion. I found a FZJ80/Land Cruiser at the local UPull and so I'm jumped on it. I pulled both front and rear e-locking diffs, but only intent on using the front because I think the rear won't fit in my V6 truck axle housing, so for now I'm only using the hi-pinion 3rd. I got both diffs, dash switches, 3rd brake light and coolant resv for a Lexus for $150. Unfortunately it would have been cheaper if I could've separated the driveshafts from the diffs, but the bolts weren't moving so I had to pay for 2 u-joints and 2 drive shafts.... oh well.
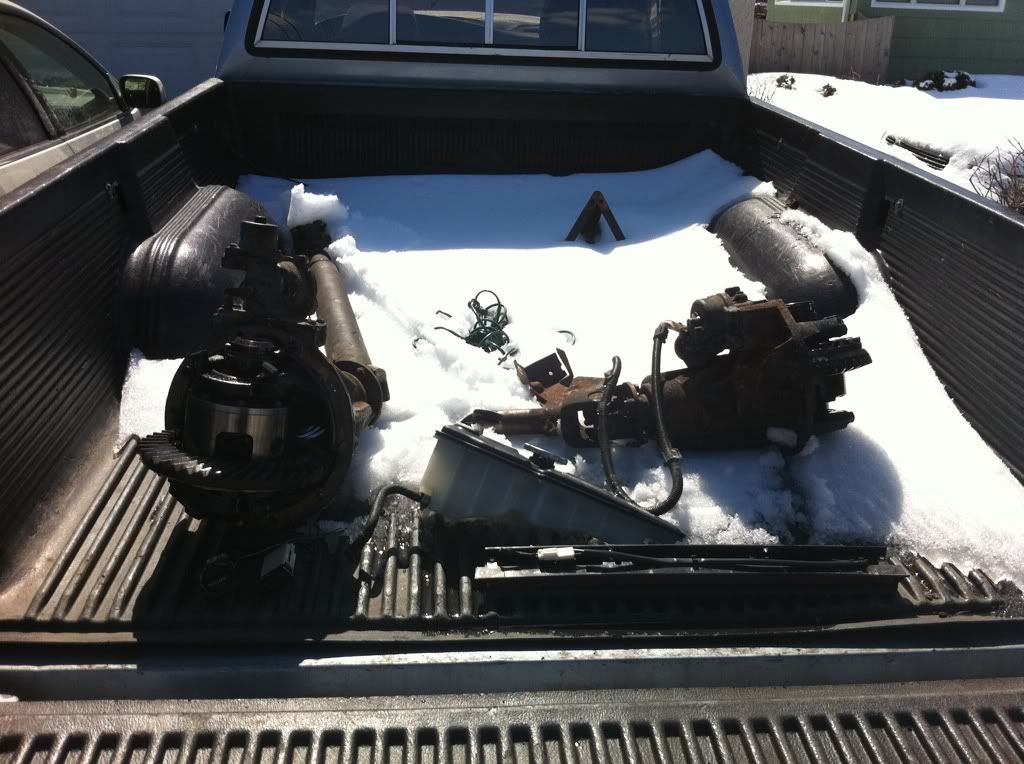
Now I can assemble my SA, cut the IFS out.... To make room for my SBC.
Now I can assemble my SA, cut the IFS out.... To make room for my SBC.
Last edited by 3uzfte; Mar 2, 2014 at 07:19 AM.
Mar 27, 2011 | 11:11 AM
#7
Registered User
Joined: Nov 2006
Posts: 580
Likes: 33
From: Saginaw, MN
Wow, was it the Rosemount Upullrparts that had the FJ80? How was the rest of the rear axle? I didn't even think to start looking there for one. I'm planning on using an FJ80 axle in my 4runner, so I'd be interested in that diff.
I've got a 4.10 4-cyl 3rd member here (actually, I've got the whole axle...but I want to keep the shafts as spares). I'll keep looking around for the 700r4 output shaft too.
I've got a 4.10 4-cyl 3rd member here (actually, I've got the whole axle...but I want to keep the shafts as spares). I'll keep looking around for the 700r4 output shaft too.
Trending Topics
Mar 27, 2011 | 03:02 PM
#8
Thread Starter
Registered User
Joined: Jan 2011
Posts: 88
Likes: 0
From: Minneapolis, MN
Wow, was it the Rosemount Upullrparts that had the FJ80? How was the rest of the rear axle? I didn't even think to start looking there for one. I'm planning on using an FJ80 axle in my 4runner, so I'd be interested in that diff.
I've got a 4.10 4-cyl 3rd member here (actually, I've got the whole axle...but I want to keep the shafts as spares). I'll keep looking around for the 700r4 output shaft too.
I've got a 4.10 4-cyl 3rd member here (actually, I've got the whole axle...but I want to keep the shafts as spares). I'll keep looking around for the 700r4 output shaft too.
I ended up buying a 4WD 4L60E output shaft on eBay, I just need to find the time now. Looks like your builds coming along nicely.
Edit: one thing I didn't know is that the FJ80 diffs are both offset the pass side. The output driveshafts both connect to the diff drop.
Last edited by 3uzfte; Mar 27, 2011 at 03:17 PM.
Apr 2, 2011 | 03:47 PM
#10
Thread Starter
Registered User
Joined: Jan 2011
Posts: 88
Likes: 0
From: Minneapolis, MN
So... I stumbled upon a $100 SBC on Craigslist. It was pulled from a 75' Chevy K5 Blazer, that was being turned into a mudder.
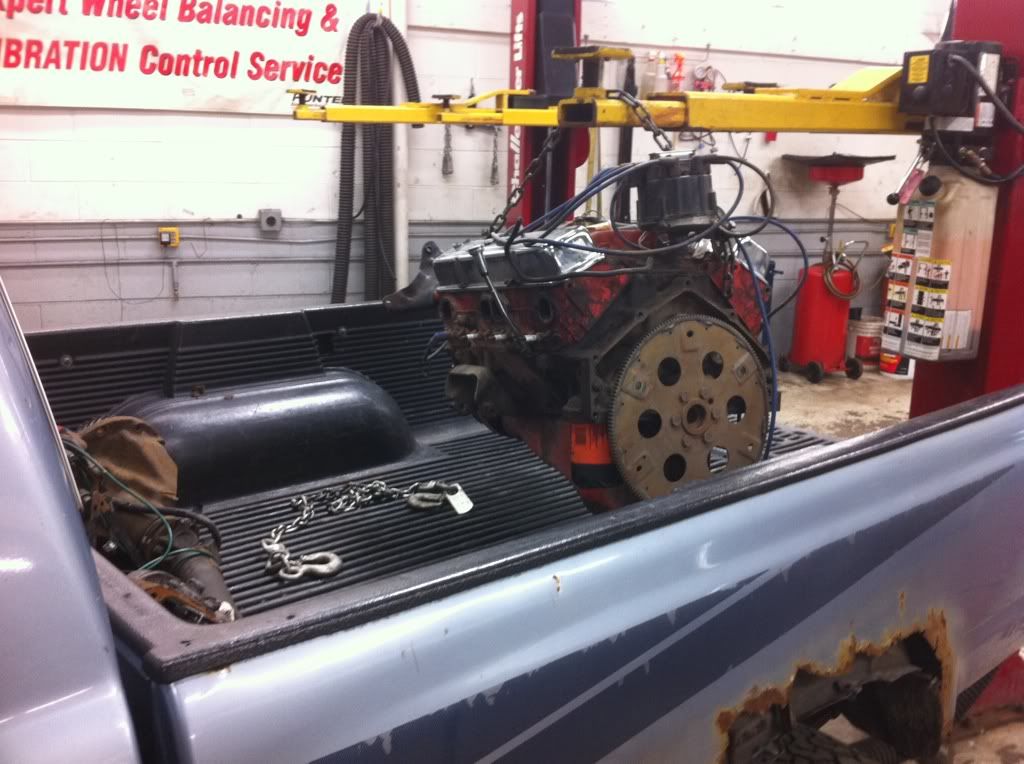
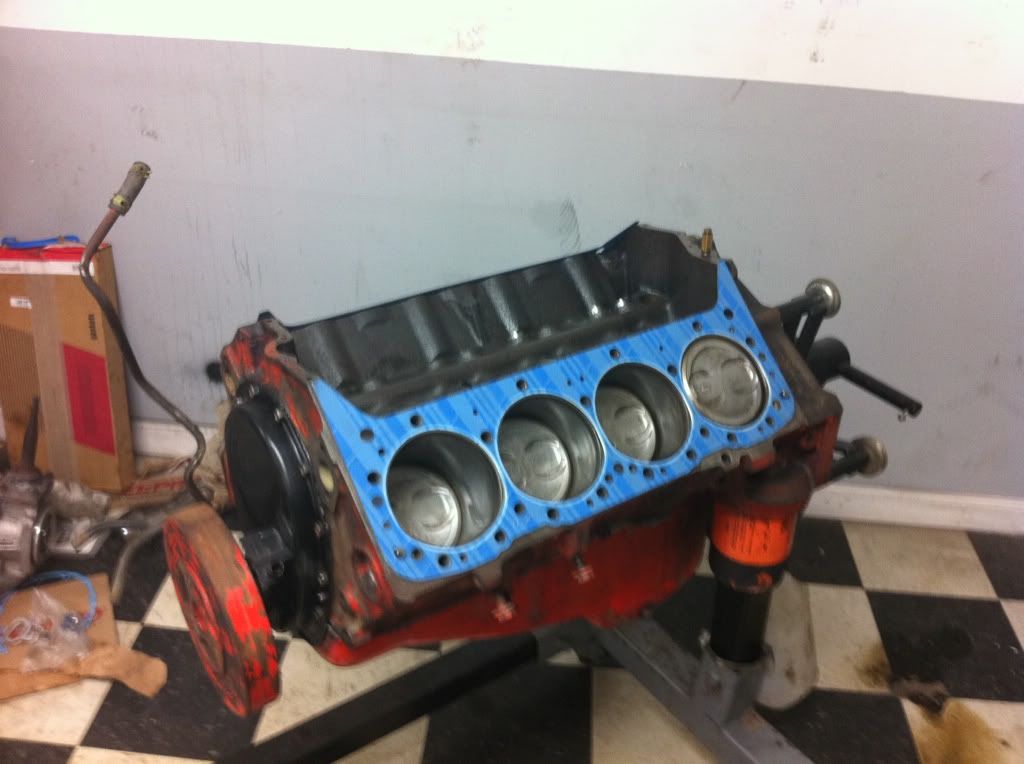
I degreased it, and stripped the heads and intake to run the "center bolt" TBI heads and Fuel Injection. So I'm freshening up the 75' 350 with a new timing chain, head gaskets, front and rear main seals. Like I mentioned, I'm running TBI so I choose to swap my heads rather than the older 882 heads, which allows me to use the TBI without having to modify the intake and run the newer style valve covers.
I degreased it, and stripped the heads and intake to run the "center bolt" TBI heads and Fuel Injection. So I'm freshening up the 75' 350 with a new timing chain, head gaskets, front and rear main seals. Like I mentioned, I'm running TBI so I choose to swap my heads rather than the older 882 heads, which allows me to use the TBI without having to modify the intake and run the newer style valve covers.
Last edited by 3uzfte; Mar 2, 2014 at 07:19 AM.
Apr 3, 2011 | 05:55 AM
#12
Thread Starter
Registered User
Joined: Jan 2011
Posts: 88
Likes: 0
From: Minneapolis, MN
As far as actual fact, I have yet to stuff it in there and see how far the front end drops. I really don't think it'll be too bad, but I'm thinking that at least an extra 200lbs is fair. For my build, I just googled, found that a typical cast iron 350 runs 575-600lbs, and the 4L60E is around 175lbs. So for the grand total of about 750lbs would be a good guess. Also from my research, I would stay a safe number for the 3VZE V6 is roughly 400lbs, and tranny is around 200lbs, for a total of 600lbs. Soooo in reality, I'm probably adding close to 150-200lbs, which might seem to make a difference, but there's really not much difference if you were to go sit on the hood of your car, does it bottom out or even flex the shocks? The difference will be driving down the road, it'll probably be more front end heavy, but that's fine with me. Also something to keep in mind is that I'm ditching the IFS during this swap and building a solid axle with a hi-pinion e-locking 3rd, so I'm sure that add some more weight as well.
Apr 4, 2011 | 03:53 PM
#13
Thread Starter
Registered User
Joined: Jan 2011
Posts: 88
Likes: 0
From: Minneapolis, MN
Here's how it's sitting presently. I am waiting for a rear main and oil pan gasket, the rest will all transfer over from the TBI block, but it turns out the oil dipstick switched from 75' to 93'.

I order a Bosch fuel pump for a 93' Suburban w/ 5.7L, which I will take out the factory Toyota hi-psi pump for the TBI pump, I figure this was cheaper and more reliable than a FPR.
I order a Bosch fuel pump for a 93' Suburban w/ 5.7L, which I will take out the factory Toyota hi-psi pump for the TBI pump, I figure this was cheaper and more reliable than a FPR.
Last edited by 3uzfte; Mar 2, 2014 at 07:20 AM.
 Apr 6, 2011 | 04:19 AM
#15
Thread Starter
Registered User
Joined: Jan 2011
Posts: 88
Likes: 0
From: Minneapolis, MN
Hey, where in MN are you? This will be my first off road truck, as the Blazer and Envoy I had previously had 22" rims and 2 square kickers w/ 1000 watt DEI amp, and clarion surround sound. I started out in Audio, than I went to Hot Rods, now I'm into tuning cars, and I'm really trying to get my truck going because I think a weekend off-roading with some friends would be a lot of fun.
Apr 9, 2011 | 03:05 PM
#16
Thread Starter
Registered User
Joined: Jan 2011
Posts: 88
Likes: 0
From: Minneapolis, MN
A minor setback as I didn't know the 70's heads use a different intake valve from the 90's, so I'll need to get a new one. So I need to wait a little longer to build the motor, but I was able to clean it up and here's how it sits now.
It took some time, but I finally got the 2wd shaft out and put the 4wd shaft in. I now need a new set of gaskets, but I'm at the point in my builds that everything is torn down, and now just require building.
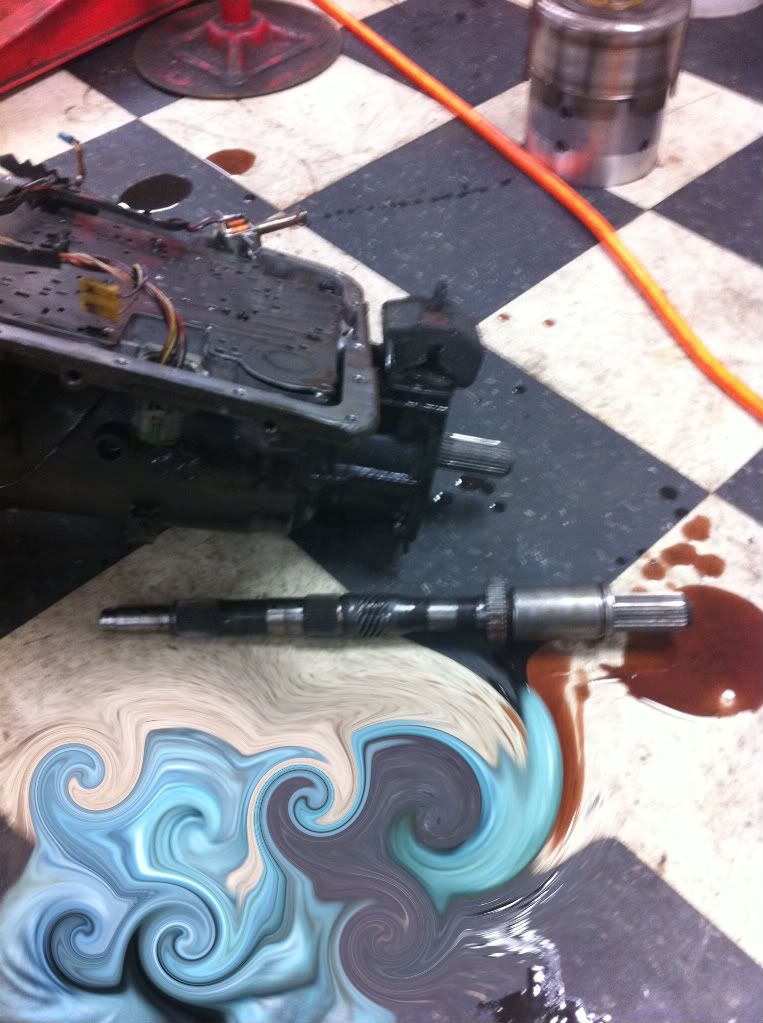
It took some time, but I finally got the 2wd shaft out and put the 4wd shaft in. I now need a new set of gaskets, but I'm at the point in my builds that everything is torn down, and now just require building.
Last edited by 3uzfte; Mar 2, 2014 at 07:21 AM. Reason: PG editing
Apr 10, 2011 | 09:46 AM
#17
Thread Starter
Registered User
Joined: Jan 2011
Posts: 88
Likes: 0
From: Minneapolis, MN
I got restless, so I had to repay the junk yard a visit. I was in the hunt for the FJ80 e-locker ecu, but it was yanked before I got there. I was able to score a set of relays that I can accomplish the same thing with, but it sucks I didn't grab the ecu when I grabbed the switch.
On my way to the junkyard I realized that I could save some money by pulling a TBI head and taking any intake valve from it to replace my warped/mushroomed #5 intake valve. After getting my hands a little greasy, I got the head off. Laid it flat, and I noticed the same that the exact same valve on a completely different motor of the same year was similarly warped/mushroomed. (Now I'm going to try to figure out why...) Anyways, I pulled an intake valve and off I went. You can see the valve bucket is above the valve cover lip, the rest are about flush.
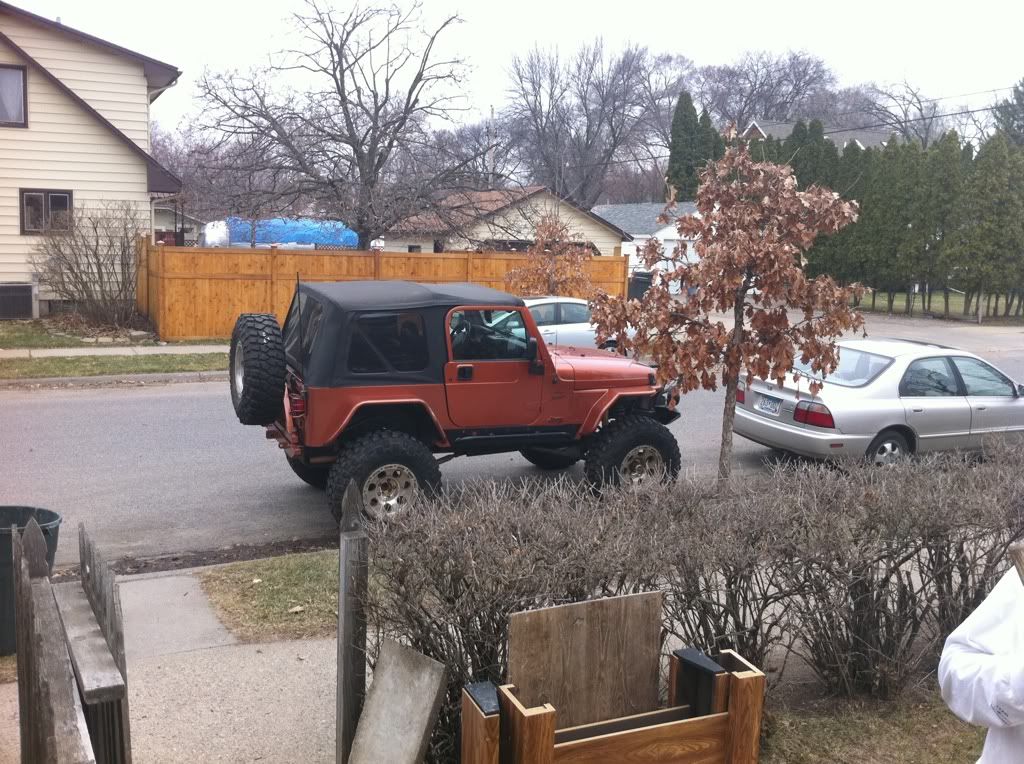
And here's my inspiration/competition. Dana 44/Ford 8.8"/ARBs/tri-linked rear/Rubicon 4speed auto/37s/etc.
On my way to the junkyard I realized that I could save some money by pulling a TBI head and taking any intake valve from it to replace my warped/mushroomed #5 intake valve. After getting my hands a little greasy, I got the head off. Laid it flat, and I noticed the same that the exact same valve on a completely different motor of the same year was similarly warped/mushroomed. (Now I'm going to try to figure out why...) Anyways, I pulled an intake valve and off I went. You can see the valve bucket is above the valve cover lip, the rest are about flush.
And here's my inspiration/competition. Dana 44/Ford 8.8"/ARBs/tri-linked rear/Rubicon 4speed auto/37s/etc.
Last edited by 3uzfte; Mar 2, 2014 at 07:23 AM.
 Apr 11, 2011 | 04:06 PM
#19
Thread Starter
Registered User
Joined: Jan 2011
Posts: 88
Likes: 0
From: Minneapolis, MN
Ha, I knew it. No worries, at least it's in good hands. It was nice meeting ya, hope everything goes ok for ya.
On the left is a normal cylinder #1 intake valve. On the right is the warped #7 valve that I'm replacing. I only bring this up because on both TBI motors I pulled apart, both engines had warped #7 intake valves... weird huh?
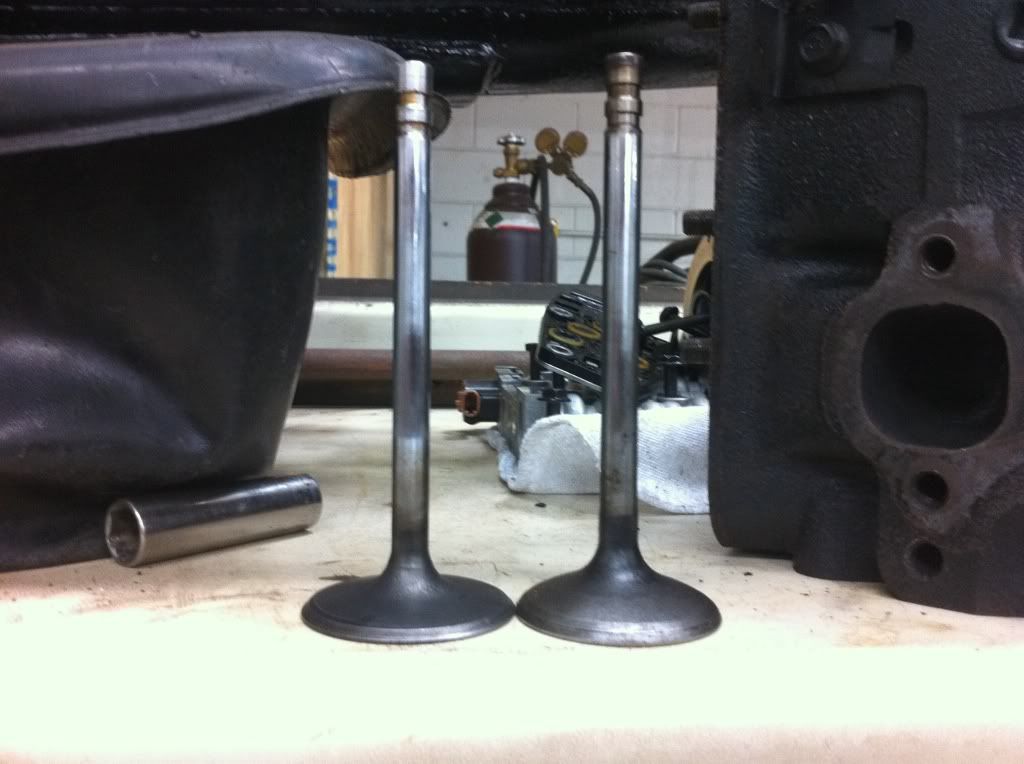
On the left is a normal cylinder #1 intake valve. On the right is the warped #7 valve that I'm replacing. I only bring this up because on both TBI motors I pulled apart, both engines had warped #7 intake valves... weird huh?
Last edited by 3uzfte; Mar 2, 2014 at 07:25 AM.
Apr 18, 2011 | 05:51 PM
#20
Thread Starter
Registered User
Joined: Jan 2011
Posts: 88
Likes: 0
From: Minneapolis, MN
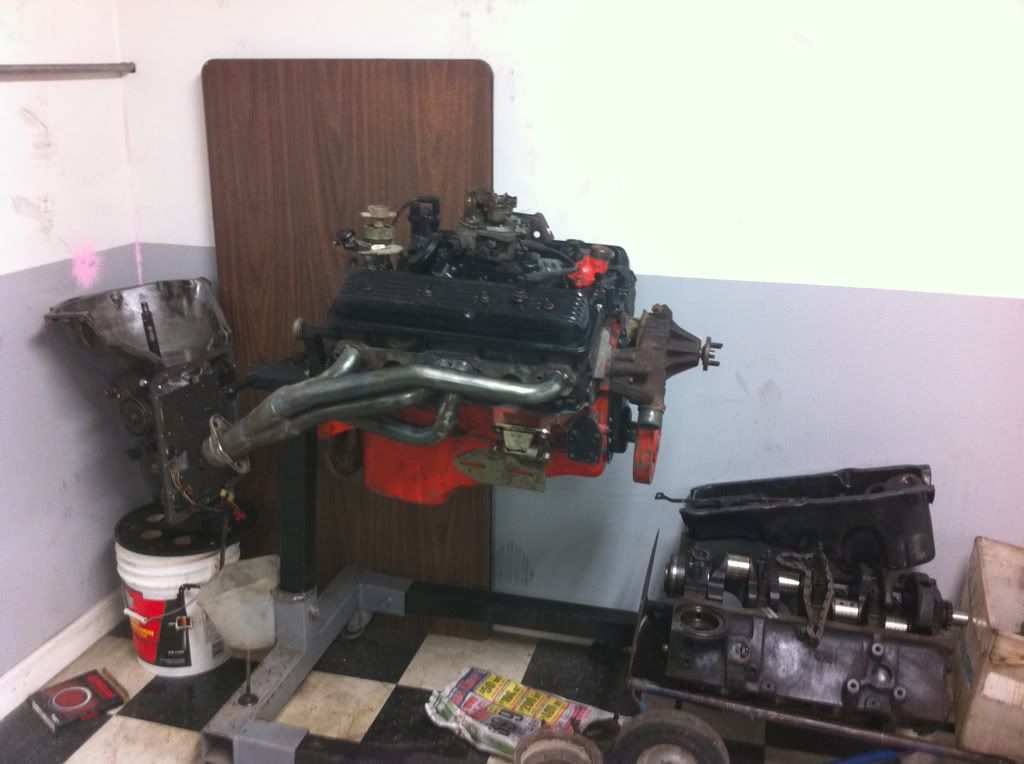
Hey all. I've been super busy with work and life. I finally put in a few hours and got the motor bolted up. My next step is the 4L60E.
More to come.
More to come.
Last edited by 3uzfte; Mar 2, 2014 at 07:25 AM.


