Project: 86 p/u sas/om617 diesel swap
 04-03-2012, 11:09 PM
#201
Contributing Member
Join Date: Mar 2003
Location: COTKU,Ontario,Canada
Posts: 11,334
Likes: 0
Received 0 Likes
on
0 Posts
IDK the engine bay looks nice but I still would've gone for a lighter colour like gray or something... that is going to be a very dark place to work in... sorry to hear about the plug...
 04-04-2012, 02:38 PM
#202
Registered User

Join Date: Jan 2012
Posts: 53
Likes: 0
Received 0 Likes
on
0 Posts
yep, rock auto can be quite wrong with their descriptions. I ordered a trans mount for my fj60 and they sent some other kind of mount. Turns out, they listed the correct one as the rear engine mount.
04-06-2012, 09:00 AM
#203
Registered User
Thread Starter
Just struggling to get the motor done now. I have machine a 10mm aluminum plug for the head. Merc doesn't sell those. At least I have a lathe and mill at school. I just have to find aluminum. I'm also struggling to get the engine timed correctly. I'm setting it at 25-26 degrees instead of 24 as I've heard 26 gives max power and fuel economy. Getting it set to the chisel mark in the block is going to be a bear. But if you have it set at the chisel mark, you get 2 degrees of play either way (retarded or advanced) in case you have to adjust later on without taking the whole pump off.
04-06-2012, 09:31 AM
#204
Registered User
im hoping to start this swam myself soon..found 85 axle and drive shaft for $150....should i move it forward to make room for the oil pan when i do the om617 swap?
04-06-2012, 09:34 AM
#205
Registered User
Thread Starter
Well if you're not in a big hurry, give me a week and I'll all that knowledge for you. Gotta get this timing figured out before I can throw the motor in the truck, and then I'll let you know. As of right now, my axle is sitting 3/4" forward and the steering is in the stock location, and the steering tie-rod didn't hit the drag link at full suspension droop/compression. I didn't paint my oil pan yet, though, in anticipation of notching it.
04-06-2012, 10:29 PM
#206
Registered User
Thread Starter
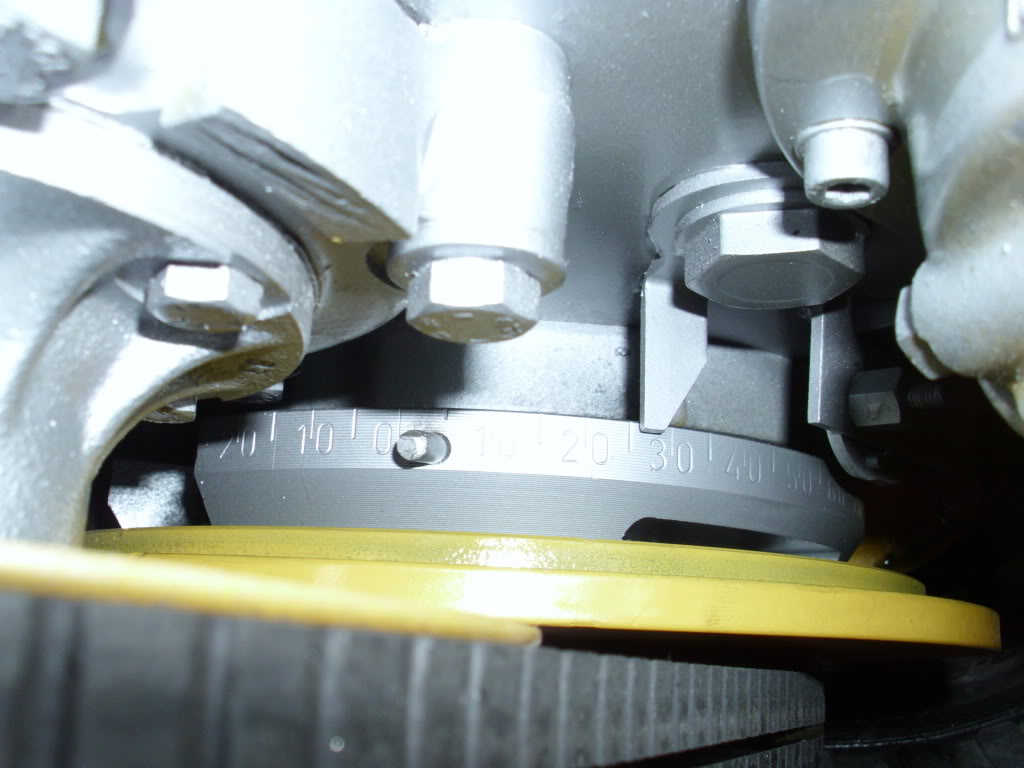
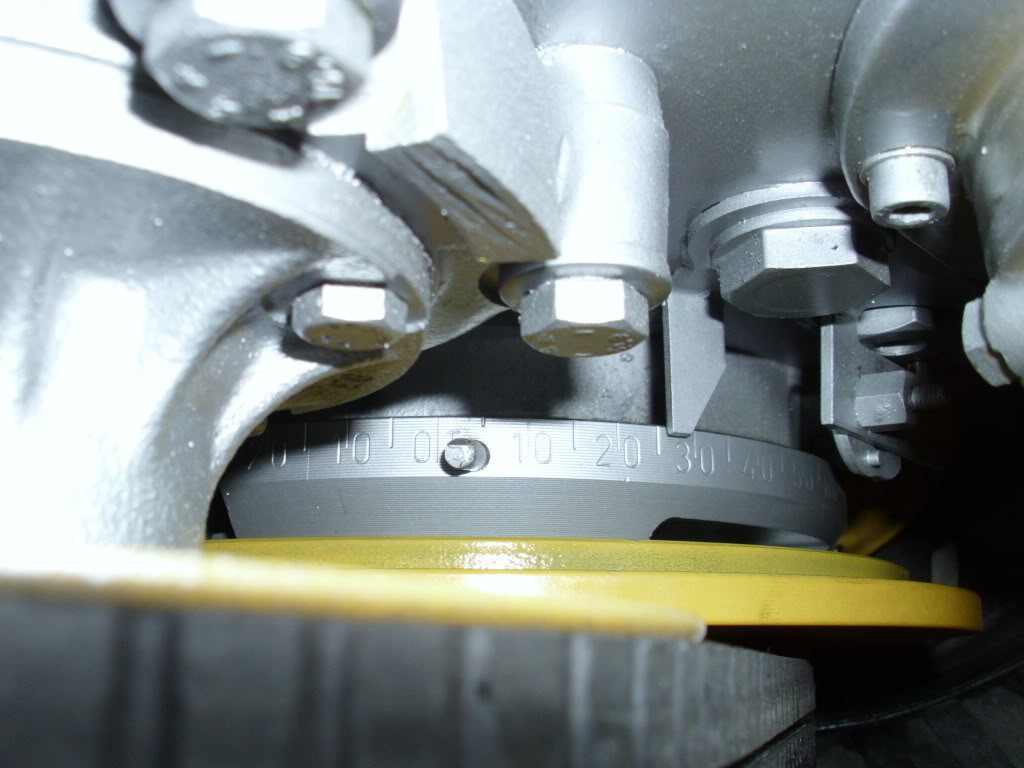
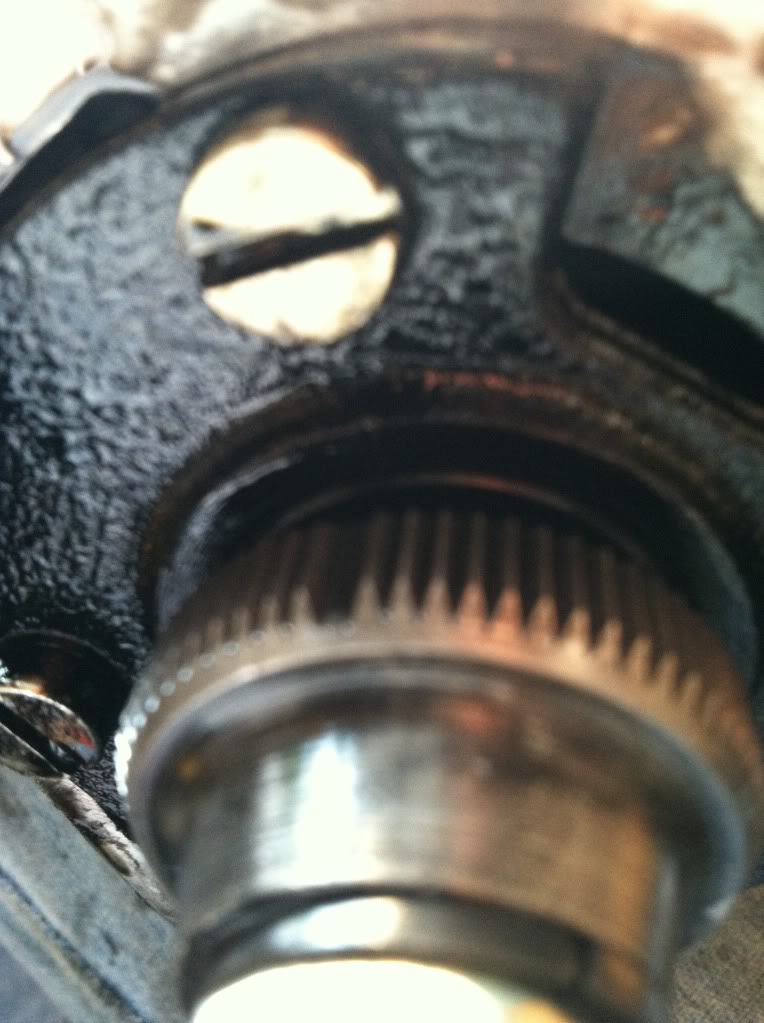
Okay, urgent question here. I'd like to get this verified by tomorrow evening so I can get this sucker fired up!! I tried setting the IP timing to 26 BTDC. Does this look like 26 degrees and does this look like the correct set up for timing? I can still adjust it now. I haven't put the new IP gasket on yet as I want to only put it on once, and I can't put the oil filter housing back on till the IP is back on for good.
If you move your head around your screen, you can get rid of the glare on the 1st picture and see the numbers perfectly.

If you move your head around your screen, you can get rid of the glare on the 1st picture and see the numbers perfectly.
04-07-2012, 09:05 PM
#208
Registered User
Thread Starter
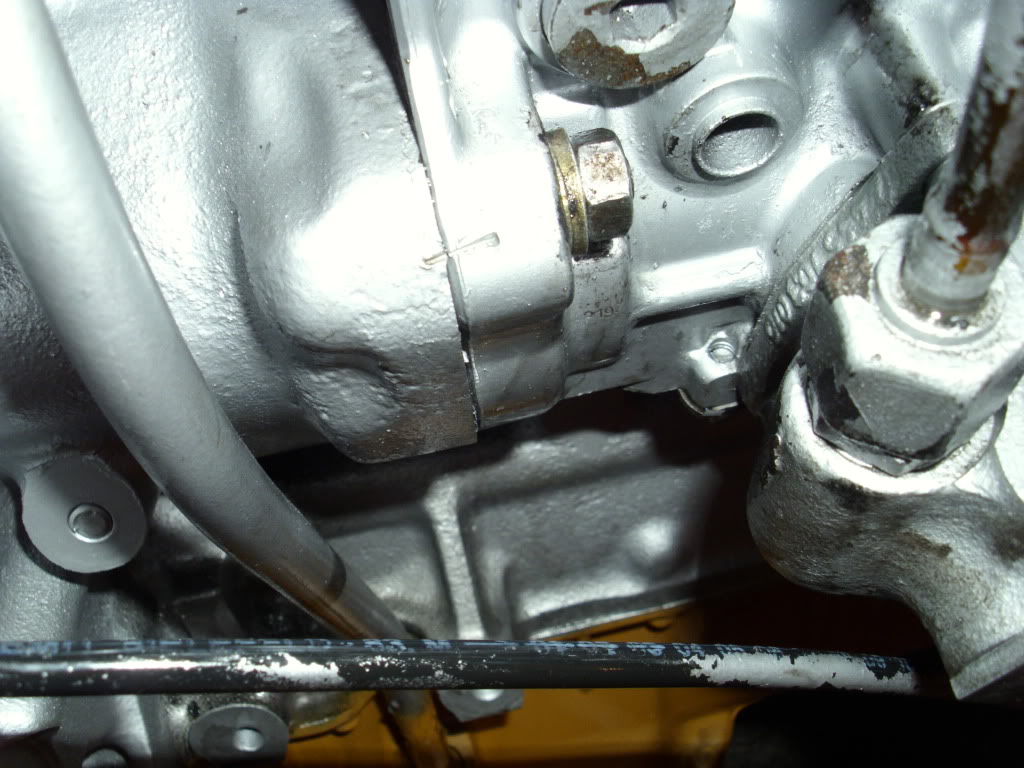
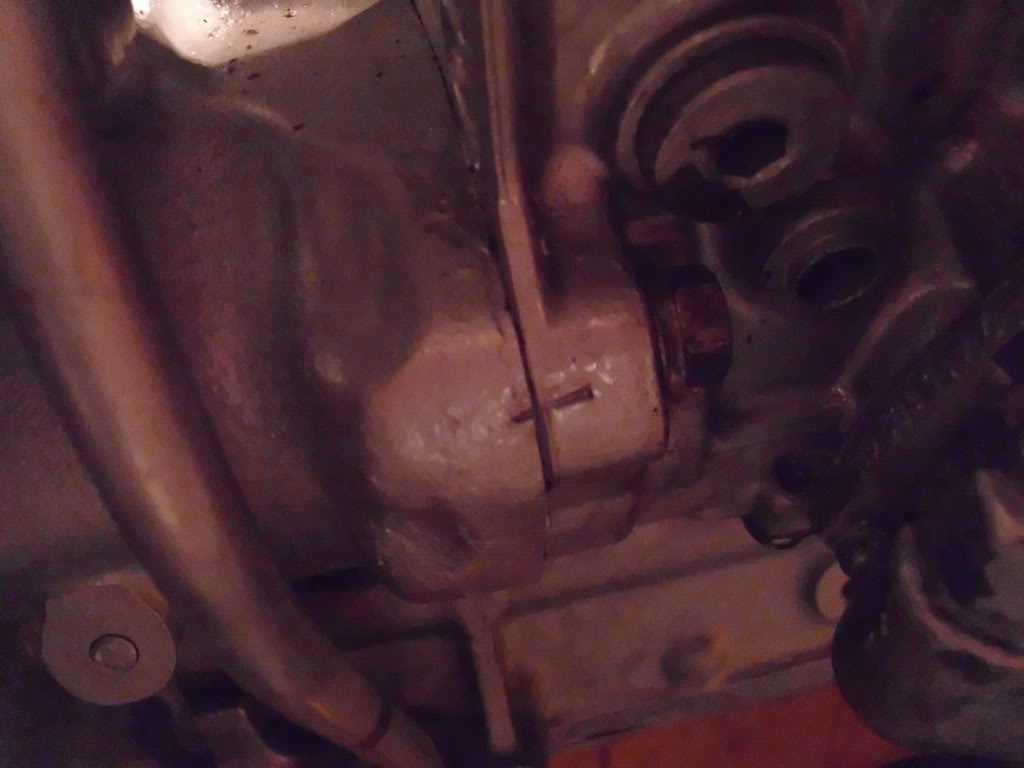
Okay, I pulled the IP back off and applied the new gasket. No leaks so far. The top of this picture is actually the left side of the IP, the top of the IP is the right side. Confusing I know, but the best I could without help. My IP timing scribe mark is pointing at the top left screw in the IP. Hopefully I don't need to be 3 teeth off. The drip timer said it was in time.
Waiting on the oil thermostat, so I'll have to rip the filter housing back off once again, but I wanted to get the engine running and do the comp test and get the tranny on this weekend. Doing the rest tomorrow. Here's the vid of it running. Let me know what you think. It kind of stuttered about mid throttle at first, but felt fine once it warmed up. I just don't want to have to mess with timing anymore. Maybe it's the ALDA that's making it respond so much differently than a month ago. IT ROLLS COAL NOW!! WOOO!!!!
http://youtu.be/5koJu6pIIkc
04-07-2012, 09:42 PM
#209
Registered User
Thread Starter
One thing I can already say is theres a LOT LESS white smoke now. Just black smoke from taking the alda off. Hopefully that means I got the IP all timed and happy. Blow by is still minimal. I could see some white smoke coming from the vent hole in the valve cover, but even with the oil fill cap loose and my revving it up, it still barely moved 
04-08-2012, 01:53 PM
#210
Registered User
Thread Starter
WOO! That head job rebuild REALLY helped. Only thing left would be new piston rings. But I can always grab another block down the road and throw it on (very distant future lol).
Here's my 1st and 2nd compression test numbers:
Cyl ..1 ....2... 3 ...4 ...5
1st 380 160 340 280 260
2nd 395 395 370 350 380
FSM Specs:
"Good" Pressure: 348 to 435
Minimum: 218
Max difference between cylinders: 43.5
Commenting on my tests:
It's interesting how my 2nd "best" cyl turned into my 2nd "worst"
and my "worst" cyl went to my "best"
The 4th cyl is out of spec by 2 psi, but I hope it's alright. I did notice that there was a large enough scratch in the 4th cyl that I could catch by fingernail on very easily. I don't know if that was my fault or if it was already there.
The leak in the rear passenger side appears to be gone. It hasn't leaked at all there yet.
Last night I filled the engine with hot water and let it sit for an hour before firing. This afternoon I fired it with the room temp cold water. It was rolling coal last night with minimal white smoke. Today it wouldn't blow any black smoke, but it blew a LOT of white smoke. I don't know what this is all about.
I'm satisfied with how it runs and how it tested, and will be putting it in the truck as soon as I can get some helping hands. I plan to attach the tranny/t-case and put it in as an assembly since I don't have a tranny jack.
One note for anyone doing a compression test: The cleanest way would be to have 2 people. Have one guy hold up on the fuel stop lever. Cover the injection pump with a clean rag. Remove all 5 injectors. After installing the compression fitting, throw the valve cover back over the head, and you should have no oil or diesel mess afterwards.
I'm going to go clean the diesel and oil off my engine. Cya later. And HAPPY EASTER!!
Here's my 1st and 2nd compression test numbers:
Cyl ..1 ....2... 3 ...4 ...5
1st 380 160 340 280 260
2nd 395 395 370 350 380
FSM Specs:
"Good" Pressure: 348 to 435
Minimum: 218
Max difference between cylinders: 43.5
Commenting on my tests:
It's interesting how my 2nd "best" cyl turned into my 2nd "worst"
and my "worst" cyl went to my "best"
The 4th cyl is out of spec by 2 psi, but I hope it's alright. I did notice that there was a large enough scratch in the 4th cyl that I could catch by fingernail on very easily. I don't know if that was my fault or if it was already there.
The leak in the rear passenger side appears to be gone. It hasn't leaked at all there yet.
Last night I filled the engine with hot water and let it sit for an hour before firing. This afternoon I fired it with the room temp cold water. It was rolling coal last night with minimal white smoke. Today it wouldn't blow any black smoke, but it blew a LOT of white smoke. I don't know what this is all about.
I'm satisfied with how it runs and how it tested, and will be putting it in the truck as soon as I can get some helping hands. I plan to attach the tranny/t-case and put it in as an assembly since I don't have a tranny jack.
One note for anyone doing a compression test: The cleanest way would be to have 2 people. Have one guy hold up on the fuel stop lever. Cover the injection pump with a clean rag. Remove all 5 injectors. After installing the compression fitting, throw the valve cover back over the head, and you should have no oil or diesel mess afterwards.
I'm going to go clean the diesel and oil off my engine.
Cya later. And HAPPY EASTER!!
Last edited by pyrojoe22; 04-08-2012 at 01:54 PM.
04-11-2012, 12:02 AM
#212
Registered User
Thread Starter

Got the motor in tonight. Damn post office has taken 5 days to get a 2 day package here. Hopefully it gets here tomorrow!! IDK what Marlin Crawler did. They sent me a FED EX package and it came from the USPS mailman. That took a week to get here. I'll get pics probably much later. Really put school off and it's about to bite me in the ass hard. Gonna be hittin the books playin catch up tomorrow before my grades suffer.
Really glad I get to work with the guy I do. I learn so much from him whenever I talk to him, and he can explain whatever he's saying, instead of just saying he read it on a forum or heard it somewhere. He has facts to back up his words. He also let me first borrow his engine hoist for 4 months, and today, his hard core racing tranny jack. This thing holds 2 tons, and lifted my tranny/t-case combo up no problem. It tilts forward/back and side-to-side. Made bolting the tranny onto the adapter plate a piece of cake since the engine was at a weird angle. One regret I have is not taking off the drag link before dropping the engine in. I hope I didn't bend it or anything, because the engine hoist started to go down (harbor freight cylinder).
Another weird thing was that on my 79 Power Wagon, when I did the tranny swap, the frame bowed out when I took the tranny cross member out. I had to use a huge steel punch to get it lined back up to bolt the Xmember back in. On my Toyota, the frame sucked it, and we had to stick a Hi-Lift between the frame rails to get it spaced back out to get the X-member bolts in. I should also note that the tranny-mount has a front and back side, so watch that when installing it!
Now the bad news.............................................. .................................
Riddarunner said he had 1" gap between firewall and valve cover with 4x4labs kit and W56 tranny. I, with 4x4labs kit and G54 have 3 1/2". Which means, you guessed it, the crank pulley is all but touching the front cross member.
Debating right now, what to do... Looks like there's minimal room between the steering box and the stock location for the A/C compressor. Power steering pump won't even think about fitting. The stock alternator location is the only thing that looks like it'll work.
For the sake of getting my truck running, I may just adapt the wiring harness to the MERC alternator if it's still good and run it. That's all I need to run the truck and the water pump pulley. I can leave my non-power steering box on and not worry about the PS pump, and I don't even know what to think about A/C at this point. Thinking I might take the summer to get the PS and A/C working and get a GM alternator. Dmarsh appears to have the right idea with his accessory locations. However, if I could move the engine/tranny back, everything up front would theoretically fit, the oil pan might not even need to be notched, and I could run the A/C condenser with little issues. Not sure I can get the mechanical fan in like PowerstrokeJoe, though. Right now, the oil filter housing looks like it'll come off pretty easily so timing the IP wouldn't be as bad as I thought.
Tomorrow I'm going to try to center the engine left to right and get it parallel with the ground. It's sitting crooked right now, but it's 3 in the morning and I'm tired of working on it. Where it sits right now, however, I will have to take a BIG chunk out of the oil pan, and pray to God it has enough room for full suspension flex. I also probably won't be able to move the steering box forward any.
If anyone has any ideas at this point, I'm all ears. I want to do it once, and do it right. If there's a simple way to space the tranny back 2 1/2" I'd love to know. I'll get a picture up later, but I had the idea of taking the 4 bolts out of the transfer case (2 on each side) and leaving the crossmember in it's stock location since it's hard to move and doesn't bolt back in easily. Then just put in some flat or some angle iron and drill 4 holes, bolt 2 holes to the t-case, and put hardened bolts with lock nuts through the other side of the plate into the transmission mount. If I'm lucky, the driveshaft will still work once I lift the rear and won't need to be shortened.
04-11-2012, 01:09 PM
#213
Registered User
so i have been reading day in and day out about this swap for weeks now witch i plan on doing soon soo this is just an idea don't know if it will work or what just trying to help....i was thing what about if u made your own custom cross member kinda like the bud built one and just make it wider and put the bolt holes 2inchs(or what every you need) up so it moves the every thing back and then u have a nice flat and stong cross member and fixes your engine placement prob!.....just a thought thou
04-11-2012, 01:14 PM
#214
Registered User
just found this this might help this is what i was thinking about
http://www.ttora.com/forum/showthread.php?t=148360
http://www.ttora.com/forum/showthread.php?t=148360
04-11-2012, 01:35 PM
#215
Registered User
Thread Starter
Ya that's exactly what I was thinking. Only problems that arise from that are these:
Lengthen the speedometer cable?
Lengthen the clutch slave cylinder line?
Enlarge shifter stick holes for tranny and t-case and possibly have interference with bench seat
Pull the engine oil sump pan further back into the drag link and require more oil sump notching and possible interference with oil pick-up
5runner, you should be fine. Joe is going to measure for me tonight and we will compare, but I believe your guys' trucks are longer in the engine bay than mine.
04-12-2012, 05:33 AM
#216
Registered User
well thats good to know...
but the speedo cable i think would bee the tricky one the other don't think it would be to hard u don't think there is enuf slack to wiggle what u need out of the speedo wire??? well not sure i have not been under my truck in a few days now is that a wire or cable? because if it is a wire then it won't even be a problem!
on another note i was wondering how u did the wiring in the truck for all the gages and idot lights and the computer because i know getting the engine running is not hard but the wire is uslay were swaps get tricky but since it this engine has no eltroncics jw how every one is doing it??
04-12-2012, 10:24 AM
#217
Registered User
Join Date: Apr 2011
Location: Sedalia, MO
Posts: 317
Likes: 0
Received 0 Likes
on
0 Posts
well thats good to know...
but the speedo cable i think would bee the tricky one the other don't think it would be to hard u don't think there is enuf slack to wiggle what u need out of the speedo wire??? well not sure i have not been under my truck in a few days now is that a wire or cable? because if it is a wire then it won't even be a problem!
on another note i was wondering how u did the wiring in the truck for all the gages and idot lights and the computer because i know getting the engine running is not hard but the wire is uslay were swaps get tricky but since it this engine has no eltroncics jw how every one is doing it??
but the speedo cable i think would bee the tricky one the other don't think it would be to hard u don't think there is enuf slack to wiggle what u need out of the speedo wire??? well not sure i have not been under my truck in a few days now is that a wire or cable? because if it is a wire then it won't even be a problem!
on another note i was wondering how u did the wiring in the truck for all the gages and idot lights and the computer because i know getting the engine running is not hard but the wire is uslay were swaps get tricky but since it this engine has no eltroncics jw how every one is doing it??
04-12-2012, 02:22 PM
#219
Registered User
Thread Starter
Joe and I measured and both of our engine bays appear to be identical in length from front to rear.
89LC How far did you move your tranny back and what tranny did you even use??
I'm trying to get a radiator ordered tonight and just make something work for now. I'm thinking about drilling my motor mounts to allow the motor to be set stock or shifted back 2" later on if I have cooling issues and need more room.
I'm looking at aluminum, crossflow radiators on summit. I have it narrowed down to 5 right now. The stock Toyota and Merc rad's were both down flow. Everyone says crossflow will cool way better. The TOY and MERC rad's both had DUAL-ROWS. Should I get a DUAL or SINGLE row? I understand the thermodynamics of it all, but in reality I just need something that will work. I have one that's the perfect size but it's SINGLE row. I'll get some pics when it's light out, but since I have the front spring hanger and I welded it fully on, I believe I can cut the top of my frame cross member out if I have to. I'm looking at narrow rad's that would slide inside of it. Otherwise I'll get a really wide radiator that will sit on top of it, and just cut the body out.
Last edited by pyrojoe22; 04-12-2012 at 06:47 PM.
04-12-2012, 09:47 PM
#220
Registered User
Thread Starter
Okay, depending on many variables yet to be determined, here is what I've gathered with about 4 hours of research.
This radiator http://www.summitracing.com/parts/GRI-1-25182-H/
if this one is too small??? http://www.summitracing.com/parts/PLI-431529/
The first is dual row, second is single row. Using the 2nd one will give me the perfect space to run the A/C condenser.
I'll cut the lower body support and either:
Shove the radiator as far forward as necessary to run the mechanical fan (Need fan dimensions since I don't have one on hand)
Or shove it as close to the motor as safely possible and run a 2" thick pusher up front http://www.summitracing.com/parts/BCI-75058/
Or if I can use the thinner radiator, then run the A/C condenser and run the "puller" version of that fan.
If it doesn't rain tomorrow, I'll rip the oil pan off and see where my steering will theoretically hit, and see how far I can pull the engine back. I may have to rotate the oil pickup, but I have an aluminum welder. I'd like to leave it alone unless absolutely necessary. The steering/oil pan scares the ˟˟˟˟ out of me. It's TIGHT! I bought a steering box relocation plate kit from Low Range, so I can tilt the pitman arm down and hopefully keep the drag link from coming up as far. I'm really confused as to what order I should do everything in. Ready to be done with this project for a while.
Just need some input on which radiator to use and what those fan dimensions are.


