
94' Ex. Cab 2UZ Swap
 Mar 9, 2012 | 04:18 AM
#21

Thread Starter
Registered User
Joined: Jan 2011
Posts: 88
Likes: 0
From: Minneapolis, MN
Update. Since we're super slow, I have no choice but to finish this thing. I am finishing up the wiring up everything, but the 2UZ ecu is bigger than the 3VZ ecu, so I will need to figure something out.

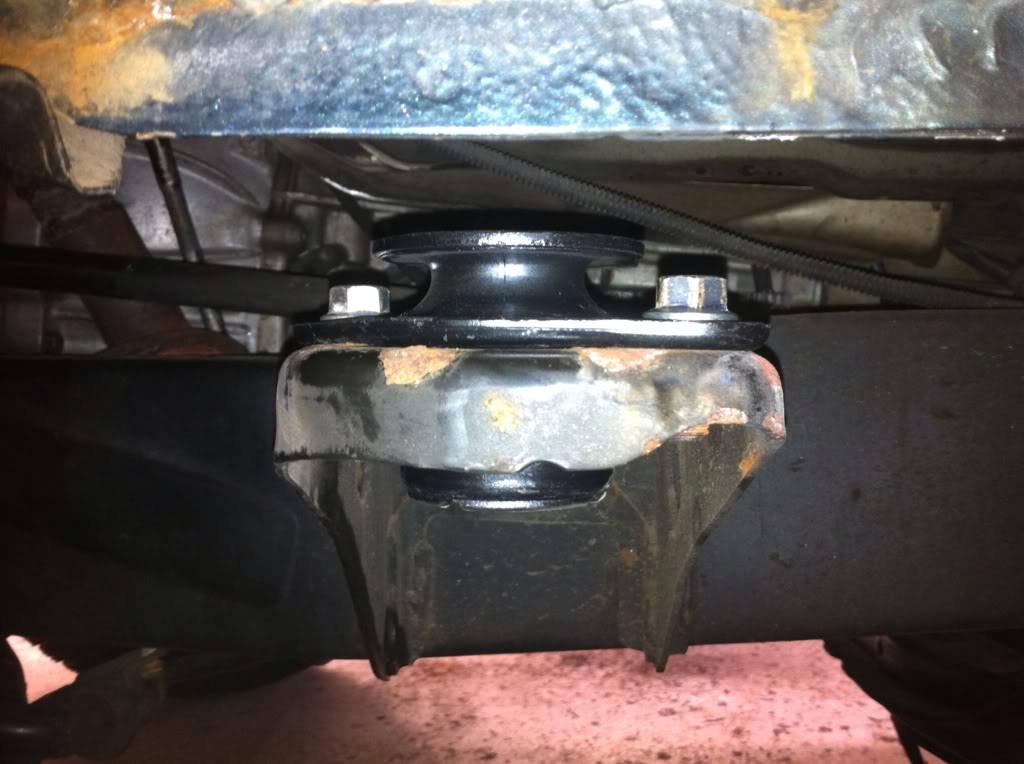
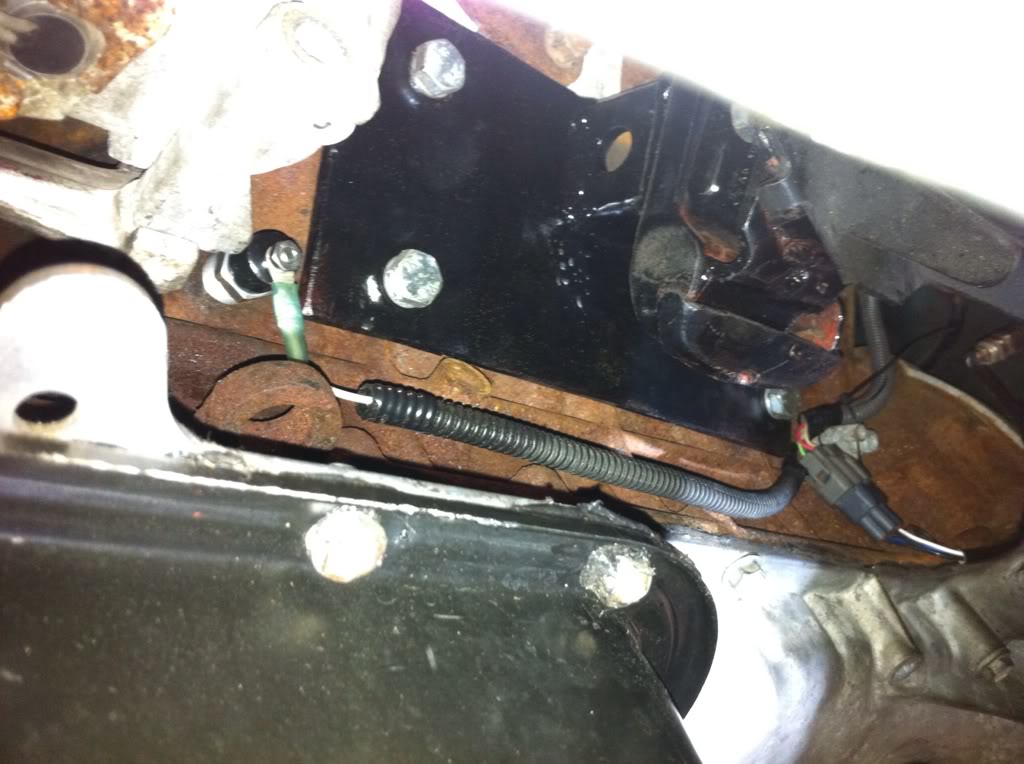
Replaced the 2 obvious blown body mounts.

I had to use the torch to get the bolts loose, but with patients comes success.
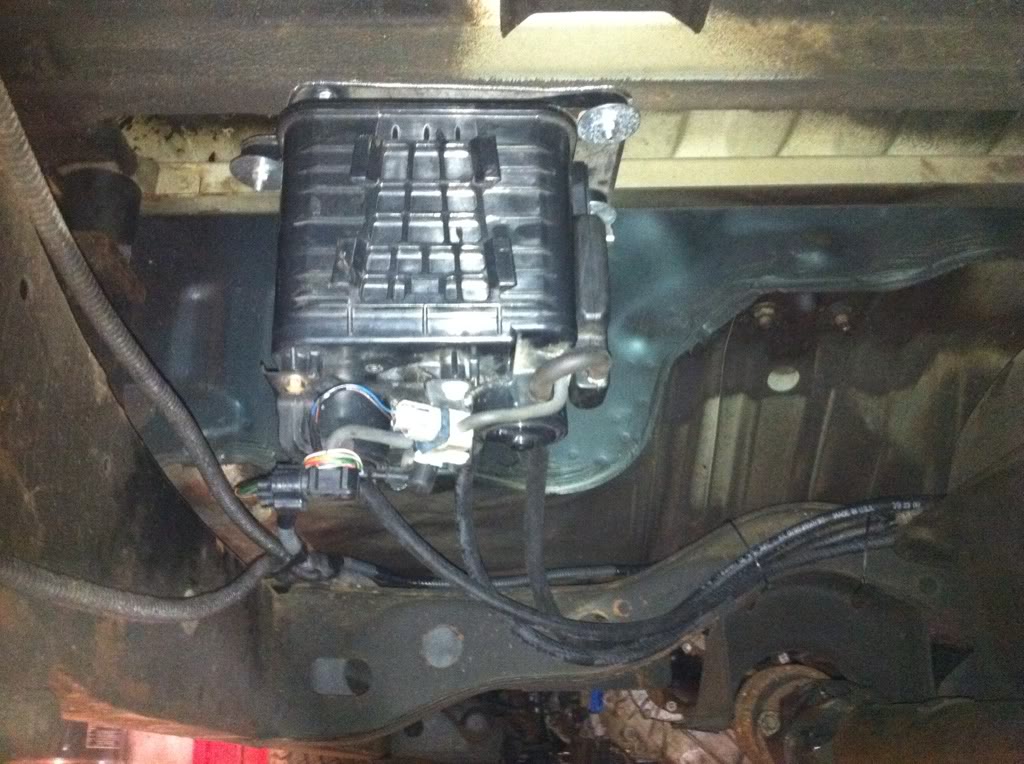
Since the Pickup's engine bay is already cramped, I wasn't able to stick the charcoal canister in it, like the Tundra. So, I put it in under the bed, right behind the cab, and where I had space.
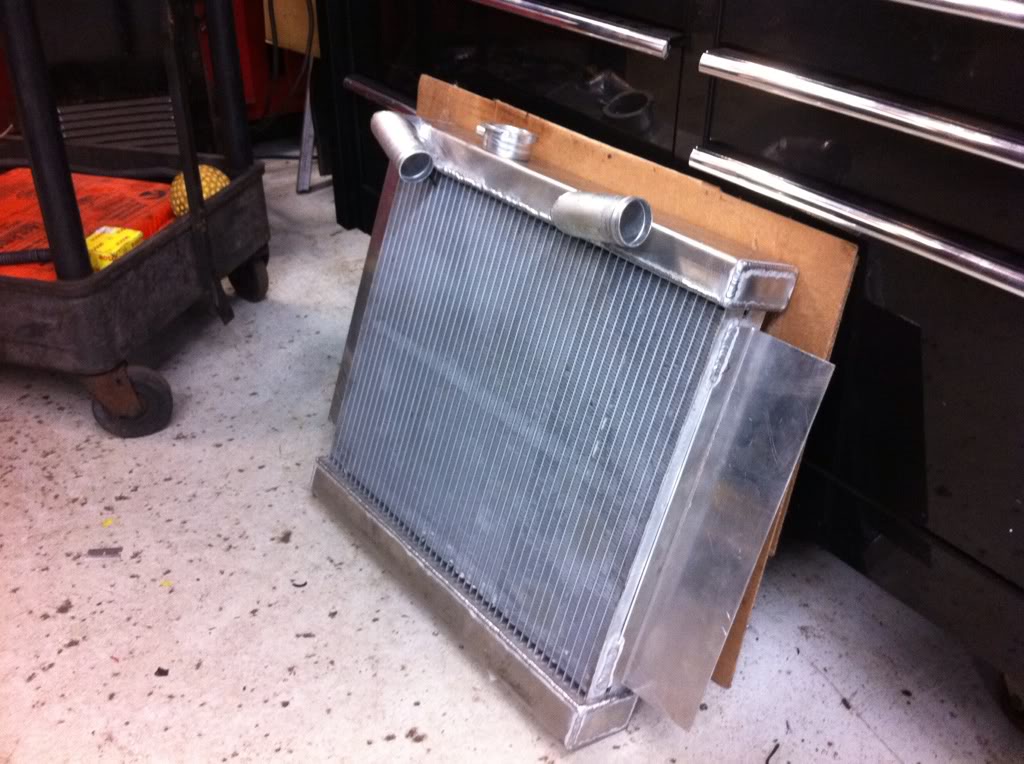
Because no easy solution was found, my boss called in a favor from the local radiator specialist and had one made.
All wired and plumbed, minus a few things here and there. I had to move the PS resevior to the back of the bay due to filter space.

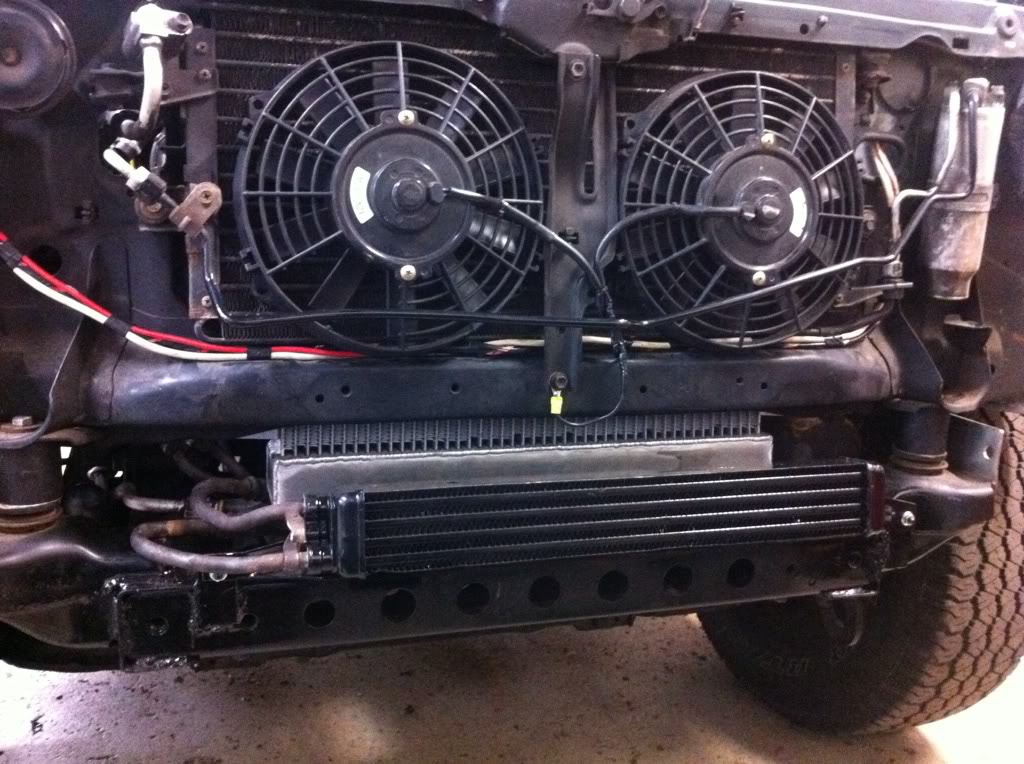
Since the radiator doesn't have a trans cooler, my boss found a left over SAAB cooler and lines that were bent and adapter to fit. The cooler is supported by two tabs welded to the frame with studs to make installation easy, and it clears the front bumper.
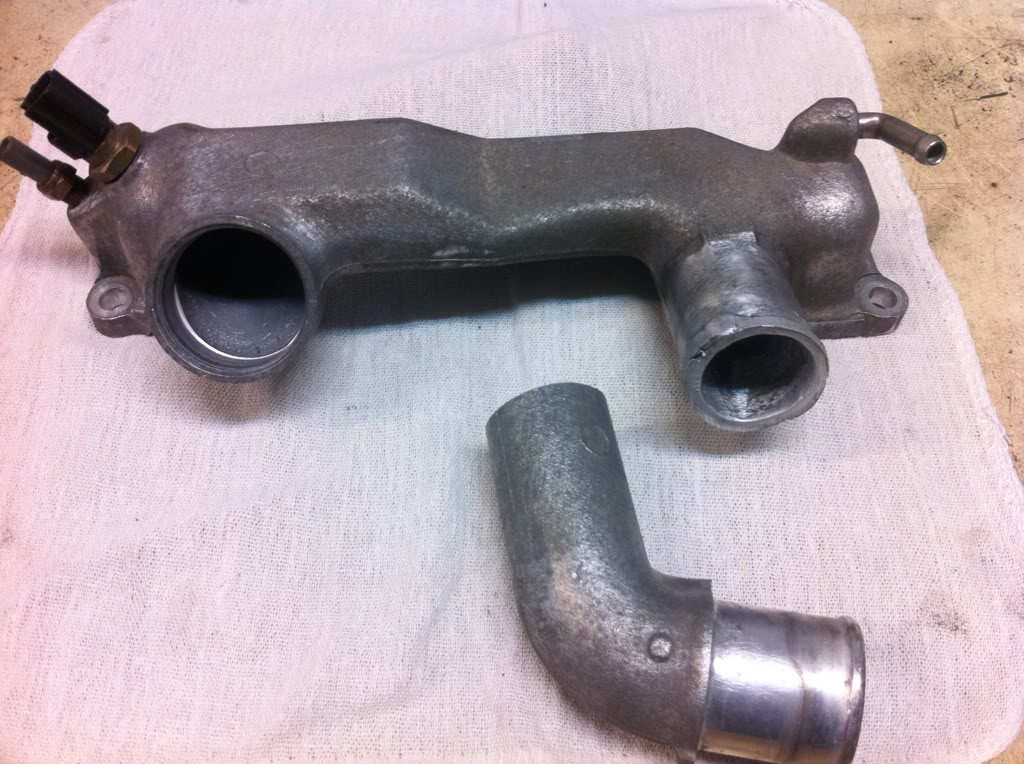
In order to make the radiator work, the coolant crossover sporting the upper radiator hose got a haircut, a large one. Than a bead was put on and shaped to keep the hose in place.
Replaced the 2 obvious blown body mounts.
I had to use the torch to get the bolts loose, but with patients comes success.
Since the Pickup's engine bay is already cramped, I wasn't able to stick the charcoal canister in it, like the Tundra. So, I put it in under the bed, right behind the cab, and where I had space.
Because no easy solution was found, my boss called in a favor from the local radiator specialist and had one made.
All wired and plumbed, minus a few things here and there. I had to move the PS resevior to the back of the bay due to filter space.
Since the radiator doesn't have a trans cooler, my boss found a left over SAAB cooler and lines that were bent and adapter to fit. The cooler is supported by two tabs welded to the frame with studs to make installation easy, and it clears the front bumper.
In order to make the radiator work, the coolant crossover sporting the upper radiator hose got a haircut, a large one. Than a bead was put on and shaped to keep the hose in place.
Last edited by 3uzfte; Aug 30, 2013 at 03:29 PM. Reason: Photobucket
Mar 9, 2012 | 04:51 PM
#22
Thread Starter
Registered User
Joined: Jan 2011
Posts: 88
Likes: 0
From: Minneapolis, MN
Update.
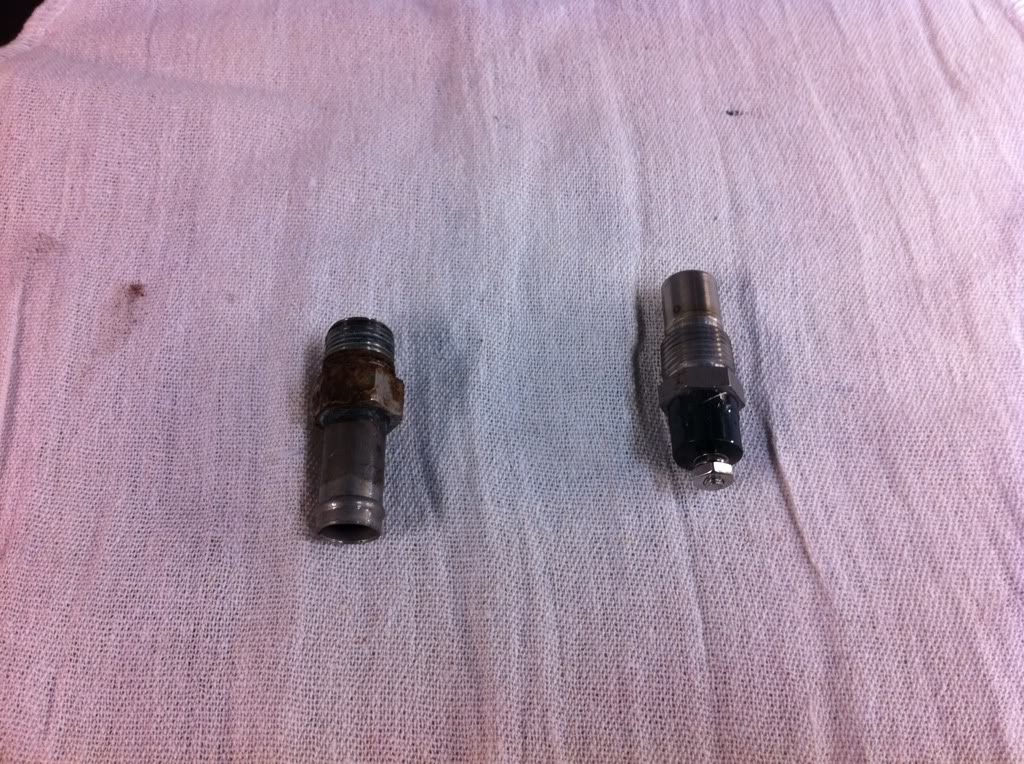
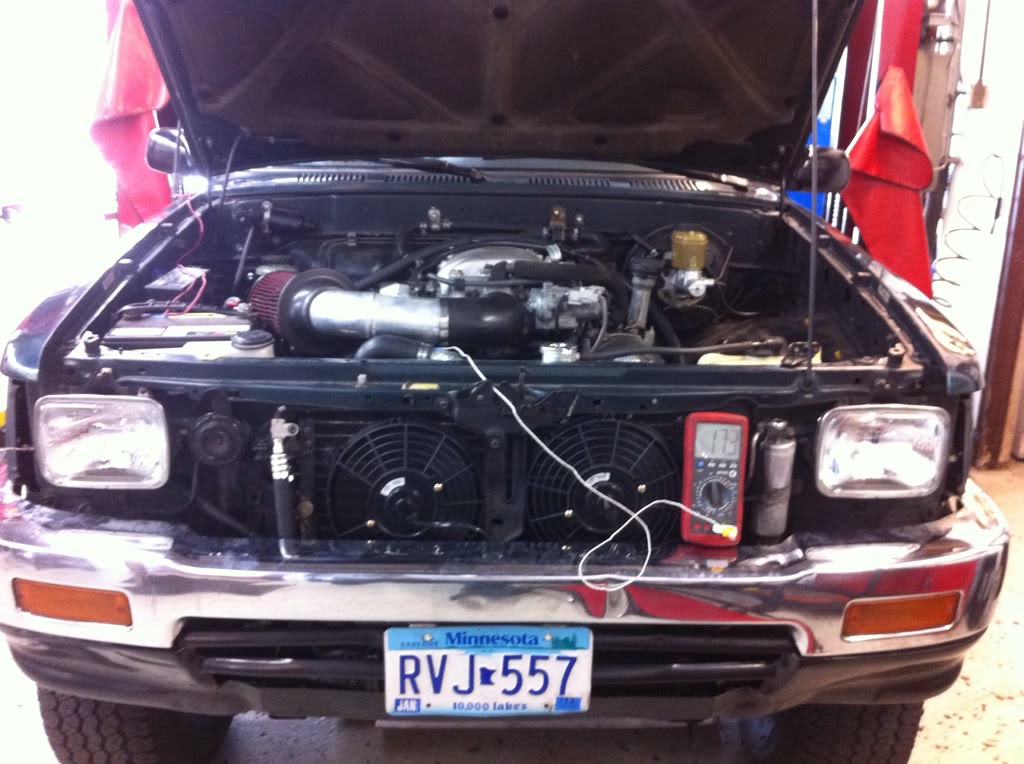
Since the 2UZ is cooled by a mechanical fan, and there is zero space for one, eFans are the obvious choice. I had a hard time fitting a single Spal fan, so I ended up using the dual Tundra AC pusher fans wired up to a thermostatic switch. I was struggling where to put it, but remembered I'm not using the oil filter cooler, so I removed the barbed nipple that was threaded into the block behind the AC compressor.
I had to wrap the wire from the fuse box, around the back side, than along side the motor to the thermo switch at the back of the AC compressor.
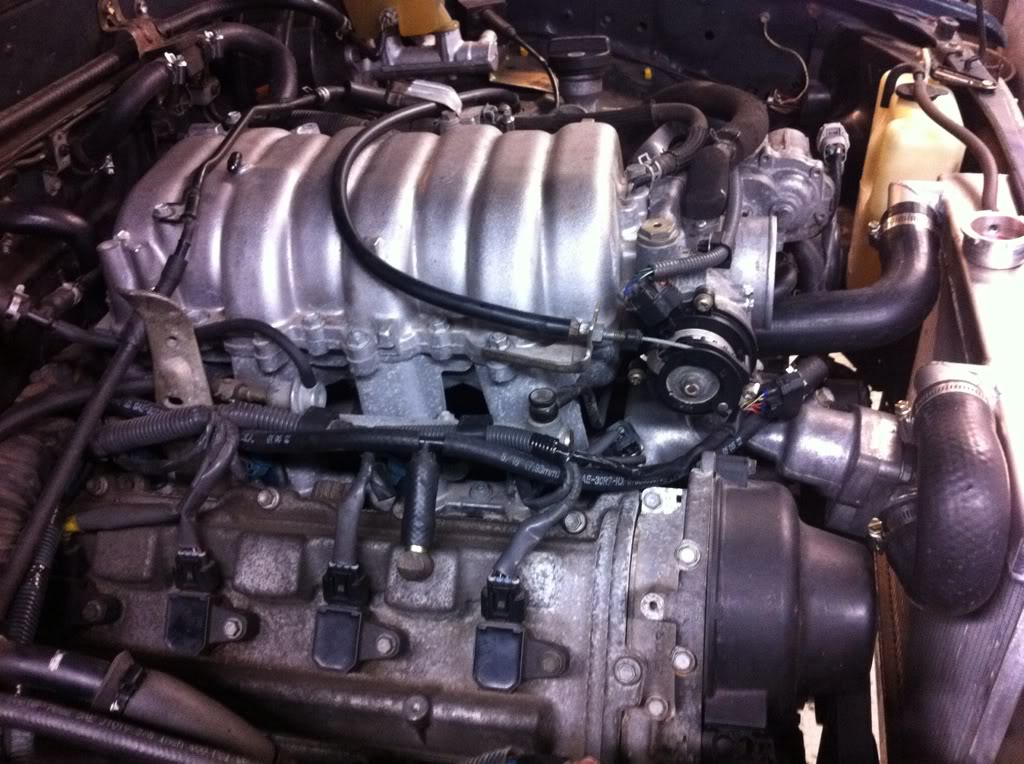
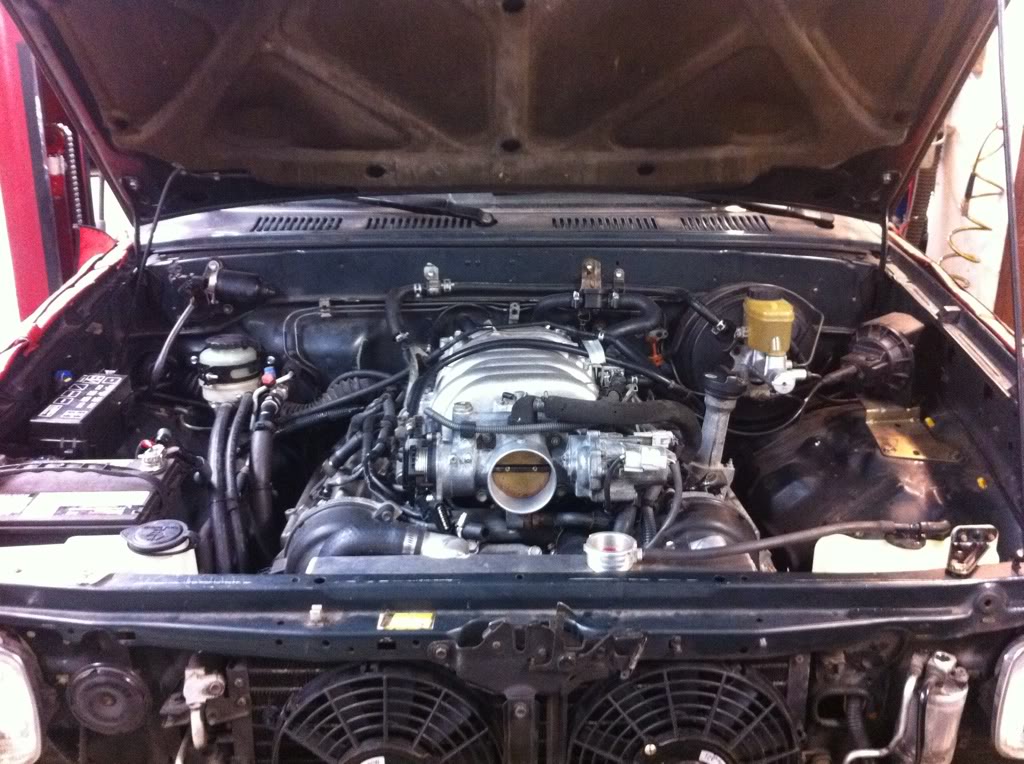
Here are a couple shots of the engine bay all plumbed, wired, stuffed, and tucked.
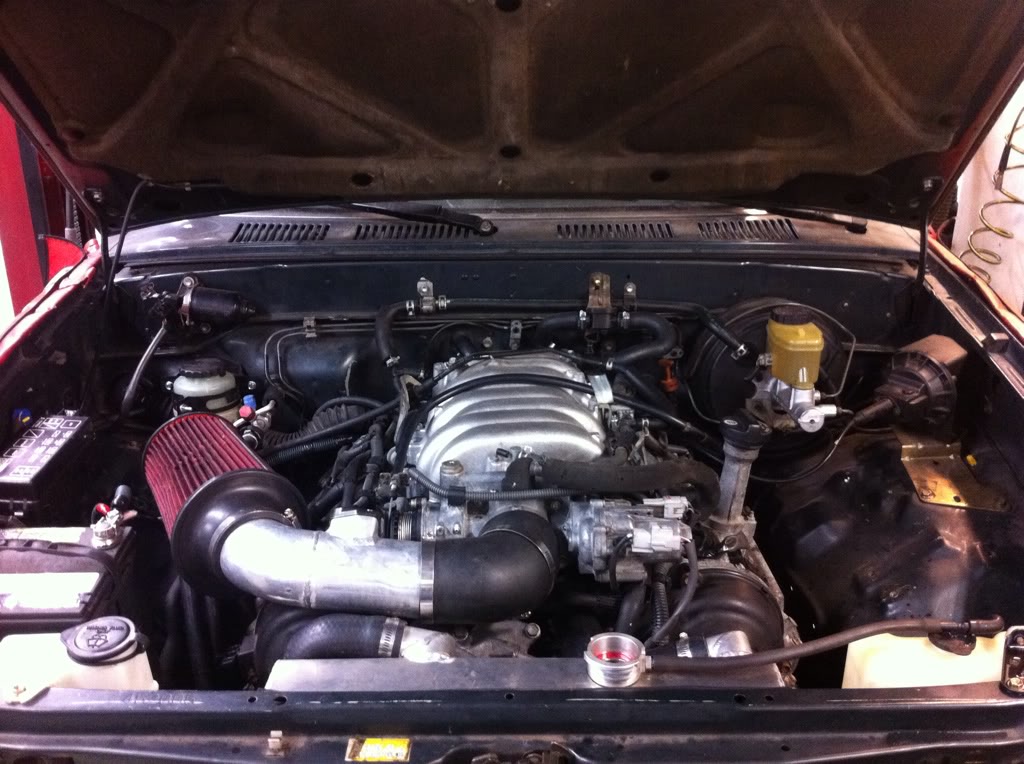
It was quite difficult coming up w/ solutions for the radiator, cooler, hoses, wiring, etc..
Good shot of driver's side of the engine bay w/o the air intake.
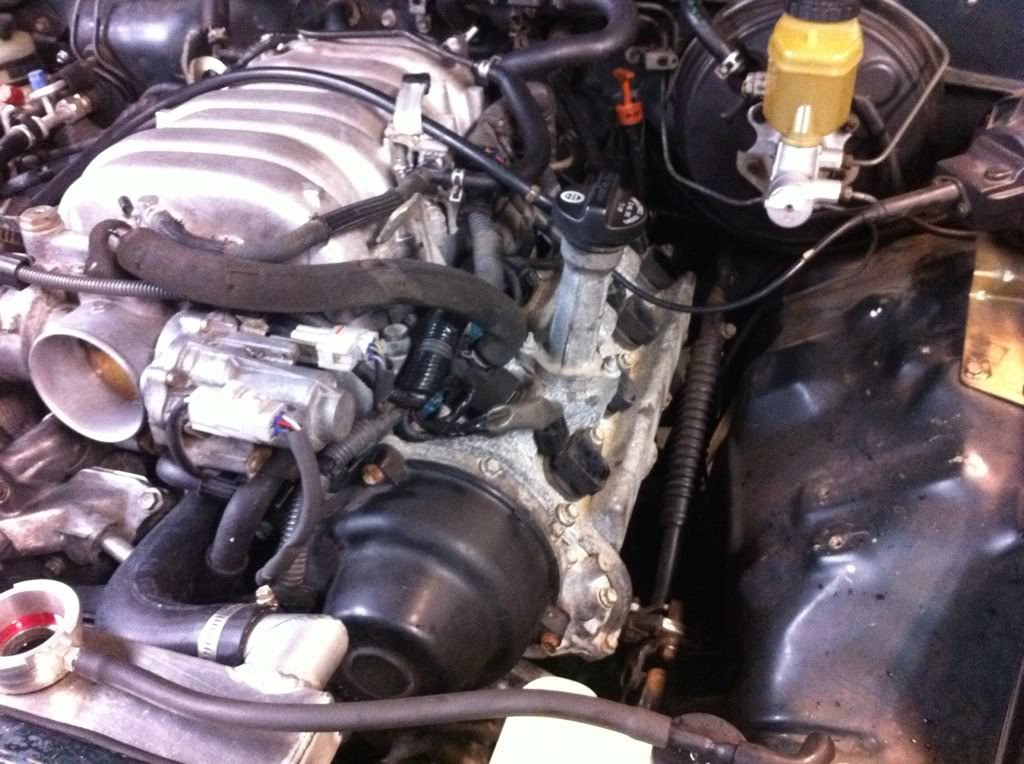
And one w/o the air intake.
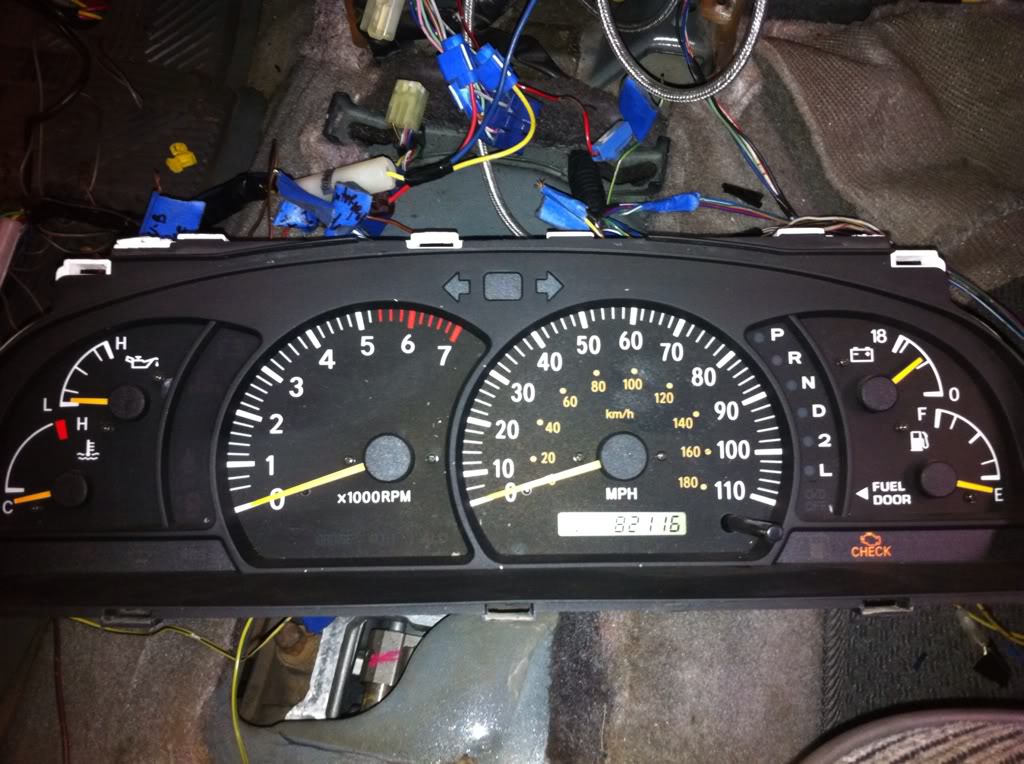
Cluster semi wired up. 250k to 82k, like that, boom.
After all that, it's started and when it did it scared me as it's running open headers and was quite loud. I've got some work to do, but I should be able to pull it in and out next week under it's own power. No doubt I'll have bugs, but it should be downhill from here.
Since the 2UZ is cooled by a mechanical fan, and there is zero space for one, eFans are the obvious choice. I had a hard time fitting a single Spal fan, so I ended up using the dual Tundra AC pusher fans wired up to a thermostatic switch. I was struggling where to put it, but remembered I'm not using the oil filter cooler, so I removed the barbed nipple that was threaded into the block behind the AC compressor.
I had to wrap the wire from the fuse box, around the back side, than along side the motor to the thermo switch at the back of the AC compressor.
Here are a couple shots of the engine bay all plumbed, wired, stuffed, and tucked.
It was quite difficult coming up w/ solutions for the radiator, cooler, hoses, wiring, etc..
Good shot of driver's side of the engine bay w/o the air intake.
And one w/o the air intake.
Cluster semi wired up. 250k to 82k, like that, boom.
After all that, it's started and when it did it scared me as it's running open headers and was quite loud. I've got some work to do, but I should be able to pull it in and out next week under it's own power. No doubt I'll have bugs, but it should be downhill from here.
Last edited by 3uzfte; Aug 30, 2013 at 03:59 PM. Reason: Photobucket
Mar 18, 2012 | 02:41 AM
#23

Registered User
Joined: Mar 2012
Posts: 2
Likes: 0
Can I get you to put up some more pics of the motor mounts? Im in the process off putting a 2uz in my 86 4runner and would like some ideas. Ive been swapping over all the wiring harnesses, ecus, heater core, ac, blower motor, brake booster, and wiper motor.
Mar 20, 2012 | 10:35 AM
#24
Thread Starter
Registered User
Joined: Jan 2011
Posts: 88
Likes: 0
From: Minneapolis, MN
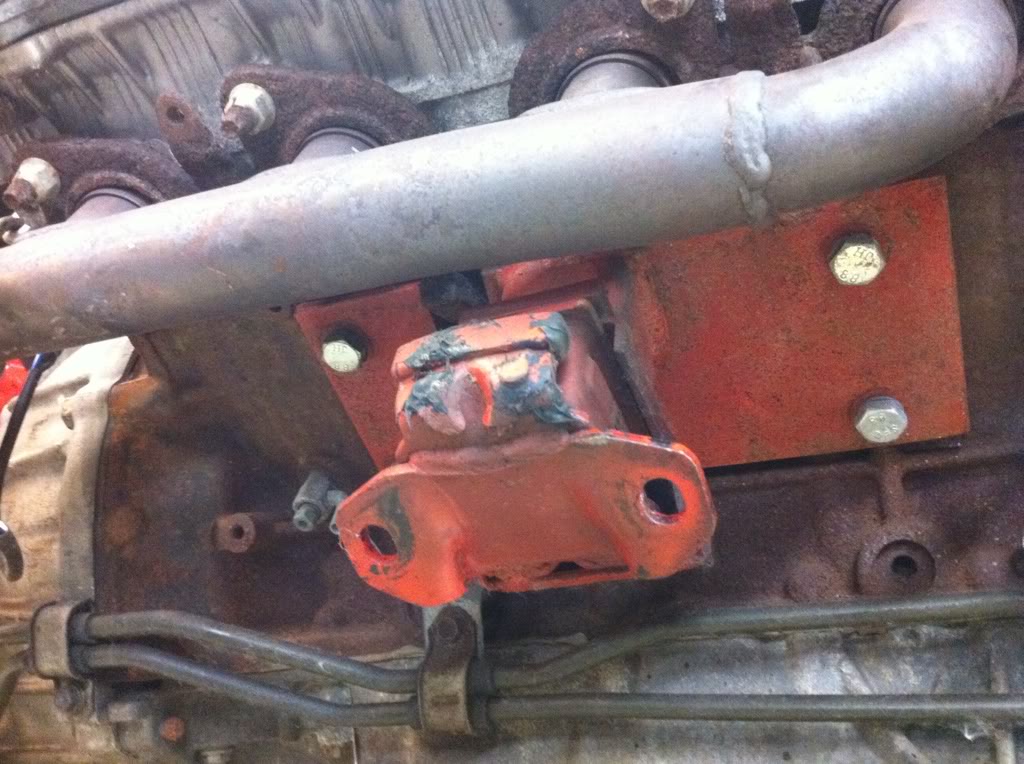
Here are two pics of the mounts that didn't make the thread. In the picture you will notice they are orange, once the motor was installed, I went back and fine tuned the heights of each mount, that's when they got painted black. Although the mount design didn't change, the height of engine did.
Passenger side.

Driver's side.

Hope they help.
Passenger side.
Driver's side.
Hope they help.
Last edited by 3uzfte; Aug 30, 2013 at 04:01 PM. Reason: Photobucket
Mar 27, 2012 | 06:39 PM
#25
Thread Starter
Registered User
Joined: Jan 2011
Posts: 88
Likes: 0
From: Minneapolis, MN
Update. Been grinding it out at work. Boss is riding my a$$ about finishing this soon, this ain't Overhaulin'....
I had to cut the sheit out of the shifter housing for the TC shifter, probably went a bit over board.
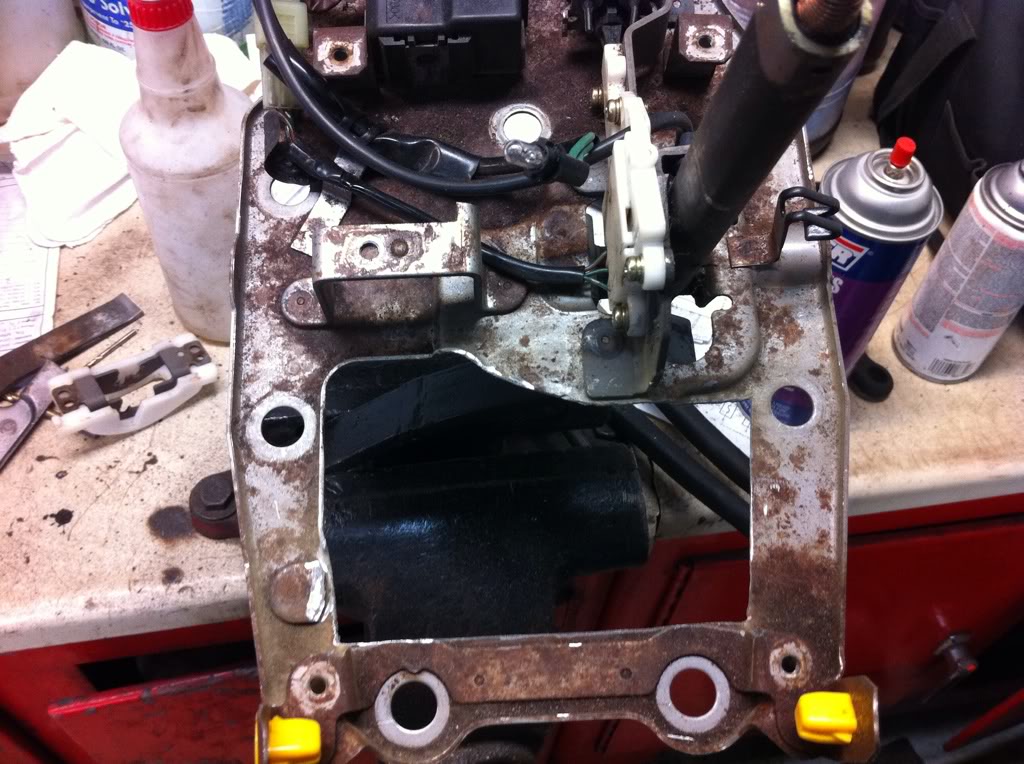
I did a lot of test fitting...
Right now, he only wants 2H and 4H, but he's deciding if we're going to cut housing to get 4L.
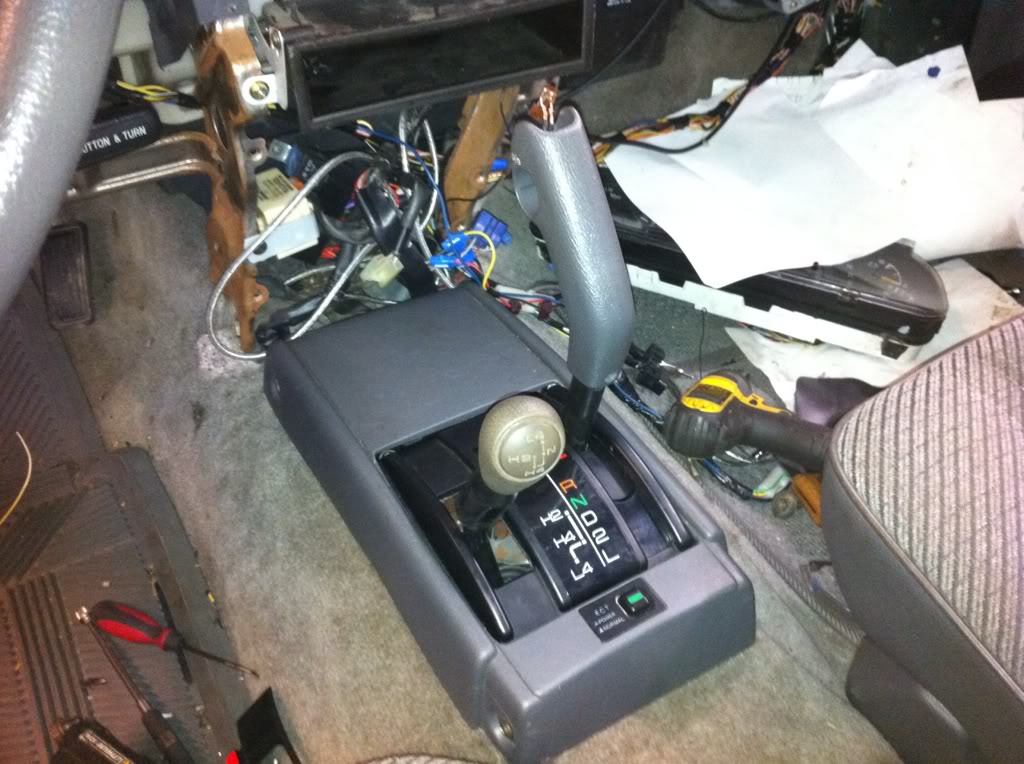
Not sure if it's factory, it came with the Tundra tranny.
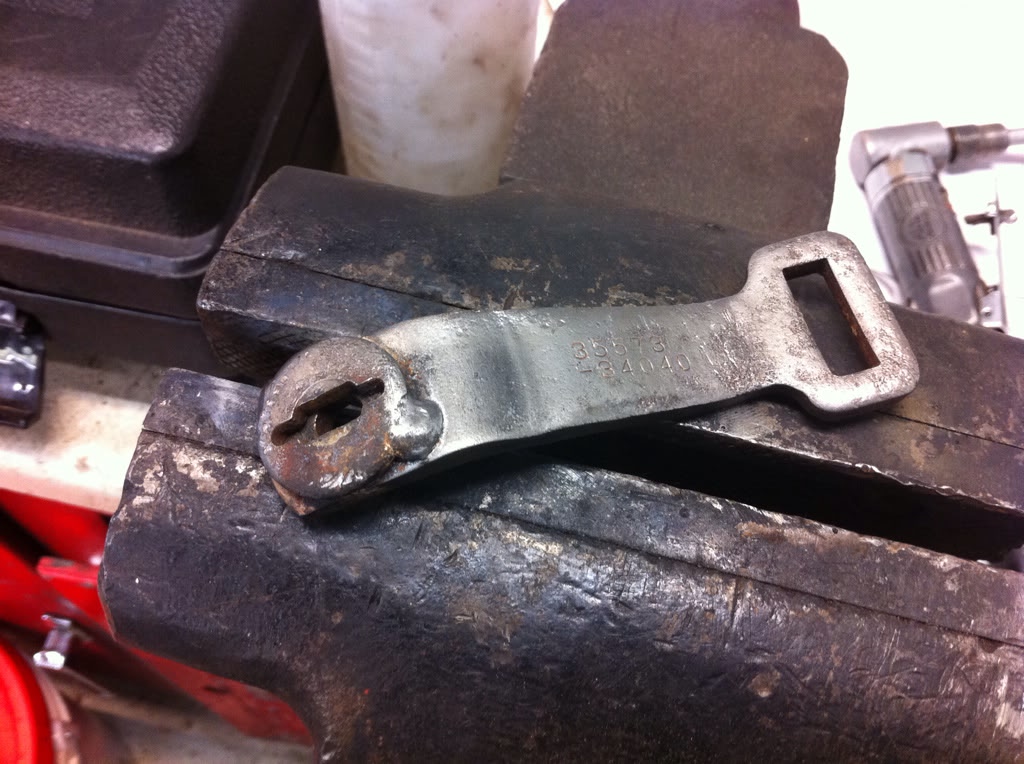
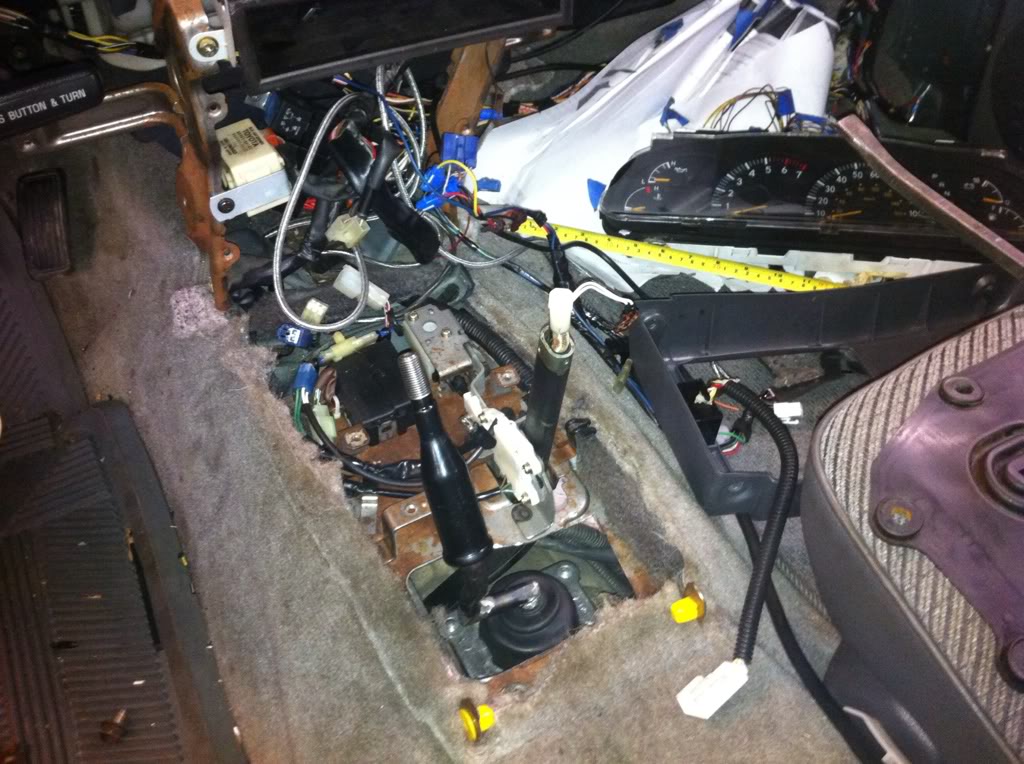
I took bar stock and copied the existing shifter arm and added 1" to the length to clear the TC, then welded it up to the shifter.
I originally started out with one hole, but than kept drilling to ensure the chances of the proper ratio for the shifter and tranny gear selector.
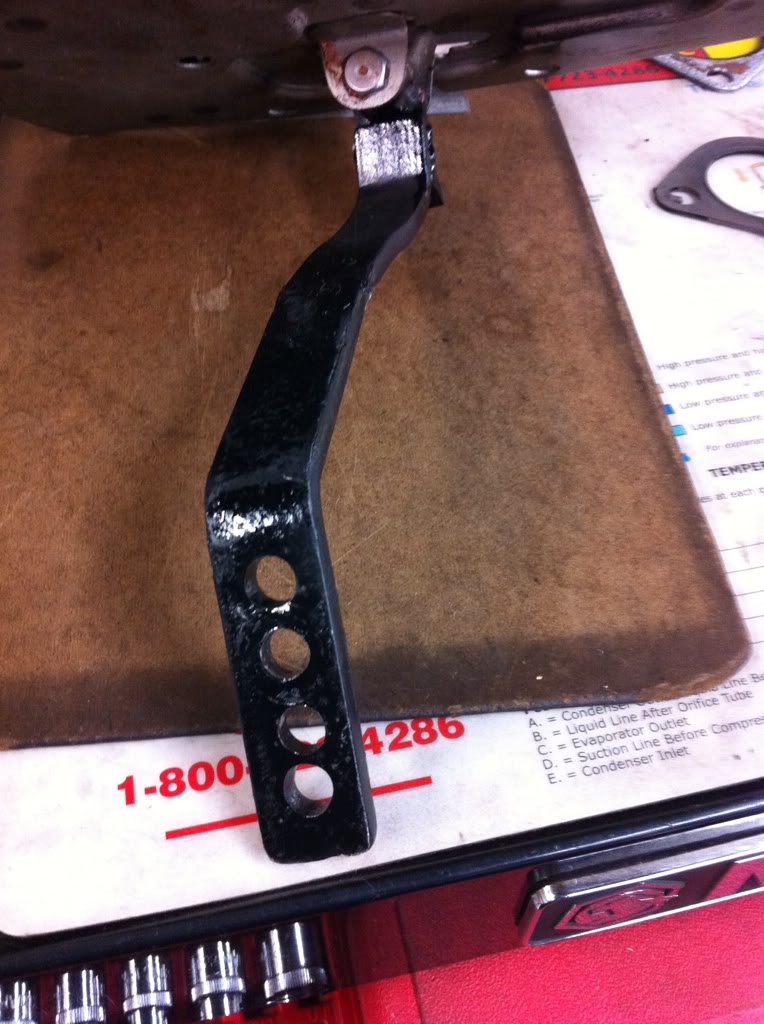
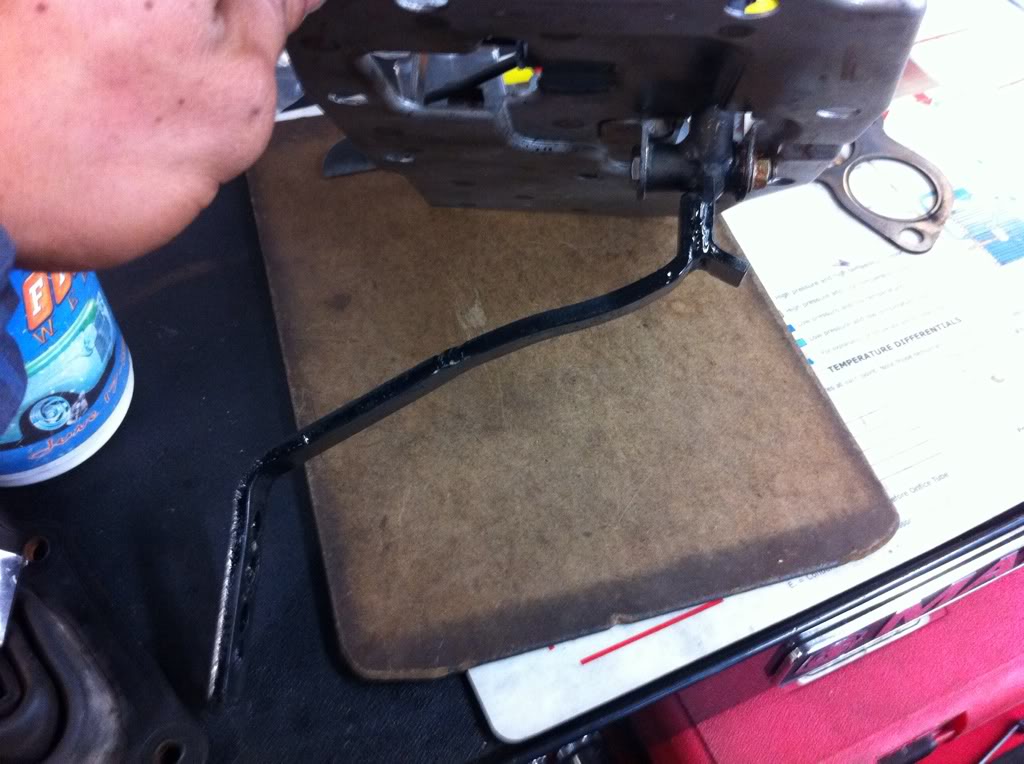
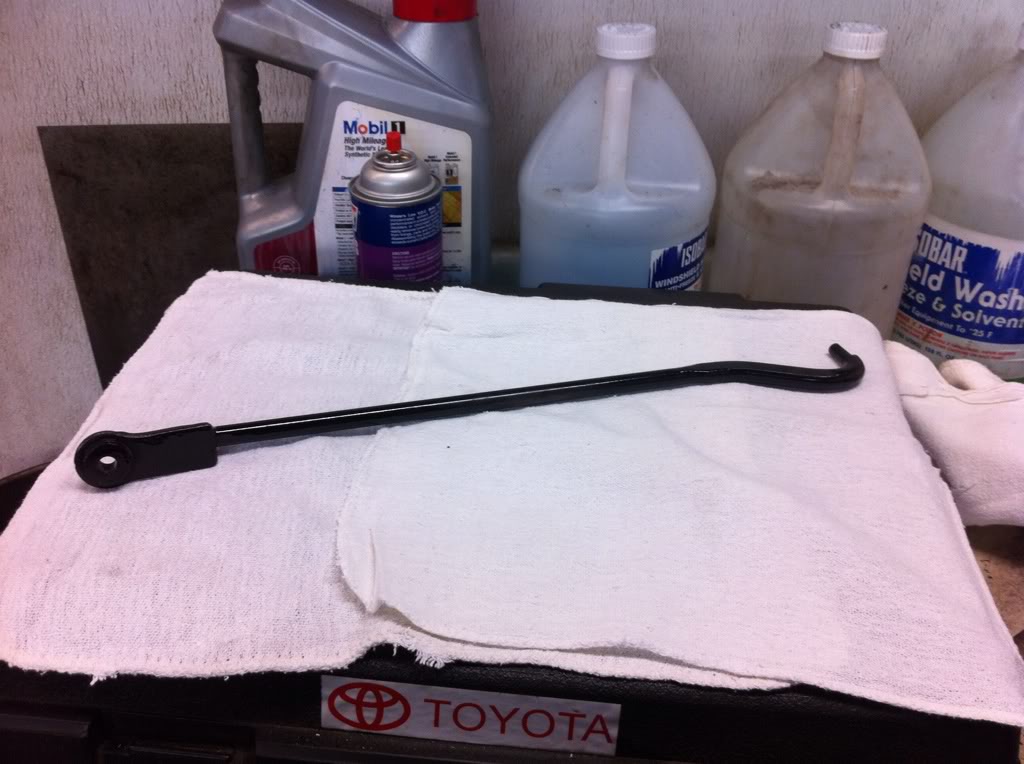
I took an old shift rod and cut the ends off, than took 1/2" steel rod and welded the ends to it. I was going to make the rod adjustable, but having the different holes in the shifter, and the lever on the tranny, both allow for adjustability.
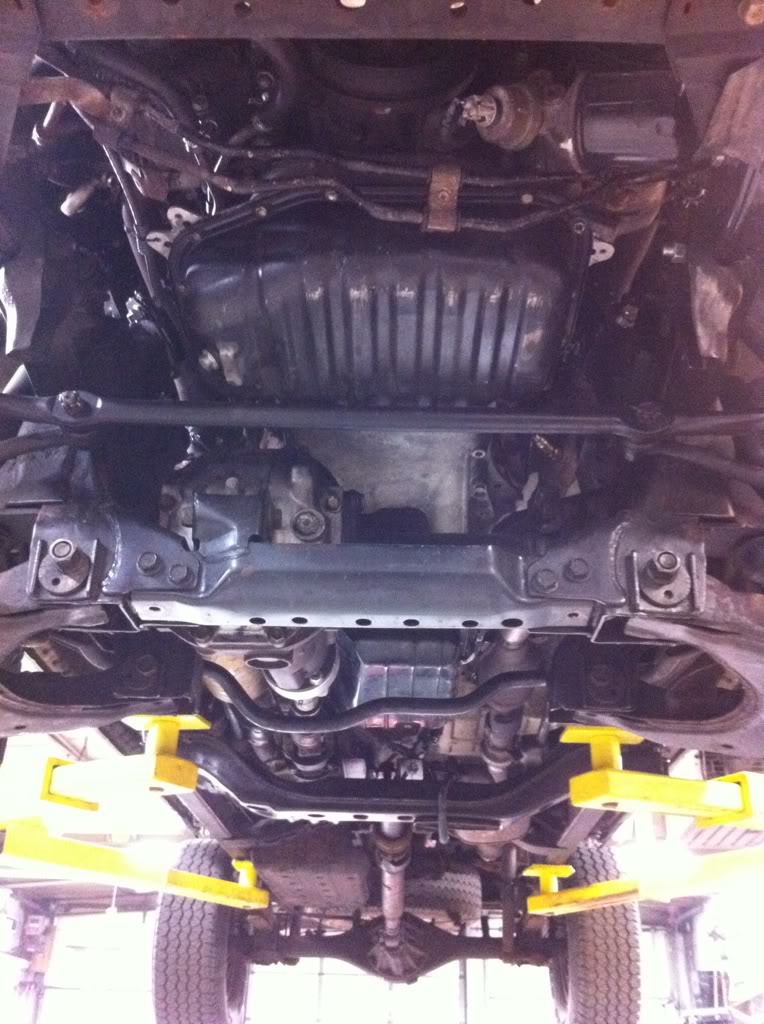
Exhaust is done.
A bit tight, but works fine.
Underneath.
I had to cut the sheit out of the shifter housing for the TC shifter, probably went a bit over board.
I did a lot of test fitting...
Right now, he only wants 2H and 4H, but he's deciding if we're going to cut housing to get 4L.
Not sure if it's factory, it came with the Tundra tranny.
I took bar stock and copied the existing shifter arm and added 1" to the length to clear the TC, then welded it up to the shifter.
I originally started out with one hole, but than kept drilling to ensure the chances of the proper ratio for the shifter and tranny gear selector.
I took an old shift rod and cut the ends off, than took 1/2" steel rod and welded the ends to it. I was going to make the rod adjustable, but having the different holes in the shifter, and the lever on the tranny, both allow for adjustability.
Exhaust is done.
A bit tight, but works fine.
Underneath.
Last edited by 3uzfte; Aug 30, 2013 at 04:11 PM. Reason: Photobucket


 May 2, 2012 | 08:02 PM
#28

Registered User
Joined: Dec 2011
Posts: 93
Likes: 0
Any updates? I'm going to eventually put one in my 90 4runner. Mine should be alot easier, i'm going to use the tranny that came with the motor and I will be taking out the 4wd as it's a longtravel prerunner, and I'm not worried about the wirring as I will be doing away with the stock dash. I'm going to modify the V8 crossmember and make engine mounts. do an exhaust and plumb the fuel lines and I should be good.
May 5, 2012 | 09:58 AM
#29
Thread Starter
Registered User
Joined: Jan 2011
Posts: 88
Likes: 0
From: Minneapolis, MN
Sure, you got a good, high paying job for me?
Any updates? I'm going to eventually put one in my 90 4runner. Mine should be alot easier, i'm going to use the tranny that came with the motor and I will be taking out the 4wd as it's a longtravel prerunner, and I'm not worried about the wirring as I will be doing away with the stock dash. I'm going to modify the V8 crossmember and make engine mounts. do an exhaust and plumb the fuel lines and I should be good.
1. The 2UZ in stock form is quite tall, this truck has a 2" BL, custom mounts, and .5" engine mount spacers to clear AC compressor from steering gear. The LS400 oil pan is about 1" shorter, plus we aren't running a steering stabilizer, and spaced the steering gear out .5". AFAIK, the V8 crossmember will not bolt into the hilux platform, our's didn't. And you will still likely have to modify the driveshaft.
2. Radiator and cooling will take some thought as there's very little room to work with and there is a need for larger capacity with more heat. We are currently having cooling issues with a custom radiator, 2 small eFans, and a mechanical direct drive fan.
3. The vehicle speed sensor, or VSS gets fed from the tranny to the cluster, to the ECU, so you may experience some funny shift patterns. 2WD will simplify it, but not by much, just remember you like using different gear and wheel size than the donor vehicle too.
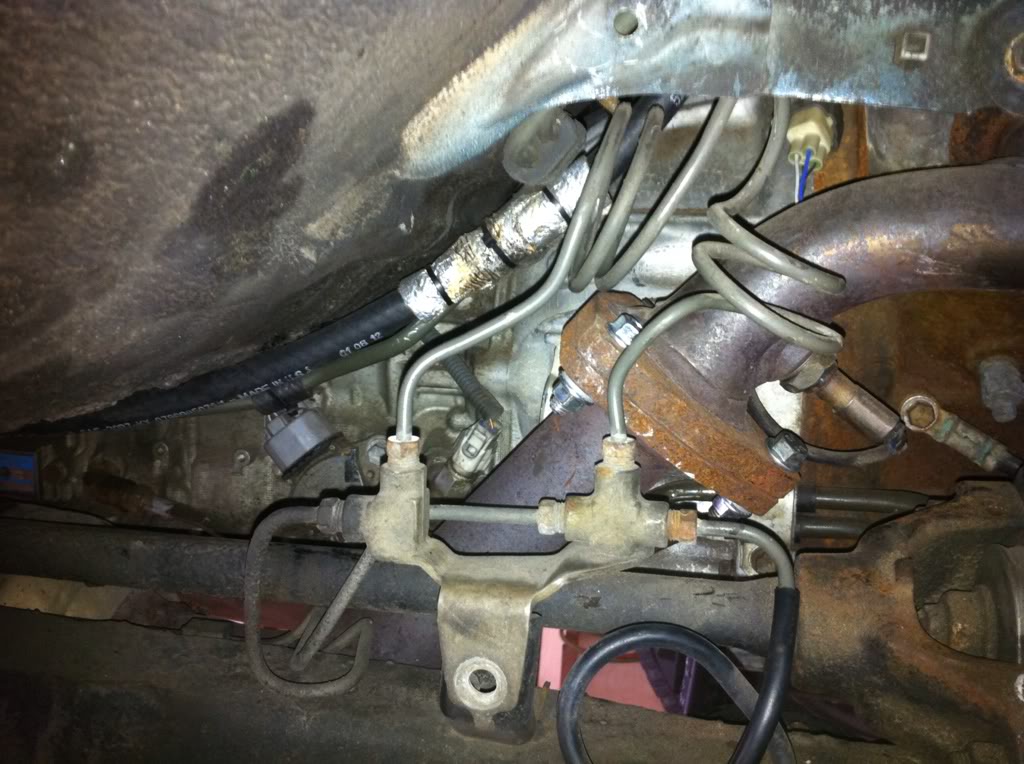
4. Current fuel lines and pump will support the V8, but you will have to massage/bend the lines to get them to fit right. Not sure if your running EVAP, but I didn't like the idea of the canister in the engine bay, it looked abnormal.
5. Power steering lines will fit, but have to be re-bent to fit around steering gear.
That's about it for now.
Update.
The swap is pretty much complete. We are now sorting out issues.
1. The first issue would be overheating. Before the temperatures got around 70*, there wasn't a problem. On the maiden voyage, sitting in traffic she got hot. I figured out the previous owner flipped the fan blades around as puller fans. So even though I had them wired up to pull, the blades weren't. With that sorted out, I was expecting much better results. I know the thermostats new, no oil cooler, and the trans cooler is external, so there's no additional heat, but the temp still ticks up. My boss decided to buy a Flex-o-lite fan and cut it down to fit, and w/ no clutch it's always pulling a small amount of air even though it's like 12". After 30 mins of idling...
Radiator inlet to intake
Radiator outlet to thermostat.
[I
Last edited by 3uzfte; Aug 30, 2013 at 07:23 PM.
Sep 23, 2012 | 06:24 PM
#31
Thread Starter
Registered User
Joined: Jan 2011
Posts: 88
Likes: 0
From: Minneapolis, MN
Of course.
Driver's exhaust manifold.

Passenger exhaust manifold.
Driver's header flange.
Passenger side header flange.
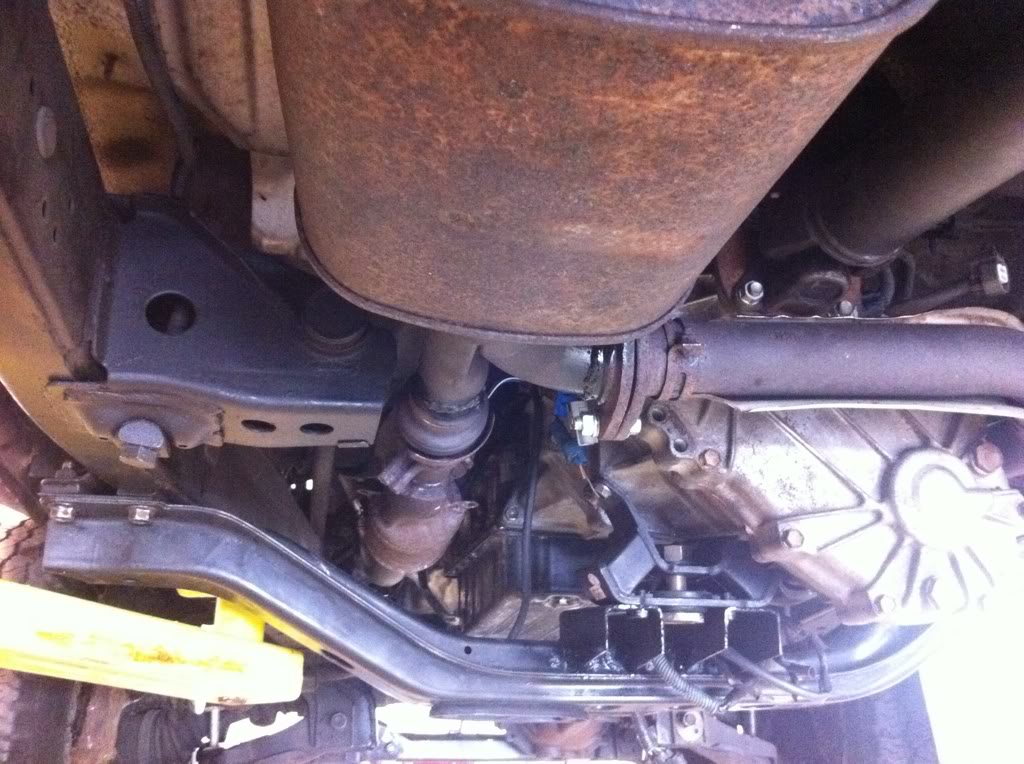
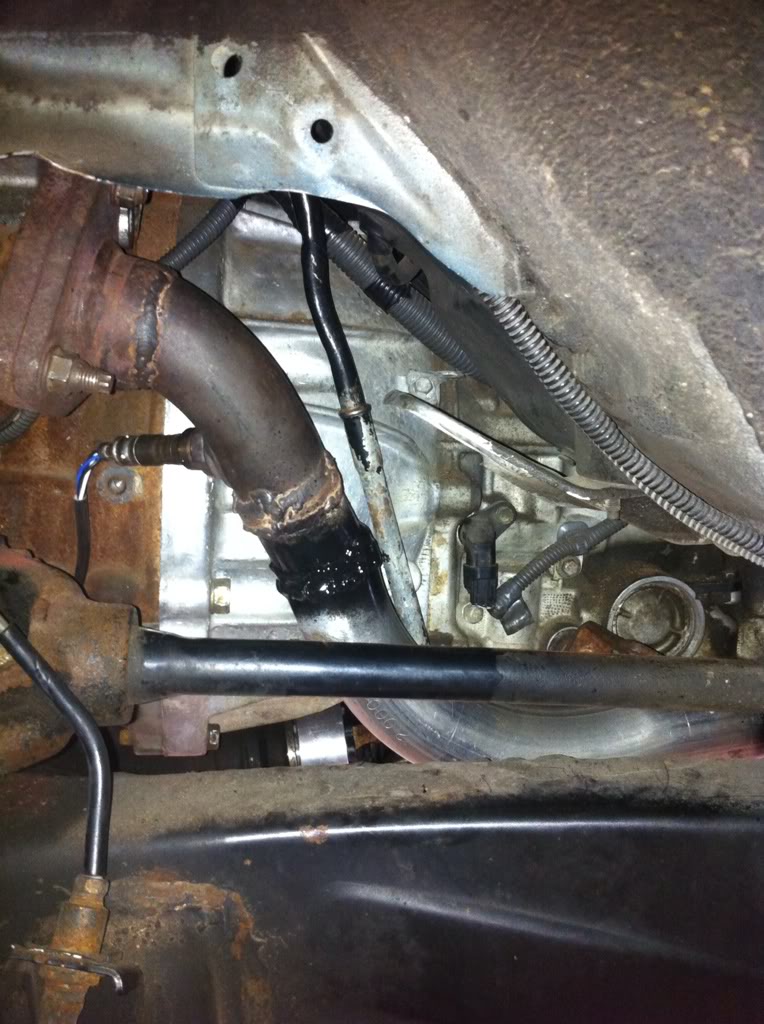
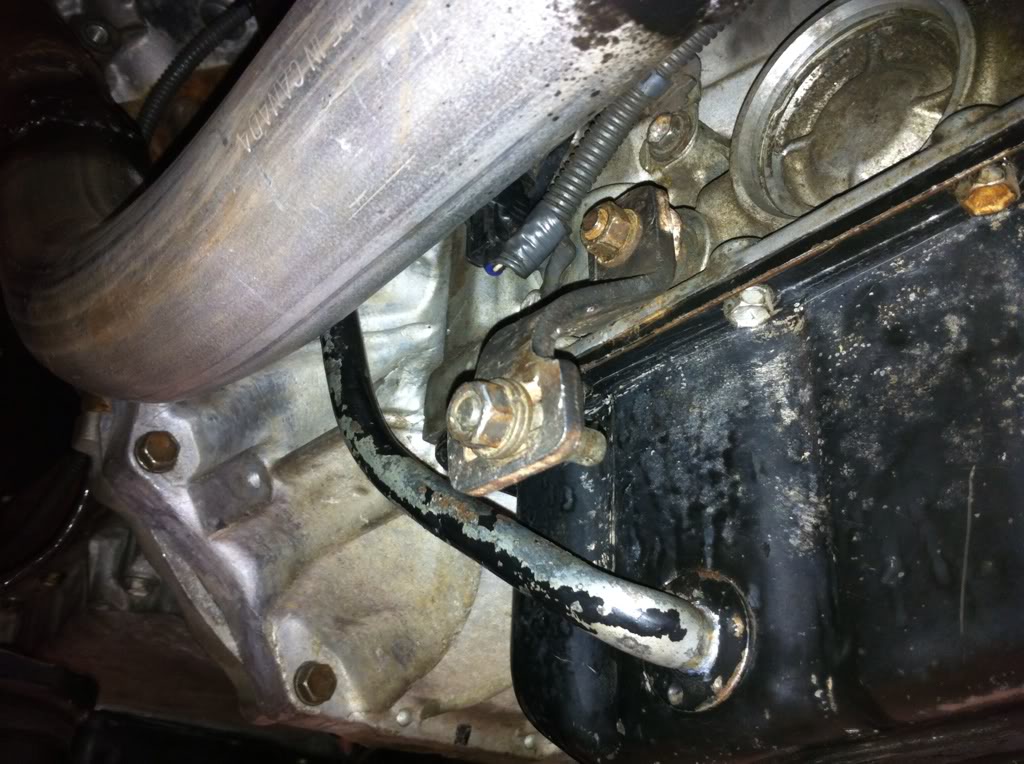
Driver's cat to trans clearance.

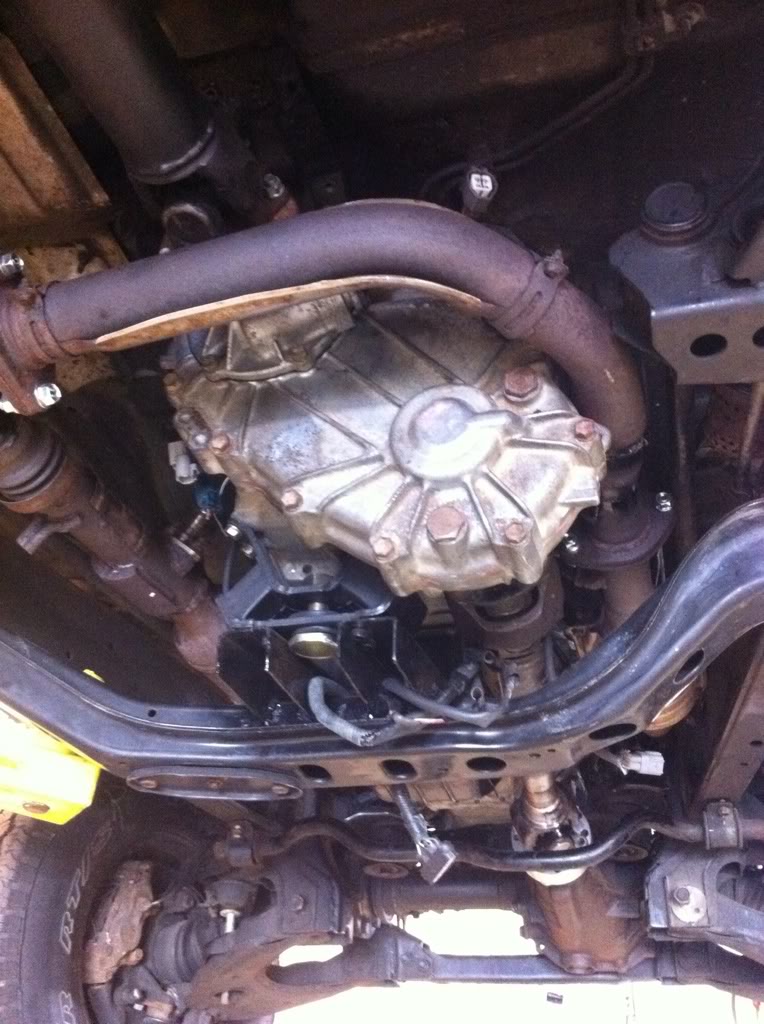
Clearance around transfer case is tight.
Had to bend the dipstick tube to clear shifter.
Y-pipe.

I believe the muffler comes from the Tundra or 4Runner, but I kept the 3.0 tailpipe which dumps out behind the driver's rear tire.
Driver's exhaust manifold.
Passenger exhaust manifold.
Driver's header flange.
Passenger side header flange.
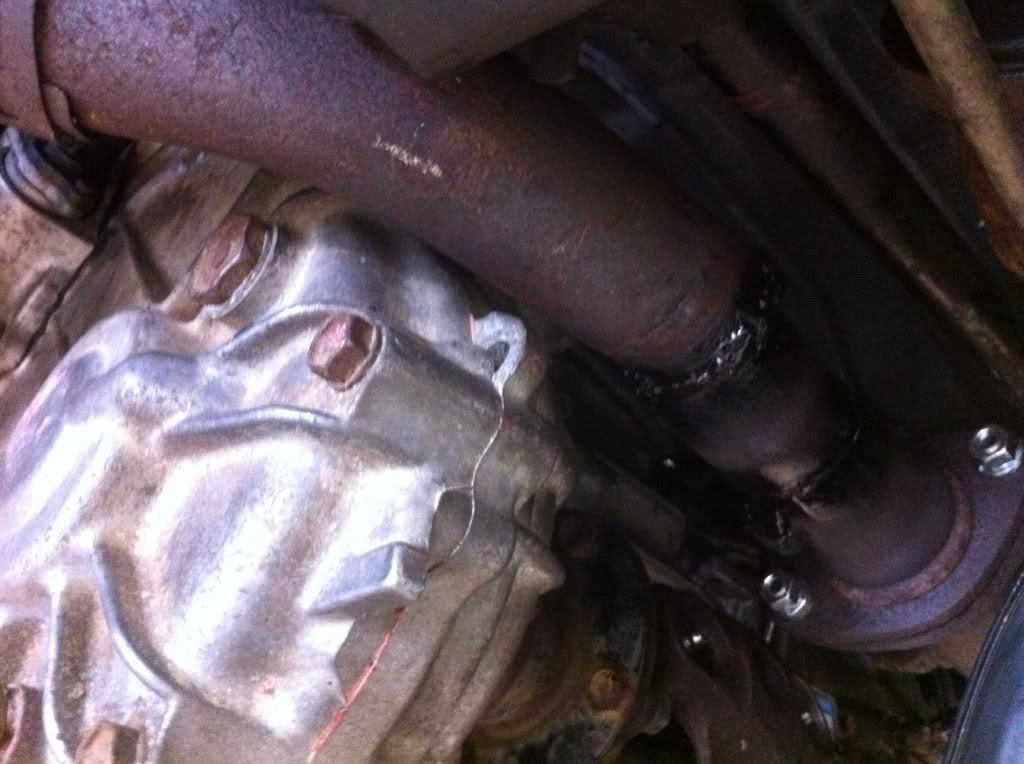
Driver's cat to trans clearance.
Clearance around transfer case is tight.
Had to bend the dipstick tube to clear shifter.
Y-pipe.
I believe the muffler comes from the Tundra or 4Runner, but I kept the 3.0 tailpipe which dumps out behind the driver's rear tire.
Last edited by 3uzfte; Aug 30, 2013 at 07:00 PM. Reason: Photobucket
 Feb 4, 2013 | 08:38 AM
#37
Registered User
Joined: Aug 2011
Posts: 1,507
Likes: 2
From: Fraser Valley, British Columbia
Really glad to see this worked out.
I want to swap one into my 2nd Gen. I have a parts rig which I will strip down to frame. I'll build it frame off. Looks like it will be tricky.
I want to swap one into my 2nd Gen. I have a parts rig which I will strip down to frame. I'll build it frame off. Looks like it will be tricky.
Feb 6, 2013 | 05:01 PM
#38
Registered User
Joined: Sep 2009
Posts: 122
Likes: 0
From: Oxford, NC
 Aug 30, 2013 | 07:19 PM
#40
Thread Starter
Registered User
Joined: Jan 2011
Posts: 88
Likes: 0
From: Minneapolis, MN
I realized all the links on the photos were bad, went back an updated it just to keep it alive
The wiring diagrams came from AllData when I worked there, I would stitch them together and edit them as I went.
The truck had 250k miles on it, and since the cluster stores the mileage, when I used the Tundra cluster, it only had 82k on it.
Thanks to all those who took the time to read it. My boss was a prick, I no longer work for the guy, and haven't seen the truck since.

Thread
Thread Starter
Forum
Replies
Last Post
WTB[MidAtl]: WTB: 89-95 radio brackets/standard cab carpet 2wd
mtb_taco
Items Wanted
0
Jul 15, 2015 08:36 AM


