
Another another SAS thread
 Jul 12, 2013 | 07:54 PM
#1

Thread Starter
Registered User
Joined: Dec 2010
Posts: 152
Likes: 0
From: Beaufort, SC
Another another SAS thread
So I am well on my way through my SAS, just thought I would post up some pictures from the whole experience so far
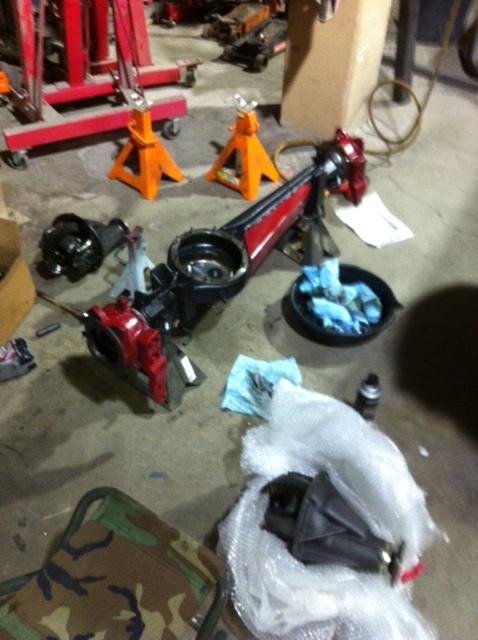
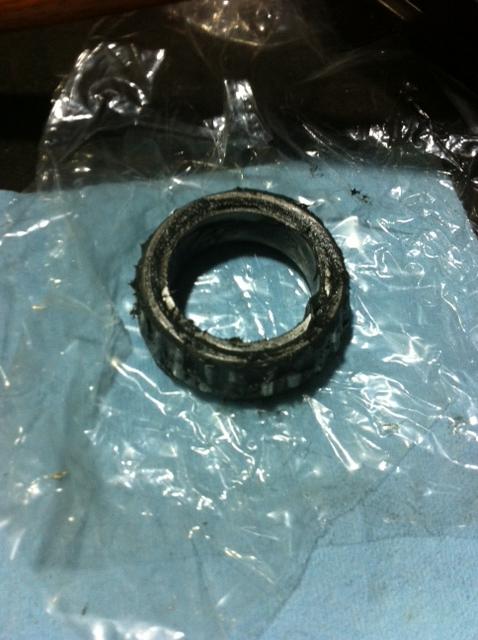
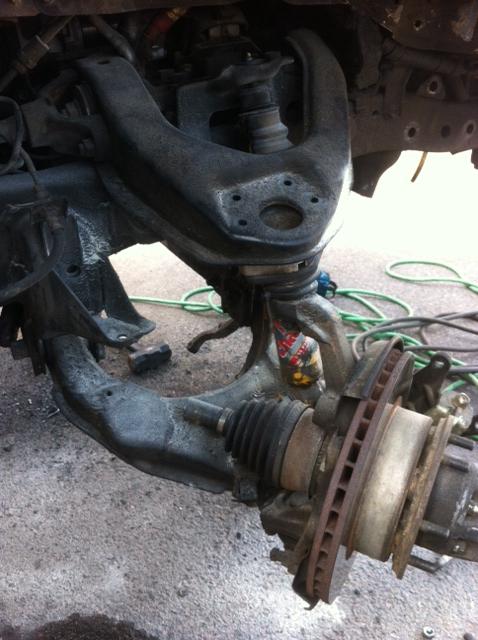
I got sick of breaking CV's on the trail... And the third time was the charm, sheared both CV's at the joint and grenaded two of the differential mounting bushings... I wish I had a picture of the carnage but alas I was to busy swearing at it.
The humble beginning of it all, junkyard '85 solid axle
Bracket grinding has begun!
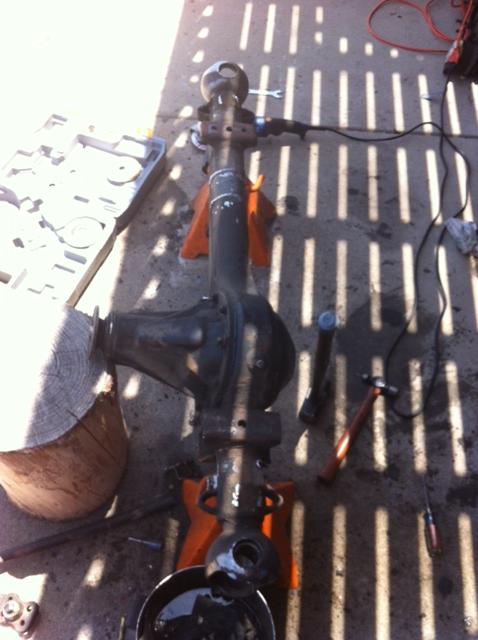
Yes the stump provided an excellent 3rd jackstand
Fitting the new shock mounts/knuckle gussets:
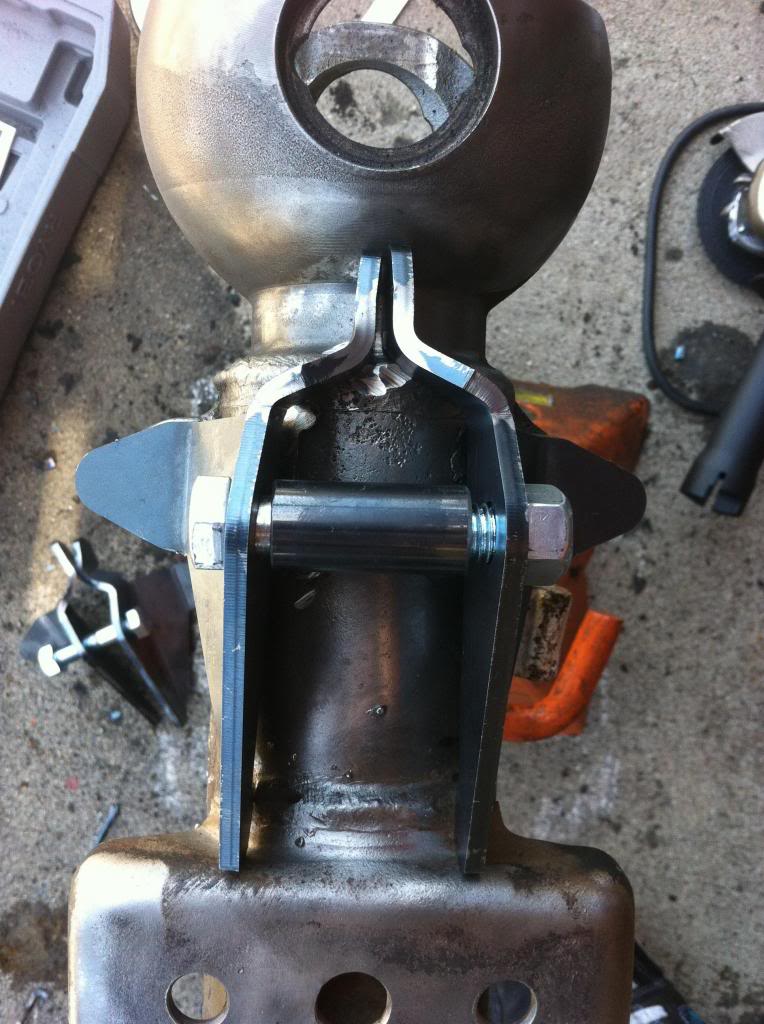

For SAS newbs... BE WARNED, if you are going w/ knuckle gussets, clearance them BEFORE you take apart the knuckle to begin with, this will save you a MAJOR freaking headache of putting the knuckle semi back together to clearance gussets, ask me how I know
And don't worry I cleaned everything down to bare metal before any welding, just mocked them up before serious cleaning of the housing had begun
I got sick of breaking CV's on the trail... And the third time was the charm, sheared both CV's at the joint and grenaded two of the differential mounting bushings... I wish I had a picture of the carnage but alas I was to busy swearing at it.
The humble beginning of it all, junkyard '85 solid axle
Bracket grinding has begun!
Yes the stump provided an excellent 3rd jackstand
Fitting the new shock mounts/knuckle gussets:
For SAS newbs... BE WARNED, if you are going w/ knuckle gussets, clearance them BEFORE you take apart the knuckle to begin with, this will save you a MAJOR freaking headache of putting the knuckle semi back together to clearance gussets, ask me how I know
And don't worry I cleaned everything down to bare metal before any welding, just mocked them up before serious cleaning of the housing had begun
Last edited by noble; Jul 12, 2013 at 08:05 PM.
Jul 12, 2013 | 08:04 PM
#2
Thread Starter
Registered User
Joined: Dec 2010
Posts: 152
Likes: 0
From: Beaufort, SC
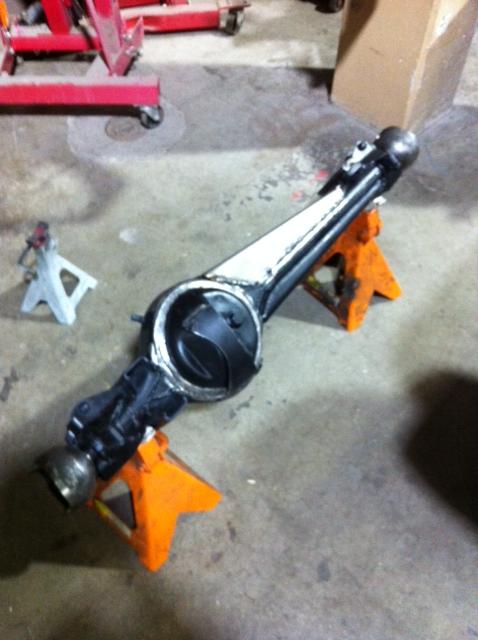
Ahhh looking much much better than the scrap heap under my deck in the blazing sun...
So moved this entire project from my house up north of Boulder, to the most amazingest place in the world, and if you live in the Denver Metro area I suggest you check this place out... Club Workshop 999 Vallejo St, Denver CO... It is a membership based shop, and for a little over $100/month you get access to a full wood/metal/auto shop plus a bunch of random awesome things like a laser engraver, vinyl cutter etc... Like full, as in MIG, TIG, Plasma cutters, oxy torch, CNC everything, lathe, powdercoating ovens of all kinds, shop press, jesus the list goes on and on, and they're putting in a painting tent! the access to equipment is amazing, so needless to say I jumped on board and moved the project there!
Looking even better, dunno why I went with red accenting, spur of the moment thing, we'll see how it looks and if it looks terrible? well than
Knuckles packed (not quite as full as they look, they're closer to 75-80% filled w/ grease... And yes the gray on the paint is grease, not missed spots haha
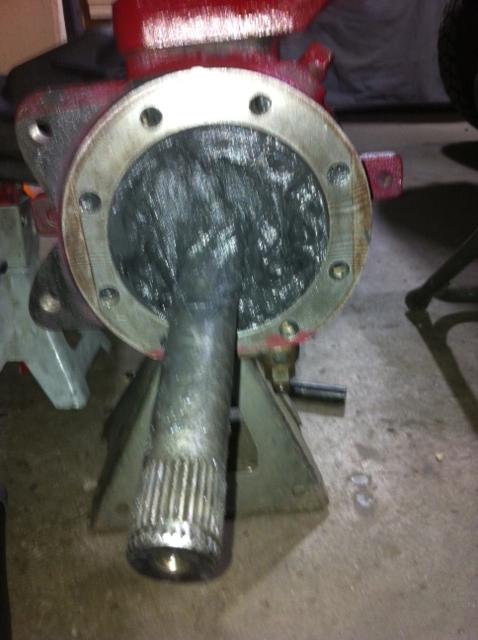
Bearings packed, those suckers can take some grease, holy cow
All buttoned up and looking purdy awaiting the final hour

So moved this entire project from my house up north of Boulder, to the most amazingest place in the world, and if you live in the Denver Metro area I suggest you check this place out... Club Workshop 999 Vallejo St, Denver CO... It is a membership based shop, and for a little over $100/month you get access to a full wood/metal/auto shop plus a bunch of random awesome things like a laser engraver, vinyl cutter etc... Like full, as in MIG, TIG, Plasma cutters, oxy torch, CNC everything, lathe, powdercoating ovens of all kinds, shop press, jesus the list goes on and on, and they're putting in a painting tent! the access to equipment is amazing, so needless to say I jumped on board and moved the project there!
Looking even better, dunno why I went with red accenting, spur of the moment thing, we'll see how it looks and if it looks terrible? well than
Knuckles packed (not quite as full as they look, they're closer to 75-80% filled w/ grease... And yes the gray on the paint is grease, not missed spots haha
Bearings packed, those suckers can take some grease, holy cow
All buttoned up and looking purdy awaiting the final hour
Jul 12, 2013 | 08:13 PM
#3
Thread Starter
Registered User
Joined: Dec 2010
Posts: 152
Likes: 0
From: Beaufort, SC
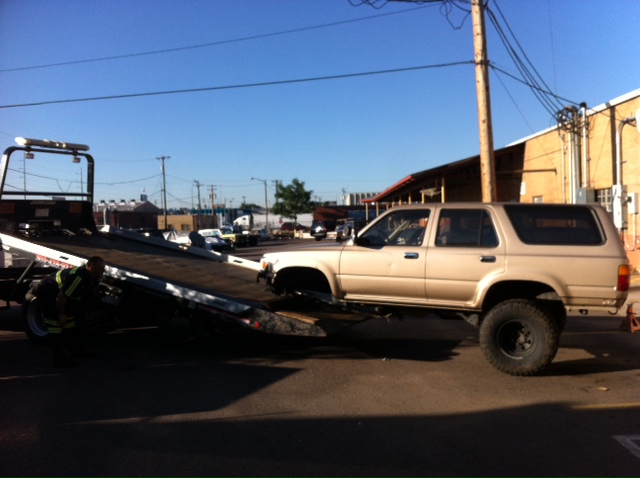
The hour had arrived around 1400 today, dragged out the torch and cutting nonsense outside to begin the project (needed to be outside, since I, not confident completely in my welding prowess am having Jacob of ToyCrawlers here in Broomfield, CO actually weld everything together). So of course it rained, today, for the first time in over a week of 90*F days, it freaking RAINED... Sigh

Well not to be discouraged, I staged everything and waited... It finally let up and dried quickly so it was ON!!
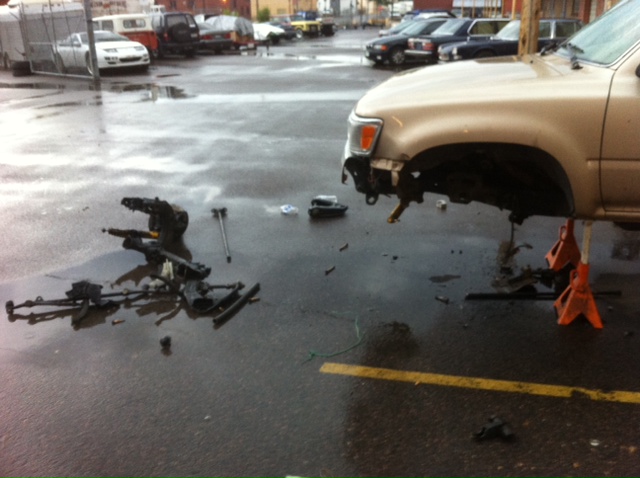
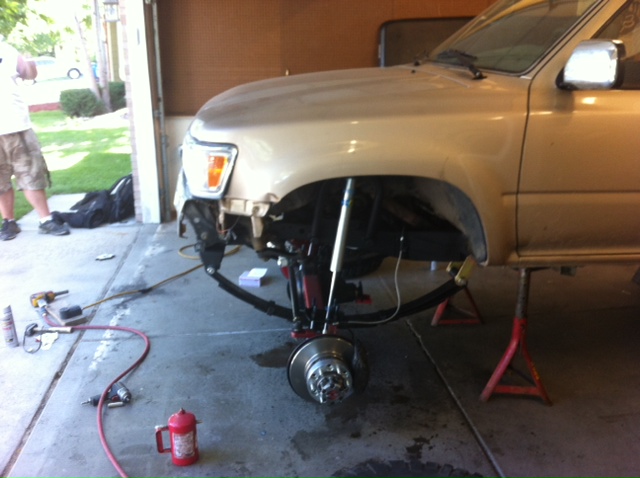
The start
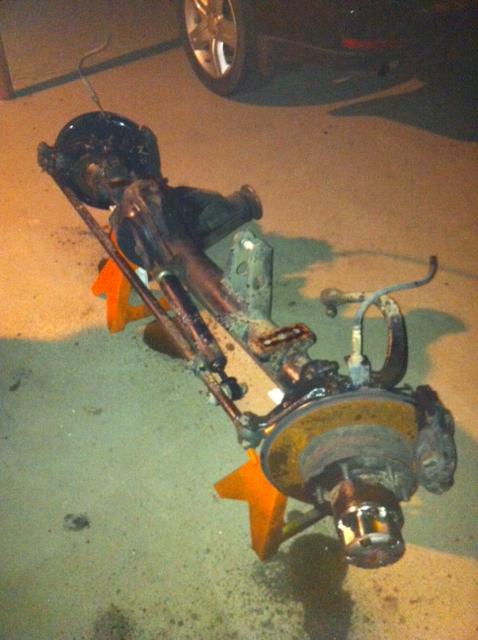
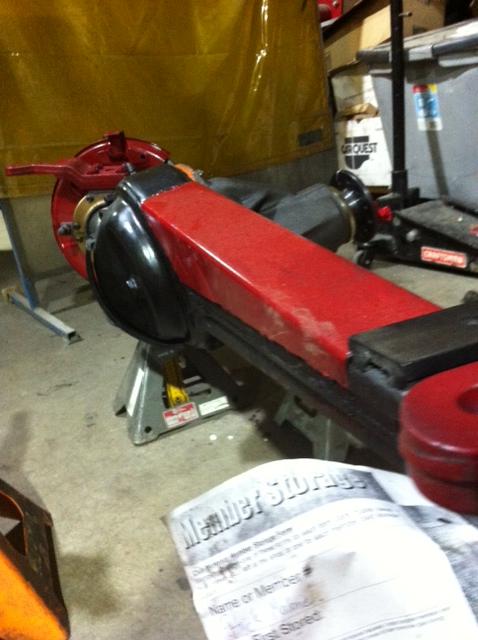
My CV's were bound so badly at the joint that to get anything out I had to cut the shafts. When I took my truck to the dealership for some routine stuff I was too lazy to do, I got a stern talking too about how unsafe my truck is w/o a bumper or axles or diff... I don't think I have ever walked in that place and walked out w/o some sort of lecture... I'll take it as a compliment
GET IT OFF MY TRUCK
[URL=http://s1211.photobucket.com/user/noblemalone/media/image7.jpeg.html]
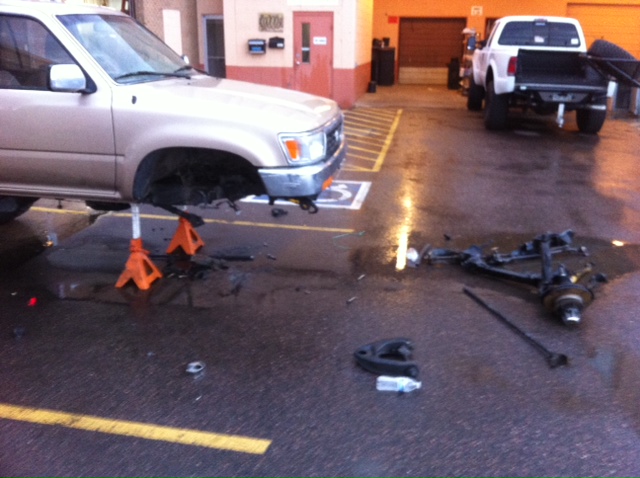
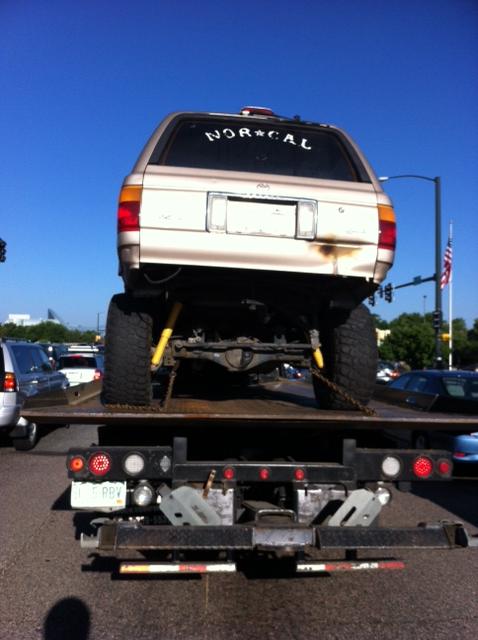
And that is where she sits now! Will be back at it Sunday, still need to remove the diff mounting brackets on the inside of the frame, and cut the UCA/Motor mount brackets, and then start the grind (literally ha)
Couple questions for anybody listening... There appear to be some steering stop bracket things hanging down from the inside of the frame just behind where tie Idler arm was located (also on the pitman arm side), can these be removed? And as for the steering stabilizer, can I remove the bracket that mounts it or will my new SA stabilizer mount into the same bracket.
Well not to be discouraged, I staged everything and waited... It finally let up and dried quickly so it was ON!!
The start
My CV's were bound so badly at the joint that to get anything out I had to cut the shafts. When I took my truck to the dealership for some routine stuff I was too lazy to do, I got a stern talking too about how unsafe my truck is w/o a bumper or axles or diff... I don't think I have ever walked in that place and walked out w/o some sort of lecture... I'll take it as a compliment
GET IT OFF MY TRUCK
[URL=http://s1211.photobucket.com/user/noblemalone/media/image7.jpeg.html]
And that is where she sits now! Will be back at it Sunday, still need to remove the diff mounting brackets on the inside of the frame, and cut the UCA/Motor mount brackets, and then start the grind (literally ha)
Couple questions for anybody listening... There appear to be some steering stop bracket things hanging down from the inside of the frame just behind where tie Idler arm was located (also on the pitman arm side), can these be removed? And as for the steering stabilizer, can I remove the bracket that mounts it or will my new SA stabilizer mount into the same bracket.
Jul 14, 2013 | 04:56 PM
#4
Thread Starter
Registered User
Joined: Dec 2010
Posts: 152
Likes: 0
From: Beaufort, SC
More progress made today...
Starting to get somewhere!! Thank god for flap disks, and Dustin at the shop, who showed me the technique to 'wash' out the welds and old IFS material left over after the cut... Super easy if you are careful not to nick the frame (which only happened once) and saves literally hours and hours of grinding time
Drivers side:
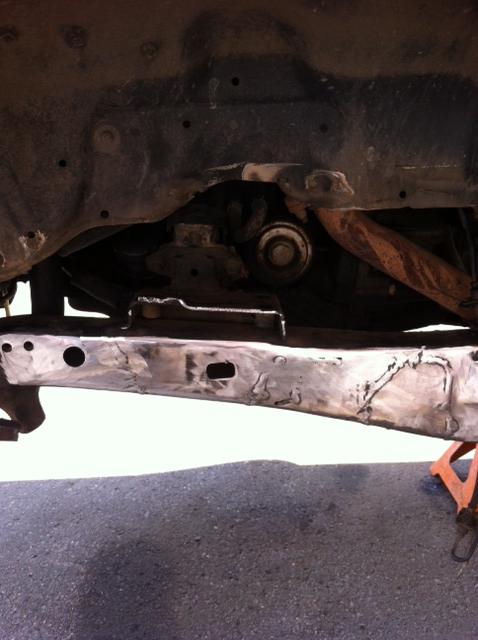
Passenger:
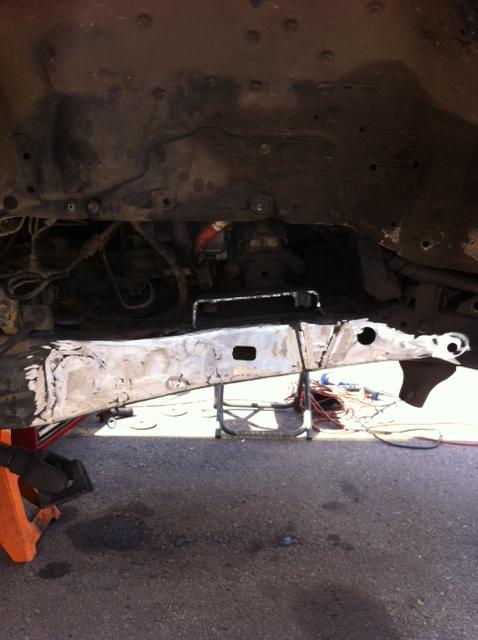
Still at a loss as to what to do with those large metal protrusions, to cut or leave in place... Can be seen hanging down under the frame in the far left of the top picture and far right of the bottom one...
Tomorrow I grind down to metal the front hanger area, underneath the body mount where the shackle hangers mount and continue to grind away the welds on the outside of the frame to get it all shiny and purty... Will be pretty close to done with the prep, getting excited
Oh and I guess I'll finally remove the front driveshaft god that thing is a pain ha
Starting to get somewhere!! Thank god for flap disks, and Dustin at the shop, who showed me the technique to 'wash' out the welds and old IFS material left over after the cut... Super easy if you are careful not to nick the frame (which only happened once) and saves literally hours and hours of grinding time
Drivers side:
Passenger:
Still at a loss as to what to do with those large metal protrusions, to cut or leave in place... Can be seen hanging down under the frame in the far left of the top picture and far right of the bottom one...
Tomorrow I grind down to metal the front hanger area, underneath the body mount where the shackle hangers mount and continue to grind away the welds on the outside of the frame to get it all shiny and purty... Will be pretty close to done with the prep, getting excited
Oh and I guess I'll finally remove the front driveshaft
god that thing is a pain ha
Jul 14, 2013 | 05:57 PM
#6
Thread Starter
Registered User
Joined: Dec 2010
Posts: 152
Likes: 0
From: Beaufort, SC
Thanks! This has been far to long coming
I've got an upgraded idler arm (brass bushings and NWOR brace), SDORI 1.5" BJ Spacers (spacers only, hardware was toasted), and a 5.29 Marlin Crawler IFS differential that I will be putting up for sale
I've got an upgraded idler arm (brass bushings and NWOR brace), SDORI 1.5" BJ Spacers (spacers only, hardware was toasted), and a 5.29 Marlin Crawler IFS differential that I will be putting up for sale

Trending Topics
Jul 17, 2013 | 04:50 PM
#8
Thread Starter
Registered User
Joined: Dec 2010
Posts: 152
Likes: 0
From: Beaufort, SC
So was at the shop at 7:15AM to witness and nervously guide this...
But was super excited for what it meant after hours and hours of cutting and grinding
On the road again, ish? Ha
Things got started around 9AM in Toycrawlers garage... His neighbors must be less than stoked about the banging and screeching and loud tow truck pulling up to his house ha... Tacking up the hangar

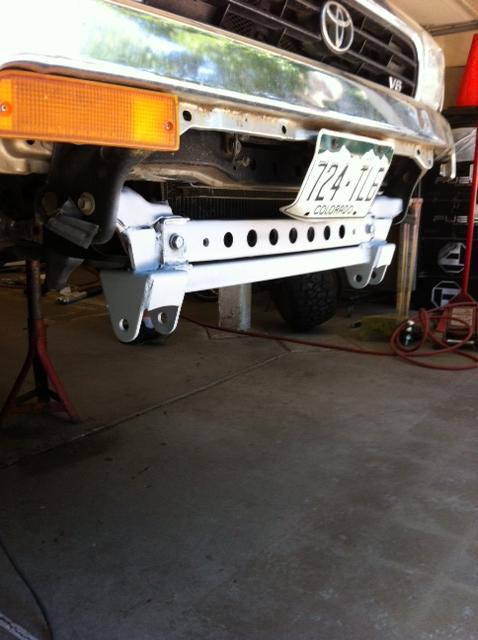
Primed hangar, applied to hot metal and baked on
So I asked Toycrawler If I could hang around and watch. He said it was fine but I would be put to work, which was more than ok by me, learning takes place by doing anyways... So didn't have a whole lot of time to snap pictures of all the steps, but it was great fun and now I am confident should I ever have to do this again
Hung up, mocked up w/loose bolts
Garage Alignment/Draglink install (is it straight? Think so, sure, good enough! ha)
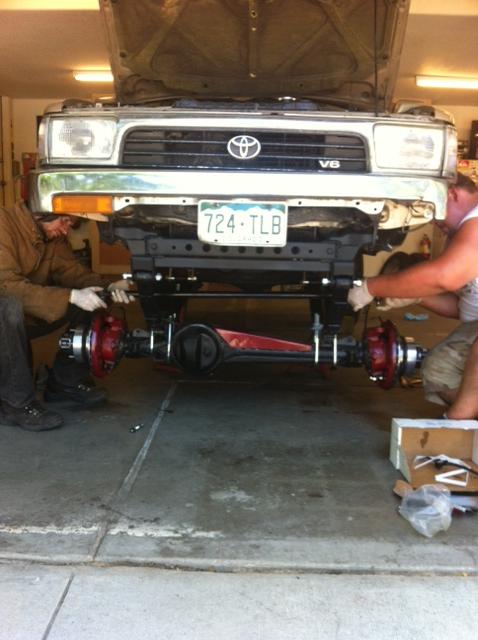
Everything up, in and ready to be tightened... Now I know I put those darn wheels around here somewhere...
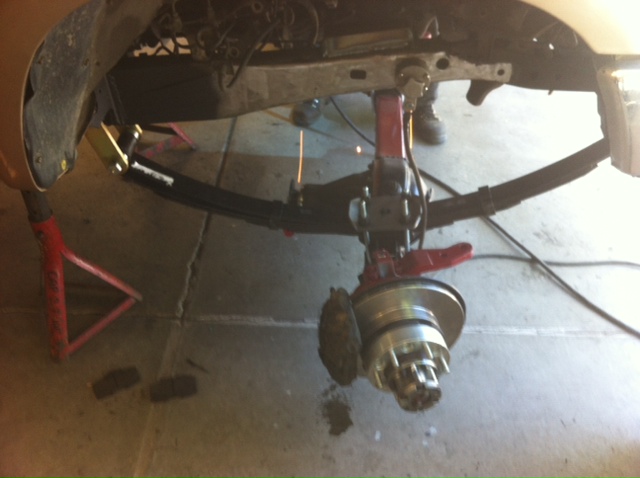
Side shot of suspension all ready to go after a long days work
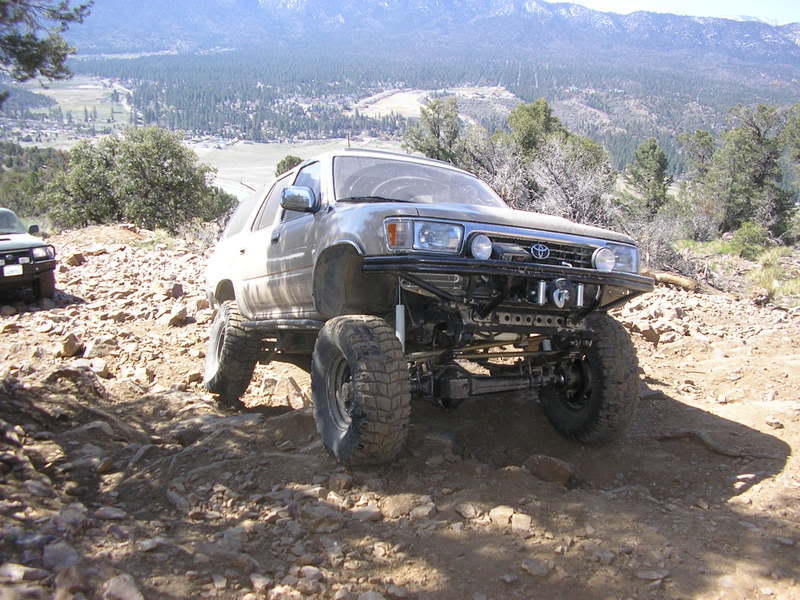
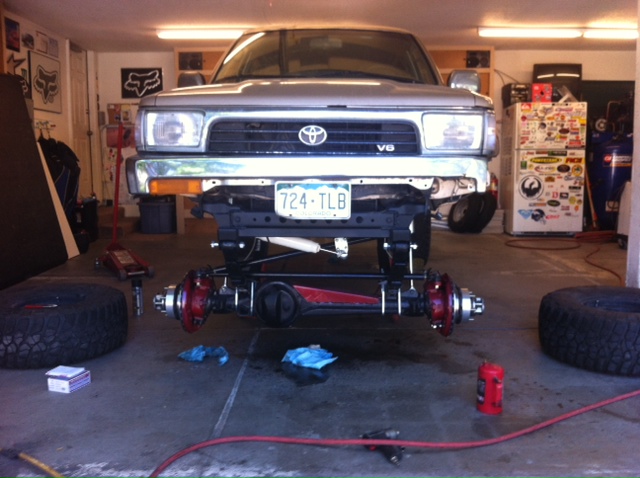
Ah! Found them... And there she blows! Sitting pretty on 4" TG leafs that will hopefully settle since she's a little high in the front, but I am alright with the stance... SHE'S GOT A SOLID AXLE NOW, no more CV's to think about... EVER


The smiley says it all...
The welds have barely cooled and I am already thinking about what I am going to do for the rear... Also have a rear swing away bumper I am about 50% through and a homebrew snorkel in the planning stages...
Sigh it's a good thing my lady is so understanding
But was super excited for what it meant after hours and hours of cutting and grinding
On the road again, ish? Ha
Things got started around 9AM in Toycrawlers garage... His neighbors must be less than stoked about the banging and screeching and loud tow truck pulling up to his house ha... Tacking up the hangar
Primed hangar, applied to hot metal and baked on
So I asked Toycrawler If I could hang around and watch. He said it was fine but I would be put to work, which was more than ok by me, learning takes place by doing anyways... So didn't have a whole lot of time to snap pictures of all the steps, but it was great fun and now I am confident should I ever have to do this again
Hung up, mocked up w/loose bolts
Garage Alignment/Draglink install (is it straight? Think so, sure, good enough! ha)
Everything up, in and ready to be tightened... Now I know I put those darn wheels around here somewhere...
Side shot of suspension all ready to go after a long days work
Ah! Found them... And there she blows! Sitting pretty on 4" TG leafs that will hopefully settle since she's a little high in the front, but I am alright with the stance... SHE'S GOT A SOLID AXLE NOW, no more CV's to think about... EVER
The smiley says it all...
The welds have barely cooled and I am already thinking about what I am going to do for the rear... Also have a rear swing away bumper I am about 50% through and a homebrew snorkel in the planning stages...
Sigh it's a good thing my lady is so understanding
Jul 17, 2013 | 05:31 PM
#9
Registered User
Joined: Apr 2012
Posts: 2,817
Likes: 2
From: Los Angeles CA
Woooo hooo hoo hoooooo Nice job man. You did a cleaner job then my SAS lol. Did you install any gears or lockers?
Just got one question. Why didnt you cut off all the IFS stuff at the place that you installed the axle?
Just got one question. Why didnt you cut off all the IFS stuff at the place that you installed the axle?
Jul 19, 2013 | 03:33 PM
#11
Thread Starter
Registered User
Joined: Dec 2010
Posts: 152
Likes: 0
From: Beaufort, SC
Rear has an Aussie w/ 5.29's, front is open with 5.29's to match, still figuring out driveshaft options that angle is well... Amazingly steep to say the least.
@Red
I belong to a techshop like place in Denver that was equipped for me to do all the cutting and prep work... And since that is what takes the longest and makes professional SAS's cost so much it was cheaper for me to do as much as I could and have it towed to Toycrawlers garage for the final install... Could I do one completely myself now? Yes, and probably couldve done it myself this time, but having someone who has done so many showing me how to set shackle angles, line up the front hanger, cut straight hanger holes through the frame and putting up w/ endless amounts of questions was well worth it for knowledge and confidence in my rig (plus I only really got decent at welding within the last month or so)... Plus the price was right! Which always helps
Last edited by noble; Jul 19, 2013 at 03:37 PM.
Jul 21, 2013 | 05:35 PM
#12
Thread Starter
Registered User
Joined: Dec 2010
Posts: 152
Likes: 0
From: Beaufort, SC
So now comes the fun of ironing out the kinks, been doing some searching about the subject of this dreaded 'death wobble'. The truck tracks true, and there is no noticeable 'rattling' or 'shaking' at any speed. However the truck does wander quite noticeably when any kind of bump in the road is encountered. Feels 'loose' or 'sloppy' is the best way I can describe it, and under hard braking the steering wheel turns predictably to the left, but the truck doesn't jerk off in that direction. Replaced the calipers thinking possibly a stuck piston, but didn't fix it. But at least I have shiny new calipers now ... Any ideas on what could be the root cause of this? Took it straight away to get an alignment (firestone lifetime alignment here in Boulder)... Just looking for direction on causes of the issue, I know many people have death wobble issues.
Much more like 'bump steer', except the steering wheel diving left under braking is odd...
Specs:
Trail Gear 4" SAS Kit
Rear sits a few inches lower than front at the moment, but others haven't had an issue with this
No front Driveshaft
Knuckle preload was on the heavy side (Marlin seemed to think 15lbs was ok, so went with that)
Tires are 33x12.5 KM2... Rears are pretty worn from bad front IFS angles, but fronts are even, look good and have equal tire pressure, could use with a rebalance but would that be a cause of steering 'wandering'?
From what I have read, shackle bolts are a common root cause, but how tight should I tighten them before issues arise from binding, crushed bushings...
Steering linkages are all new and tight (just installed kit), could the old OEM steering box be a cause? Doesn't seem like that is very common...
... Any ideas on what could be the root cause of this? Took it straight away to get an alignment (firestone lifetime alignment here in Boulder)... Just looking for direction on causes of the issue, I know many people have death wobble issues.Much more like 'bump steer', except the steering wheel diving left under braking is odd...
Specs:
Trail Gear 4" SAS Kit
Rear sits a few inches lower than front at the moment, but others haven't had an issue with this
No front Driveshaft
Knuckle preload was on the heavy side (Marlin seemed to think 15lbs was ok, so went with that)
Tires are 33x12.5 KM2... Rears are pretty worn from bad front IFS angles, but fronts are even, look good and have equal tire pressure, could use with a rebalance but would that be a cause of steering 'wandering'?
From what I have read, shackle bolts are a common root cause, but how tight should I tighten them before issues arise from binding, crushed bushings...
Steering linkages are all new and tight (just installed kit), could the old OEM steering box be a cause? Doesn't seem like that is very common...
Last edited by noble; Jul 21, 2013 at 05:38 PM.

Thread
Thread Starter
Forum
Replies
Last Post
Flying91
86-95 Trucks & 4Runners (Build-Up Section)
45
Apr 11, 2024 04:39 PM
Peevedkitten
86-95 Trucks & 4Runners (Build-Up Section)
11
Aug 31, 2015 06:57 PM


