
93 runner 1 ton'd


 May 10, 2008 | 07:18 AM
#42

Thread Starter
Registered User
Joined: Nov 2006
Posts: 71
Likes: 0
From: Oregonian in Utah
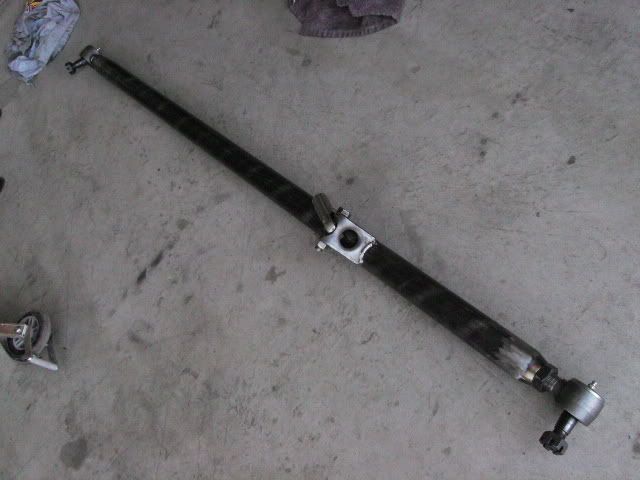
High steer tie rod, 1.75x .375 wall tubing.

[IMG]http://i214.photobucket.com/albums/cc160/smashmetal/93%20Toyota%204Runner[IMG]
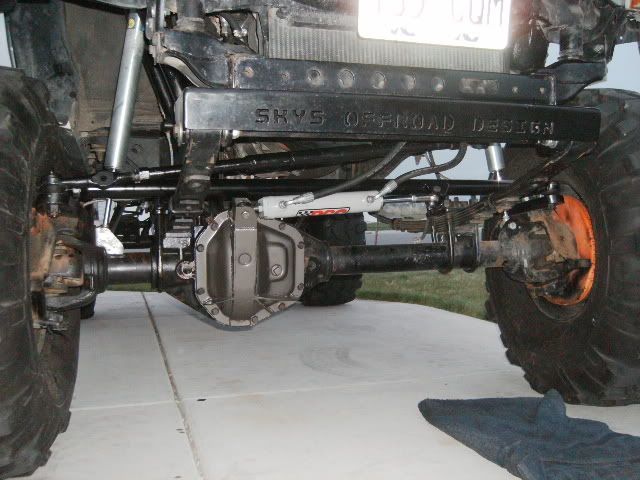
Painted and all mounted up.


[IMG]http://i214.photobucket.com/albums/cc160/smashmetal/93%20Toyota%204Runner[IMG]
Painted and all mounted up.
Last edited by smashmetal; May 10, 2008 at 07:20 AM.

 May 11, 2008 | 05:53 AM
#45
Thread Starter
Registered User
Joined: Nov 2006
Posts: 71
Likes: 0
From: Oregonian in Utah
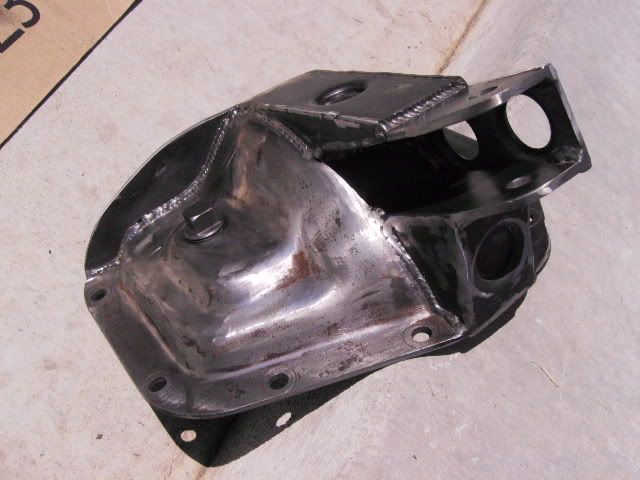
The Transfer case mount was $87 shipped, so even if your old one dosent fail it's still woth the upgrade. Not to mention it's much cheaper that the Marlin T/C mount and twice as strong.
May 11, 2008 | 05:57 AM
#46
Thread Starter
Registered User
Joined: Nov 2006
Posts: 71
Likes: 0
From: Oregonian in Utah
Finally got a chance to get a good flex test on it, I need to get the spring rates abit more even. The rear's are way softer then the front's and it's time to take some sheet metal off the back quarters fo some tire clearance.


May 11, 2008 | 12:07 PM
#49
Thread Starter
Registered User
Joined: Nov 2006
Posts: 71
Likes: 0
From: Oregonian in Utah
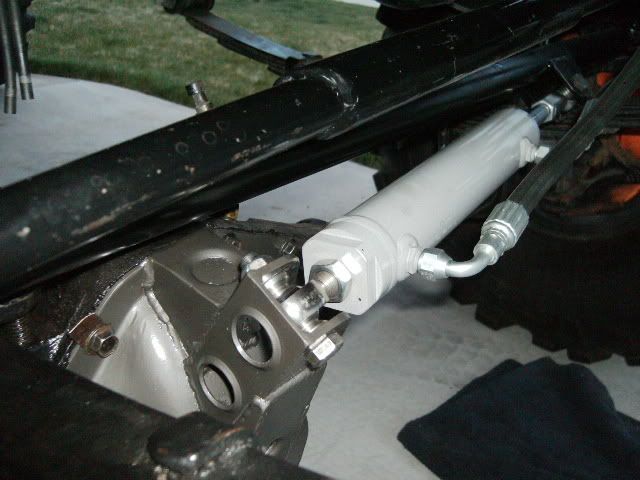
The resivor I had on my stock Toyota V6 power steering pump was plastic so there was little I could do to mod it. Lucky for me I had a friend that just removed the power steering pump from his 88 V6 4runner. For some reason the early modle V6 power steering pumps used a steel resivor, three bolts and it just pulls right off the pump. That is the resivor you see pictured above, much easer to mod steel than plastic.
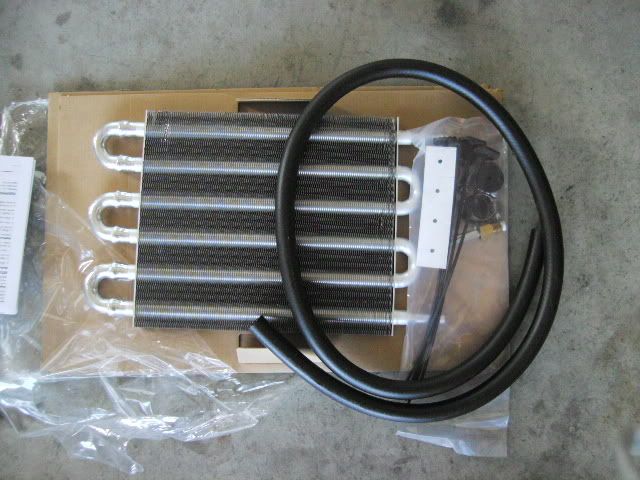
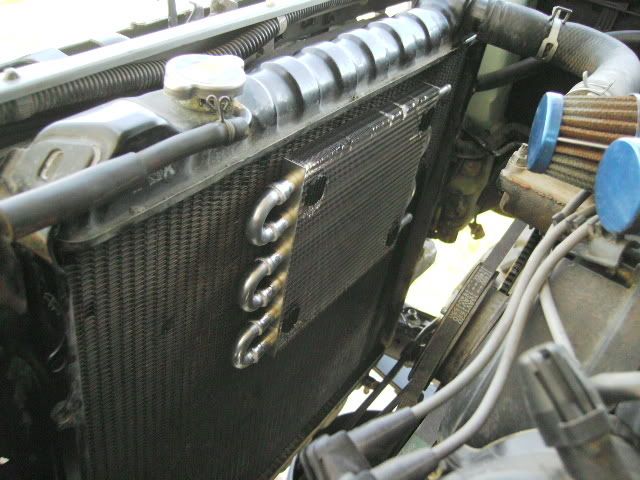
Word of advise thought! if you wanna go the same rout as I did make sure you add a large cooler to the system. The tiny resivor dosent support enough fluid capicity the make the system work corectly. It took me a couple of days to find out why I couldent get the hydro assist to work
May 11, 2008 | 12:14 PM
#50
Thread Starter
Registered User
Joined: Nov 2006
Posts: 71
Likes: 0
From: Oregonian in Utah
Your in luck I have a much more detailed thread here that list all the prices and part #'s I used to put it together. It starts near the bottom of the page. If you need any more info just let me now, this should awnser most of your questions.
http://www.offroadfabnet.com/forums/...?t=925&page=10
Here are a few more resources I used to help get started.
http://www.pirate4x4.com/forum/showthread.php?t=630765
http://www.pirate4x4.com/forum/showt...+steering+pump

 May 12, 2008 | 06:27 PM
#52
Thread Starter
Registered User
Joined: Nov 2006
Posts: 71
Likes: 0
From: Oregonian in Utah
Fore sure! Im trimming the rear sheet metal a bit to keep the tires from getting cut too piss. I think I gotem where I want them, I just need to give it another flex test to make sure I got it all.
Stupid fuel prices are kinda taking the fun out of everything these days.
Stupid fuel prices are kinda taking the fun out of everything these days.
 Sep 14, 2008 | 06:36 AM
#54
Thread Starter
Registered User
Joined: Nov 2006
Posts: 71
Likes: 0
From: Oregonian in Utah
Been a while since I threw down some updates!
Finally got my hydro assist working correctly, just need a decient sized resivore!

Started getting the winch mounted, Trail Gears winch mount serves as a good base. There is roughly about 3/4" of steel on the front of the frame now!


Finally got my hydro assist working correctly, just need a decient sized resivore!
Started getting the winch mounted, Trail Gears winch mount serves as a good base. There is roughly about 3/4" of steel on the front of the frame now!
Sep 14, 2008 | 06:39 AM
#55
Thread Starter
Registered User
Joined: Nov 2006
Posts: 71
Likes: 0
From: Oregonian in Utah
Had to rebuild the king pins real quick!

So I could do this! I also learned that by putting limiting straps on the rear suspension finally made the front springs start working.


So I could do this! I also learned that by putting limiting straps on the rear suspension finally made the front springs start working.
Last edited by smashmetal; Sep 14, 2008 at 06:53 AM. Reason: werds


 Sep 14, 2008 | 06:49 AM
#57
Thread Starter
Registered User
Joined: Nov 2006
Posts: 71
Likes: 0
From: Oregonian in Utah
Then I added some new body mounts from 4crawler

shortened the 2" body lift by 3/8". I would have just taken it out but there where to many other things that I would have had to move again like shocks, steering box, and fuel tank. Not worth my time to do it all again.


Started making some nerfs.


Mocking up.


shortened the 2" body lift by 3/8". I would have just taken it out but there where to many other things that I would have had to move again like shocks, steering box, and fuel tank. Not worth my time to do it all again.
Started making some nerfs.
Mocking up.
Last edited by smashmetal; Sep 14, 2008 at 06:56 AM. Reason: werds
 Sep 15, 2008 | 06:24 PM
#60
Thread Starter
Registered User
Joined: Nov 2006
Posts: 71
Likes: 0
From: Oregonian in Utah
As far as a build go's it will probably be never ending. There always seams to be something new to work on after I wheel it.
It's kinda hard these days to do something diffrent. The main tubes are actually 2". A bit bigger than most sliders are but I think it helps them stand out more!
It's kinda hard these days to do something diffrent. The main tubes are actually 2". A bit bigger than most sliders are but I think it helps them stand out more!


