
Headlight Harness Wiring Upgrade (w/pics)

 Mar 17, 2014 | 02:33 PM
#22

Registered User
Joined: Jun 2013
Posts: 32
Likes: 0
Thanks for the writeup aviator. Definitely helped with mine.
I decided to go with this kit as the wire was a little heavier gauge and came w/ ceramic plugs than the other premade kits I could find.
http://cgi.ebay.com/ws/eBayISAPI.dll...m=330813121438
Basically, I did it the same as you, working left to right:
1. Remove battery holder.
2. Remove windshield washer fluid holder.
3. Loosen passenger side radiator bolts.
4. Loosen drivers side radiator bolts.
5. Remove radiator top foam.
6. Remove coolant overflow holder (I went ahead and flushed this out as there was crud at the bottom of the container...)
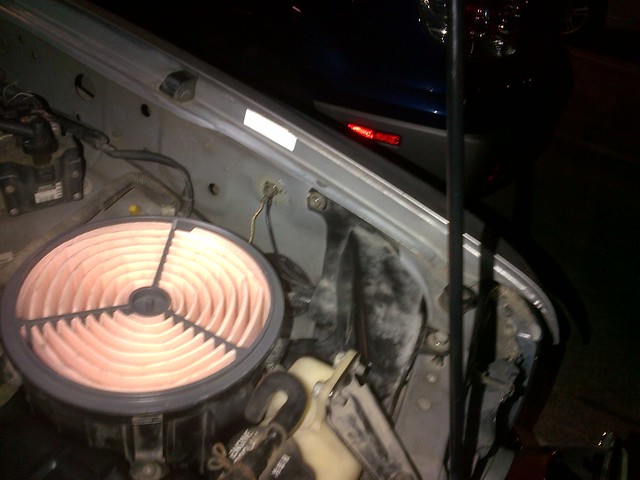
7. Remove air deflector -- I went ahead and removed the whole thing as it made it easier to remove the deflector and I needed space for another project anyways (haven't detailed yet, but added an add'l square inch of air intake by drilling 1/4" holes below the front drivers side light...).
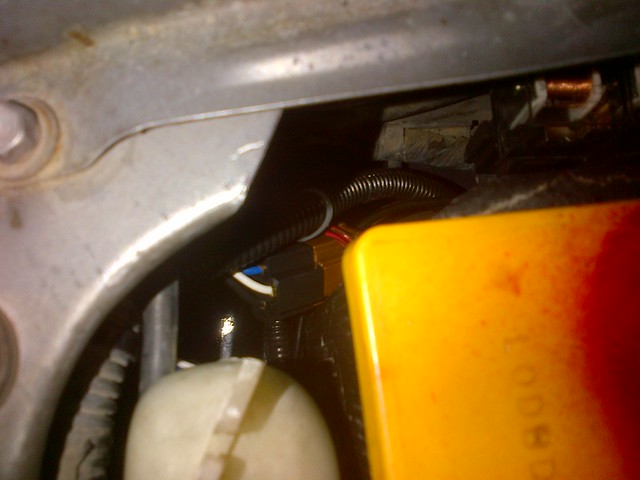
8. Run the light harness right below the stock harness and loosely zip tie.
9. Double check your end links (grounds and connections to lights for appropriate length) before tightening zip ties all the way.
10. Install grounds (I used existing ground locations and just sanded away some paint to ensure with good connection, and once installed coated w/ diaelectric grease).
11. Remove battery for working room. (While I had it out I took a wire brush to below the tray, hosed it off, waited for it to dry, and dropped a couple coats of spray paint beneath the battery too -- one of the few rust spots on my rig).
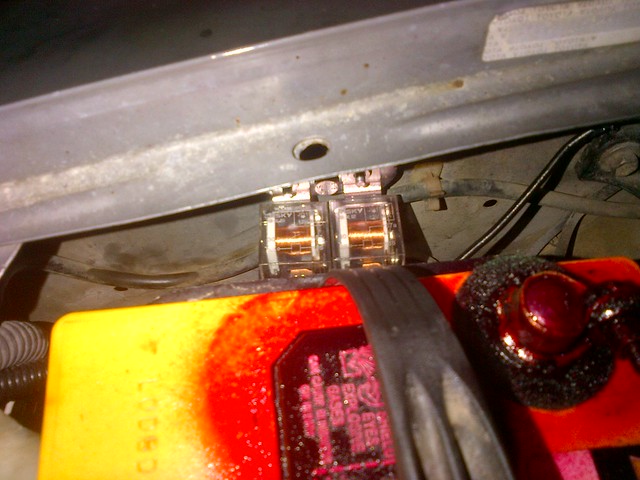
12. Install relays in factory screw terminal in inside engine bay wall next to battery (I just used a piece of flashing as it was the cheapest sheet metal at the hardware store). I want to say it was an 8x1.0 thread fitting but it is the same size as the air deflector screws (actually probably the air deflector install point for yota diesels...). I used a couple of washers between the bracket and frame to allow space for the windshield washer hose to pass behind -- female screw mount is already slightly raised from engine wall.
13. Connect the the new harness male control connector to factory passenger side light connection. Good time for electrical tape.
14. Zip tie drivers side factory light connection out of the way so it doesn't dangle.
15. Reinstall battery.
16. Install power cable to battery positive.
17. Reinstall everything else your removed.
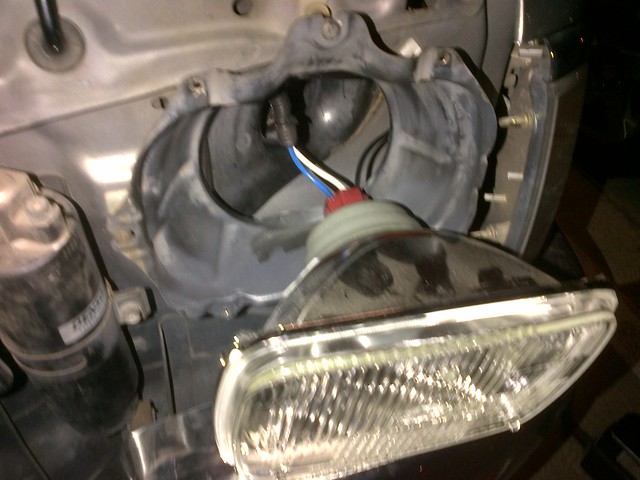
18. Connect new harness connections to lights before install -- found on drivers side that it was easiest to install deflector with light not yet installed (the H4s extend a little further back than the old sealed beams did...).
19. Test that your lights work.
20. And done.
Here are some pics.
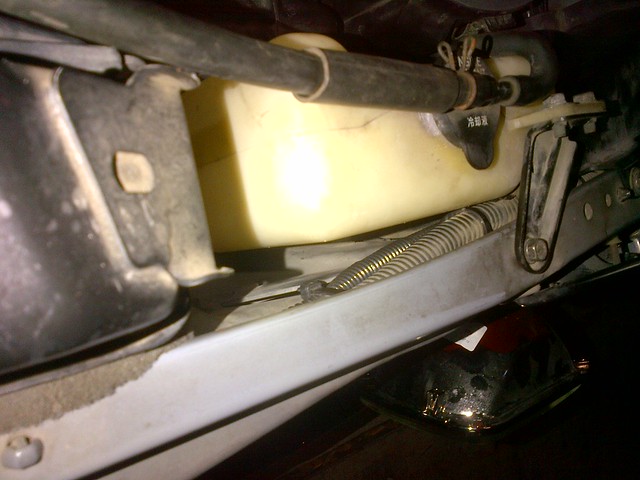
Harness run and zip tied between windshield washer fluid reservoir and radiator
Harness leaving radiator by coolant reservoir to air deflector
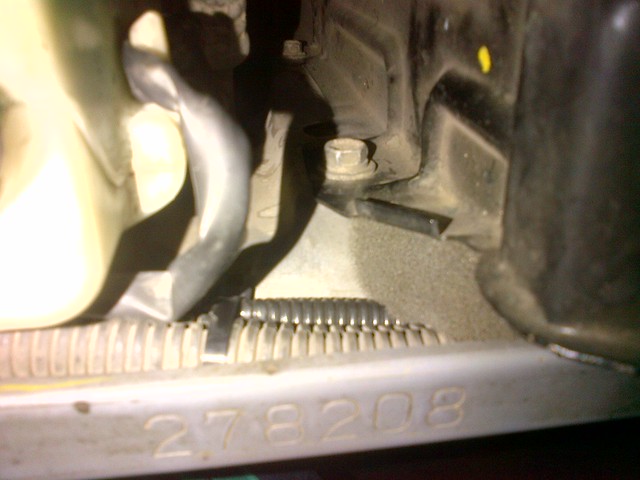
Drivers side ground to existing ground location (make sure the ground wire runs/fits through air deflector wire slot)
Passenger side ground location (the battery to frame ground location -- my next big electrical project is addressing the wiring at the battery and new battery terminals)
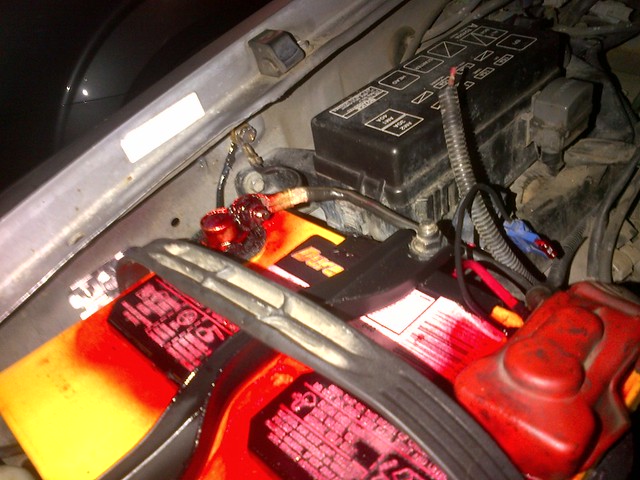
Relays installed
Old light connection to new relay harness
Old v New Harness

New harness, driver side, on new Hella H4 light conversion
I decided to go with this kit as the wire was a little heavier gauge and came w/ ceramic plugs than the other premade kits I could find.
http://cgi.ebay.com/ws/eBayISAPI.dll...m=330813121438
Basically, I did it the same as you, working left to right:
1. Remove battery holder.
2. Remove windshield washer fluid holder.
3. Loosen passenger side radiator bolts.
4. Loosen drivers side radiator bolts.
5. Remove radiator top foam.
6. Remove coolant overflow holder (I went ahead and flushed this out as there was crud at the bottom of the container...)
7. Remove air deflector -- I went ahead and removed the whole thing as it made it easier to remove the deflector and I needed space for another project anyways (haven't detailed yet, but added an add'l square inch of air intake by drilling 1/4" holes below the front drivers side light...).
8. Run the light harness right below the stock harness and loosely zip tie.
9. Double check your end links (grounds and connections to lights for appropriate length) before tightening zip ties all the way.
10. Install grounds (I used existing ground locations and just sanded away some paint to ensure with good connection, and once installed coated w/ diaelectric grease).
11. Remove battery for working room. (While I had it out I took a wire brush to below the tray, hosed it off, waited for it to dry, and dropped a couple coats of spray paint beneath the battery too -- one of the few rust spots on my rig).
12. Install relays in factory screw terminal in inside engine bay wall next to battery (I just used a piece of flashing as it was the cheapest sheet metal at the hardware store). I want to say it was an 8x1.0 thread fitting but it is the same size as the air deflector screws (actually probably the air deflector install point for yota diesels...). I used a couple of washers between the bracket and frame to allow space for the windshield washer hose to pass behind -- female screw mount is already slightly raised from engine wall.
13. Connect the the new harness male control connector to factory passenger side light connection. Good time for electrical tape.
14. Zip tie drivers side factory light connection out of the way so it doesn't dangle.
15. Reinstall battery.
16. Install power cable to battery positive.
17. Reinstall everything else your removed.
18. Connect new harness connections to lights before install -- found on drivers side that it was easiest to install deflector with light not yet installed (the H4s extend a little further back than the old sealed beams did...).
19. Test that your lights work.
20. And done.
Here are some pics.
Harness run and zip tied between windshield washer fluid reservoir and radiator
Harness leaving radiator by coolant reservoir to air deflector
Drivers side ground to existing ground location (make sure the ground wire runs/fits through air deflector wire slot)
Passenger side ground location (the battery to frame ground location -- my next big electrical project is addressing the wiring at the battery and new battery terminals)
Relays installed
Old light connection to new relay harness
Old v New Harness
New harness, driver side, on new Hella H4 light conversion
The link says it is for 9003, thought we used a 9004. Does this work for a 1990 toyota pickup? It says yes on ebay but i don't trust them very well.
Jan 3, 2015 | 11:39 AM
#24
Registered User
Joined: Oct 2014
Posts: 905
Likes: 4
The NOKYA kit the OP used has wires that are too thin for my liking. The NOKYA kit also looks exactly like the Putco harness other than the color of the large wire sleeves.
The Taiwan made Putco kit the Jeep guys are using is 16 awg with junk relays so I'm not about to use that.
16 AWG is fine for stock wattage demands but when you want to push higher wattages with full voltage I think it's going to create some resistance and heat. You'll want 14 awg minimum with 12 awg preferred for 100/90 bulbs and ceramic connectors. The last time I ran 100/90 bulbs I had 10awg wire and plastic connectors, it started melting the connector.
Here's the kit millball used but in the auction it makes no mention of what gauge the wires are.
http://www.ebay.com/itm/HD-Head-Lamp-Headlight-Wiring-Harness-For-High-Wattage-Bulbs-9004-100-90w-Kit/400830393876?_trksid=p2047675.c100011.m1850&_trkparms=aid%3D222007%26algo%3DSIC.MBE%26ao%3D1%26asc%3D20140602152332%26meid%3Da6fa2afcd42440ecb2b3ca7974938778%26pid%3D100011%26prg%3D20140602152332%26rk%3D2%26rkt%3D10%26sd%3D331391850534
Last edited by Odin; Jan 15, 2015 at 02:58 AM.
Feb 25, 2015 | 04:18 PM
#25

Registered User

Joined: Jan 2015
Posts: 592
Likes: 3
I put some HELLA Vision Plus headlamps in a few weeks ago, they were a lot better but not quite as bright as I thought they should be. I checked for voltage drop from the battery to the headlamps and had a 0.4 volt drop on the positive terminals and 0.7 volt drop on the negative terminals. I installed this $22 HEADLIGHT RELAY WIRING HARNESS http://www.ebay.com/itm/330997592807 and immediately noticed an increase in brightness. I also replaced the speedometer lamps with some blue LEDs, looks cool.
Also, would like to see a wiring schematic for 1992 base 22RE headlamp system if anyone has it. I'm curious how the factory headlamps are wired. There is a factory headlamp relay in the underhood fusebox.
Also, would like to see a wiring schematic for 1992 base 22RE headlamp system if anyone has it. I'm curious how the factory headlamps are wired. There is a factory headlamp relay in the underhood fusebox.
Last edited by bswarm; Feb 25, 2015 at 05:19 PM.
Feb 26, 2015 | 05:39 AM
#27
Registered User
Joined: Jan 2015
Posts: 592
Likes: 3
Anyone know the bulb size in the heater control for 1992?
Feb 26, 2015 | 12:04 PM
#29
Registered User
Joined: Oct 2014
Posts: 905
Likes: 4
I meant total voltage, like 13.5V?
With my stock size battery POS & NEG cables cleaned and smeared with dielectric grease I get 14.48 at the battery. Using my stock harness and placing clips on the bulbs terminals my low beam is getting 13.07V.
I temporarily hooked up my Putco relay harness to see if it was going to work or not (it does) but I didn't check voltage because I didn't want to install it as a permanent item until I had made a couple of changes.
Last edited by Odin; Feb 26, 2015 at 12:22 PM.
Feb 26, 2015 | 01:02 PM
#30
Registered User
Joined: Jan 2015
Posts: 592
Likes: 3
It is 14.3 at the headlamp with it plugged in and turned on, it was 13.something on the old setup. Voltage drop is a much better test. Most of the drop was on the negative side with the stock setup, it's almost 0 with the new setup at the ground. I may swap the relays the kit came with for some solid state relays, it depends how long these last. The KYBs make for a rough ride and things tend to shake apart (like my old radiator did)
Also, the high beam indicator no longer works, don't really need it to remind me they're on anyway.
Also, the high beam indicator no longer works, don't really need it to remind me they're on anyway.
Last edited by bswarm; Feb 26, 2015 at 01:33 PM.
Feb 26, 2015 | 01:42 PM
#31
Registered User
Joined: Oct 2014
Posts: 905
Likes: 4
Voltage drop is definitely more accurate for testing the system. I was just curious what voltage you were getting at the bulb because it relates to lumen output.
At 14.3V you're driving those bulbs pretty damn good. Any thoughts of a higher wattage bulb?
At 14.3V you're driving those bulbs pretty damn good. Any thoughts of a higher wattage bulb?
Feb 26, 2015 | 02:05 PM
#32
Registered User
Joined: Jan 2015
Posts: 592
Likes: 3
This is what I installed It came with 60/55W HB2 (9003) bulbs. Big difference over the stock H6054 sealed beams which were 65/35W.
I think I found the bulb for the heater control, bulb #74. Ordered a blue LED from Amazon that should fit.
Last edited by bswarm; Feb 26, 2015 at 02:08 PM.
Feb 26, 2015 | 02:05 PM
#33
Registered User
Joined: Oct 2014
Posts: 905
Likes: 4
I may swap the relays the kit came with for some solid state relays, it depends how long these last.
The KYBs make for a rough ride and things tend to shake apart (like my old radiator did)
Also, the high beam indicator no longer works, don't really need it to remind me they're on anyway.
The KYBs make for a rough ride and things tend to shake apart (like my old radiator did)
Also, the high beam indicator no longer works, don't really need it to remind me they're on anyway.
I've had KYB's on my 66 Nova and my El Camino. They are rougher riding than I like and I've had my fill of them. I'm either going with Bilstein or stock shocks.
Given your background you probably know the more vibrations and shaking the bulb experiences the shorter the lifespan. Sometimes the lenses aren't held securely by the retaining ring and they can vibrate and move around a little. Slightly bending the tabs on the retaining ring has always fixed it for me.
The high beam indicator doesn't work with my Putco harness either. As you've discovered it really isn't an issue though. Once you have good lenses and are driving the bulbs with good voltage you definitely know when the high beams are on. There is a thread on here where someone got a relay kit that had a resistor in it that allowed the indicator to work.
I think? it was a 9004 harness though.
Last edited by Odin; Feb 26, 2015 at 02:43 PM.


 Feb 26, 2015 | 02:46 PM
#35
Registered User
Joined: Jan 2015
Posts: 592
Likes: 3
Solid state relays? Hmm, can't say I've heard of those before. Something to look into.
I've had KYB's on my 66 Nova and my El Camino. They are rougher riding than I like and I've had my fill of them. I'm either going with Bilstein or stock shocks.
Given your background you probably know the more vibrations and shaking the bulb experiences the shorter the lifespan. Sometimes the lenses aren't held securely by the retaining ring and they can vibrate and move around a little. Slightly bending the tabs on the retaining ring has always fixed it for me.
The high beam indicator doesn't work with my Putco harness either. As you've discovered it really isn't an issue though. Once you have good lenses and are driving the bulbs good you definitely know when the high beams are on. There is a thread on here where someone got a relay kit that had a resistor in it that allowed the indicator to work. I think? it was a 9004 harness though.
Feb 26, 2015 | 02:48 PM
#36
Registered User
Joined: Oct 2014
Posts: 905
Likes: 4
I find the makers are listed on ebay as Sun Shine, Sunshine, or California Sunshine.
Last edited by Odin; Feb 26, 2015 at 02:57 PM.
Feb 26, 2015 | 03:34 PM
#38
Registered User
Joined: Oct 2014
Posts: 905
Likes: 4
I installed this $22 HEADLIGHT RELAY WIRING HARNESS http://www.ebay.com/itm/330997592807
Don't know if I'd like that. Adding two fuses is one of the thing's I'm doing to the Putco harness.
Last edited by Odin; Feb 26, 2015 at 03:40 PM.
Feb 26, 2015 | 03:57 PM
#39
Registered User
Joined: Jan 2015
Posts: 592
Likes: 3
I looked at the Putco ones, I didn't even see a fuse on them, that looked dangerous. I carry spare fuses, and even if the relay went out, I could just plug the stock connectors back onto the headlamps.


