


 Mar 23, 2016, 02:55 PM
Last edit by: IB Advertising
See related guides and technical advice from our community experts:
- Toyota 4Runner, Tacoma, and Tundra Paint Modifications<br>Overview of popular modifications to help you customize your Toyota.

Show us your best cheap mods!
Nov 30, 2012 | 07:16 AM
#882
Registered User
Joined: Nov 2012
Posts: 10
Likes: 0
From: The Great State of Texas
also, just thought of this one a couple hours ago, I went and tested out my yota last weekend and got mud all over my side windows to where i couldnt see, tried rolling them up and down to no avail.... I think there used to be that little black rubber piece that squeegeed(?) the window for that reason, but since my truck is old I guess it just rotted away, but Im gonna try replacing is with the adhesive velcro strips ( the soft side) and see if that helps.
Man this place is a goldmine.
Man this place is a goldmine.
Nov 30, 2012 | 09:43 AM
#883
Registered User
Joined: Sep 2011
Posts: 169
Likes: 0
From: San Diego, CA
Hell yes, I appreciate the welcome, and as soon as I figure out how to do all of that, I will get right on it lol.. In the meantime, Another Mod: My Soon to be father-in-law used to have a 78 bronco with 3 3/8 steel pipe bumpers, he said that he just drilled a hole in the side, added some grommets and a valve stem to where he could fill it with air, and then a quick release air hose.. came in handy for flat tires and air mattresses.

it would come in handy pretty much anywhere
Nov 30, 2012 | 05:50 PM
#884
Registered User
Joined: Nov 2012
Posts: 10
Likes: 0
From: The Great State of Texas
Trying to keep this thread alive.. how do I post pics in forums? Dumb question I know, But I've searched to no avail.. I dont mind bein whipped, as long as I learn a thing or two, so Bring on the backlash!
Nov 30, 2012 | 07:03 PM
#886
Contributing Member
Joined: Nov 2010
Posts: 5,125
Likes: 4
From: Columbia River Gorge, Oregon...east side
Nov 30, 2012 | 08:14 PM
#887
Registered User
Joined: Sep 2011
Posts: 169
Likes: 0
From: San Diego, CA
Dec 1, 2012 | 07:20 AM
#888
Registered User
Joined: Nov 2012
Posts: 10
Likes: 0
From: The Great State of Texas
Thanks man, this internet stuff is complicated lol. 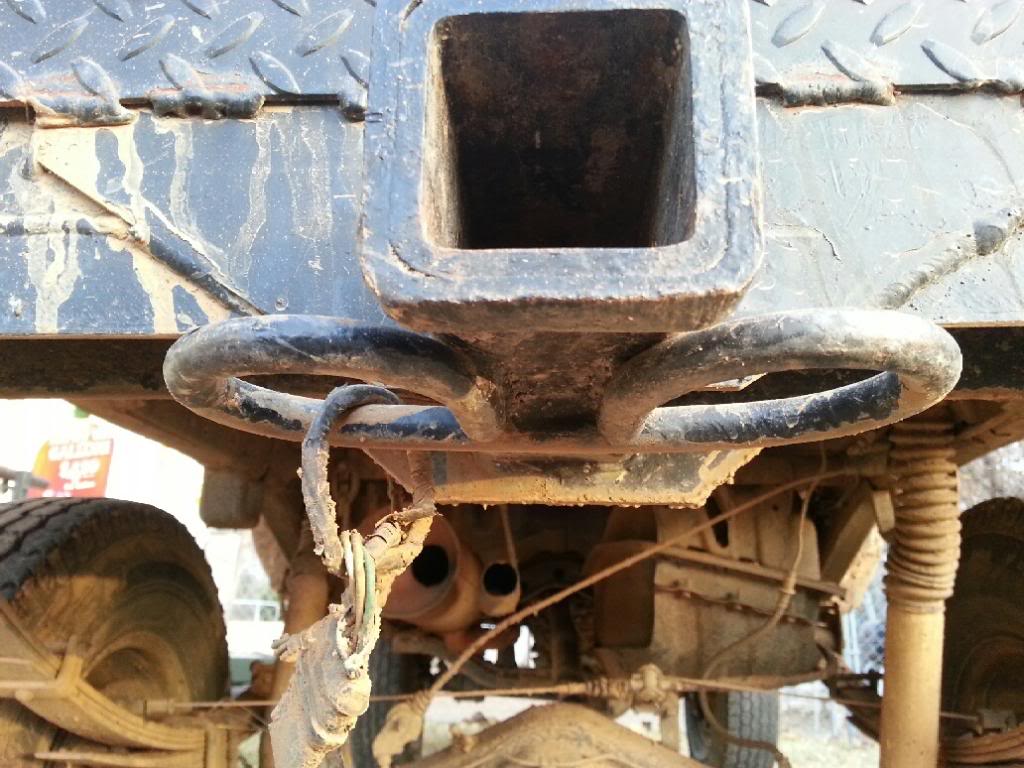 this should be the extra hookpoints on my hitch, that come in super handy when dragging around my Pathfinder to mow lol. I've only had the truck for two months, so haven't got to do much yet, But trust me plans are in the works!
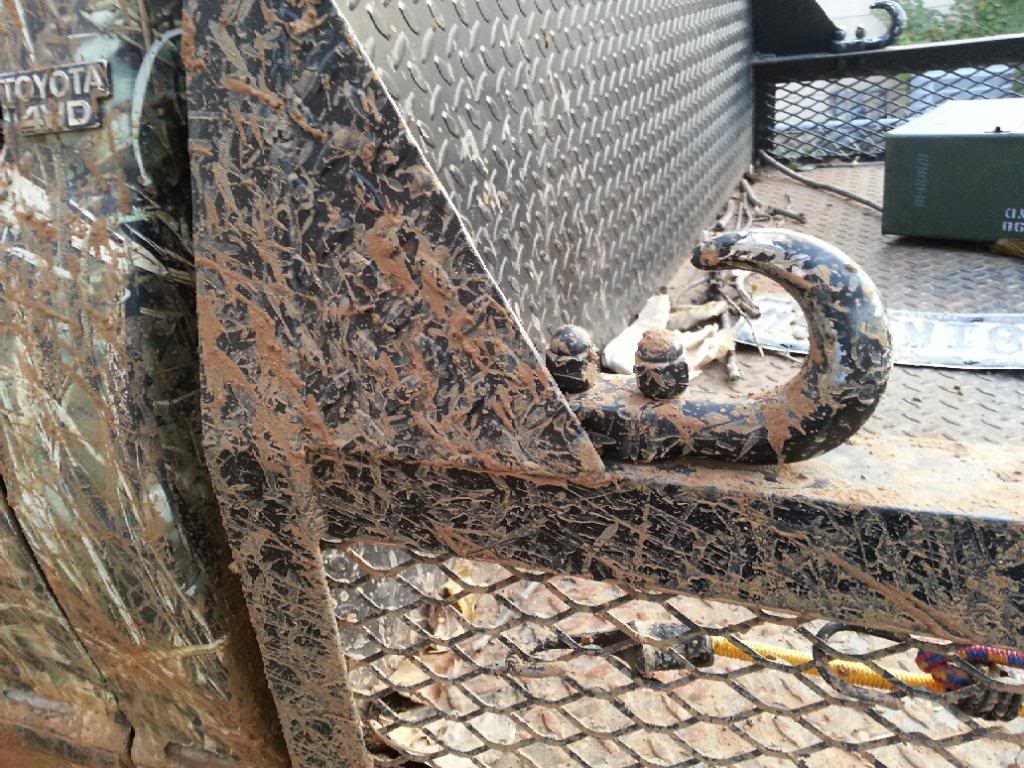 can never have enough towhooks.
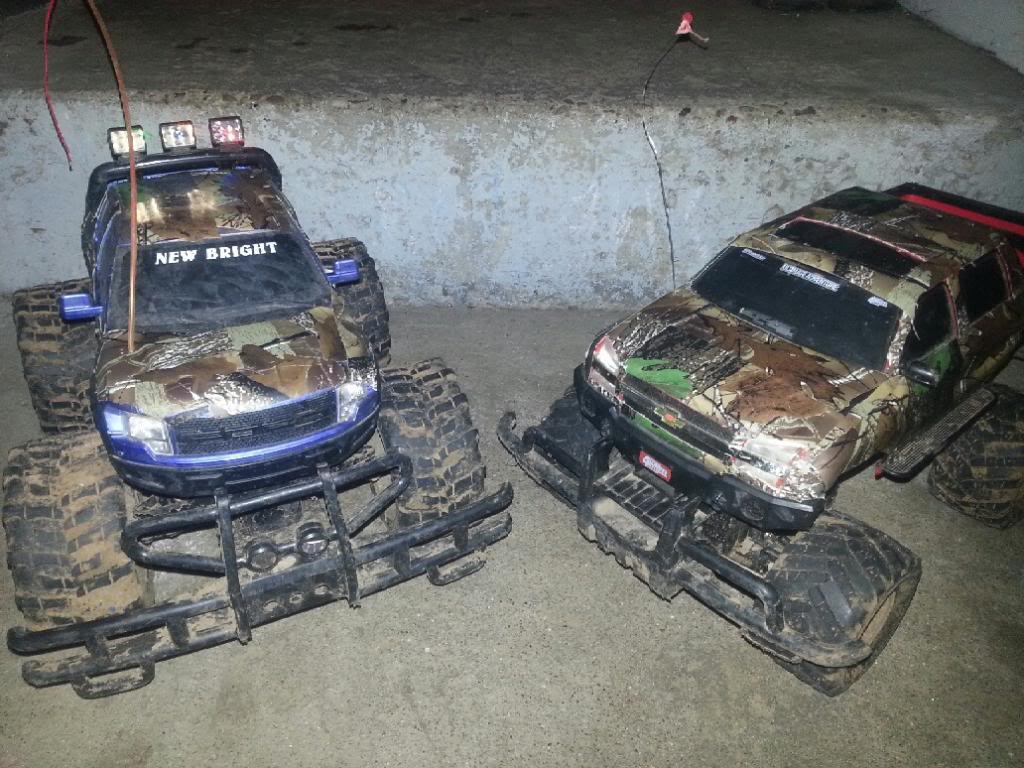
Not really a mod lol but the kid liked Geronimo so much he wanted to camowrap our rc trucks, about three bucks.
this should be the extra hookpoints on my hitch, that come in super handy when dragging around my Pathfinder to mow lol. I've only had the truck for two months, so haven't got to do much yet, But trust me plans are in the works! can never have enough towhooks. Not really a mod lol but the kid liked Geronimo so much he wanted to camowrap our rc trucks, about three bucks.
Dec 2, 2012 | 07:16 AM
#890
Registered User
Joined: Jan 2011
Posts: 1,746
Likes: 6
From: 46 50' 36.82'' N 122 19' 41.01'' W
Still havent done this mod. Is there any reason other than more throttle noise?
__________________
__________________
Last edited by ThatGuy1295; Dec 2, 2012 at 06:55 PM.
Dec 2, 2012 | 06:57 PM
#892
Registered User
Joined: Jan 2011
Posts: 1,746
Likes: 6
From: 46 50' 36.82'' N 122 19' 41.01'' W
after my accident, my dad rebuilt the front of my camry and we ended up getting black car parts, in which my car is white so we painted it with a sponge roller.
 Dec 3, 2012 | 04:10 PM
#893
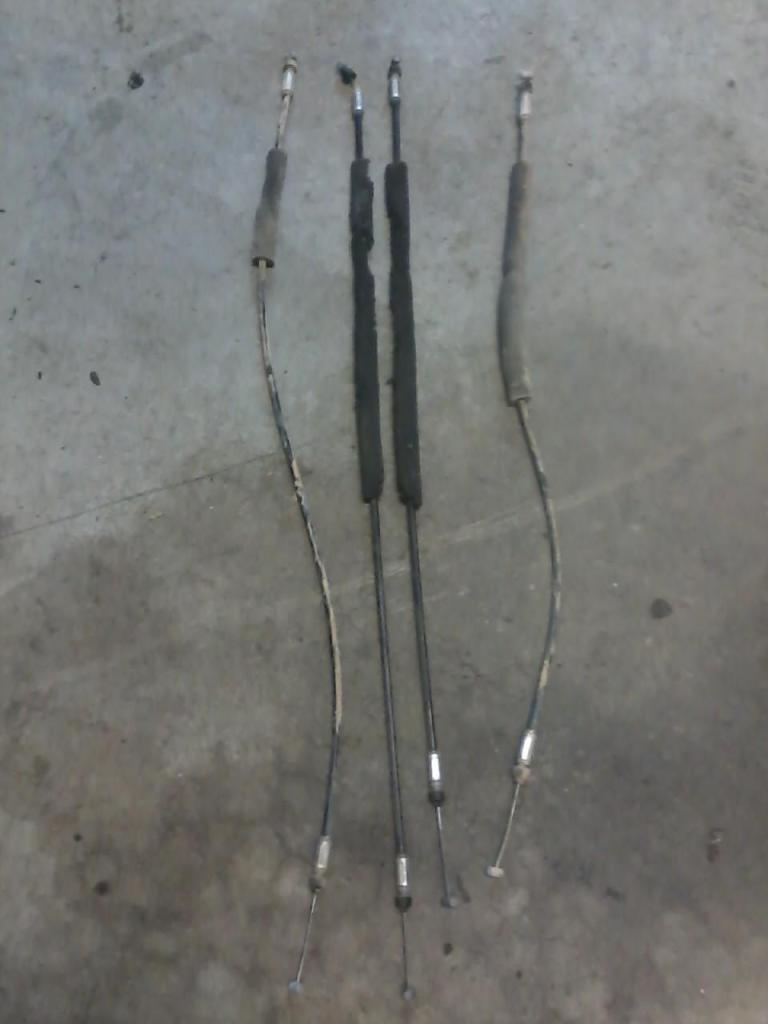
1st Gen and 2nd Gen 4Runner tailgate cables are interchngeable. The 2nd gens seem to be better built.
The out side cables (dusty) are the 94s the center two cables are mine.
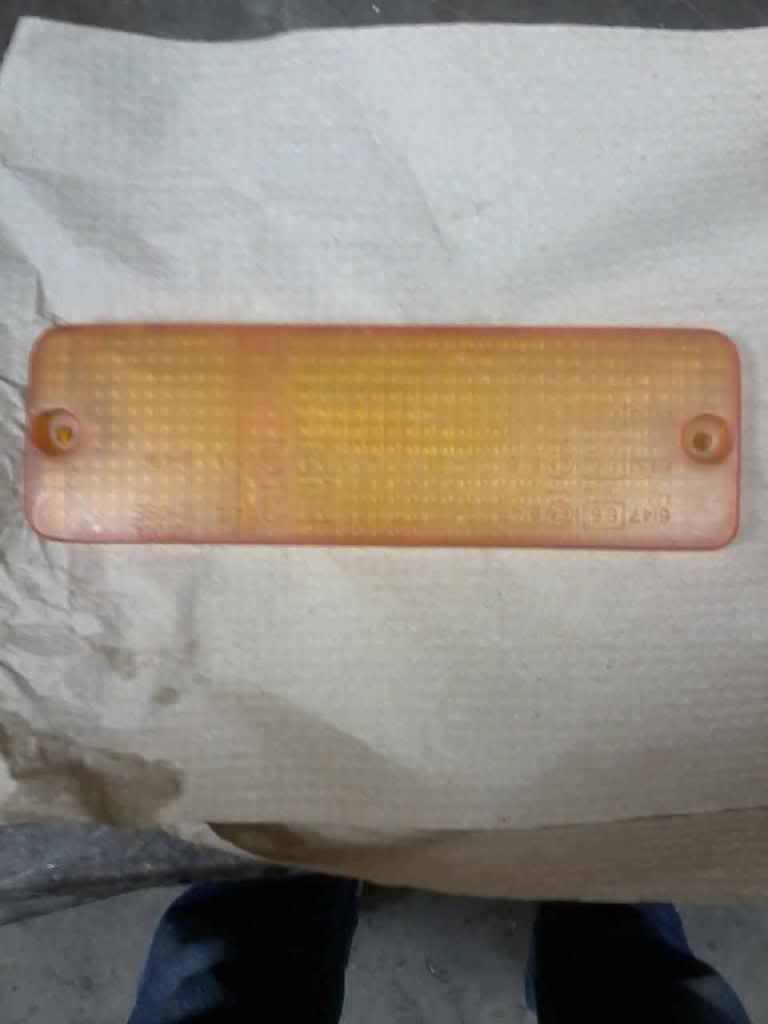
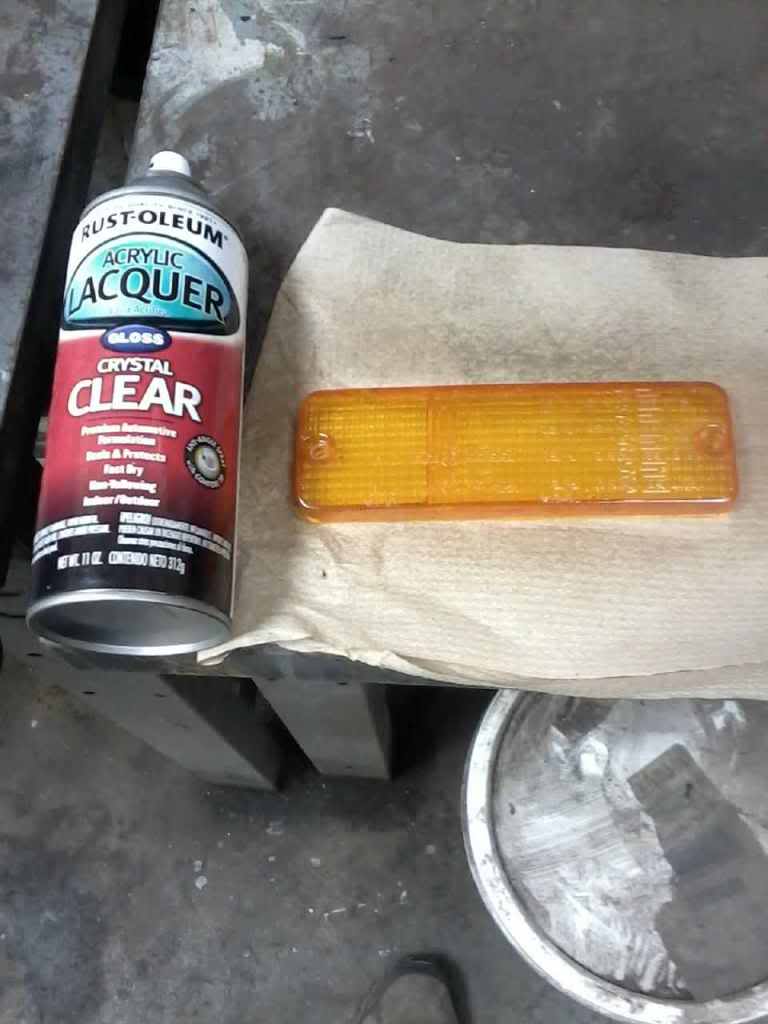
I used to wax my lense covers, but it would just wear back off. Saved a few dollars by just using rattle can clear coat on faded lenses and seems to be lasting quite well.
Faded as most are.
Cleared and looking newer.
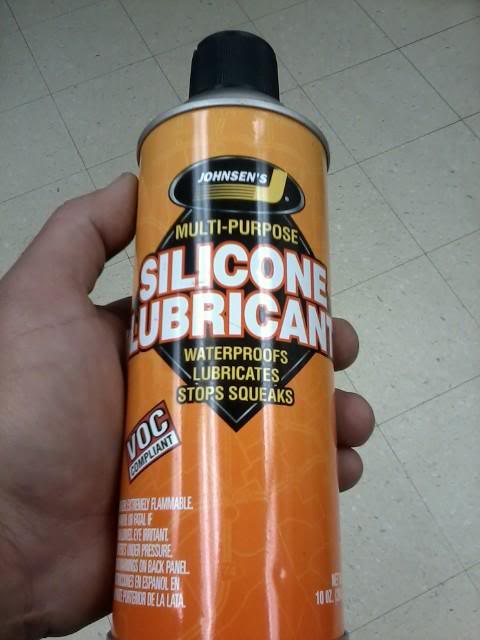
This fixes windows that are hard to roll up. Just spray in track. Also works great for the backhatch.
I wanted to put my SR5 Guage in and got to looking at it and wanted it cleaner. Remove the tabs that screw the cluster to the dash to get the lense off.

I used a lense cleaner to clean it up.
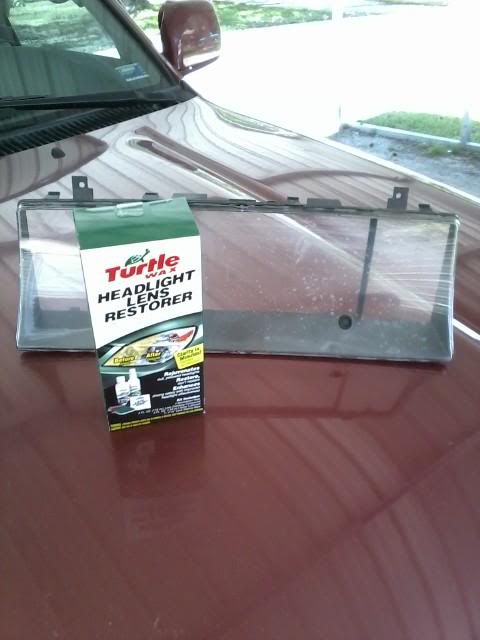
I am quite happy with the results. The label says to allow up to 24 hours for the lense coating to dry. Will have to wait and see final results. Either way I am stuck with it. I have it tilted to avoid a glare while taking the picture. No matter how hard I tried, just couldnt get a good pic without the glare.

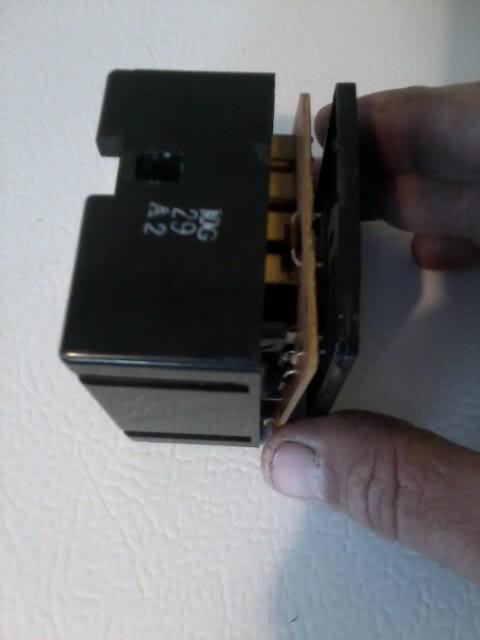
I thought I was going to fix a problem and created another. I always got tired of hearing my door buzzer alarm and first thing I did was find it under the Steering Column.
All was fine until I noticed that I did not have a dome light when I opened the drivers door. Passenger door worked and so did the switch on the cab. First thing I thought was the door switch was bad or dirty or corroded. I checked it out and it was good.
Another problem solved because of Yotatech. Did some looking around and you have to have the door alarm in for the drivers door light to work.
Also found the cure for the alarm on YT. Just bent the tab out a little so as not to make contact. If you ever want to hear it again, it can be bent back in.
Here is the Buzzer Box under the Steering Column.
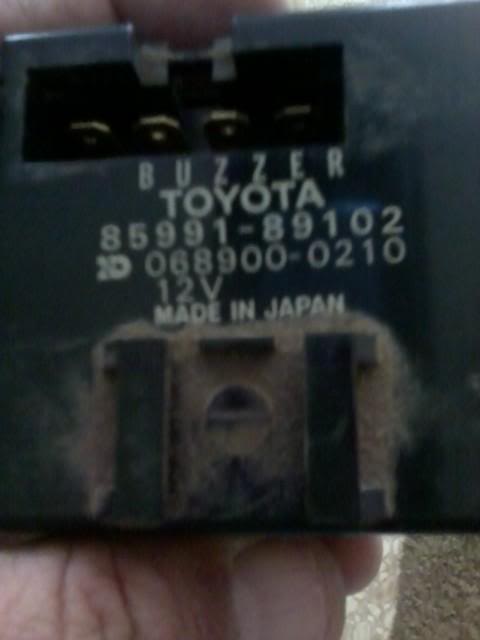
Just bend the tab out from the bottom a little bit.
Here it is going back together. There are 2 tabs to the cover that I just pryed a pocket knife. Life is good now.
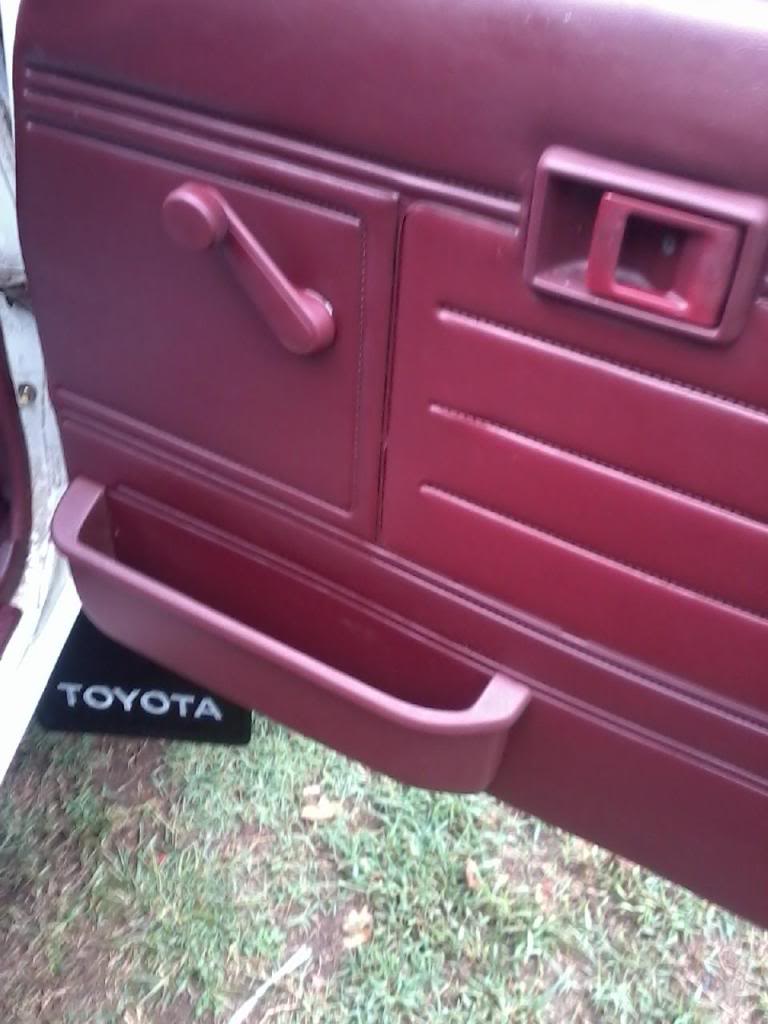
took some door pockets off of a 2nd gen runner as I dont have alot to choose from here in this part of the country.
I took a door pocket and had to take a cut off wheel and knock down the tall tabs. On the Runner I pulled it from it was only being held by 4 screws. Haynes Manual has a great descrition for getting your door panel off.
I then figured where I wanted it and put a dab of weater seal on the screw holes and set it where I wanted it so as to know where to make the screw holes. I used about the smallest drill bit I had and made a small hole and ran the screws in from the back side then mounted it to the door panel.
Here it is done and is the way the 2nd gen was mounted. Wont take heavy items but will work for what I need. I got it off of a brown truck and did have to paint it.
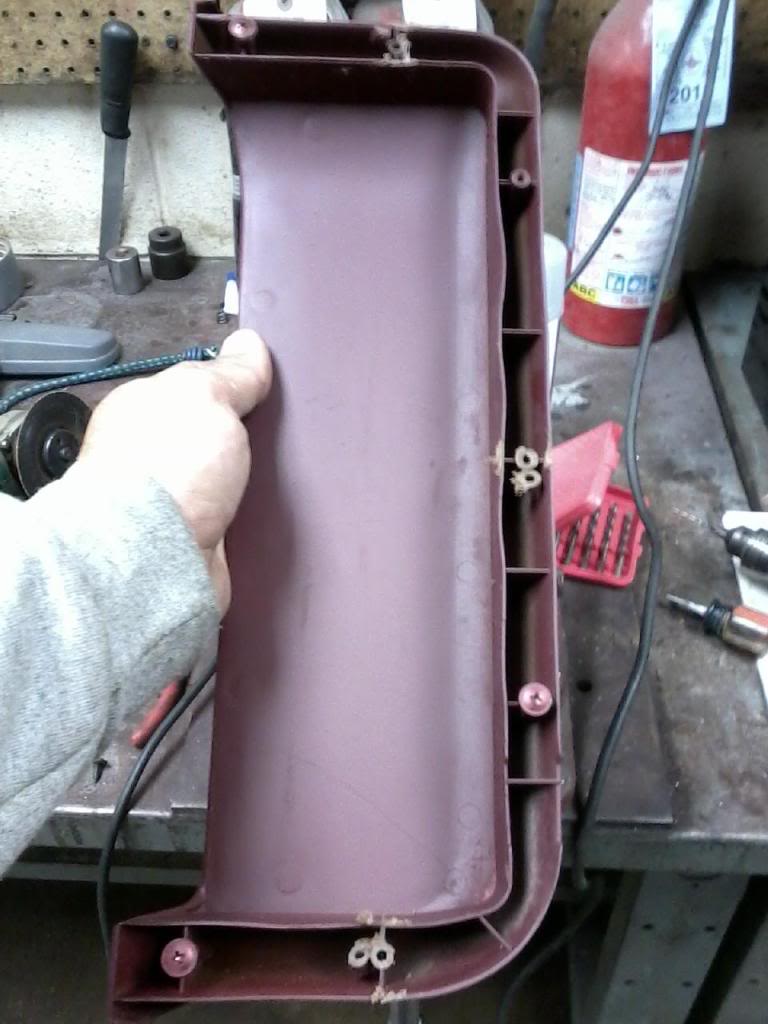
While in the boneyard awhile back, I found some side pockets for th rear passengers. I always seen to get the plain jane trucks and like looking for what else they had to offer and upgrade mine.
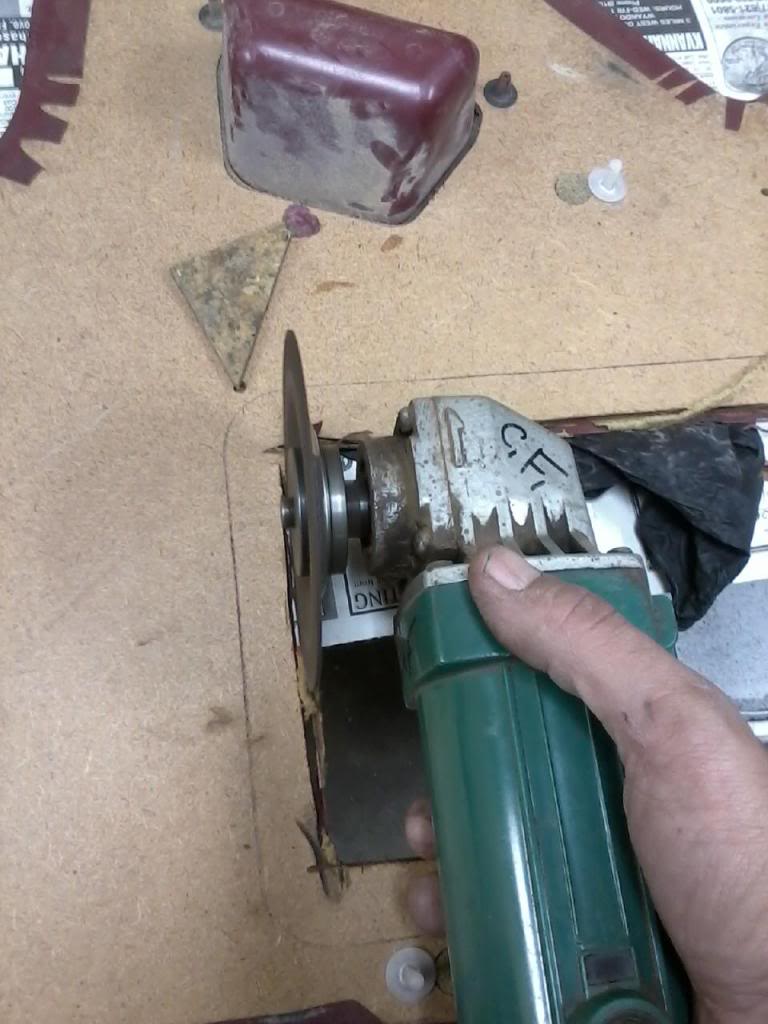
Dont know what I really needed them for but still like the idea of having them. I was apprehensive about cutting and possibly destroying some good panels, but figured since I was taking the chance, may as well as go big, so I used a cutoff wheel. It worked GREAT!! It is the only way to do it and get a good clean cut. I was going to use a razor knife, but am glad I decided to be brave.
I marked the backside and using the cutoff wheel, I was allowing for a tight fit and room for error and did have to go back and knock out some a little at a time.
Here they are done. I need to paint the buckets and will do that later today. Still need to do some repair on the hard plastic panels as mine are really brittle and get it all finished up. Still need to wire my rear speakers in and this should be the last time I need to have the panels off. Bad cell phone pics, but will work I guess.

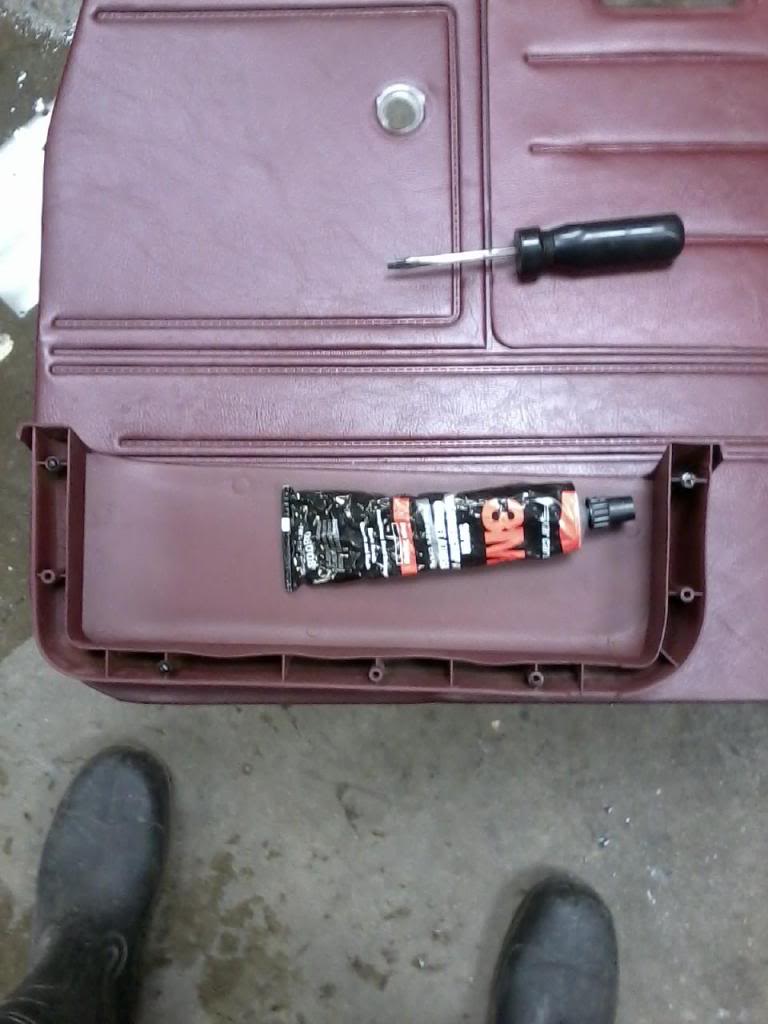
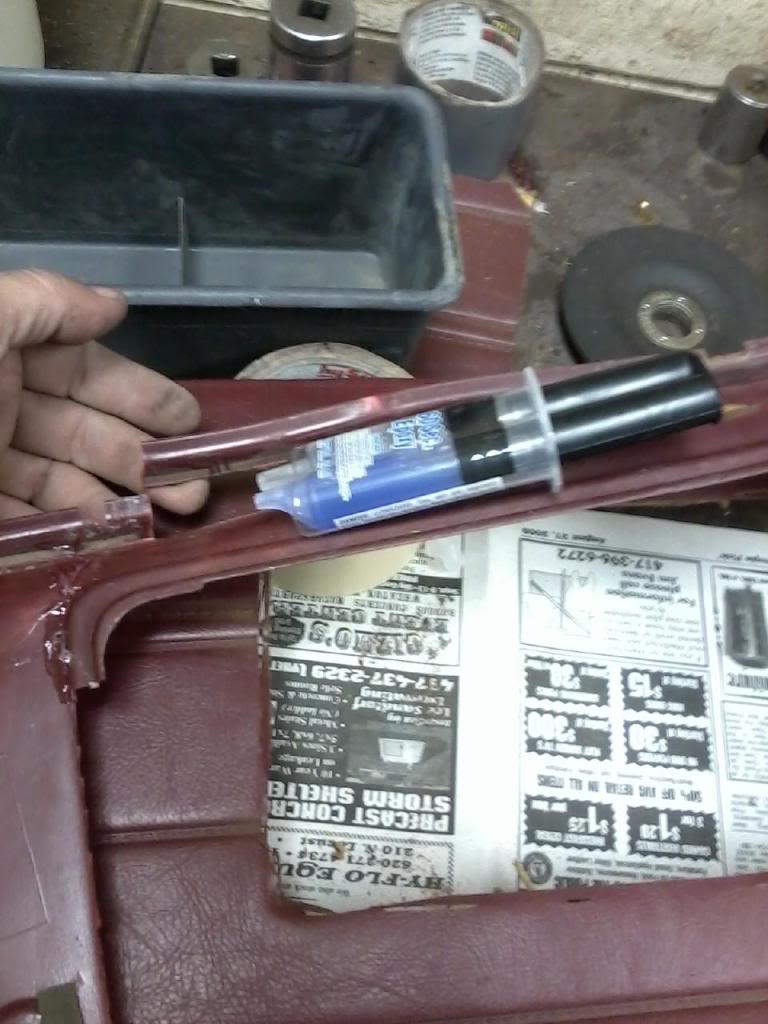
Here is how I am repairing my rear panels and also I used this stuff with a dab of glue around the edges of the pockets to help hold them to the side panels. I used the cutoff wheel and knocked off the tabs that are located on the edge of the side pockets trim. No way am I good enough to match the holes to the panles.
The out side cables (dusty) are the 94s the center two cables are mine.
I used to wax my lense covers, but it would just wear back off. Saved a few dollars by just using rattle can clear coat on faded lenses and seems to be lasting quite well.
Faded as most are.
Cleared and looking newer.
This fixes windows that are hard to roll up. Just spray in track. Also works great for the backhatch.
I wanted to put my SR5 Guage in and got to looking at it and wanted it cleaner. Remove the tabs that screw the cluster to the dash to get the lense off.
I used a lense cleaner to clean it up.
I am quite happy with the results. The label says to allow up to 24 hours for the lense coating to dry. Will have to wait and see final results. Either way I am stuck with it. I have it tilted to avoid a glare while taking the picture. No matter how hard I tried, just couldnt get a good pic without the glare.
I thought I was going to fix a problem and created another. I always got tired of hearing my door buzzer alarm and first thing I did was find it under the Steering Column.
All was fine until I noticed that I did not have a dome light when I opened the drivers door. Passenger door worked and so did the switch on the cab. First thing I thought was the door switch was bad or dirty or corroded. I checked it out and it was good.
Another problem solved because of Yotatech. Did some looking around and you have to have the door alarm in for the drivers door light to work.
Also found the cure for the alarm on YT. Just bent the tab out a little so as not to make contact. If you ever want to hear it again, it can be bent back in.
Here is the Buzzer Box under the Steering Column.
Just bend the tab out from the bottom a little bit.
Here it is going back together. There are 2 tabs to the cover that I just pryed a pocket knife. Life is good now.
took some door pockets off of a 2nd gen runner as I dont have alot to choose from here in this part of the country.
I took a door pocket and had to take a cut off wheel and knock down the tall tabs. On the Runner I pulled it from it was only being held by 4 screws. Haynes Manual has a great descrition for getting your door panel off.
I then figured where I wanted it and put a dab of weater seal on the screw holes and set it where I wanted it so as to know where to make the screw holes. I used about the smallest drill bit I had and made a small hole and ran the screws in from the back side then mounted it to the door panel.
Here it is done and is the way the 2nd gen was mounted. Wont take heavy items but will work for what I need. I got it off of a brown truck and did have to paint it.
While in the boneyard awhile back, I found some side pockets for th rear passengers. I always seen to get the plain jane trucks and like looking for what else they had to offer and upgrade mine.
Dont know what I really needed them for but still like the idea of having them. I was apprehensive about cutting and possibly destroying some good panels, but figured since I was taking the chance, may as well as go big, so I used a cutoff wheel. It worked GREAT!! It is the only way to do it and get a good clean cut. I was going to use a razor knife, but am glad I decided to be brave.
I marked the backside and using the cutoff wheel, I was allowing for a tight fit and room for error and did have to go back and knock out some a little at a time.
Here they are done. I need to paint the buckets and will do that later today. Still need to do some repair on the hard plastic panels as mine are really brittle and get it all finished up. Still need to wire my rear speakers in and this should be the last time I need to have the panels off. Bad cell phone pics, but will work I guess.
Here is how I am repairing my rear panels and also I used this stuff with a dab of glue around the edges of the pockets to help hold them to the side panels. I used the cutoff wheel and knocked off the tabs that are located on the edge of the side pockets trim. No way am I good enough to match the holes to the panles.
Dec 4, 2012 | 01:20 PM
#894
Registered User
Joined: Mar 2012
Posts: 387
Likes: 1
From: Topeka, Kansas
https://www.yotatech.com/forums/f131...e-pics-254141/
heres my contribution i disabled the door buzzer while retaining the headlight alarm and the dome light
heres my contribution i disabled the door buzzer while retaining the headlight alarm and the dome light
Dec 11, 2012 | 10:32 AM
#896
Opened a drawer and found some quick fist mounts I had bought a few years ago and got to thinking about some temp back up lights for my tow rig

Had the magnets on the fridge in the garage..5 minutes later..should be handy for backing up the trailer after dark
Had the magnets on the fridge in the garage..5 minutes later..should be handy for backing up the trailer after dark
 Dec 19, 2012 | 08:08 AM
#898

Registered User
Joined: Dec 2012
Posts: 25
Likes: 0
From: Jamestown, NC
the thread sure pretty cool im gonna keep it going by giving my two cents
No picture for now but should have one up by the end of the day
i took some sun visors out of an old 2001 dodge caravan and put them in my 82 yota replacing those old worn out ones
No picture for now but should have one up by the end of the day
i took some sun visors out of an old 2001 dodge caravan and put them in my 82 yota replacing those old worn out ones
Dec 25, 2012 | 03:28 PM
#899
Registered User
Joined: Aug 2007
Posts: 1,133
Likes: 7
From: PDX
Cadillac 4 note horn
did this one awhile ago: Cadillac 4 note horn install to replace the weak factory horn. If you've never heard the Caddy horns check this link out (kinda sounds like a train):
I picked up a set at the local Pick-N-Pull from a Buick Park Avenue that had all 4 notes - A, C, D and F notes are marked on the horn by the opening - and can say they are definitely larger and louder than the stock ones. You can also find these in huge Cadillacs. Don't forget to clip off the electrical connector. Cost was about $5 each at the yard, or you can find a full set on fleabay for $60-$80.

Here they are mounted, they barely fit behind the grill - to mount them I just used a bolt through one of the holes in the bracket and cut the excess bracket off. I have them wired with a 20 amp fuse on a relay (blew the 10amp fuse I used originally). Another indication of how powerful these are: when I first tested them my wrenches vibrated right off the radiator support


I picked up a set at the local Pick-N-Pull from a Buick Park Avenue that had all 4 notes - A, C, D and F notes are marked on the horn by the opening - and can say they are definitely larger and louder than the stock ones. You can also find these in huge Cadillacs. Don't forget to clip off the electrical connector. Cost was about $5 each at the yard, or you can find a full set on fleabay for $60-$80.
Here they are mounted, they barely fit behind the grill - to mount them I just used a bolt through one of the holes in the bracket and cut the excess bracket off. I have them wired with a 20 amp fuse on a relay (blew the 10amp fuse I used originally). Another indication of how powerful these are: when I first tested them my wrenches vibrated right off the radiator support


