
Thanks Corey for all of your parts :)
 Sep 9, 2009 | 08:43 PM
#1
Thread Starter
Registered User
Joined: Aug 2008
Posts: 1,068
Likes: 4
From: Calgary, AB
Thanks Corey for all of your parts :)
Picked this up this evening after work from the freight depot:

my BRAND NEW FIBERGLASS BED! Complete with flared wheel arches, a set of matching front fenders, and brand new tailgate. The end result once painted will look something like this (from his website):

Hope to have some more pictures up this weekend with it installed. I also found it fitting that I went and picked it up, in the truck it was going on to.
Side note, anyone in Calgary want my old bed? 50 bucks and it's yours. I'm keeping the old tailgate for parts though.
my BRAND NEW FIBERGLASS BED! Complete with flared wheel arches, a set of matching front fenders, and brand new tailgate. The end result once painted will look something like this (from his website):
Hope to have some more pictures up this weekend with it installed. I also found it fitting that I went and picked it up, in the truck it was going on to.
Side note, anyone in Calgary want my old bed? 50 bucks and it's yours. I'm keeping the old tailgate for parts though.

 Sep 10, 2009 | 08:33 AM
#4
I'm sure 874RunnerSR5 would want your bed.
Hey you two are from Calgary, you should join up ct4wd.com. Calgary Toyota 4wd. Great little club with some great guys (and gals), lots of various events and meetings.
Hey you two are from Calgary, you should join up ct4wd.com. Calgary Toyota 4wd. Great little club with some great guys (and gals), lots of various events and meetings.
Sep 10, 2009 | 09:43 AM
#5
Registered User
Joined: May 2008
Posts: 3,948
Likes: 11
From: Calgary, AB Canaduh
 Sep 10, 2009 | 07:37 PM
#6
Registered User
Joined: Jun 2006
Posts: 2,243
Likes: 5
From: Calgary, AB
I'm going to. I just discovered that site a couple days ago and pointed it out to a buddy of mine who has an FJ. So, you'll probably see one or both of us in the next couple months.
Trending Topics


 Sep 11, 2009 | 08:13 PM
#9
Thread Starter
Registered User
Joined: Aug 2008
Posts: 1,068
Likes: 4
From: Calgary, AB
I registered on that site a while ago, then they went through like two forum changes and I got lost. I should check it out again.
The plan was to put the bed on this weekend, but suddenly there's a crew of guys replacing my roof, and there's a huge dumpster in the driveway blocking me from getting into the garage. Depending on how fast they work, I still may have time this weekend to install the bed atleast. The build quality on the parts is outstanding.
The plan was to put the bed on this weekend, but suddenly there's a crew of guys replacing my roof, and there's a huge dumpster in the driveway blocking me from getting into the garage. Depending on how fast they work, I still may have time this weekend to install the bed atleast. The build quality on the parts is outstanding.
 Sep 13, 2009 | 03:30 PM
#12
Thread Starter
Registered User
Joined: Aug 2008
Posts: 1,068
Likes: 4
From: Calgary, AB
OMGz, I made progress!
First of all, let me say this: Everything you are about to see was done by myself, in about 2 and a half hours (includig slurpee break), which makes it all the more impressive. It wasn't terribly complicated technically, but when you have a pair of 300+ lb beds to move, by yourself, it can get tricky. Sorry about the picture quality, I was using my blackberry as I was working.
So, first thing's first. Bed was unloaded from my truck (ok, my dad helped me with that one before he went out of town). I un-crated it, and moved the bed into the garage

The truck was backed into the other stall of the garage, and the bed was strapped into my come-along, which I've installed in the roof many years ago.

There are 8 bolts holding the bed on to the frame. I tried loosening one, but it was rusted on there pretty good. So, I got lazy, and just took the plasma cutter to all of them. I also removed the wiring harness for the rear tail lights, and removed (cut out with my plasma cutter, as it too was rusted in to the bed) the fuel filler. The bed was lifted off, and the truck driven out of the garage

Go Flames.
Here's the truck without the bed

The two beds were shuffled around with the help of my creeper, and the new bed was placed on the truck the same way the old one came off. The result No more rusted bed!!!

At this point I was pretty beat from all the heavy lifting, and called it a day. The bed still needs to be bolted down, tail lights wired, and fuel filler installed, and tailgate latch installed.
I couldn't have done it without my trusty come-along. Many a motor have hung from this thing.

The only issue I had, when unloading the crate from my truck with everything in it, the corner of my old bed cracked one of my new front fenders.

It's not Too big of a deal, I can patch it pretty easily.
Now, question time:
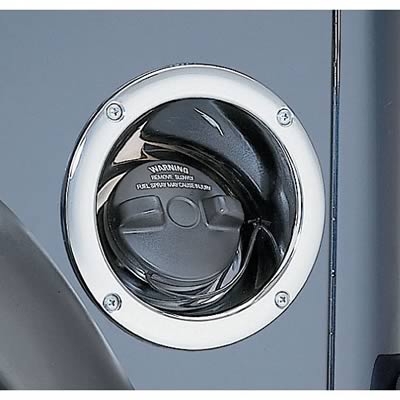
What should I do about the fuel filler? There's no place to install it on the bed. My thoughts are to just go buy an aftermarket fuel filler cap, something I can flush mount into the side of the box, and install it. Something like this:
I'm going to assume Corey might look at this thread so I'll just ask here. In order to bolt the bed down, I'm going to assume I want to align the bed up where I want it, then drill holes up through the bottom of the bed, and install the bolts?
First of all, let me say this: Everything you are about to see was done by myself, in about 2 and a half hours (includig slurpee break), which makes it all the more impressive. It wasn't terribly complicated technically, but when you have a pair of 300+ lb beds to move, by yourself, it can get tricky. Sorry about the picture quality, I was using my blackberry as I was working.
So, first thing's first. Bed was unloaded from my truck (ok, my dad helped me with that one before he went out of town). I un-crated it, and moved the bed into the garage
The truck was backed into the other stall of the garage, and the bed was strapped into my come-along, which I've installed in the roof many years ago.
There are 8 bolts holding the bed on to the frame. I tried loosening one, but it was rusted on there pretty good. So, I got lazy, and just took the plasma cutter to all of them. I also removed the wiring harness for the rear tail lights, and removed (cut out with my plasma cutter, as it too was rusted in to the bed) the fuel filler. The bed was lifted off, and the truck driven out of the garage
Go Flames.
Here's the truck without the bed
The two beds were shuffled around with the help of my creeper, and the new bed was placed on the truck the same way the old one came off. The result No more rusted bed!!!
At this point I was pretty beat from all the heavy lifting, and called it a day. The bed still needs to be bolted down, tail lights wired, and fuel filler installed, and tailgate latch installed.
I couldn't have done it without my trusty come-along. Many a motor have hung from this thing.
The only issue I had, when unloading the crate from my truck with everything in it, the corner of my old bed cracked one of my new front fenders.
It's not Too big of a deal, I can patch it pretty easily.
Now, question time:
What should I do about the fuel filler? There's no place to install it on the bed. My thoughts are to just go buy an aftermarket fuel filler cap, something I can flush mount into the side of the box, and install it. Something like this:
I'm going to assume Corey might look at this thread so I'll just ask here. In order to bolt the bed down, I'm going to assume I want to align the bed up where I want it, then drill holes up through the bottom of the bed, and install the bolts?
Sep 13, 2009 | 04:02 PM
#13

hey Rob , glad you got it !!!
and THANK YOU !!! for your patronage
crappy about the front fender , must have had er' in there good !! , but as I had mentioned , your going to have to "massage" them a bit anyway , ... as i'm not real happy with the fit .. but easy fix . (hence the price discount)
and yes ... to mount the bed , make sure your body lines are all lined up , using the rubber silencer pads , and then drill up from the bottom , 1 at a time !!
The fuel filler you have picked is a great choice , I really like it ,I'm going to do something exactly like that for my Trekker ..
I also did a "custom" fuel filler for a customer in Norway
I put in the 79-83 fuel filler pot , and door (with a little massaging)
Last edited by slacker; Sep 13, 2009 at 04:03 PM.
 Sep 13, 2009 | 07:50 PM
#15
Contributing Member
Joined: Mar 2003
Posts: 11,334
Likes: 0
From: COTKU,Ontario,Canada
If you go for the exposed filler cap don't forget to switch to a locking cap. You don't want some tweaker siphoning your go juice it's just too expensive up here.
The new bed looks good.
The new bed looks good.
Sep 13, 2009 | 08:48 PM
#16
Thread Starter
Registered User
Joined: Aug 2008
Posts: 1,068
Likes: 4
From: Calgary, AB
Yes, locking cap will be included if I go that route. Was one of the first things I thought of. I still have the original gas door, with matching lock for my truck though, I might do what corey did, and re-use it. I'm undecided. The remote opening gas door could also be an option. I have the same sort of setup on my Supra, and my old 83 Celica funny enough had both a remote opener, and a lock on the gas door for the key.
Sep 14, 2009 | 06:12 AM
#17
i am trying to tackle the same issue with the fuel filler door for the fiberglass bedsides i picked up. the best and easiest idea i cam up with was to use a locking billet fuel boor that is readily avalable for a jeep or full size truck like this one http://cgi.ebay.com/ebaymotors/CHEVY...Q5fAccessories
but i like your recessed pocket idea too. where can those be found?
but i like your recessed pocket idea too. where can those be found?
Sep 14, 2009 | 02:57 PM
#19
never mind, i found it at summitracing http://www.summitracing.com/parts/RPE-7508/
Sep 16, 2009 | 08:47 PM
#20
Thread Starter
Registered User
Joined: Aug 2008
Posts: 1,068
Likes: 4
From: Calgary, AB
More progress made today.
Bed was bolted down, which took a lot of time to line up. I'm a little disappointed, it's about 5mm to the driver's side, and it's noticeable if you compare the lines of the vehicle looking at both sides, but I'll live with it. Tailgate was installed with all of the hardware, which also took forever to line up. License place was installed, and finally, the old tail lights were jammed in there to keep the wires off the ground. The new bed is actually designed for 89+ tail lights, so I need to go pick up a set at the PnP this weekend.
Here's a few poor pictures of the results. You can really notice the difference in the width of the wheel arches in these pictures. Compare the stock fronts to the widened rears.


And I saved a piece off of the old tailgate. My girlfriend says this needs to go on the new one. I agree, but I don't have the heart to cut apart a BRAND NEW Toyota tailgate and weld it in........yet.

I mean, a simple Toyota logo on the back of the truck is one thing, but the embossed metal plate is just awesome.
Front fenders go on tomorrow.
Bed was bolted down, which took a lot of time to line up. I'm a little disappointed, it's about 5mm to the driver's side, and it's noticeable if you compare the lines of the vehicle looking at both sides, but I'll live with it. Tailgate was installed with all of the hardware, which also took forever to line up. License place was installed, and finally, the old tail lights were jammed in there to keep the wires off the ground. The new bed is actually designed for 89+ tail lights, so I need to go pick up a set at the PnP this weekend.
Here's a few poor pictures of the results. You can really notice the difference in the width of the wheel arches in these pictures. Compare the stock fronts to the widened rears.
And I saved a piece off of the old tailgate. My girlfriend says this needs to go on the new one. I agree, but I don't have the heart to cut apart a BRAND NEW Toyota tailgate and weld it in........yet.
I mean, a simple Toyota logo on the back of the truck is one thing, but the embossed metal plate is just awesome.
Front fenders go on tomorrow.


