Strykersd's Turbo 4runner build
 02-25-2013, 08:51 PM
#101
After snapping a idler arm on my last 4runner and already bending the idler on this 4runner, I decided to drop the money on a Total Chaos Idler arm for the piece of mind on the trails. Here's the TC idler next to my stock idler.
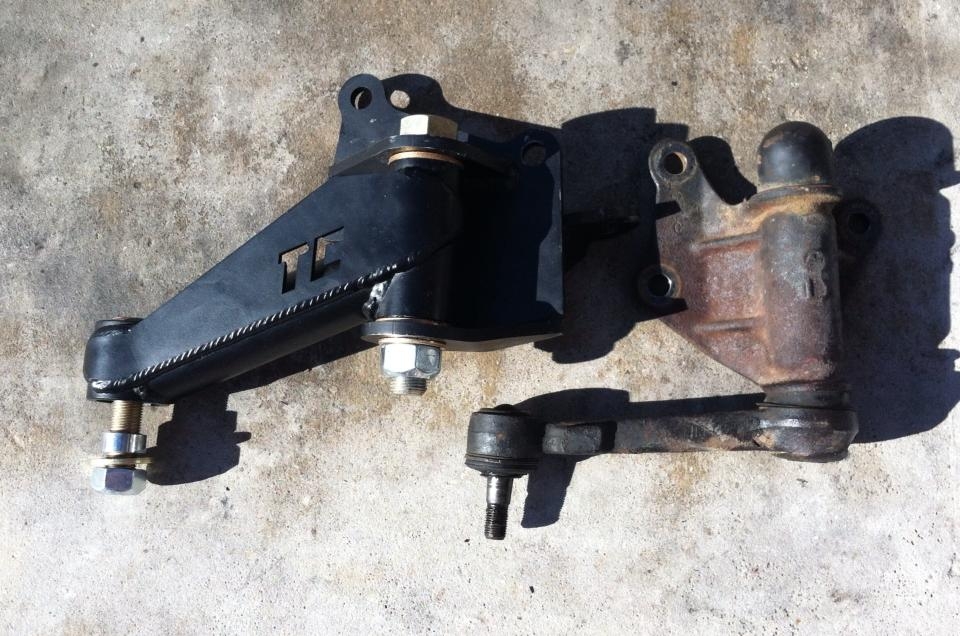
The only modification you need to install the TC arm is boring out your center link to 5/8". Here is the idler installed!
After I got it installed, I decided to go take the 4runner on an shakedown run to test the idler arm and radiator. I took it easy other than a rocky hill climb I decided to try.
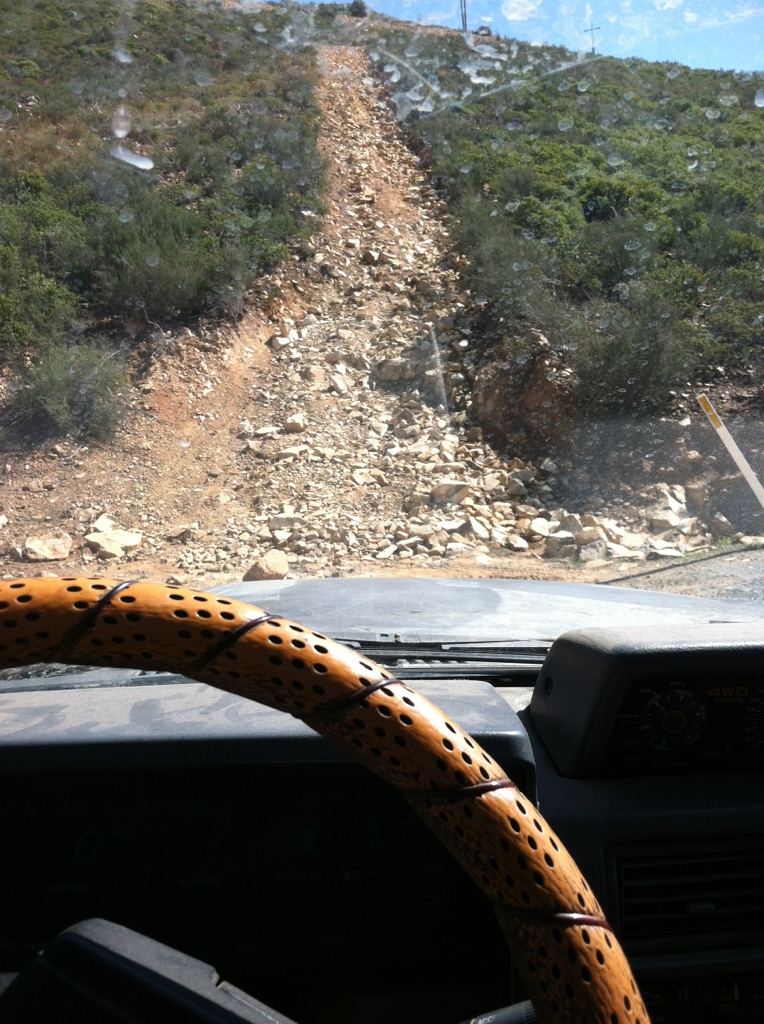
Like usual the picture doesn't do the obstacle justice! It's steep and some of those rocks are decently large. After a few runs at it dual locked and at street pressure, I only made it 2/3 of the way up. I probably could have made it if I aired down but didn't have my compressor and my truck was starting to overheat (I believe because I wasn't running a radiator shroud) so I just called it quits and will be back another day.
The TC idler set me back $351 from Kartek, bringing my build total up to $4703! The only thing stopping me from really wheeling this thing is a rear bumper, once I get one of those I'll really be able to beat on this thing!
The only modification you need to install the TC arm is boring out your center link to 5/8". Here is the idler installed!
After I got it installed, I decided to go take the 4runner on an shakedown run to test the idler arm and radiator. I took it easy other than a rocky hill climb I decided to try.
Like usual the picture doesn't do the obstacle justice! It's steep and some of those rocks are decently large. After a few runs at it dual locked and at street pressure, I only made it 2/3 of the way up. I probably could have made it if I aired down but didn't have my compressor and my truck was starting to overheat (I believe because I wasn't running a radiator shroud) so I just called it quits and will be back another day.
The TC idler set me back $351 from Kartek, bringing my build total up to $4703! The only thing stopping me from really wheeling this thing is a rear bumper, once I get one of those I'll really be able to beat on this thing!
Last edited by strykersd; 05-10-2014 at 07:35 AM.
 02-27-2013, 05:49 PM
#102
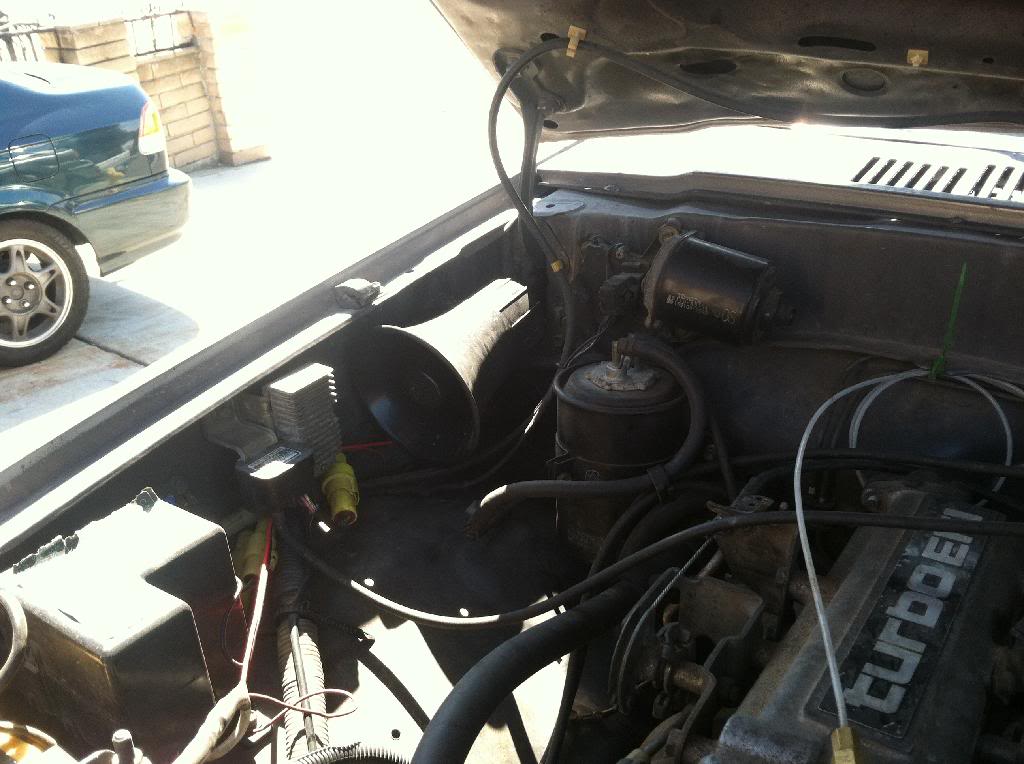
For the past few days I've been calling around everywhere looking for a V6 radiator shroud with no luck. Unlike the metal radiator shroud on the 22re, the V6 shrouds were plastic and seem to crack over time. I considered buying one new, but figured I'd play see if my 22re shroud would work instead. After a few small tweaks, the shroud bolted up to the radiator and aligned perfectly with the engine. The shroud aligned with the sides and bottom of the radiator, but there is a small gap at the top of the radiator.
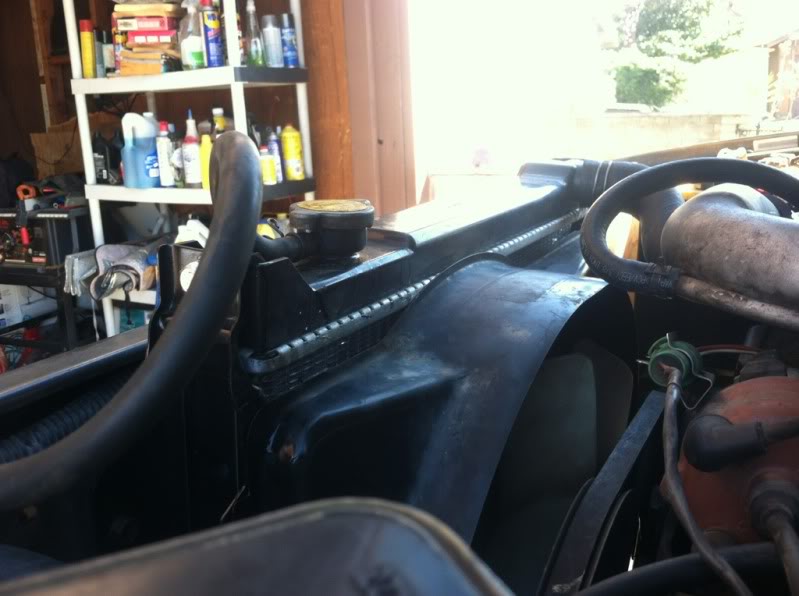
For now I'm going to run it like this, I might just add duct tape over the gap and call it a day!
For now I'm going to run it like this, I might just add duct tape over the gap and call it a day!
Last edited by strykersd; 02-27-2013 at 05:56 PM.
02-28-2013, 11:51 AM
#103
Registered User
Join Date: Jun 2012
Location: seattle
Posts: 48
Likes: 0
Received 0 Likes
on
0 Posts
For the past few days I've been calling around everywhere looking for a V6 radiator shroud with no luck. Unlike the metal radiator shroud on the 22re, the V6 shrouds were plastic and seem to crack over time. I considered buying one new, but figured I'd play see if my 22re shroud would work instead. After a few small tweaks, the shroud bolted up to the radiator and aligned perfectly with the engine. The shroud aligned with the sides and bottom of the radiator, but there is a small gap at the top of the radiator.

For now I'm going to run it like this, I might just add duct tape over the gap and call it a day!
For now I'm going to run it like this, I might just add duct tape over the gap and call it a day!
Ductape it! =) I love ghetto fixes, when I first bought my 4runner the PO had stuffed the muffler in between the outer roll cage and the body, this had rusted a hole in the body (as one would imagine) and was pumping in a bit of exhaust into the cab. I was a bit rushed due a trail run I was going on and don't own a welder so I cut the exhaust off with my grinder and put a piece of dryer hose to point the exhaust at the ground lol. it worked great for that one run but the dryer hose didn't stand the test of time. *wish I had a picture of it*
06-19-2013, 04:48 PM
#104
After stupidly locking my rear end and doing burnouts with my 35" MTRs on ashalpht I believe I blew my torque converter. I was sick of dealing with the auto so I just changed it out with a w56 manual transmission and transfer case. I'm all done with the swap and loving my 22RTE more than ever! Here's my thread that documented the swap. Total cost of the swap was $588.
While running the clutch lines for the swap I had to remove my steering rod and while doing that I decided to cut out part of driver side wheel well. On my last first 4runner I blew out a power steering box and had to change it the snow at night. It took us much longer to do because of the stock wheel well, so I decided to do a little trimming incase I ever have to do it again.
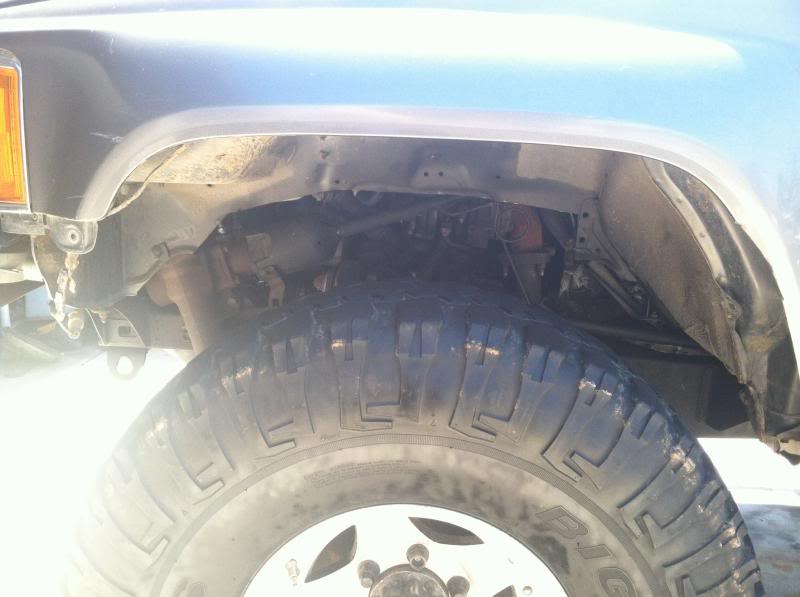
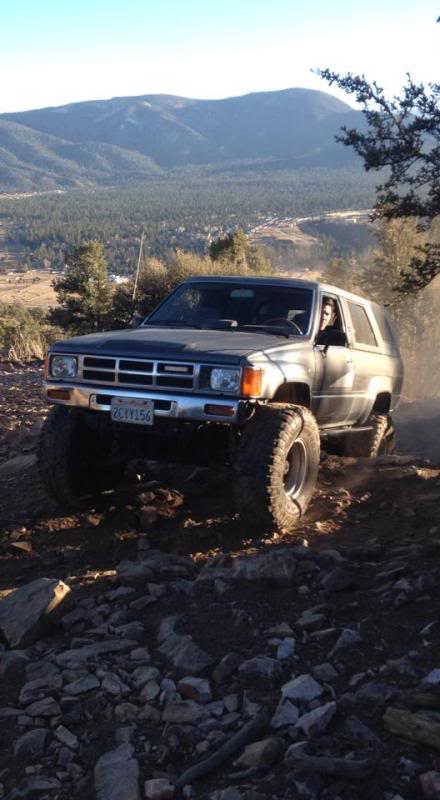
In other news, while scouring the junkyard for parts for the swap I came across a prestine condition driver door the same color as mine, so I picked it up for $50 and bolted it in. Here's a picture of the truck with the new door installed.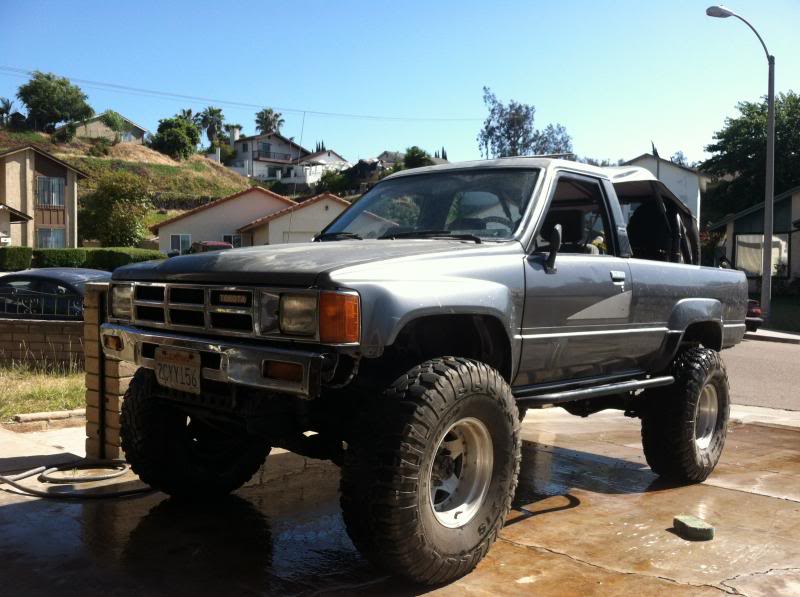
Total cost of the 4runner so far $5,241
Although it's running great, I won't be able to wheel it for months. You might also have noticed I haven't been working on the truck much the last few months. The reason for this is because I'm going on a two month cross country with a buddy. I've wanted to do this for the longest time and finally had the right opportunity. I've been saving money for months, quit my jobs and got out of my lease. If you want to follow along, we have a blog we'll be updating as we go! https://www.facebook.com/livinlifeontheroad
While running the clutch lines for the swap I had to remove my steering rod and while doing that I decided to cut out part of driver side wheel well. On my last first 4runner I blew out a power steering box and had to change it the snow at night. It took us much longer to do because of the stock wheel well, so I decided to do a little trimming incase I ever have to do it again.
In other news, while scouring the junkyard for parts for the swap I came across a prestine condition driver door the same color as mine, so I picked it up for $50 and bolted it in. Here's a picture of the truck with the new door installed.
Total cost of the 4runner so far $5,241
Although it's running great, I won't be able to wheel it for months. You might also have noticed I haven't been working on the truck much the last few months. The reason for this is because I'm going on a two month cross country with a buddy. I've wanted to do this for the longest time and finally had the right opportunity. I've been saving money for months, quit my jobs and got out of my lease. If you want to follow along, we have a blog we'll be updating as we go! https://www.facebook.com/livinlifeontheroad
Last edited by strykersd; 05-10-2014 at 07:38 AM.
 08-26-2013, 11:18 PM
#107
Luckily that was the second time on the trip that I drove into a city the day after a record breaking storm, it happened a few weeks earlier in Minneapolis.
09-15-2013, 07:47 PM
#109
While out doing some light off road testing I noticed something was up with my steering. After checking everything out, it turns out that my Total Chaos idler arm was hitting my frame. One of the main reasons I dropped the $400 for a TC idler arm was so that I could stop worrying about bending idler arms and them hitting my frame. I emailed TC and they advised me to "loosening all of the mounting bolts and trying to rotate the idler arm down, then re-tighten all of the hardware." Although I was able to do that and clear the frame rail, I didn't trust that it would hold up to the forces of off roading so I just decided to weld my total chaos idler arm to my frame.

Hopefully that'll solve the problem!
I just got a new job and now have weekends off! Once I get my engine running well I'll finally get to take this truck out!
11-06-2013, 07:31 PM
#110
I'm just finishing up paying off the trip I went on this summer, so I finally freed up some funds for the 4runner. I've slowly been buying parts for a supra turbo swap (CT26), but while buying turbo parts I've come across some small things I've needed for the 4runner. The other day I picked up a set of headrests for the rear seats of a turbo 4runner since my truck didn't come with them and this gem.

Both for just $60! My interior is just about complete!
I'm still collecting parts for the swap, so I'll update this thread when I start the swap!
Total cost of the 4runner so far $5,291
Both for just $60! My interior is just about complete!
I'm still collecting parts for the swap, so I'll update this thread when I start the swap!
Total cost of the 4runner so far $5,291
Last edited by strykersd; 05-10-2014 at 07:38 AM.
11-15-2013, 06:18 PM
#111
After all the bad things I've heard about the CT20 turbos that came on the 22rte's, I figured I'd pull my turbo and check it out. There was a small crack on the outside of the exhaust housing, but when I got the turbo out I saw this.

After realizing that my turbo trashed I tracked down a newly rebuilt CT26 turbo from the Toyota Supra on craigslist for $100! I'm still tracking down parts for the swap, but here's a side by side comparison of the turbos.
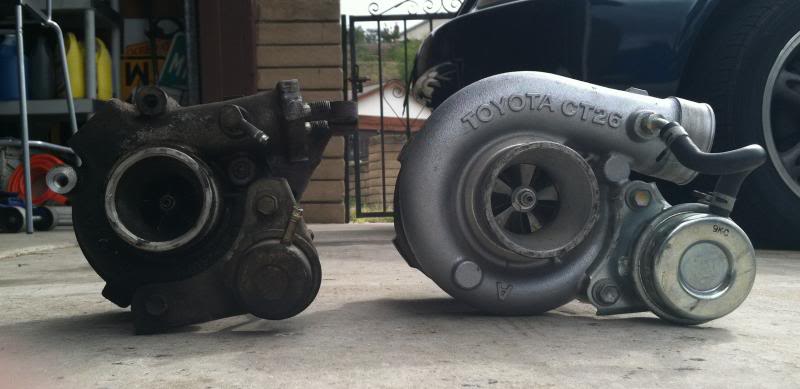
The stock CT20 on the left and the new CT26 turbo on the right! In the word's of Jeremy Clarkson from Top Gear, "Powaaaaaaaa!"
Total cost of the 4runner so far $5,391. This cost tally is starting to get depressing!
After realizing that my turbo trashed I tracked down a newly rebuilt CT26 turbo from the Toyota Supra on craigslist for $100! I'm still tracking down parts for the swap, but here's a side by side comparison of the turbos.
The stock CT20 on the left and the new CT26 turbo on the right! In the word's of Jeremy Clarkson from Top Gear, "Powaaaaaaaa!"
Total cost of the 4runner so far $5,391. This cost tally is starting to get depressing!
Last edited by strykersd; 05-10-2014 at 07:38 AM.
01-31-2014, 12:01 PM
#112
Alright, I've been busy working on my 4runner lately and it's finally a reliable truck! While swapping a Supra CT26 turbo into my truck I decided to bite the bullet and pull my motor and do a complete rebuild on my motor. I always heard a slight rod knock and while ripping apart my motor I discovered I was right.

Looks like this motor was oil starved and damaged my rod bearings. Luckily my crank was fine.
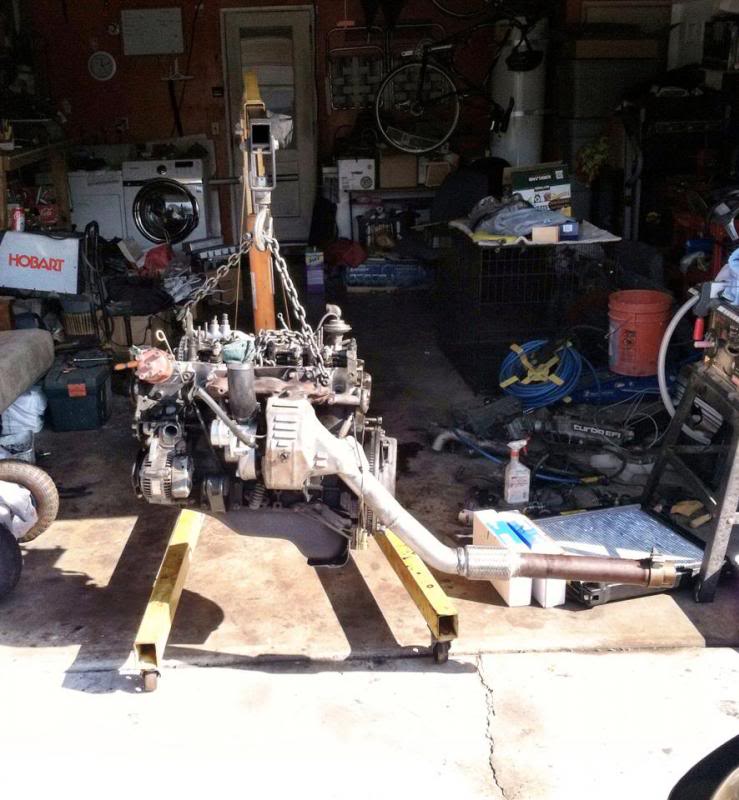
Here's the rebuilt motor complete with the CT26 turbo, custom down pipe and 4xinnovations solid motor mounts.
While I was waiting on parts for the rebuild I also ordered a set of H4 headlights to replace my sealed beam headlights. It's a night and day difference, I can finally see the road at night!
Three days after I finished the build and got the truck running I took my 4runner up to Big Bear Lake for a snowboarding weekend. Since none of my buddies have 4WD trucks I didn't want to risk breaking down on a trail far from the road so I just wheeled Gold Mountain. I made it up the trail with five women in my truck! Here's the best pic I have from the trail
All in all, I love the way the a higher 22rte with the CT26 turbo runs! While in Big Bear I drove my buddy's 2WD 22r pickup and it's just a dog comparatively!
Cost:
-I got the motor mounts new off craigslist for $50
-headlights were $40 off ebay
-not counting gaskets, the rest of the parts for the turbo swap (not including the turbo) set me back $50
Total cost of the 4runner so far $5,531!
Looks like this motor was oil starved and damaged my rod bearings. Luckily my crank was fine.
Here's the rebuilt motor complete with the CT26 turbo, custom down pipe and 4xinnovations solid motor mounts.
While I was waiting on parts for the rebuild I also ordered a set of H4 headlights to replace my sealed beam headlights. It's a night and day difference, I can finally see the road at night!
Three days after I finished the build and got the truck running I took my 4runner up to Big Bear Lake for a snowboarding weekend. Since none of my buddies have 4WD trucks I didn't want to risk breaking down on a trail far from the road so I just wheeled Gold Mountain. I made it up the trail with five women in my truck! Here's the best pic I have from the trail
All in all, I love the way the a higher 22rte with the CT26 turbo runs! While in Big Bear I drove my buddy's 2WD 22r pickup and it's just a dog comparatively!
Cost:
-I got the motor mounts new off craigslist for $50
-headlights were $40 off ebay
-not counting gaskets, the rest of the parts for the turbo swap (not including the turbo) set me back $50
Total cost of the 4runner so far $5,531!
Last edited by strykersd; 05-10-2014 at 07:39 AM.
01-31-2014, 02:48 PM
#114
Registered User
Join Date: Jun 2012
Location: seattle
Posts: 48
Likes: 0
Received 0 Likes
on
0 Posts
Love the engine rebuild! Been wanting to do the ct26 swap as well. Ive got a few questions.
How did you mount the ct26 to the exhaust manifold?
Did you use the stock ECU?
Did you give ARP head bolts any consideration?
Gas mileage still reasonable (really wondering if you are running too rich or not)?
Thanks for the info!!!
How did you mount the ct26 to the exhaust manifold?
Did you use the stock ECU?
Did you give ARP head bolts any consideration?
Gas mileage still reasonable (really wondering if you are running too rich or not)?
Thanks for the info!!!
01-31-2014, 03:03 PM
#115
I lowered the boost to 6PSI for now as I'm breaking in the motor.
-To mount the CT26 to my factory turbo manifold I spent hours with a die grinder opening up the port of the turbo manifold and opening up the mounting holes on the CT26.
-Yes I'm running the stock ECU.
-I already have ARP head studs
-I have yet to check gas mileage yet, I'll let you know when I do. I have an Innovate LC-1 sideband in the garage I'm installing in the truck so I'll have a definite answer of whether I'm running lean or rich.
I'm planning on making a separate thread on doing a CT26 swap on here soon!
Love the engine rebuild! Been wanting to do the ct26 swap as well. Ive got a few questions.
How did you mount the ct26 to the exhaust manifold?
Did you use the stock ECU?
Did you give ARP head bolts any consideration?
Gas mileage still reasonable (really wondering if you are running too rich or not)?
Thanks for the info!!!
How did you mount the ct26 to the exhaust manifold?
Did you use the stock ECU?
Did you give ARP head bolts any consideration?
Gas mileage still reasonable (really wondering if you are running too rich or not)?
Thanks for the info!!!
-Yes I'm running the stock ECU.
-I already have ARP head studs
-I have yet to check gas mileage yet, I'll let you know when I do. I have an Innovate LC-1 sideband in the garage I'm installing in the truck so I'll have a definite answer of whether I'm running lean or rich.
I'm planning on making a separate thread on doing a CT26 swap on here soon!
02-16-2014, 10:11 AM
#116
After being in the backseat of a first ten 4runner in a high speed rollover and always seeming to have someone in my back seat while wheeling I turned my attention to my rear seat belts. In my opinion the factory rear lap belts in first generation 4runners suck! They just keep tightening down until you can no longer breath. I had to pick some parts up at the junkyard the other day and decided to buy some shoulder belts for my 4runner. I was hoping to find some from a 84-89 Toyota pickup but had no luck so I just picked up a rear seat belt set from a 96 Honda Passport. Here's a shot of it installed.
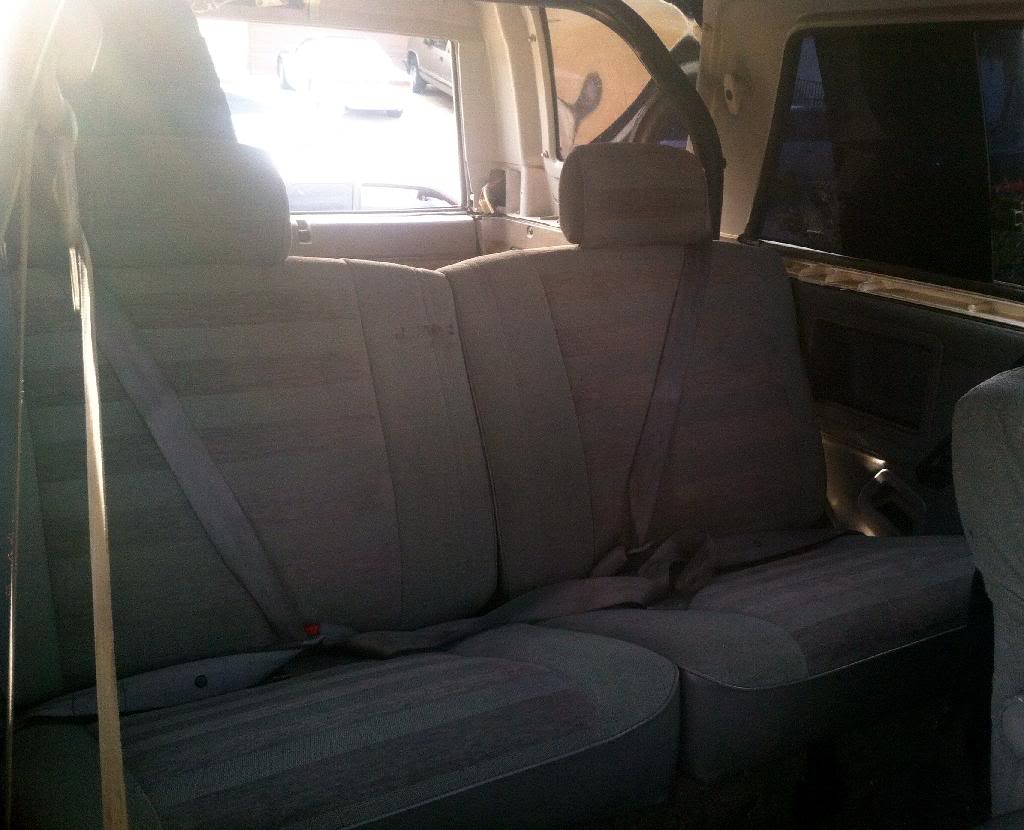
Here's a shot of it installed on my roll bar
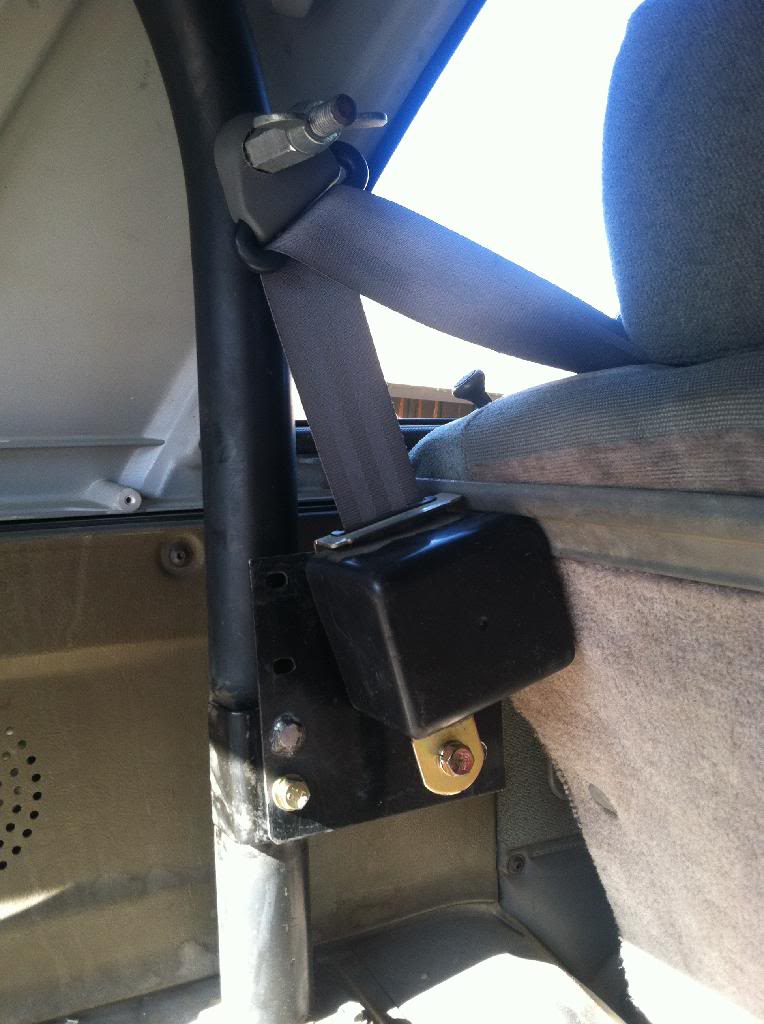
You can also see my modified 4crawler hi-lift mount to work with the shoulder belts. The ironic part is that I don't even have a hi-lift! I just picked it up at a junkyard for $5 a few years back.
My final verdict, I love them! Much more comfortable than those factory lap belts!
They set me back $20, bring my total cost to $5,551!
Here's a shot of it installed on my roll bar
You can also see my modified 4crawler hi-lift mount to work with the shoulder belts. The ironic part is that I don't even have a hi-lift! I just picked it up at a junkyard for $5 a few years back.
My final verdict, I love them! Much more comfortable than those factory lap belts!
They set me back $20, bring my total cost to $5,551!
Last edited by strykersd; 05-10-2014 at 07:39 AM.
03-05-2014, 11:45 AM
#117
I just got a new girlfriend recently and we planned a weekend snowboarding trip. Since I have the worst luck with snow chains I decided we'd take the 4runner. Considering that she has a brand new car, the 4runner is a little rough around the edges so I did a little work to it before I let her inside of it! haha
Firstly, my windshield wipers are easily a decade old and two of the four mounting screws were stripped out. My solution was to go to a junkyard with a hacksaw, cut off some new wiper arm ends and just weld them to mine. Here's a picture of my old wiper arms on top, the new cut off end in the center and the finished product on the bottom.
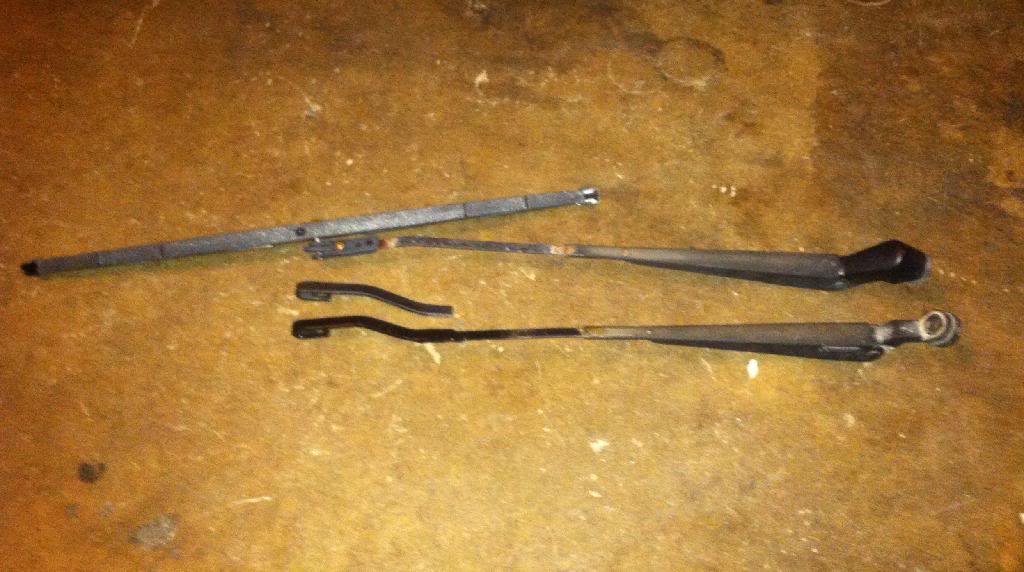
My verdict, I love them! No more needing a screwdriver to change wiper blades and now I can just buy any off the shelf wiper I want.
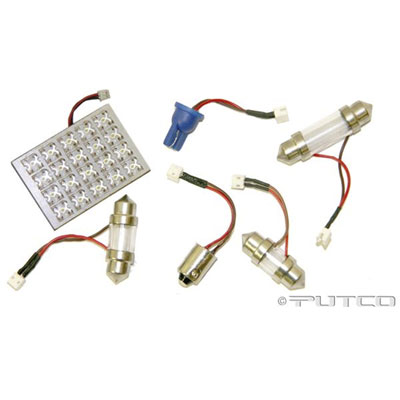
Next up was the interior lighting in my 4runner. I'm not sure if it is because of weak stock bulbs or that the plastic has discolored over the last 28 years, but my dome light sucked. For that I installed an Putco 20 piece LED light panel (Autozone part #980115) into my factory dome light.
Now I can clearly see everything in my truck, including everything on the floor!
Total Cost: The wiper arms cost me $2 and the dome light was another $25, bringing my grand total up to $5,576
Firstly, my windshield wipers are easily a decade old and two of the four mounting screws were stripped out. My solution was to go to a junkyard with a hacksaw, cut off some new wiper arm ends and just weld them to mine. Here's a picture of my old wiper arms on top, the new cut off end in the center and the finished product on the bottom.
My verdict, I love them! No more needing a screwdriver to change wiper blades and now I can just buy any off the shelf wiper I want.
Next up was the interior lighting in my 4runner. I'm not sure if it is because of weak stock bulbs or that the plastic has discolored over the last 28 years, but my dome light sucked. For that I installed an Putco 20 piece LED light panel (Autozone part #980115) into my factory dome light.
Now I can clearly see everything in my truck, including everything on the floor!
Total Cost: The wiper arms cost me $2 and the dome light was another $25, bringing my grand total up to $5,576
Last edited by strykersd; 05-10-2014 at 07:40 AM.
03-05-2014, 11:56 AM
#118
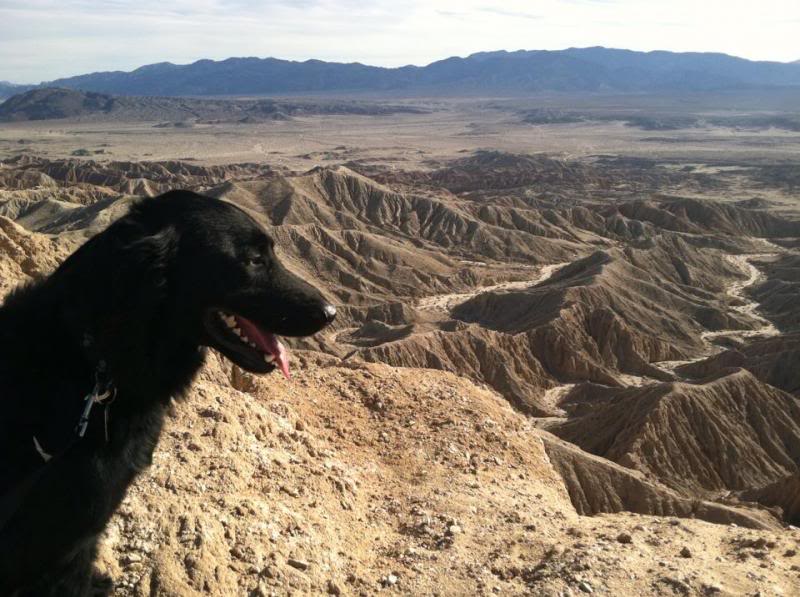
Last weekend I took my 4runner on it's last trip of the desert/snowboarding season! Thursday morning I packed up my gear and my dog and hit the desert for Tierra Del Sol's 52nd Desert Safari! I wheeled a bit Thursday and Friday, but didn't get as much in as I'd like since things kept going wrong. I had one friend roll his Willy's, one friend broke an aluminum wheel on his Rubicon and another friend crack his aftermarket t-case mount on his samurai. So on the bright side, the 4runner held up like a champ! It was my dog Guinness' first trip out to the desert and he had a blast! Here's a shot of him at Font's Point in Anza Borrego!
I got home from the desert Friday night, cleaned the truck out and got a few hours sleep before picking up my girlfriend and taking the 4runner up to Big Bear for a weekend of snowboarding! All in all the truck ran great!
Here's a shot of the stuff I had to drive through that weekend!
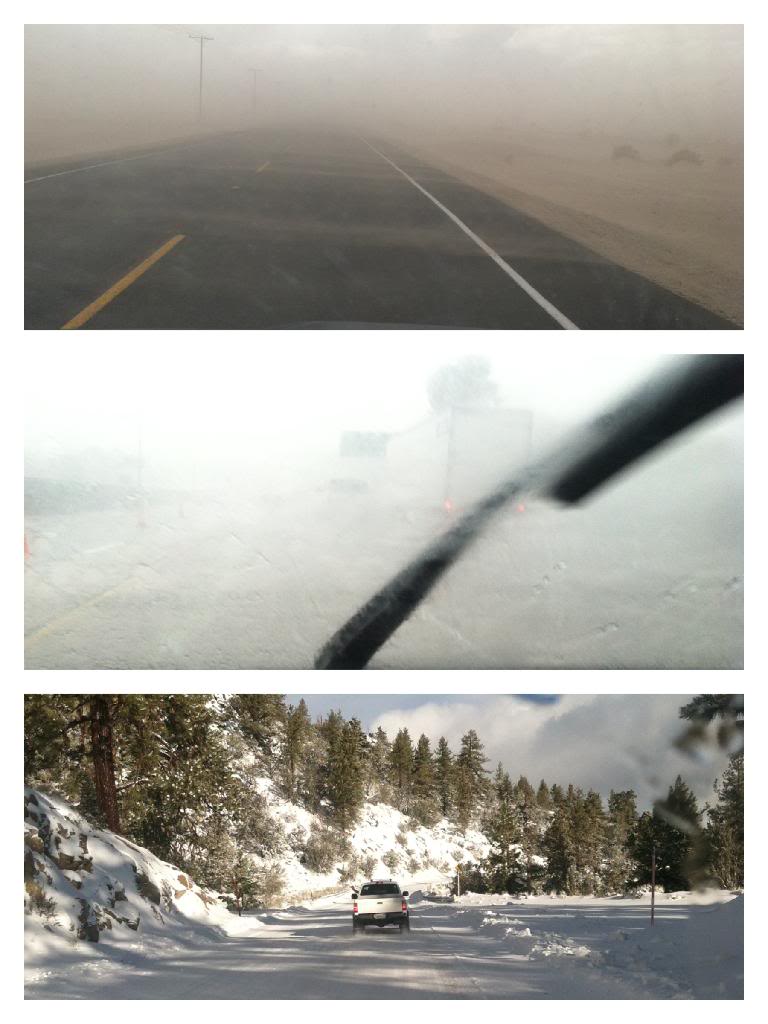
Sandstorms in the desert, torrential downpour and snow up in the mountains! It was an amazing weekend!
I got home from the desert Friday night, cleaned the truck out and got a few hours sleep before picking up my girlfriend and taking the 4runner up to Big Bear for a weekend of snowboarding! All in all the truck ran great!
Here's a shot of the stuff I had to drive through that weekend!
Sandstorms in the desert, torrential downpour and snow up in the mountains! It was an amazing weekend!
03-05-2014, 12:22 PM
#119
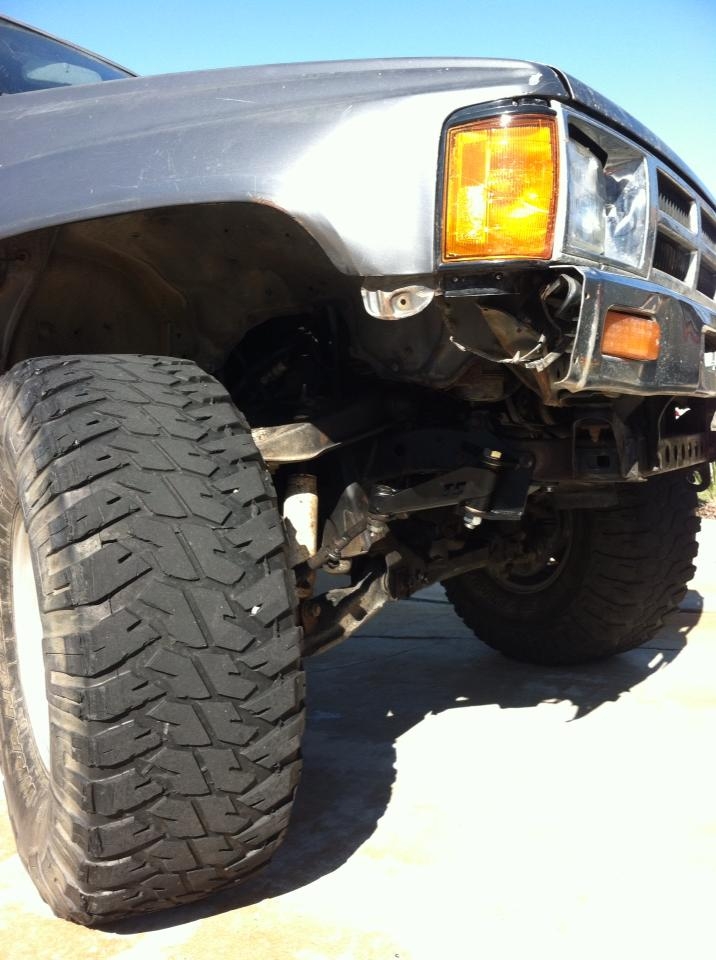
Due to some labor laws I've had a reduction in hours lately so when I got back from the weekend trips I've been working on my 4runner quite a bit the last few days. I noticed my tires were rubbing while off-roading in the desert so out came the sawzall! Here's a shot of my front fender, before on top and after below.

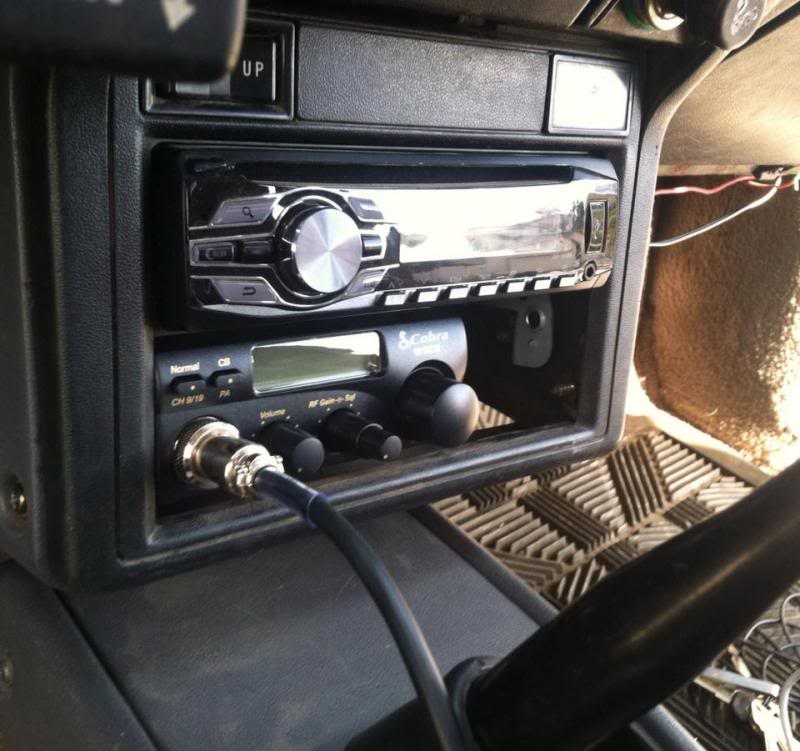
Next up I installed the CB radio I bought a few weeks ago. It's nothing special, just a $30 Cobra 19 from Walmart. I wanted a bluetooth CB radio but didn't have the guts to try it since my truck is an open air vehicle most of the year! Here's a shot of the CB installed under my radio.
Oh and I almost forgot the best part, I spent the extra $15 for a PA horn for it!
Total Cost: The CB radio and PA system set me back $50, bring my total up to $5626
Last edited by strykersd; 05-10-2014 at 07:40 AM.
03-05-2014, 06:38 PM
#120
Registered User

Join Date: Feb 2014
Posts: 58
Likes: 0
Received 0 Likes
on
0 Posts
No more overheating right? I was going to suggest that the torque converter was causing your overheating if there was no leaks in the cooling system but it seems you have found the problem and corrected it.


