
Rune's 3.0 rebuild thread
 Jul 22, 2007 | 08:19 PM
#1
Thread Starter
Registered User
Joined: Oct 2005
Posts: 587
Likes: 0
From: Berkeley, CA
Rune's 3.0 rebuild thread
Figured I might start a thread about my rebuild since I might need some help up the road and maybe somebody else can get some help from my experiences as well.
A couple of months ago I got a rod knock in my engine (or at least that's wat I think it was). I ignored it for a while, until the sound got a lot worse and I was freaked out enough about it to just have the 4runner towed back home again. After exploring some options I decided to try to rebuild it.
Last weekend I started taking things apart to get ready to pull the engine. Figured I spent 4 hours or so then, a couple of hours yesterday and about the same today. Now I have everything off and the only things I nned to do are to unbolt the transmission, loosen the engine mounts and lift her out.
Don't know if I have any pictures worthwhile posting here yet, it's mostly vacuum lines and stuff like that so I can put it back together again when the rebuild is done. I haven't really run into any problems yet - the biggest one was probably the two nuts that rounded instantly on the exhaust manifold (and I've read about people having a lot of problems with those). Used some liquid wrench on them and then went to OSH to pick up the complimenting pieces to my already purchased Craftsman nut extractor set. A #9 extractor fit perfectly on the 14mm nuts and made it relatively easy to get them out. They were stuck prettly badly, but all I needed was some extensions to reach the nuts from underneath the truck, my 18" breaker bar and some good viking muscle to get them off.
I figured since everybody talks so much about how hard it is to get the crankshaft bolt out I should loosen it while I still have the engine in the car and the transmission to hold everything in place. Again, it was easier then feared, I put a 12" pipe at the end of the breaker bar, gave it a few good pushes and it loosened like a charm.
I haven't destroyed anything yet as far as I know (except that I accidentaly emptied out my AC - gotta deal with that later), so I'm in good spirits. The 4runner is down, but the family can survive for now with one car. Can't wait to get the engine out and see what is damaged.
Jul 22, 2007 | 09:00 PM
#2
Thread Starter
Registered User
Joined: Oct 2005
Posts: 587
Likes: 0
From: Berkeley, CA
OK, a couple of pictures.
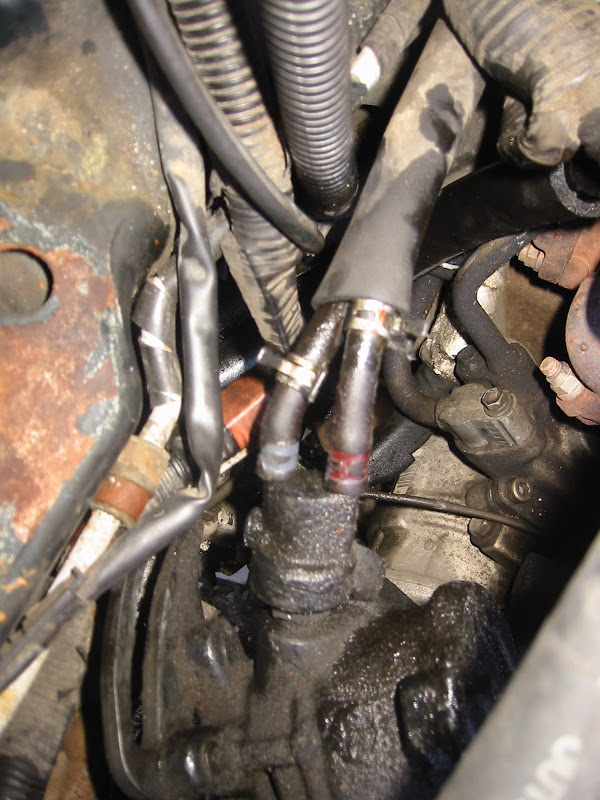
1. Lots of oils and grime under the power steering pump (at least that's where I think this was ). It might need some work.
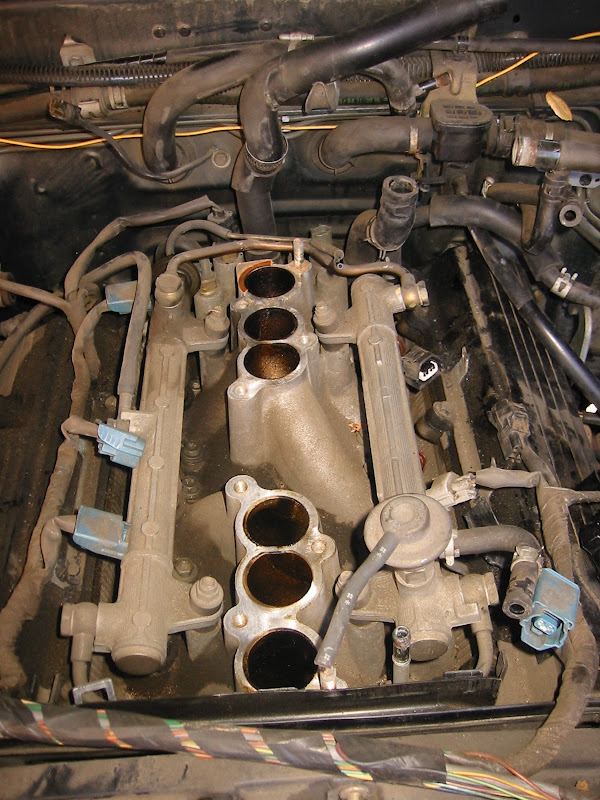
2. I took of the intake to be able to disconnect the whole engine harness. Lots of dust and dirt in here.
1. Lots of oils and grime under the power steering pump (at least that's where I think this was
). It might need some work. 2. I took of the intake to be able to disconnect the whole engine harness. Lots of dust and dirt in here.
Last edited by runethechamp; Jul 22, 2007 at 09:04 PM.

 Jul 24, 2007 | 11:14 AM
#4
Thread Starter
Registered User
Joined: Oct 2005
Posts: 587
Likes: 0
From: Berkeley, CA
Got a couple of quotes from local machine shops in the area for different work I might need (or maybe I just want to have it all done):
Place 1:
Bore/hone cylinders - $180
Boil/clean block - $45 (probably doesn't include freeze plugs, forgot to ask them)
Deck the block - $135
Full valve job - $358
Place 2:
Bore/hone cylinders - $90
Boil/clean block - $80 (does include freeze plugs, ready to mount the crank)
Deck the block - $80
Full valve job - $430
It's a little bit more expensive than other prices I've seen posted on yotatech, but not too bad. What do people think?
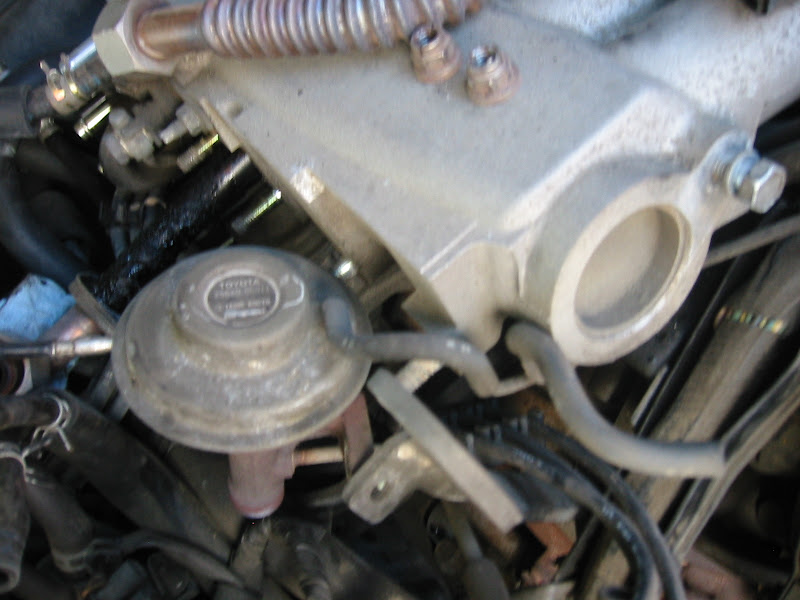
Oh, and check the crud on the EGR valve pipe as it is coming out:
Last edited by runethechamp; Jul 24, 2007 at 11:21 AM.
Jul 24, 2007 | 12:20 PM
#5
Registered User
Joined: Sep 2005
Posts: 8,656
Likes: 16
From: NW Ark on wooded ten acres...Ozarks at large!
Hey,
If you hadn't thought of it, put as many nuts and bolts back where they're supposed to go after pulling parts. It's even easier than taking pics....plus you don't lose anything and it's already there when you reassemble.
Good luck. I'll be watching.
If you hadn't thought of it, put as many nuts and bolts back where they're supposed to go after pulling parts. It's even easier than taking pics....plus you don't lose anything and it's already there when you reassemble.
Good luck. I'll be watching.
Jul 24, 2007 | 12:22 PM
#6
Contributing Member
Joined: Jan 2007
Posts: 1,521
Likes: 0
From: SRQ, FL
my egr looked like that when I pulled it. I just cut that tube and deactivated the EGR. That thing sticks a good ways into the intake portion, heating up the air all the way. I don't know if you mind a check engine light, but you can pretty much eliminate all but the PCV vac line off the intake manifold and the rig will run great 
Jul 24, 2007 | 12:23 PM
#7
Thread Starter
Registered User
Joined: Oct 2005
Posts: 587
Likes: 0
From: Berkeley, CA
Thanks for the tip, that's exactly what I am doing. I've mostly taken pics of the vacuum tubes and coolant hoses and such. I might have one or two loose bolts, the rest of them are back where they came from.
Trending Topics
Jul 24, 2007 | 12:27 PM
#8
Registered User
Joined: Sep 2005
Posts: 8,656
Likes: 16
From: NW Ark on wooded ten acres...Ozarks at large!
Smart man.
I know you're taking pics, but I did find it really nice to paint alphabets with a paint pen on vacuum hoses. You can get one at a hobby store real cheap.
The famed resistor would take care of the CEL. Plus, eliminates any issues by not having the gas temp sensor, either.
I know you're taking pics, but I did find it really nice to paint alphabets with a paint pen on vacuum hoses. You can get one at a hobby store real cheap.
The famed resistor would take care of the CEL. Plus, eliminates any issues by not having the gas temp sensor, either.
Jul 25, 2007 | 04:37 AM
#10

Registered User
Joined: Jun 2007
Posts: 182
Likes: 1
From: Marietta, Georgia
Reassembly Suggestions
Anti Seize on all fasteners, Super Lube or some other grease on electrical connectors. New studs and nuts on exhaust manifolds. Replace hoses in inaccessable places like under the manifold, and at the rear of the engine. Make sure you have good contact on grounding straps. Replacethe brushes in the alternator. Most 12MM fasteners torque to only around 15 foot pounds, it is easy to over tighten them. If you don't disassemble or leave connected things that you are not going to work on, such as the various intake manifold components, power steering, A/C, then you save time and prevent potential reassembly problems. Put as many components, such as the alternator, on the engine while it is out of the truck.
Good luck with your project.
Good luck with your project.
Jul 25, 2007 | 08:30 AM
#11
Thread Starter
Registered User
Joined: Oct 2005
Posts: 587
Likes: 0
From: Berkeley, CA
 ) so I'll see if I can get the camshaft bolt off with my breaker bar (with pipe extension on) as well.
Anti Seize on all fasteners, Super Lube or some other grease on electrical connectors. New studs and nuts on exhaust manifolds. Replace hoses in inaccessable places like under the manifold, and at the rear of the engine. Make sure you have good contact on grounding straps. Replacethe brushes in the alternator. Most 12MM fasteners torque to only around 15 foot pounds, it is easy to over tighten them. If you don't disassemble or leave connected things that you are not going to work on, such as the various intake manifold components, power steering, A/C, then you save time and prevent potential reassembly problems. Put as many components, such as the alternator, on the engine while it is out of the truck.
Good luck with your project.
Good luck with your project.
Jul 25, 2007 | 10:46 AM
#13
Registered User
Joined: Mar 2007
Posts: 318
Likes: 0
From: Orange, CA
 Jul 27, 2007 | 11:18 AM
#14
Thread Starter
Registered User
Joined: Oct 2005
Posts: 587
Likes: 0
From: Berkeley, CA
Figured I'd bump the thread to see if there is anything to look for when I get an engine stand, or should I just get a $50-60 model from Kragen or Harbor Freight. I get to borrow a hoist from a co-worker, so I'm covered on that one.
Jul 27, 2007 | 11:30 AM
#15
Registered User
Joined: Aug 2006
Posts: 103
Likes: 0
From: Stevens Point, WI
I just pulled my engine and bought a $50 engine stand from Fleet Farm, rented the hoist. The only thing i don't like about the stand is that when you rotate the engine, the tube connected to the engine holder (bolted to the back of the engine) slides back into the tube housing it (connected to the stand itself) making it a pain to put the locking pin in the hole. If that makes sense. You have to use a pry bar to pry it forward in order to place the pin. Good luck w/ ur engine.
Jul 29, 2007 | 08:15 PM
#17
Thread Starter
Registered User
Joined: Oct 2005
Posts: 587
Likes: 0
From: Berkeley, CA
Didn't do much this weekend except getting all the bolts holding the tranny to the engine out. All of thew got out relatively easily from under the car, a couple of the top ones needed a bunch of extendsions and a u-joint, but they weren't stuck very hard so that was no problem.
Also got to borrow an engine hoist and engine stand from a coworker, so I'm saving money not having to buy those. Wondering a little bit about lifting points. The engine hoist comes with short chains that are attached to angle pieces with holes in them. These will not reach down to the normal lift hooks, but I saw that somebody used bolts at the headbolt locations to attach these. My problem is only that my heads aren't off yet.
I'll take a picture of some locations that look like they're used for lifting the engine (there's 4 of them). Any lifting advice is very welcome.
 Jul 29, 2007 | 09:08 PM
#19
Registered User
Joined: Jun 2006
Posts: 471
Likes: 1
From: California
Just make sure that you have enough room lifting all the way up, when I lift mine I did it on the opposite way. You can lift it from the mark that you did, that can balance it all out. Just make sure you disconnect everything before lifting it, like the fuel line, etc.
Last edited by Guardian_Saint; Jul 29, 2007 at 11:15 PM.


