
Replacement Of Head With Pictures
 Sep 12, 2009 | 02:58 PM
#1

Thread Starter
Registered User
Joined: Sep 2009
Posts: 68
Likes: 0
From: Fontana ca
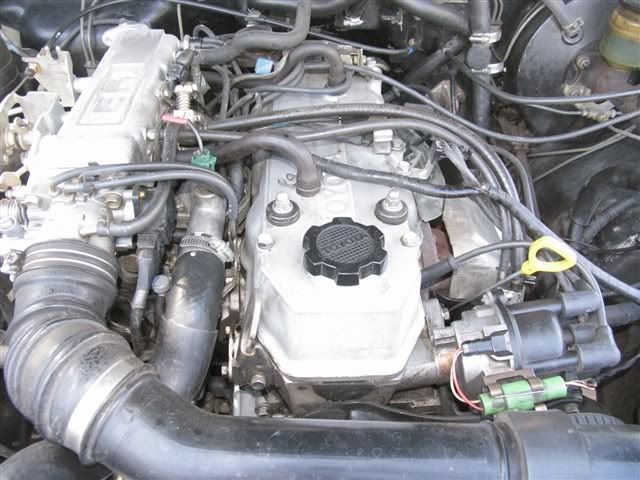
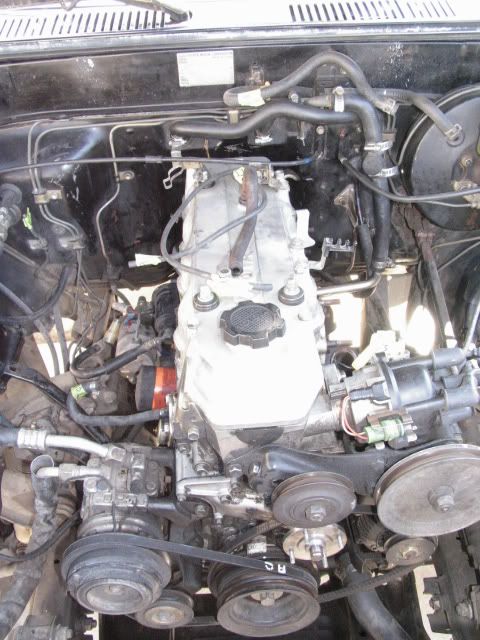
Im replacing my Cylinder head I finished this today im leaving it for tomorrow I bagged everything And labeled every single vaccum hose. The guy I bought it from didnt tell me that it had a bad head and I drove it home for 400 miles. It only overheated on my once and the rest I would just pull over to put water in the radiator before it would overheat. Well let me know if im doing the steps correctly. Another question do I have to remove the timing cover to remove the head? It doesnt look like I have to but Im not to sure does anyone know if its nessacery?
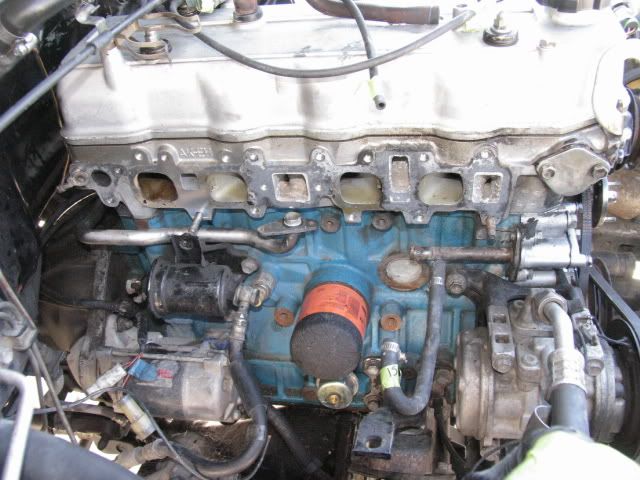

Theres like white stuff coming out of the ports what is that.? Do you guys see it?
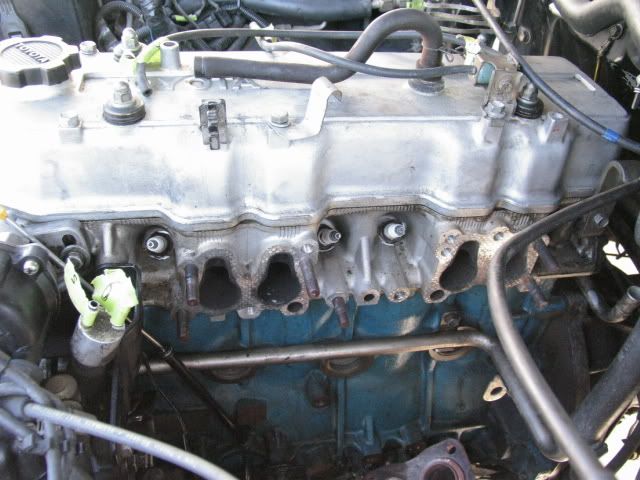
This Is what the spark plugs
Looked like. they didnt look bad.
Looked like. they didnt look bad.
Sep 12, 2009 | 04:53 PM
#3
YotaTech Milestone-Two Millionth Post
Joined: Jan 2009
Posts: 12,009
Likes: 122
From: Northeast Pennsylvania
i'm gonna do my timing cover.....reference my thread ---> https://www.yotatech.com/forums/f116...thread-188472/
i'm curious how you are gonna remove the a/c...i'm very new at this.....you are mles ahead of me on this one.....one TIP....may nt be the head, in my case it may or may not be but the timing chain guide is gone and it has dug in....might be worth a look in your case too befor pulling the head. But based on how you've gutted the engine bay so far you are fairly skilled....me NOT. Pots lots of pics , i could sure use them.
i'm curious how you are gonna remove the a/c...i'm very new at this.....you are mles ahead of me on this one.....one TIP....may nt be the head, in my case it may or may not be but the timing chain guide is gone and it has dug in....might be worth a look in your case too befor pulling the head. But based on how you've gutted the engine bay so far you are fairly skilled....me NOT. Pots lots of pics , i could sure use them.
Sep 12, 2009 | 04:53 PM
#4
Thread Starter
Registered User
Joined: Sep 2009
Posts: 68
Likes: 0
From: Fontana ca
ohh man good thing i dont have to remove the timing cover. Another question, Can I remove the distributor at any position or are there step to removing the distributor? like do i have to crank the crankshaft or anything? wHATS the best way to remove the distributor without messing the timing up?
Sep 12, 2009 | 04:56 PM
#5
Thread Starter
Registered User
Joined: Sep 2009
Posts: 68
Likes: 0
From: Fontana ca
well about the a.c ive read that All you really have to do is unmounted and slide it out of the way. you dont have to discharge the whole a.c system which is really good.. Ok cool ill post more pictures up just remember before you start go buy yourself some ziplock bags and every single screw you take out lable it in the baggie and every hose you disconnect tape it with a number so when you go put it back together it will be cake.
Sep 12, 2009 | 05:02 PM
#6
Contributing Member
Joined: Feb 2007
Posts: 9,055
Likes: 10
From: maple ridge, British Columbia, Canada
Put the motor to TDC, and using a punch make a mark on the edge of the distributor and head.
This way you will know exactly where to line it up after you are done.
I did it that way and when I put it all back together timing was bang on!
Check the condition of the timing chain and drivers side guide... seriously do it!
You don't wanna be doing it again, its cheap and easy once the motor is torn down.
Sep 12, 2009 | 05:11 PM
#7
YotaTech Milestone-Two Millionth Post
Joined: Jan 2009
Posts: 12,009
Likes: 122
From: Northeast Pennsylvania
x3 on the timing chain('cause i said it twice now)...if I could do that much, you certainly should be able to.....again it might be the culprit in this...i've read sooooo many times about that driver's side guide and that's my problem (or at least one of them).
i have links to 4crawlers write-ups on my thread and i saw a good one on 4x4wire about the timing cover.
with a/c it looks like at least one or 2 bolts go into the timing cover i think, or not...but it looks like i could probably remove the mount without removing the compressor, i might be wrong.
baggies are good, but i have paper sandwich bags i write on. I are smart.
Trending Topics
Sep 13, 2009 | 01:05 AM
#10
Thread Starter
Registered User
Joined: Sep 2009
Posts: 68
Likes: 0
From: Fontana ca
Ok what do you guys mean by the driver side guides? Im really confused? What guides are we talking about? another quick question how do you put the engine in top dead center? and what does he mean by this ----> "Put the motor to TDC, and using a punch make a mark on the edge of the distributor and head"
 Sep 13, 2009 | 06:54 AM
#12
Registered User
Joined: Jun 2007
Posts: 572
Likes: 0
Ok what do you guys mean by the driver side guides? Im really confused? What guides are we talking about? another quick question how do you put the engine in top dead center? and what does he mean by this ----> "Put the motor to TDC, and using a punch make a mark on the edge of the distributor and head"
Here's a picture from when I last worked on mine, the black pieces are the guides. Like already said, DOA Racing makes metal guides. Expensive though.
Also,for any of you hawk eyed members out there - the passenger side guide is on backwards - I know this, haha. I had it there so I wouldn't lose them or anything.
Anyway, the drivers side is usually the first guide to go kaput.

To put the motor in TDC, Top Dead Center. You want to rotate the engine by the crank, using a wrench on the crank pulley bolt - or using your hands on the crank pulley. That's how I do it, anyway. You want to bring the #1 and #4 pistons to the very top of their stroke, and pistons #2 and #3 will be at bottom center.
You can mark the distributor and the head where they meet, and when you replace the distributor you align it up with those marks and slide it back into place. The timing should either be right, or very close to right. Provided you don't spin the distributors gears for fun or anything. Set it aside and forget it exists until you need to replace it.
Last edited by Kaydon; Sep 13, 2009 at 07:23 AM. Reason: 'Cause I'm a retard.
Sep 13, 2009 | 07:21 AM
#13
Registered User
Joined: Nov 2007
Posts: 3,278
Likes: 2
From: chippawa niagara falls ontario
everyone gotta start somewhere...my first yota tech experience was replacing a clutch on a second yota i had and it took me a month.. but i never really fixed anything on my trucks before..
i have faith with yota tech even a novice cant repair a toyota truck with the right tools and following directions and reseach..
good luck and X90 on checking your timing chain its a pain to tear into again
i have faith with yota tech even a novice cant repair a toyota truck with the right tools and following directions and reseach..
good luck and X90 on checking your timing chain its a pain to tear into again
Sep 13, 2009 | 07:53 AM
#14

In case you don't have this already
'93 online FSM
http://personal.utulsa.edu/~nathan-buchanan/93fsm/
the cylinder head section
http://personal.utulsa.edu/~nathan-b.../7cylinder.pdf
scroll down to pg 18 on the cylinder head section for a reasonably good description of setting TDC. As previously mentioned, you can turn the crankshaft until the timing mark on the crankshaft pulley lines up with the 0 mark on the timing cover. If you have the valve cover off you will see the timing chain and camshaft gear with marks to indicate TDC (a dimple on the gear and 2 shiny chain links straddling the mark) If not you are at bottom dead center (BDC) and need to turn the engine over one more full turn and then everything should line up as described. Also, if you still have the cover on, you can pop off your distributor cap and there should be a mark on the edge of the distributor (approximately pointing at the #1 spark plug) Rotate the engine until 0 is lined up and the rotor on the dist is pointing at the mark. Then when you remove the valve cover everything should be lined up as described (chain links, dimple etc.) Good luck. Take tons of pics before you tear down in addition to marking everything (cheap insurance in case you have a leftover plug or vaccum hose at the end)
Regardless of what year truck you have the '93 manual will be good for 90-99% of it. It's what I used on my '86 without problems.
Sep 13, 2009 | 08:43 AM
#15
Contributing Member
Joined: Dec 2008
Posts: 2,505
Likes: 16
From: San Jose ,Ca
Sep 13, 2009 | 08:59 AM
#16
Registered User
Joined: May 2008
Posts: 3,948
Likes: 11
From: Calgary, AB Canaduh


