
Project 4Rescue:
 Jul 16, 2007 | 02:23 PM
#1
Thread Starter
Registered User
Joined: Aug 2005
Posts: 420
Likes: 0
From: PDX, Oregon
Project 4Rescue:
Well, I figure with the New Job and Money copming in, I should spend some on the old 4Runner seeing as I've had her a little over 2 years and I want her to ride a little better.
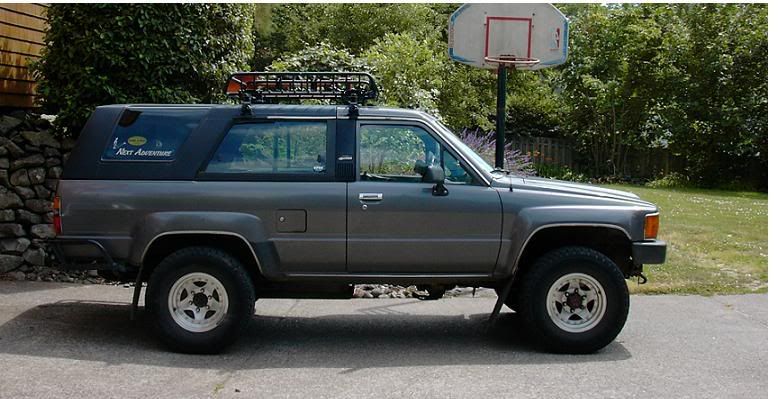
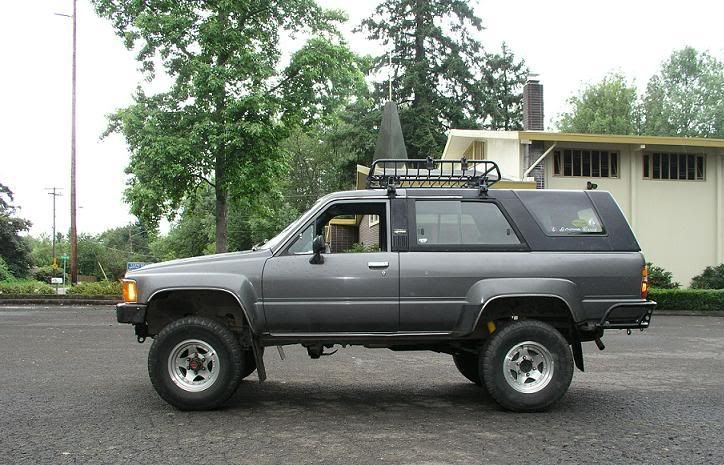
So: 89 4Runner, 22RE 5-spd. 31x10.50's, Marlin Rear Bumper, Yak Load Warriorw/ Shovel Mounted.
Basicly I'm using this rig as an all around DD and trail rig. I do alot of rafting and outdoor sports so i need a good reliable rig that can get me out to Idaho (and where ever the rivers have good whitewater) and haul my gear, let me sleep in the back etc. Also, being an EMT and a trained Fire Fighter, I often end up using my truck as a sort of mobile rescue station.
Here's how she sit's right now:
Right now I have sitting in my garage:
Ome Rear springs
BJ spacers
OME Shocks all around
OME Steering stabilizer.
Here's what goes on tomorow:
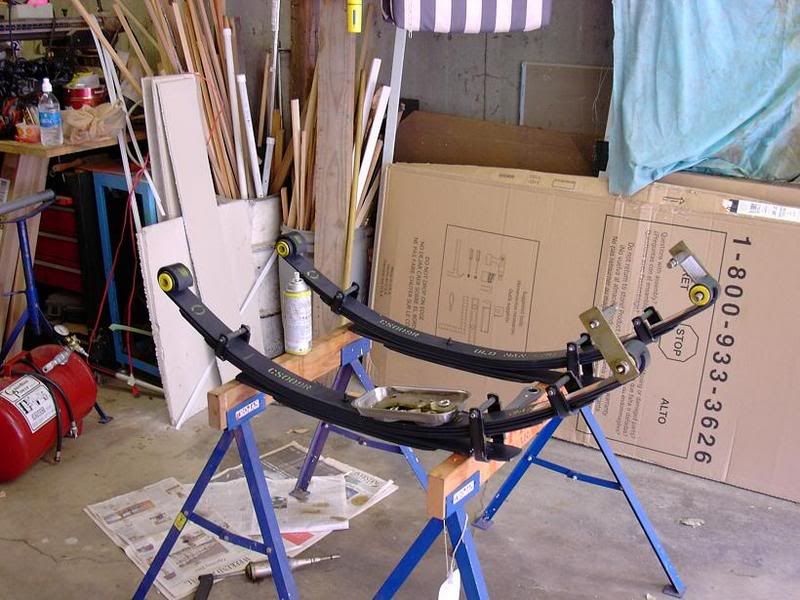
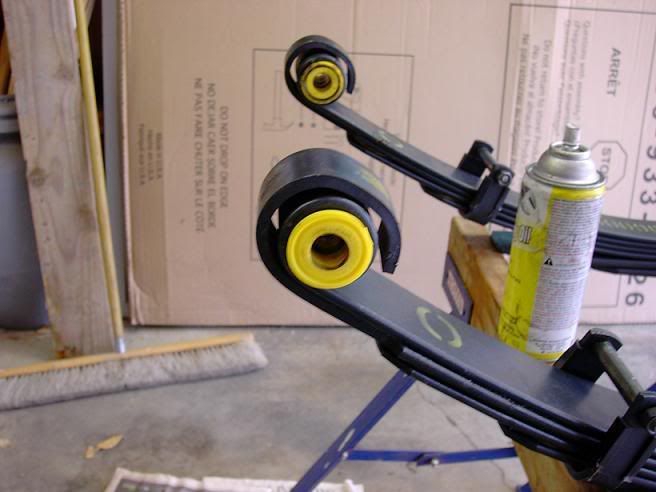
Question: Which Direction do the springs go? Which end to the front?:
This one?
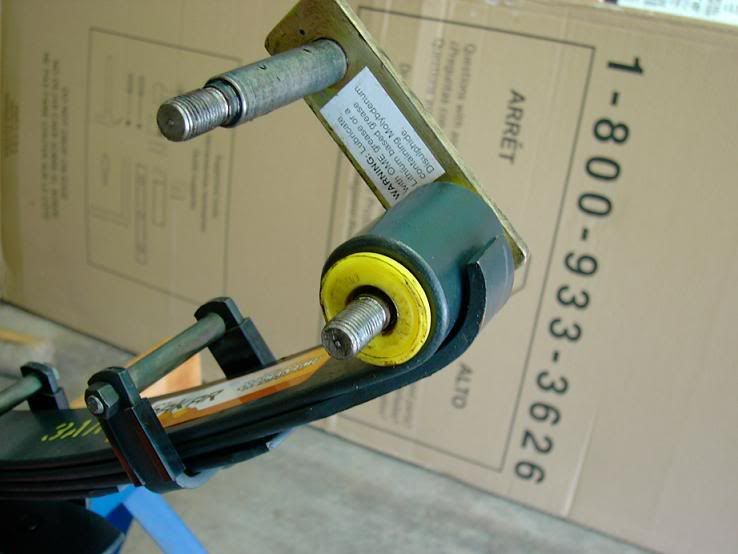
Or this end?
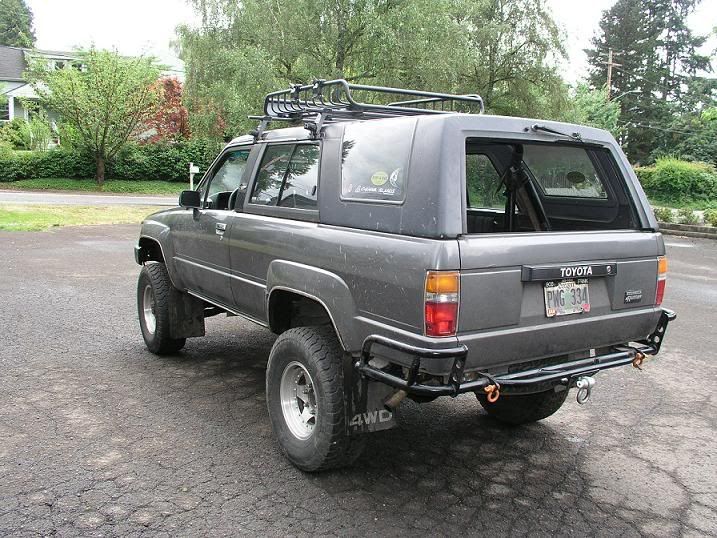
After this project, the next thing on the agenda is a rear drawer to get rid of this sight:
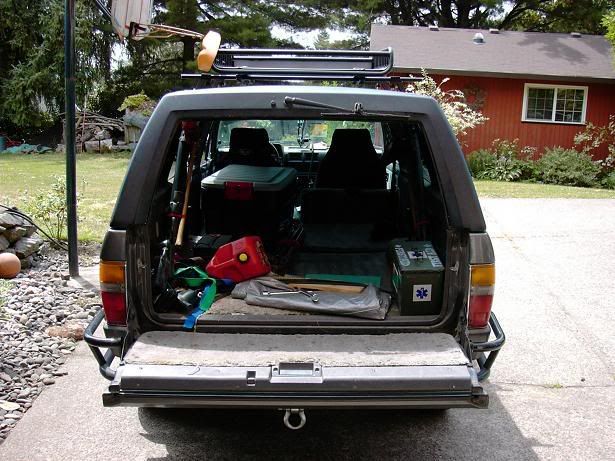
I want to maybe use one of those pre-fabbed drawer systems and then just put a deck made of plywood to better fill the gaps so I can sleep in there and not have to take out the big box I store everything in right now. I'll also be able to make a false floor and put the seat cushion back in behind the driver seat for true 4/5 seater capability should I need it.
After this I am getting Aire Rafts to make ame a custom "Crash Pad" airmattress for the rear deck. I also figure with this type of storage, when I finnaly get to take the top off, I can remove the "key" bolt so you can't lower the rear window and therefore can't open the tailgate and get to the drawer.
I work 6p-2a in the ER tonight so I'll be jumping on the suspension tomorow at about 11am...
Should have a before and after shot tomorow or Wed (need to get it alligned Wed I think). FINGERS CROSSED!!!!
Cheers and No worries
Dave
So: 89 4Runner, 22RE 5-spd. 31x10.50's, Marlin Rear Bumper, Yak Load Warriorw/ Shovel Mounted.
Basicly I'm using this rig as an all around DD and trail rig. I do alot of rafting and outdoor sports so i need a good reliable rig that can get me out to Idaho (and where ever the rivers have good whitewater) and haul my gear, let me sleep in the back etc. Also, being an EMT and a trained Fire Fighter, I often end up using my truck as a sort of mobile rescue station.
Here's how she sit's right now:
Right now I have sitting in my garage:
Ome Rear springs
BJ spacers
OME Shocks all around
OME Steering stabilizer.
Here's what goes on tomorow:
Question: Which Direction do the springs go? Which end to the front?:
This one?
Or this end?
After this project, the next thing on the agenda is a rear drawer to get rid of this sight:
I want to maybe use one of those pre-fabbed drawer systems and then just put a deck made of plywood to better fill the gaps so I can sleep in there and not have to take out the big box I store everything in right now. I'll also be able to make a false floor and put the seat cushion back in behind the driver seat for true 4/5 seater capability should I need it.
After this I am getting Aire Rafts to make ame a custom "Crash Pad" airmattress for the rear deck. I also figure with this type of storage, when I finnaly get to take the top off, I can remove the "key" bolt so you can't lower the rear window and therefore can't open the tailgate and get to the drawer.
I work 6p-2a in the ER tonight so I'll be jumping on the suspension tomorow at about 11am...
Should have a before and after shot tomorow or Wed (need to get it alligned Wed I think). FINGERS CROSSED!!!!
Cheers and No worries
Dave
Jul 16, 2007 | 03:49 PM
#2
I think I have seen your truck around town. Anyway I think that you have got your shackle on the correct end, but hey like you I got a 50/50 shot. Check out 4Crawler.com. Roger probably has something explaining spring orientation on his site. I was gonna check by DSL is running at glacier pace today.
Curious how long Marlin took to deliver your bumper to you? Contemplating ordering one for my truck soon.
Curious how long Marlin took to deliver your bumper to you? Contemplating ordering one for my truck soon.
Jul 16, 2007 | 04:03 PM
#3
Thread Starter
Registered User
Joined: Aug 2005
Posts: 420
Likes: 0
From: PDX, Oregon
Nice, you're from P-Town too I see. I live over in Selwood, and I work at St. Vincents ER so I kinda drive around alot... I think from looking at the stock springs, that the orientation of the springs as I have them now is coprrect, the Mill Wrap should be at the front and teh shackles go on the non wraped end, but then again, I could be wrong LOL.
Pm'd you about the Bumper...
CHeers
Dave
Pm'd you about the Bumper...
CHeers
Dave
Jul 17, 2007 | 08:05 PM
#4
Thread Starter
Registered User
Joined: Aug 2005
Posts: 420
Likes: 0
From: PDX, Oregon
Well, No pics till tomorow, had a few things that hungh us up for a while. I'll lay it all out tomorw, but let me say, I'm already contemplating ordering the T-bars this week seeing as the back looks like a 5in lift compared to the saggy ass of the past.
Everything is very high quality, and I'm really looking forward to driving it. My concern is that the rear is going to be drasticly higher than the front and I'll have to crank the T-bars for the time being. Then I've gotta gfet it aligned and it's off to the Deschutes to drink and raft all weekend.
Pics to come tomorow when I get'm off the camera.
Side note: So, as my truck has no fornt tires currently, I drove my dad's 98 XJ up-country, and frankly I love the 4.0L, and I'm really getting all twised up over what motor I want to put in my rig. First it was a 1KZte but it is just too involved a swap for me at this point. The 3rz is the front runner currently, but a big part of me is now leaning towards re-gearing (have 4.10's and 33 10.50's) going to 33x9.50 ATko's and just rebuilding my 22RE. There is somehting I really love about the 22RE, not the least of which is that it is near bombproof, and frankly when you consider how heavy my Toy's tend to be, I think it does a comendable job moving the truck around. BAh, too much to think about.
Tomorow I finish the truck (For Now) !!!!!!
Dave
Jul 18, 2007 | 02:40 PM
#7
Thread Starter
Registered User
Joined: Aug 2005
Posts: 420
Likes: 0
From: PDX, Oregon
Well!!!! It's on 4 wheels and it rides GREAT... Just gotta get it alligned in about 30 min from now and the freaky steering problem should be solved. It looks killer IMO and I love actualy having some bump absorbtion in the rear now...
Teaser Pics (I'll write up the process and hang-ups after I get back form the Alignment shop.
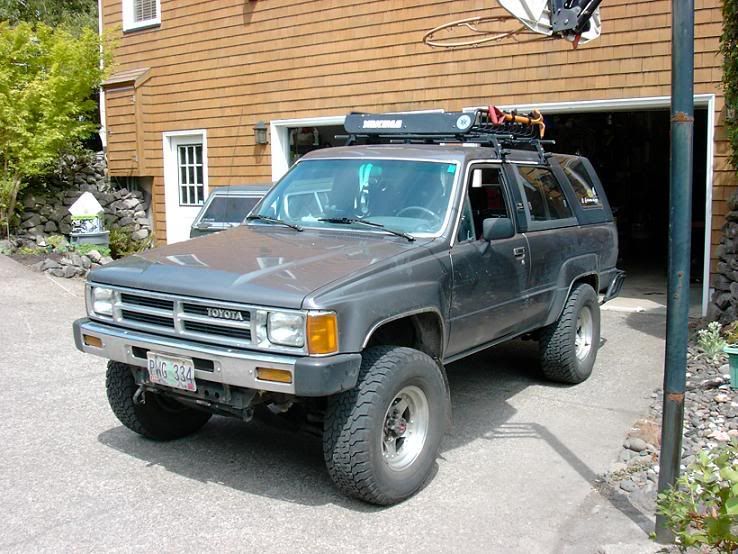
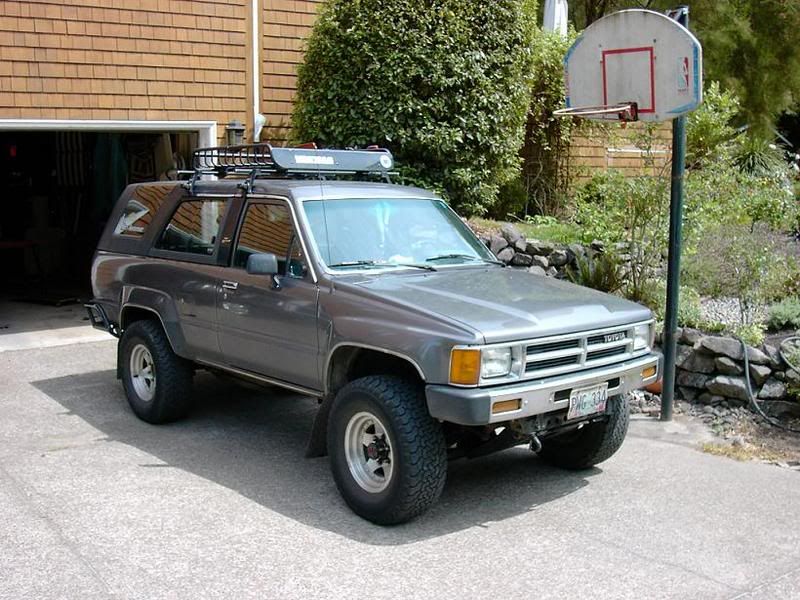
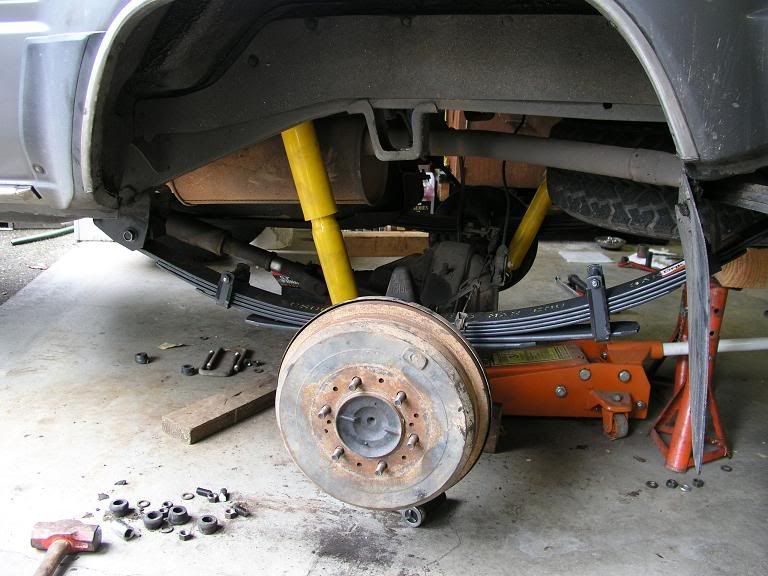
Before:
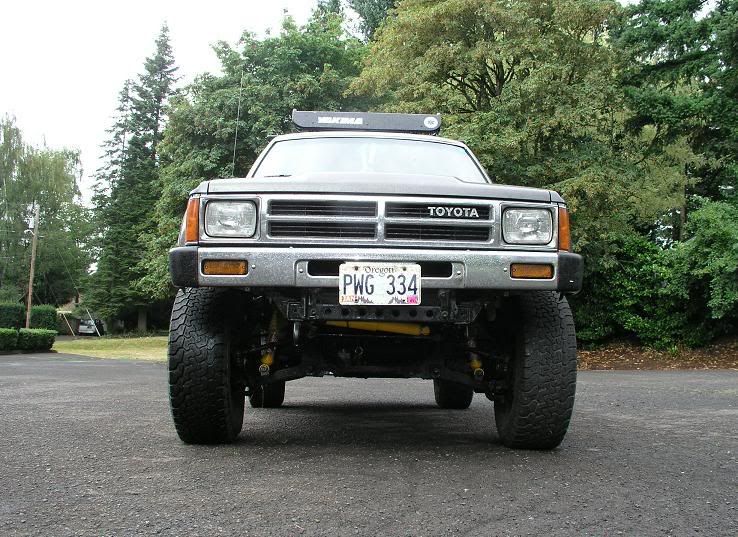
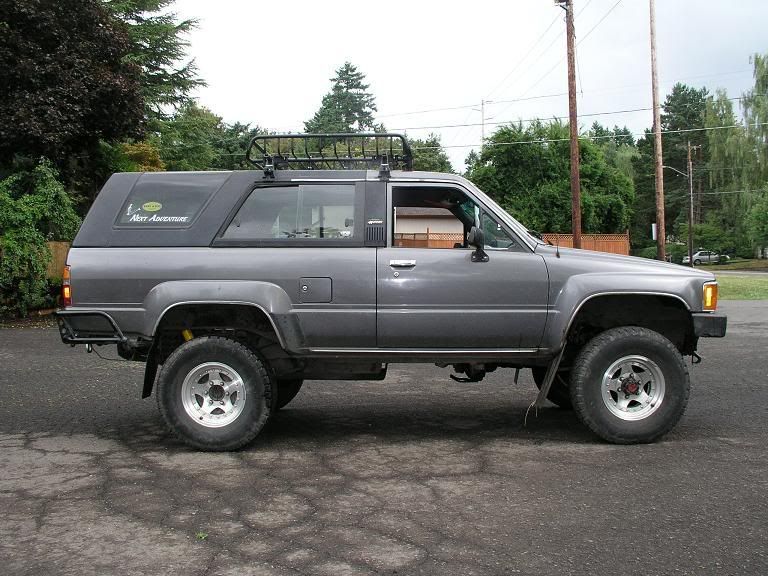
After: No T-bar crank, just BJ Spacers and OME shocks Fr and Rear with OME Cs009R Springs.
Teaser Pics (I'll write up the process and hang-ups after I get back form the Alignment shop.
Before:
After: No T-bar crank, just BJ Spacers and OME shocks Fr and Rear with OME Cs009R Springs.
Trending Topics
 Jul 18, 2007 | 09:47 PM
#10
Thread Starter
Registered User
Joined: Aug 2005
Posts: 420
Likes: 0
From: PDX, Oregon
Thanks Guy's... Funny thing about the steering is it now feels like it has less on center tightness, it rides a million times better, but it now drives like a truck instead of the very very tight steering it used to have... Odd, but not a deal breaker, I LOVE IT NOW!!!. My neighborhood has those awful big speed bumps, and before the suspension, I had to creep over'm or I'd slam into the bump stops, now I can literaly fly over them and I hardly feel it. So far this is the single best thing I've done for my truck since I bought it.
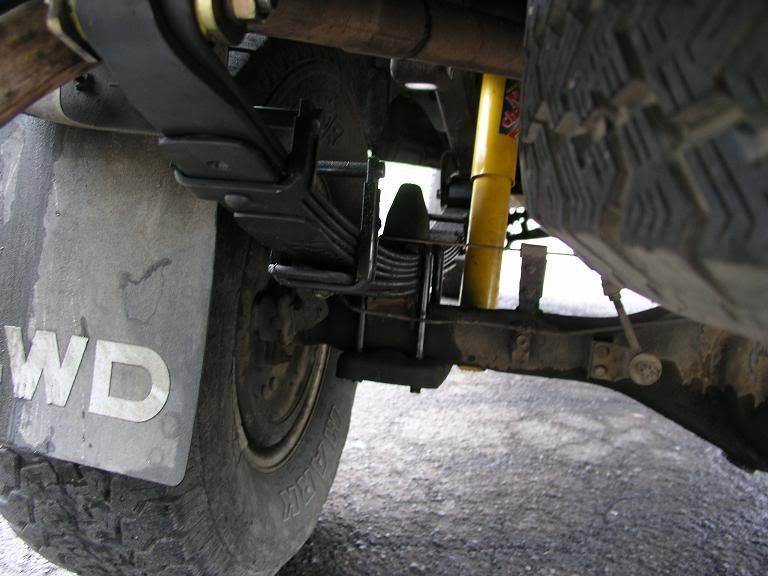
SO:The Rear was pretty damn straight forward, they're leafs, after you figure out that the double wrap leafs go to the front. One thing to note with this set-0up: You don't need the front fixed OME spring pin kit. It is for some other Hilux itteration. Problem is the greasable pin is alot thicker than the stock pin and without removing (as in cutting off) one of the tabs, you could never use the pin.
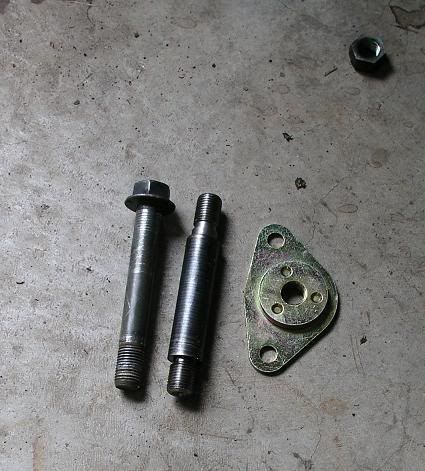
Luckily I had a set of replacement bushings with a brass sleve that I hadn't used so I just pounded the brass sleve into the fixed end using the OME yellow spring eye bushings. Works for me. I'd have liked to have used the greaseable pins like the other end uses for the shackles, but, O well.
Here are the rear springs on.
At this pioint I torqued everything down to specs, and put the rear end on the ground so i could reposition it to work on teh front end... Almost drove out of the garage without checking the clearence of teh roof-rack/Shovel...
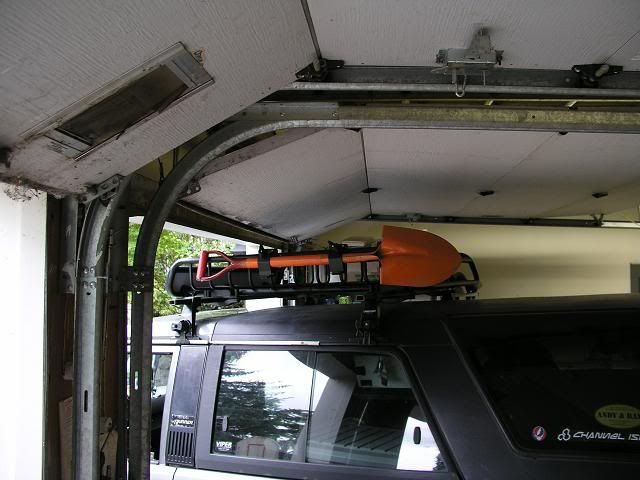
Thankfully I checked and avoided disaster...
So on to the front...
First things first, my suggestion is to do this :
-Jack the reuck up and put it on jack stands under the IFS sub frame
- remove the tire
-remove the shock
-remove the swaybar bolt
-disconnect the brake line 9maybe yo can do it with out, but I didn't want to try...
-support the spindle/knuckle with a floor jack and remove the nuts form the tops of the Ball0-joint studs.
-at this point, I suggest (hopefully you've already soakedeverything in penetrating lube) giving the studs a try while the ball joint is held in place by the a-arms. pound out the studs, be careful not to hit the zirc fitting on top of the ball joint.
-Shim the upper bumpstop between it and the A arm to hold it up where it is, and...
-then drop the lower a-arm/knuckle and Ball Joint away from teh upper a-arm.
-Now get out the cutoff wheel and start the carving.
-Hold the Spacer up to the arm and it should become readily apparent where to trim.
I sat on a roller seat thing adn cradles the brake/hub between my legs/in my lap while I threaded 2 of the studs across for eachother through the the ball joint and through the spacer so that when you get the BJ/spacer up in line you can just push the bolts through adn get a nut on it and hold the assembly in place. Assuming the Cv joint hasn't pulled itself out of line (mine did and required a bit of monkeying to get back in line) bolt every thing back up install the new shock and go get it aligned...
Here's what they look like installed:
The Steering stabilizer turned out to be the biggest hurdle... Apparently the pin attached to the Tie-rod is pressed in, and after 222K Miles, mine had pretty much welded itself into place. We tried twisting it, pounding it out etc...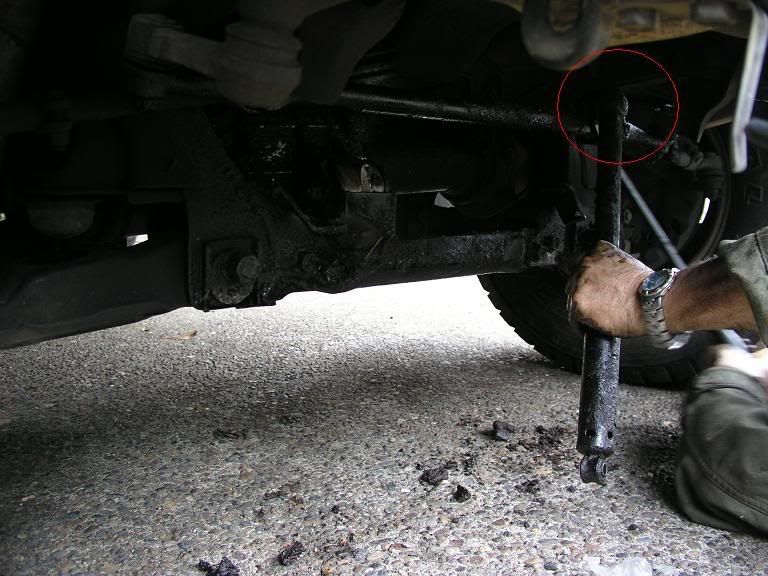
My dad who was helping me took it on as a personal vendetta and went at it with the drill... after rmoving I ▓▓▓▓ you not, 3/4's of the stud with the drill, it finnaly moved a 16th of an inch... So we heated the rod up a bit and punded it out... but it dissapeared when it fianly let go??? Seriously, where the ▓▓▓▓ is it??? Turns out it bounced off something and was about 30ft behind us in the driveway... O well, at least it was finaly out and I could put it all together...so that was done:
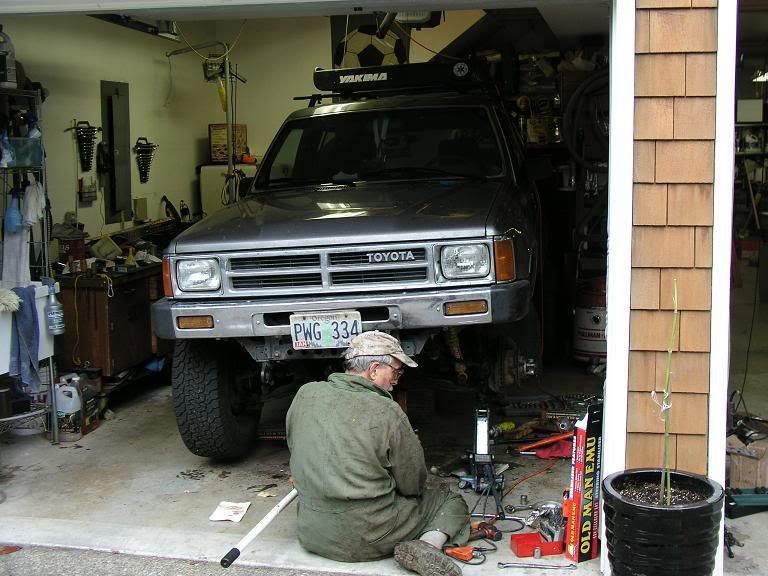
Here's my dad. Best person to work on a truck with ever. Thanks dad I couldn't have done it without out you...
And after all this ▓▓▓▓ adn an alignment: TADA!!!
SO:The Rear was pretty damn straight forward, they're leafs, after you figure out that the double wrap leafs go to the front. One thing to note with this set-0up: You don't need the front fixed OME spring pin kit. It is for some other Hilux itteration. Problem is the greasable pin is alot thicker than the stock pin and without removing (as in cutting off) one of the tabs, you could never use the pin.
Luckily I had a set of replacement bushings with a brass sleve that I hadn't used so I just pounded the brass sleve into the fixed end using the OME yellow spring eye bushings. Works for me. I'd have liked to have used the greaseable pins like the other end uses for the shackles, but, O well.
Here are the rear springs on.
At this pioint I torqued everything down to specs, and put the rear end on the ground so i could reposition it to work on teh front end... Almost drove out of the garage without checking the clearence of teh roof-rack/Shovel...
Thankfully I checked and avoided disaster...
So on to the front...
First things first, my suggestion is to do this :
-Jack the reuck up and put it on jack stands under the IFS sub frame
- remove the tire
-remove the shock
-remove the swaybar bolt
-disconnect the brake line 9maybe yo can do it with out, but I didn't want to try...
-support the spindle/knuckle with a floor jack and remove the nuts form the tops of the Ball0-joint studs.
-at this point, I suggest (hopefully you've already soakedeverything in penetrating lube) giving the studs a try while the ball joint is held in place by the a-arms. pound out the studs, be careful not to hit the zirc fitting on top of the ball joint.
-Shim the upper bumpstop between it and the A arm to hold it up where it is, and...
-then drop the lower a-arm/knuckle and Ball Joint away from teh upper a-arm.
-Now get out the cutoff wheel and start the carving.
-Hold the Spacer up to the arm and it should become readily apparent where to trim.
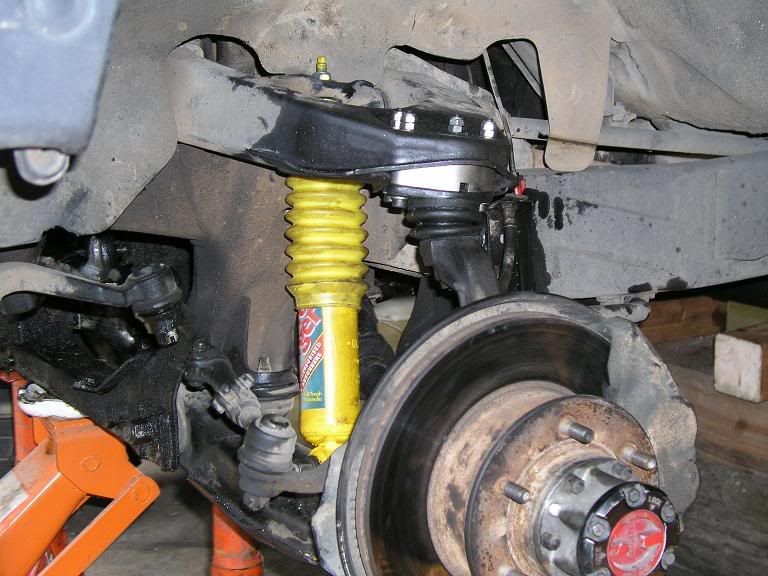
I sat on a roller seat thing adn cradles the brake/hub between my legs/in my lap while I threaded 2 of the studs across for eachother through the the ball joint and through the spacer so that when you get the BJ/spacer up in line you can just push the bolts through adn get a nut on it and hold the assembly in place. Assuming the Cv joint hasn't pulled itself out of line (mine did and required a bit of monkeying to get back in line) bolt every thing back up install the new shock and go get it aligned...
Here's what they look like installed:
The Steering stabilizer turned out to be the biggest hurdle... Apparently the pin attached to the Tie-rod is pressed in, and after 222K Miles, mine had pretty much welded itself into place. We tried twisting it, pounding it out etc...
My dad who was helping me took it on as a personal vendetta and went at it with the drill... after rmoving I ▓▓▓▓ you not, 3/4's of the stud with the drill, it finnaly moved a 16th of an inch... So we heated the rod up a bit and punded it out... but it dissapeared when it fianly let go??? Seriously, where the ▓▓▓▓ is it??? Turns out it bounced off something and was about 30ft behind us in the driveway... O well, at least it was finaly out and I could put it all together...so that was done:
Here's my dad. Best person to work on a truck with ever. Thanks dad I couldn't have done it without out you...
And after all this ▓▓▓▓ adn an alignment: TADA!!!
Jul 19, 2007 | 06:40 AM
#13

Registered User
Joined: Jun 2006
Posts: 82
Likes: 0
Looks fantastic!
I too need to do the same thing and have decided on the same components. Tell us more about the ride. Have you done any fire road bombing with it yet? Can't wait to hear more and thanks for posting the install details. Will help when I'm ready.
I too need to do the same thing and have decided on the same components. Tell us more about the ride. Have you done any fire road bombing with it yet? Can't wait to hear more and thanks for posting the install details. Will help when I'm ready.
Last edited by Compressed; Jul 19, 2007 at 06:47 AM.
Jul 19, 2007 | 07:05 AM
#14
Registered User
Joined: Dec 2006
Posts: 2,880
Likes: 2
From: Olympia, WA
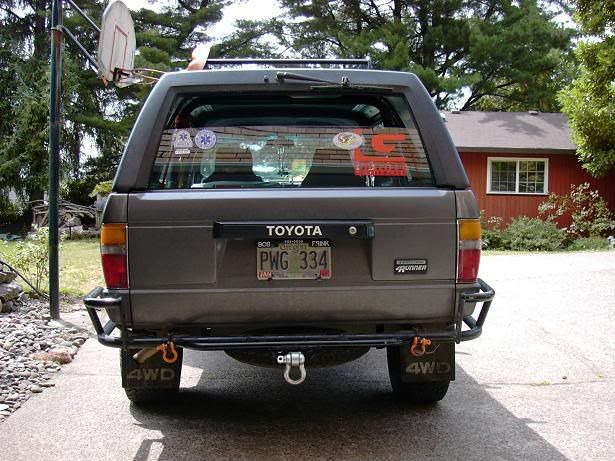
Don't forget about the LSPV valve out back =) Your rear brakes are now being used even less FYI..
LSPV = Load Sensing Proportioning Valve
*That long metal rod connects from the axle to the LSPV tucked up on the pass side frame rail above the axle.. When the rod is down the rear brakes get less pressure, the excess pressure is routed to the front brakes.. When the rod is up (under a heavy load, saggy rear end, or anytime the suspension is compressed, then the rear brakes recieve more of the pressure thats going to them and LESS is routed back to the front brakes*
4crawler sells a lil lifter for it, or you could replace it with a $40 manual one load proportioning valve from summit. (well it costs a bit more after u get the adapters)
Last edited by drew303; Jul 19, 2007 at 07:08 AM.
Jul 19, 2007 | 11:19 AM
#15
Thread Starter
Registered User
Joined: Aug 2005
Posts: 420
Likes: 0
From: PDX, Oregon
Crap, forgot about the LSPV... GOnna have to do something about that. I'll have a full review of the Off-road/Fire-road performance after this weekend, I'm headed out to Maupin Or to go camping and rafting and the roads out there are horrible. Can't wait to get the truck ou ton them eh...
Cheers
Dave
Cheers
Dave
Jul 20, 2007 | 02:37 PM
#18
Registered User
Joined: Aug 2006
Posts: 587
Likes: 2
From: allen tx/provo ut
I know exactly what you were talking about with the steering stabilizer. I used a ball joint separator and it took care of it in four hits. I had been trying everything I could for two hours before that.
Jul 21, 2007 | 08:20 AM
#19
Registered User
Joined: Sep 2005
Posts: 8,656
Likes: 16
From: NW Ark on wooded ten acres...Ozarks at large!
Don't forget about the LSPV valve out back =) Your rear brakes are now being used even less FYI..
LSPV = Load Sensing Proportioning Valve
*That long metal rod connects from the axle to the LSPV tucked up on the pass side frame rail above the axle.. When the rod is down the rear brakes get less pressure, the excess pressure is routed to the front brakes.. When the rod is up (under a heavy load, saggy rear end, or anytime the suspension is compressed, then the rear brakes recieve more of the pressure thats going to them and LESS is routed back to the front brakes*
4crawler sells a lil lifter for it, or you could replace it with a $40 manual one load proportioning valve from summit. (well it costs a bit more after u get the adapters)
Last edited by thook; Jul 21, 2007 at 08:27 AM.
Jul 22, 2007 | 02:35 PM
#20
Thread Starter
Registered User
Joined: Aug 2005
Posts: 420
Likes: 0
From: PDX, Oregon
I kinda want to put some really incognito flashers on it, maybe an amber up top for schnits and giggles... And seeing your bumper/grill paint job has now inspired me to do the same (they still have a KILLER deal on the TJM) so thanks for that...
I do alot of whitewater rafting so I am setting it up to be a good long haul rig for getting around the NW all year round. I have however used it as an impormptou Ambulance after a praticularly nasty ejection (from a raft) with the rear folded flat, it worked killer. I also use it for an Anchor alot for Zdrags and High lines on the RIver. I love my truck and use it heavily.
Future mods (in probable order of appearance)
- Rear drawer/dummy floor for a flat sleepable cargo area and to carry Recovery/repair gear
- TJM or ARB Bumper
- 4.88's, 33x9.50's (can't decide on the tire yet) and a Locker
- Rebuild the 22RE possibly with a few minbor enhancements (Although I still can't get the nagging thought out of my head to do the 3RZ (2.7L Taco 4cyl)
- Sliders
And on and on and on and on and...
Cheers
Last edited by Diesel_Freak; Jul 22, 2007 at 02:37 PM.


