
Philbert's 87 4Runner Head Gasket & head replacement - take II
 Mar 8, 2013 | 08:59 AM
#121
Thread Starter
Registered User
iTrader: (2)
Joined: Dec 2009
Posts: 2,159
Likes: 7
From: Pleasanton, CA - SF Bay Area
Picked up my lower intake manifold today on way to work, with the 1/8" NPT hole drilled and tapped - sender fits great!
Got some 10 gauge wire to connect from the + battery terminal to the fuse box (extended since I'm moving battery).
No injectors yet
I'm also looking for the alternator adjustment bolt and don't know what size it is (grrr).
Got some 10 gauge wire to connect from the + battery terminal to the fuse box (extended since I'm moving battery).
No injectors yet
I'm also looking for the alternator adjustment bolt and don't know what size it is (grrr).
 Mar 8, 2013 | 09:31 AM
#123

Registered User
Joined: Feb 2013
Posts: 11
Likes: 0
I am still at the beginning. I now know why mechanics charge so much to do this. everything is covered in gunk, so it seems like I will spend the majority of the time cleaning everything before putting it back. should have pictures up soon, but its not pretty. nowhere near as clean as the engines I have seen so far.
Mar 8, 2013 | 09:48 AM
#124

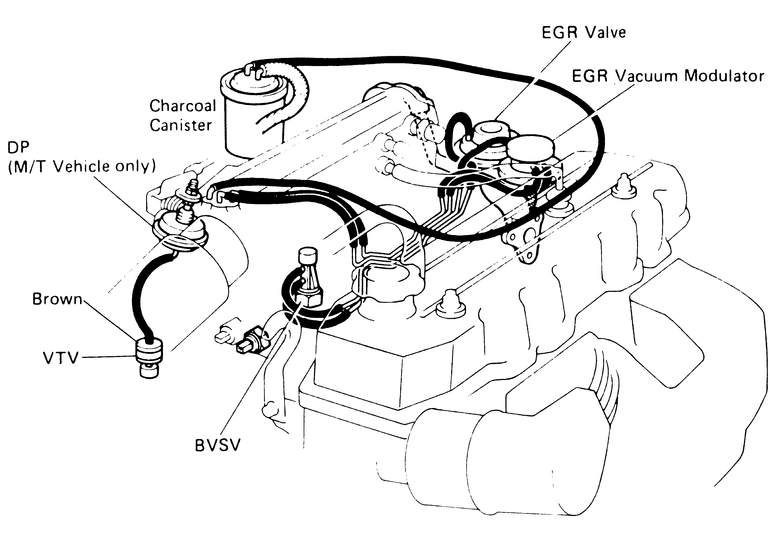
Hmm guess I haven't done that model year's vac diagram with color code yet, its close enough to the other late 80's one I don't think I'll bother. Just ignore the parts you can't locate 
22re Vac diagram w/ color
22re Vac diagram w/ color
Mar 8, 2013 | 10:39 AM
#126
Thread Starter
Registered User
iTrader: (2)
Joined: Dec 2009
Posts: 2,159
Likes: 7
From: Pleasanton, CA - SF Bay Area
I am still at the beginning. I now know why mechanics charge so much to do this. everything is covered in gunk, so it seems like I will spend the majority of the time cleaning everything before putting it back. should have pictures up soon, but its not pretty. nowhere near as clean as the engines I have seen so far.
Get:
- Wire brushes - lots (harbor freight)
- Plastic scrube brushes and old toothbrushes
- Orange degreaser material
- Old scotch brite pads/sponges
- Lots of rags
- Something a bit stronger like Krud Kutter
- Dish soap and warm water soaking does wonders too
Mar 8, 2013 | 10:41 AM
#127
Thread Starter
Registered User
iTrader: (2)
Joined: Dec 2009
Posts: 2,159
Likes: 7
From: Pleasanton, CA - SF Bay Area
I steal from the best!
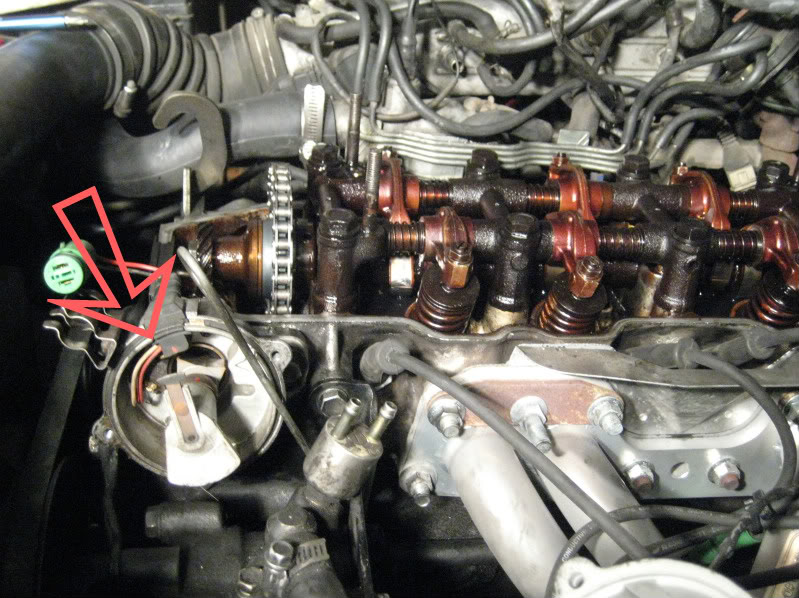
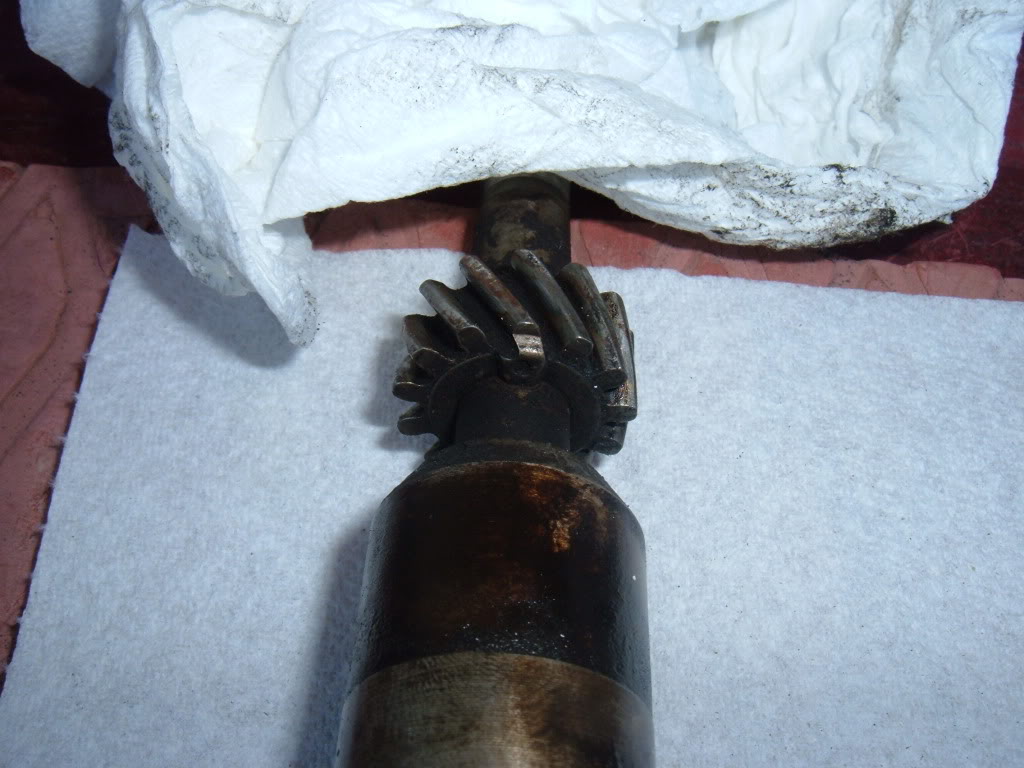
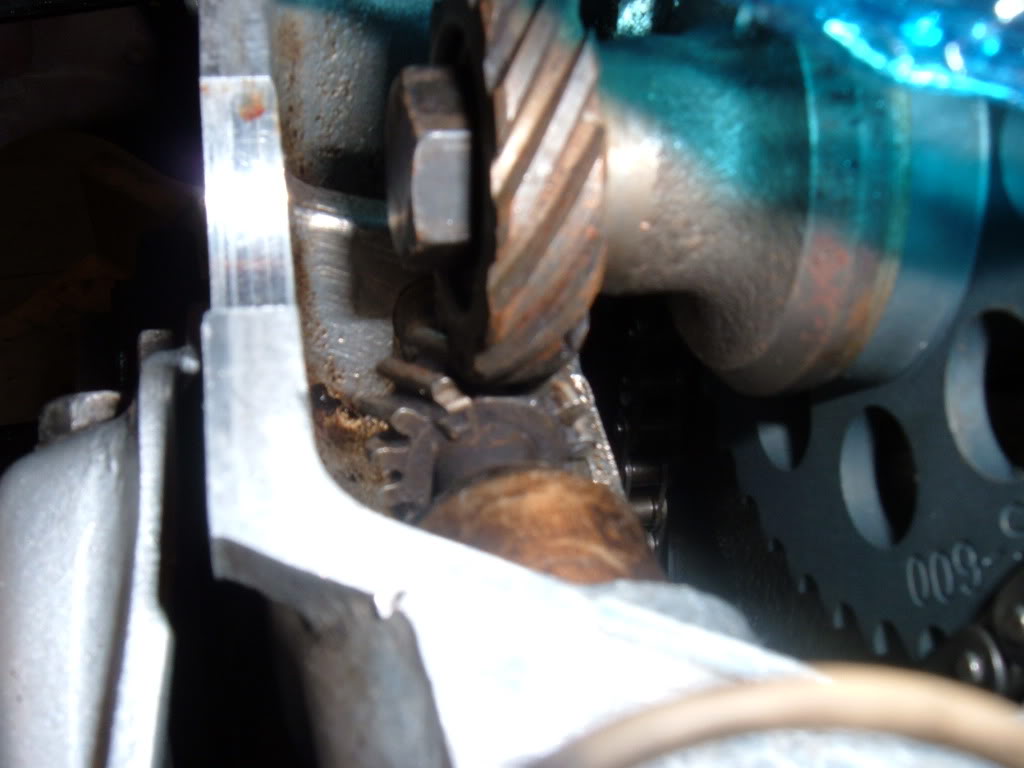
(for those who don't know, I was off a tooth last time I buttoned things up when I did my timing chain install a few years back....92 TOY's photos here helped me realize that and set things straight - amazing what a tooth off can do (as in not let your motor start!)
(for those who don't know, I was off a tooth last time I buttoned things up when I did my timing chain install a few years back....92 TOY's photos here helped me realize that and set things straight - amazing what a tooth off can do (as in not let your motor start!)
Mar 8, 2013 | 10:42 AM
#128
Registered User
Joined: Feb 2013
Posts: 11
Likes: 0
That is because no one wants to show off a dirty motor....unless they want to show it later after it's cleaned up!
Get:
- Wire brushes - lots (harbor freight)
- Plastic scrube brushes and old toothbrushes
- Orange degreaser material
- Old scotch brite pads/sponges
- Lots of rags
- Something a bit stronger like Krud Kutter
- Dish soap and warm water soaking does wonders too
Get:
- Wire brushes - lots (harbor freight)
- Plastic scrube brushes and old toothbrushes
- Orange degreaser material
- Old scotch brite pads/sponges
- Lots of rags
- Something a bit stronger like Krud Kutter
- Dish soap and warm water soaking does wonders too
Mar 8, 2013 | 10:51 AM
#129
Sounds like it's coming together! Cant wait for the VROOOOM video! Lol.
I did lots of clean up like mentioned, while it was apart... man was it worth all the hours of cleaning parts!
Like the progress on the AIR/BATTERY swap and sounds like u came up with a genius plan for the wiring routing (and the wiring over the bellhousing is interesting on the other)... Makes sense to get the air intake to the cool side... ur running a K&N fit to the 3" Supra AFM? Wut shorty tube?
Mar 8, 2013 | 11:06 AM
#130
YotaTech Milestone-Two Millionth Post
Joined: Jan 2009
Posts: 12,009
Likes: 122
From: Northeast Pennsylvania
I steal from the best!
(for those who don't know, I was off a tooth last time I buttoned things up when I did my timing chain install a few years back....92 TOY's photos here helped me realize that and set things straight - amazing what a tooth off can do (as in not let your motor start!)
(for those who don't know, I was off a tooth last time I buttoned things up when I did my timing chain install a few years back....92 TOY's photos here helped me realize that and set things straight - amazing what a tooth off can do (as in not let your motor start!)
awwww shucks. :blushes:
Mar 13, 2013 | 02:16 PM
#132
Thread Starter
Registered User
iTrader: (2)
Joined: Dec 2009
Posts: 2,159
Likes: 7
From: Pleasanton, CA - SF Bay Area
Got my injectors back today!
Got all 4 back plus the CSI from Witchhunter today. They look great!
The test sheet also came with and from what I can tell, they were actually performing pretty well before the cleaning - can anyone confirm if I'm crazy on that notion? I read the FAQ on how to read the test sheet:
http://witchhunter.com/testresults.php
Here are the injectors:
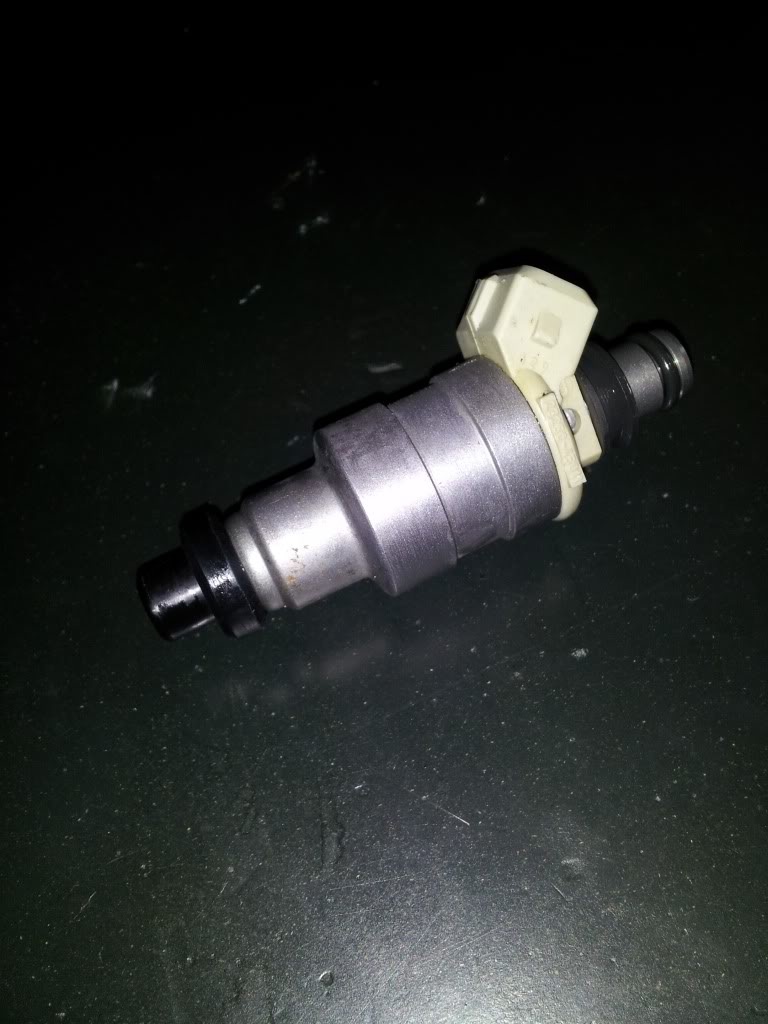
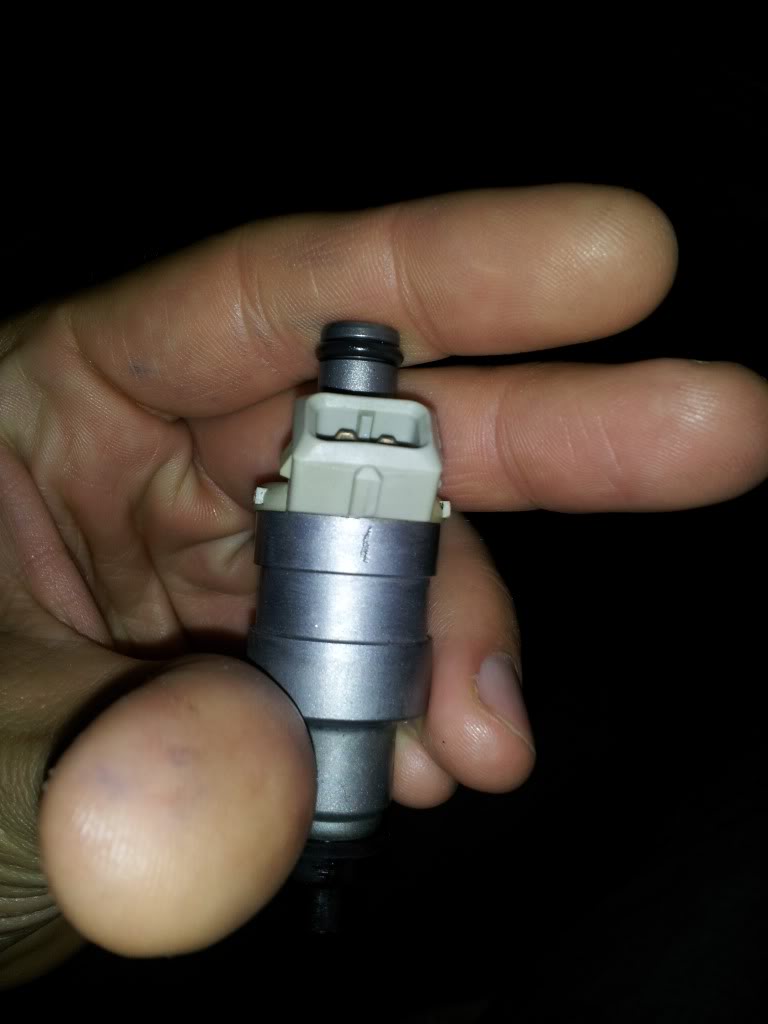
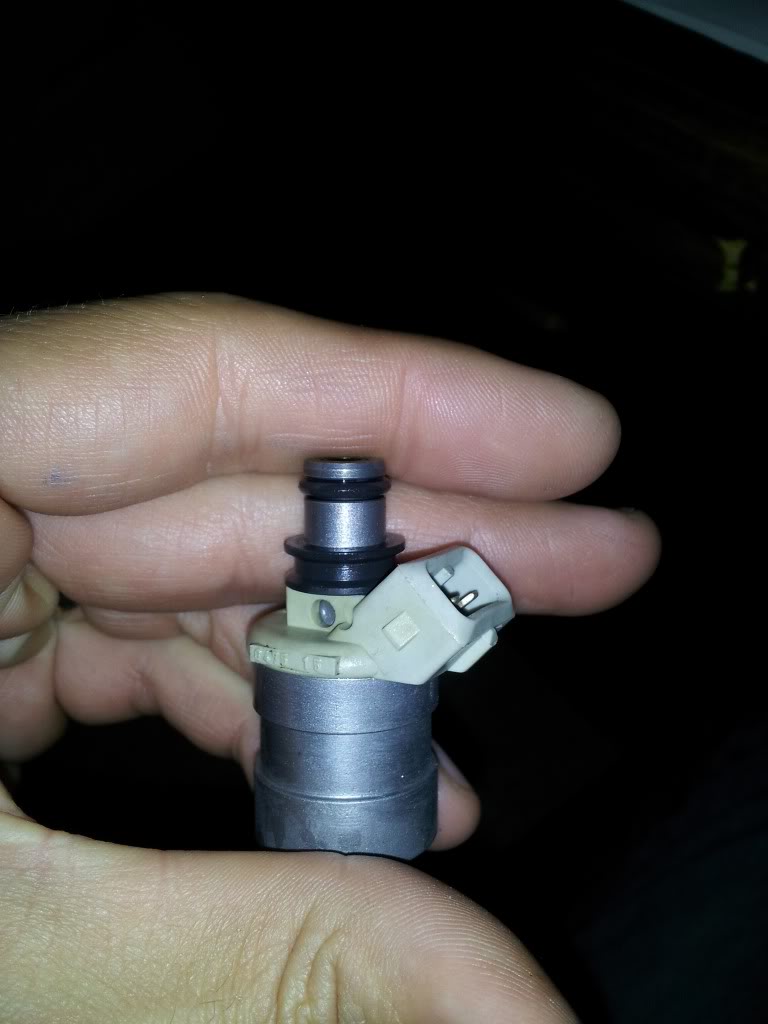
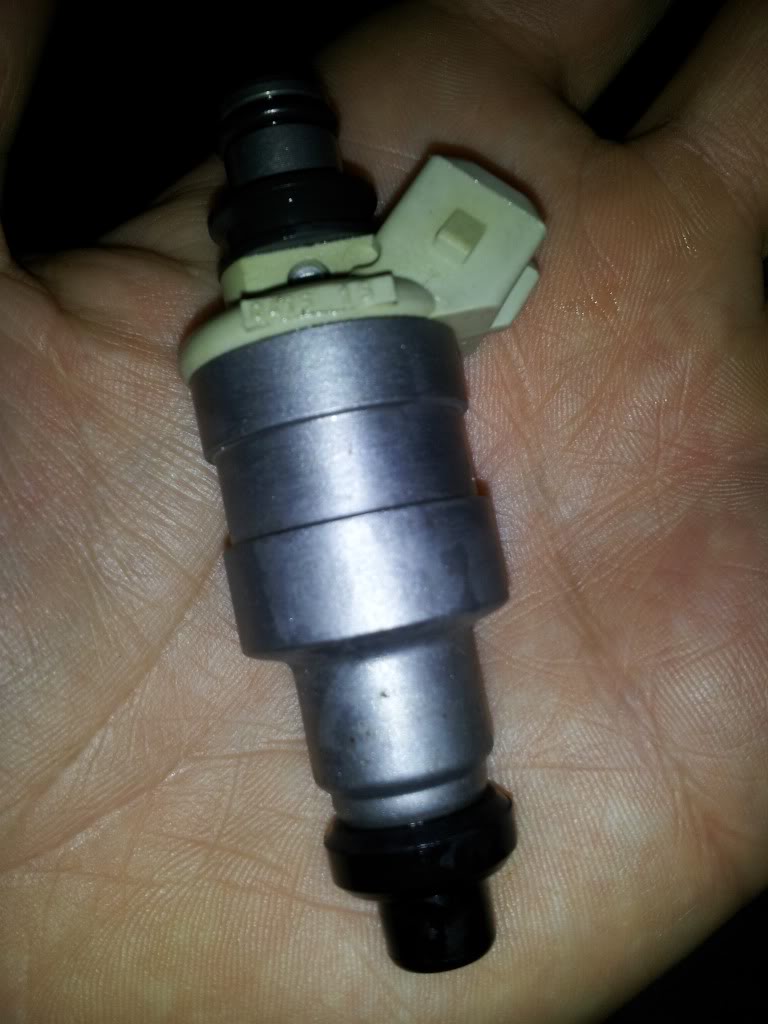
And the test sheet:

I'm out of town through next weekend so I won't get to this until end of March
The test sheet also came with and from what I can tell, they were actually performing pretty well before the cleaning - can anyone confirm if I'm crazy on that notion? I read the FAQ on how to read the test sheet:
http://witchhunter.com/testresults.php
Here are the injectors:
And the test sheet:
I'm out of town through next weekend so I won't get to this until end of March
Mar 17, 2013 | 01:32 PM
#133
I am still at the beginning. I now know why mechanics charge so much to do this. everything is covered in gunk, so it seems like I will spend the majority of the time cleaning everything before putting it back. should have pictures up soon, but its not pretty. nowhere near as clean as the engines I have seen so far.
Mar 17, 2013 | 01:38 PM
#134
Hey Philbert,
I've been away from posting, but see that you have been busy with the HG. One little thing I do here down south is get the part sku and run by http://www.toyotapartszone.com and then head over to the local dealer and they actually started matching the price. This works great form me as I save on shipping and time, 1) don't have to pay the regular listed retail price and also the cost of shipping from http://www.toyotapartszone.com and 2) I can get it at the latest the next day. Now they all know me so even if its a special order they just put it through allowing me to pay and pick up at the same time. Helps out a great deal.
I've been away from posting, but see that you have been busy with the HG. One little thing I do here down south is get the part sku and run by http://www.toyotapartszone.com and then head over to the local dealer and they actually started matching the price. This works great form me as I save on shipping and time, 1) don't have to pay the regular listed retail price and also the cost of shipping from http://www.toyotapartszone.com and 2) I can get it at the latest the next day. Now they all know me so even if its a special order they just put it through allowing me to pay and pick up at the same time. Helps out a great deal.
Mar 17, 2013 | 03:11 PM
#135
Thread Starter
Registered User
iTrader: (2)
Joined: Dec 2009
Posts: 2,159
Likes: 7
From: Pleasanton, CA - SF Bay Area
Hey Philbert,
I've been away from posting, but see that you have been busy with the HG. One little thing I do here down south is get the part sku and run by http://www.toyotapartszone.com and then head over to the local dealer and they actually started matching the price. This works great form me as I save on shipping and time, 1) don't have to pay the regular listed retail price and also the cost of shipping from http://www.toyotapartszone.com and 2) I can get it at the latest the next day. Now they all know me so even if its a special order they just put it through allowing me to pay and pick up at the same time. Helps out a great deal.
I've been away from posting, but see that you have been busy with the HG. One little thing I do here down south is get the part sku and run by http://www.toyotapartszone.com and then head over to the local dealer and they actually started matching the price. This works great form me as I save on shipping and time, 1) don't have to pay the regular listed retail price and also the cost of shipping from http://www.toyotapartszone.com and 2) I can get it at the latest the next day. Now they all know me so even if its a special order they just put it through allowing me to pay and pick up at the same time. Helps out a great deal.
I can't wait to get this thing running again. I am gone all this week but hope to get it on the road by April.
Still Need to:
- install injectors/fuel rail
- install upper intake manifold and senders/wiring
- solder/extend AFM wiring
- solder in GM wiring pigtail for alternator
- install GM alternator
- install header
- install Supra AFM
I think that's it.
Mar 17, 2013 | 03:13 PM
#136
YotaTech Milestone-Two Millionth Post
Joined: Jan 2009
Posts: 12,009
Likes: 122
From: Northeast Pennsylvania
just checking in man. may be doing mine again soon, think I have a problem. see my original thread.
the video of the diff breather in that other thread....that guy has some really good videos, check them out. i went to his page a few weeks ago and search toyota.
the video of the diff breather in that other thread....that guy has some really good videos, check them out. i went to his page a few weeks ago and search toyota.
Mar 17, 2013 | 03:56 PM
#137
Thread Starter
Registered User
iTrader: (2)
Joined: Dec 2009
Posts: 2,159
Likes: 7
From: Pleasanton, CA - SF Bay Area
Thanks Jerry - sorry to hear you're having issues with your cooling system again - just read that last page of your thread. Looks like PumpkinYota has some good advice.
Now you have me worried....did you lube your head bolts (new) when installing? I didn't.....I put some oil around the bolt head where it meets the valve train, to lessen the resistance when torquing it down...but I kept the bolt threads and block holes DRY/clean when installing...should I have lubed those too???
Hope your issues are as simple as retorquing...that's what SuperBleeder did for his coolant leak, and what I tried (but it failed soon after)....
Mar 18, 2013 | 07:21 AM
#140

Registered User
Joined: Mar 2013
Posts: 45
Likes: 0
Great thread, going to be undertaking the same thing and a full timing replacement while I'm at it once the finances are in order, the pictures are quite helpful and there's a plethora or info here. Thanks for the thread


