
Philbert's 87 4Runner Head Gasket & head replacement - take II
 03-01-2013, 03:58 PM
#81
Registered User
I was always told a tap will "loosen" the threads. I use a chaser set on boltholes. Terry's method will do a great job as well. I use taps to cut threads, and you will remove material if you use a tap.
 03-01-2013, 05:45 PM
#82
Registered User

Join Date: Oct 2012
Posts: 125
Likes: 0
Received 0 Likes
on
0 Posts
before closing up the cooling system i say flush it out by first taking out the thermostat from the housing and put the housing back and get your house and flush it thoroughly; thats what i did when my coolant ports on the HG got clogged and a lot of junk came out of the lower radiator hose, it also help rotating the water pump if possible.
03-01-2013, 08:16 PM
#83
Registered User
Join Date: Nov 2008
Location: Vancouver< WA
Posts: 247
Likes: 0
Received 0 Likes
on
0 Posts
Thanks guys for weighing in. Scope, didn't realize you were in the Bay Area as well, cool!
I would sell my old head with the caveats mentioned here - maybe someone wants to do this themselves, or have the OEM head fixed, who knows. I'm really leaning toward the ENGNBLDR head/cam set up since it's well reviewed, comes with the 268* cam, and oversized valves/etc - more power, better fuel economy, and it's "new".
LTLRED - did ENGNBLDR tell you that about the head HE sells, or just in general, you need to resurface any head when you're doing the gasket (unless it's one of his new ones)?
I ordered my missing hoses/gaskets just now from Toyotapartszone too.
Any recommendations on cleaning out the TB?
my head would need to be surfaced. Its a good thing because it didn't pass the pressure test. So I basically had the head rebuilt again. I'm not sure if its the new valve stem seals or my honong job on the cyllinders but my oil consumption is now close to zero. Oh, I also "drove it like I stole it" to break it in.
03-05-2013, 10:18 AM
#85
Registered User
Thread Starter
iTrader: (2)
Join Date: Dec 2009
Location: Pleasanton, CA - SF Bay Area
Posts: 2,159
Likes: 0
Received 7 Likes
on
5 Posts
Well, today I dropped off my intake manifold, EGR, water pipes, thermostat housing and valve cover to get hot tanked - should be ready tomorrow. They are going to drill and tap for my water temp sender as well - there appears to be room and sufficient wall thickness to do this in the same spot you guys were talking about earlier.
Got the head, bolts this week and am taking them home today.
Also got the GM alternator bracket mount kit in the mail yesterday.
Going to try to get the timing cover back on tonight, then tackle the head/gasket tomorrow night. I think I have a solution for keeping the timing chain/sprocket still while I'm putting on the gasket and head - will post photos later.
Also, here's a question I can't seem to answer....
I am putting the timing cover on first and plan to use Toyota FIPG along with the provided gaskets to seal it up. How should I address sealing up the union between the head, the HG, and the top of the timing cover? Should I slather FIPG on top of the timing cover and the HG in that area, when I put the head on?
03-05-2013, 11:41 AM
#89
Registered User

Join Date: Feb 2013
Posts: 11
Likes: 0
Received 0 Likes
on
0 Posts
 Keep the questions coming, we have a good group following.
03-05-2013, 03:11 PM
Keep the questions coming, we have a good group following.
03-05-2013, 03:11 PM
#91

Also, here's a question I can't seem to answer....
I am putting the timing cover on first and plan to use Toyota FIPG along with the provided gaskets to seal it up. How should I address sealing up the union between the head, the HG, and the top of the timing cover? Should I slather FIPG on top of the timing cover and the HG in that area, when I put the head on?
I am putting the timing cover on first and plan to use Toyota FIPG along with the provided gaskets to seal it up. How should I address sealing up the union between the head, the HG, and the top of the timing cover? Should I slather FIPG on top of the timing cover and the HG in that area, when I put the head on?
Book says just to seal the corners where the block and timing cover intersect. If you do the gasket to the timing cover and to the head it makes servicing the timing chain later difficult or risky. All the "don't damage the head gasket" reminders when swapping the timing chain
 03-06-2013, 12:36 PM
#92
Registered User
Thread Starter
iTrader: (2)
Join Date: Dec 2009
Location: Pleasanton, CA - SF Bay Area
Posts: 2,159
Likes: 0
Received 7 Likes
on
5 Posts
Yeah I remember that warning from when I did my timing chain a few years back....and my HG was already messed up around that area so I just cut it off with a razor blade from underneath 
I got the timing cover on last night and used FIPG black along with the gaskets. Will do water and oil pumps tonight with new gaskets, and hopefully will be able to get the head on tonight if I can clean everything up.
I also picked up my cleaned parts today - not bad for $30! They are drilling and tapping my lower intake manifold this afternoon for my 1/8" NPT Autometer sender.
More updates and photos tonight I hope.
Thanks guys
03-06-2013, 10:47 PM
#93
Registered User
Thread Starter
iTrader: (2)
Join Date: Dec 2009
Location: Pleasanton, CA - SF Bay Area
Posts: 2,159
Likes: 0
Received 7 Likes
on
5 Posts
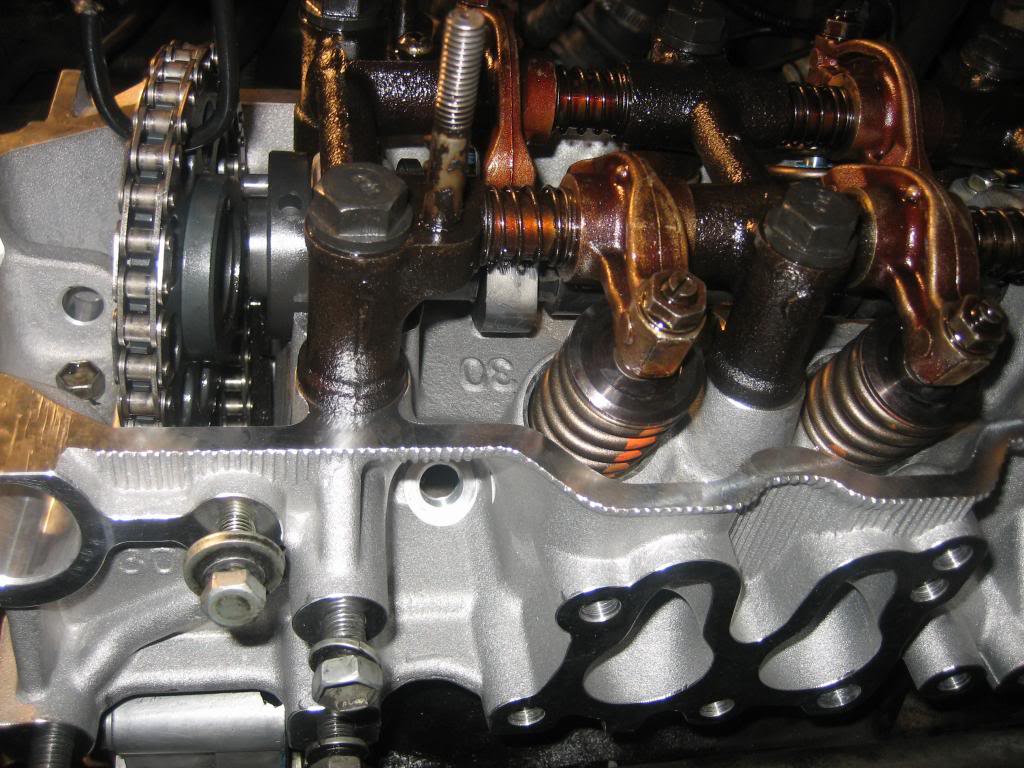
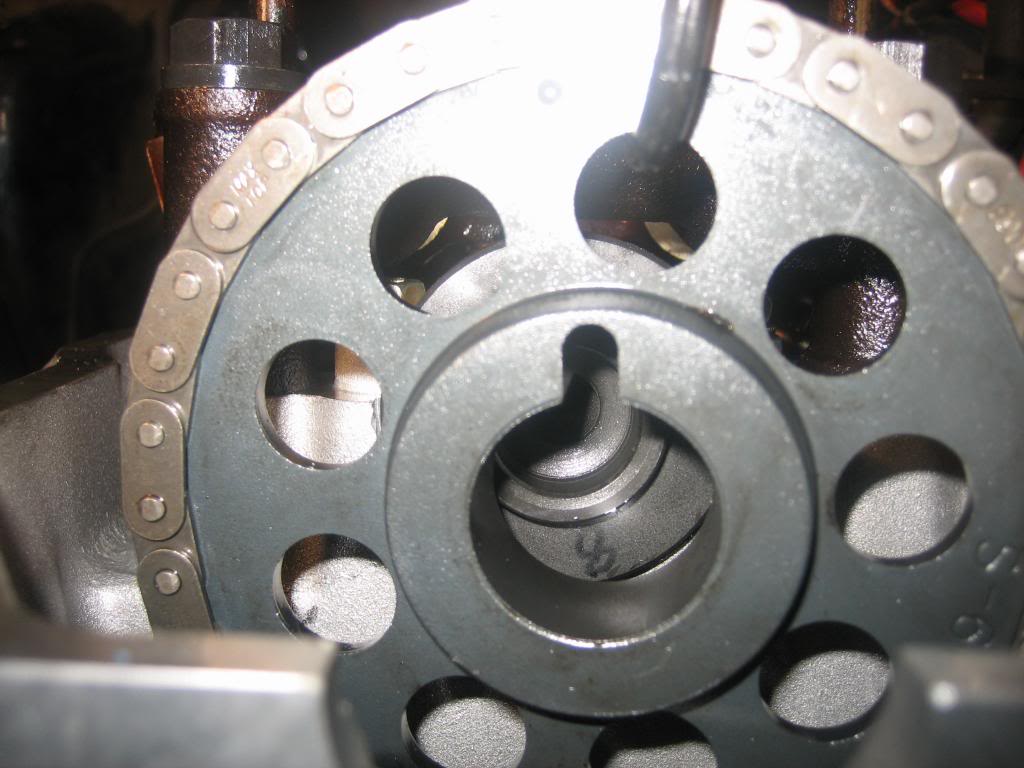
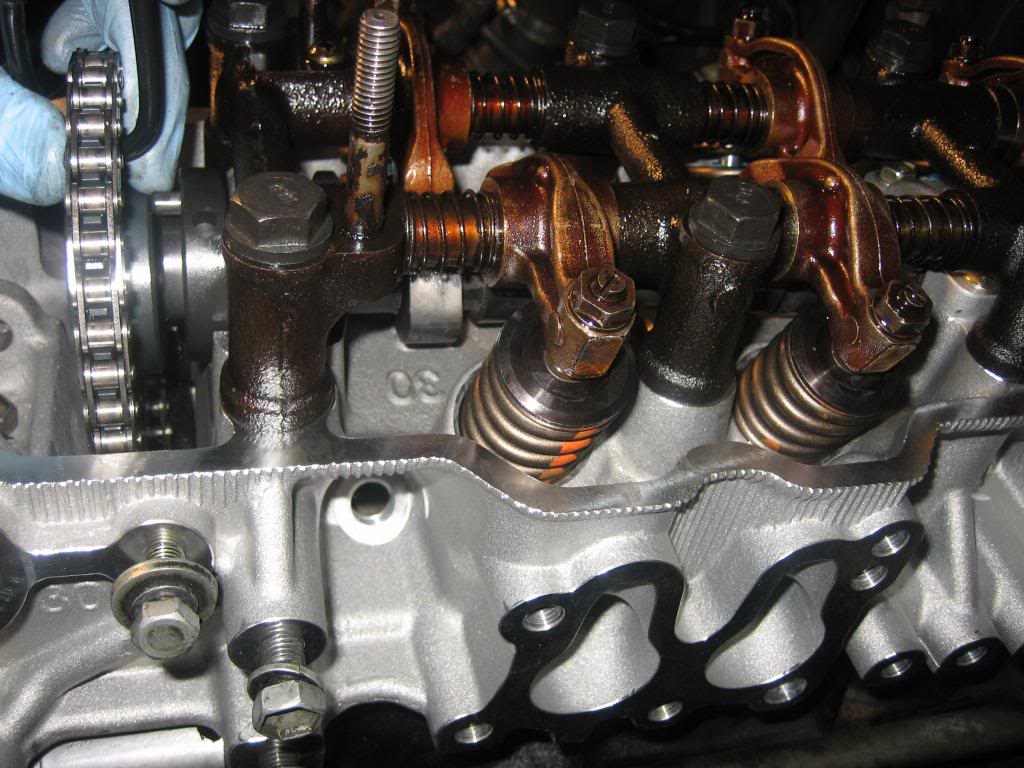
So I got the Head on but ran into a snag...
Hi guys,
I spent about 4 hours on it tonight, and made some good progress.
I finished cleaning up the top of the block, as well as the bolt holes. Then came the gasket and head (that thing is HEAVY!). I put the valve rocker assembly on, with the 5 new dowels from ENGNBLDR, and torqued down the bolts in 3 passes, ending on 58 ft/lbs. I ran a small amount of oil under each of the bolt tops, to ensure they would rotate freely and not interfere with the torque settings.
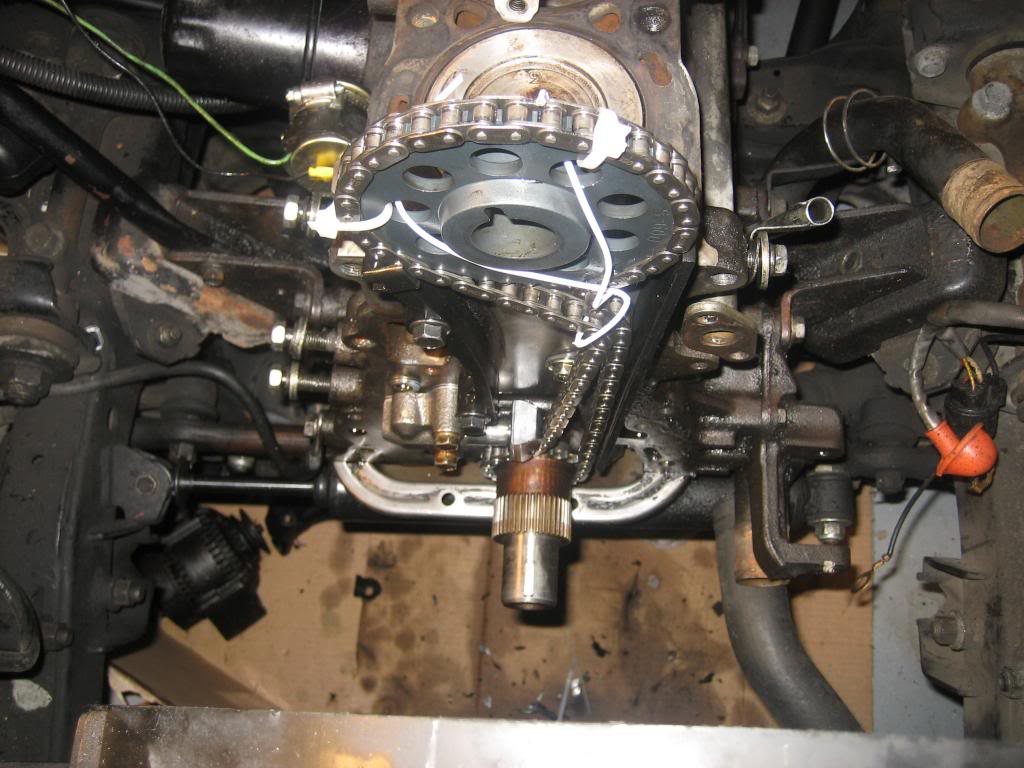
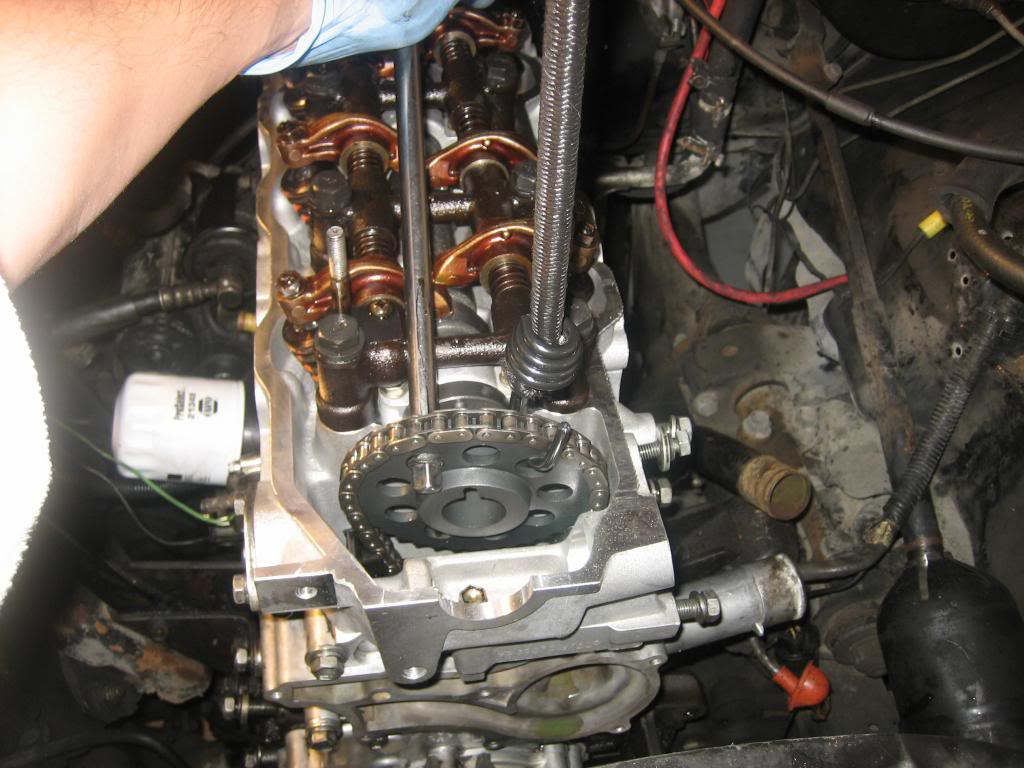
So I got it all torqued down in sequence, per the FSM, then went to put the cam sprocket onto the camshaft...BUT IT SITS ABOUT 1/8" to 1/4" *BELOW* where it apparently needs to be?! I recall from doing the timing chain job a few years back that it required some jimmying, but wasn't THIS far off. I was really careful to line up the bright links on the crank and cam sprocket (I've done this before), and had tension on the drivers side the whole time I was putting the timing cover on. I also, after the head was on, rotated the crank left and right, but that doesn't change anything.
I NEED HELP/IDEAS HERE IN ORDER TO MOVE FORWARD!
Here you can see where the cam sprocket comes up short:

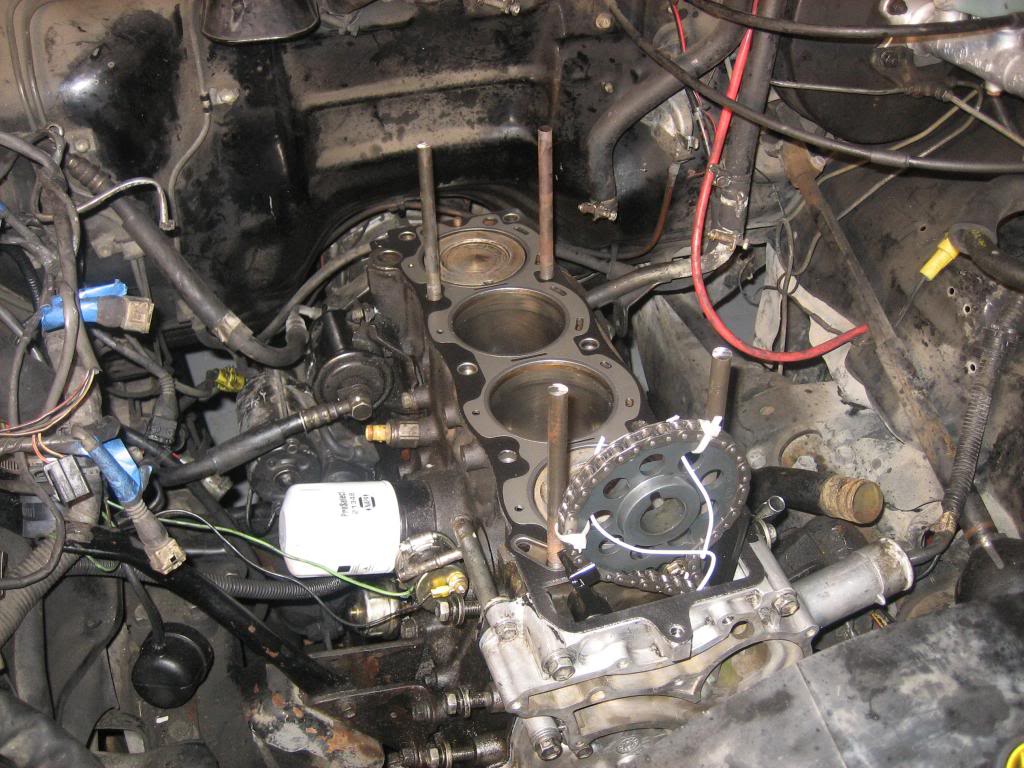
Here is where I used the old head bolts (minus their tops) to act as centering posts for the new gasket and head:
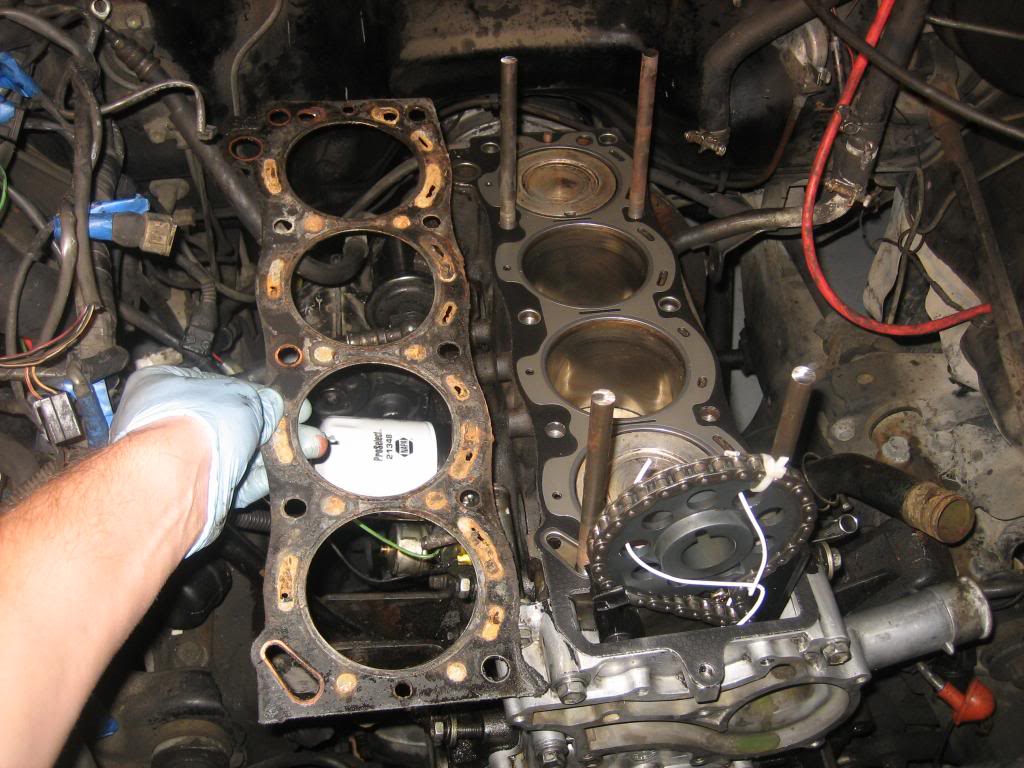
The old gasket next to the new:
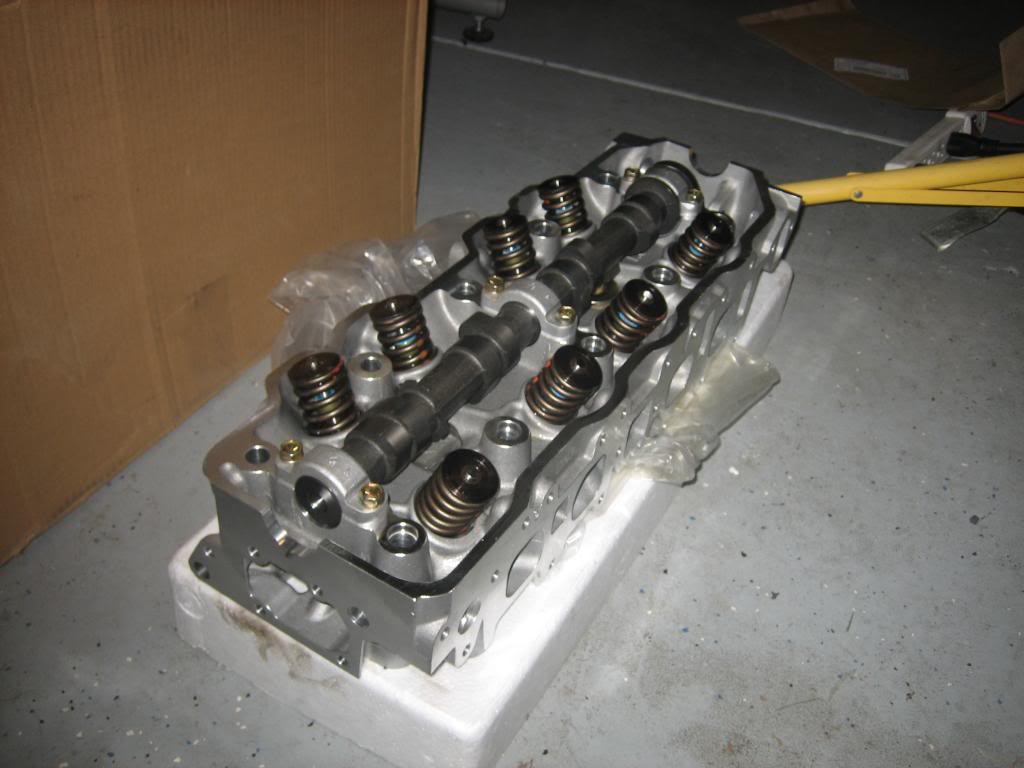
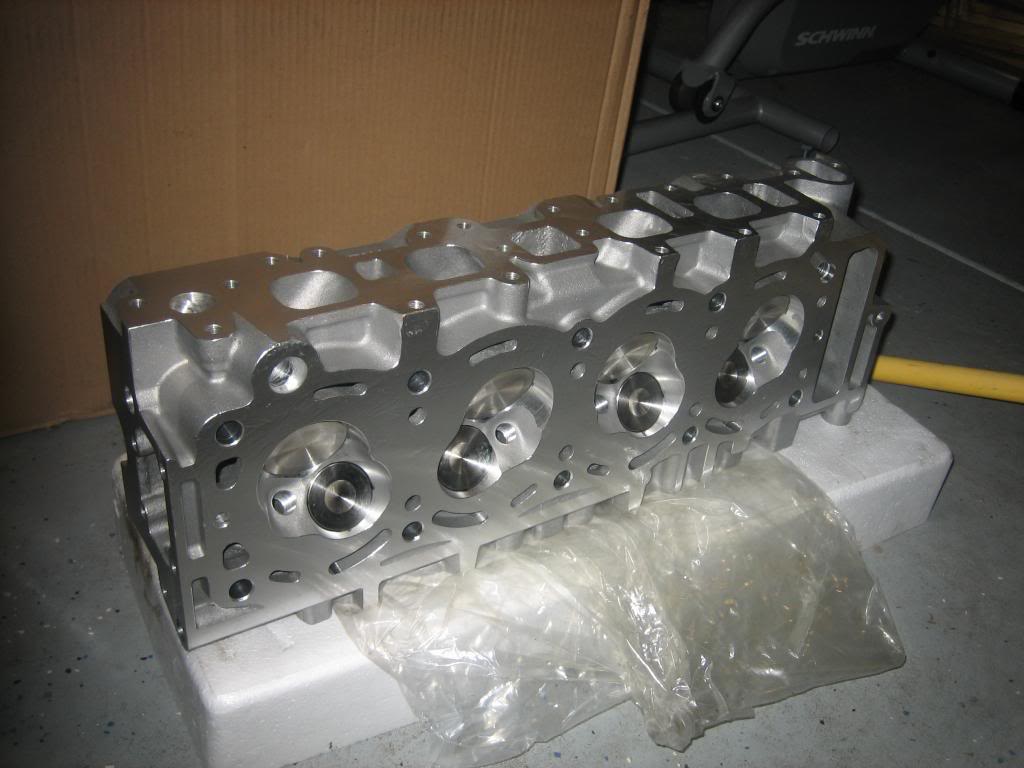
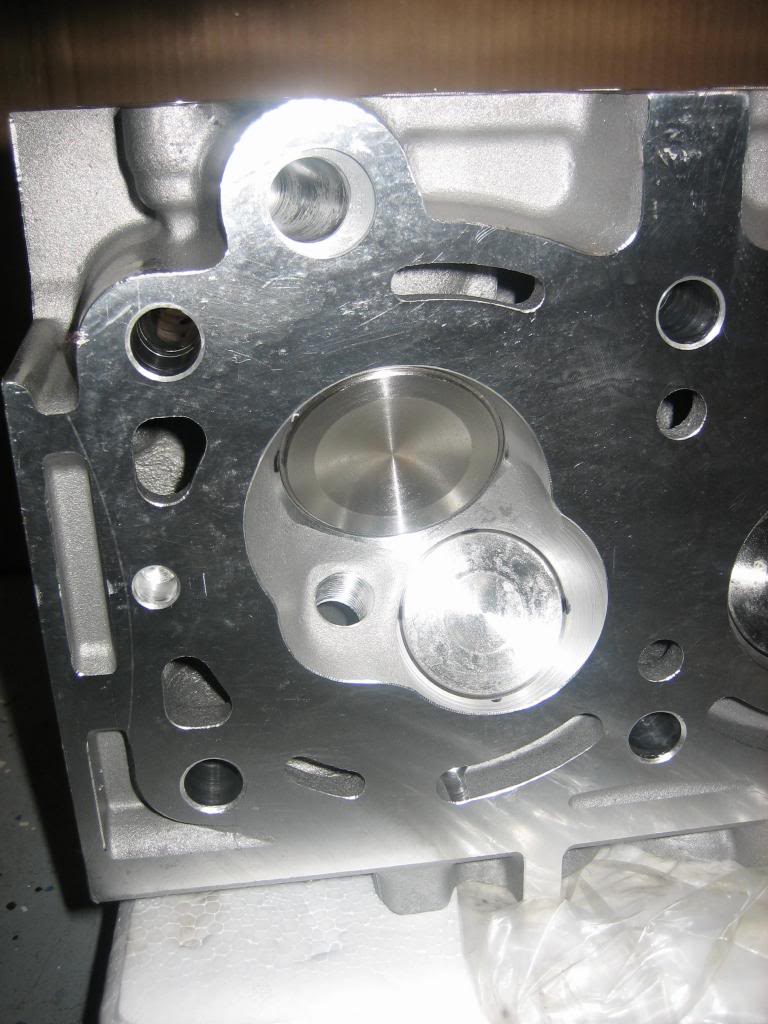
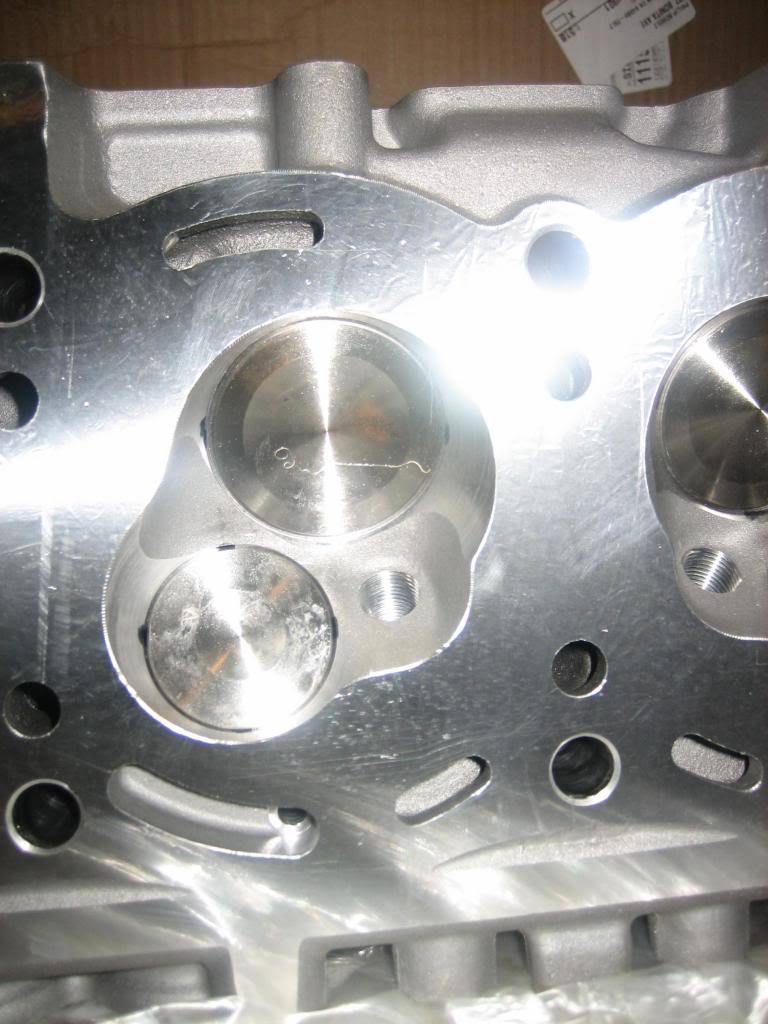
The shiny new head:

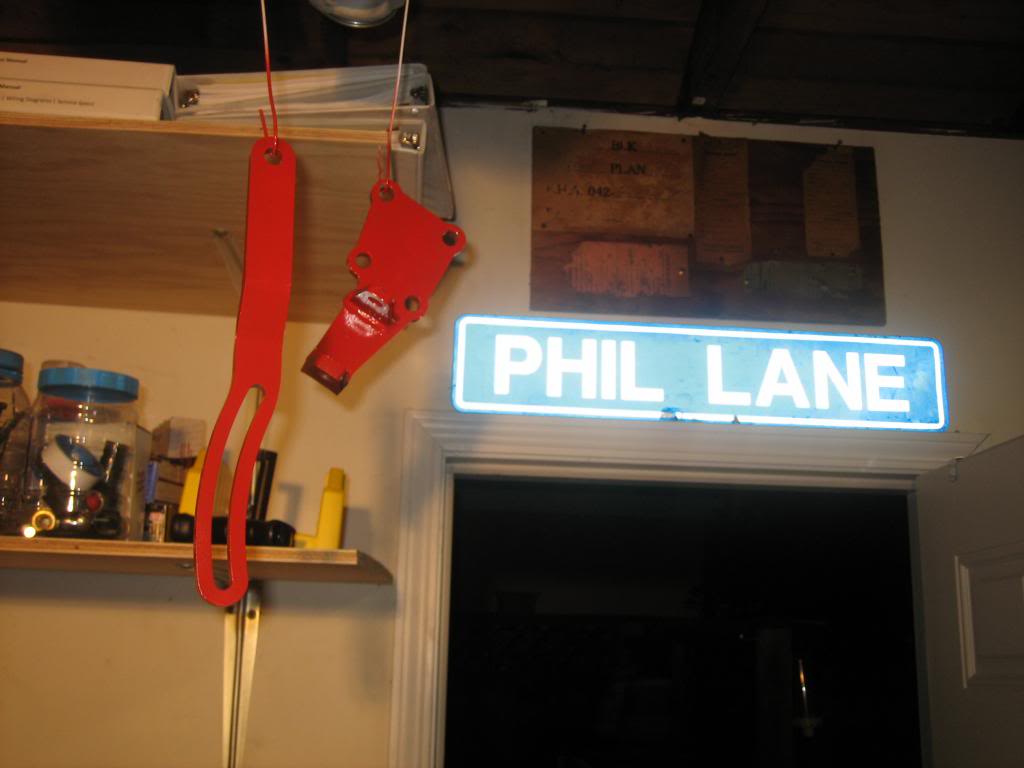
I painted my new Trail Gear GM alternator mounts with engine paint, then cured them in the oven for an hour at 200*:
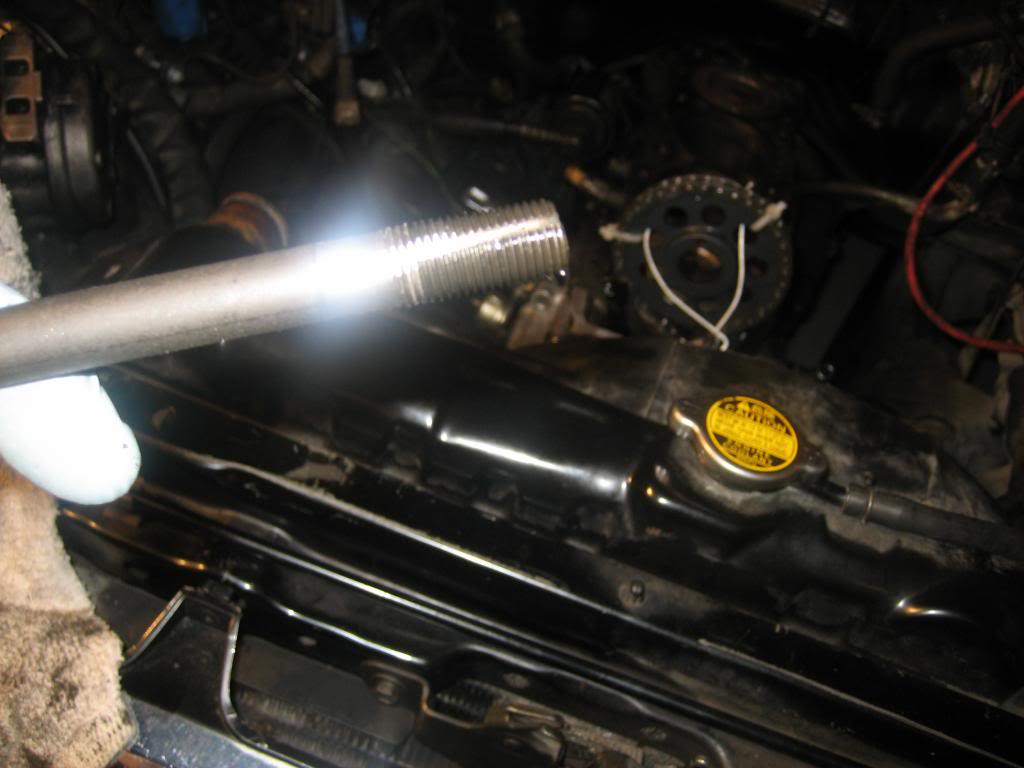
Hard to see here with the glare but I used an old head bolt and cut a groove in the side with an angle grinder to act as a chaser - got a fair amount of liquid out as it bottomed out:
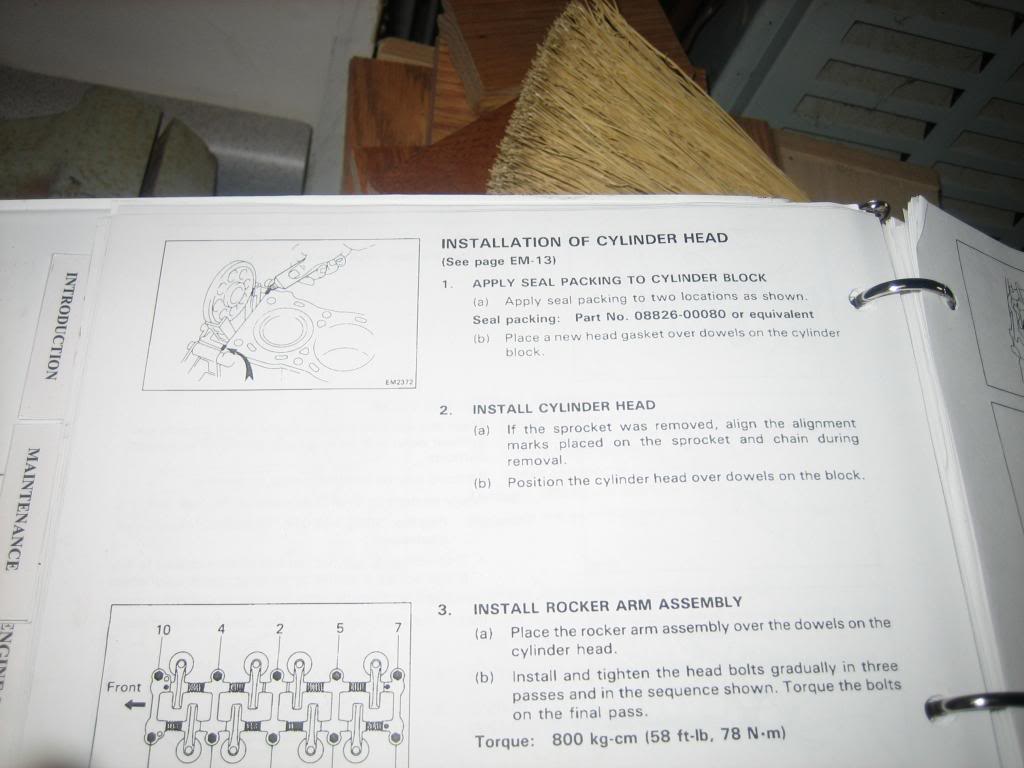
Oh, and to answer the question earlier about how/where to use FIPG on the top of the timing cover/HG....I did find it in the FSM and followed it:
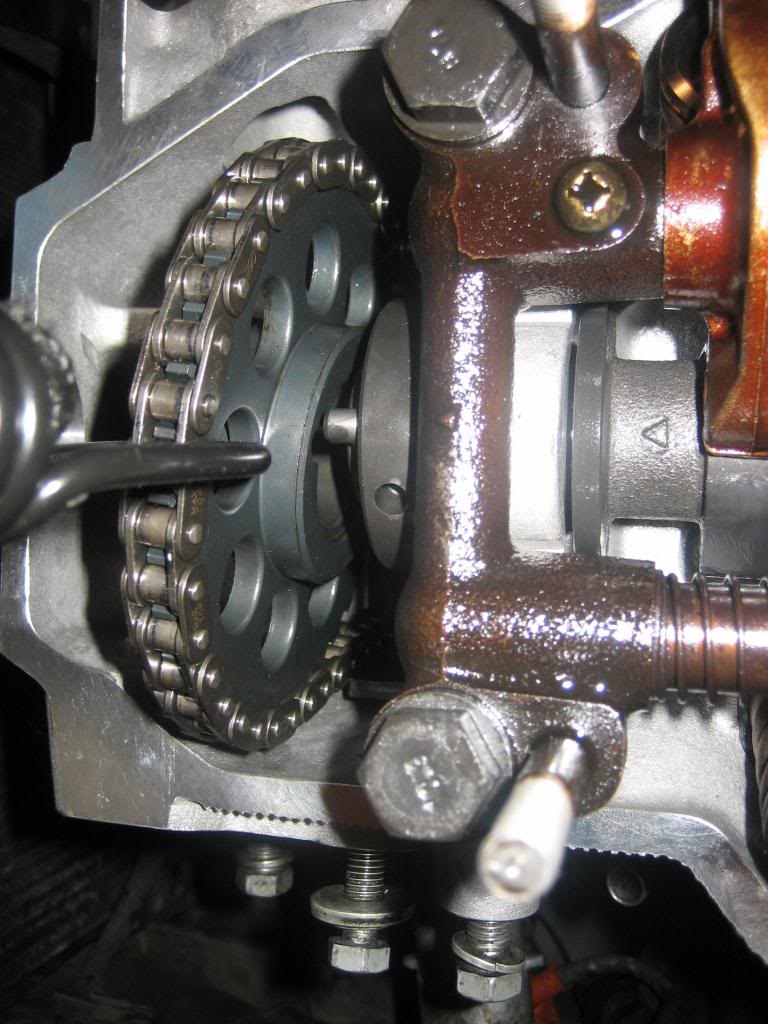
And this is the technique I used to keep tension on the timing chain - I zip tied the top sprocket to the chain, wrapped some hanger wire around the chain under the cam sprocket to create tension, and sort of gently wedged the cam gear against the passenger side guide to keep tension on the drivers side chain:
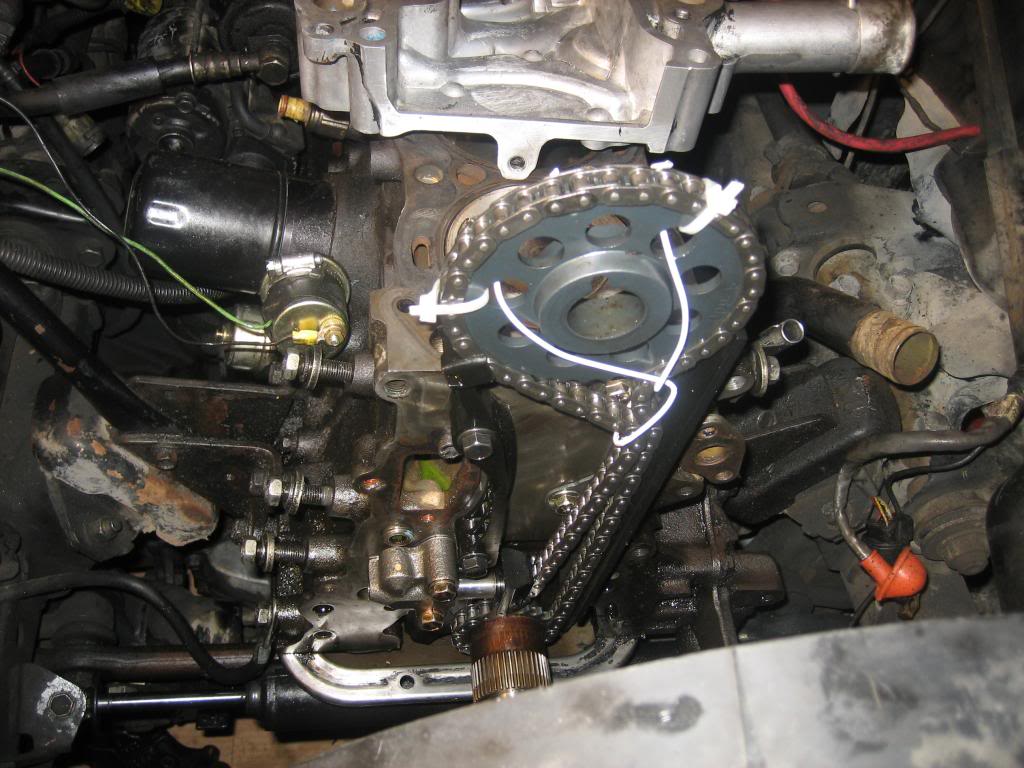
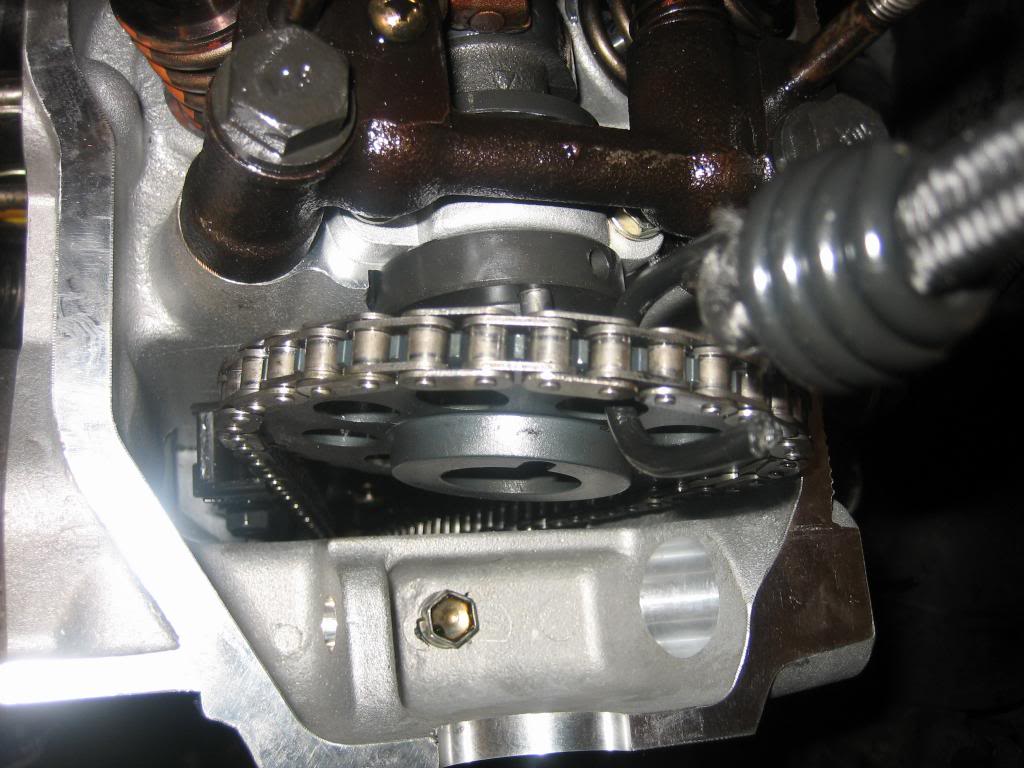
And here's where it sits at the end of the night:
I spent about 4 hours on it tonight, and made some good progress.
I finished cleaning up the top of the block, as well as the bolt holes. Then came the gasket and head (that thing is HEAVY!). I put the valve rocker assembly on, with the 5 new dowels from ENGNBLDR, and torqued down the bolts in 3 passes, ending on 58 ft/lbs. I ran a small amount of oil under each of the bolt tops, to ensure they would rotate freely and not interfere with the torque settings.
So I got it all torqued down in sequence, per the FSM, then went to put the cam sprocket onto the camshaft...BUT IT SITS ABOUT 1/8" to 1/4" *BELOW* where it apparently needs to be?! I recall from doing the timing chain job a few years back that it required some jimmying, but wasn't THIS far off. I was really careful to line up the bright links on the crank and cam sprocket (I've done this before), and had tension on the drivers side the whole time I was putting the timing cover on. I also, after the head was on, rotated the crank left and right, but that doesn't change anything.
I NEED HELP/IDEAS HERE IN ORDER TO MOVE FORWARD!
Here you can see where the cam sprocket comes up short:
Here is where I used the old head bolts (minus their tops) to act as centering posts for the new gasket and head:
The old gasket next to the new:
The shiny new head:
I painted my new Trail Gear GM alternator mounts with engine paint, then cured them in the oven for an hour at 200*:
Hard to see here with the glare but I used an old head bolt and cut a groove in the side with an angle grinder to act as a chaser - got a fair amount of liquid out as it bottomed out:
Oh, and to answer the question earlier about how/where to use FIPG on the top of the timing cover/HG....I did find it in the FSM and followed it:
And this is the technique I used to keep tension on the timing chain - I zip tied the top sprocket to the chain, wrapped some hanger wire around the chain under the cam sprocket to create tension, and sort of gently wedged the cam gear against the passenger side guide to keep tension on the drivers side chain:
And here's where it sits at the end of the night:
03-07-2013, 12:01 AM
#94
The 2nd picture of the "down the timing cover" and the 2nd to last picture. Looks like the D side chain is hooked behind that guide rail bolt/nut, I stared at it for a bit longer and I guess I see that rail mount to the P side of the chain but the angle just doesn't look right.
Sorry I'm no help.. Think I remember reading someone had to jam a pry bar thru one of the holes upto the rocker bracket. (Yeah I grimace even typing it...) Give it another shot after a "break" and I think you'll get it.
Notice the book has it rotated so the sprocket pin is at about 11 o'clock when they pull it up. This keeps the D side tension and puts abit more on the tensioner, so then when you rotate it to the 12 it'll come up more.
03-07-2013, 02:34 AM
#95
YotaTech Milestone-Two Millionth Post
I remember giving the passenger's side of the chain an extended yank to make the tesnsioner move in before I was able to get it on. a long pry bar or really long socket handle may do the job too.
03-07-2013, 04:14 AM
#96
Exactly what I was going to say. It does take a bit more force then you'd think. I used a long extension through one of the outer holes in the cam gear against the rocker assembly. Slowly apply pressure till it finally (it will feel that way) starts coming up. have the bolt ready to go to help get it started so you don't loose it. I left the bolt threaded enough to have movement and wiggled the gear in place.
03-07-2013, 09:13 AM
#98
Registered User
Thread Starter
iTrader: (2)
Join Date: Dec 2009
Location: Pleasanton, CA - SF Bay Area
Posts: 2,159
Likes: 0
Received 7 Likes
on
5 Posts
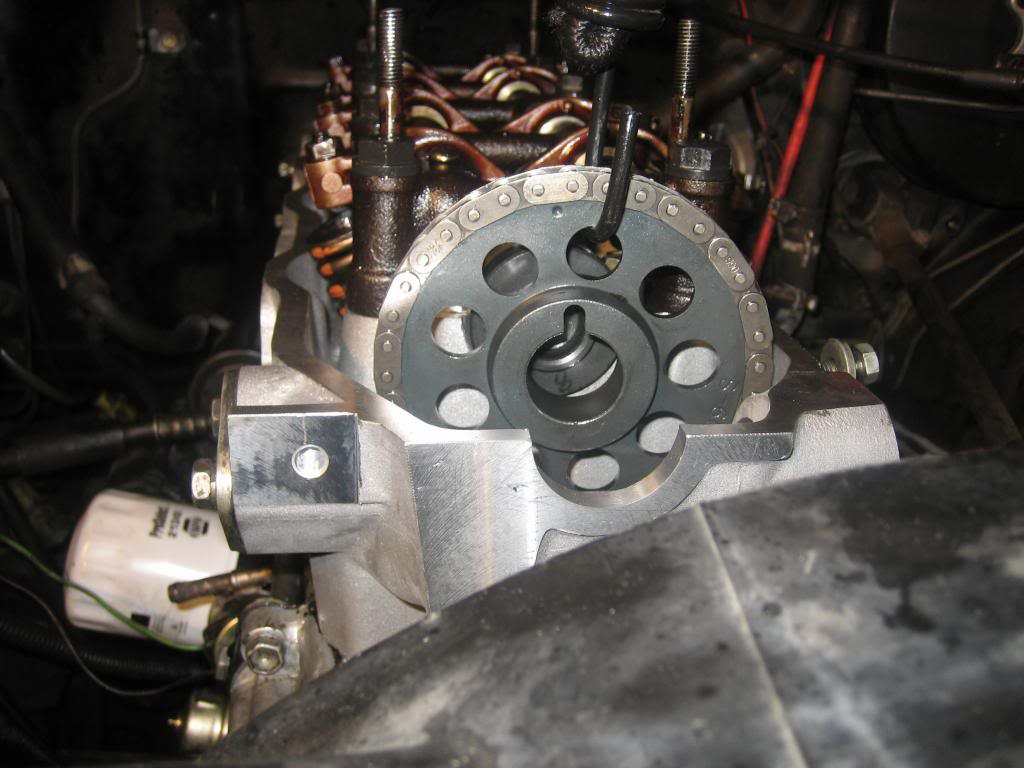
Another hour, and no progress :(
Thanks guys for all the tips since last night. I went back to it this morning with renewed vigor and optomism but am back to square one.
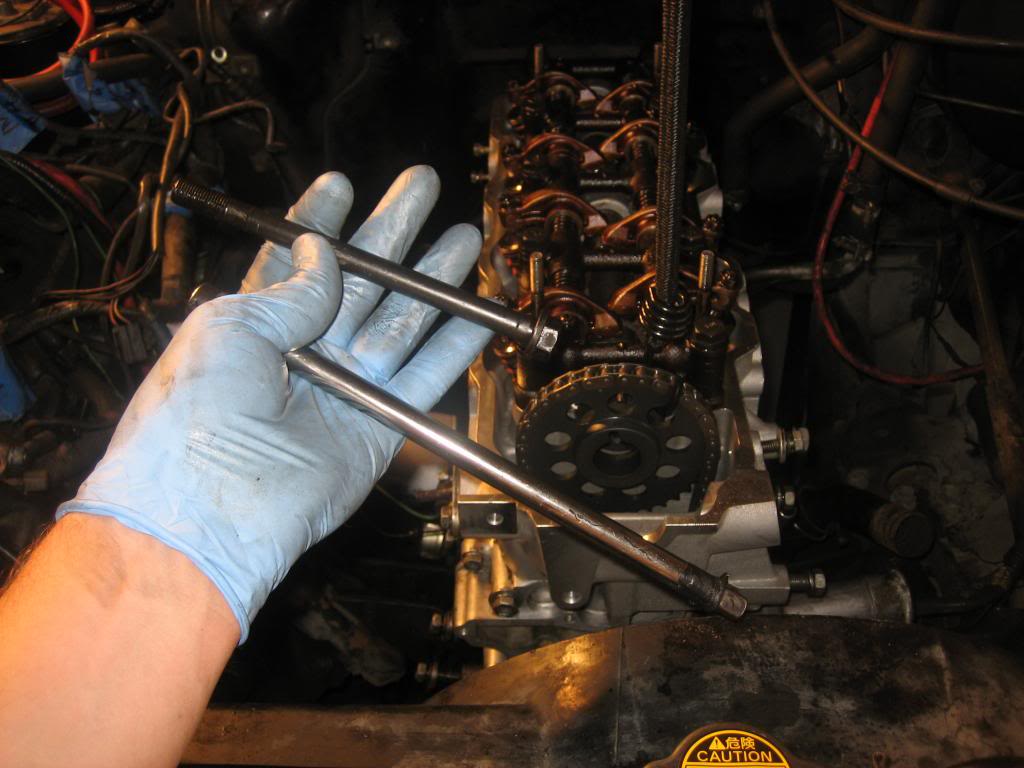
It's SOOOOO close to snugging on that camshaft:
I tried a 1/4" extension to leverage against the valve train:
Tried a headbolt too but that had less leverage:
I also tried my 18" breaker bar, and that 18" 1/4" extension to see if I could push against the tensioner - I was able to make contact, but I can't get that thing to BUDGE! It did move before I put the cover on - I checked.
I'm at a loss now and not sure what approach to take next??
Dario - I will try to get you the bolt dims today - do you want the bolts that attach the bracket to the block or the ones that attach the AC to the bracket? Or both?
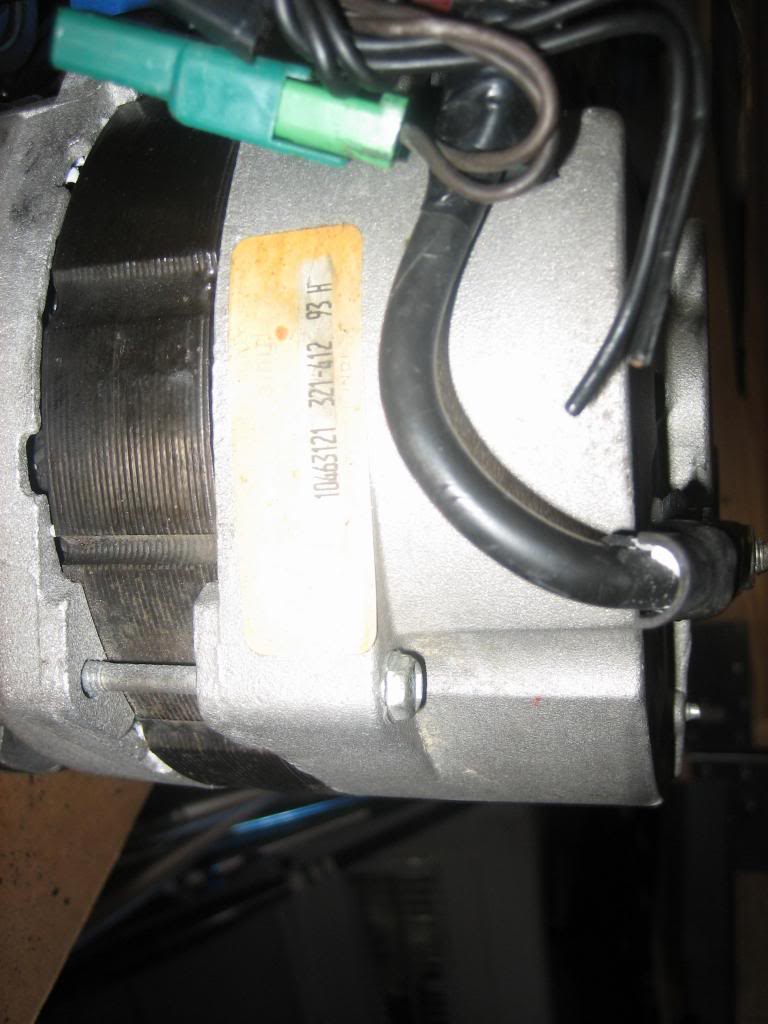
In other news, I looked at the GM alternator I got from ChefYota recently - I wanted to tackle this today, after I got the damn cam sprocket on....
I'm not sure what Delco Remy Alternator this is....did a google search on these part numbers and am coming up blank:
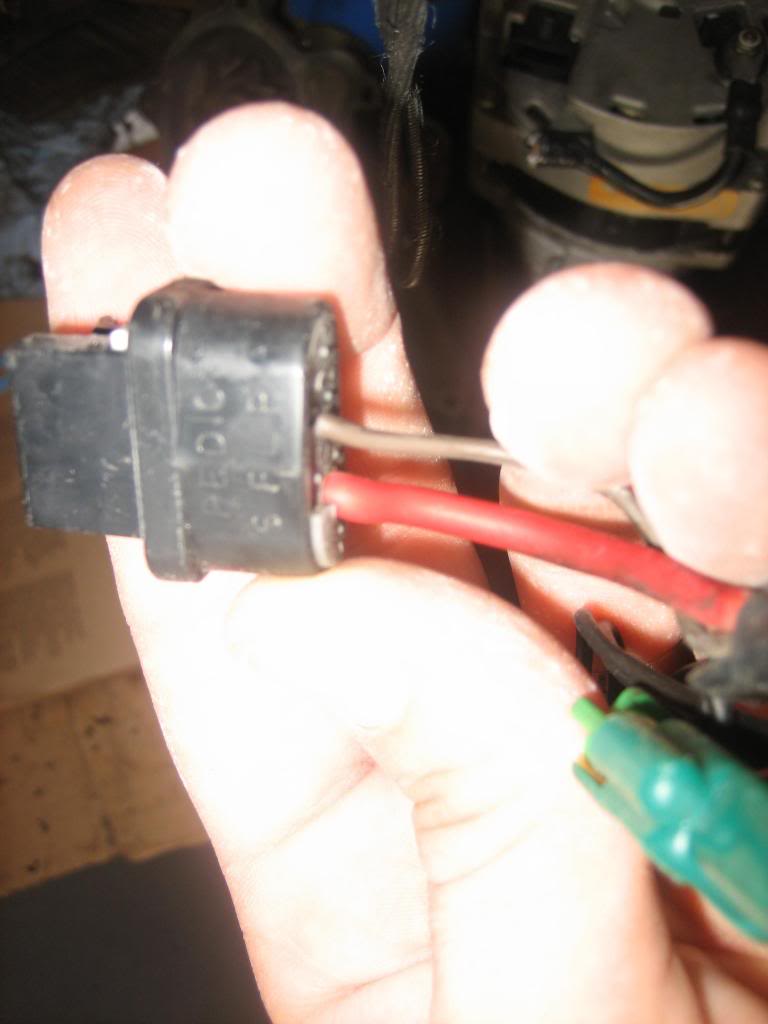
The pigtail it came with has "SFLP" on it for the prongs that attach to the alternator, but only 2 wires coming out the back:
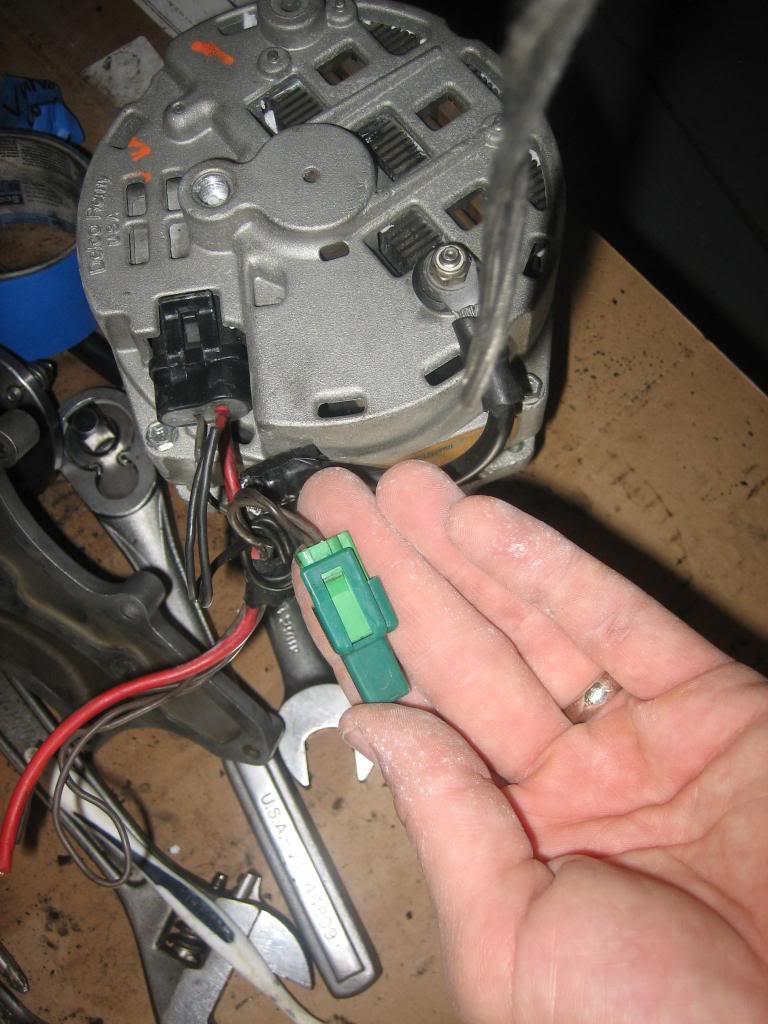
Then there's THIS plug....no idea what it is:
It's SOOOOO close to snugging on that camshaft:
I tried a 1/4" extension to leverage against the valve train:
Tried a headbolt too but that had less leverage:
I also tried my 18" breaker bar, and that 18" 1/4" extension to see if I could push against the tensioner - I was able to make contact, but I can't get that thing to BUDGE! It did move before I put the cover on - I checked.
I'm at a loss now and not sure what approach to take next??
Dario - I will try to get you the bolt dims today - do you want the bolts that attach the bracket to the block or the ones that attach the AC to the bracket? Or both?
In other news, I looked at the GM alternator I got from ChefYota recently - I wanted to tackle this today, after I got the damn cam sprocket on....
I'm not sure what Delco Remy Alternator this is....did a google search on these part numbers and am coming up blank:
The pigtail it came with has "SFLP" on it for the prongs that attach to the alternator, but only 2 wires coming out the back:
Then there's THIS plug....no idea what it is:
03-07-2013, 09:19 AM
#100
Registered User
Thread Starter
iTrader: (2)
Join Date: Dec 2009
Location: Pleasanton, CA - SF Bay Area
Posts: 2,159
Likes: 0
Received 7 Likes
on
5 Posts
I can't get the tensioner to budge is what I think is my biggest issue. I don't want to take the timing cover off again since I have the HG on there all snug (and a brand new gasket kit).
I guess I'm looking for better ideas than I had, to depress the tensioner manually, or get more upward leverage on the pass side sprocket, without damaging/marring my new head/etc.
I'm all ears!


