
OME Steering Stabilizer Installed
 Sep 25, 2006 | 04:59 PM
#1
Thread Starter
Registered User
Joined: Aug 2006
Posts: 587
Likes: 2
From: allen tx/provo ut
OME Steering Stabilizer Installed
I got my new Old Man Emu Steering Stabilizer in the mail today and I decided to put it right on. Well that was at about 4 pm. A word of advice before you decide to put this on. Make sure you have ALL of the right stuff. It ended up taking me 3 hours because I kept having to go to the store to buy different tools. Here's what I recommend having:
ratchet
12mm, 14mm, 17mm, and 19mm sockets
socket universal joint
rubber mallet and regular old hammer
wd40 cant hurt
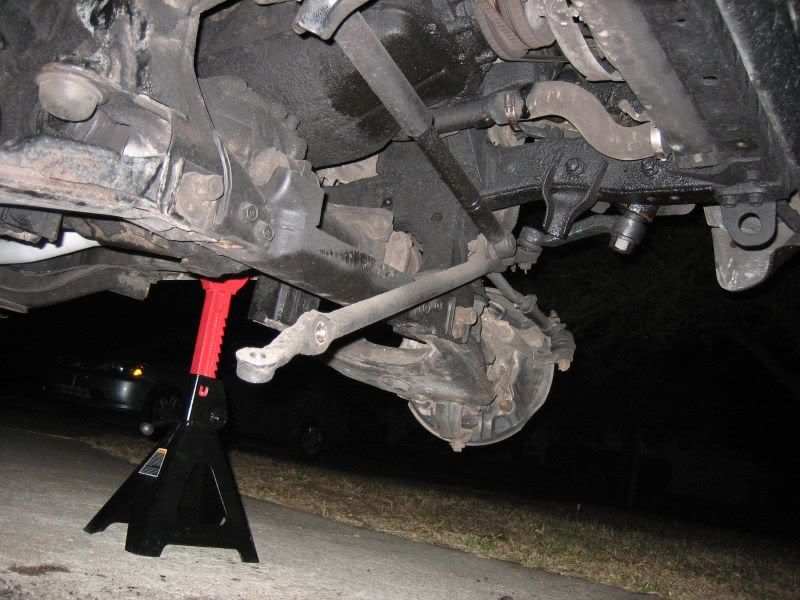
ball joint separator (VERY VERY IMPORTANT)
i wish i had just gone out and bought the bj separator in the first place. UKMyers has a write up on this where he called it a pickle hammer and I had no clue what he was talking about (i dont know much about tools) But after an hour and a half of trying to use a crow bar and a hammer to get the stud out of the hole, I gave up and headed over to Oreilly's and bought the separator. 15 seconds and 5 whacks with a hammer later, i had that stud out of the hole. Thats just my advice for the day, and really my first experience doing anything with my 4runner.
ratchet
12mm, 14mm, 17mm, and 19mm sockets
socket universal joint
rubber mallet and regular old hammer
wd40 cant hurt
ball joint separator (VERY VERY IMPORTANT)
i wish i had just gone out and bought the bj separator in the first place. UKMyers has a write up on this where he called it a pickle hammer and I had no clue what he was talking about (i dont know much about tools) But after an hour and a half of trying to use a crow bar and a hammer to get the stud out of the hole, I gave up and headed over to Oreilly's and bought the separator. 15 seconds and 5 whacks with a hammer later, i had that stud out of the hole. Thats just my advice for the day, and really my first experience doing anything with my 4runner.
 Sep 25, 2006 | 05:45 PM
#3
Thread Starter
Registered User
Joined: Aug 2006
Posts: 587
Likes: 2
From: allen tx/provo ut
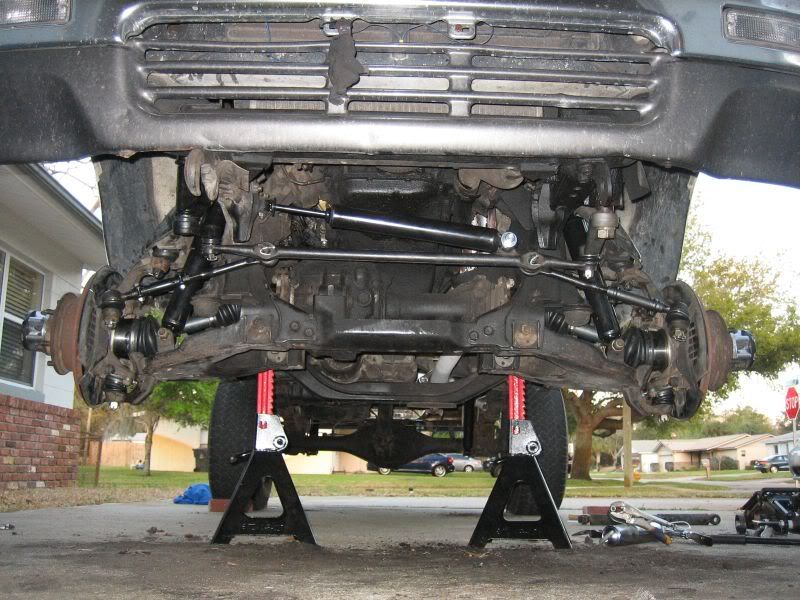
i didnt actually take any pics of the install since i was so frustrated with the whole thing. so sorry about that. but here's UKmyer's write up on the install. Mine was more of...helpful tips.
 Oct 4, 2006 | 06:45 AM
#6
Registered User
Joined: Feb 2003
Posts: 3,689
Likes: 4
From: Sarasota, FL
I remember changing my outer tie rods...without a pickle fork! LOL The drivers one came out relatively easily after about an hour of working on it....the other, well lets just say the neighbors learned a bunch of new cussword phrases...the neighbors that live 1/4 mile away! lol
2 whacks from a 10lb maul on a pickle fork took care of the other tie rod, damn man for that want of the proper tools!
2 whacks from a 10lb maul on a pickle fork took care of the other tie rod, damn man for that want of the proper tools!


Trending Topics
 Sep 10, 2008 | 03:23 PM
#11
Registered User
Joined: Mar 2008
Posts: 12,723
Likes: 6
From: Temecula Valley, CA
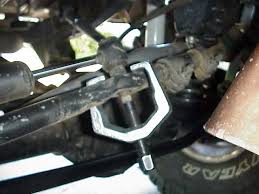
measure the diameter of the bolt protruding through the steering linkage and get a pickle fork as close to that size as possible- there are many different sizes.
alternatively, you could get a screw driven separator that would hook over the linkage and when you turn the screw in, which would be centered on the bolt, it pushes the part out of the other side... similar to how a pulley puller or steering wheel puller operates.
the thing about pickle forks is that they damage dust boots and sometimes the joint itself making it unable to be reused, which may be a bad thing depending on your intentions.
Last edited by abecedarian; Sep 10, 2008 at 03:24 PM.
Apr 12, 2009 | 05:37 PM
#12
Registered User
Joined: Jun 2008
Posts: 735
Likes: 1
From: Abington, PA
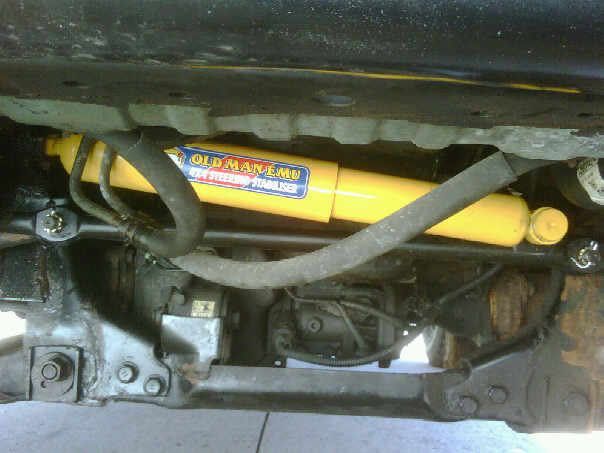
Sorry to bring this from the dead but I think they re-designed the OME Steering Stabilizer. Either that, or I received the incorrect one from TRDParts and made it work. In the tech article there is a stud piece that you have to push through the grommet, so both ends start as open ends/loops. The steering stabilizer I received, there is only one end with an open loop and the other was round and I had to use vice grips to hold it in order to tighten only one nylon lock nut. Here is a picture I took of it installed, maybe it will shed some light on what I am referring to:
Last edited by BoostinChick; Apr 12, 2009 at 06:10 PM.


 on 'Bleederdude!
Apr 12, 2009 | 08:01 PM
on 'Bleederdude!
Apr 12, 2009 | 08:01 PM
#16
Contributing Member
Joined: Feb 2008
Posts: 12,248
Likes: 33
From: Lake City, Fl


 Apr 13, 2009 | 10:40 PM
#19
Registered User
Joined: Jul 2008
Posts: 4,592
Likes: 0
From: Grew up in S.C.V, So Cal.....now in Hampstead, NC
Apr 14, 2009 | 06:21 AM
#20
Registered User
Joined: Jun 2008
Posts: 735
Likes: 1
From: Abington, PA

The large one to the right is what I ended up using.
That kit made replacing my steering components cake. Just have to watch when the bolt/thread breaks loose...many o' many of knuckle busting scabs on my hands.
Last edited by BoostinChick; Apr 14, 2009 at 06:24 AM.


