
New 22RE Performance Engine Install
 Nov 12, 2010 | 02:48 PM
#1
Thread Starter
Registered User
Joined: Nov 2008
Posts: 2,306
Likes: 8
From: Cheyenne, Wyoming
New 22RE Performance Engine Install
Well the time finally came to put a new engine in the truck. I have officially retired this truck to be the hunting truck and therefore I have an excuse to put money into it�even if that only justifies it to the little lady.
So some quick background on the why I am doing all this.
About 4 months ago I was on my way up to my little cabin to cut out the never-ending supply of dead pine beetle kill trees from around the property.
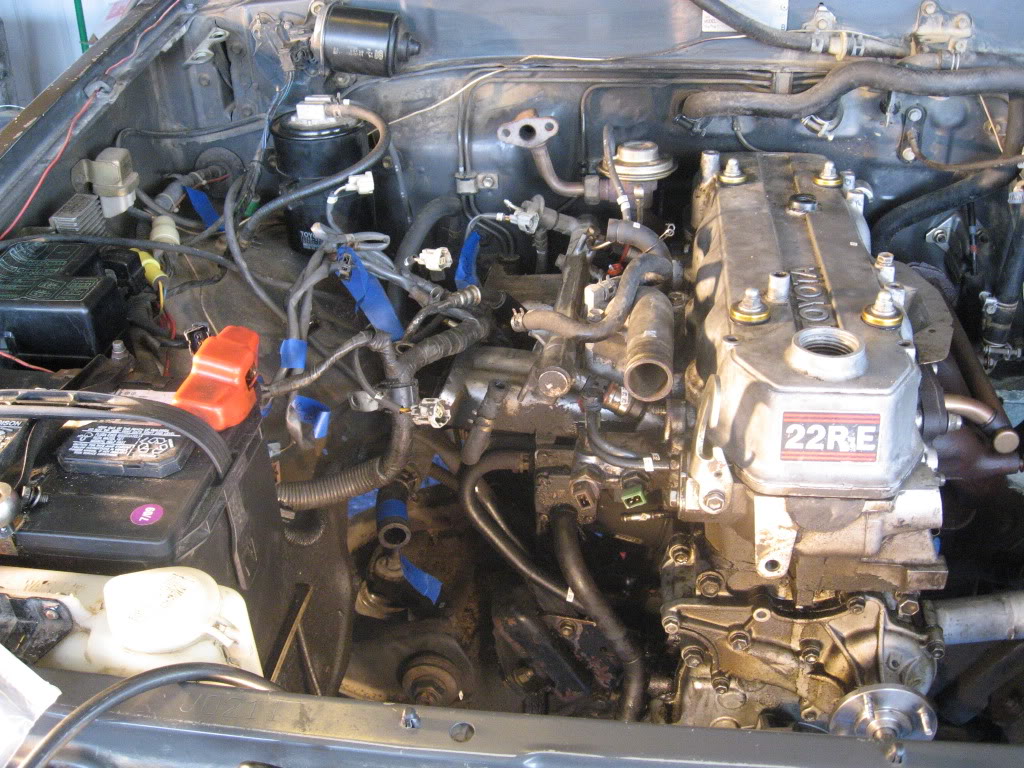
It was pretty snowy still and I was towing the wood chipper to a part I cleared last summer to clear out the slash. Worked all day chipping and was on my way out when the dependable Toyota started knocking real bad. Right away I knew something was wrong. Limped back to my "workshop in the hills", which is nothing more than a large storage shed, and took the valve cover off. Everything looked fine...no obvious sings of damage and all fluids check out looking normal. So then I knew it was in the bottom end. So a couple of weeks later...towed it back to town. I am 95% sure I spun a bearing on the crank shaft.
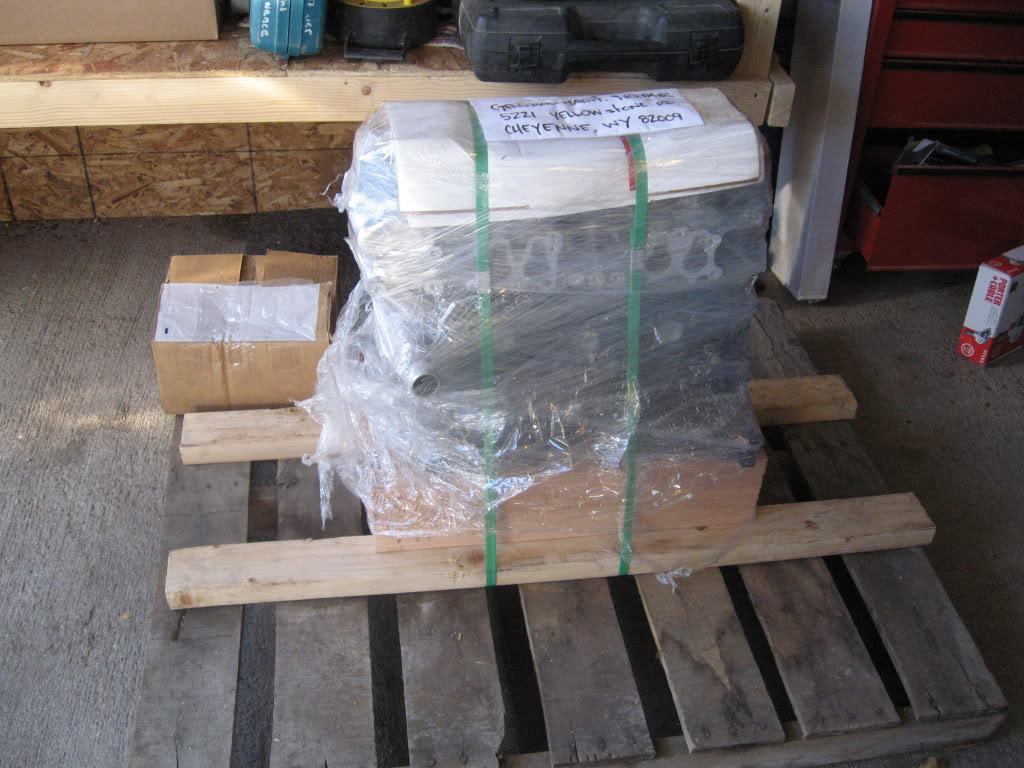
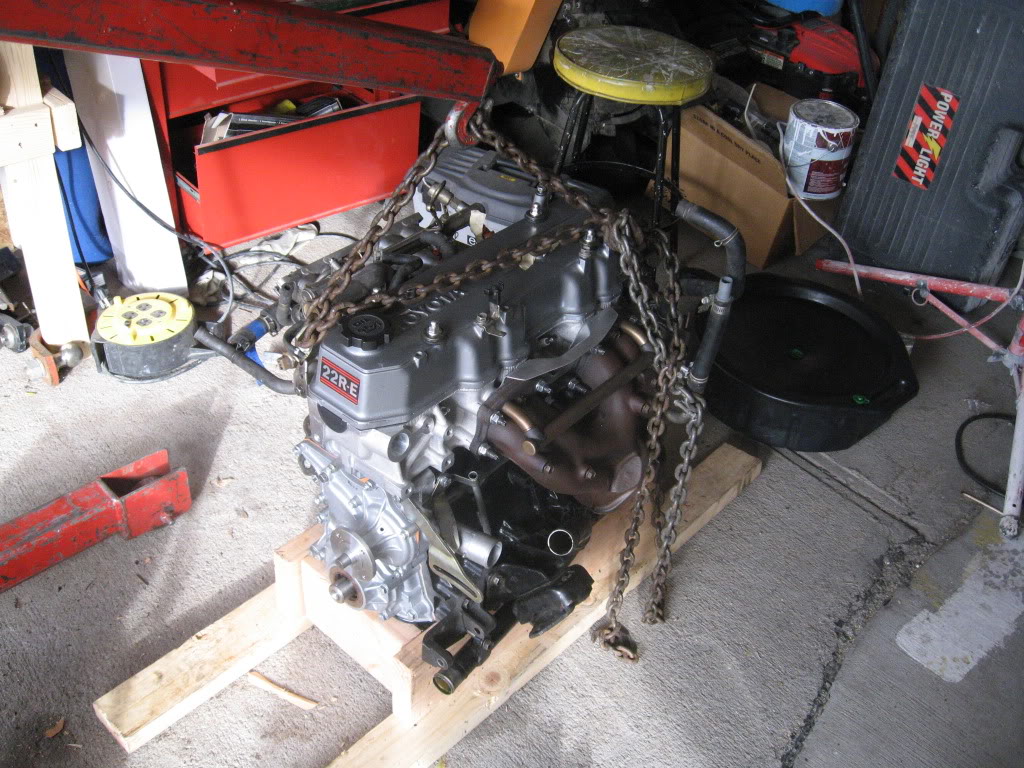
I decided to get a complete engine from 22re Performance because they seemed to be the most knowledgeable of all the rebuilders I talked to. So I ordered it up and it arrived looking like this:
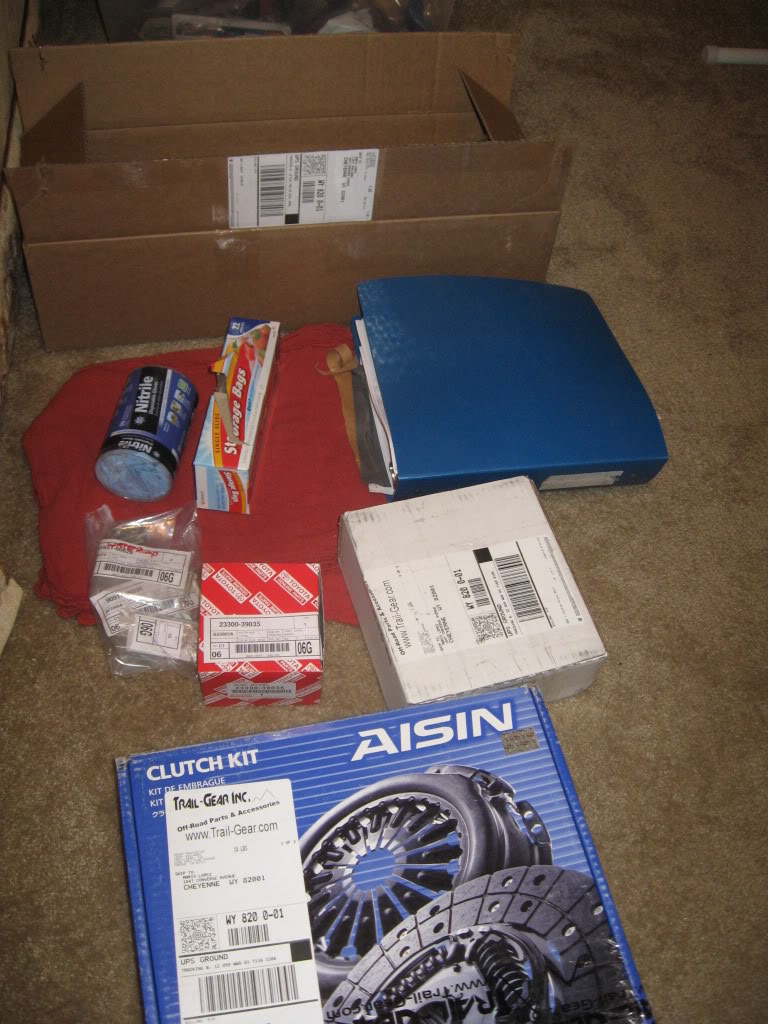
This past weekend, I finally had all my parts that I think I needed and the most important thing...the time.
The little lady was at a board meeting and I had 3 days of interrupted time to tinker.
Pulled the truck in garage to start the fun at 4:00 on Friday!
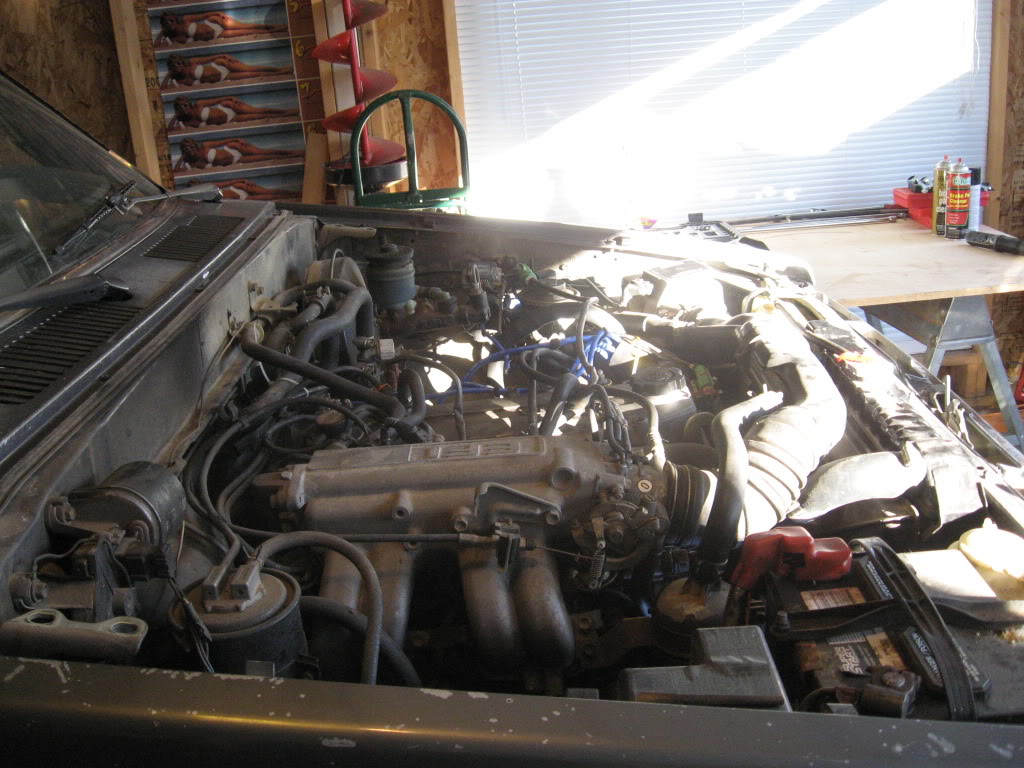
Proceeded to label everything and take things apart.
By 10:00 Firday it was ready for the next morning to pull out.
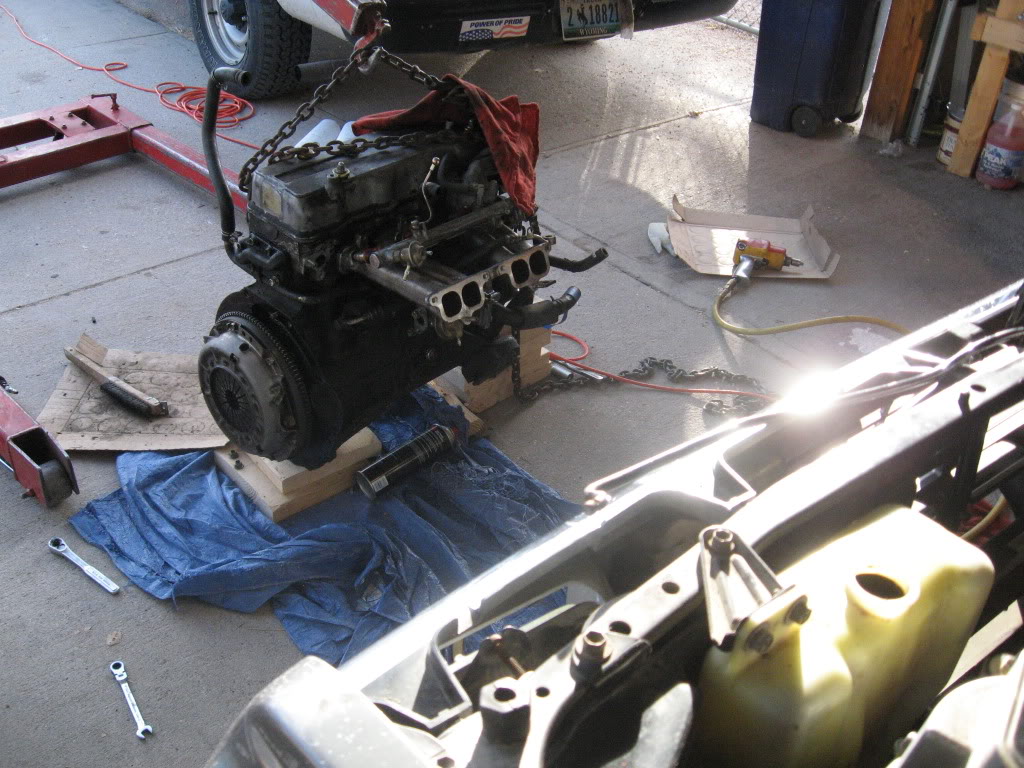
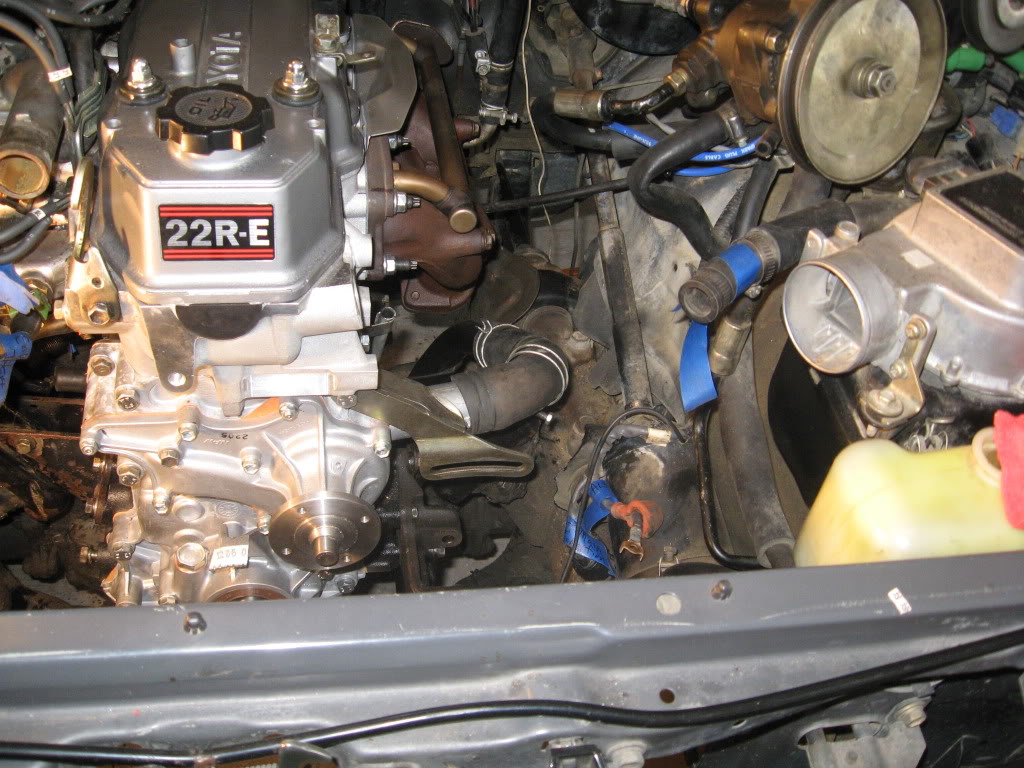
Here is the engine out by noon
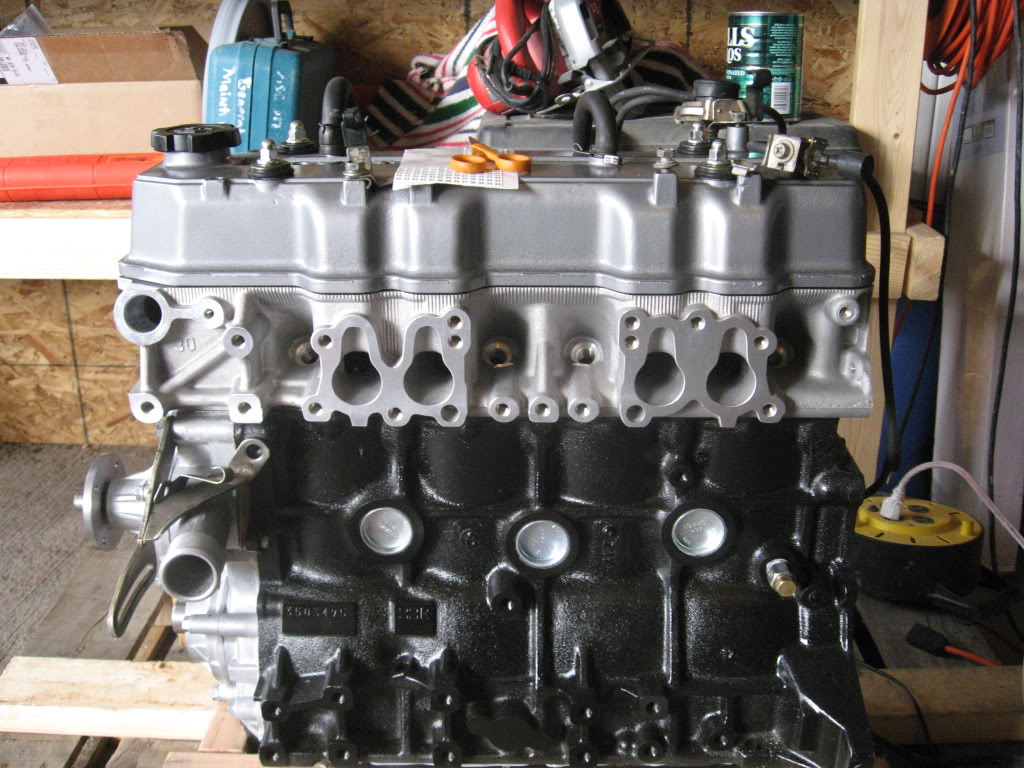
Here is the new engine!

Here we are transferring parts from the old to the new.
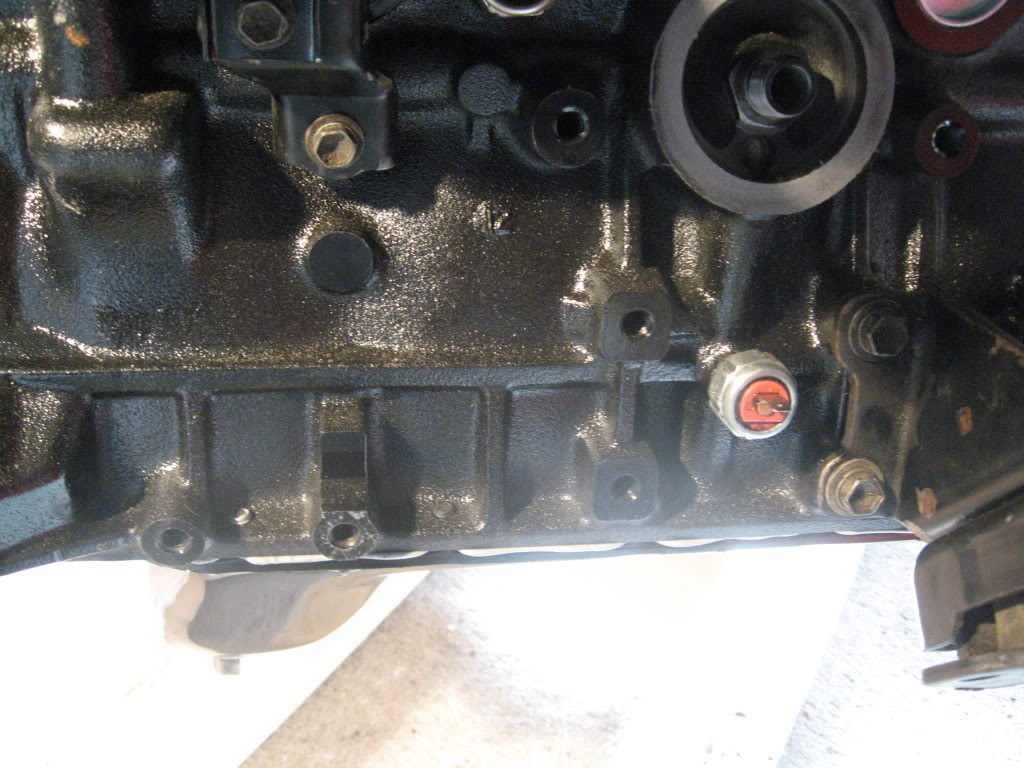
Here is a picture of the the block and the oil pan. Note how nice the bead of sealant looks. This really shows the pride 22RE Preformance puts into their work. After seeing this, I know this will be a strong engine for many years to come.
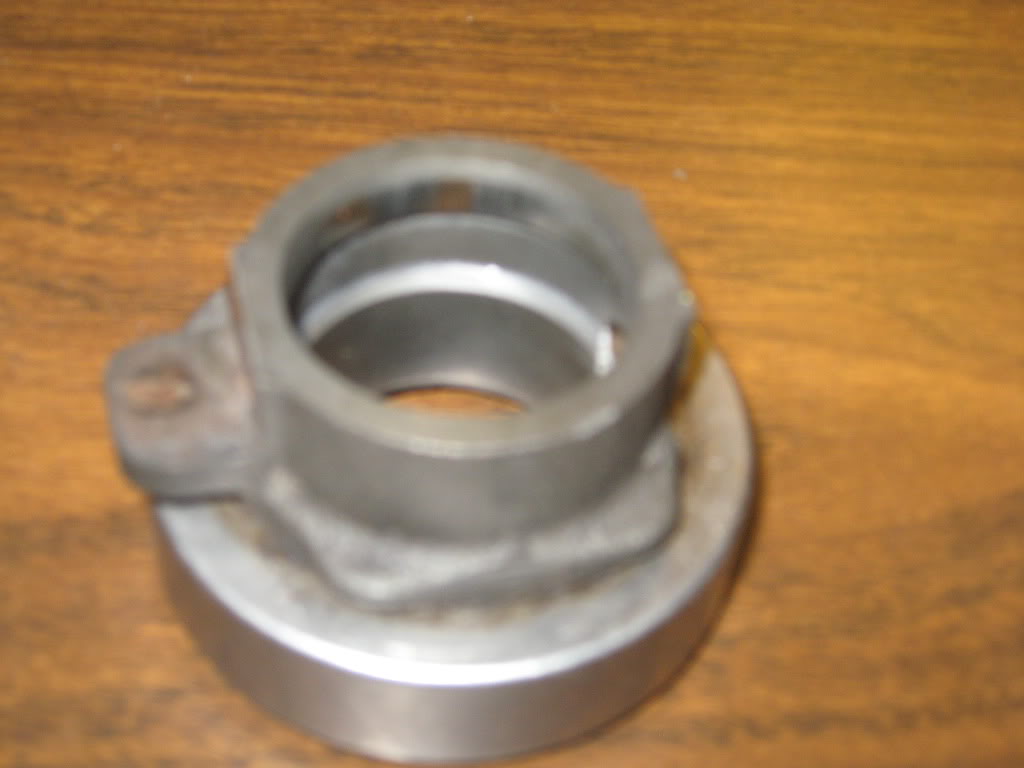
8:00 and the engine is ready to be put back in the truck the next morning. I just had one little thing to do before I could stab it in, a quick run to SEARS to have them press off the release bearing and press the new one. I know, I should have went somewhere else, but they were the only place open on Sunday. Well I told them they CAN�T support the hub by the two dog ears to press it off. Well they came back looking white like a ghost and I knew it was not good. The guy they had do it broke the dog ears off just like I said to be careful of.
So that little screw up by the �knowledgeable mechanic� costed me an entire day and prevented me from putting my engine back in. They of course wanted to rectify the situation but they wanted to order the part from AutoZone. I had insisted the part come from Toyota and I would bring them the bill. So Monday morning I went to Toyota and ordered the part and waited patiently until it came in on Wednesday. It only came to $40.00, but they still weren�t happy but they reimbursed me for it.
So tomorrow I will finish putting in the engine and hopefully be able to start it. I will put up the final pictures tomorrow and let everyone know how it goes.
So some quick background on the why I am doing all this.
About 4 months ago I was on my way up to my little cabin to cut out the never-ending supply of dead pine beetle kill trees from around the property.
It was pretty snowy still and I was towing the wood chipper to a part I cleared last summer to clear out the slash. Worked all day chipping and was on my way out when the dependable Toyota started knocking real bad. Right away I knew something was wrong. Limped back to my "workshop in the hills", which is nothing more than a large storage shed, and took the valve cover off. Everything looked fine...no obvious sings of damage and all fluids check out looking normal. So then I knew it was in the bottom end. So a couple of weeks later...towed it back to town. I am 95% sure I spun a bearing on the crank shaft.
I decided to get a complete engine from 22re Performance because they seemed to be the most knowledgeable of all the rebuilders I talked to. So I ordered it up and it arrived looking like this:
This past weekend, I finally had all my parts that I think I needed and the most important thing...the time.
The little lady was at a board meeting and I had 3 days of interrupted time to tinker.
Pulled the truck in garage to start the fun at 4:00 on Friday!
Proceeded to label everything and take things apart.
By 10:00 Firday it was ready for the next morning to pull out.
Here is the engine out by noon
Here is the new engine!
Here we are transferring parts from the old to the new.
Here is a picture of the the block and the oil pan. Note how nice the bead of sealant looks. This really shows the pride 22RE Preformance puts into their work. After seeing this, I know this will be a strong engine for many years to come.
8:00 and the engine is ready to be put back in the truck the next morning. I just had one little thing to do before I could stab it in, a quick run to SEARS to have them press off the release bearing and press the new one. I know, I should have went somewhere else, but they were the only place open on Sunday. Well I told them they CAN�T support the hub by the two dog ears to press it off. Well they came back looking white like a ghost and I knew it was not good. The guy they had do it broke the dog ears off just like I said to be careful of.
So that little screw up by the �knowledgeable mechanic� costed me an entire day and prevented me from putting my engine back in. They of course wanted to rectify the situation but they wanted to order the part from AutoZone. I had insisted the part come from Toyota and I would bring them the bill. So Monday morning I went to Toyota and ordered the part and waited patiently until it came in on Wednesday. It only came to $40.00, but they still weren�t happy but they reimbursed me for it.
So tomorrow I will finish putting in the engine and hopefully be able to start it. I will put up the final pictures tomorrow and let everyone know how it goes.


 Nov 13, 2010 | 04:54 PM
#6
Thread Starter
Registered User
Joined: Nov 2008
Posts: 2,306
Likes: 8
From: Cheyenne, Wyoming
I just got it running!!!!!!!
It sounds so good. Just got the cam broken in and will give it a about 5 good heat cycles to break in the rings.
No leaks and no burning oil!
Will put the pictures up later.
It sounds so good. Just got the cam broken in and will give it a about 5 good heat cycles to break in the rings.
No leaks and no burning oil!
Will put the pictures up later.


Trending Topics

 Nov 14, 2010 | 11:59 AM
#12
Thread Starter
Registered User
Joined: Nov 2008
Posts: 2,306
Likes: 8
From: Cheyenne, Wyoming
Well I have taken it through about 6 heat cycles now and it just keeps getting more and more power. I think the computer is finally fully adjusted back in and everything is running real good. I am now super glad I went with Putney's for this engine, they really are, just a bolt on drop in engine.
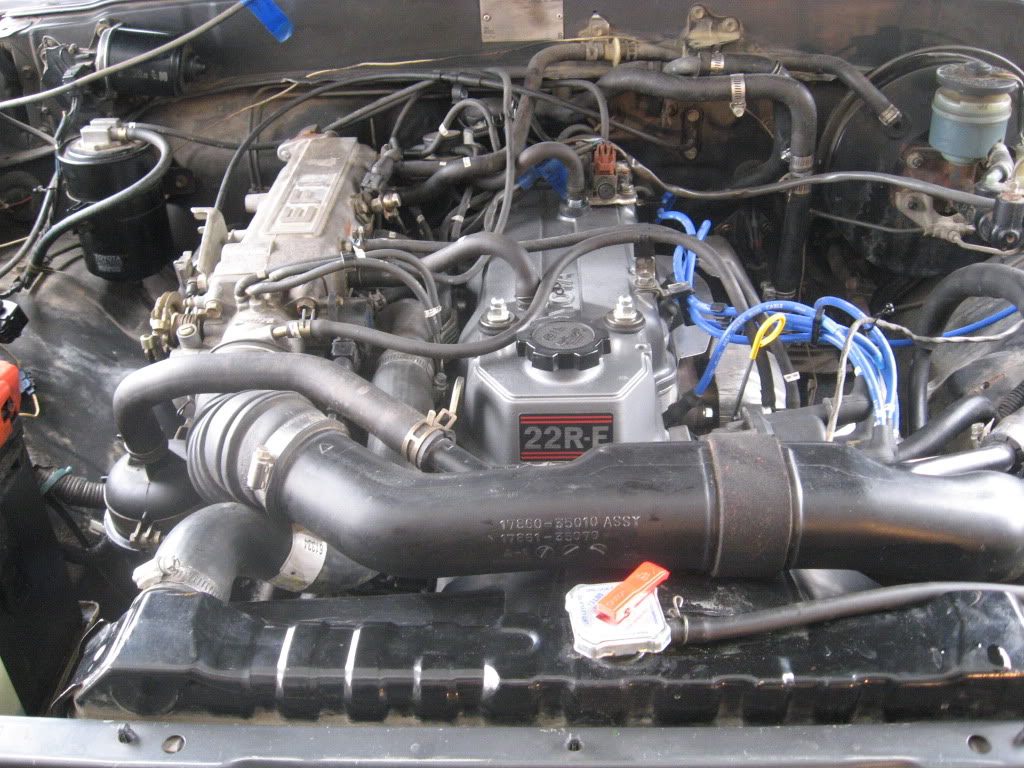
Here is right after we got it put in. There were more than a few cuss words on that fun aspect of the job. It took about 2 whole hours of "messaging" it in, but it finally went into it's home.
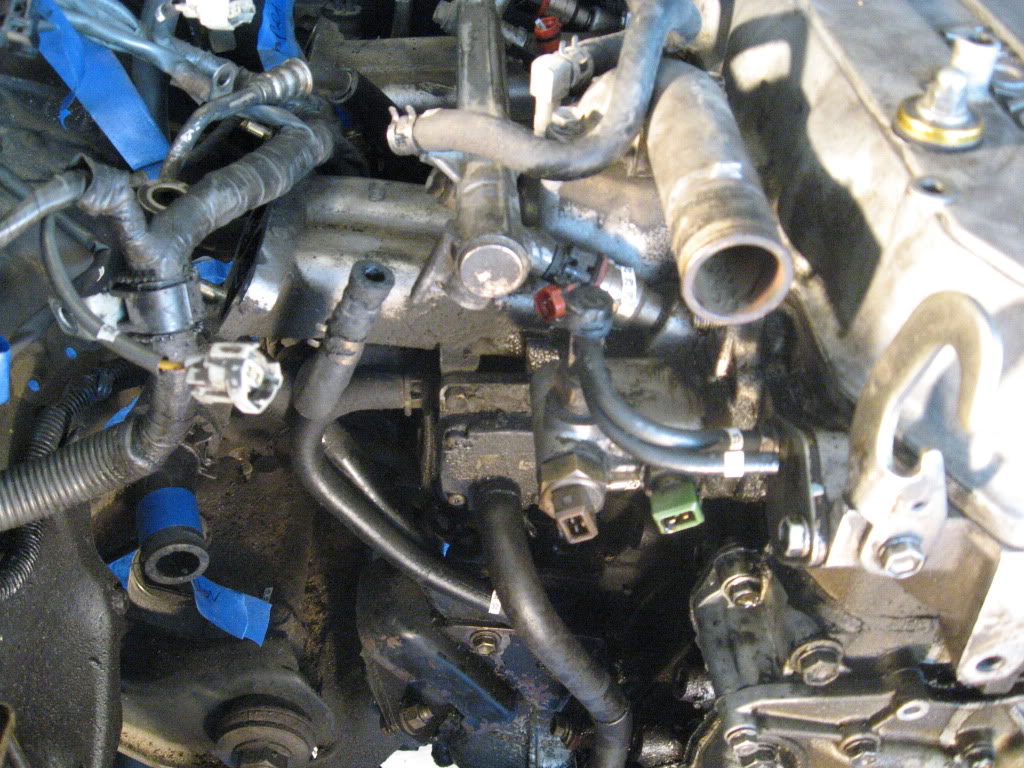
I only ran into two little issues before I could fire it up. I took off the coil wire on the dist. and cranked it over a few times to get oil up to the cams. I found I forgot to hook up a little coolant line on the bottom of the intake�got that fixed. Then I was actually trying to start it and I smelt gas. I found the brand-new Toyota Fuel filter and the fuel screw's threads were severely stripped. Ironically, I had a brand new one from years ago that I must have never gotten around to installing� probably because they are so hard to get too. So I re-tapped the treads on the screw and it sealed it up nicely.
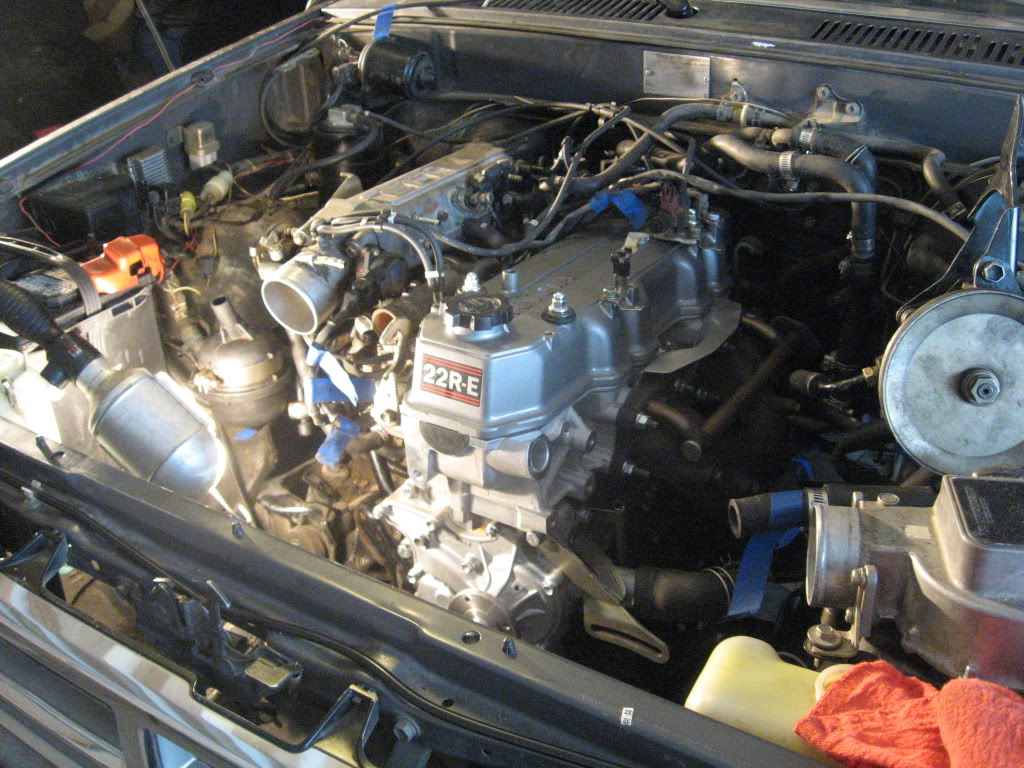
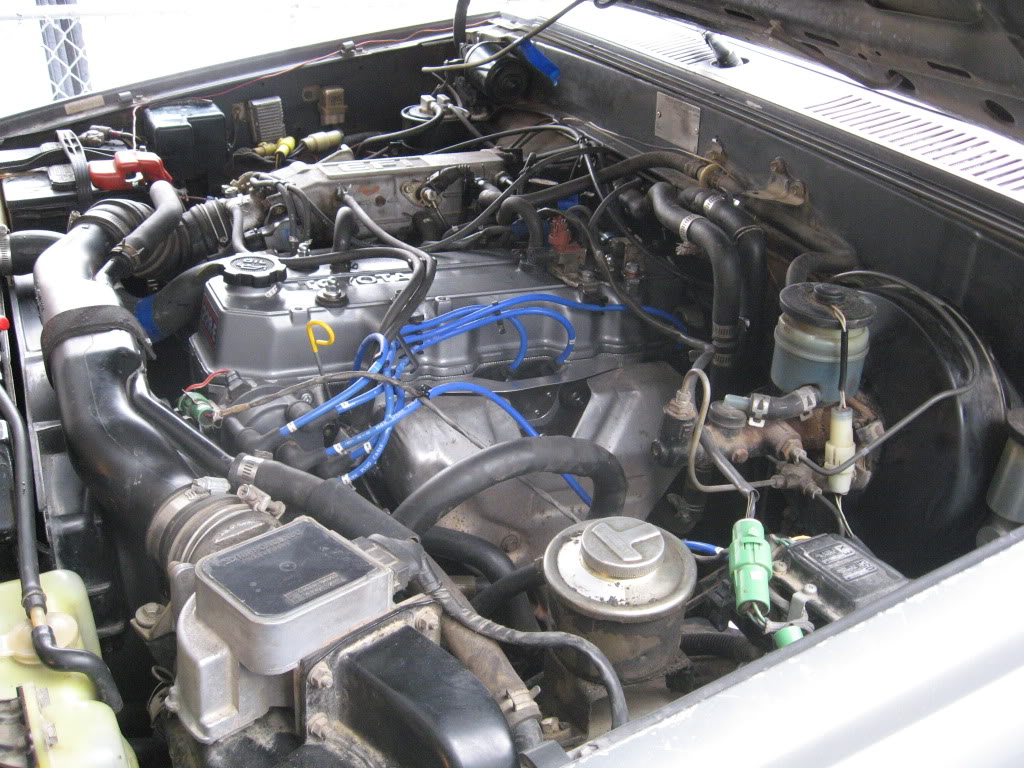
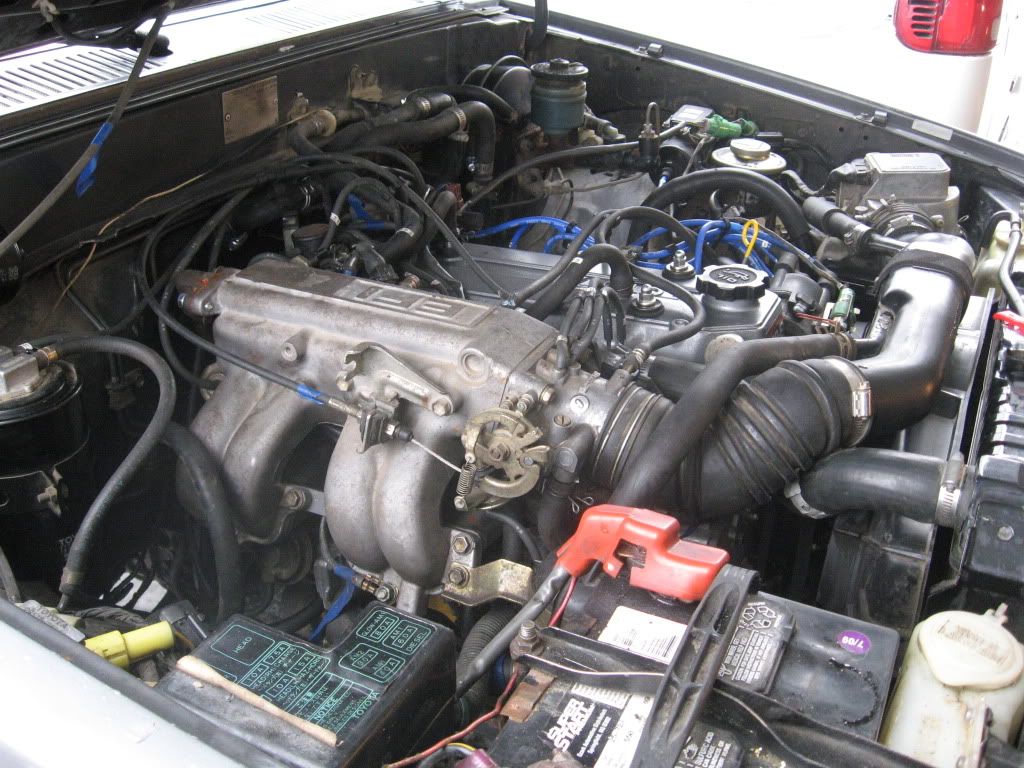
Here are some finished photos
So that is pretty much it. I Checked the timing again today and everything looked good. Jim at Putney�s said there is no need to re-torque the heads or adjust the valves. So I guess I won't unless there is an obvious need to. I put in a Lucus oil zinc additive for breaking in flat tappet rockers arm motors. I run that for 500 miles and then do an oil change. Then another oil change 1000 miles later then regular oil changes then on. Right now I am running just straight 30-weight Rotella conventional oil. I will probably switch over to 10w-30 for at least 15,000 miles. After that I will go to synthetic and run that for another 300,000 miles!! Total cost for everything was right around $3,500. I know it's a bit on the pricey side, but I guess you get what you pay for.
Here is right after we got it put in. There were more than a few cuss words on that fun aspect of the job. It took about 2 whole hours of "messaging" it in, but it finally went into it's home.
I only ran into two little issues before I could fire it up. I took off the coil wire on the dist. and cranked it over a few times to get oil up to the cams. I found I forgot to hook up a little coolant line on the bottom of the intake�got that fixed. Then I was actually trying to start it and I smelt gas. I found the brand-new Toyota Fuel filter and the fuel screw's threads were severely stripped. Ironically, I had a brand new one from years ago that I must have never gotten around to installing� probably because they are so hard to get too. So I re-tapped the treads on the screw and it sealed it up nicely.
Here are some finished photos
So that is pretty much it. I Checked the timing again today and everything looked good. Jim at Putney�s said there is no need to re-torque the heads or adjust the valves. So I guess I won't unless there is an obvious need to. I put in a Lucus oil zinc additive for breaking in flat tappet rockers arm motors. I run that for 500 miles and then do an oil change. Then another oil change 1000 miles later then regular oil changes then on. Right now I am running just straight 30-weight Rotella conventional oil. I will probably switch over to 10w-30 for at least 15,000 miles. After that I will go to synthetic and run that for another 300,000 miles!! Total cost for everything was right around $3,500. I know it's a bit on the pricey side, but I guess you get what you pay for.
 Nov 15, 2010 | 02:26 PM
#14
Looks real nice. Are you confident that you have your vacuum tubes back on the right way? I had my engine replaced a while back and the vacuum tubes just don't look right. If you are sure yours are correct, I may use your photos as a guide for straightening mine out.
Thanks, CR
Thanks, CR
Nov 15, 2010 | 02:37 PM
#16
Thread Starter
Registered User
Joined: Nov 2008
Posts: 2,306
Likes: 8
From: Cheyenne, Wyoming
Looks real nice. Are you confident that you have your vacuum tubes back on the right way? I had my engine replaced a while back and the vacuum tubes just don't look right. If you are sure yours are correct, I may use your photos as a guide for straightening mine out.
Thanks, CR
Thanks, CR
Nov 15, 2010 | 02:42 PM
#17
Thread Starter
Registered User
Joined: Nov 2008
Posts: 2,306
Likes: 8
From: Cheyenne, Wyoming
Well I only have about 100 miles on it so far, but each time I drive it, it gets more and more power. I don't expect the full power to come on until at least 1000 miles are on the engine.
I haven't even taken it on the highway yet. I definitely am not babying it with the break in. I want those rings to seat, which I know they are doing. I have no smoke out the back end and it hasn't burned any oil.
I am really happy with how it turned out.
 Oct 15, 2011 | 10:08 AM
#20
Registered User
Joined: Sep 2011
Posts: 7
Likes: 0
From: Murfreesboro, TN
Awesome reference pictures! Replacing my engine in the next few weeks! I am looking for any advice planning the install. Do you know a good list of parts to replace while I am installing it?
I know I will do the clutch and general radiator hoses, and heat hoses.
What about sensors?
I am also going to take a look at the injectors while they are to see if the need cleaned and rebuilt.
I know I will do the clutch and general radiator hoses, and heat hoses.
What about sensors?
I am also going to take a look at the injectors while they are to see if the need cleaned and rebuilt.


