
find a little something new every day...
 Oct 16, 2008 | 02:05 PM
#1
Thread Starter
Contributing Member
Joined: Feb 2008
Posts: 12,248
Likes: 33
From: Lake City, Fl
find a little something new every day...
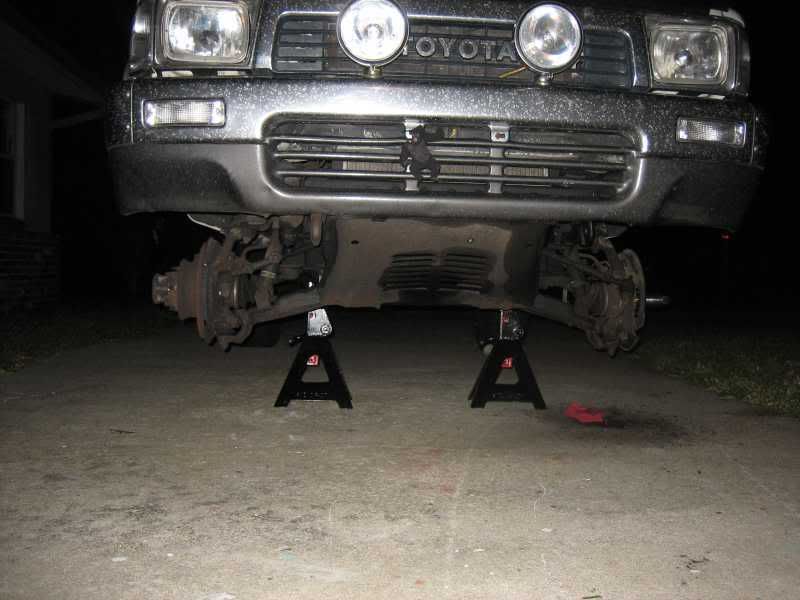
So I'm sure most of you seen my recent post about wheel bearings. Today I jacked the truck back up for a little closer look and found out something kinda odd...
just watch the video, you'll see...
[YOUTUBE]http://www.youtube.com/watch?v=dNxsR-1uoxg[/YOUTUBE]
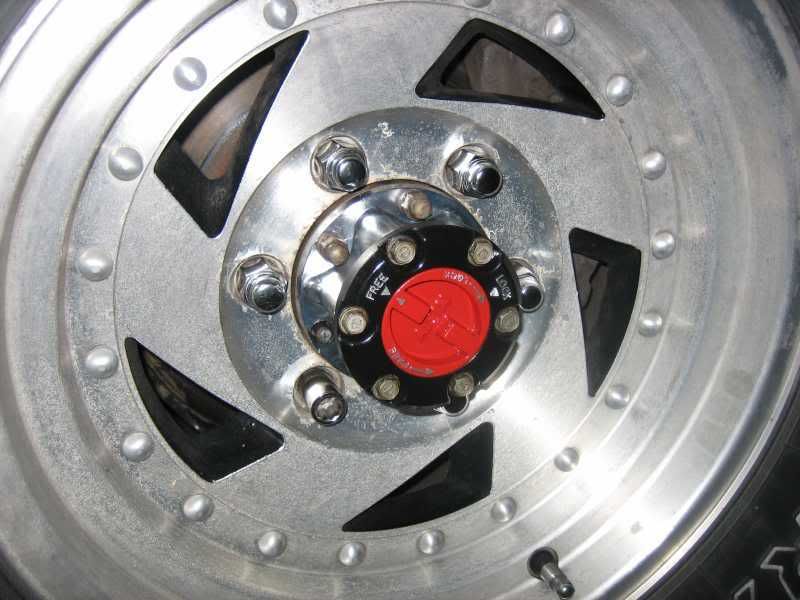
Yep, that's the CV turning while the hub's unlocked... er rather, suppose to be unlocked, but obviously the hub's not put together right...
I've been letting the hub dial thing go for a while cause I thought it was actually unlocking, but I guess I thought wrong obviously...
So it's torn the inner boot to peices as you can see, and I think I've finally found where my slight front end vibration is coming from.
I called up the dealership, and I'll be going to pick up the hub mounting gasket, the hub cover gasket, and the dial o-ring for both sides Saturday morning, $10 a side, so not too bad, so It looks like I'll get the hubs rebuilt and the bearings re-packed this weekend afterall

just watch the video, you'll see...
[YOUTUBE]http://www.youtube.com/watch?v=dNxsR-1uoxg[/YOUTUBE]
Yep, that's the CV turning while the hub's unlocked... er rather, suppose to be unlocked, but obviously the hub's not put together right...
I've been letting the hub dial thing go for a while cause I thought it was actually unlocking, but I guess I thought wrong obviously...
So it's torn the inner boot to peices as you can see, and I think I've finally found where my slight front end vibration is coming from.
I called up the dealership, and I'll be going to pick up the hub mounting gasket, the hub cover gasket, and the dial o-ring for both sides Saturday morning, $10 a side, so not too bad, so It looks like I'll get the hubs rebuilt and the bearings re-packed this weekend afterall
Last edited by iamsuperbleeder; Oct 16, 2008 at 04:58 PM.
Oct 16, 2008 | 02:11 PM
#2
Registered User

Joined: May 2008
Posts: 3,277
Likes: 23
From: way way nor cal
I start in on mine this weekend CV's, TRE's< Ball Joints up and down. The whole thing.
Good luck.
D
Good luck.
D
So I'm sure most of you seen my recent post about wheel bearings. Today I jacked the truck back up for a little closer look and found out something kinda odd...
just watch the video, you'll see...
[YOUTUBE]http://www.youtube.com/watch?v=dNxsR-1uoxg[/YOUTUBE]
Yep, that's the CV turning while the hub's unlocked... er rather, suppose to be unlocked, but obviously the hub's not put together right...
I've been letting the hub dial thing go for a while cause I thought it was actually unlocking, but I guess I though wrong obviously...
So it's torn the inner boot to peices as you can see, and I think I've finally found where my slight front end vibration is coming from.
I called up the dealership, and I'll be going to pick up the hub mounting gasket, the hub cover gasket, and the dial o-ring Saturday morning, $10 a side, so not too bad, so It looks like I'll get the hubs rebuilt and the bearings re-packed this weekend afterall
Oct 16, 2008 | 05:07 PM
#5
Thread Starter
Contributing Member
Joined: Feb 2008
Posts: 12,248
Likes: 33
From: Lake City, Fl
lol, I'm hoping so, I've never messed with em before
But I've studied the section of the FSM that I printed about taking apart and assymbling the hubs over, and over, and over, and over again, and have gone over too many web sites to count reading how-to's and looking at pictures...
I could probably do them now for the first time ever without even having instructions in front of me, lol
It just appears that on their last rebuild, someone didn't have the guts of the hub clocked to match the "Free" position of the hub cover and dial, like the sliding portions inside the hub that lock the hub body to the axle splines are in about half locked (or maybe 2/3 locked) position when the hub dial and cover shows it's in the free position; this would explain why it only takes a 3rd of a turn to make them fully engauged... but I'm no expert by any means...
I guess I'll see what's goin on in there once I get er all torn apart, so I'll let yall know what I find!
Last edited by iamsuperbleeder; Oct 16, 2008 at 05:08 PM.
Oct 16, 2008 | 06:39 PM
#7
Contributing Member
Joined: Feb 2007
Posts: 9,055
Likes: 10
From: maple ridge, British Columbia, Canada
Yes, to do the wheel bearings you need a 54mm socket.
check out:
http://forum.ih8mud.com/79-95-toyota...b-rebuild.html
Best writeup on rebuilding aisin hubs. I found this when I rebuilt mine
check out:
http://forum.ih8mud.com/79-95-toyota...b-rebuild.html
Best writeup on rebuilding aisin hubs. I found this when I rebuilt mine
Trending Topics
Oct 16, 2008 | 06:43 PM
#8
Thread Starter
Contributing Member
Joined: Feb 2008
Posts: 12,248
Likes: 33
From: Lake City, Fl
Yes, to do the wheel bearings you need a 54mm socket.
check out:
http://forum.ih8mud.com/79-95-toyota...b-rebuild.html
Best writeup on rebuilding aisin hubs. I found this when I rebuilt mine
check out:
http://forum.ih8mud.com/79-95-toyota...b-rebuild.html
Best writeup on rebuilding aisin hubs. I found this when I rebuilt mine
Oct 16, 2008 | 07:50 PM
#10

Registered User
Joined: Aug 2008
Posts: 264
Likes: 0
Yes, to do the wheel bearings you need a 54mm socket.
check out:
http://forum.ih8mud.com/79-95-toyota...b-rebuild.html
Best writeup on rebuilding aisin hubs. I found this when I rebuilt mine
check out:
http://forum.ih8mud.com/79-95-toyota...b-rebuild.html
Best writeup on rebuilding aisin hubs. I found this when I rebuilt mine
Good Luck!
Oct 16, 2008 | 08:17 PM
#11
Thread Starter
Contributing Member
Joined: Feb 2008
Posts: 12,248
Likes: 33
From: Lake City, Fl
oh yeah, I heard losing those is common, lol, thanks man
I'll start the disassymbely tomorrow since I can probably borrow a 54mm socket from one of the tech's at work (if not, I'll just have to buy one somwhere), and I'll just borrow my roommate's car to go to the dealership Sat morning to get the gaskets; he'll be sleeping anyway since he work's 4pm - 12am.
It'll gimme something to do tomorrow night; I'll get both the hubs off, maybe all the wheel bearings out too, clean everything up and lay all the parts out, probably give the cover and dial a nice fresh coat of paint and clear coat, then run up to Toyota first thing Sat morning, get my gaskets and come back, start pack'n the bearings, and throw it all back together in time to head down the road for the local once a month mud-bogs! Not me run'n my truck in it, but watch'n other people tear their stuff up
Oct 16, 2008 | 09:28 PM
#12
Registered User
Joined: Oct 2007
Posts: 319
Likes: 0
From: quesnel b.c Canada
lol yea that looks like a problem  hubs arent too bad just take em to a table or something to do the work. gravel driveway isn't recommended!
  most of the manual hubs ive pulled apart previous owners have stuffed full of grease for some reason which really doesnt help them be adjustable when they are cold! get em nice and clean and just spray on a thin film of aerosol lithium grease, makes it so even my girlfriend can turn her side in when its -20.
hubs arent too bad just take em to a table or something to do the work. gravel driveway isn't recommended! most of the manual hubs ive pulled apart previous owners have stuffed full of grease for some reason which really doesnt help them be adjustable when they are cold! get em nice and clean and just spray on a thin film of aerosol lithium grease, makes it so even my girlfriend can turn her side in when its -20.
Oct 17, 2008 | 05:08 PM
#13
Thread Starter
Contributing Member
Joined: Feb 2008
Posts: 12,248
Likes: 33
From: Lake City, Fl
Well, I got to it this afternoon, and I'm plesantly surprised it was as easy as it was!
Only managed to get one side off due to the fact that it got dark... well, I could have drug up a light and continued on, but in Fl, once the sun goes down, the masquito's come out, and I was getting eatin alive...
I would have done the messed up side first, but I opted to take apart the side that was working right so that I could first see how a correctly working once was put together...
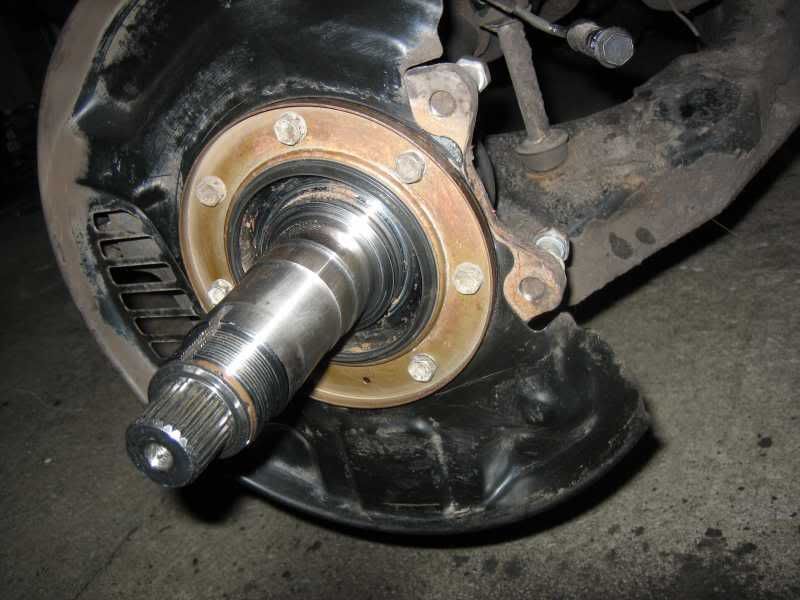
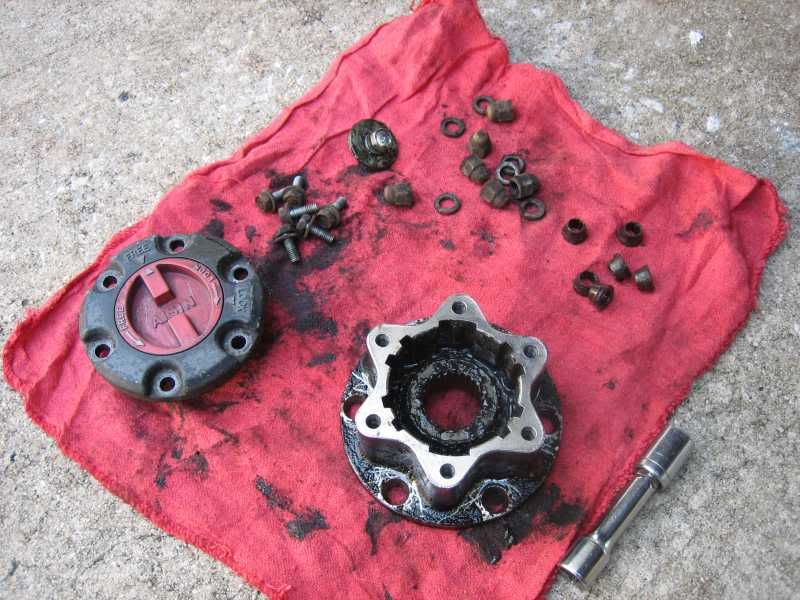
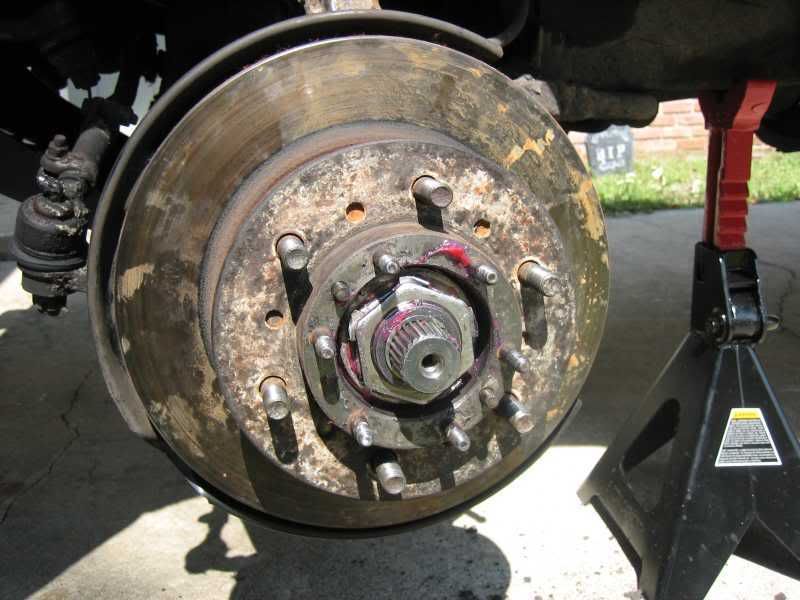
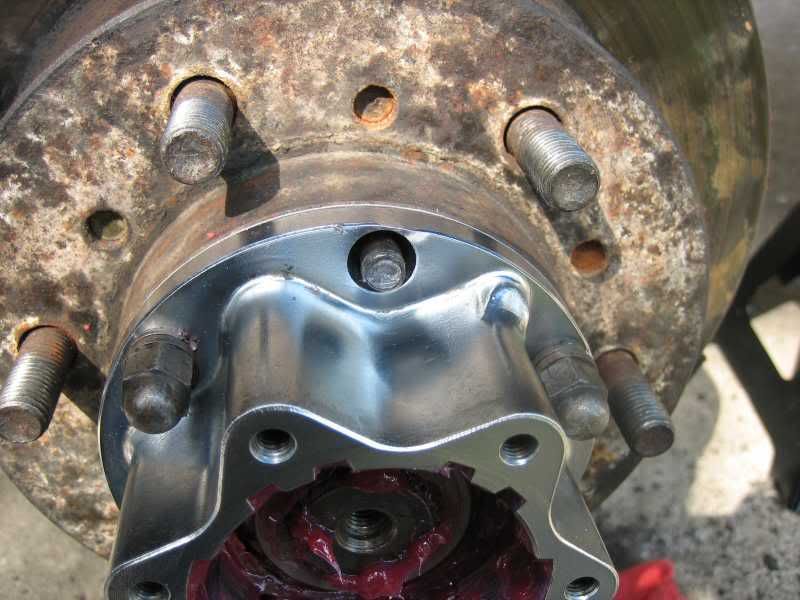
So here's basically what I was starting with...
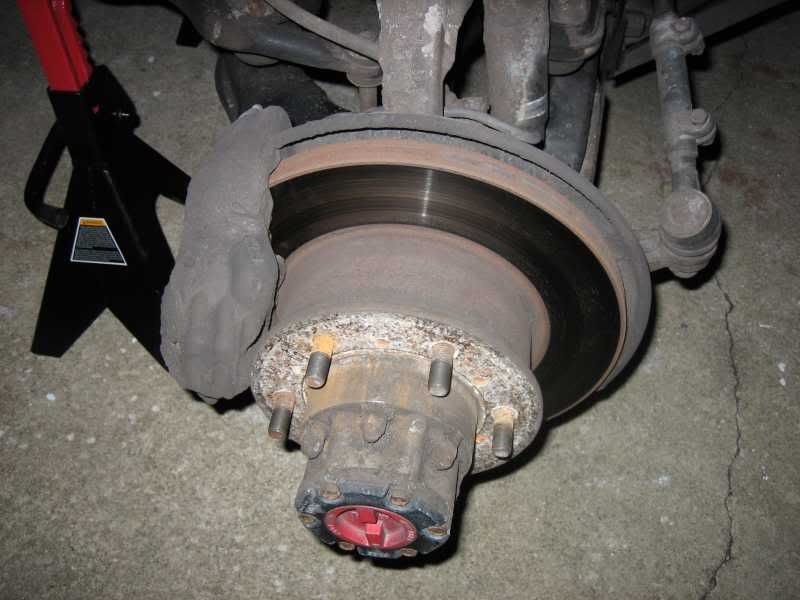

lots of dirt...
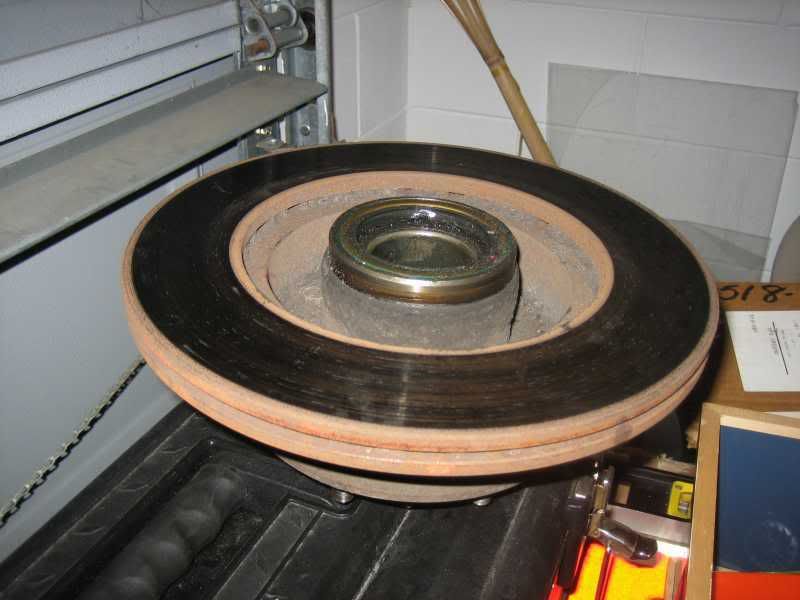
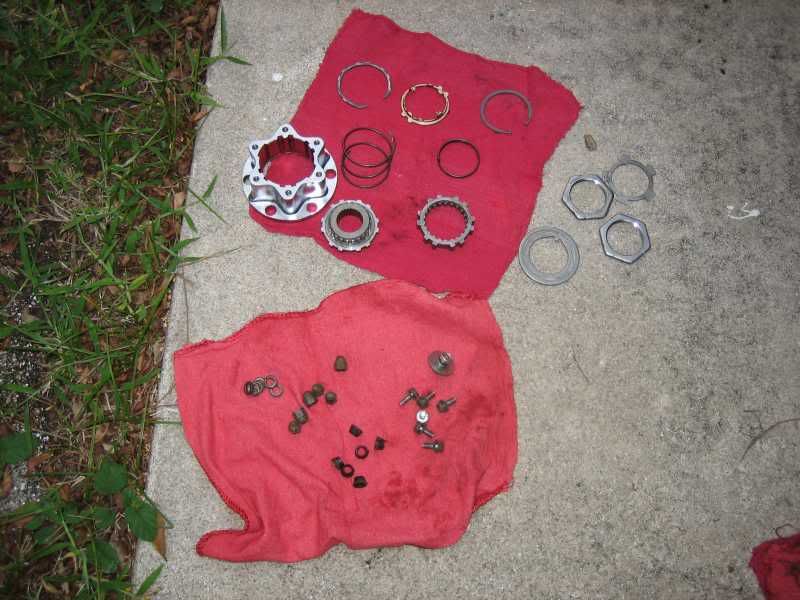
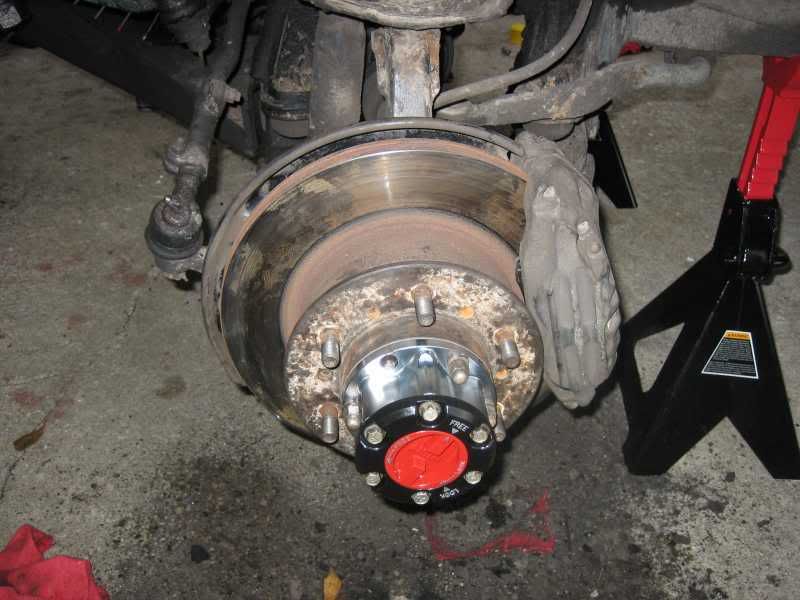
and here's what I ended up with on the other side...
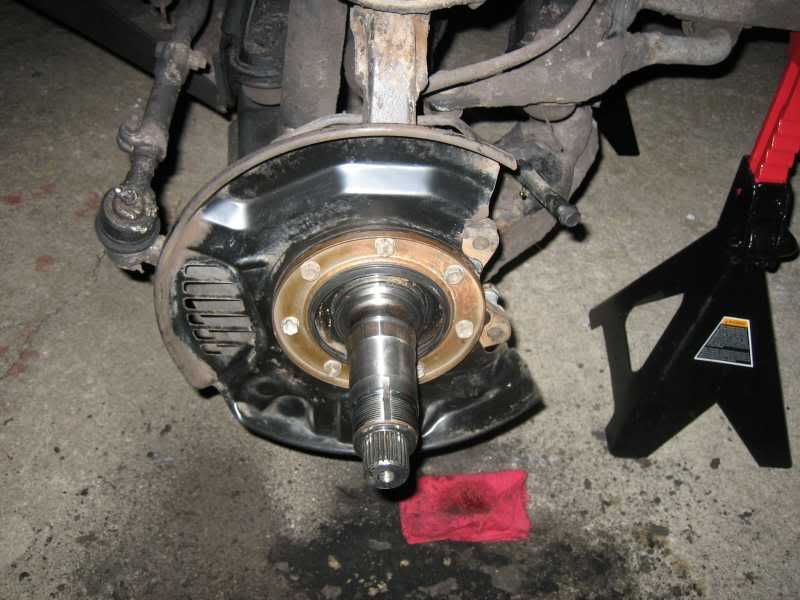
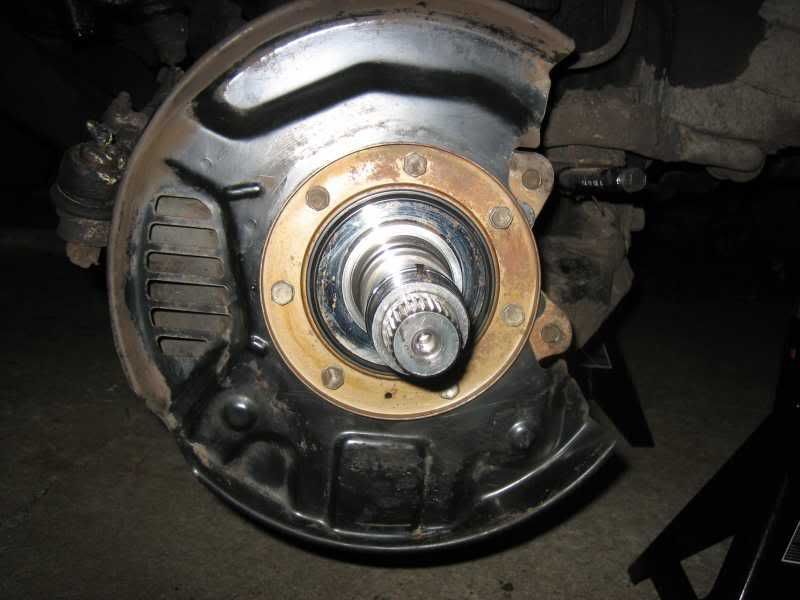
all cleaned up and just wating...
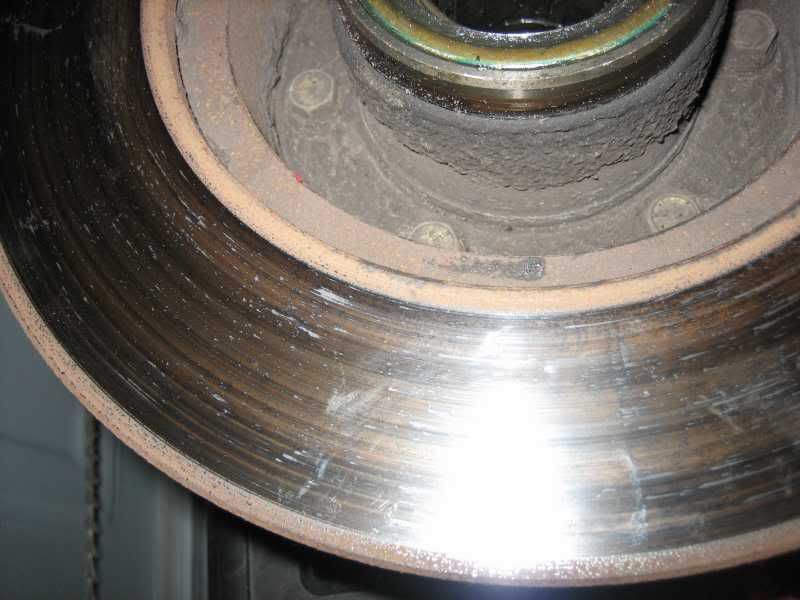
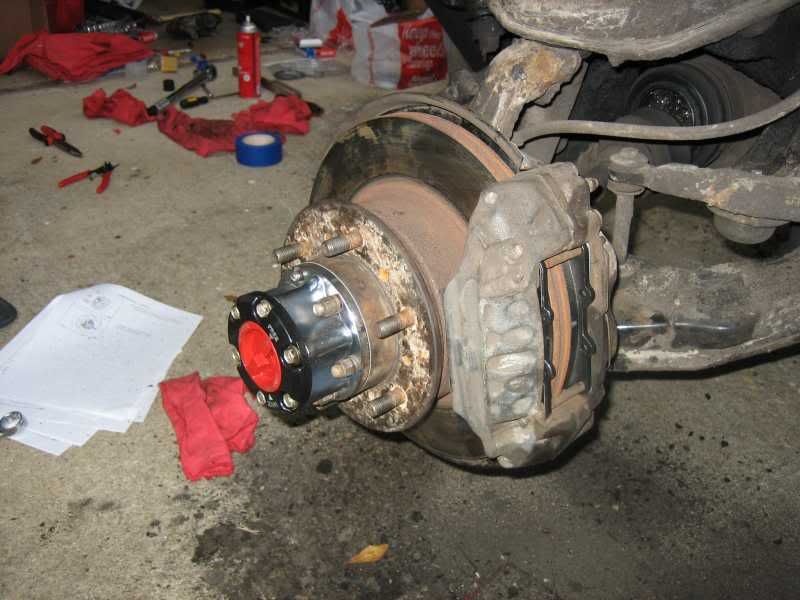
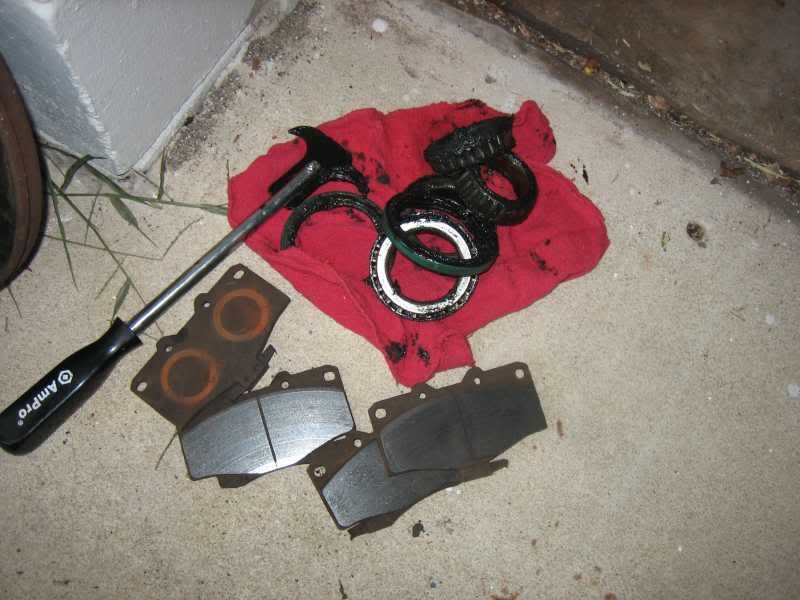
I'm considering replacing the rotor and pads too...
looks a little glazed...
I know, I know, what about that hub...
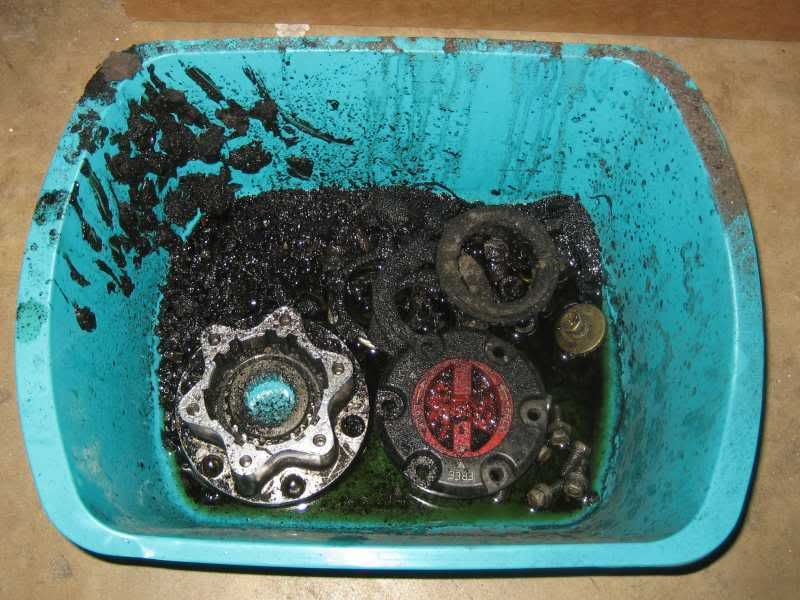
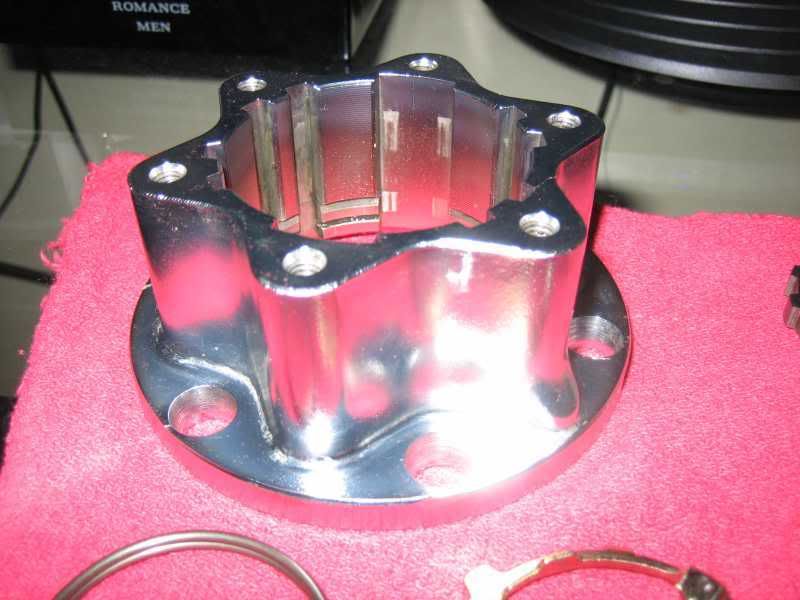
I turned that pile of mud and metal into this!
I was amazed out just how much the hub body shines once you get it all cleaned up!
And then I did a dry assymble just to make sure I can put it back together...
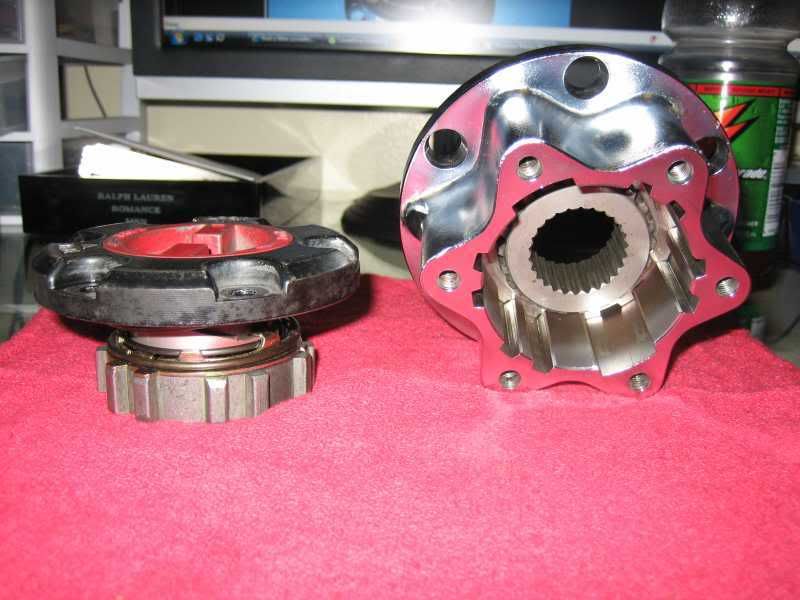
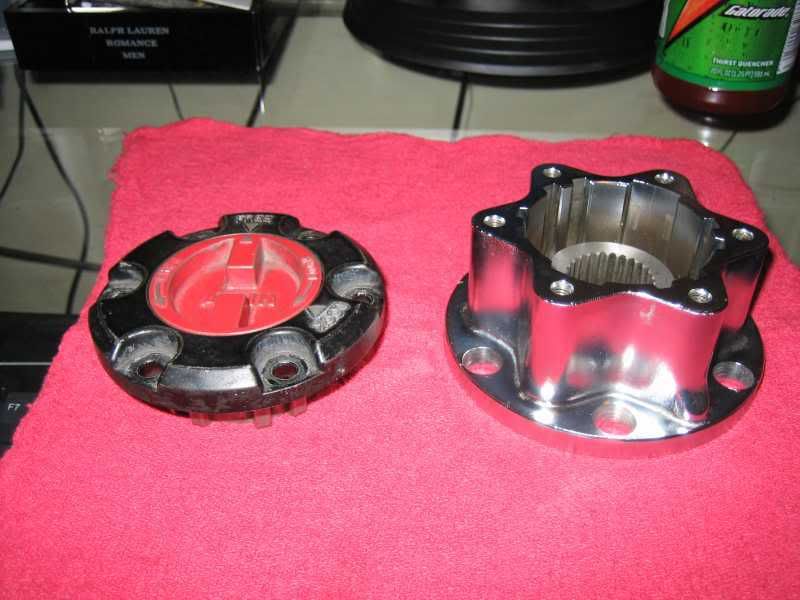
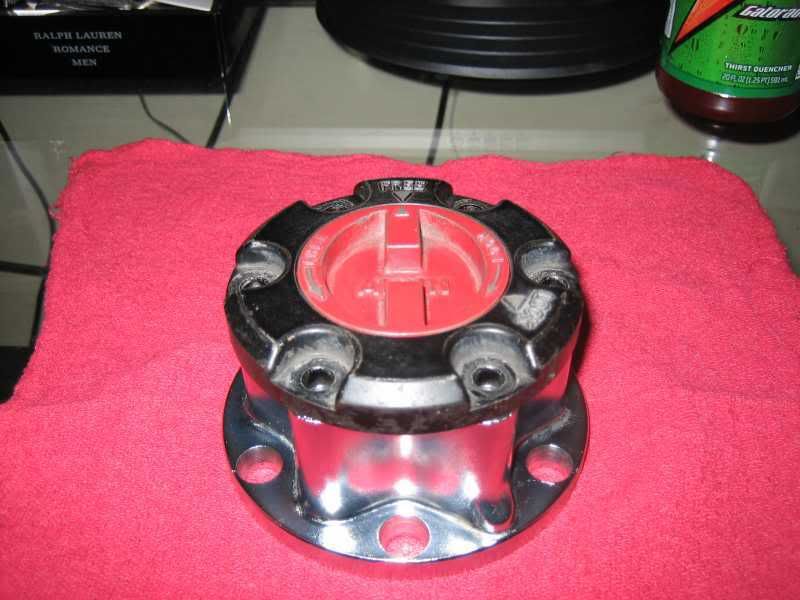
NO PROBLEM!
But it really was much easier than I was expecting, and Imma be up bright and early to get the dealership tomorrow to get my gaskets then continue on!

Only managed to get one side off due to the fact that it got dark... well, I could have drug up a light and continued on, but in Fl, once the sun goes down, the masquito's come out, and I was getting eatin alive...
I would have done the messed up side first, but I opted to take apart the side that was working right so that I could first see how a correctly working once was put together...
So here's basically what I was starting with...
lots of dirt...
and here's what I ended up with on the other side...
all cleaned up and just wating...
I'm considering replacing the rotor and pads too...
looks a little glazed...
I know, I know, what about that hub...
I turned that pile of mud and metal into this!
I was amazed out just how much the hub body shines once you get it all cleaned up!
And then I did a dry assymble just to make sure I can put it back together...
NO PROBLEM!
But it really was much easier than I was expecting, and Imma be up bright and early to get the dealership tomorrow to get my gaskets then continue on!
Last edited by iamsuperbleeder; Oct 18, 2008 at 07:20 PM.
 Oct 17, 2008 | 05:15 PM
#16
Contributing Member
Joined: Mar 2003
Posts: 11,334
Likes: 0
From: COTKU,Ontario,Canada
Very nice! If you leave that sleeve off when you put the hub back on they'll stay that way... those sleeves can really hold a lot of junk around the hub body leading to damage it has been reported by others...
Finally getting my torque wrench this weekend so I'll be doing my aisin install/rebuild next week [I've only had the hubs lying around for about 3yrs and gone through two sets of gaskets... keep loosing them... lol
Finally getting my torque wrench this weekend so I'll be doing my aisin install/rebuild next week [I've only had the hubs lying around for about 3yrs and gone through two sets of gaskets... keep loosing them... lol
Oct 17, 2008 | 05:22 PM
#17
Thread Starter
Contributing Member
Joined: Feb 2008
Posts: 12,248
Likes: 33
From: Lake City, Fl
Very nice! If you leave that sleeve off when you put the hub back on they'll stay that way... those sleeves can really hold a lot of junk around the hub body leading to damage it has been reported by others...
Finally getting my torque wrench this weekend so I'll be doing my aisin install/rebuild next week [I've only had the hubs lying around for about 3yrs and gone through two sets of gaskets... keep loosing them... lol
Finally getting my torque wrench this weekend so I'll be doing my aisin install/rebuild next week [I've only had the hubs lying around for about 3yrs and gone through two sets of gaskets... keep loosing them... lol
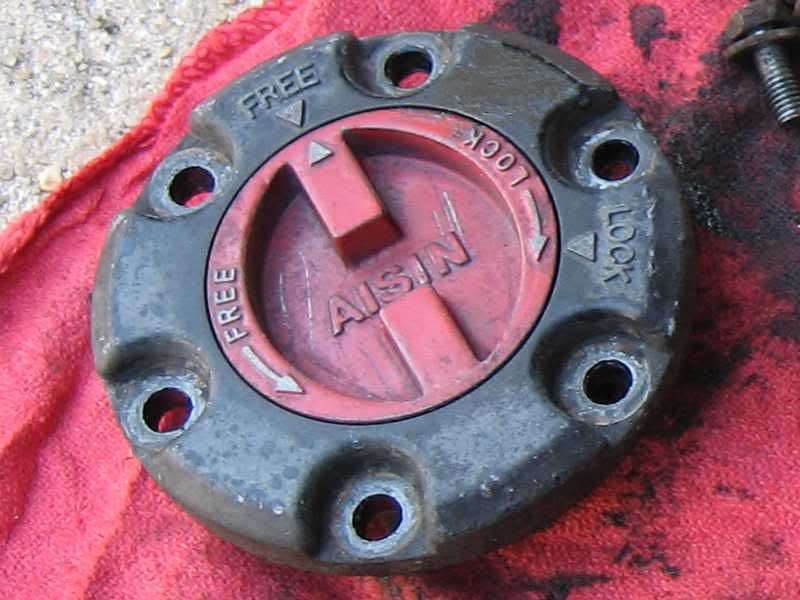
And yeah, I tossed those freak'n covers in the trash... first off their rusted up and look horrible, and secondly, these hubs are gunna shine when I'm done, and I want to show em off, lol
Oct 18, 2008 | 08:12 PM
#18
Thread Starter
Contributing Member
Joined: Feb 2008
Posts: 12,248
Likes: 33
From: Lake City, Fl
Done!!!
Well, I got outta bed around 9 am (yeah, I slept in a lil bit, but it's Sat, so it's ok), drove up to Toyota to get my gaskets, came back home, then spent the rest of the day and some of the night getting everything finished up!
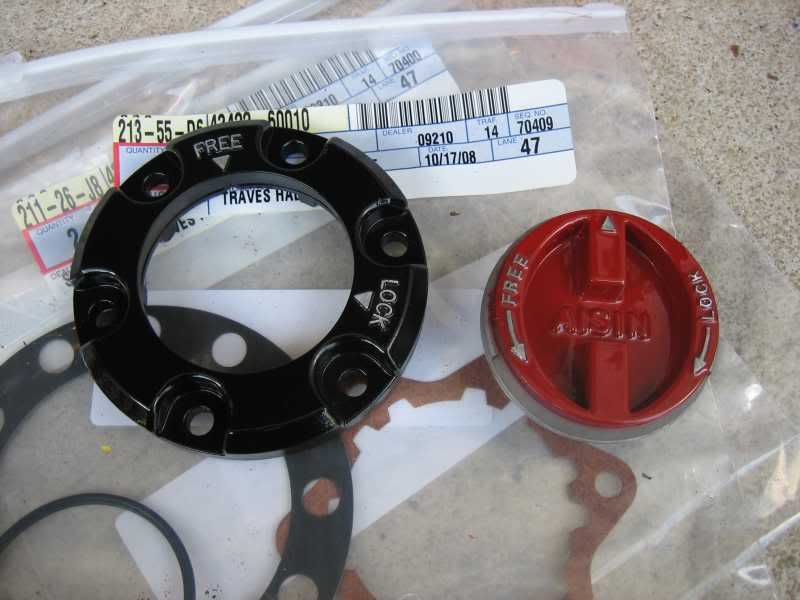
Look at these pretty things...
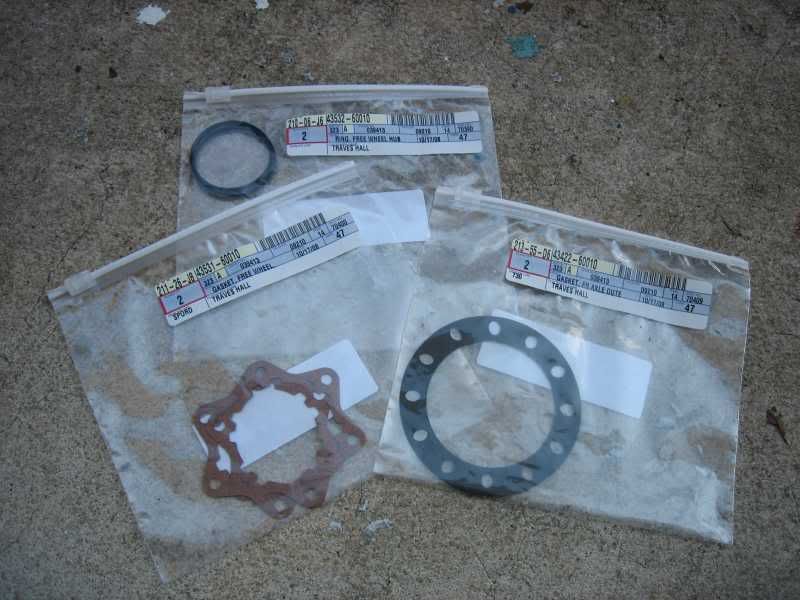
If anyone's curious the part number are:
Hub body mounting flange - 43422-60010
Hub Cover to Hub Body - 43531-60010
Hub Dial O-ring - 43532-60010
came to $19.21 for all of em
So basically, here's what I found on both sides...
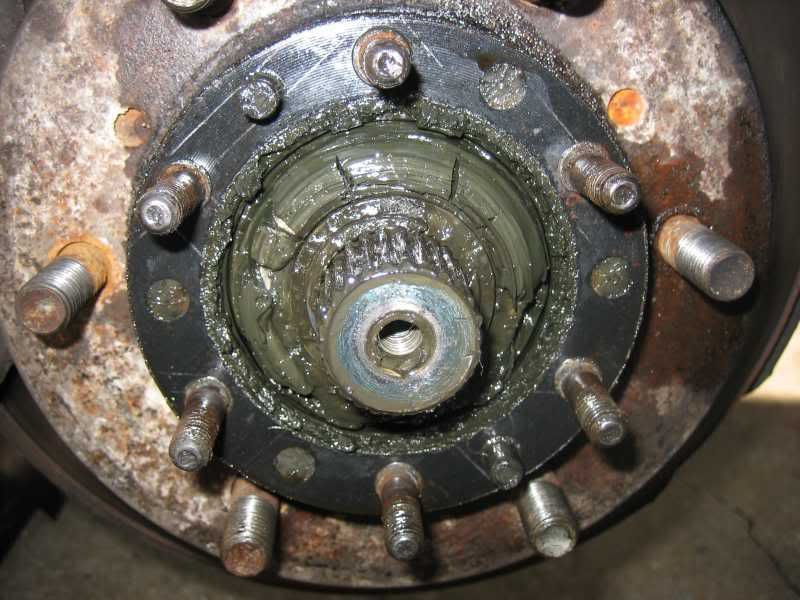
Packed in nasty grease... that was way to "liquidy", so I think some water may have made its way in there in the past... or the grease was just so old it broke down...
dirty hub parts...
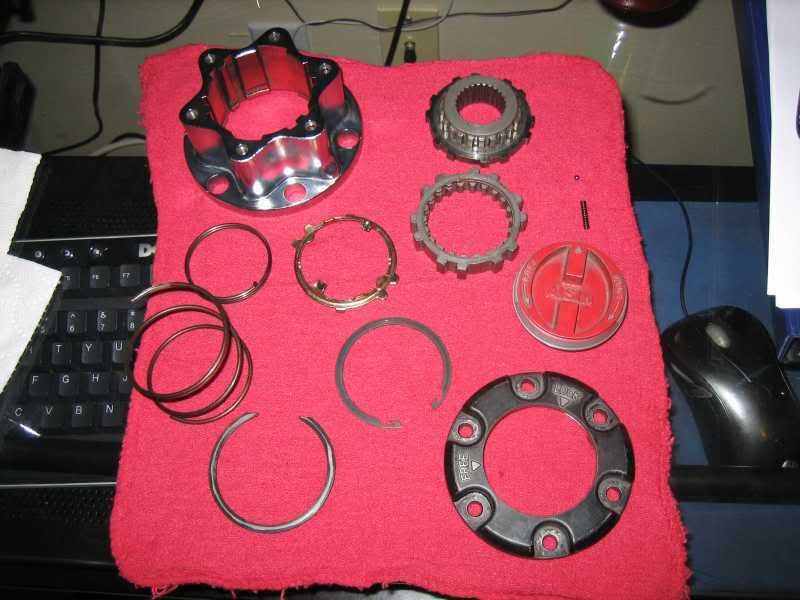
clean hub parts
the covers were taken off looking like this...
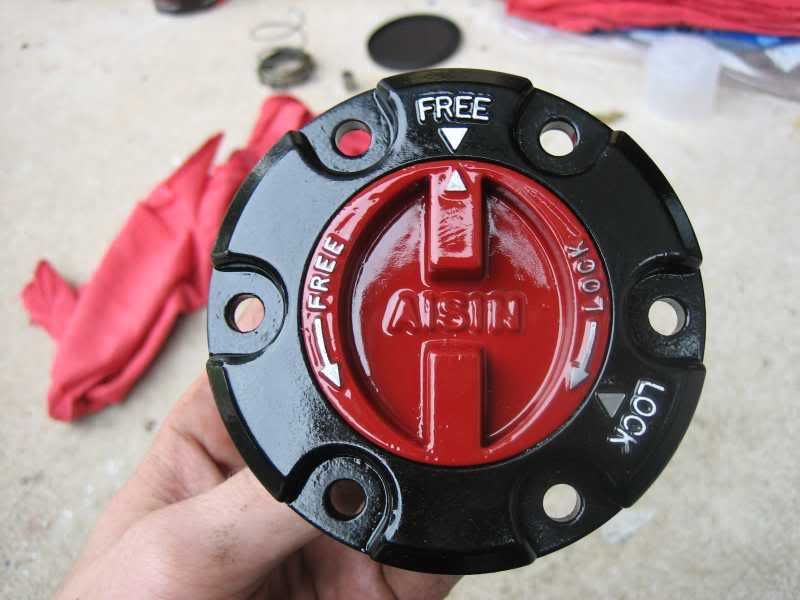
and were put back on looking like this!
new grease packed into new bearings, tension set and nuts locked into place, just waiting on the hubs...
bolt er up
I hit one snag in the entire process. I tried to torque a hub mounting bolt with the cone washer under it to the torque spec the FSM says which is 23 ft/lbf... well, the stud didn't hold up...
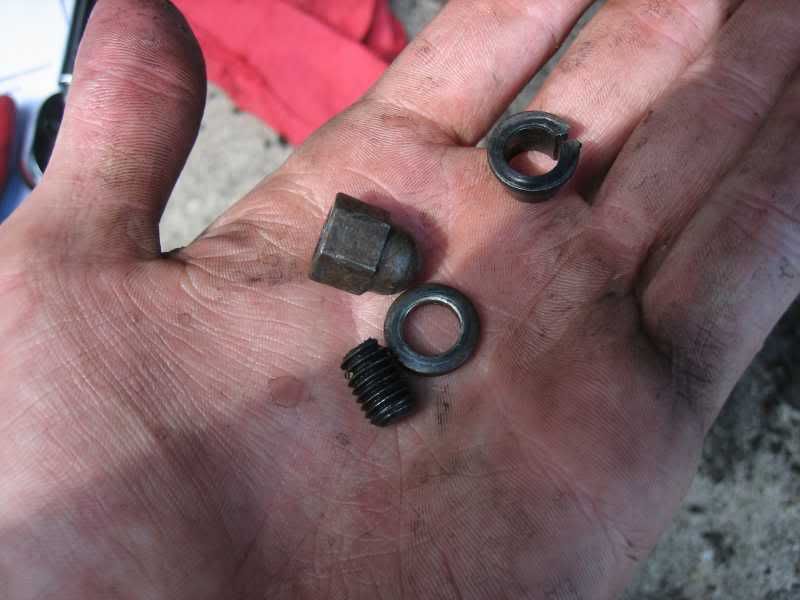
now to me this can mean one of 3 things; 1) the FSM manual is misprinted, which I highly doubt, 2) the bolts are just old and brittle which would be understandable, or 3) my torque wrench is cheap and isn't accurate, which I can definitely see being the case... I did buy it on sale after all...
so all the others got torqued to only 13 ft/lbf; still pretty tight with such a small bolt, but not tight enough to snap it off...
free bearings, seals, and brake pads for anyone who wants to dig into my trash can for em
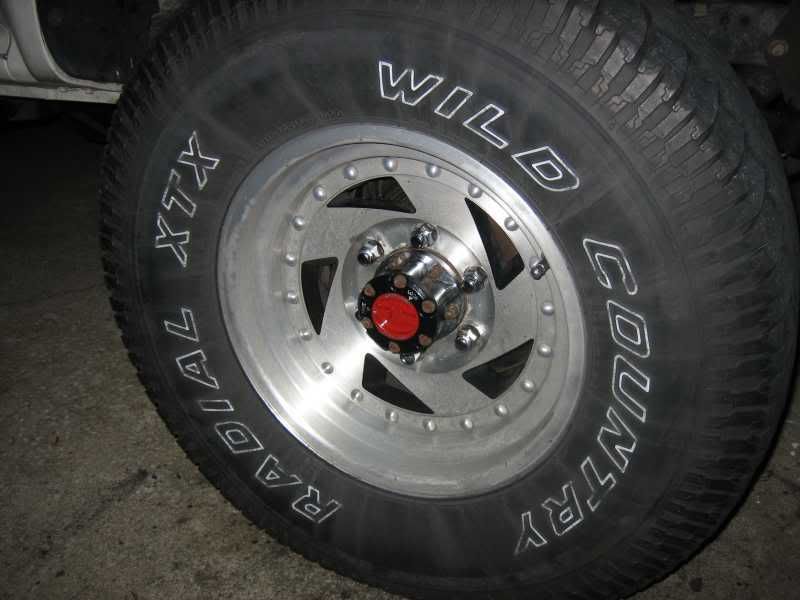
Wheels installed; now I need nice new good looking wheels to go with the hubs, lol
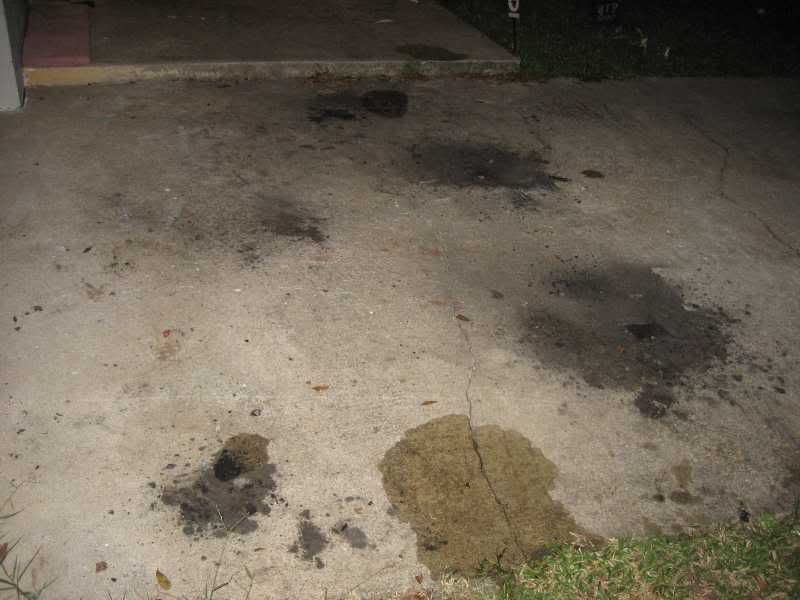
Aftermath in the drive-way...
the 2 large spots to the right were the areas under the control arm/steering knuckle assembly; the 2 smaller ones to the left were from the brake calipers alone...
All said and done, mission accomplished!
She got new bearings, grease, gaskets, seals, brake pads, and brake fluid. Everything around anything I was working on was scraped clean of all dirt, every last bit of old grease was removed, and between the 2 sides I used close to a whole tub of grease. Went through 5 cans of brake clean, a can of PB Blaster, and a bottle of brake fluid.
Everything works the way it should now. Their free when in the "FREE" position, and when I turn them to "LOCK", they lock, and unlock when I put them back to "FREE", so I'd say all is well!
The brakes work great; I can lock up all 4 now, lol.
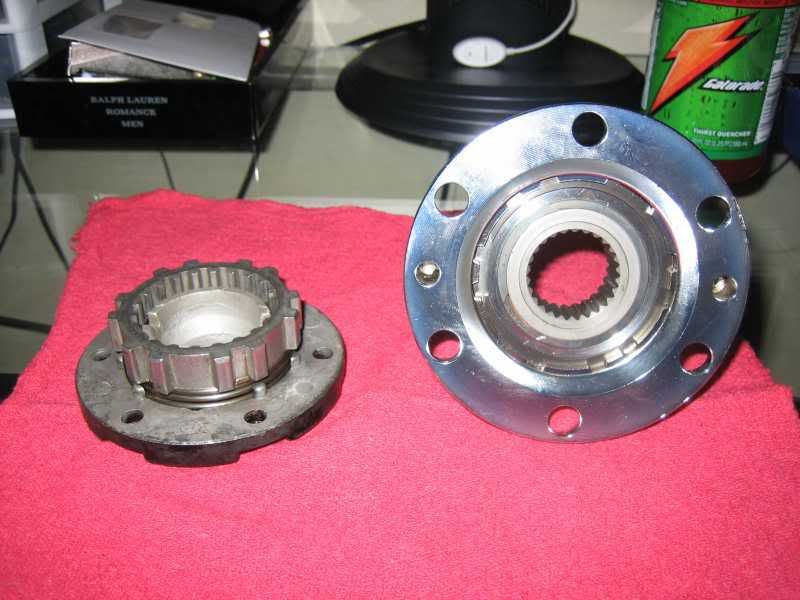
The side that was acting up, well the only thing I can assume is that when it was put together by whoever did it last before I got the truck, they started to put the hub cover on only to realize those metal tabs that stick out further from the spring were hitting a tooth on the hub body. Instead of pulling the whole thing out like they should of and lining it back up right and then sliding it back in, they just turned the hub cover and dial till that tab lined up with the wide open grove in the hub body, and that pretty much did the same thing as turning the dial 2/3 the way to lock...
It took all the play in the wheels out; there was a little play in the bearings before, so they definitely needed some work; I removed both of the 54mm nuts from each side by hand, that's how lose they were. After going through the torque and adjusting methods the FSM says, they have no play and turn good and make no noise!
As far as the broken stud, those just unscrew out right? If so, I can probably get one, lock some vice-grips to what's left of the old one and get er out, then just thread the new one in, tighten the nut down on it and be done without taking anything else apart. I don't see that it would cause any harm driving it around for now just missing that one bolt; I mean damn, I driven cars thousands of miles missing a few lug nuts, lol.
So what do yall think!
Look at these pretty things...
If anyone's curious the part number are:
Hub body mounting flange - 43422-60010
Hub Cover to Hub Body - 43531-60010
Hub Dial O-ring - 43532-60010
came to $19.21 for all of em
So basically, here's what I found on both sides...
Packed in nasty grease... that was way to "liquidy", so I think some water may have made its way in there in the past... or the grease was just so old it broke down...
dirty hub parts...
clean hub parts
the covers were taken off looking like this...
and were put back on looking like this!
new grease packed into new bearings, tension set and nuts locked into place, just waiting on the hubs...
bolt er up
I hit one snag in the entire process. I tried to torque a hub mounting bolt with the cone washer under it to the torque spec the FSM says which is 23 ft/lbf... well, the stud didn't hold up...
now to me this can mean one of 3 things; 1) the FSM manual is misprinted, which I highly doubt, 2) the bolts are just old and brittle which would be understandable, or 3) my torque wrench is cheap and isn't accurate, which I can definitely see being the case... I did buy it on sale after all...
so all the others got torqued to only 13 ft/lbf; still pretty tight with such a small bolt, but not tight enough to snap it off...
free bearings, seals, and brake pads for anyone who wants to dig into my trash can for em
Wheels installed; now I need nice new good looking wheels to go with the hubs, lol
Aftermath in the drive-way...
the 2 large spots to the right were the areas under the control arm/steering knuckle assembly; the 2 smaller ones to the left were from the brake calipers alone...
All said and done, mission accomplished!
She got new bearings, grease, gaskets, seals, brake pads, and brake fluid. Everything around anything I was working on was scraped clean of all dirt, every last bit of old grease was removed, and between the 2 sides I used close to a whole tub of grease. Went through 5 cans of brake clean, a can of PB Blaster, and a bottle of brake fluid.
Everything works the way it should now. Their free when in the "FREE" position, and when I turn them to "LOCK", they lock, and unlock when I put them back to "FREE", so I'd say all is well!
The brakes work great; I can lock up all 4 now, lol.
The side that was acting up, well the only thing I can assume is that when it was put together by whoever did it last before I got the truck, they started to put the hub cover on only to realize those metal tabs that stick out further from the spring were hitting a tooth on the hub body. Instead of pulling the whole thing out like they should of and lining it back up right and then sliding it back in, they just turned the hub cover and dial till that tab lined up with the wide open grove in the hub body, and that pretty much did the same thing as turning the dial 2/3 the way to lock...
It took all the play in the wheels out; there was a little play in the bearings before, so they definitely needed some work; I removed both of the 54mm nuts from each side by hand, that's how lose they were. After going through the torque and adjusting methods the FSM says, they have no play and turn good and make no noise!
As far as the broken stud, those just unscrew out right? If so, I can probably get one, lock some vice-grips to what's left of the old one and get er out, then just thread the new one in, tighten the nut down on it and be done without taking anything else apart. I don't see that it would cause any harm driving it around for now just missing that one bolt; I mean damn, I driven cars thousands of miles missing a few lug nuts, lol.
So what do yall think!
Last edited by iamsuperbleeder; Oct 18, 2008 at 08:15 PM.
Oct 18, 2008 | 08:30 PM
#20
Thread Starter
Contributing Member
Joined: Feb 2008
Posts: 12,248
Likes: 33
From: Lake City, Fl
oh yeah, 2 fresh coats of red and black paint, sanded the raised lettering and arrows, and covered it all up with 3 coats of clear!


