
EPIC FAIL!!! your gonna love this
 Oct 31, 2011 | 10:47 AM
#42
Thread Starter
Registered User
Joined: Sep 2011
Posts: 46
Likes: 0
From: Everett,WA
Okay, im back with another question or "rant" lol. So... I ran the truck and noticed a fuel leak amongst the vacuum lines and fixed that as previously posted and then i noticed that the pass side valve cover was leaking oil pretty bad so i removed the intake plenum and the valve cover and rtv'd the valve cover gasket that stopped the leak. Next i noticed that the water pump leaked at the T-stat so i drained the coolant and repaired that and now i have a leak free engine! My main concern is the timing though. I have searched and searched the yotatech forums looking for answers but i have not been able to get my rig running rite. So this is where im at rite now, I set the crank to TDC and set the dizzy at #1 cylinder per someones post showing where his rotor is pointing when it was @ TDC #1. Next i got the truck started and it ran real rough untill it warmed up and then it idled great. it did have hesitation starting and giving it throttle. next once the engine was up to temp i through the timing light on it and brought crank mark to zero and it seemed to run okay. still had the minor hesitation though. So that was yesterday and today i am here at my shop and went to start the truck and it acts like its WAY out of time. no spuddering or popping, it just starts and then idles WAY down till it dies out. At first i thought it was a ground problem and i checked all the ground points and everything looks legit, next I thought it was a crossed wire or plug needed to be gaped rite but thats not the problem. I am not sure what to do next or where to go from here. i have checked and re-checked over and over the timing and redone the timing over 20 times so far and where it is now is the best its going to get (with what i got). But the truck still dont seem to be running 100%. Does anyone have any suggestions for me? any tips or tricks? I have checked vac leaks, plug gap, crossed wires, and TDC and still i have no answers. I have brought the timing 5* above and below TDC and no help. i have set it to zero and same result. Please yotatech waive your magic wand and click your heels together and lets get this thing back on the road where she belongs! Thanks to EVERYONE!
Oct 31, 2011 | 10:51 AM
#43
Registered User
Joined: Aug 2010
Posts: 2,027
Likes: 1
From: Oregon, USA
Timing should be at least 10 degrees BTDC. Note that timing MUST be set with E1 & TE1 shorted in the diagnostics port. If it's still running like crap, your cam timing may be off.
Last edited by BMcEL; Oct 31, 2011 at 02:38 PM. Reason: Schpelling error.
Oct 31, 2011 | 11:16 AM
#44
Registered User
Joined: Apr 2011
Posts: 487
Likes: 0
From: West Palm Beach, FL
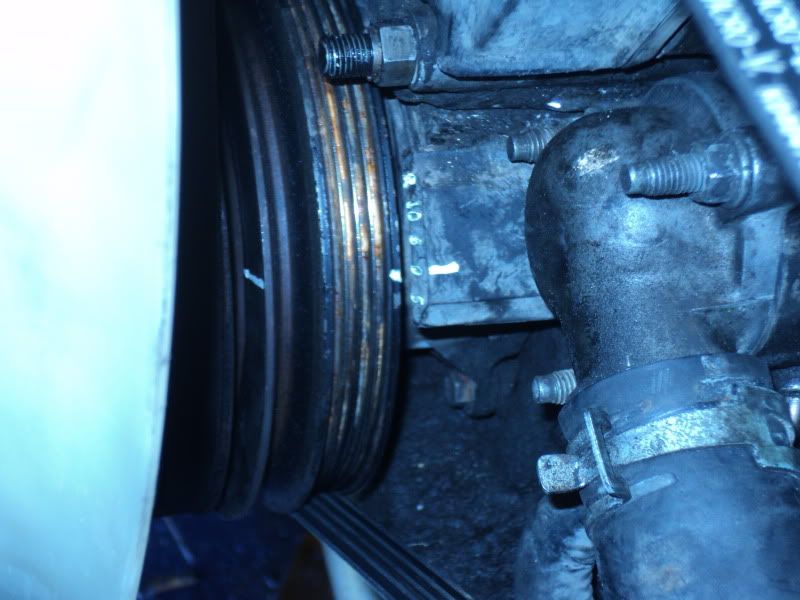
What hose did you connect to the fuel outlet above the reed valve. It should be connected to a fuel return hose that leads into a metal pipe, goes along the passenger side rail, going back to the fuel tank. If you connected it to that vacuum valve as seen in the images you posted just after your picture of the fuel pipe outlet, then this is the problem.
Last edited by 93toyrunner2; Oct 31, 2011 at 11:33 AM.
Oct 31, 2011 | 11:22 AM
#45
Registered User
Joined: Apr 2011
Posts: 487
Likes: 0
From: West Palm Beach, FL

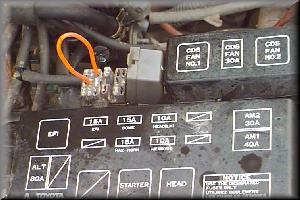
1. Reed valve
2. Fuel return hose
3. Brake booster
4. Rear air hose at the AC idle up
5. PS pump valve
6. Front air hose at the AC idle up
7. Vac hose #1 to pass side of rear VSV
8. Vac hose #2 to pass side of center VSV
9. PCV hose
10. Vac hose #5 to driver side of center VSV
11. Vac hose #3 to pass side of front VSV
12. Vac hose #6 to driver side of front VSV
13. PS pump valve
Vac hose #4 goes from driver side of rear VSV to the reed valve
AC idle up vacuum hoses:
- pass side to diaphragm (very short hose)
- driver side tee's into vacuum hose #2 (item 8 in your picture)

Thanks to Bugs1961 for this excellent writeup and details in a previous thread!!
Last edited by 93toyrunner2; Oct 31, 2011 at 11:33 AM. Reason: more images
Oct 31, 2011 | 11:30 AM
#46
Thread Starter
Registered User
Joined: Sep 2011
Posts: 46
Likes: 0
From: Everett,WA
reconnected the rubber fuel line to the metal fuel line. I did not know that the metal vac lines had a fuel line ran in it. i did (on accident) have that vac line in the picture connected to the fuel line but only for a few seconds until i noticed that it was not rite and leaking. i then disconnected the vac line and pointed it down to dump out any fuel that mite have been in the hose, then i let it sit and air dry for a few hours before connecting everything the rite way. everything is connected as it should be now i believe. And BMcELL, im sorry but im not sure what you are trying to explain. so i need to cross those 2 ports with a jumper (paper clip) and then set the crank to TDC and then the DIZZY to TDC? then hit it with a light and bring it to 10* BTDC? Im not sure how shorting it will affect the timing? any explanation would be great on this. that really stumps me.
Oct 31, 2011 | 11:39 AM
#47
Registered User
Joined: Aug 2010
Posts: 2,027
Likes: 1
From: Oregon, USA
Yes, with cylinder 1 at TDC, the rotor should be pointing at cylinder 1. In order to set the base timing, you have to short E1 & TE1 in the diagnostics port:
If you do not do this, you will never be able to set the ignition timing correctly.
If you do not do this, you will never be able to set the ignition timing correctly.
Last edited by BMcEL; Oct 31, 2011 at 11:40 AM.
Oct 31, 2011 | 12:06 PM
#48
Thread Starter
Registered User
Joined: Sep 2011
Posts: 46
Likes: 0
From: Everett,WA
Okay, I just snapped these pictures. does everything look rite to you? question.... i NEVER mess with ANY of the timing without disconnecting the neg off the battery. so should i keep it connected while "jumping" the diagnostic port as per your picture? also should i "jump" the dio box with the battery connected then manually set crank to TDC then install the dizzy to TDC and then start it and hit it with the light, all with the jumper in? or should i go from where i am now (see pics) and install the jumper and start the truck (jumper installed) and hit it with a light? Im not sure at what point do i install the wire??? before i uninstall? after i reinstall? before i start the truck? thanks for the help though. and that vacuum diagram is SWEET! thanks.
crank at TDC compression stroke

dizzy installed and pointing to #1 cylinder (i think) ???
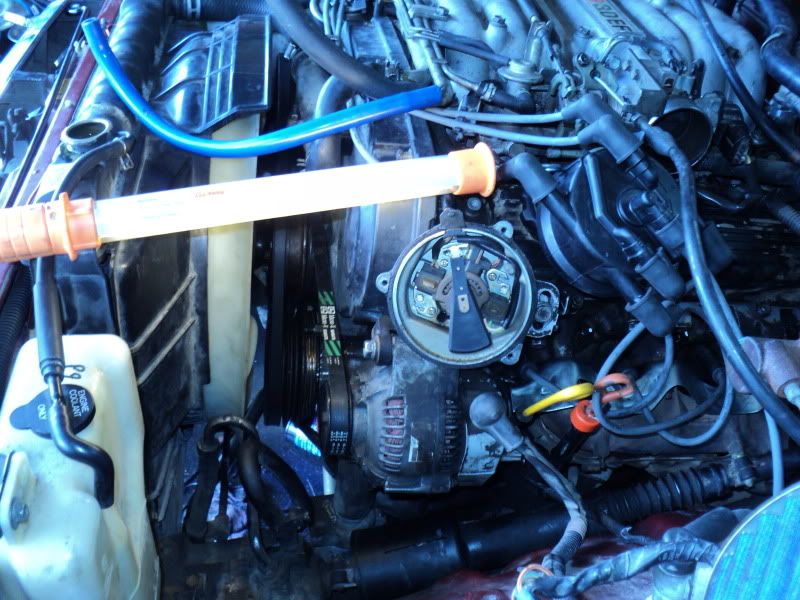
picture of both crank and dizzy in relationship to the rest of the engine.
crank at TDC compression stroke
dizzy installed and pointing to #1 cylinder (i think) ???
picture of both crank and dizzy in relationship to the rest of the engine.
Oct 31, 2011 | 12:20 PM
#51
Registered User
Joined: Apr 2011
Posts: 487
Likes: 0
From: West Palm Beach, FL
Look at the distributor cap on the outside for #1 cylinder plug, then look inside directly below the #1 plug on the cap, and you should see the metal where the #1 spark comes through the cap. That is where the distributor rotor needs to be pointing when the crank is at TDC. Once this is set, then start your vehicle, jump the E1 to TE1, and set your timing to 10 degrees BTDC. (to the left of 0). Tighten down distributor, remove your jumper and go for a test drive.
Oct 31, 2011 | 12:44 PM
#52
Thread Starter
Registered User
Joined: Sep 2011
Posts: 46
Likes: 0
From: Everett,WA
So BMcELL..... what do i owe you for that trick? lol. seems to be running tip top now. YAY~~~ how come i never read that in any other post on timing issues? weird. oh well im glad a small paper clip actually fixed the problem. is this the same thing you do to read codes? im not throwing any now but i would like to know because before i would have a check engine light on when i pushed my truck hard (going up a hill punched) (laying rubber on the pavement) and i would like to know how to check and make sure everything is okay.
Oct 31, 2011 | 12:51 PM
#53
Registered User
Joined: Aug 2010
Posts: 2,027
Likes: 1
From: Oregon, USA
So BMcELL..... what do i owe you for that trick? lol. seems to be running tip top now. YAY~~~ how come i never read that in any other post on timing issues? weird. oh well im glad a small paper clip actually fixed the problem. is this the same thing you do to read codes? im not throwing any now but i would like to know because before i would have a check engine light on when i pushed my truck hard (going up a hill punched) (laying rubber on the pavement) and i would like to know how to check and make sure everything is okay.

And yes that's also how you check for codes. With the jumper in place, turn the ignition to ON (with engine off) and the check engine light will blink the codes. Might want to download yourself a copy of the FSM (link in sig) and keep it for future reference. All of this information is in there.
Oct 31, 2011 | 02:04 PM
#54
Thread Starter
Registered User
Joined: Sep 2011
Posts: 46
Likes: 0
From: Everett,WA
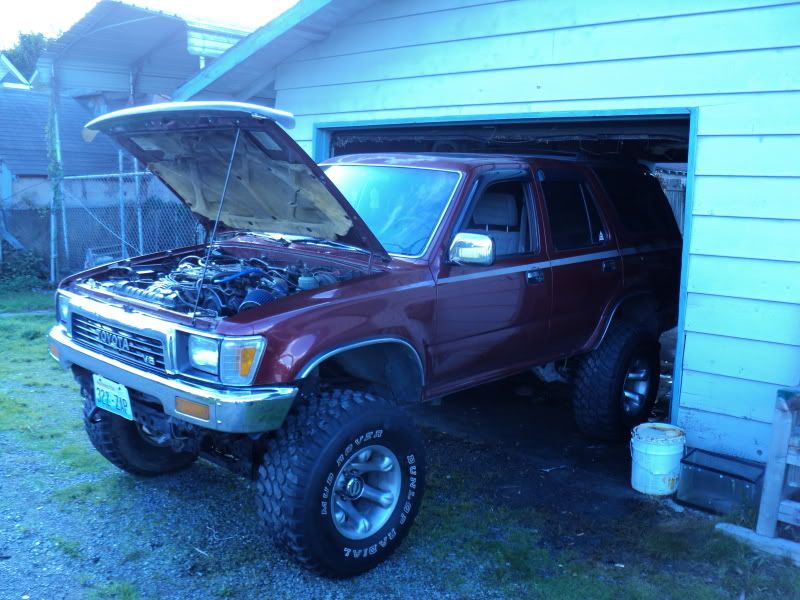
First test drive! Everything is running nice and smooth. Had some smoke from the new exhaust gaskets but other then that everything seems to be 100%. thanks to EVERYONE that helped. Next week i will be on to the steering issue i have with the truck, gonna go to the junk yard and get a new (used) steering box from a runner with 156xxx miles. should be better then mine with 270xxx miles. here is one more pic of the truck back in the shop after the initial test drive. Thanks again everyone.
Oct 31, 2011 | 02:53 PM
#55
Registered User
Joined: Aug 2010
Posts: 2,027
Likes: 1
From: Oregon, USA
Good to hear it's running right again. Forgot to answer your question earlier...
The computer can advance/retard timing to what it thinks is 'optimal' and when you try to advance it without the jumper connected, the computer is fighting you and trying to retard it. Jumping E1 & TE1 is like putting it under for surgery...it won't fight back.
Nov 8, 2011 | 01:54 PM
#58
Thread Starter
Registered User
Joined: Sep 2011
Posts: 46
Likes: 0
From: Everett,WA
So, my last post on this topic I said I was on to the next task of replacing my steering box. I haven't had the time to make it out to the yard to pick one up yet so guess what happened???...??? LMFAO! My steering box cracked! It blew psychedelic patterns of ATF all over the engine and throughout the engine bay... Just thought I would share my trouble.
Nov 8, 2011 | 02:32 PM
#59
Registered User
Joined: Aug 2010
Posts: 2,027
Likes: 1
From: Oregon, USA
That's no good...better get on that!
I picked up a reman from Napa for $500 and change...had it for over a year now and it's still tight as new. You could probably save a lot of money on a good junkyard unit though.
I picked up a reman from Napa for $500 and change...had it for over a year now and it's still tight as new. You could probably save a lot of money on a good junkyard unit though.


