EPIC FAIL!!! your gonna love this
 Oct 11, 2011 | 06:40 AM
#23
Registered User
Joined: Apr 2007
Posts: 1,458
Likes: 5
From: ATL!

Turns out that the timing belt is shot and needs to be replaced.
should I pull the whole darn thing and spend a few more bucks and rebuild the bottom end too? i would love to do that but i got a funny feeling once i dump that much time and money into the engine then the tranny will go out.... oh the life of!
should I pull the whole darn thing and spend a few more bucks and rebuild the bottom end too? i would love to do that but i got a funny feeling once i dump that much time and money into the engine then the tranny will go out.... oh the life of!
i can't make a recommendation on your bottom end, but i definitely suggest replacing EVERYTHING that could fail in an overheat condition. hoses, t-stats, etc. anything in the cooling system is "cheap" compared to losing a freshly rebuilt engine, and overheating is most likely the greatest threat to one. blow a heater hose, lose your coolant, all your hard work and $$ dumps on the road in a big splash.
keep up the good work, man!
Oct 18, 2011 | 10:45 AM
#24
Thread Starter
Registered User
Joined: Sep 2011
Posts: 46
Likes: 0
From: Everett,WA
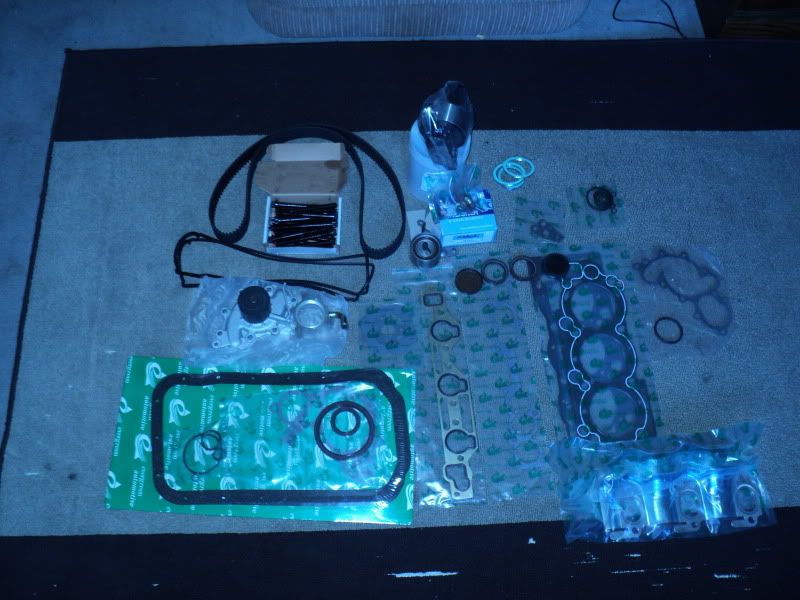
Got all my parts in today! yaya!!! all this for just under $200. Full gasket set and a timing belt master kit. I have an extra set of new valve cover gaskets and cam plugs/seals if anyone wants them they can have them, just pay for shipping and there yours.
So, in the process of tearing the engine apart i discovered that I don't have a cam holding tool and a crank holding tool.... the cams were easy, i just read a post about sticking an extension with a 10mm socket on one of the cam plate bolts and TA-DA! The crank was a little more tricky thou. After looking at everything i have on hand I decided to make this...
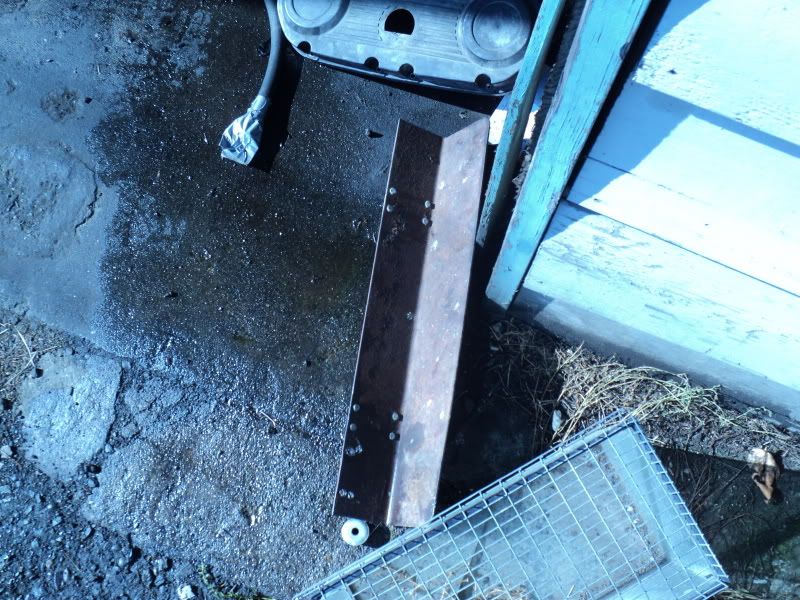
Its just the lip piece from a old hand truck that rotted away outside. Drilled 4 holes in it and it worked perfect. Yes i said 4 holes, lol. the first 2 holes were too far apart so i tryed it again and got it perfect.
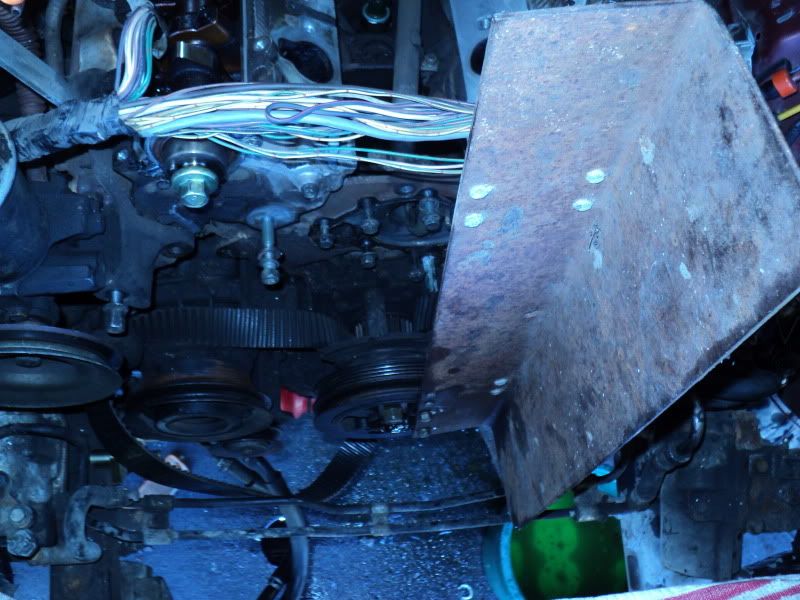
So today im going to try to make it down to the local auto parts store and pick up a steering wheel puller or a pulley puller and get the damper off as well as the exhaust and then everything will be ready for the new H/G's and timing belt. Just thought i would post an update and let ya know whats the deal. Also im going to order a roll of exhaust/headder/turbo wrap and wrap the exhaust crossover pipe before i reinstall it. sound good?
So, in the process of tearing the engine apart i discovered that I don't have a cam holding tool and a crank holding tool.... the cams were easy, i just read a post about sticking an extension with a 10mm socket on one of the cam plate bolts and TA-DA! The crank was a little more tricky thou. After looking at everything i have on hand I decided to make this...
Its just the lip piece from a old hand truck that rotted away outside. Drilled 4 holes in it and it worked perfect. Yes i said 4 holes, lol. the first 2 holes were too far apart so i tryed it again and got it perfect.
So today im going to try to make it down to the local auto parts store and pick up a steering wheel puller or a pulley puller and get the damper off as well as the exhaust and then everything will be ready for the new H/G's and timing belt. Just thought i would post an update and let ya know whats the deal. Also im going to order a roll of exhaust/headder/turbo wrap and wrap the exhaust crossover pipe before i reinstall it. sound good?
Oct 18, 2011 | 11:57 AM
#25
Registered User
Joined: Apr 2011
Posts: 487
Likes: 0
From: West Palm Beach, FL
Have you tried pulling the damper off without the puller? I went out and got a puller for mine, and while I was setting it up, the pulley came off in my hands! Might save you a few bucks!
Oct 18, 2011 | 12:29 PM
#26
Thread Starter
Registered User
Joined: Sep 2011
Posts: 46
Likes: 0
From: Everett,WA
thanks for the tip but sadly no, it wont come off. I even tryed a small cat paw pry bar and tryed to gently push it off but this thing is STUCK on there. i thought i had the rite puller but the only thing i have is a power steering pulley puller and it wont work. ill try a little lithium grease and see if that helps before i go spend more $$$.
Oct 18, 2011 | 04:03 PM
#28
Thread Starter
Registered User
Joined: Sep 2011
Posts: 46
Likes: 0
From: Everett,WA
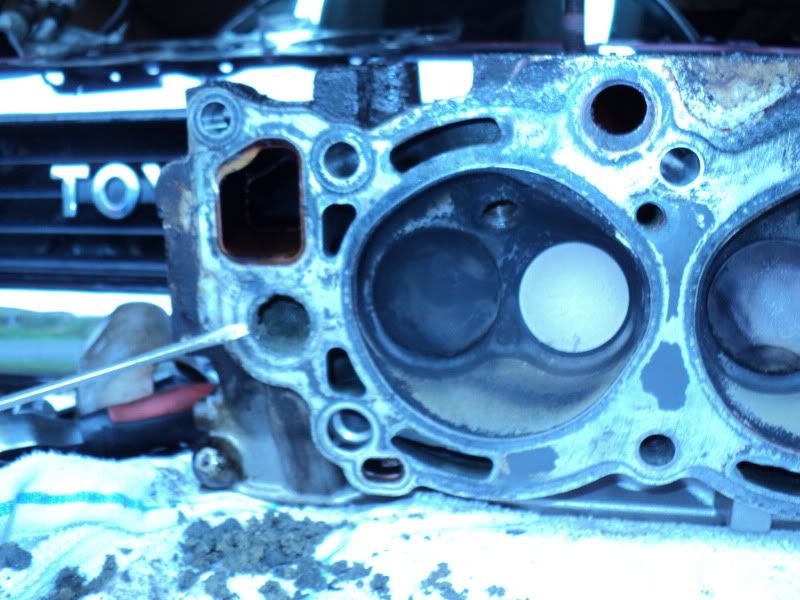
ANOTHER QUESTION... okay so i got the driver side exhaust/cam/head off of the truck just now and was in the possess of replacing the exhaust manifold gaskets and saw this, just to the rite of my hand you can see a crack in the manifold.
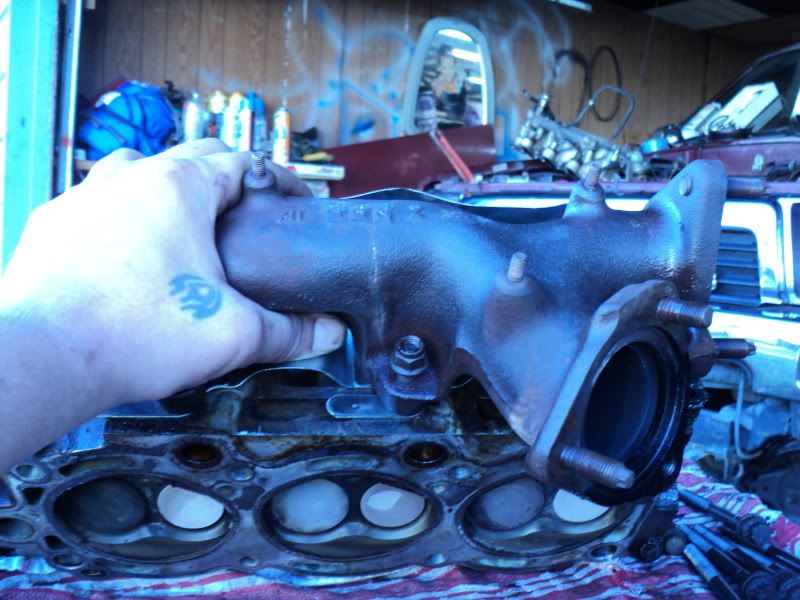
Im in college here at everettCC and i am taking welding and weld blueprint reading, so i have access to all the welders and grinders that I need. my question is, can I just weld up this crack and call her good? will it last? I would love to buy a set of doug's headders but they are pretty pricey plus i would have to pay to have the rest of the exhaust done and with me in school and pretty much broke i dont see that happening.
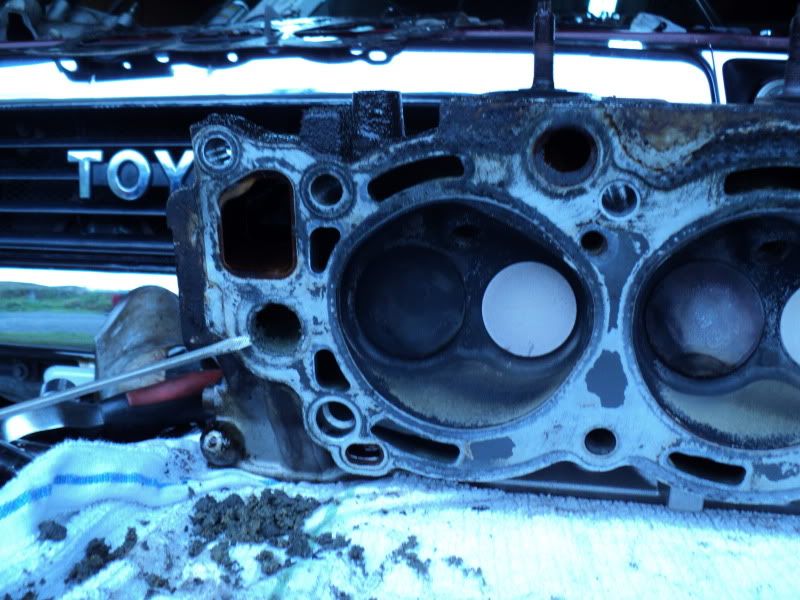
Next, I pulled the head off the truck and the gasket and found rather large pieces of rubber gasket plugging up some of the coolant passages on the block... yikes! maybe thats why i over heated. Im going to take my shop vac and suck out all the passages tomorrow and try to pull out any remaining gunk. i only pulled the one side so far and the head gasket actually looked good still. here is a random picture of the block after the head was removed.

Im in college here at everettCC and i am taking welding and weld blueprint reading, so i have access to all the welders and grinders that I need. my question is, can I just weld up this crack and call her good? will it last? I would love to buy a set of doug's headders but they are pretty pricey plus i would have to pay to have the rest of the exhaust done and with me in school and pretty much broke i dont see that happening.
Next, I pulled the head off the truck and the gasket and found rather large pieces of rubber gasket plugging up some of the coolant passages on the block... yikes! maybe thats why i over heated. Im going to take my shop vac and suck out all the passages tomorrow and try to pull out any remaining gunk. i only pulled the one side so far and the head gasket actually looked good still. here is a random picture of the block after the head was removed.
Oct 20, 2011 | 07:34 AM
#29
Registered User
Joined: Apr 2007
Posts: 1,458
Likes: 5
From: ATL!
drill each end of the crack to stop it from growing, then weld it up.
you definitely gotta get those coolant passages clean. i don't have a good recommendation for doing it with the block in the vehicle. anyone else?
you definitely gotta get those coolant passages clean. i don't have a good recommendation for doing it with the block in the vehicle. anyone else?
Oct 20, 2011 | 07:45 AM
#30
Registered User

Joined: Jan 2010
Posts: 953
Likes: 21
From: Imperial County CA
Something to think about: If the coolant passages in the block look like that, what does the inside of the radiator look like? I don't have a good answer on how to clean it but I'm sure someone on here does.
Also if you have a yard close you could probably find an exhaust manifold really cheap. Then you don't have to worry about the crack.
Also if you have a yard close you could probably find an exhaust manifold really cheap. Then you don't have to worry about the crack.
Last edited by JBurt; Oct 20, 2011 at 07:46 AM.
Oct 20, 2011 | 06:40 PM
#31
where did you get your parts for those prices? I currently have my 3.0 out of my runner, pulled apart and just about ready to take to a machine shop. My number 6 rod is a little bent. Luckily no damage other then the rod.
I also talked to a local engine builder and they swear by using the older head bolts rather then the new ones. Not sure how I feel about that.
Anyway not trying to hijack. I look forward to your updates.
I also talked to a local engine builder and they swear by using the older head bolts rather then the new ones. Not sure how I feel about that.
Anyway not trying to hijack. I look forward to your updates.
Oct 21, 2011 | 10:35 AM
#32
Thread Starter
Registered User
Joined: Sep 2011
Posts: 46
Likes: 0
From: Everett,WA
where did you get your parts for those prices? I currently have my 3.0 out of my runner, pulled apart and just about ready to take to a machine shop. My number 6 rod is a little bent. Luckily no damage other then the rod.
I also talked to a local engine builder and they swear by using the older head bolts rather then the new ones. Not sure how I feel about that.
Anyway not trying to hijack. I look forward to your updates.
I also talked to a local engine builder and they swear by using the older head bolts rather then the new ones. Not sure how I feel about that.
Anyway not trying to hijack. I look forward to your updates.
GOTTADOG~ I actually bought my parts from ebay. I got my timing belt master kit from domestic gaskets from ebay for $86 with free shipping. And the full engine gasket set i purchased from mizumo auto for $92.79 with free shipping. both sets came exactly 4 days after i made payment so I think shipping was super fast. log on to ebay and go to ebay motors and type in your vehicle information and then search through engine and components for the full gasket set and search timing and components for the timing set. when surfing the ebay pages look for domestic gasket as a seller and mizumo auto for a seller. All in all i am happy with the parts i received. everything looks as good or better then the local nappa store for half the price. check out these ebay auctions... 280597870829.,...220698513094.,...
Oct 21, 2011 | 10:54 AM
#33
Thread Starter
Registered User
Joined: Sep 2011
Posts: 46
Likes: 0
From: Everett,WA
Something to think about: If the coolant passages in the block look like that, what does the inside of the radiator look like? I don't have a good answer on how to clean it but I'm sure someone on here does.
Also if you have a yard close you could probably find an exhaust manifold really cheap. Then you don't have to worry about the crack.
Also if you have a yard close you could probably find an exhaust manifold really cheap. Then you don't have to worry about the crack.
also your comment inspired me to go and hit the yard this weekend if the rain holds out for a new manifold. i originally wanted to weld the old one to spare me the time and bloody hands from going to the yard and pulling the plenum/intake/exhaust/head/all other components to remove before the head can come off,and finally the manifold. But i think i have came up with a good idea... im going to go with a pair of snippers and all the tools i need plus a cordless recip saw and just cut the fender off and the exhaust and unbolt the manifold in hopes that all i will have to do is cut some and unbolt and go! I will unbolt the outer fender in hopes that someone will use/buy it.
Oct 21, 2011 | 02:40 PM
#34
Thread Starter
Registered User
Joined: Sep 2011
Posts: 46
Likes: 0
From: Everett,WA
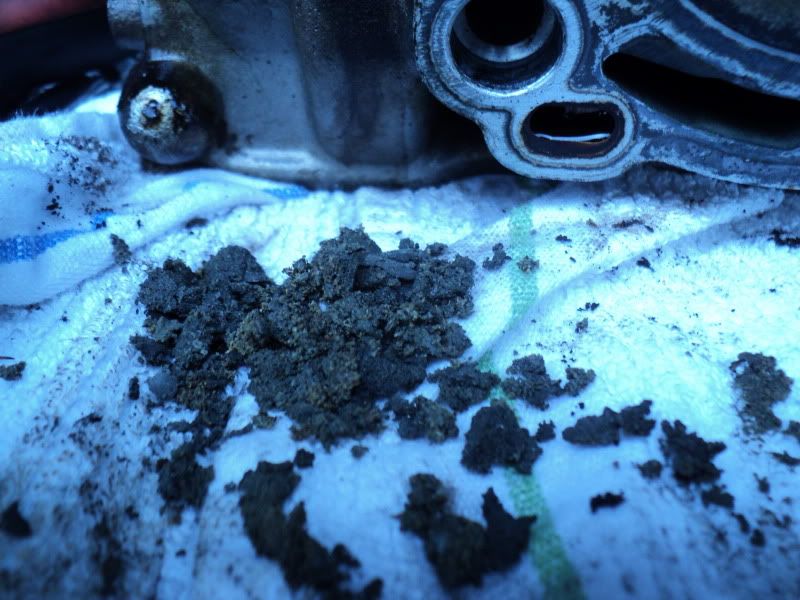
WHAT THE HECK IS THIS??? okay so i pulled off the pass side head this afternoon and found this. i have no idea what it is but im assuming that its some sort of head gasket repair that the previous owner did. it looks and feels like sand or gritty clay. it was in the entire water port from block to intake where my screwdriver is pointing. tipped the head over and milky (not oil) water came out and it was grey... YUK! Not only is this not acceptable to me but guess what else i found??? thats rite... more rubber gasket pieces clogging up the water jackets. I think all these rubber pieces came from over gooping the cam shaft ends with sealant. it was a mess in there. anyone have any other opinions on what this grey goopy mess is? in the photo you can see how much was pulled out. Jeez im glad I pulled the heads...
Oct 21, 2011 | 04:03 PM
#35

Registered User
Joined: Jul 2011
Posts: 49
Likes: 0
From: Cedaredge ,CO
I have no Idea what the grey gunk is. However not trying to toot autozones horn, but they do have a specialty tool loan program. On things like pullers you pay for the tool and when you are done you take them back for a full refund. Really helps when you are doing things yourself and on a budget.
Oct 24, 2011 | 10:35 AM
#36
Registered User
Joined: Sep 2008
Posts: 3,887
Likes: 16
From: Spokane, WA
On the subject of the crack in your exhaust manifold, you need to get the manifold HOT. Preheat it in an oven, weld it, then you need to let it cool slowly. If not, it'll just crack around the weld.
A good way to cool it slowly is to bury it in sand..
A good way to cool it slowly is to bury it in sand..
Oct 28, 2011 | 08:56 AM
#38
Thread Starter
Registered User
Joined: Sep 2011
Posts: 46
Likes: 0
From: Everett,WA
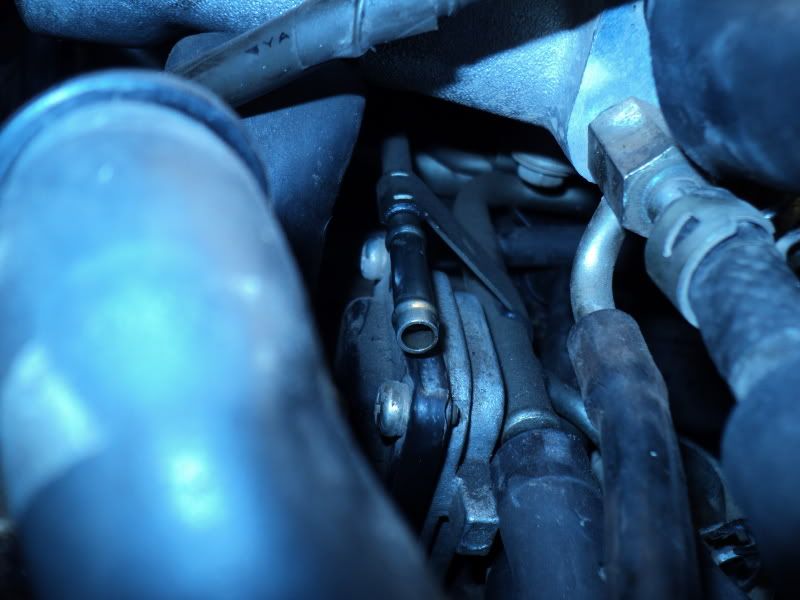
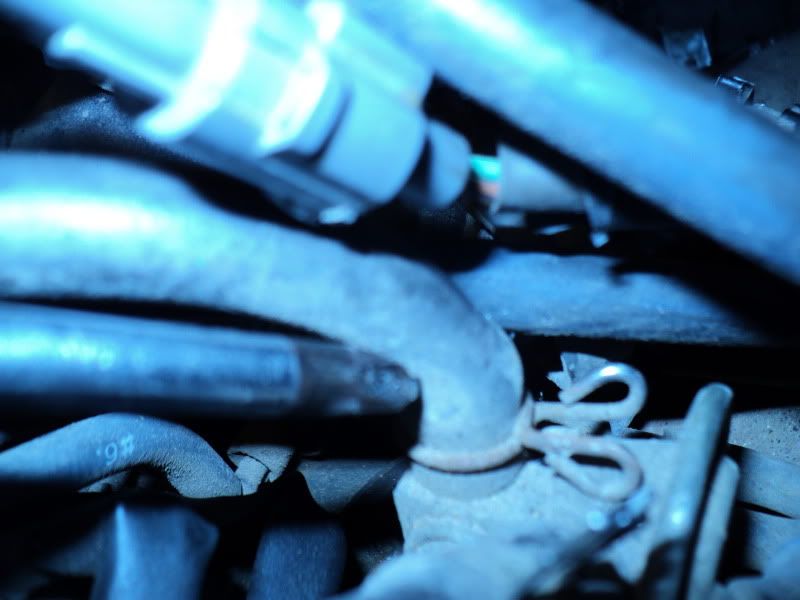
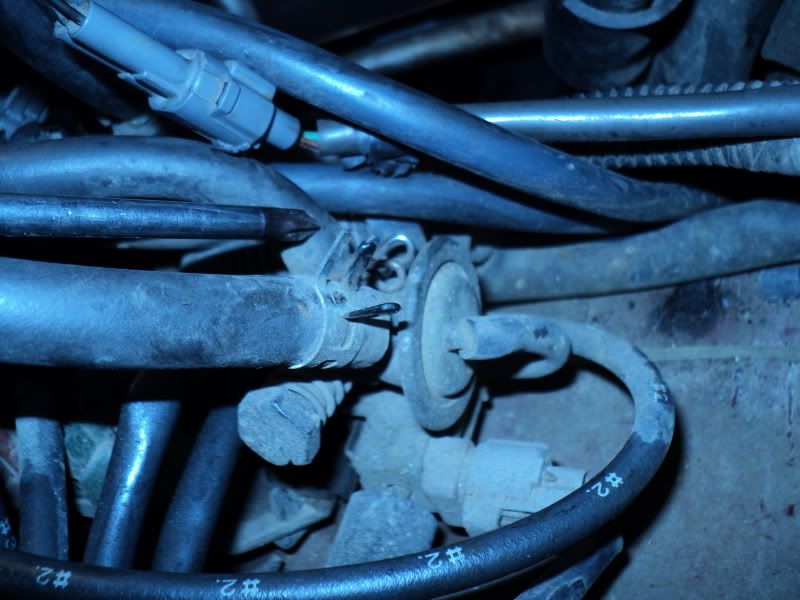
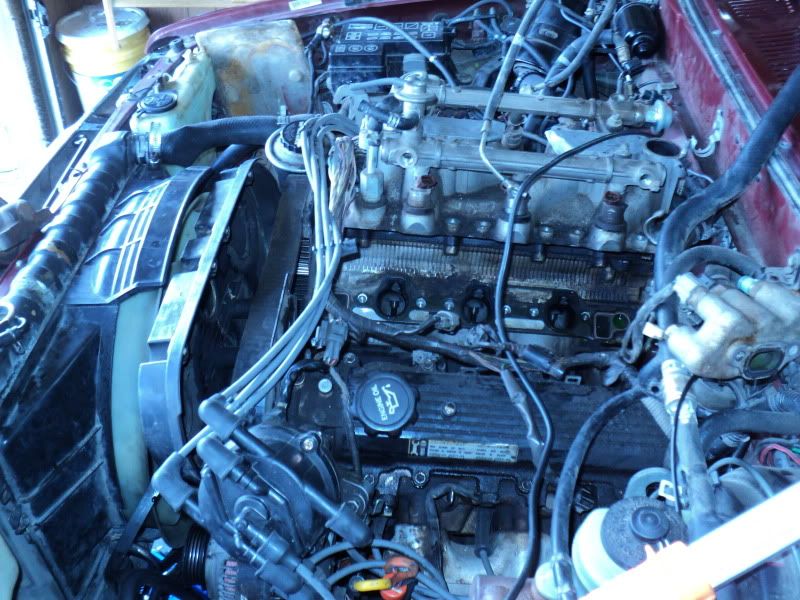
okay, I'm in the home stretch now! I got the engine all put back together except for the dizzy and lower radiator hose, but along the way i managed to loose the cold start fuel injector bolt? I think thats the name of it. Its the bolt that bolts on the little fuel line to the intake plenum. must have fell on the floor maybe? gonna try to hit the local yards and find one ASAP! thats all thats keeping me starting this thing up. I will post once i get it done and let ya know if she fired!
Oct 28, 2011 | 12:17 PM
#39
Thread Starter
Registered User
Joined: Sep 2011
Posts: 46
Likes: 0
From: Everett,WA
just got back and installed the fuel line bolt and got the dizzy installed and started the truck and i think the dizzy is 180* out but it started and ran rough but at least it started!!! i ran into a problem though. after running the truck for about 5 seconds i noticed that there was a fuel leak. i tracked down the leak and here is where it is coming from (pics). it seems to be coming out of one of the vac lines off the intake plenum. my question is, is there supposed to be fuel in any of these lines? im kinda stuck and need some advice. if this is supposed to be a fuel line then thats great, i will just put a better clamp on it to keep it from leaking. but to me it dont seem like fuel should be coming from any of these outlets. PLEASE HELP!!!