Cold Start injector intermittent, HELP!
#81
Registered User
Thread Starter
I appreciate the input. I will run some more hot/cold tests today. And work through your step by step. Also is there a better way to identify that is the correct vsv?
#82
Registered User
iTrader: (-1)
Get the engine warmed up and in the no start condition. Put the regulator vacuum line direct to the intake. See if it starts. Check the fuel pressure with and without the bypass.
Neither of these will tell you what the mystery wires are, what the fpu signals are in which states, if the wires aren't crossed/shorted/damaged.
You will have higher pressure when there is vacuum in the intake (partial throttle), this means more fuel usage and strain on the fuel pump.
#83
Registered User
Join Date: Sep 2007
Location: San Francisco East Bay
Posts: 8,254
Likes: 0
Received 822 Likes
on
649 Posts
..., jumper the fuel pump on, then pull a vacuum on the regulator with a hand pump. Note wether the fuel pressure goes up or not. If it doesn't go up the regulator is faulty. ...
You will have higher pressure when there is vacuum in the intake (partial throttle), this means more fuel usage and strain on the fuel pump.
You will have higher pressure when there is vacuum in the intake (partial throttle), this means more fuel usage and strain on the fuel pump.
The purpose of the FPR is to keep the pressure across the injectors constant. With vacuum in the plenum (idle), lower pressure. As the vacuum drops (pressure going up), the fuel pressure tracks and also rises.
#84
Registered User
iTrader: (-1)
Other way around. The fuel pressure goes down when you put vacuum on the FPR. http://web.archive.org/web/201501160...28fuelpump.pdf (vacuum is greater at idle than with engine stopped.)
The purpose of the FPR is to keep the pressure across the injectors constant. With vacuum in the plenum (idle), lower pressure. As the vacuum drops (pressure going up), the fuel pressure tracks and also rises.
The purpose of the FPR is to keep the pressure across the injectors constant. With vacuum in the plenum (idle), lower pressure. As the vacuum drops (pressure going up), the fuel pressure tracks and also rises.
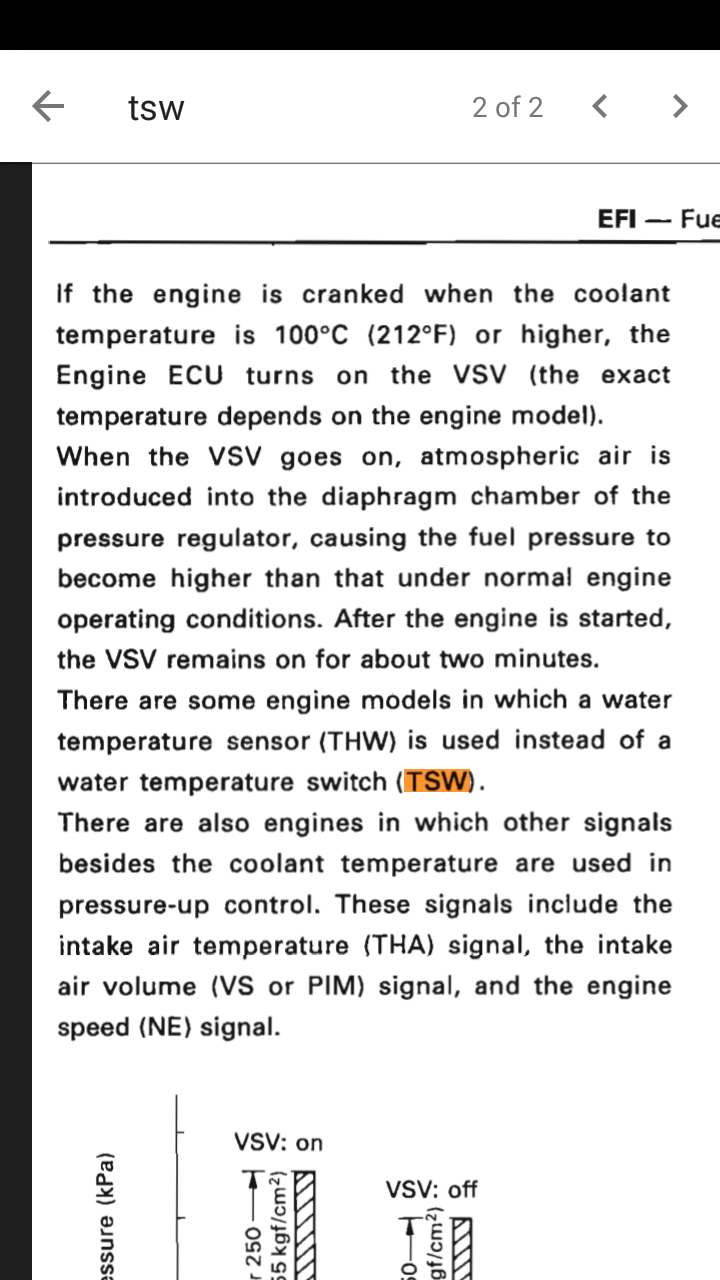
The FPU vsv switches the FPR vacuum to atmosphere pressure, as stated in the excerpt posted above.
#88
Registered User
Thread Starter
I checked the FPR vacuum and it seems to be operating normally.(pressure rises once disconnected) So just to clarify yall want me to pull the vacuum hose off the FPR and verify it has vacuum suction when it is in the no start mood?
#89
Registered User
Thread Starter
I seriously hope I start finding clues to this issue and that the weather warms up another 3-4 inches of snow this weekend and my garage heater only does so much before I get choked out. (not good also because i've been fighting a cold for 8 days now)
#90
Registered User
Thread Starter
This could be a possible solution but quite a lot of work to find a bad ground in the entire wire harness. I need to do more research on how to find a bad ground or bad wire.
#91
Registered User
iTrader: (-1)
I want you to sort out those loose/floppy wires, I'm curious why the vafm unplug works exactly.
You, at this point, just want it to bloody start and quit stranding you places.
It is an intermittent condition, these are never simple to diagnose. It may wind up being a simple fix but you have to find the issue first.
Yes check the state of the fpu, what is the pressure and vsv state (open/closed). If it's in the high state and not starting try without fpu active and if it's not high try it high.
#92
Registered User
iTrader: (-1)
Really not that hard to find by doing the voltage drop testing. I described this earlier. Measure each junction from one side to the other on the ground wire, when you find something non-zero clean it up wire brush it and cinch it down if it doesn't get better just move on down to the next junction.
#93
Registered User
Thread Starter
I want you to sort out those loose/floppy wires, I'm curious why the vafm unplug works exactly.
You, at this point, just want it to bloody start and quit stranding you places.
It is an intermittent condition, these are never simple to diagnose. It may wind up being a simple fix but you have to find the issue first.
Yes check the state of the fpu, what is the pressure and vsv state (open/closed). If it's in the high state and not starting try without fpu active and if it's not high try it high.
You, at this point, just want it to bloody start and quit stranding you places.
It is an intermittent condition, these are never simple to diagnose. It may wind up being a simple fix but you have to find the issue first.
Yes check the state of the fpu, what is the pressure and vsv state (open/closed). If it's in the high state and not starting try without fpu active and if it's not high try it high.
Last edited by YotaRick27; 02-12-2018 at 02:26 PM.
#94
Registered User
Thread Starter
So I measure the resistance from a part of the wire to the ground and if anything pops up like on 20k ohms lets say it reads .03 then I remove ground clean it and re-check to try and get it to 0?
#95
Registered User
iTrader: (-1)
Loose unknown wires are the two you out to that temp sender/switch on the t-stat housing. And any others you have just hanging in open air not connected to what they should be.
Voltage drop testing, you might want to reread the post before you didn't get any of the major points. You are not measuring the resistance directly on an unloaded wire, you measure the voltage as it is passing current. Resistance will only tell you that it is or isn't an open circuit in the case of a high-power circuit..
So again, voltage drop test. With you meter set to 20vdc. For example the battery connections are "suspect". Headlights on highbeam, dmm set to 20vdc, red probe to the negative battery terminal, black probe to the negative battery cable lug. Zero volts is a good reading, anything over (made up number) say half a volt means you need to clean and tighten the battery post and cable lug junction.
#96
Registered User
ON A COLD TRUCK
Verify E2 at all those sensors. Back probe E2 at each sensor (one sensor at a time is probably best). Turn ignition/key on. Turn digital volt/ohm meter (dvom) to D.C. Volt. Connect one dvom lead to the battery negative and the other lead to the back probed t pin at E2. Repeat at E2 for each sensor, write down dvom reading for each sensor. It's possible (slim but possible) you might not find any bad readings because the truck starts and runs fine cold...
ON A HOT TRUCK
Now, drive the truck around get it up to temp. Obviously you would like to get the symptoms to arise at your house or wherever you're working on this thing. Get these no hot start symptoms (or whatever they are, my brain is mush right now, long day) to happen. Then repeat the same process you did on the cold truck on the hot truck when it is experiencing the symptoms. Record all findings. The highest reading points to the wiring being bad around that sensor. Likely, if this is a voltage drop problem, all findings will be exacerbated on the hot truck because as temp goes up resistance goes up and voltage goes down or drops. Hence, voltage drop.
Anything registering on the dvom higher than a half volt proves voltage drop to ground. Find a reading higher than the others, then that sensor WIRING is closer to the issue than the others. You're looking for bad wiring. Specifically, resistance. Though wires may pass a continuity test they can still have high resistance with voltage applied (why ignition keyed on is so important), and that is what this voltage drop test is showing/proving, voltage drop to ground.
If you get through all of this and all dvom readings are 0 to .5 volts, then you can back probe E2 at the ECU, with ignition keyed on, dvom set to D.C. Volts, and verify that there is no voltage drop to ground in the ecu. Any reading over .5 volts implys there is voltage drop aka bad ecu.
If all of this proves futile, well at least you have somewhat wrapped your head around voltage drop tests. Which also work on the positive side of circuits too. Just not as common. Set dvom to D.C. Voltage, put one lead on the positive battery terminal and the other lead on the positive/power side of the circuit. It will come in handy at some point.
Last edited by RASALIBRE; 02-12-2018 at 06:34 PM.
#98
I found this site that says acceptable volt. drop is 3% =
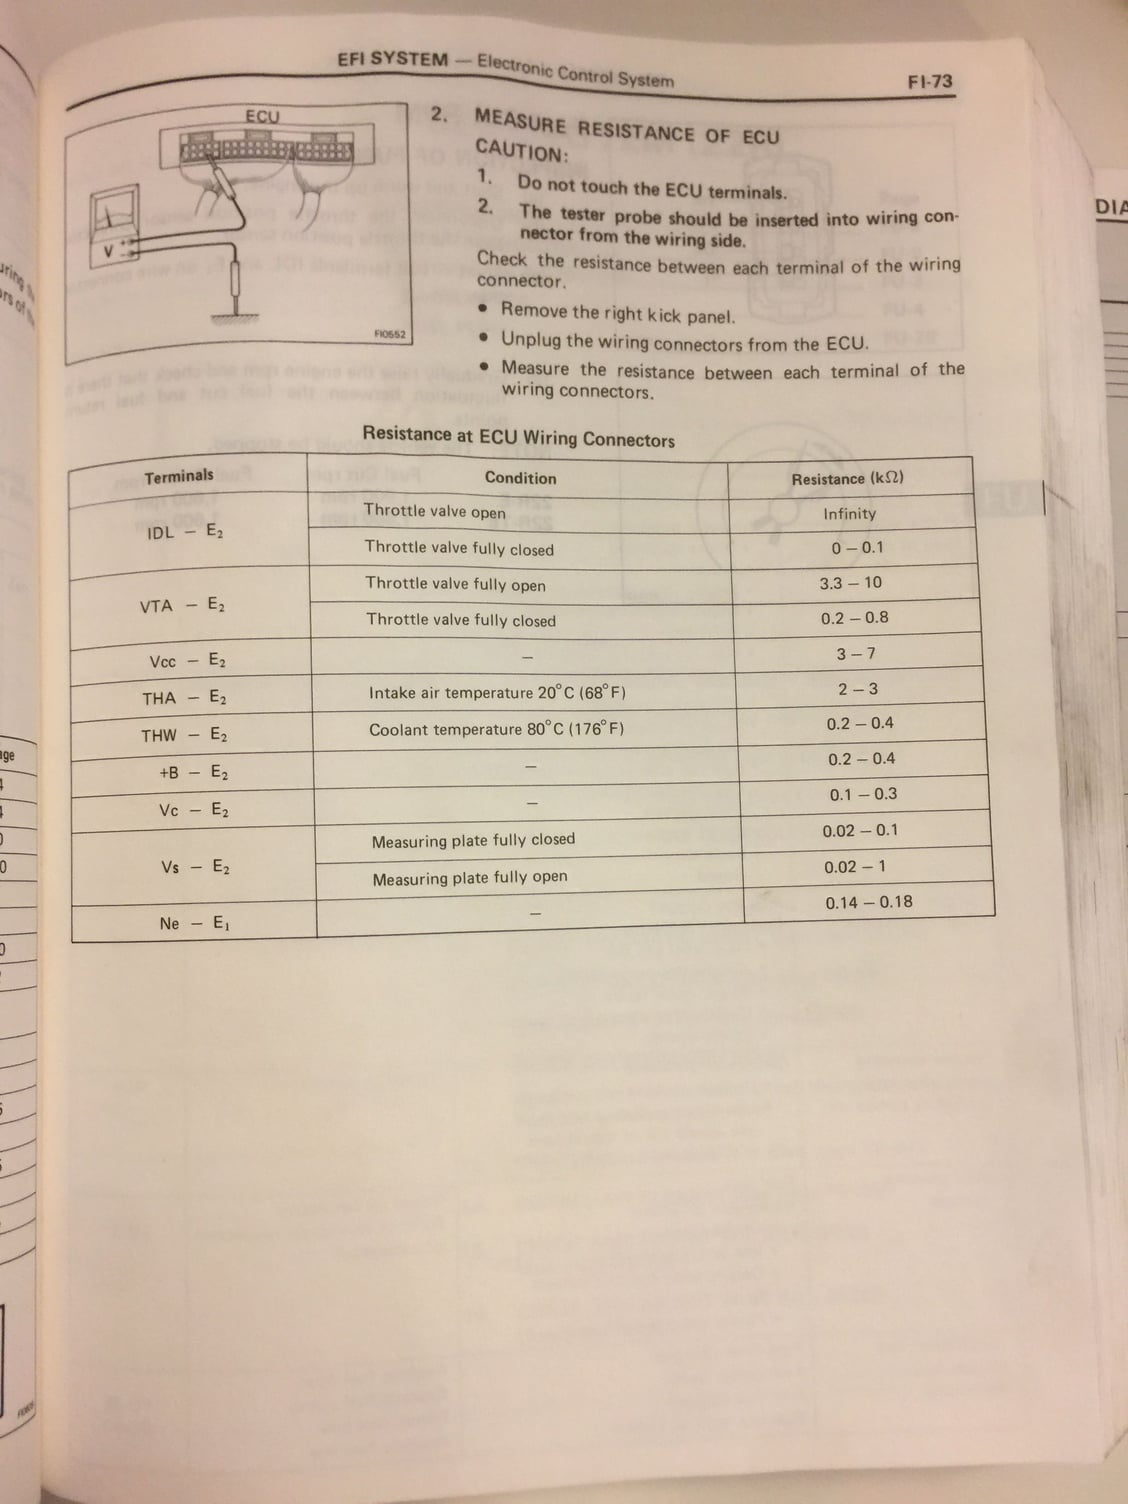
.36 V on our trucks. (https://www.engineeringtoolbox.com/a...uge-d_730.html).
I would shoot for that or less.
#99
Registered User
iTrader: (-1)
E1 to negative battery post, you can clean these. Battery cable to block and fender, ECU ground to intake.
E1 to E2, mostly internal to the ECU. Make sure both spade connectors are clean and tight.
This will clean up your ECU voltage some.
E2 to sensors, this is what Rasalibre is concerned with. You'll want to clean the sensor side spade. Note these are low current computer signals, something in the 10-50ma range. You won't see large variance unless there is wire damage between a hot and cold engine bay.
You can do the same voltage drop tests to the ECU power inputs. Clean up the connectors, again tighten the spade lugs. A big variable there will be voltage drop in the efi relay itself.
#100
Maybe Problem is From TOO LOW a resistance not high resistance.
Maybe Problem is From TOO LOW a resistance not high resistance.
Rick,
After you check that all connections are good, you may want to consider this:
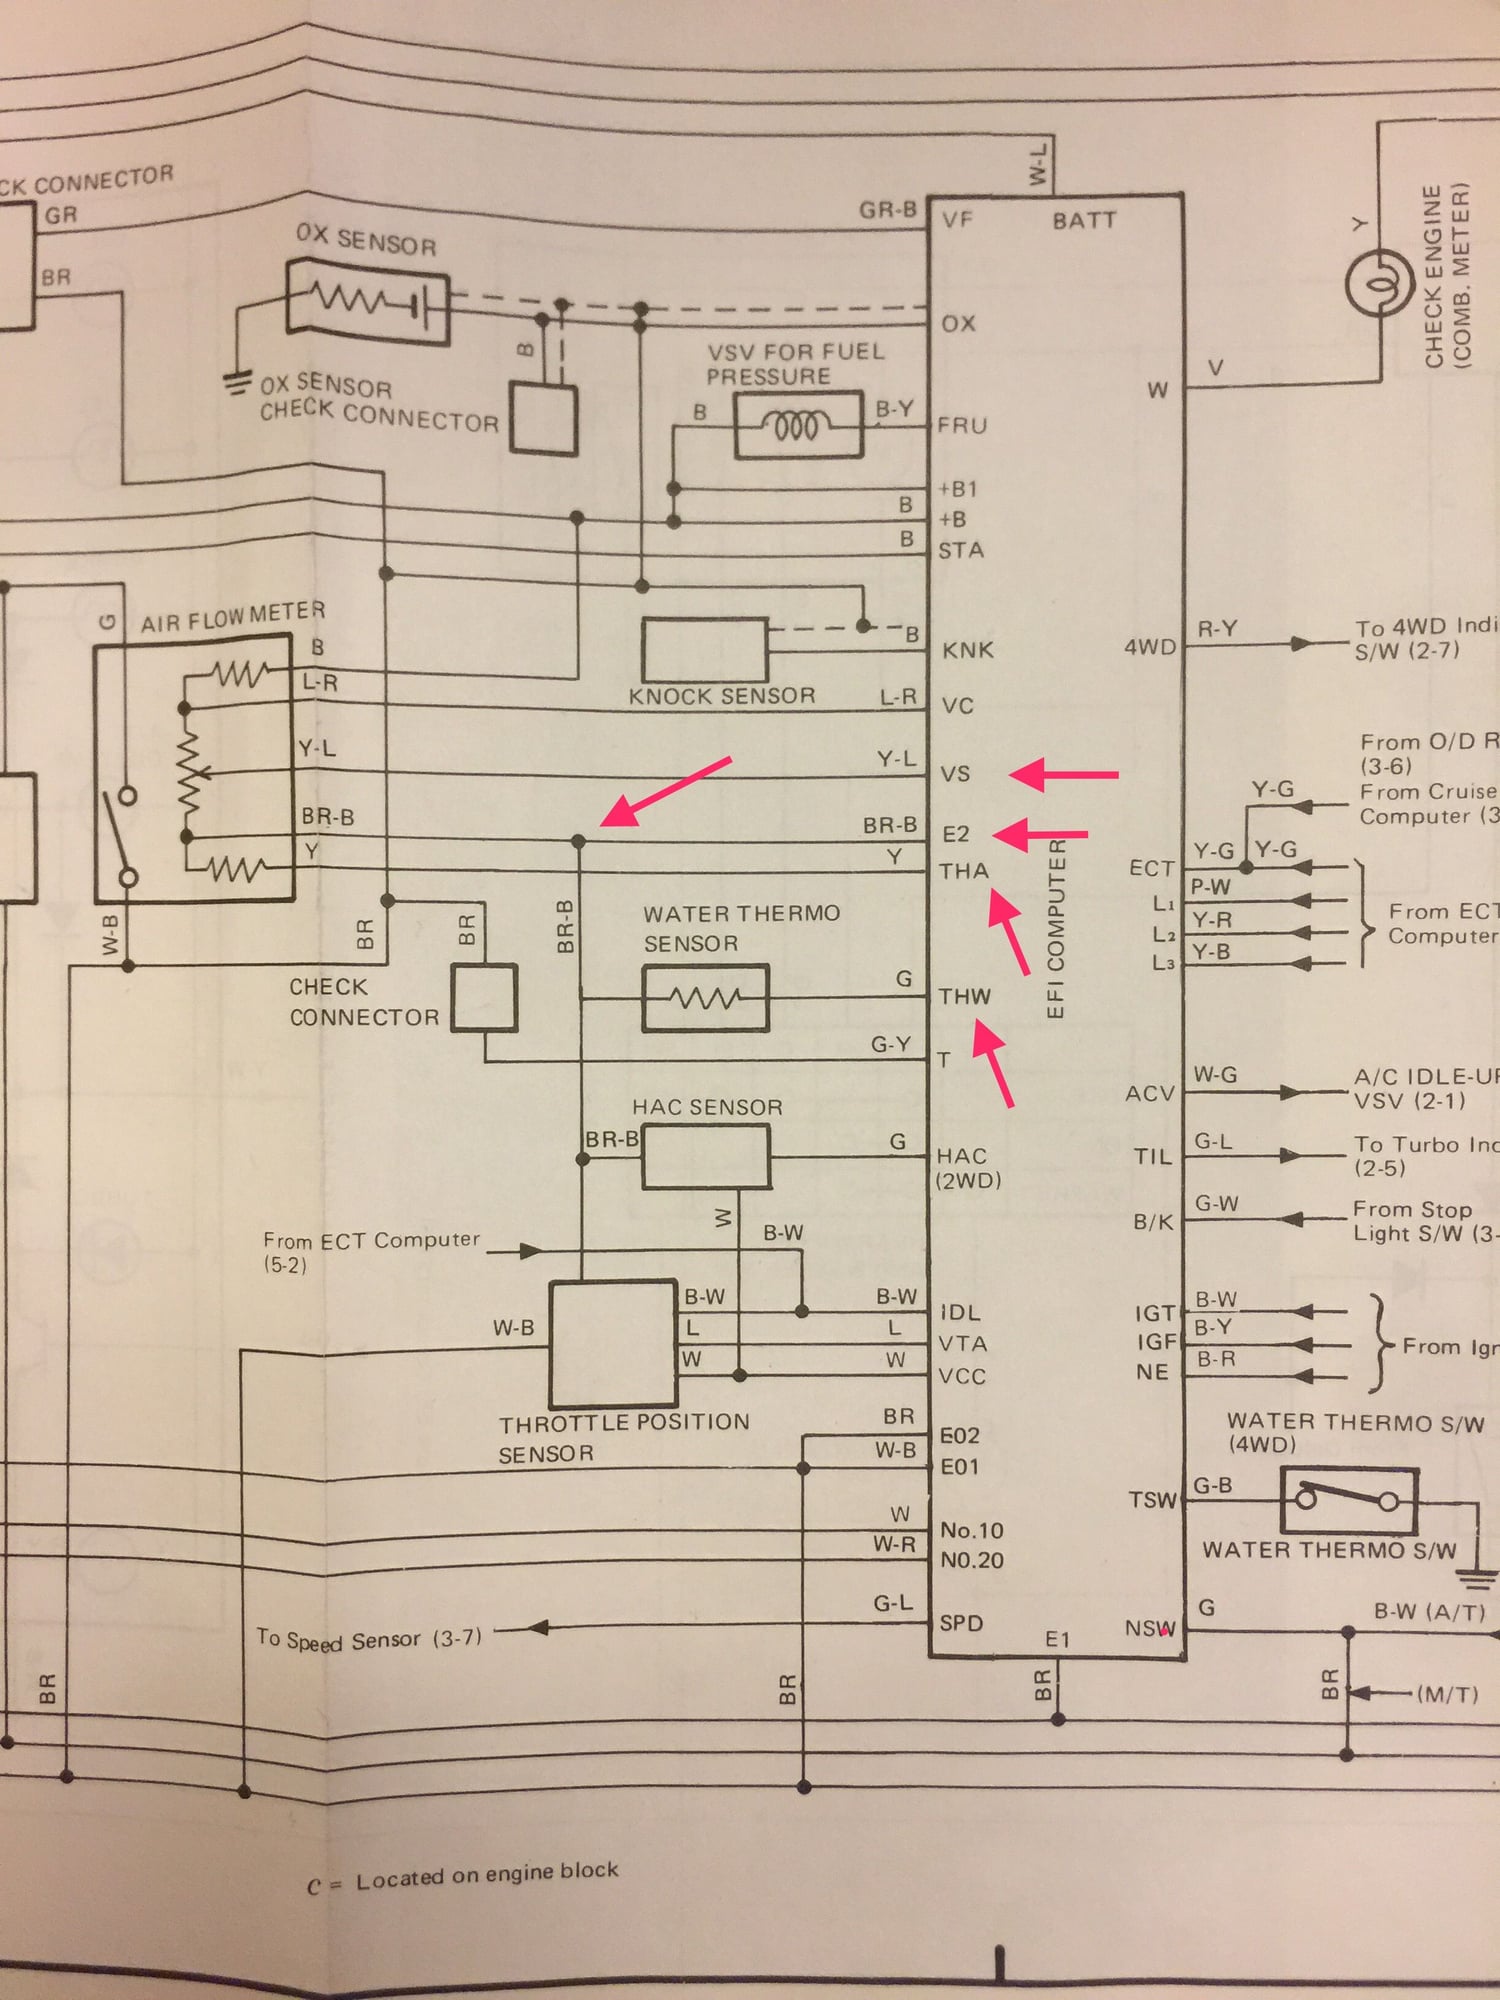
The variable resistances in the AFM act as variable voltage divider. Total 12V voltage is supplied by B+. The ECU reads voltages @ E2, THA, VS, LC pins produced by those variable resistance.
When the AFM is momentarily disconnected, 12V from B+ is disconnected, resulting in zero or low Voltage at E2, THA, VS, LC, and the truck starts.
Disconnecting the AFM also means resistances between E2, THA, VS, LC pins and AFM is infinity or HIGHER. This seems to make the truck start.
The above suggests that TOO LOW resistance or TOO HIGH a voltage at one of those test points is the cause of no start.
If I had this same problem, I would either:
1) Insert momentary normally-closed switch in those lines one at a time and see which line, when momentarily interrupted allows truck to start, OR
2) Monitor (as I mentioned earlier) voltages with little temporary volt-meters on dash, and observe which voltage ECU "likes". Sounds like a lot of work, of course, like putting vital signs monitors on a patient


