
Charchee's 89 Runner Windshield and Rust Repair
 Apr 22, 2017 | 09:54 AM
#1
Thread Starter
Registered User
Joined: Jul 2012
Posts: 893
Likes: 2
From: Arkansas
Charchee's 89 Runner Windshield and Rust Repair
I thought I'd go ahead and start me a thread on my windshield replacement and rust repair job so I could quit bugging Rad on his buildup page and to share my experience. I am taking it slow and haven't made all of my decisions yet so chime in if you have any input at all.
It's about time to go get the boat out of the barn where I winter it and my old Runner is going to loose it's carport space. It's been leaking into the passenger floorboard for a while now and it's already cost me one ECU. I'm gearing up for an engine swap and a more complete restoration so I need to get the leaks fixed before I go any further.
Here's where I'm at. Wednesday I removed the trim pieces to find what I already knew was back there. A bunch of rust and 30 years of debris. The trim pieces will come off but you are going to break the clips. Just be prepared for that and order clips if you want to reuse them. The top piece is tough to get off without bending it. I bent mine but wasn't planning on reusing it anyway. For those of you who don't know, a set of that trim will set you back more than the windshield job. Rust was everywhere but not that deep for the most part.
Thursday I set out to remove the glass. Didn't really care if I broke it but wanted to try and get it out in one piece for fun. Made me some good tools and they were working for a couple feet until I hit an imperfection in the back side of the glass with the curved puller I had made. As soon as I hit it I heard a crack. I was happy that it happened after five minutes rather than after five hours. Removal was easy after that. Cut a few inches. Pry up gently and slide a screwdriver or any kind of device in under it and move on down. Leave the screwdriver in and when you need to do it again, drop another screwdriver in. I used three or four. The more you use, the easier the next section will be.
Next, I found my worst rust spots and ground them down to see how deep they were. All were good except for the P-side upper corner where I ground through in three places. There wasn't rust on the back side of that area luckily. I was going to weld in a piece but my patch piece was going to be curved around three different angles and I was going to have to weld too close to the windshield mounting surface, which was still in good shape. I decided to try and fill the holes with a liquid metal filler but I'm not sure if I'm going to like the results. It is dry now so I'm about to go grind it down and check it out. I may still have to weld a patch in but only if I have to. My welder has been at work and someone has set it up to weld as hot as it will weld and I couldn't find my lighter wire and tips when I loaded it up yesterday.
Here are the questions I'm currently pondering on.
Rad said to grind out the weld seams and reseal them. I have the stuff to do it and I know I'm going to do it to the area around the outside edge of the windshield but do I need to lay down that sealant under the windshield's epoxy? Will that prevent it's adhesion? Not sure what I'm going to do on that yet. Any advice would be great.
I picked up two different types of rust kill / seal / prime products. I'll read about them and make a post on them shortly. Then we'll decide what to do in that regard. One of them is gloss black when it dries. I may use it and paint my whole channel with it. I wanted to fill the pits but I'm thinking glazing putty will not be as good of a rust barrier as the sealant. I may be able to use the putty over the sealant. I'll just have to read.
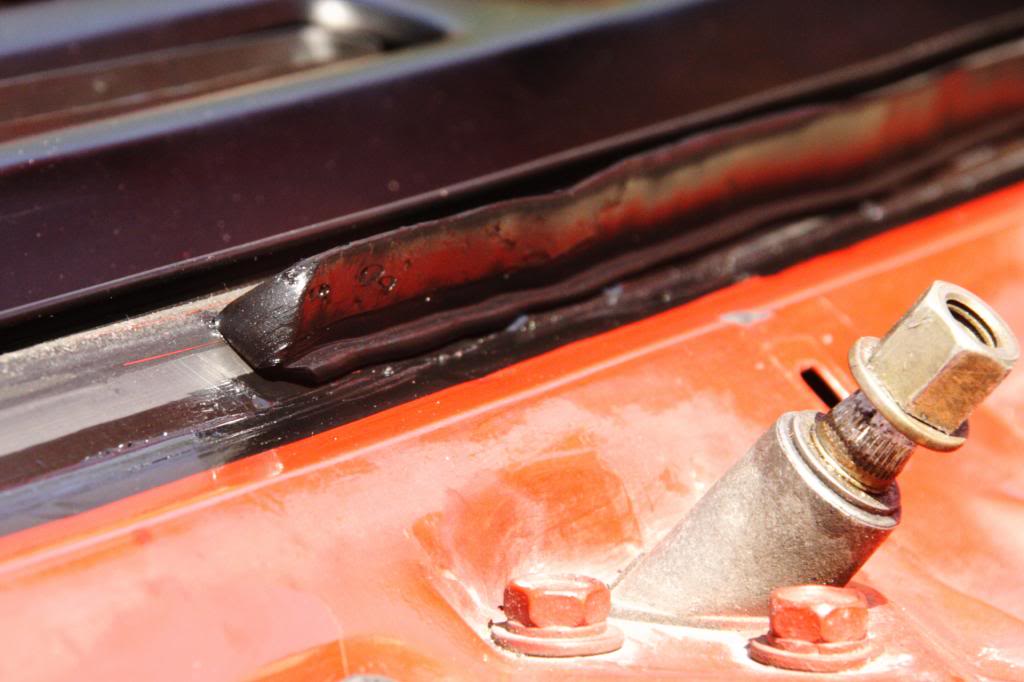
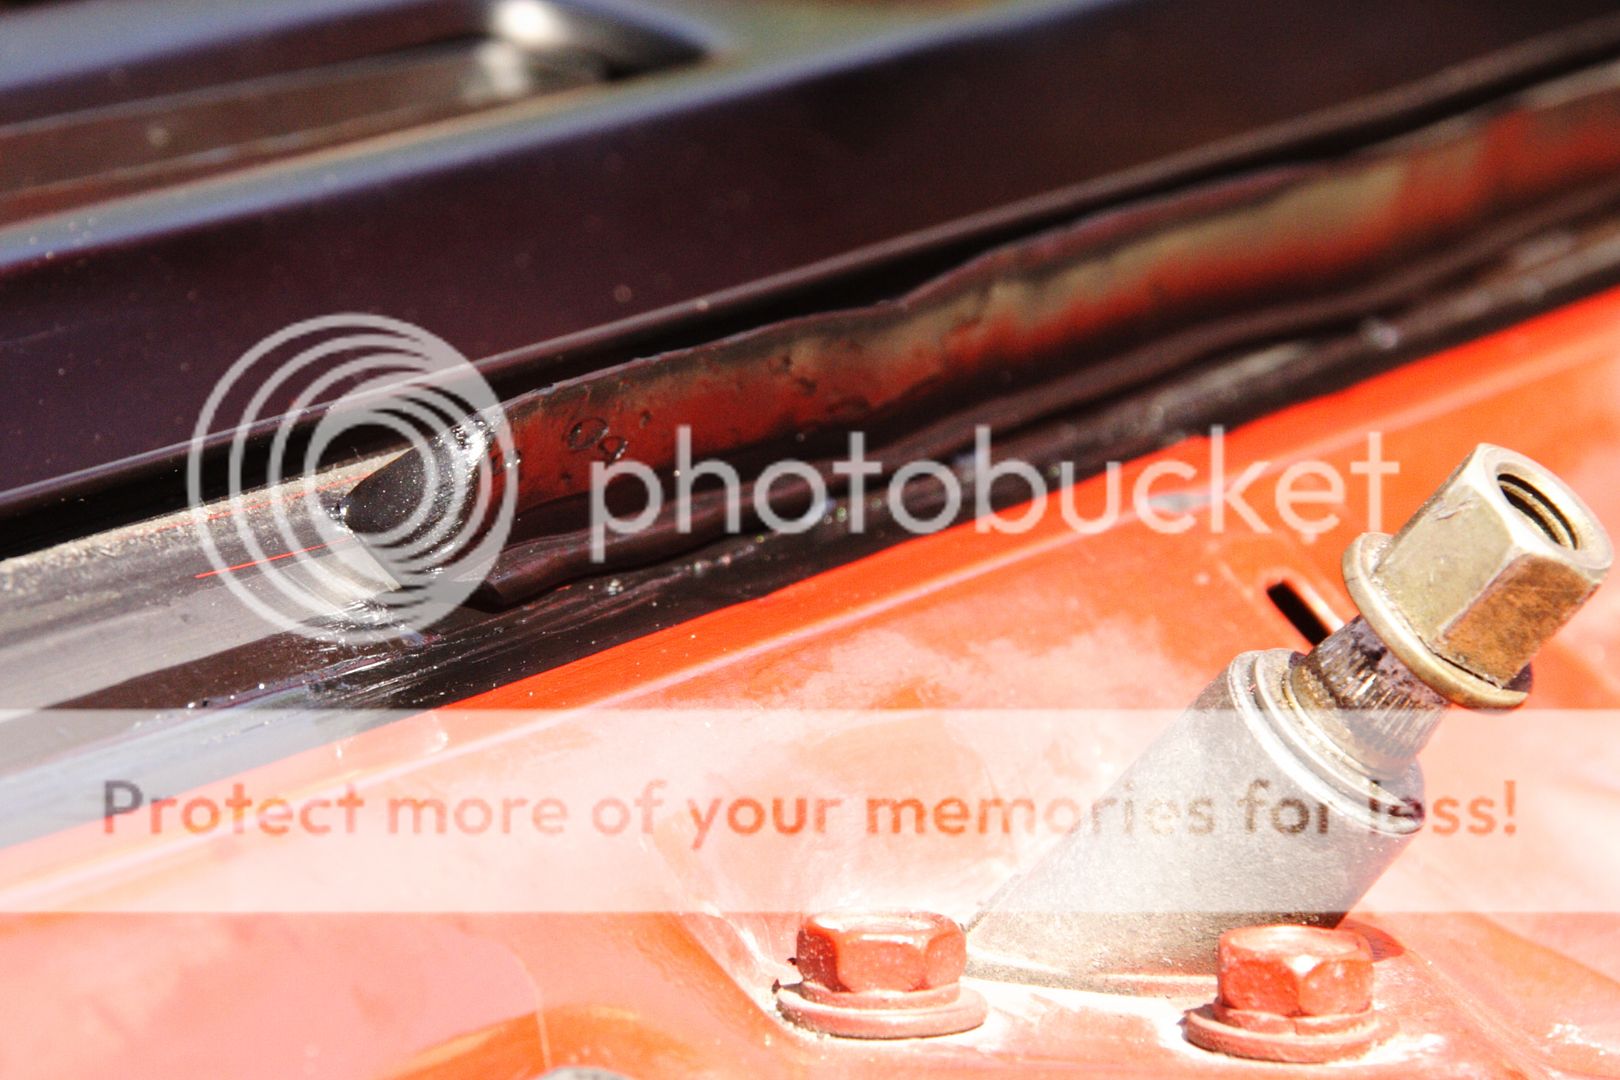
I didn't get a good before picture but I'll start my pictures at the point where I had first knocked off a good deal of the rust.
It's about time to go get the boat out of the barn where I winter it and my old Runner is going to loose it's carport space. It's been leaking into the passenger floorboard for a while now and it's already cost me one ECU. I'm gearing up for an engine swap and a more complete restoration so I need to get the leaks fixed before I go any further.
Here's where I'm at. Wednesday I removed the trim pieces to find what I already knew was back there. A bunch of rust and 30 years of debris. The trim pieces will come off but you are going to break the clips. Just be prepared for that and order clips if you want to reuse them. The top piece is tough to get off without bending it. I bent mine but wasn't planning on reusing it anyway. For those of you who don't know, a set of that trim will set you back more than the windshield job. Rust was everywhere but not that deep for the most part.
Thursday I set out to remove the glass. Didn't really care if I broke it but wanted to try and get it out in one piece for fun. Made me some good tools and they were working for a couple feet until I hit an imperfection in the back side of the glass with the curved puller I had made. As soon as I hit it I heard a crack. I was happy that it happened after five minutes rather than after five hours. Removal was easy after that. Cut a few inches. Pry up gently and slide a screwdriver or any kind of device in under it and move on down. Leave the screwdriver in and when you need to do it again, drop another screwdriver in. I used three or four. The more you use, the easier the next section will be.
Next, I found my worst rust spots and ground them down to see how deep they were. All were good except for the P-side upper corner where I ground through in three places. There wasn't rust on the back side of that area luckily. I was going to weld in a piece but my patch piece was going to be curved around three different angles and I was going to have to weld too close to the windshield mounting surface, which was still in good shape. I decided to try and fill the holes with a liquid metal filler but I'm not sure if I'm going to like the results. It is dry now so I'm about to go grind it down and check it out. I may still have to weld a patch in but only if I have to. My welder has been at work and someone has set it up to weld as hot as it will weld and I couldn't find my lighter wire and tips when I loaded it up yesterday.
Here are the questions I'm currently pondering on.
Rad said to grind out the weld seams and reseal them. I have the stuff to do it and I know I'm going to do it to the area around the outside edge of the windshield but do I need to lay down that sealant under the windshield's epoxy? Will that prevent it's adhesion? Not sure what I'm going to do on that yet. Any advice would be great.
I picked up two different types of rust kill / seal / prime products. I'll read about them and make a post on them shortly. Then we'll decide what to do in that regard. One of them is gloss black when it dries. I may use it and paint my whole channel with it. I wanted to fill the pits but I'm thinking glazing putty will not be as good of a rust barrier as the sealant. I may be able to use the putty over the sealant. I'll just have to read.
I didn't get a good before picture but I'll start my pictures at the point where I had first knocked off a good deal of the rust.
Apr 22, 2017 | 12:31 PM
#2
Registered User
iTrader: (1)
Joined: Apr 2009
Posts: 13,381
Likes: 100
From: I live in New Tripoli Pa out in the woods
Now that is some rust .
Since very few take pictures yours is about the worse I have seen .
The dirt gets in there behind the trim every time it rains it soaks up water and takes so very long to dry
Since very few take pictures yours is about the worse I have seen .
The dirt gets in there behind the trim every time it rains it soaks up water and takes so very long to dry
Apr 22, 2017 | 12:45 PM
#3
Thread Starter
Registered User
Joined: Jul 2012
Posts: 893
Likes: 2
From: Arkansas
Do you know what I should do about those seams that are in the corner? I have them ground out to bare metal. Don't know if I should us 3M seam sealant now or let the urethane fill them under the window. I know I'm going to seal them outside of the window.
Apr 22, 2017 | 12:45 PM
#4
Lol. Man I was just about to say that it didn't look bad compared to the mess on my 80. I agree welding new metal in is best or a donor piece, but most of The truck are bad in the same spots. Have you used lead before? It's perfect for this job if you have.
Apr 22, 2017 | 03:51 PM
#5
Registered User


Joined: Mar 2012
Posts: 7,133
Likes: 683
Just came across this. These guys must know what they're doing... http://www.phoenixglass.biz/collisio...eld-repair.htm
WEBSITE SAYS:
"Do Not! use body filler on the pinchweld where glass urethane adhesive will be applied. Small irregularities in the flange surface will be filled when the adhesive bead is applied.
Do Not! Use “Spray Can Etching Primer” on the PinchWeld.It WILL NOT! dry to the point where the windshield Primer will not emulsify it..."
Applies to seam sealer, too. I agree with this, and this is what I did at the seams (like the one on upper corner). The less layers to fail the better. To be safe, if seam sealing is desired, work the seam sealer INTO the seam, not outside or on the seam. Then prep the exposed metal for rust-proofing.
ANOTHER GOOD WEBSITE:
http://www.spdweb.net/index.php/know...d-a-windshield
Last edited by RAD4Runner; Apr 22, 2017 at 03:59 PM.
Apr 22, 2017 | 04:25 PM
#6
Thread Starter
Registered User
Joined: Jul 2012
Posts: 893
Likes: 2
From: Arkansas
Thank you sir. I am notoriously slow and patient with projects but this one has taken me longer than it did to swap drivetrains from my 3Rd Gen parts runner to my 02 plus build a harness and relay system to run the diff lock. I have just sanded, thought, grinded, thought, cleaned, thought etc for 20 hours on this thing. I finally just made decisions and proceeded. Was just about to do some spraying. Fortunately, what you said above is what I had decided on. Less layers to fail, the better. I even taped off the bare metal window mount surface. The glass shop said that they were going to sand off whatever I put on there and use their priming method anyway so that was a no-brainer. I have the day off monday so, since I was invited by the shop to participate, I think I will see what they do that makes them so confident. I'll post whatever methods they use that we haven't thought of..


Trending Topics
Apr 22, 2017 | 06:10 PM
#8
Registered User
Joined: Aug 2016
Posts: 596
Likes: 70
No seam sealer, first layer should be allmetal to fill, then POR or regular paint (sounds like your windshield shop is painting anyway, that's good)
You're moving fast compared to me, mine took months, lol
Surprised you broke your windshield
A firm push from the inside and mine popped right out
You're moving fast compared to me, mine took months, lol
Surprised you broke your windshield
A firm push from the inside and mine popped right out
Last edited by magnet18; Apr 22, 2017 at 06:13 PM.
Apr 22, 2017 | 06:53 PM
#9
Registered User
Joined: Mar 2012
Posts: 7,133
Likes: 683
Below is how the bead looks like. Plenty thick so it will fill any dips and bumps left by seams or welding on the pinch-weld.
Last edited by RAD4Runner; Apr 22, 2017 at 06:54 PM.
Apr 22, 2017 | 09:16 PM
#10
Thread Starter
Registered User
Joined: Jul 2012
Posts: 893
Likes: 2
From: Arkansas
I don't think windshield shop paints the pinch-weld. What the service rep said was "priming". The tech would scuff whatever the pinch-weld finish is, apply primer for the urethane windshield adhesive (not for paint), then a bead of adhesive.
Below is how the bead looks like. Plenty thick so it will fill any dips and bumps left by seams or welding on the pinch-weld.
Below is how the bead looks like. Plenty thick so it will fill any dips and bumps left by seams or welding on the pinch-weld.
I also bought a can of Locktite's version of a rust sealer/primer that I was going to use until I read the directions and saw that it said, in capitals, that there must be some surface rust present for it to work right. By that point I had it all down to bare metal.
Anyway, that's all for tonight. Here are some pics of my repaired corner along with pictures of the products and a spec sheet on the Zero Rust. I'll peel the paint in the morning and show you what the coating looks like.
Apr 23, 2017 | 04:47 AM
#11
Registered User
Joined: Aug 2016
Posts: 596
Likes: 70
I don't think windshield shop paints the pinch-weld. What the service rep said was "priming". The tech would scuff whatever the pinch-weld finish is, apply primer for the urethane windshield adhesive (not for paint), then a bead of adhesive.
Below is how the bead looks like. Plenty thick so it will fill any dips and bumps left by seams or welding on the pinch-weld.
Below is how the bead looks like. Plenty thick so it will fill any dips and bumps left by seams or welding on the pinch-weld.
I sure wish they would have done the painting. I sanded everything down to metal, taped off the pinch weld along with the roof and a pillars outside of the channel, then used a rust sealer/coating called Zero Rust on all of the areas of the channel that won't be covered by the windshield. I asked the folks at Crowe's what they had for rust. They showed me this stuff and then let me out back to see a piece of rusty expanded metal they had sprayed several months ago and left out there in the mud. The coated side was smooth dry and had no bubbles or chips in it. I tried to claw off some of it and even smacked it with a piece of metal a couple times and it never gave up. It's about $11 a can. It went on well and looks good. They said that it will look oxidized after several months but it can be top coated. I'll address that later if needed.
I also bought a can of Locktite's version of a rust sealer/primer that I was going to use until I read the directions and saw that it said, in capitals, that there must be some surface rust present for it to work right. By that point I had it all down to bare metal.
Anyway, that's all for tonight. Here are some pics of my repaired corner along with pictures of the products and a spec sheet on the Zero Rust. I'll peel the paint in the morning and show you what the coating looks like.
Apr 23, 2017 | 10:41 AM
#12
Thread Starter
Registered User
Joined: Jul 2012
Posts: 893
Likes: 2
From: Arkansas
Give me a shout when you get close to ready and I'll give you a better review of the product after some time.
By the way Ray, I found a stupid rust spot in my outside passenger a pillar inside the rain gutter. Didn't look like hardly anything but I feel like when I grind it out, it's going to go all the way through. Any advice for removing the sealant and fixing the issue? I'll get a picture later.
By the way Ray, I found a stupid rust spot in my outside passenger a pillar inside the rain gutter. Didn't look like hardly anything but I feel like when I grind it out, it's going to go all the way through. Any advice for removing the sealant and fixing the issue? I'll get a picture later.
Apr 23, 2017 | 10:50 AM
#13
Registered User
Joined: Aug 2016
Posts: 596
Likes: 70
Give me a shout when you get close to ready and I'll give you a better review of the product after some time.
By the way Ray, I found a stupid rust spot in my outside passenger a pillar inside the rain gutter. Didn't look like hardly anything but I feel like when I grind it out, it's going to go all the way through. Any advice for removing the sealant and fixing the issue? I'll get a picture later.
By the way Ray, I found a stupid rust spot in my outside passenger a pillar inside the rain gutter. Didn't look like hardly anything but I feel like when I grind it out, it's going to go all the way through. Any advice for removing the sealant and fixing the issue? I'll get a picture later.
Re the gutters on mine
I wirebrushed all the old sealant out and painted the seam. If you can see the rust it probably runs down between the 2 pieces of metal pretty bad
They're just spot welded on before the truck is painted and the 30yr old seam sealer lets water in eventually
After brushing out the sealant, any paint in the gutters ran right down into the door jam
Apr 23, 2017 | 11:01 AM
#14
Registered User
Joined: Mar 2012
Posts: 7,133
Likes: 683
I have little rust spot below the A-pillar gutter, too. Will do same approach as Magnet18. I will be very generous with seam seal on that gutter.
Meaning, it's a good idea to brush on some rust converter into that gap and let it dry, steel brush exposed metal around the seam and apply seam sealer. I mention exposed metal because the Dynatron I'm using is best applied to textured, bare metal.
After brushing out the sealant, any paint in the gutters ran right down into the door jam
Last edited by RAD4Runner; Apr 23, 2017 at 11:32 AM.
Apr 23, 2017 | 11:20 AM
#15

Headed out the door for work so this is going to be short and I didn't read everything above in depth..
The cab roof to pillar joint is best filled with "lead", old school style braze in stuff.
My gutter seals didn't require any grinding, it all flaked right out with a small screw driver because it was dryer than the Sahara.
The cab roof to pillar joint is best filled with "lead", old school style braze in stuff.
My gutter seals didn't require any grinding, it all flaked right out with a small screw driver because it was dryer than the Sahara.
Apr 23, 2017 | 12:17 PM
#16
Thread Starter
Registered User
Joined: Jul 2012
Posts: 893
Likes: 2
From: Arkansas
Headed out the door for work so this is going to be short and I didn't read everything above in depth..
The cab roof to pillar joint is best filled with "lead", old school style braze in stuff.
My gutter seals didn't require any grinding, it all flaked right out with a small screw driver because it was dryer than the Sahara.
The cab roof to pillar joint is best filled with "lead", old school style braze in stuff.
My gutter seals didn't require any grinding, it all flaked right out with a small screw driver because it was dryer than the Sahara.
I'll see if I can get those gutter seals out. I have new 3M sealer for that area.
Apr 23, 2017 | 12:52 PM
#17
TP Tools has a decent kit on sale right now. I just reordered 5lbs of lead for another project for $65 shipped.
I am also working on a retrofit for the windshield frame that will build the entire opening up to flush fit new glass with very little (3/64) gap, and no gasket required.
I am also working on a retrofit for the windshield frame that will build the entire opening up to flush fit new glass with very little (3/64) gap, and no gasket required.
Last edited by flg8r22; Apr 23, 2017 at 12:59 PM. Reason: Additional info
Apr 24, 2017 | 08:14 AM
#18
Thread Starter
Registered User
Joined: Jul 2012
Posts: 893
Likes: 2
From: Arkansas
Windshield Installed
Well I got everything ready last night and got the windshield installed this morning.
I painted the outer channel with the zero rust product to seal the pits that were left in there. I had removed all of the rust but there is always a minute amount of the reaction left at the bottom of any pit, no matter how clean they appear. Better safe than sorry. The Zero Rust was available in several colors. I chose gloss black and I'm glad I did. The windshield tech, who was the owner of the place, used an adhesive primer called 5504G. The stuff was thick, black and shiny and went on with an applicator like you get in PVC primer jars. He said it was a rust sealant as well as a fine primer. He said I could have used it on the outer channel where I did the Zero Rust and I believe it after seeing it go on the pinch weld area. We tried to use a universal molding but neither of us liked it for the potential to allow trapped debris as well as the way it would affect the seal to the metal. (I'll elaborate on this if necessary.) Anyway, he applied a thick layer of sealant and stuck her in there. The sealant pressed out beautifully and I could see a perfect seal through the glass. The black Zero Rust on the outer channel and the black sealant look great in there and I am very pleased with the simple glass to metal installation. Here are some pics of the final product.
I painted the outer channel with the zero rust product to seal the pits that were left in there. I had removed all of the rust but there is always a minute amount of the reaction left at the bottom of any pit, no matter how clean they appear. Better safe than sorry. The Zero Rust was available in several colors. I chose gloss black and I'm glad I did. The windshield tech, who was the owner of the place, used an adhesive primer called 5504G. The stuff was thick, black and shiny and went on with an applicator like you get in PVC primer jars. He said it was a rust sealant as well as a fine primer. He said I could have used it on the outer channel where I did the Zero Rust and I believe it after seeing it go on the pinch weld area. We tried to use a universal molding but neither of us liked it for the potential to allow trapped debris as well as the way it would affect the seal to the metal. (I'll elaborate on this if necessary.) Anyway, he applied a thick layer of sealant and stuck her in there. The sealant pressed out beautifully and I could see a perfect seal through the glass. The black Zero Rust on the outer channel and the black sealant look great in there and I am very pleased with the simple glass to metal installation. Here are some pics of the final product.
Apr 24, 2017 | 12:56 PM
#20
Thread Starter
Registered User
Joined: Jul 2012
Posts: 893
Likes: 2
From: Arkansas
Thanks to everyone who participated. I consider this project a group effort. That's what I love about Yotatech. The pros have the experience of having done something a dozen times. We have the advantage of the experiences of a dozen different people who have done the job and are willing to share what they did right as well as what they did wrong.
Thanks again. Now on to the rusted spot in the rain gutter. Maybe one day I'll have all of the leaks fixed.
Thanks again. Now on to the rusted spot in the rain gutter. Maybe one day I'll have all of the leaks fixed.


