
Bleeder-Dude's Official 22re Engine Rebuild Thread - TONS OF PICTURES!!!

 May 12, 2009 | 05:46 PM
#123
Thread Starter
Contributing Member
Joined: Feb 2008
Posts: 12,248
Likes: 33
From: Lake City, Fl
lmao, tell me about man... I think it was way overdue for this overhaul...
I pulled the head off, and my sister happen to walk in the garage when I pulled it, and she seen it and goes "Oh my god, that was still running?!?!?"
lmao
I was just like "it's a Toyota sis, what do you expect"

I pulled the head off, and my sister happen to walk in the garage when I pulled it, and she seen it and goes "Oh my god, that was still running?!?!?"
lmao
I was just like "it's a Toyota sis, what do you expect"


 May 12, 2009 | 06:10 PM
#126
Thread Starter
Contributing Member
Joined: Feb 2008
Posts: 12,248
Likes: 33
From: Lake City, Fl


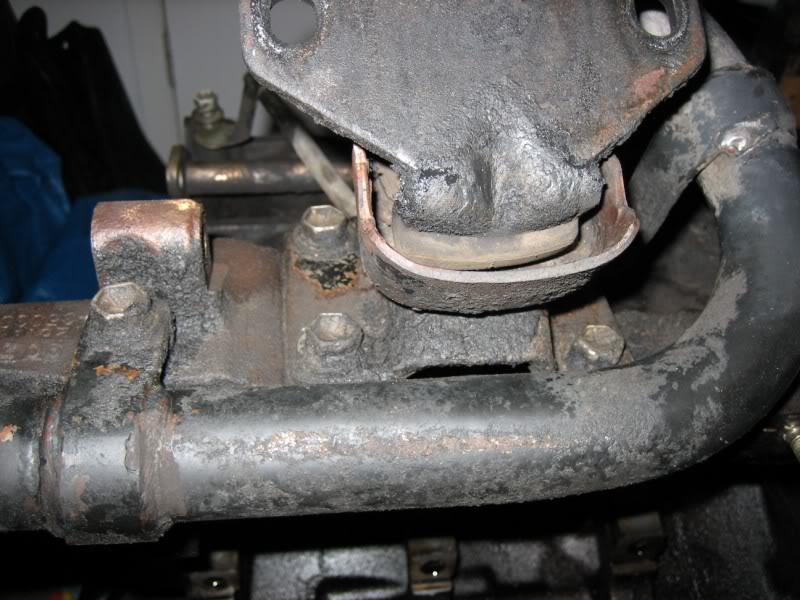
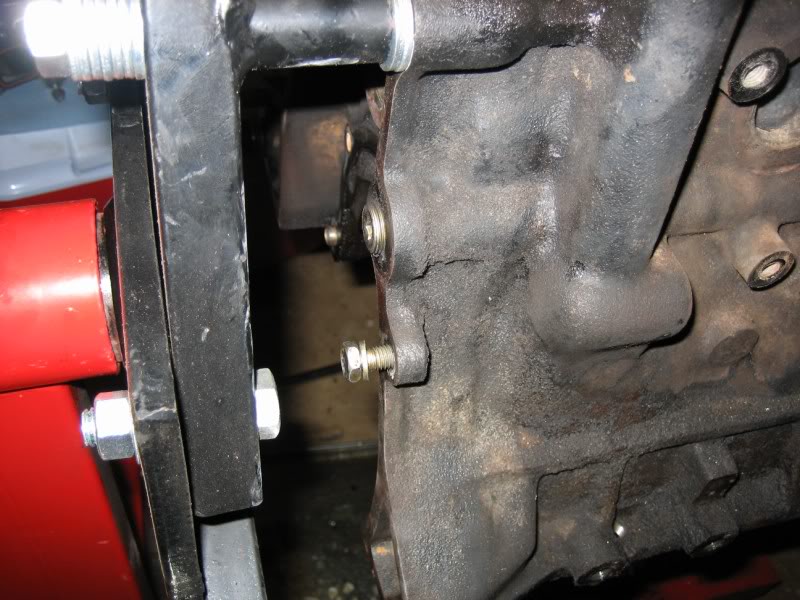
this is a SLOOOOWWWWW process for me, and it's driving me crazy... I only get about 2-3 hours a day after work to tinker with it... and today I had even less time because of a meeting after work that I had forgotten about untill I actually got to work today, lol. So I didn't even get home untill about 7:30pm... but at least now the motor's in the garage and I don't have to be out in direct sunlight wrenching on it, and it's away from the mesquitos once the sun goes down, so I might be able to wrench on it a little later into the afternoon

thank ya brotha!
Last edited by iamsuperbleeder; May 12, 2009 at 06:11 PM.
May 12, 2009 | 07:38 PM
#131
Thread Starter
Contributing Member
Joined: Feb 2008
Posts: 12,248
Likes: 33
From: Lake City, Fl
I WAS going to just have the machine shop do it, but I just went ahead and picked up some plastigauge, and I'm going to do the darn thing's myself; how hard can it be; all I have to do is follow torque sequence and specs, and she'll be good to go

plus, now I really want to do it myself, just to say I did
the only thing I MAY have them mess with is the wrist pins... but we'll see; I can probably do them with the press at work
I'll save the plane ticket $$$ and use it on the motor

Thanks!
Last edited by iamsuperbleeder; May 12, 2009 at 07:43 PM.
May 12, 2009 | 09:18 PM
#133
Contributing Member
Joined: Dec 2008
Posts: 2,505
Likes: 16
From: San Jose ,Ca
Looking good bleeder, THe machine shop should have no problem removing the bolts . I had one break off flush with the block , got the block back looking like new no problems. The wrist pins .. just heat them up and press them out staight.
May 13, 2009 | 07:27 PM
#136
Thread Starter
Contributing Member
Joined: Feb 2008
Posts: 12,248
Likes: 33
From: Lake City, Fl
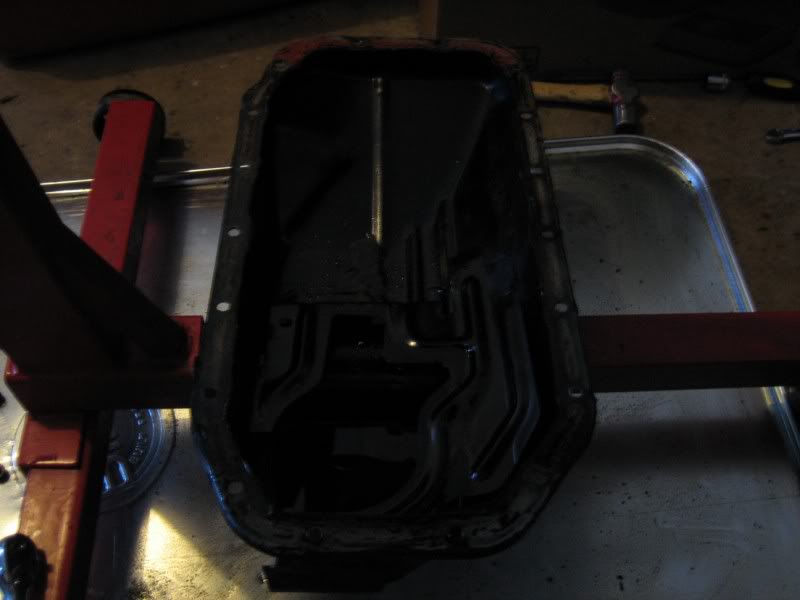
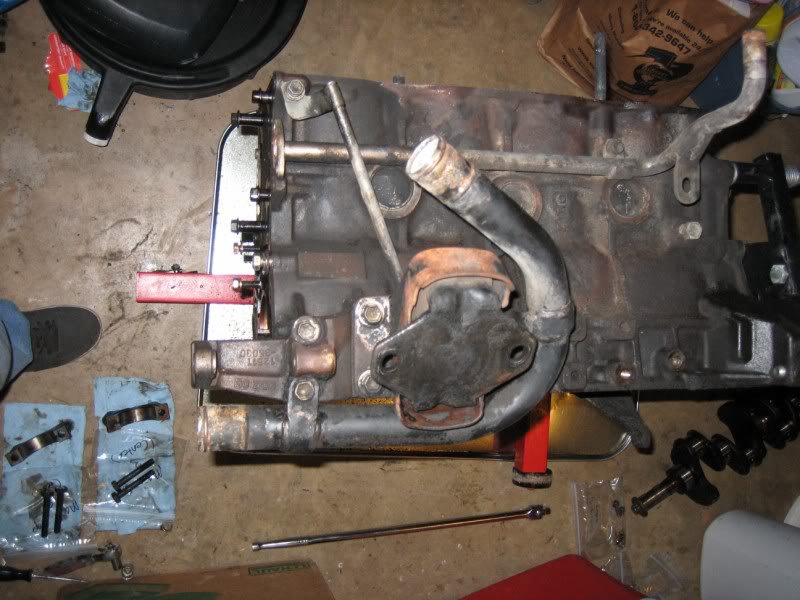
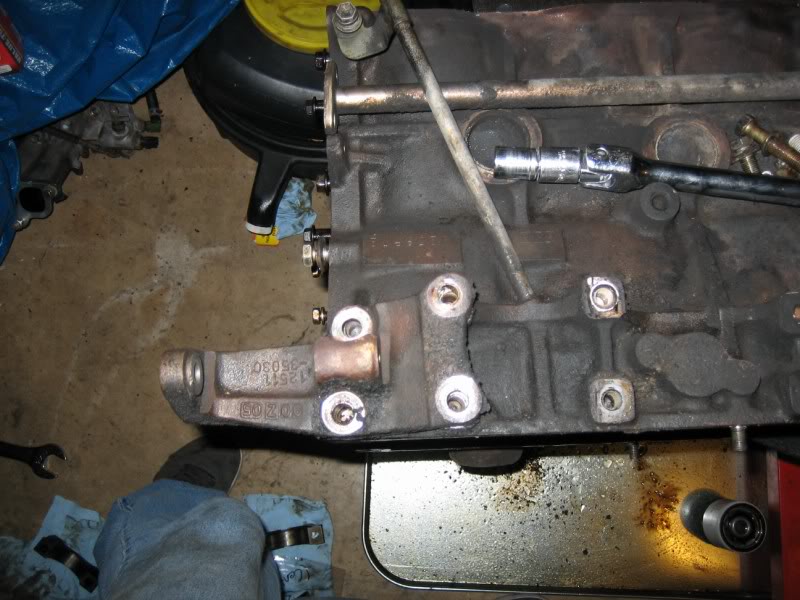
well, I didn't get home untill about 6:15pm today (I seem to be putting more and more overtime hours in at work... oh well, it's good, cause I'll need the extra $$$ in a little while when I call up LCE to place my order, lol ), but I got in, ate some food, then headed to the garage for a little more tearing down 
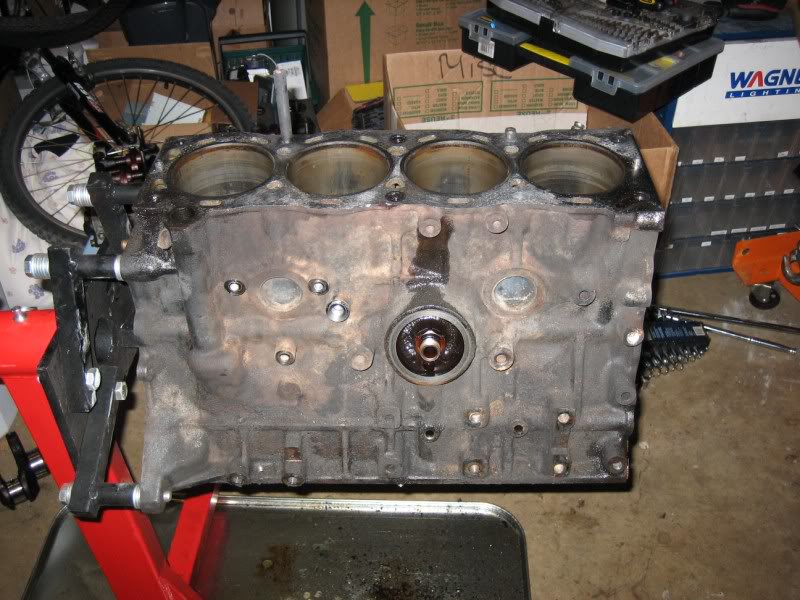
started off by getting the oil pan out of the way, to expose the guts
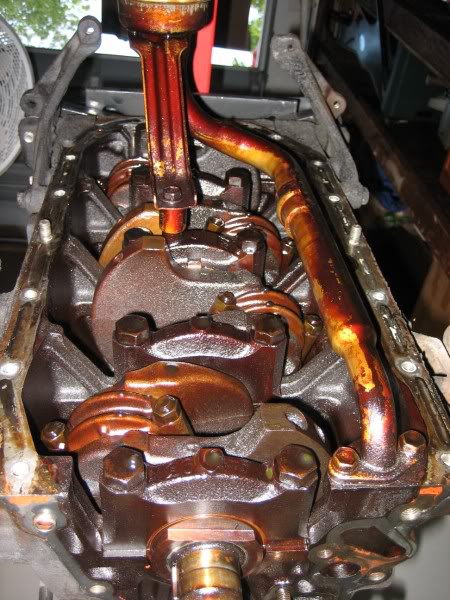
taking a little peak, cause I'm impatient, lol
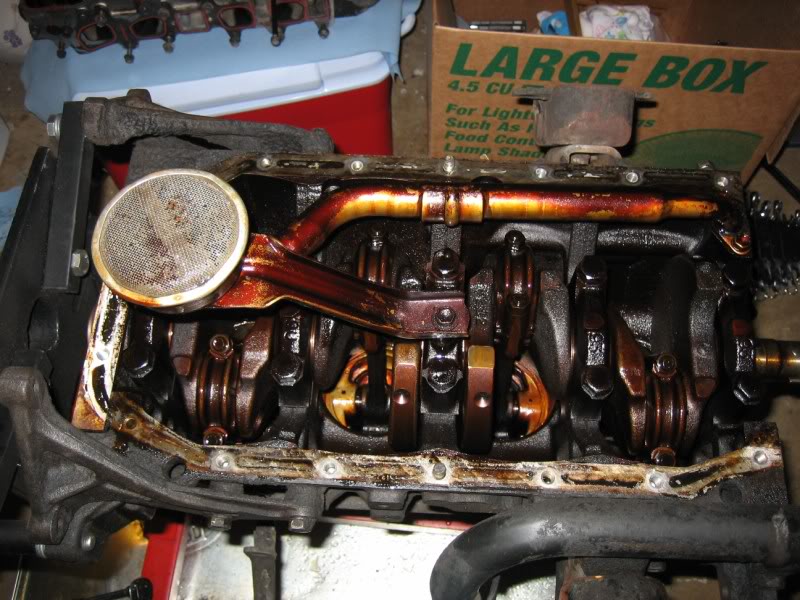
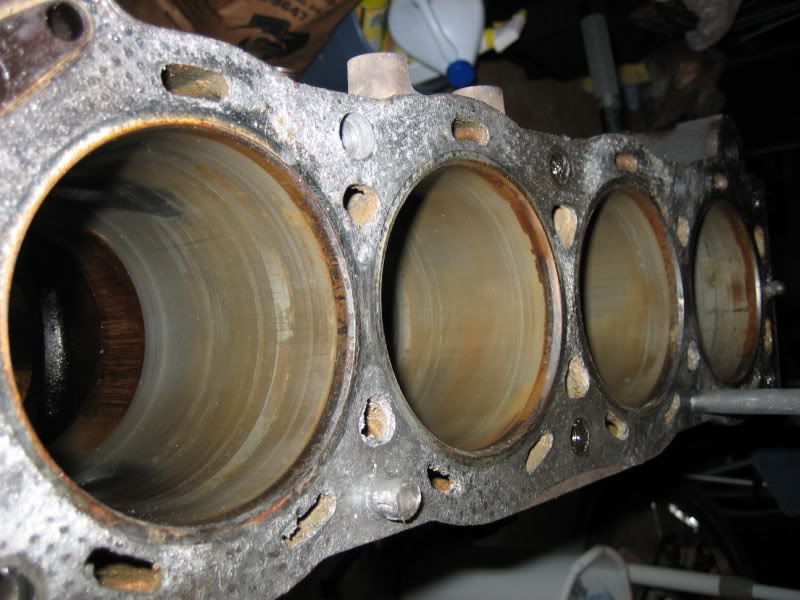
then removed all the rods and pistons
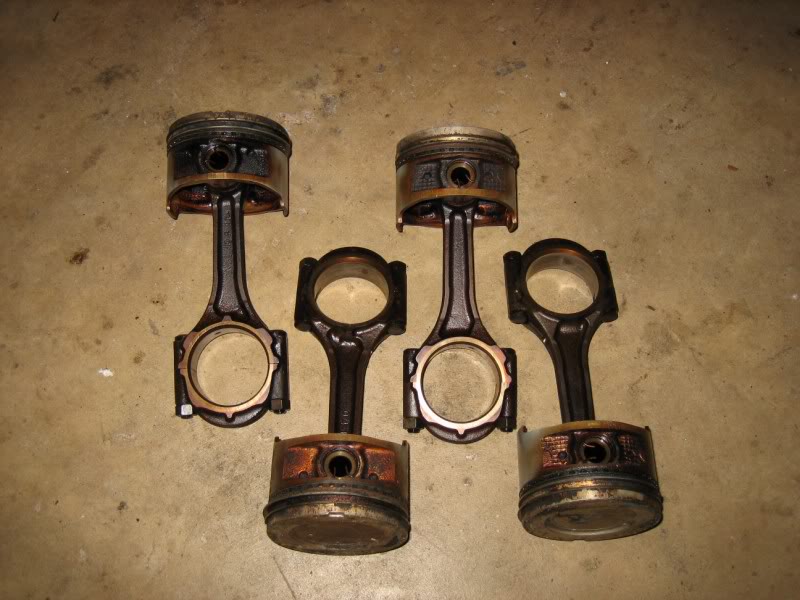
which showed a little wear and tare on the sides

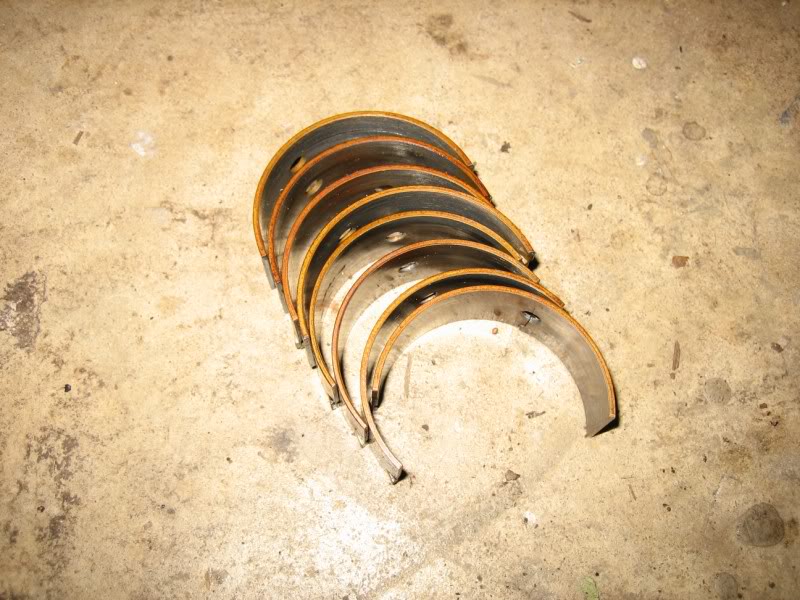
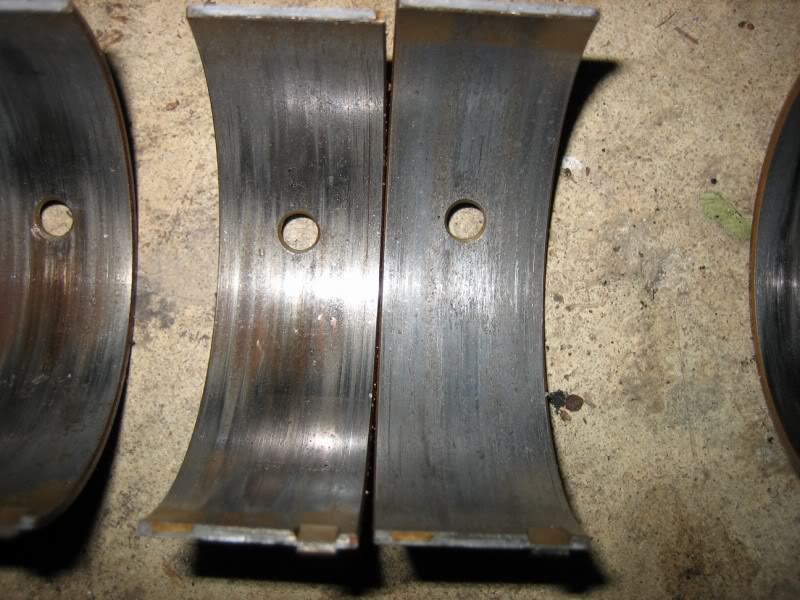
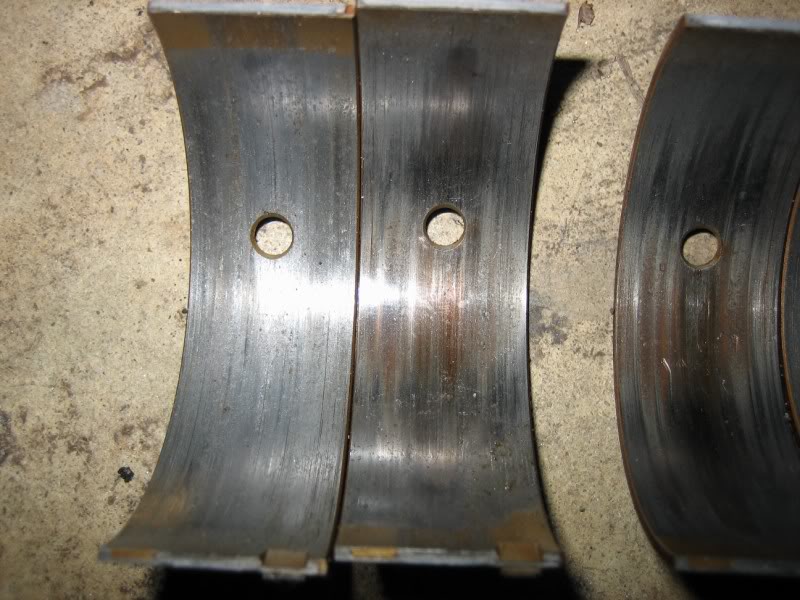
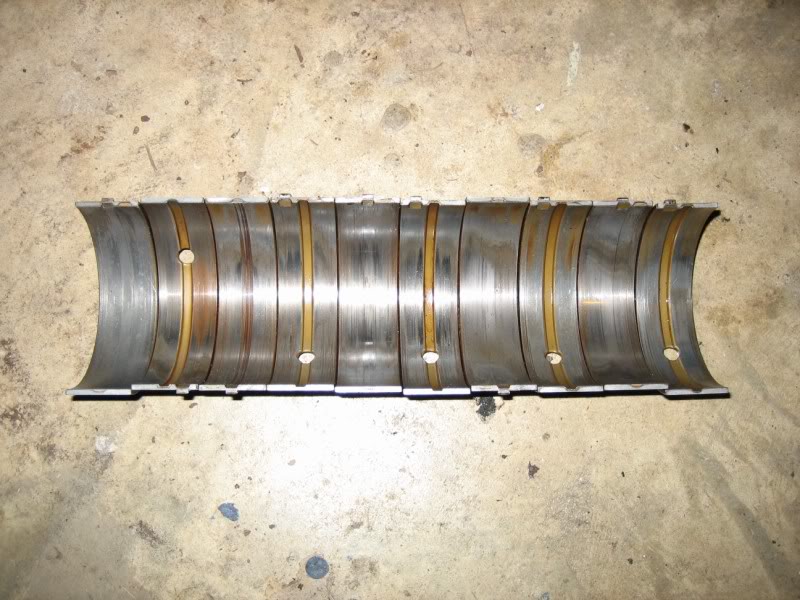
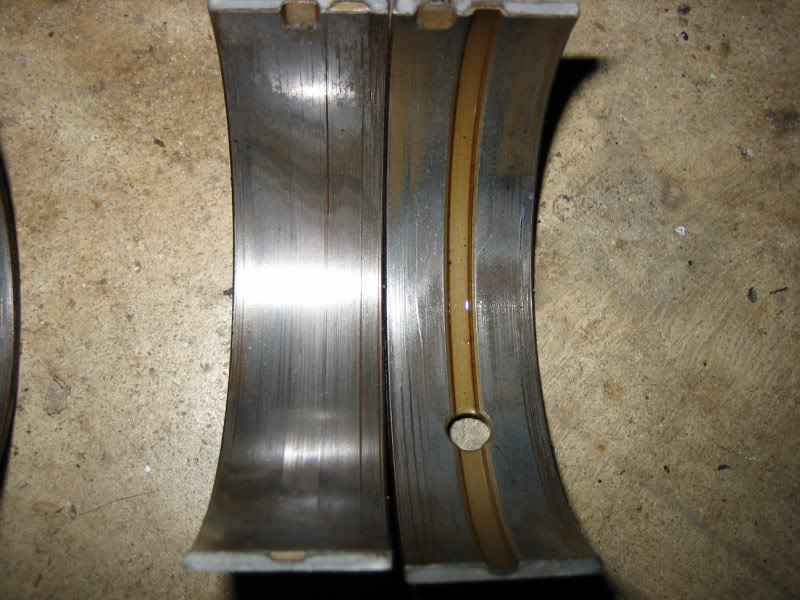
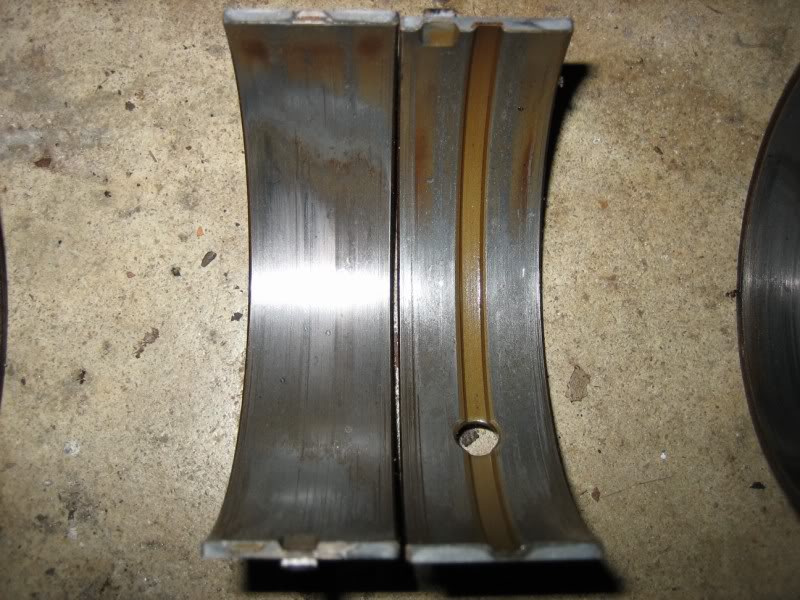
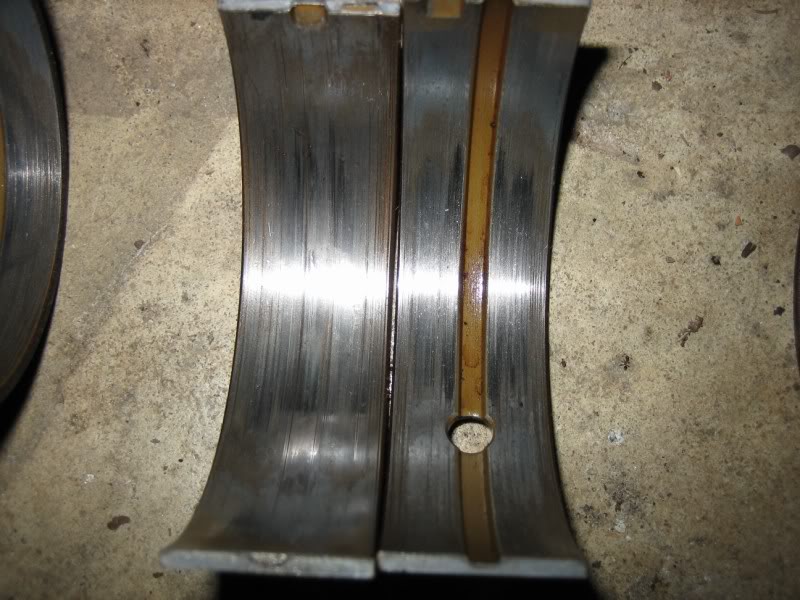
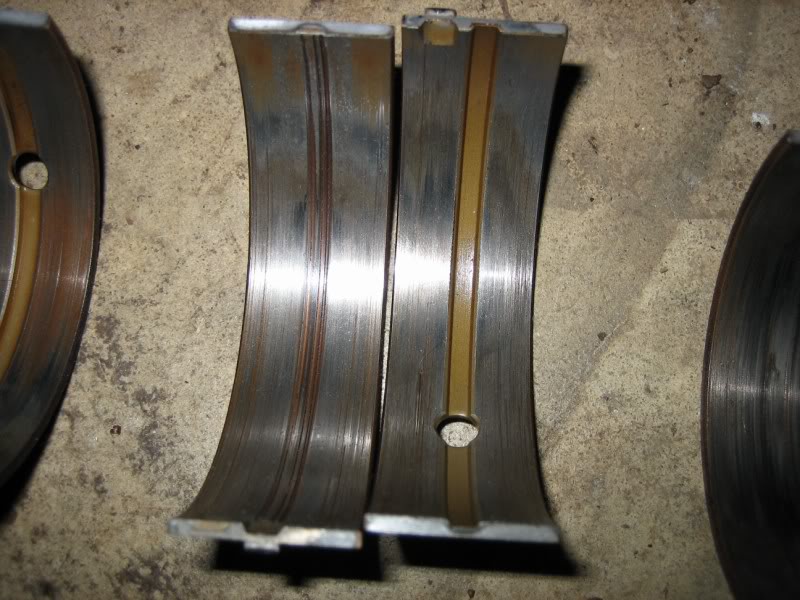
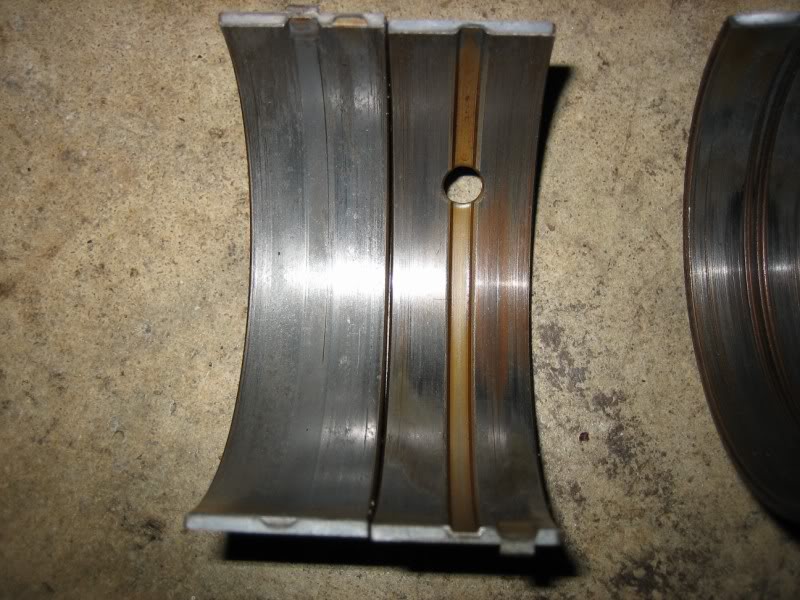
lmao, and the rod bearings, well, they DEFINATELY are shot...
one of the bearings on the #1 cylinder was actually cracked!
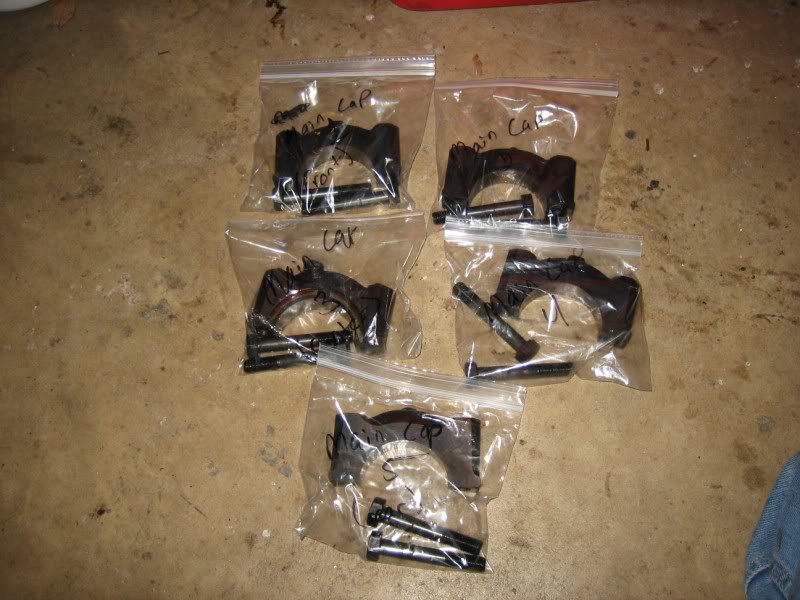
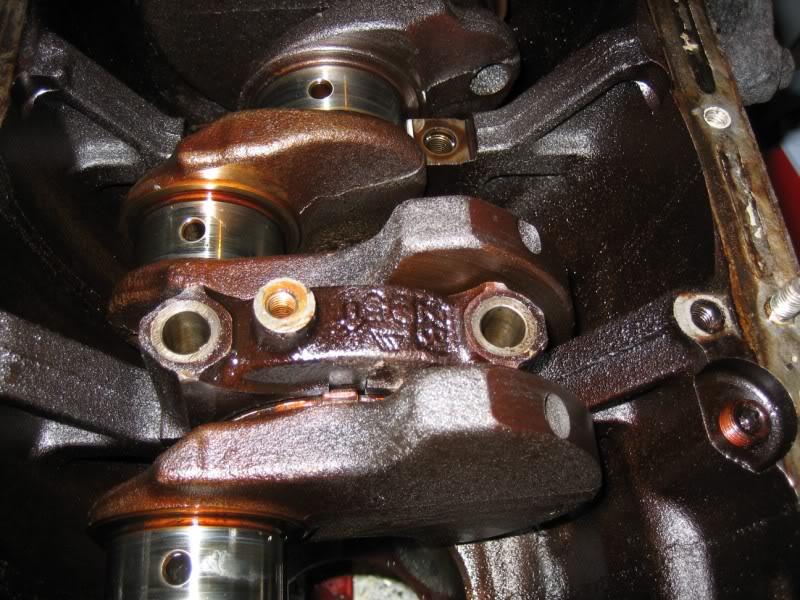
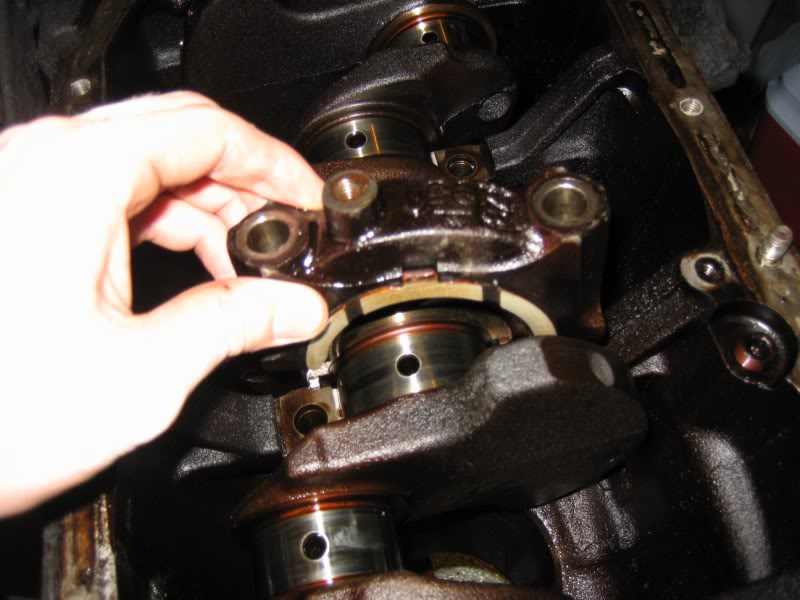
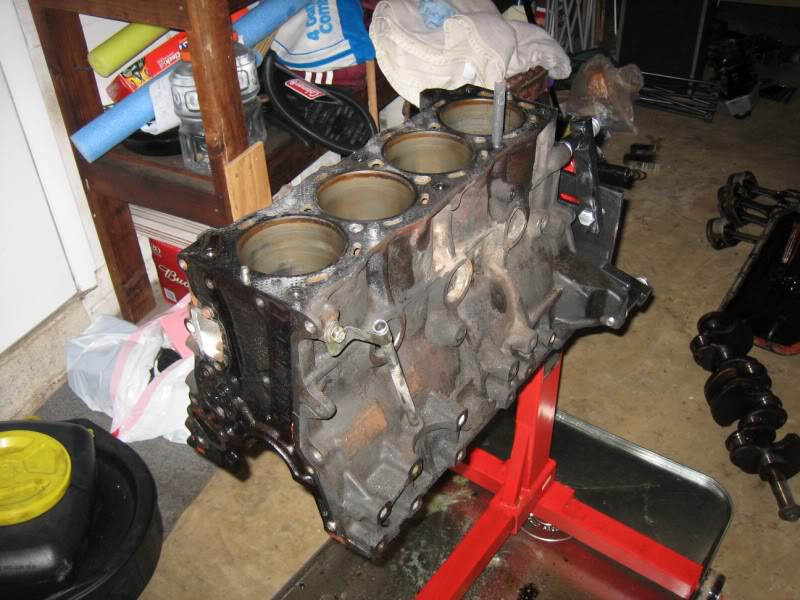
and then pulled the crank main caps
and at least I kept these organised I'm actually keeping all of the important motor stuff in baggies and labeled
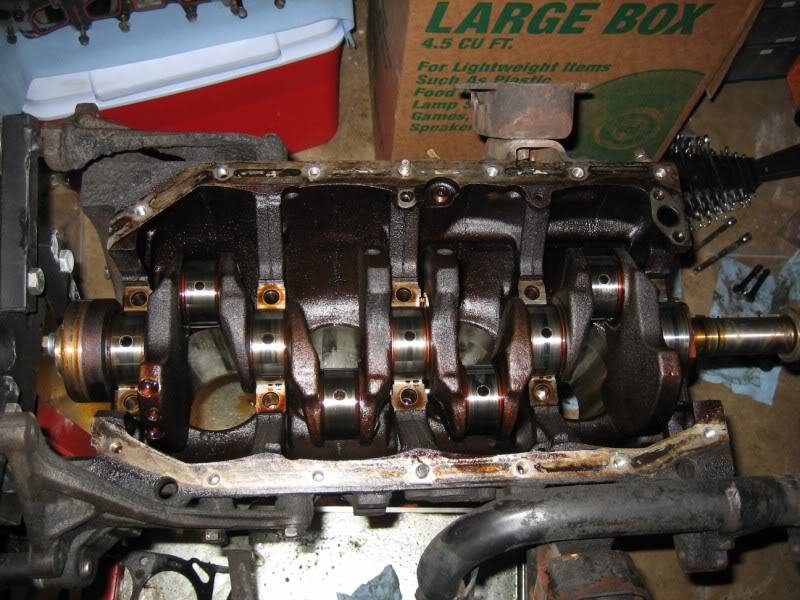
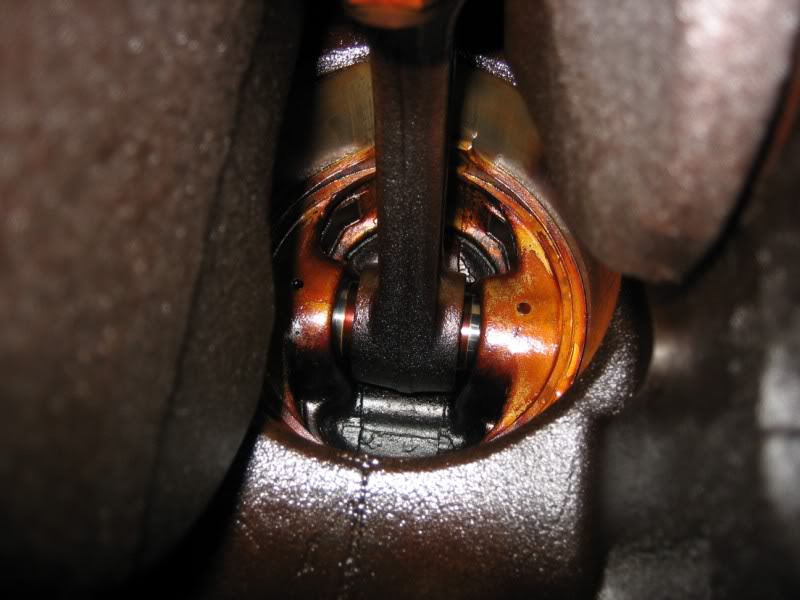
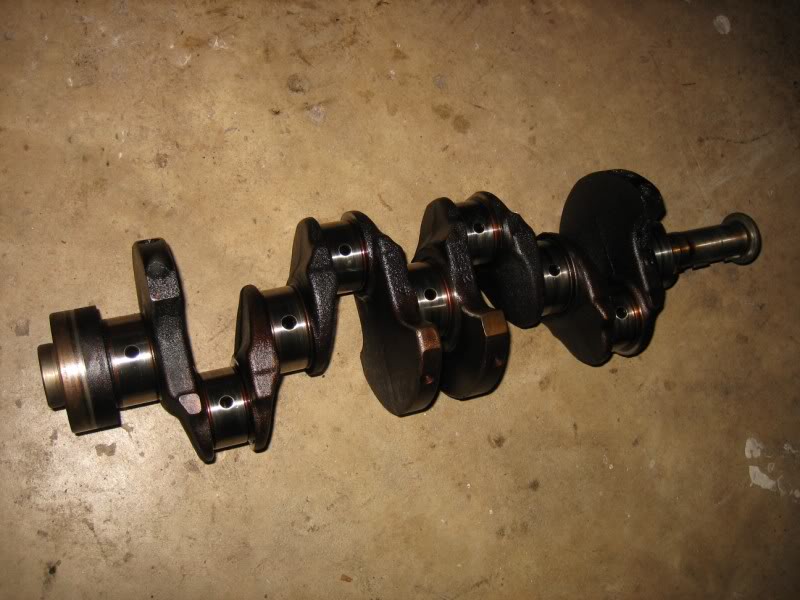
and then lifted the crank out

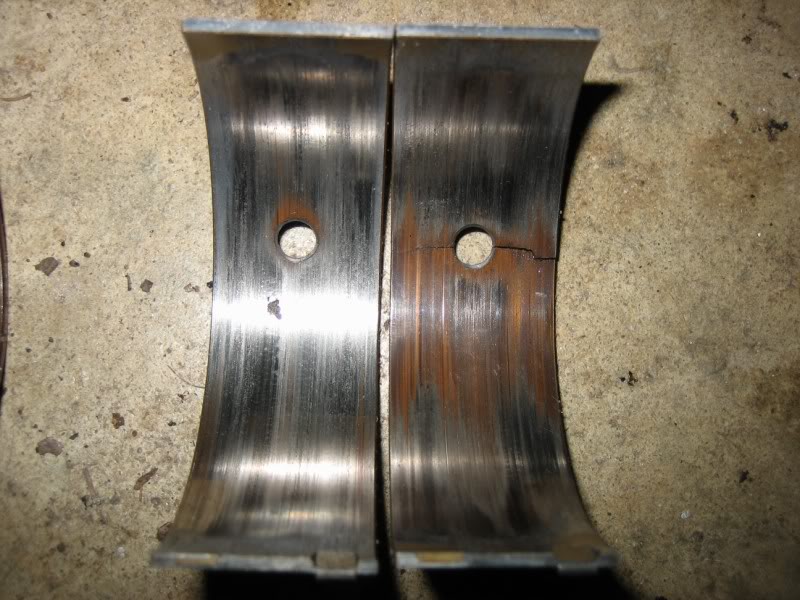
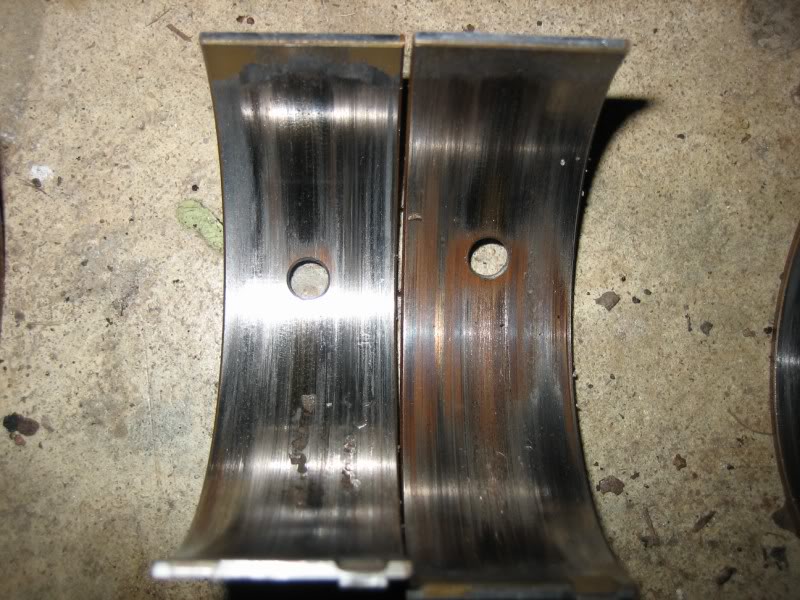
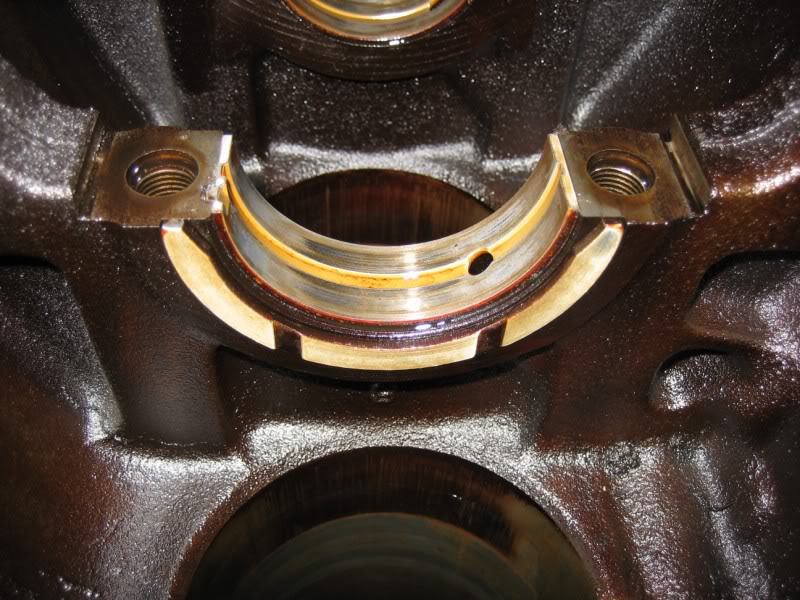
and the main crank bearings were in just as bad of shape as the rod bearings, lol. it was getting into the brass on most of them...
and the thrust washers showed normal wear; nothing crazy on those
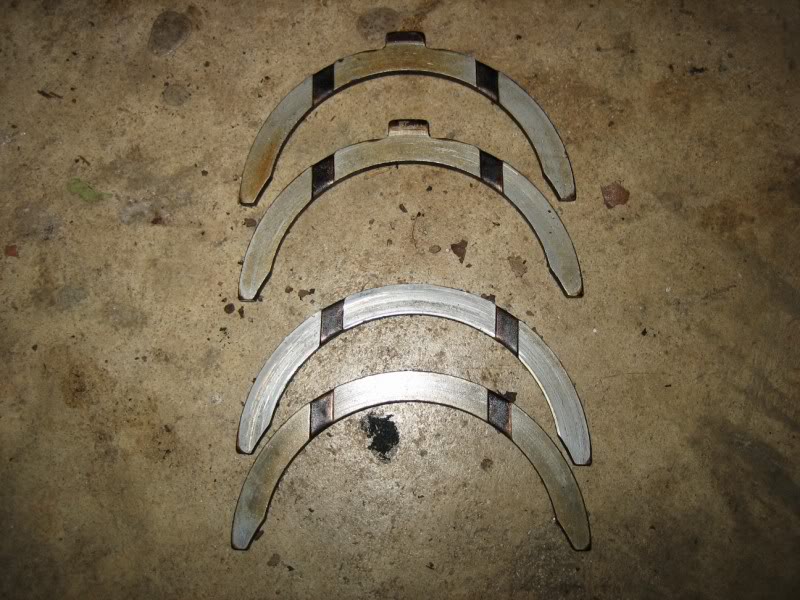
there was a little wear on the crank, but not as bad as what the bearings suggest, lol


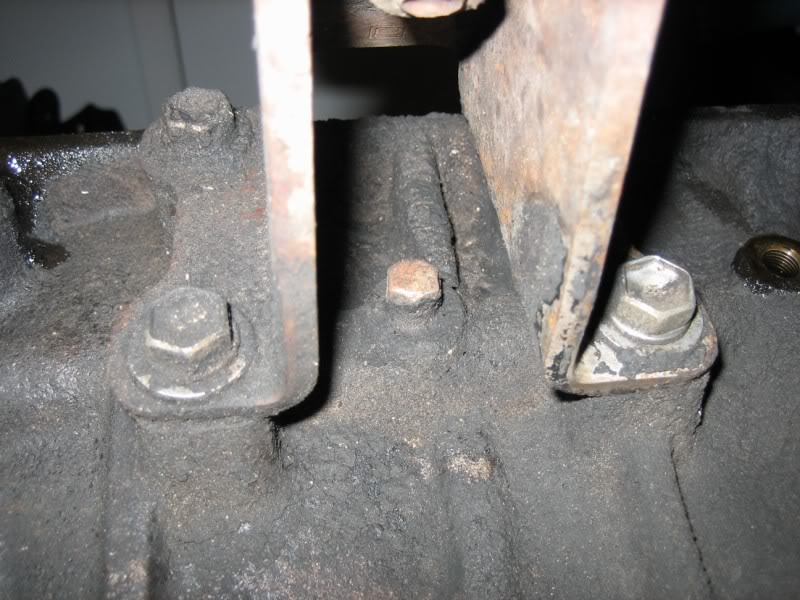
by the way, for anyone looking threw this thread having plans to tear into there 22re, here's a little trick I thought up
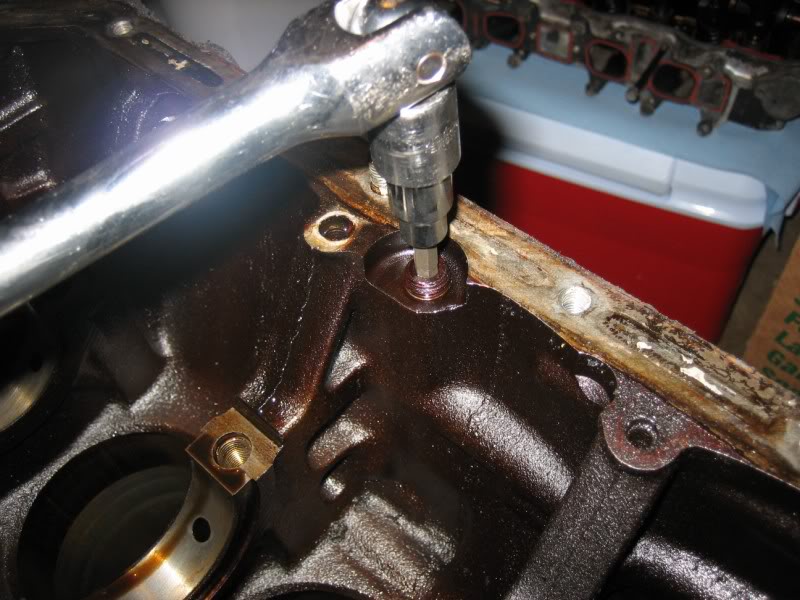
when removing the main caps, the two front and two rears should come off pretty easy, with maybe a few light taps with a small hammer. in my case, the middle cap was a PITA, and after 5 minutes or so of messing with it, I couldn't hardly get it to budge.
well after studying it a bit, I though up a plan, and it involved... a 3/8" drive extention
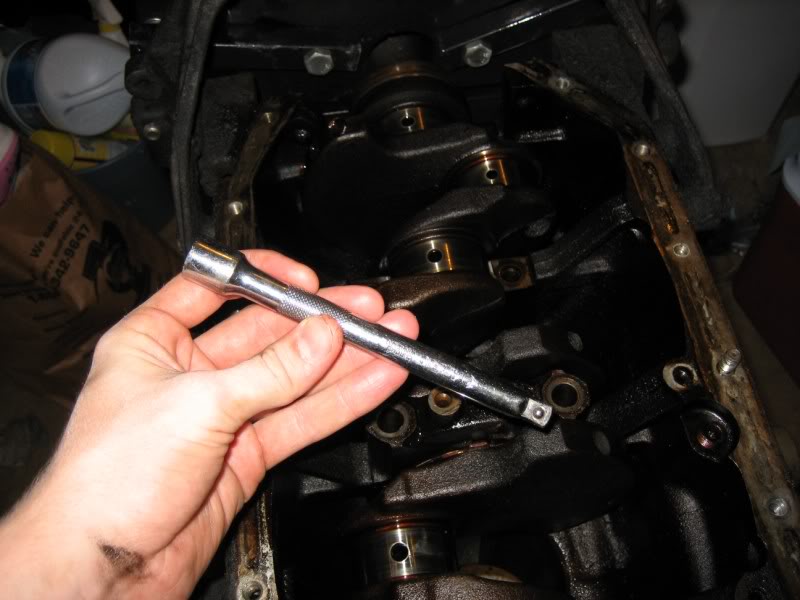
drop it down into one of the bolt holes, and give it a few light taps with a hammer, and it should raise right up!
it doesn't really matter what side; it works either way
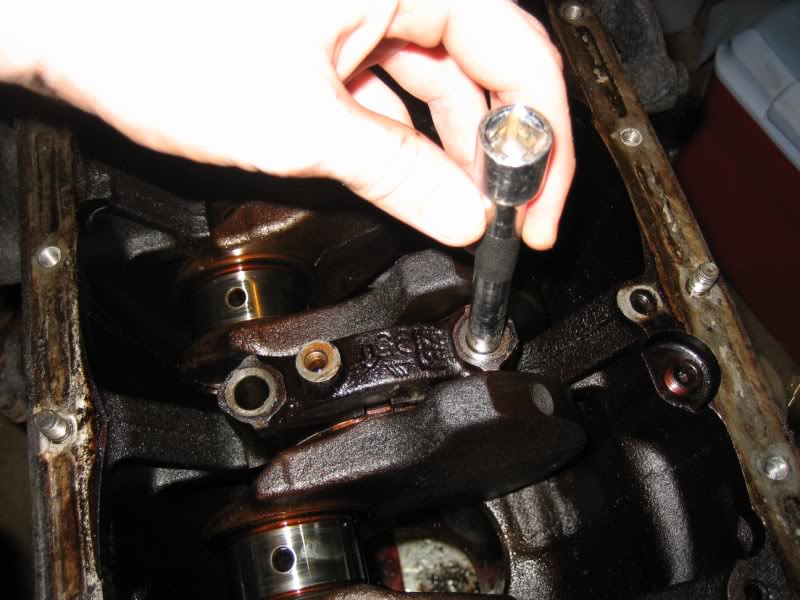
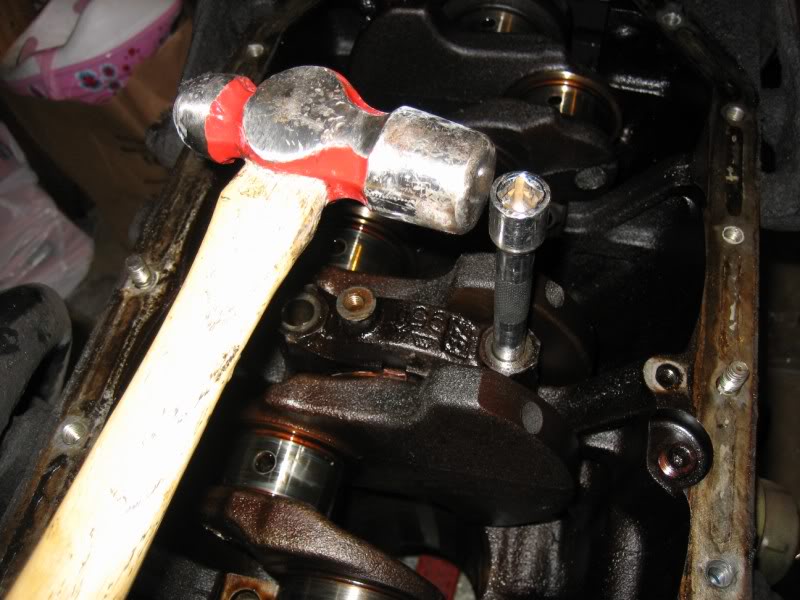
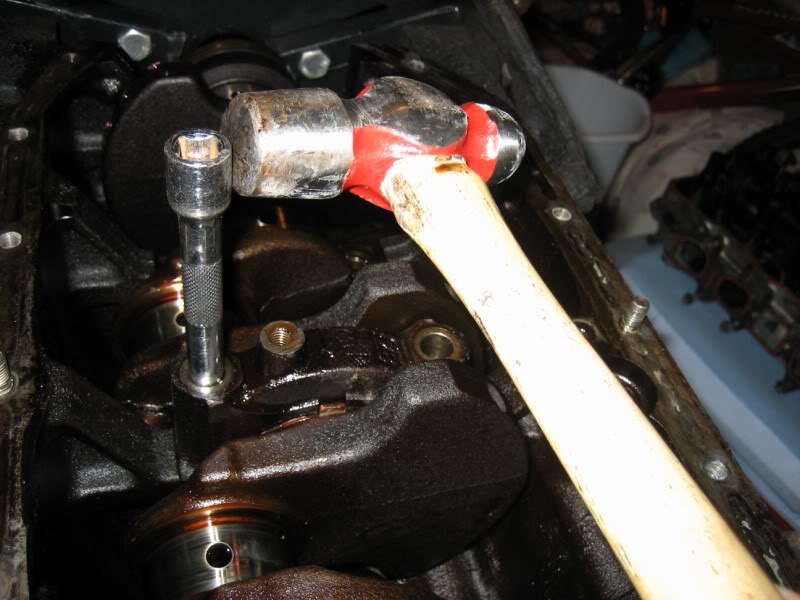
tada!
but the rest of the pics I took today were some more "where does this go" pics

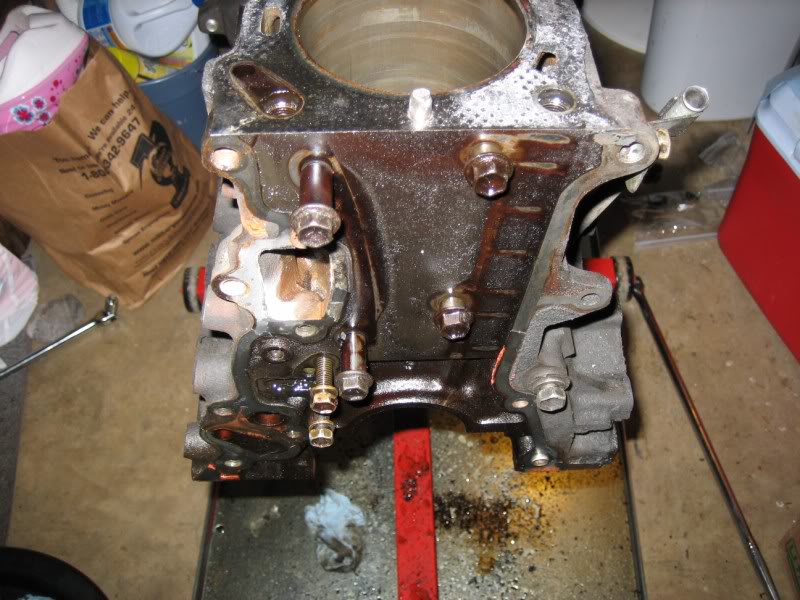

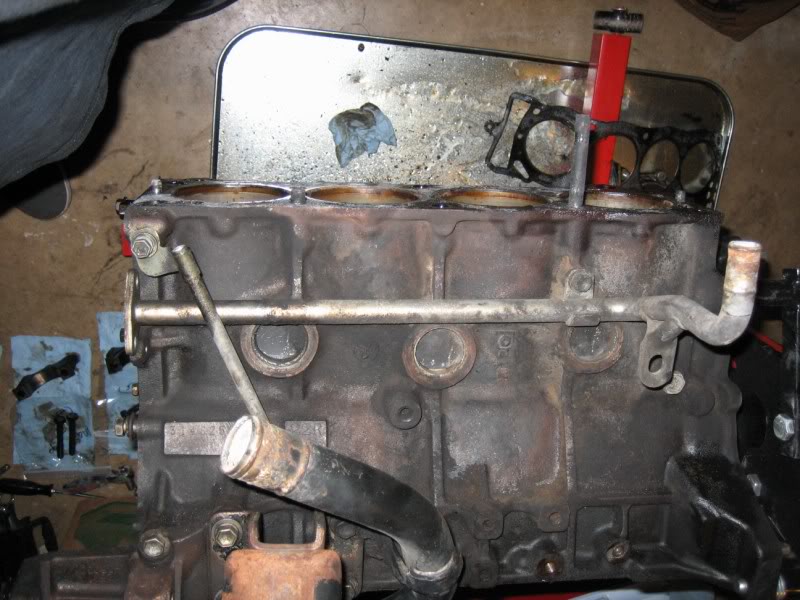
so, I end with a bare block tonight
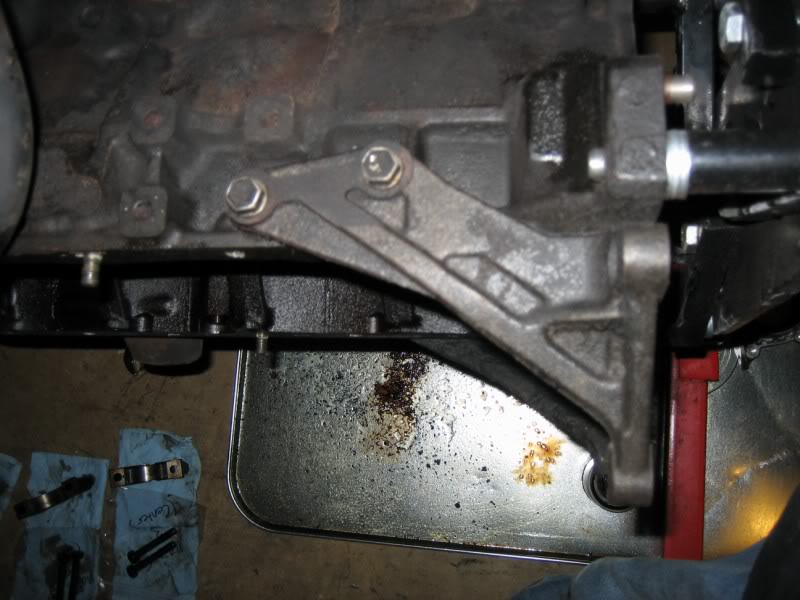
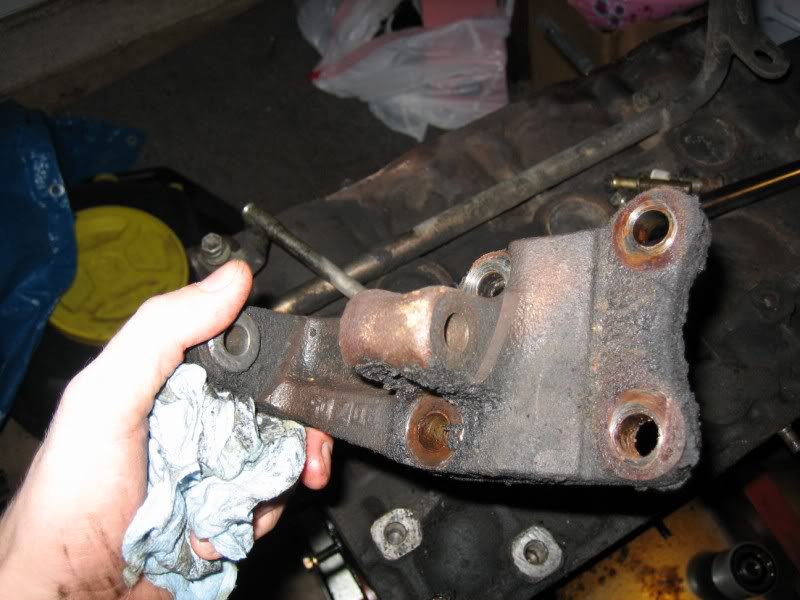
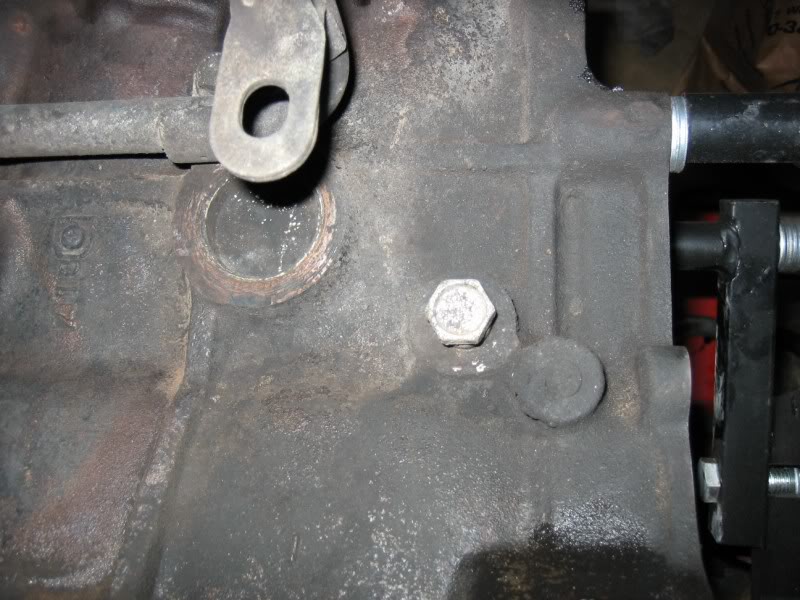
so who can tell me what in the hell the purpose of this is on the driver's side of the block, lmao
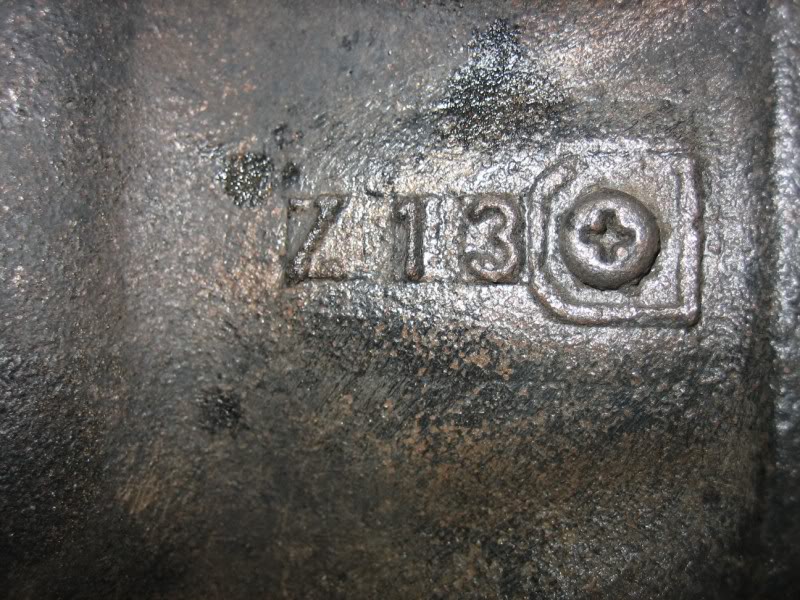
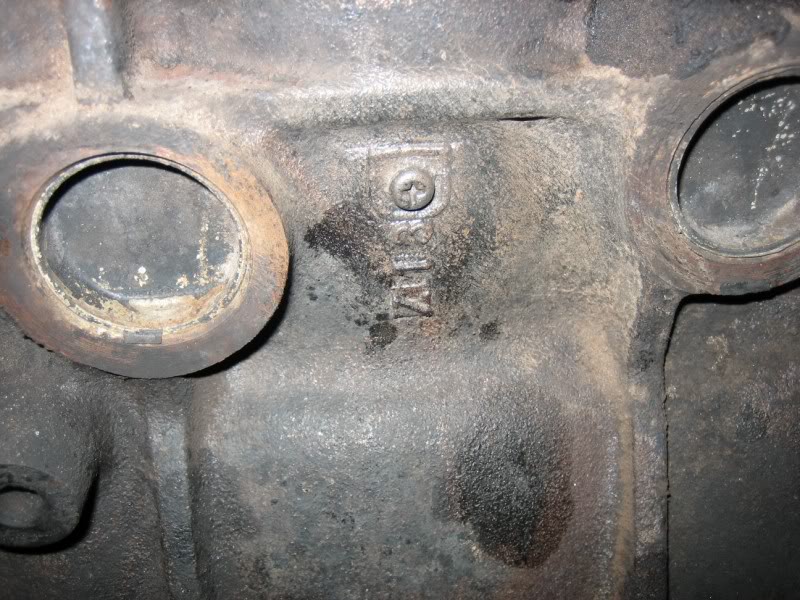
it's like, not even a real screw a false screw, lol
weird...
and a mud-dobber wasp nest, lmao
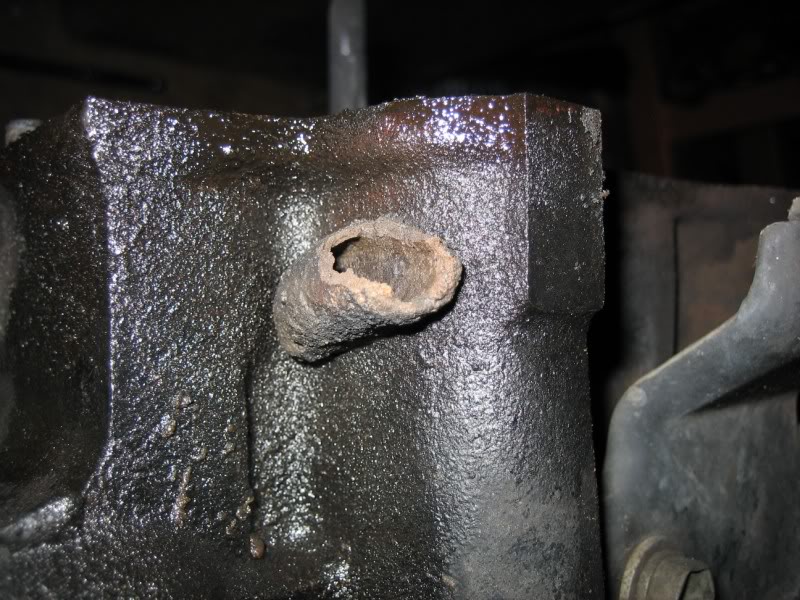
also, maybe one you guys can answer this for me... does the dip stick tube pull out of the block? I removed the bolt on the bracket holding it onto the block, but can't get the tube to pull outta the block, and I gave up before I bent it and mess it up
), but I got in, ate some food, then headed to the garage for a little more tearing down started off by getting the oil pan out of the way, to expose the guts
taking a little peak, cause I'm impatient, lol
then removed all the rods and pistons
which showed a little wear and tare on the sides
lmao, and the rod bearings, well, they DEFINATELY are shot...
one of the bearings on the #1 cylinder was actually cracked!
and then pulled the crank main caps
and at least I kept these organised
I'm actually keeping all of the important motor stuff in baggies and labeled and then lifted the crank out
and the main crank bearings were in just as bad of shape as the rod bearings, lol. it was getting into the brass on most of them...
and the thrust washers showed normal wear; nothing crazy on those
there was a little wear on the crank, but not as bad as what the bearings suggest, lol
by the way, for anyone looking threw this thread having plans to tear into there 22re, here's a little trick I thought up
when removing the main caps, the two front and two rears should come off pretty easy, with maybe a few light taps with a small hammer. in my case, the middle cap was a PITA, and after 5 minutes or so of messing with it, I couldn't hardly get it to budge.
well after studying it a bit, I though up a plan, and it involved... a 3/8" drive extention
drop it down into one of the bolt holes, and give it a few light taps with a hammer, and it should raise right up!
it doesn't really matter what side; it works either way
tada!
but the rest of the pics I took today were some more "where does this go" pics
so, I end with a bare block tonight
so who can tell me what in the hell the purpose of this is on the driver's side of the block, lmao
it's like, not even a real screw
a false screw, lolweird...
and a mud-dobber wasp nest, lmao
also, maybe one you guys can answer this for me... does the dip stick tube pull out of the block? I removed the bolt on the bracket holding it onto the block, but can't get the tube to pull outta the block, and I gave up before I bent it and mess it up
May 13, 2009 | 07:53 PM
#140
Thread Starter
Contributing Member
Joined: Feb 2008
Posts: 12,248
Likes: 33
From: Lake City, Fl


