
BEGINNER'S 22re Timing Chain Failure / replacement / head gasket replacement
 May 29, 2010 | 04:24 AM
#42
Thread Starter
YotaTech Milestone-Two Millionth Post
Joined: Jan 2009
Posts: 12,009
Likes: 122
From: Northeast Pennsylvania
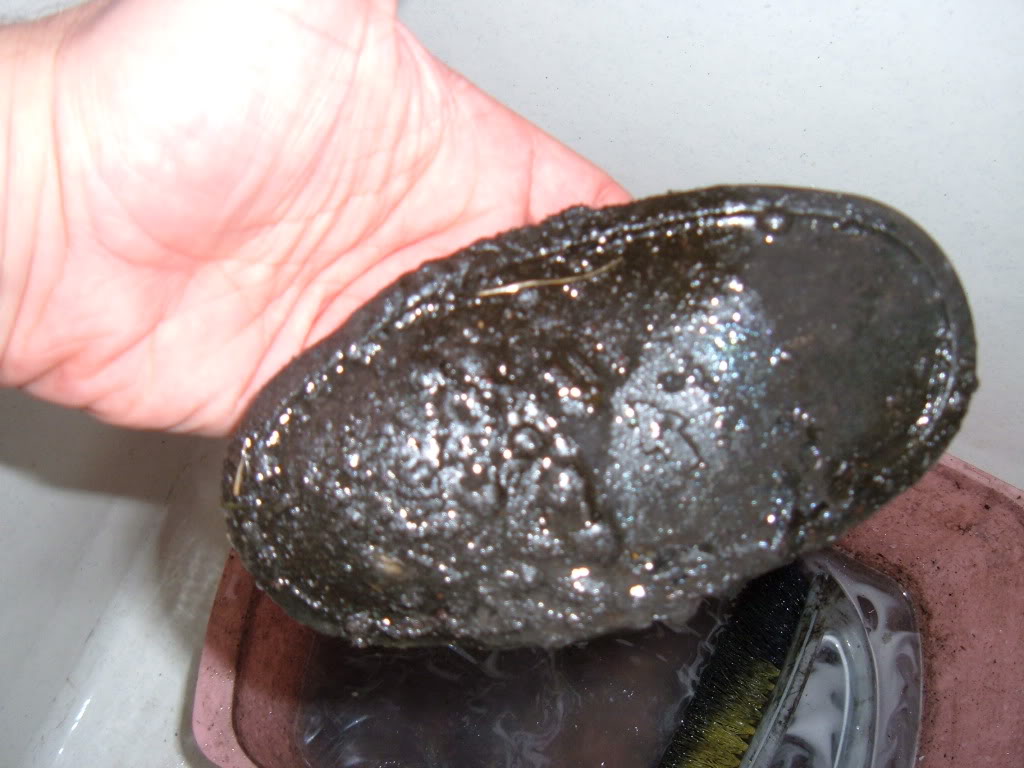
Valve lapping
this is one of those "trying to shine sh-t" functions......
initially i tried to just clean them with brake cleaner and a green scotch brite.... so i lapped them just like that.
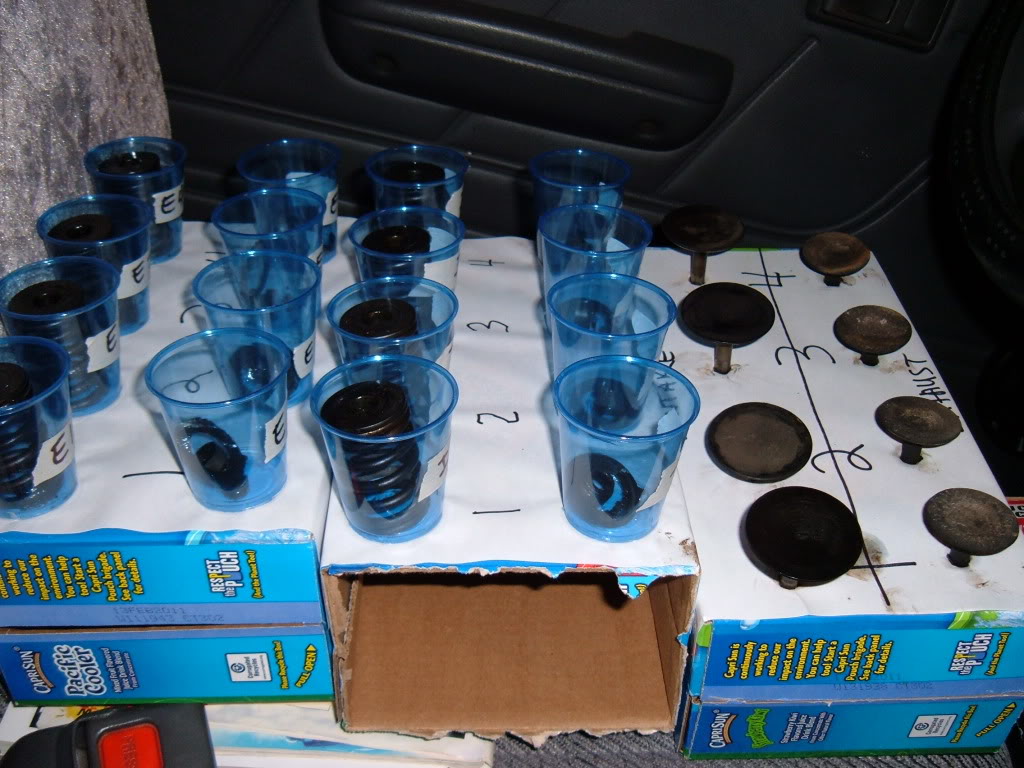
a pic of everything removed and organized carefully...
but again, my conscience got the best of me. but i was wondering how in the world i would get the valve surfaces cleaned up. they were like very coarse sandpaper (most of them) and i could not, in good conscience put them back together like that.
ugh...

i had already lapped the valves as-is...not a hard prcess at all....arduous and time consuming, but not hard at all.....a little shmootz of compound on the valve and then commence to "shhh-shh-shhh-shhh-pop-pop-pop" on and on....the fruit of my labor was easily seen quickly.
so, in wanting to get the actual valves cleaned up nicely, and not having a bench vise, or a drill press, or extra arms, i came up with a cool idea.......this is another one of those DO IT!!!! ideas that i am happy to share.
a drill, zip-tied to the bumper of my truck, with the trigger zip-tied in the "on" position
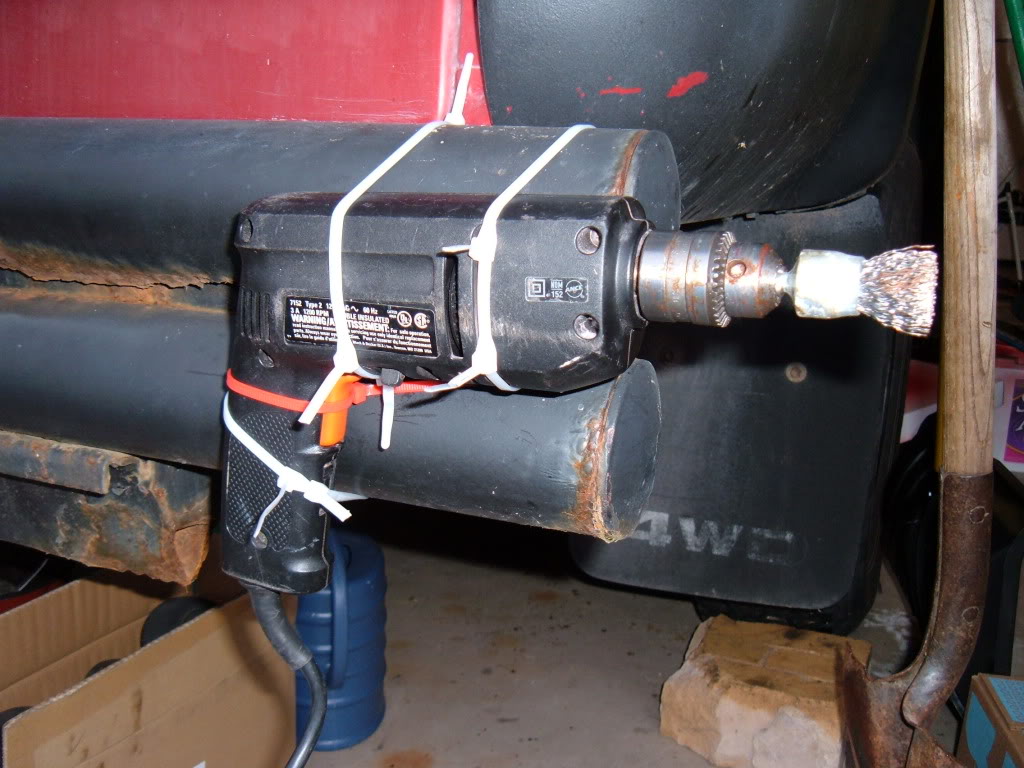
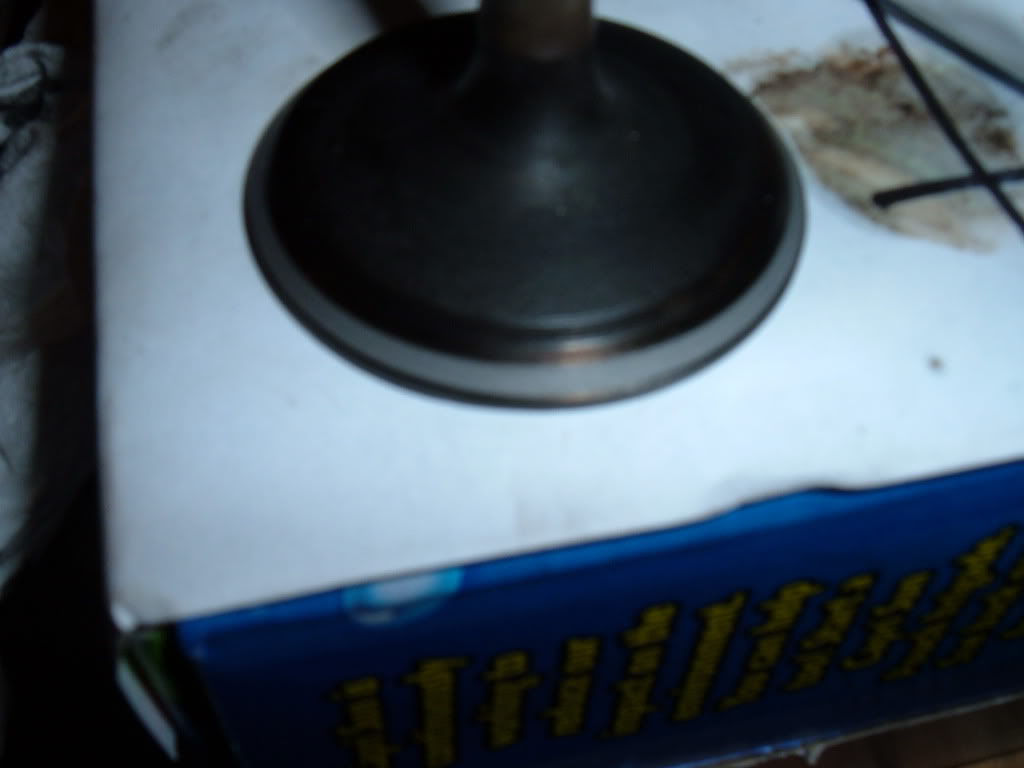
some valve compound on the surface.....(wear eye protection...the stuff splatters)
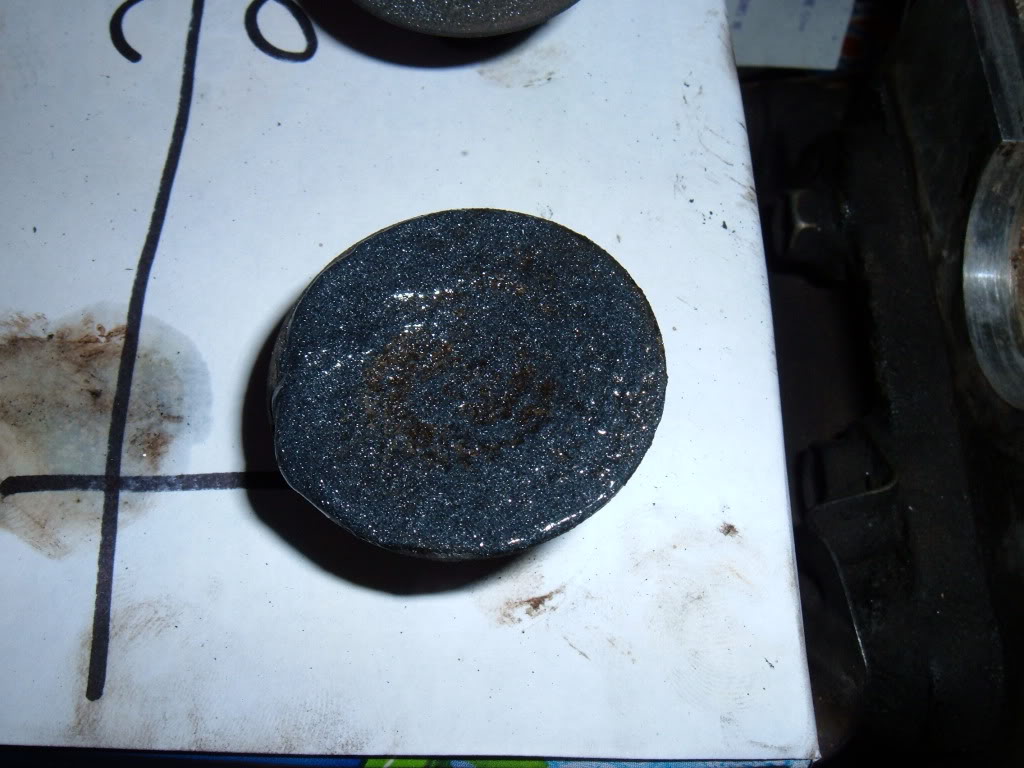
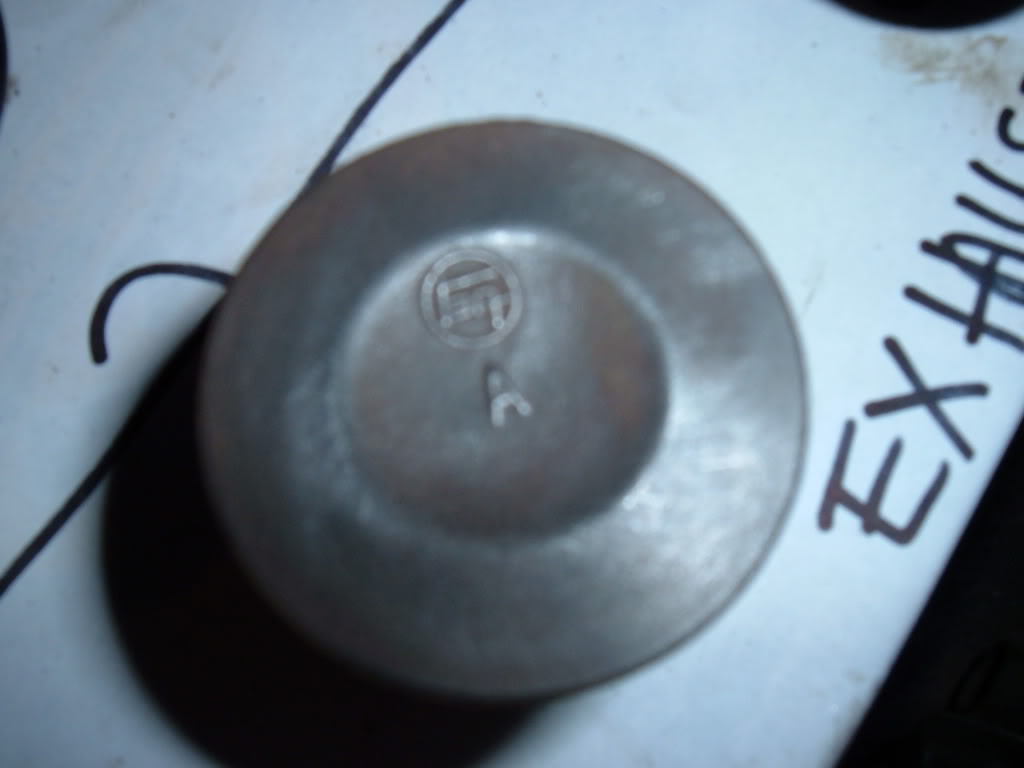
and probably after a minute or 2 of careful scrubbing, you end up like this....
after doing all the valves.....NOW, i was able to do the valve lapping again, the right way.

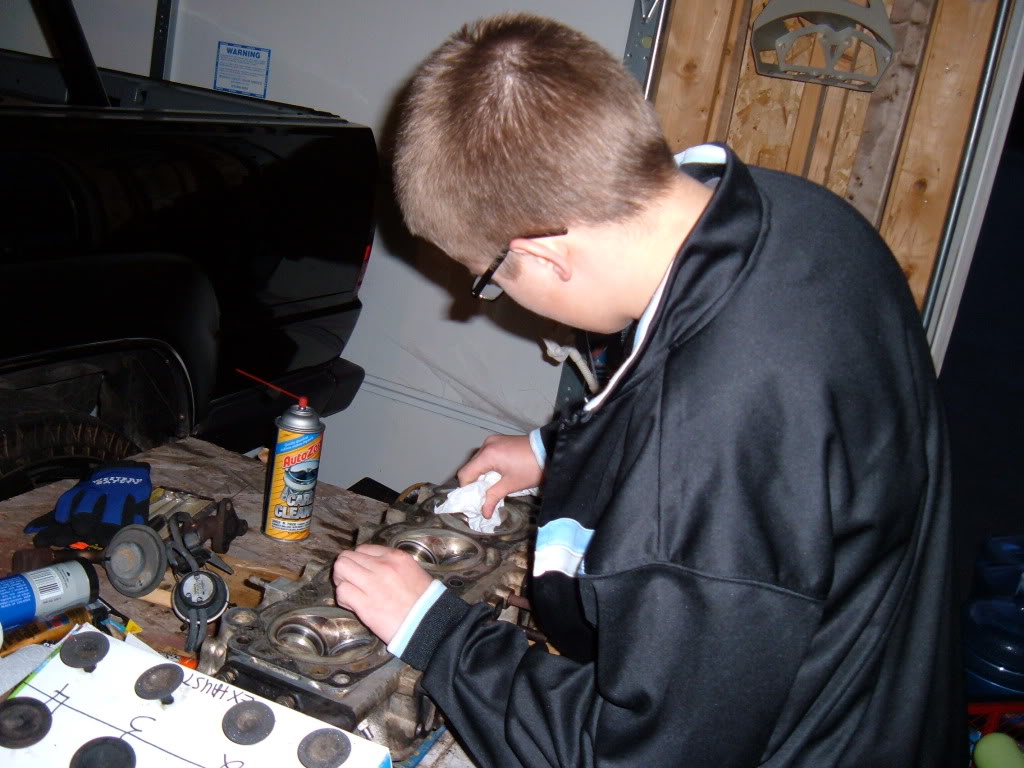
and i had some help this time (joe)
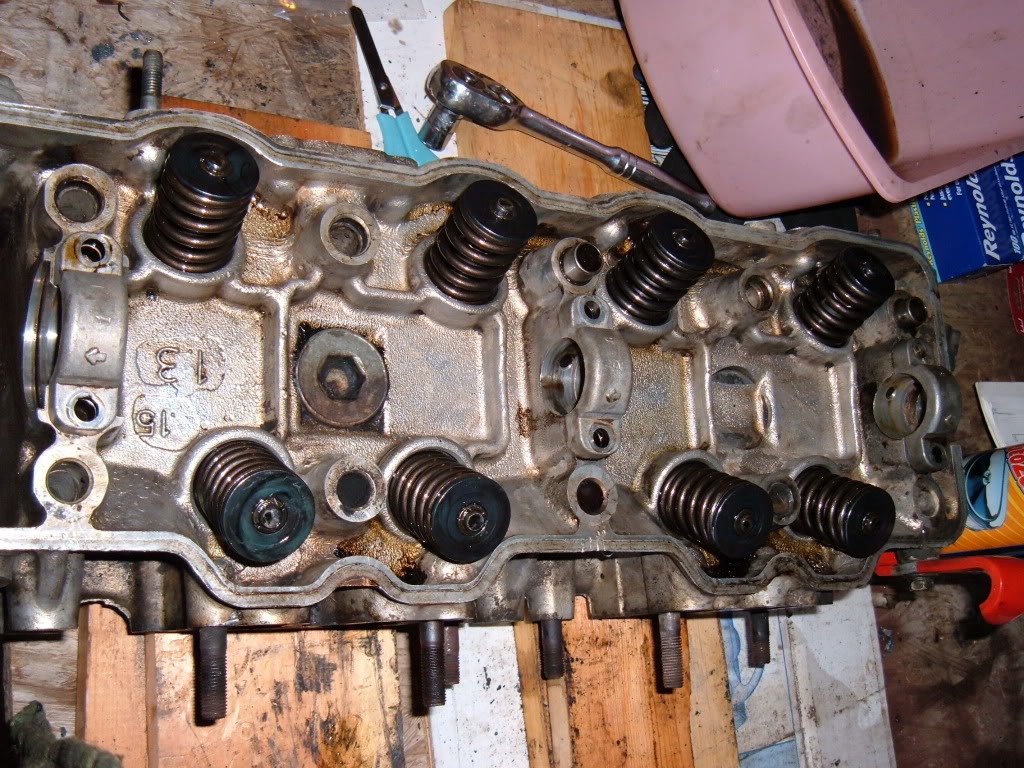
it was time to reassemble things.....
so methodically and slowly, i took each spring, each ??washer(that sandwiched each spring) and bathed them with carb cleaner and gave them a dip in oil.
new valve oil seals (included in Ted's kit) were installed like the FSM shows...first by hand to be sure they were squarely on the seat and then with a socket over them and a quick rap of a hammer to seat them....this is probably where you can screw things up good for yourself in getting them installed askew or ripping the seals....be very careful.
wrestling with greased pigs( also know as a valve spring compressor and springs coated in oil) is another one of those slow but sure functions.....quite aggravating and labor intensive....but once complete, you know this is something you won't have to do again soon, if ever.
initially i tried to just clean them with brake cleaner and a green scotch brite.... so i lapped them just like that.
a pic of everything removed and organized carefully...
but again, my conscience got the best of me. but i was wondering how in the world i would get the valve surfaces cleaned up. they were like very coarse sandpaper (most of them) and i could not, in good conscience put them back together like that.
ugh...
i had already lapped the valves as-is...not a hard prcess at all....arduous and time consuming, but not hard at all.....a little shmootz of compound on the valve and then commence to "shhh-shh-shhh-shhh-pop-pop-pop" on and on....the fruit of my labor was easily seen quickly.
so, in wanting to get the actual valves cleaned up nicely, and not having a bench vise, or a drill press, or extra arms, i came up with a cool idea.......this is another one of those DO IT!!!! ideas that i am happy to share.
a drill, zip-tied to the bumper of my truck, with the trigger zip-tied in the "on" position
some valve compound on the surface.....(wear eye protection...the stuff splatters)
and probably after a minute or 2 of careful scrubbing, you end up like this....
after doing all the valves.....NOW, i was able to do the valve lapping again, the right way.
and i had some help this time (joe)
it was time to reassemble things.....
so methodically and slowly, i took each spring, each ??washer(that sandwiched each spring) and bathed them with carb cleaner and gave them a dip in oil.
new valve oil seals (included in Ted's kit) were installed like the FSM shows...first by hand to be sure they were squarely on the seat and then with a socket over them and a quick rap of a hammer to seat them....this is probably where you can screw things up good for yourself in getting them installed askew or ripping the seals....be very careful.
wrestling with greased pigs( also know as a valve spring compressor and springs coated in oil) is another one of those slow but sure functions.....quite aggravating and labor intensive....but once complete, you know this is something you won't have to do again soon, if ever.
Last edited by 92 TOY; May 29, 2010 at 04:27 AM.
May 29, 2010 | 04:29 AM
#43
Thread Starter
YotaTech Milestone-Two Millionth Post
Joined: Jan 2009
Posts: 12,009
Likes: 122
From: Northeast Pennsylvania
ahh yes, i forgot to mention about the "locks"??? at the tops of the valves......magnet wand, vaseline, good lighting...all necessary ingredients........once you get the hang of that part it's simple, but,again, it's labor intensive and aggravating.
May 29, 2010 | 04:38 AM
#44
Thread Starter
YotaTech Milestone-Two Millionth Post
Joined: Jan 2009
Posts: 12,009
Likes: 122
From: Northeast Pennsylvania
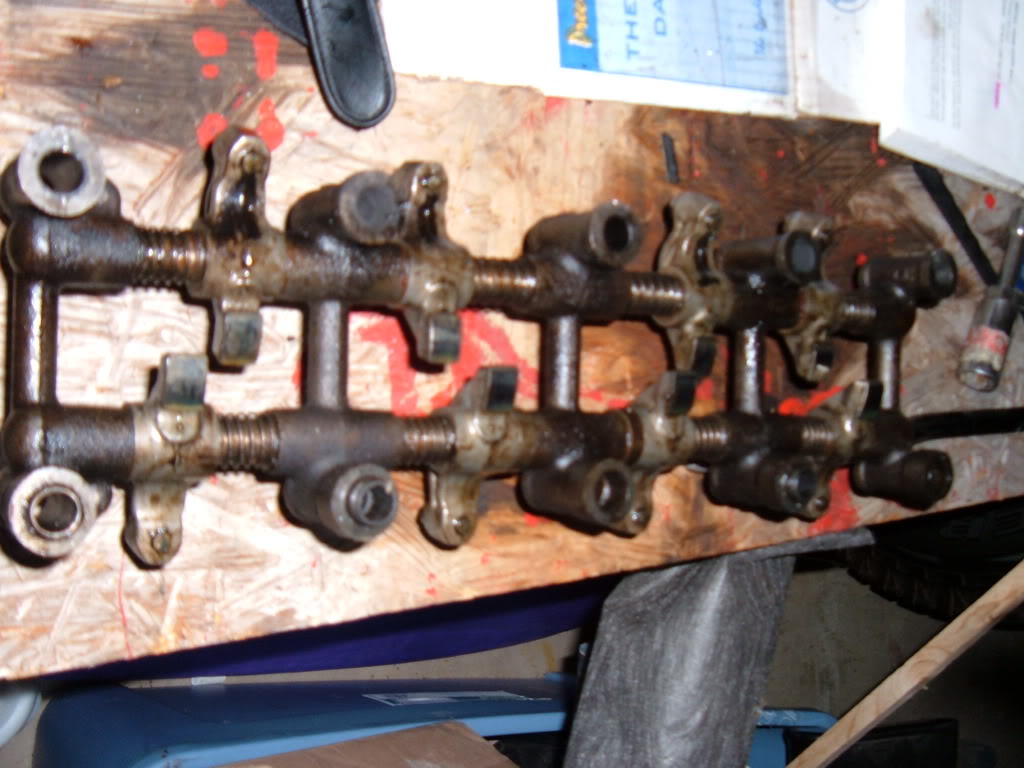
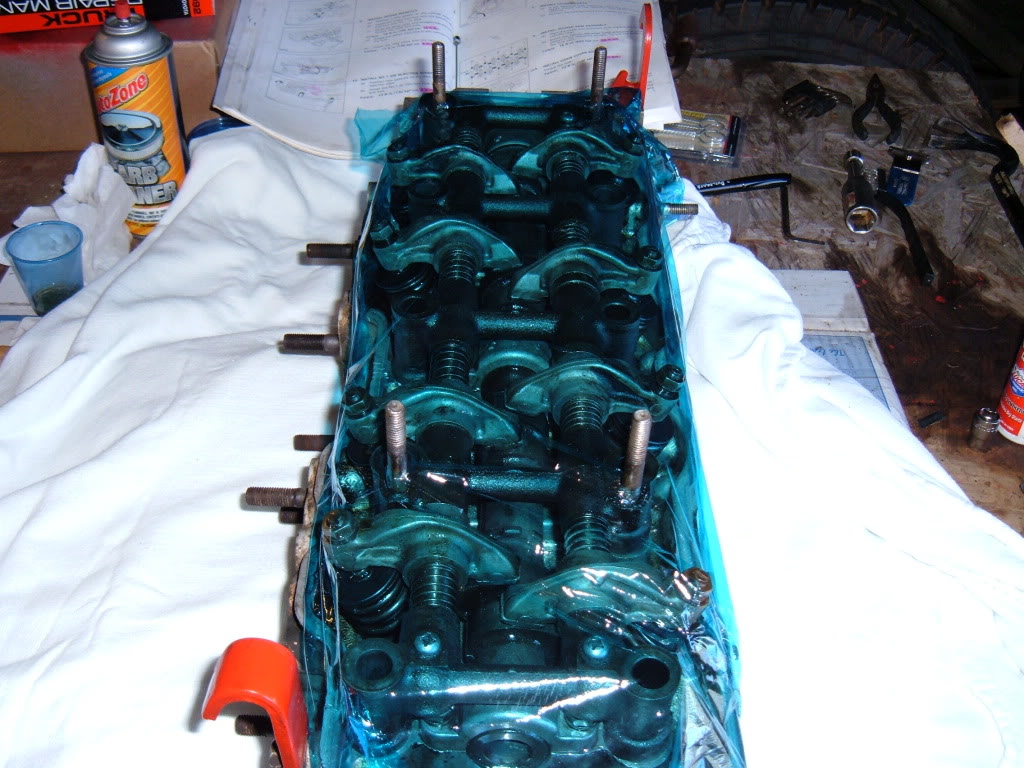
Rocker arm assembly
so while the head was apart, i cleaned the cam, bathed it in oil and wrapped it up in a plastic bag, carefully hidden so as to not get damaged.
i did NOT full disassemble to rocker arms.....cleaned them up well, squirted carb cleaner in the holes and basically rinsed it out with it.
intiatillay (and before i had fully disassembled the head and valves), when i thought bi could just get away with a superficial cleaning 9which i just explained i did not) i was horrified to see i could NOT get the seembly to seat flat on the head again.....it was explained it was because of the valves basically pushing up on it...i assume (newbie assumption here) that at some point at all times there is contact with a valve a rocker and the cam no matter what the position....i could be wrong....but when installing the cam, so the dimple was in the right spot, this was the case. also, make sure you know where bearing caps 1,2,3 go.....i forget right now, but make sure you remember.
so (on the advice of several members), i loosened up the valve nuts(??)...so as the allow little to no contact to take place......after careful cleaning again of the holes where the head bolts pass through (with a very tiny bottle brush and carb cleaner.....glasses again, it sprays) and a littl bit of oil to help it seat easily it was back on and torqued down.......
assembly lube had been used on the bearings and on the cam
rocker arm assembly
and sealed up......for freshness...i know, i'm a wacko with alot of this stuff.
Last edited by 92 TOY; May 29, 2010 at 04:40 AM.
May 29, 2010 | 04:42 AM
#45
Thread Starter
YotaTech Milestone-Two Millionth Post
Joined: Jan 2009
Posts: 12,009
Likes: 122
From: Northeast Pennsylvania
so a problem i noted at this point was alot of the oil i had used for re-assembly of the valves was pooling or running down.....this was getting on the bottom of the head....i was aggravated by this....but in reality...the longer i waited the better and more complete the job of cleaning the bottom of the head would be....i certainly did not want any oil here when i go to put it on the block......oh yeah too, scraped the head with a razor blade (carefully) and acetone.
Last edited by 92 TOY; May 29, 2010 at 04:55 AM.
May 29, 2010 | 04:55 AM
#46
Thread Starter
YotaTech Milestone-Two Millionth Post
Joined: Jan 2009
Posts: 12,009
Likes: 122
From: Northeast Pennsylvania
Block prep
to this point, i had left the headgasket right where i found it....i figure this was providing me some protection for the block since i was not getting the block machined.
so now it was time to remove that and start prepping the block and head bolt holes.
i struggled with the proper way of doing this.....getting a tap...(i bought one.....i'll sell it to ya....snap-on, ...hardly used)......or cutting slits in a head bolt.
the whole point is to clean the bolt holes out and threads up....
again, i didn't feel comfortable trying to cut slits in a bolt...i was afraid that somehow, this would mess up the corresponding threads in the block.
likewise, when i used my tap i bought (proper size, checked a zillion times), i could get it to thread maybe 2 or 3 complete turns but then it was uncomfortably tight....so i aborted that idea.
so, another tip was to "blow out the holes with an air compressor"....don't have one......so i'm thiking...what are ya really trying to do???....theres nothing wrong with the threads in the block or even on the bolts i removed.......so i started cleaning up a bolt and cleaning out the hole with q-tips....lots of them (this all, of course after i carefully scraped the bock and cleaned it up nice with acetone too).
so slowly but surely, i threaded 1 bolt....as you do it very slowly it will weep the oil out....wipe it away, remove the bolt, clean it off, repeat 1 million times.....i even used an itsy bitsy eyeglass screwdriver to scrape the bottom of each hole to loosen up the hard stuff.....and after a million q-tips later and a million passes of the bolt and acetone, each hole was perfectly clean...each thread 'chased" with an original bolt so i was sure i wasn't doing damage and i was done.
this took a while....it's another one of those very time-consuming details that MUST be done.
and wipe away all the oil and clean the block again with acetone....and then seal it for freshness......hehehehehe
May 29, 2010 | 05:19 AM
#47
Thread Starter
YotaTech Milestone-Two Millionth Post
Joined: Jan 2009
Posts: 12,009
Likes: 122
From: Northeast Pennsylvania
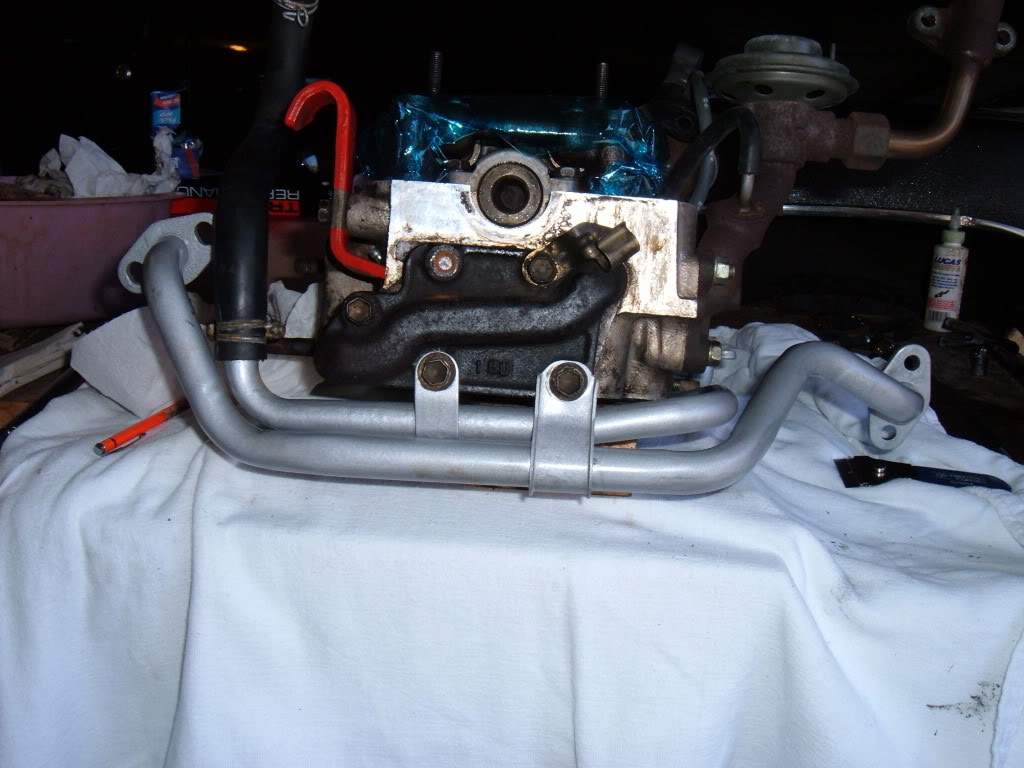
Head prep / installation
HOLY CRAP!!!
i was at the point where i was finally able to get ready, to think about, to almost feel like maybe, i could kinda, i think, put the head on.......get it??, i was kinda indisbelief.
put these SOB's on (not bad now, but a PITA later...and as EXTREME22R said, reason #3 to pull the engine....#1CRANKSHAFT BOLT, #2 OIL PAN, #3 THESE PIPES, #4 INITIAL SETTING OF THE VALVES)
anyway...here's a pic...
so i had attempted to get some quick "maybe 10 minutes" of help from some guys......2 of my wife's brothers, but that didn't pan out....so bright and early this lovely saturday morning, i thought, today is the day.
is that a golf club?
YUP...it is.....
the head weighs what?, about 40lbs if that.......but attach those pipes to it, it's now much wider.....how in God's name guys do it with the intake manifolds and or exhaust manifold attached is beyond me.......so i rehearsed the choreography of how this was going to go.....'i'm gonna have it on the wagon in front of the truck and swing it in from the driver's side under that stuff......" is what i was saying to myself, and now to my poor son Joe who really wanted to help but i'm sure was quite nervous because i had told him this was likely the single-most important step.
i told him that this head has to be put down straight and true the 1st time....have to match the 2 dowel pins (1 on the block and 1 in the head), the absolute 1st time, no mistakes, no retakes, because otherwise i was sure i would damage the gasket.
so with gasket on....our roles rehearsed (Joe was going to be in charge of holding a shoelace i had tied to the upper sprocket and pass it through and up the front of the head while all the while maintaining traction on it ....very quickly.
let me just say...Joe follows directions well.....it all went as planned on the 1st try....i remember saying "HOLY SHEET(ummm, other word), i actually got it on the 1st try!!".
but then i was horrified that i had forgotten something i had been repeating in my head the whole while......partially install the last head bolt on the drivers side and hold it with a rubber band.....OOOPS...i forgot that....that bolt was impossible to remove while head was in the truck because of the heater hoses or whatever that crap is directly above that.
i had already expelled all my strength and energy holding that head straight out in front of me and putting it on.
so i crawled INTO the engine compartment where i was much more positioned to pick the head up 1 more time while Joe dropped that bolt in.....it went well....only some slight uncomfortable pressure to the genitals from the fan clutch mount...but worth it....i then stayed right there and installed the rest of the bolts...by hand ...easily.
hand tight, kinda loosely tight with the socket, then a little more and more and more, following the FSM tightening sequence and then finally with the torque wrench and at least 3 more times after assuring i was at 58ft/lbs.
May 29, 2010 | 05:33 AM
#48
Thread Starter
YotaTech Milestone-Two Millionth Post
Joined: Jan 2009
Posts: 12,009
Likes: 122
From: Northeast Pennsylvania
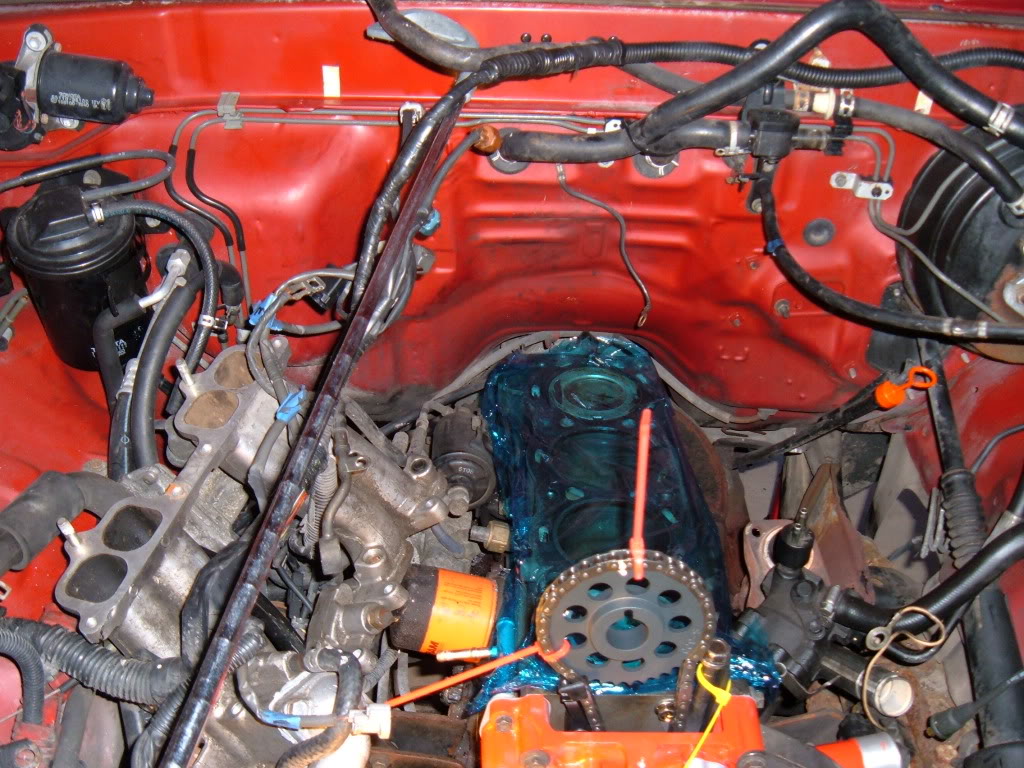
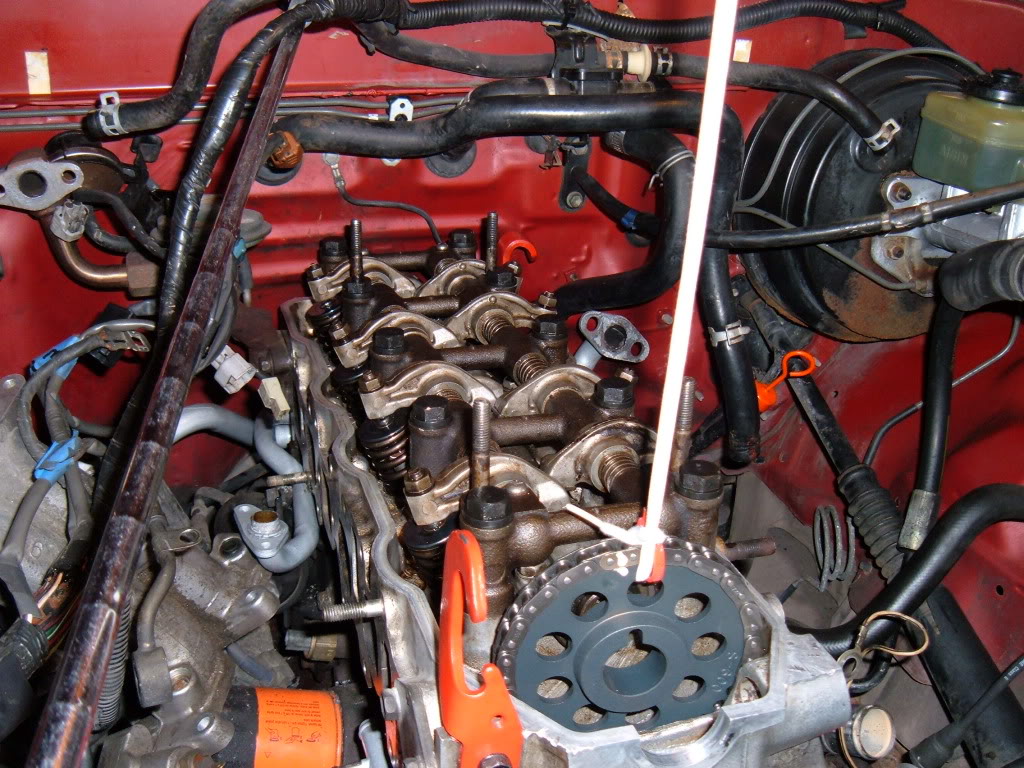
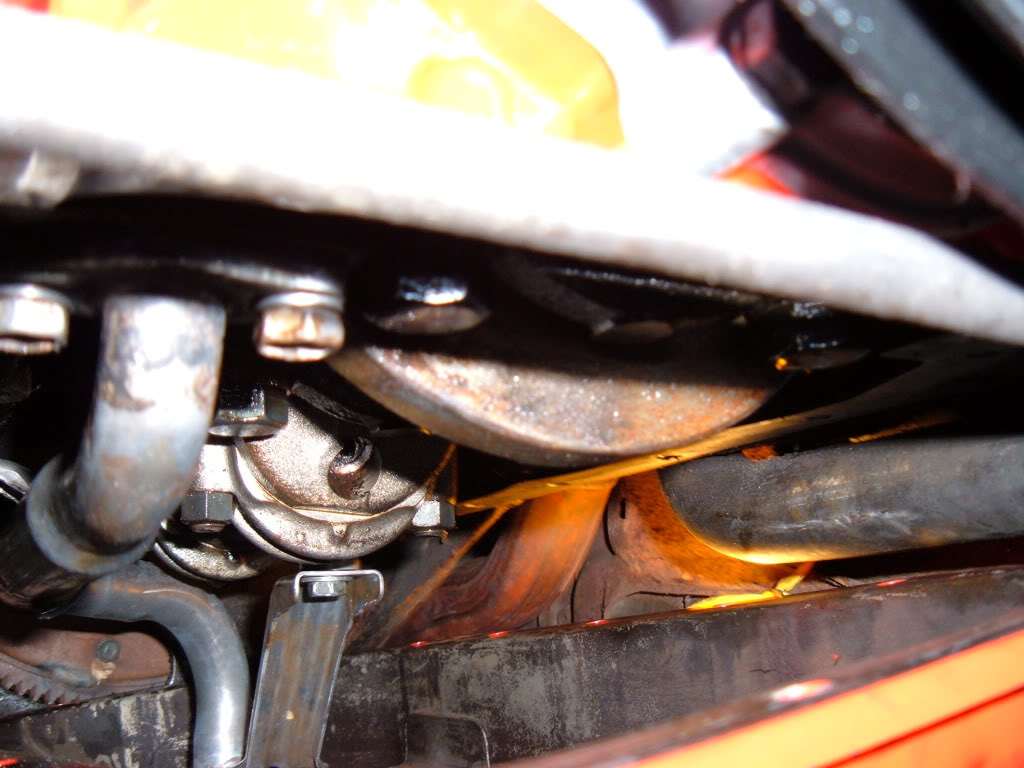
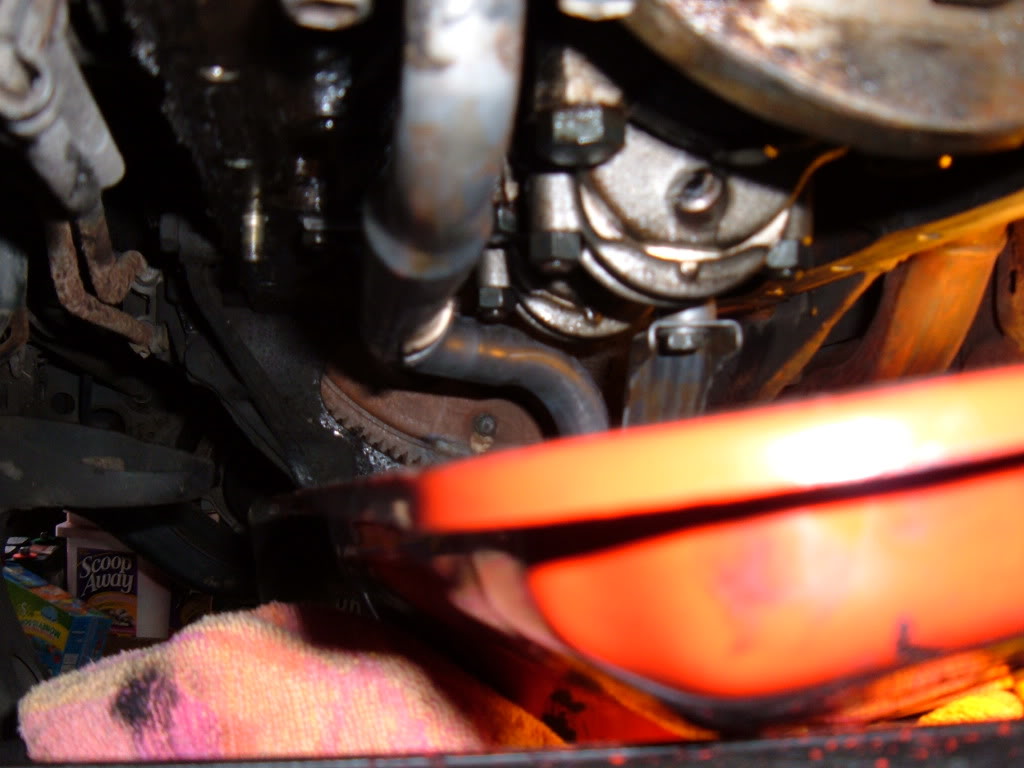
Cam gear install / timing chain final install
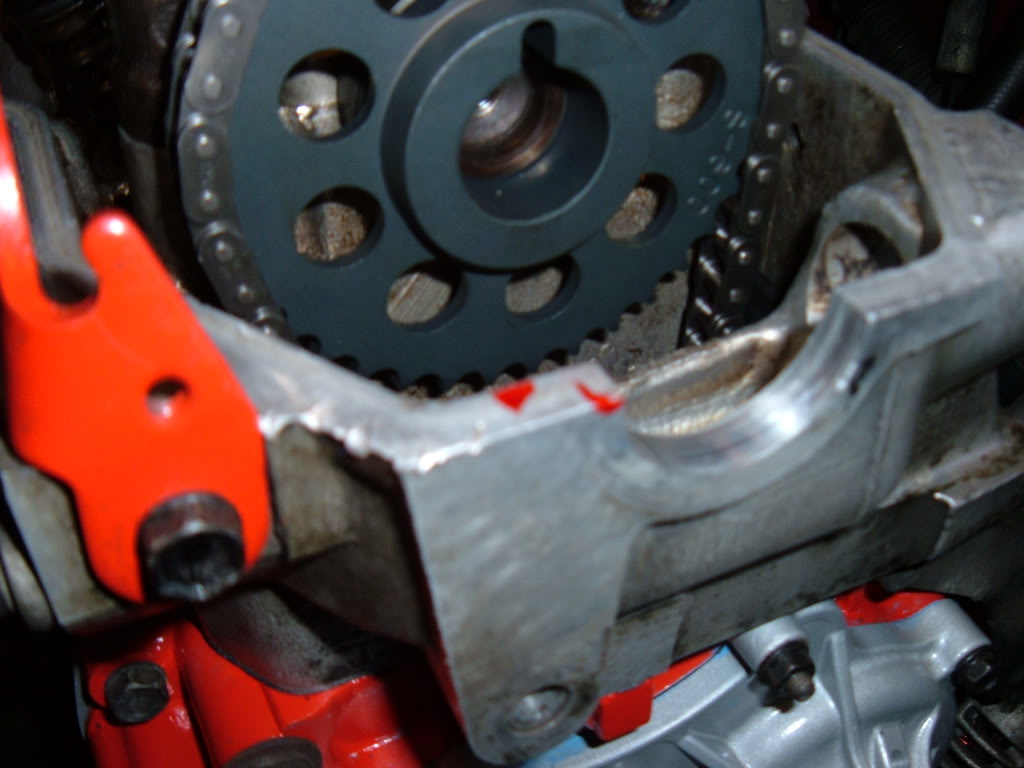
I could finally put that cam gear back on.....but looking at the placement of the upper sprocket in relation to where the cam gear was going to be, i saw this was going to be an effort as well.
so here's how i did it...with the upper sprocket still tied tightly to the hood, and VERY sure i had not allowed any slack that would necessitate removing the cover to see if i had screwed something up...i started to thing.
i remember reading threads with the exact same problem...'insert a long screwdriver...."...some guys put the head on 1st and the cover 2nd...do what you want, i know a debate ensues with that one, i've read that you can do that, i've read of miserable, horrible failures too.....for me..any sprinkle of negativity is enough to make me a nervous wreck.
in messing around, i noted that with slow and steady tension applied to the passenger's side (tensioner side) of the chain...pulling up, you can compress the tensioner....i was able to, and quite easily, and slowly do this enough to get the sprocket to mostly get on the front of the cam.....with a block of wood over the front of the sprocket (make sure it's on there) i was able to "rap" the sprocket on.....and with that, iwas able to put the cam gear bolt back on, using my pulley holder.
i know this picture looks wrong, but when you compress the tensioner, it goes into the right position of 11:30
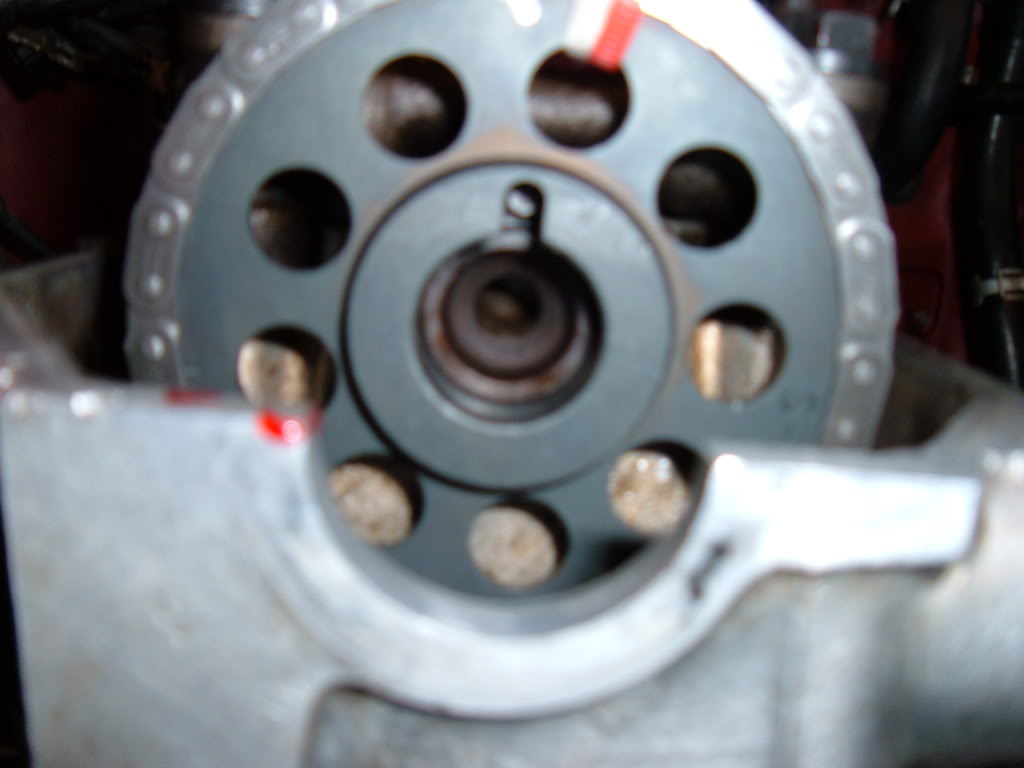
(yes that's blood)
so here's how i did it...with the upper sprocket still tied tightly to the hood, and VERY sure i had not allowed any slack that would necessitate removing the cover to see if i had screwed something up...i started to thing.
i remember reading threads with the exact same problem...'insert a long screwdriver...."...some guys put the head on 1st and the cover 2nd...do what you want, i know a debate ensues with that one, i've read that you can do that, i've read of miserable, horrible failures too.....for me..any sprinkle of negativity is enough to make me a nervous wreck.
in messing around, i noted that with slow and steady tension applied to the passenger's side (tensioner side) of the chain...pulling up, you can compress the tensioner....i was able to, and quite easily, and slowly do this enough to get the sprocket to mostly get on the front of the cam.....with a block of wood over the front of the sprocket (make sure it's on there) i was able to "rap" the sprocket on.....and with that, iwas able to put the cam gear bolt back on, using my pulley holder.
i know this picture looks wrong, but when you compress the tensioner, it goes into the right position of 11:30
(yes that's blood)
May 29, 2010 | 06:27 AM
#50
Thread Starter
YotaTech Milestone-Two Millionth Post
Joined: Jan 2009
Posts: 12,009
Likes: 122
From: Northeast Pennsylvania
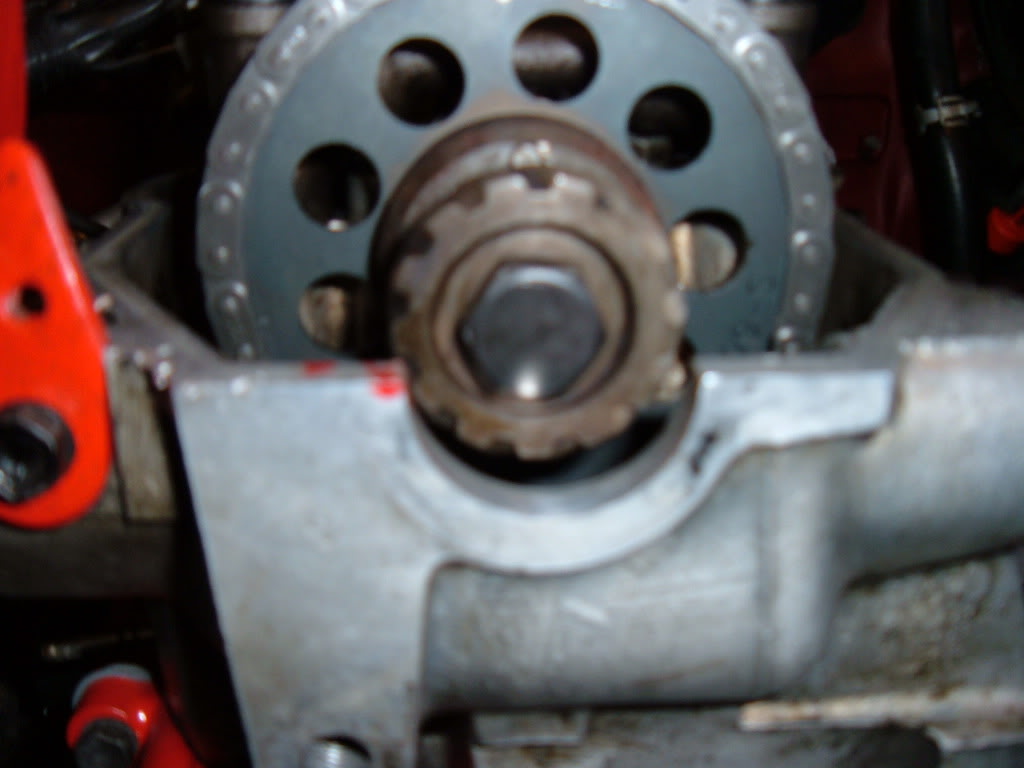
Crankshaft bolt installation
so now it was time to put his baby back on.
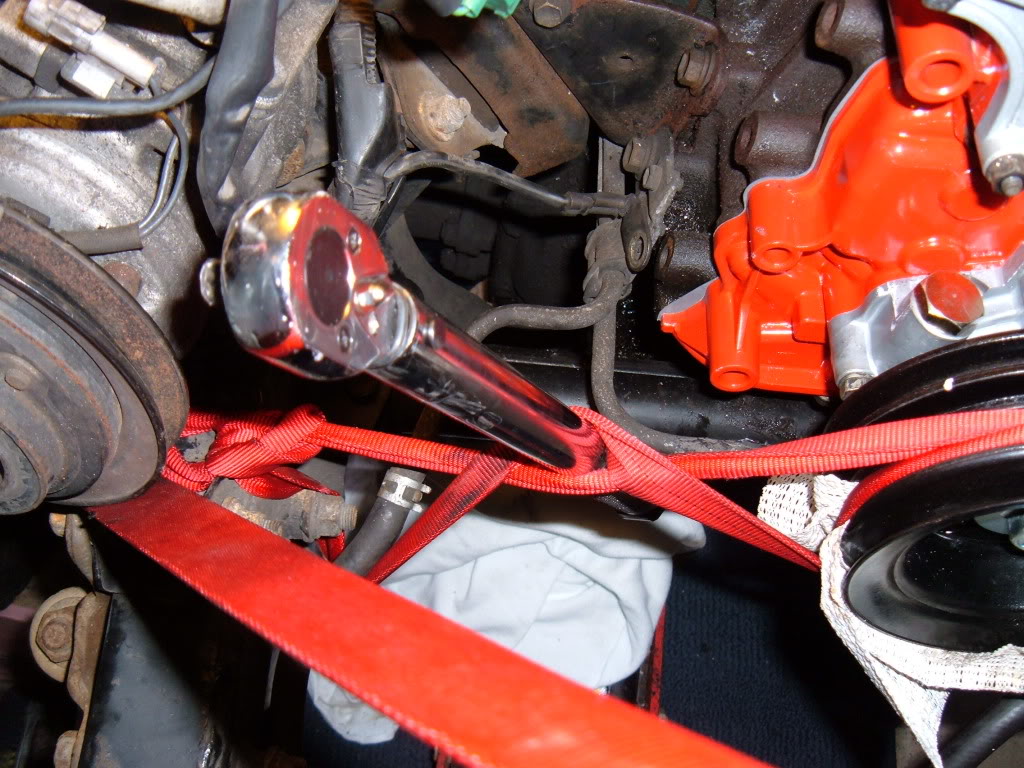
so , same trick, opposite direction...except i added 1 more twist to it.
prior to installing the bolt for good, i decided i was finally able to see if i had this all right and wanted to take the crank for a spin......i rotated the engine 1 complete revolution (i think) and made sure to hear ''shoosh....pffffft" as the valves did their thing...and hoping to not hear "crunch-crunch".....no crunching, just the good noises.
so i commenced to tieing off the pulley again.......same process....this time tied off to the passenger's side frame and same carpet pad, but i couldn't get it to hold still.....so i inserted a handle of one of the wrenches to give the webbing a "twist" to absolutely 'tourniquet" it tight.......so while holding that wrench in place with my foot, and hoping it wouldn't slip and nail me in the face ....with very little effort, i was able to torque it to the required 116ft/lbs.
all done
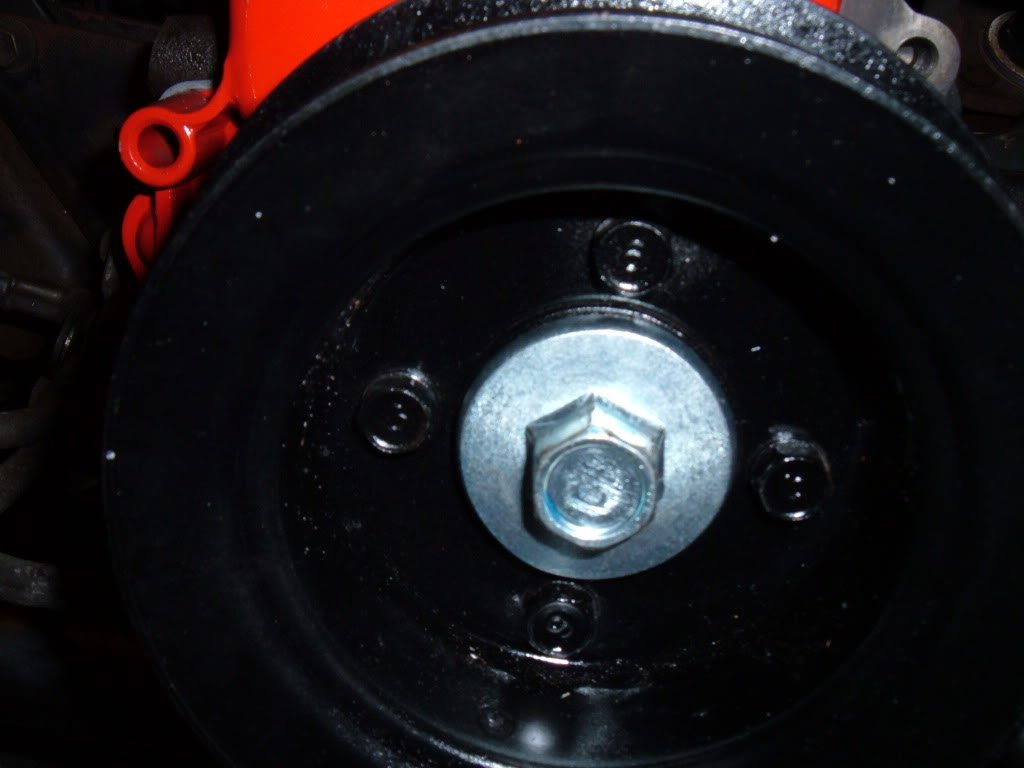
no locktite on it either....was told it didn't need it
so , same trick, opposite direction...except i added 1 more twist to it.
prior to installing the bolt for good, i decided i was finally able to see if i had this all right and wanted to take the crank for a spin......i rotated the engine 1 complete revolution (i think) and made sure to hear ''shoosh....pffffft" as the valves did their thing...and hoping to not hear "crunch-crunch".....no crunching, just the good noises.
so i commenced to tieing off the pulley again.......same process....this time tied off to the passenger's side frame and same carpet pad, but i couldn't get it to hold still.....so i inserted a handle of one of the wrenches to give the webbing a "twist" to absolutely 'tourniquet" it tight.......so while holding that wrench in place with my foot, and hoping it wouldn't slip and nail me in the face ....with very little effort, i was able to torque it to the required 116ft/lbs.
all done
no locktite on it either....was told it didn't need it
Last edited by 92 TOY; May 29, 2010 at 06:28 AM.
May 30, 2010 | 03:28 AM
#52
Thread Starter
YotaTech Milestone-Two Millionth Post
Joined: Jan 2009
Posts: 12,009
Likes: 122
From: Northeast Pennsylvania
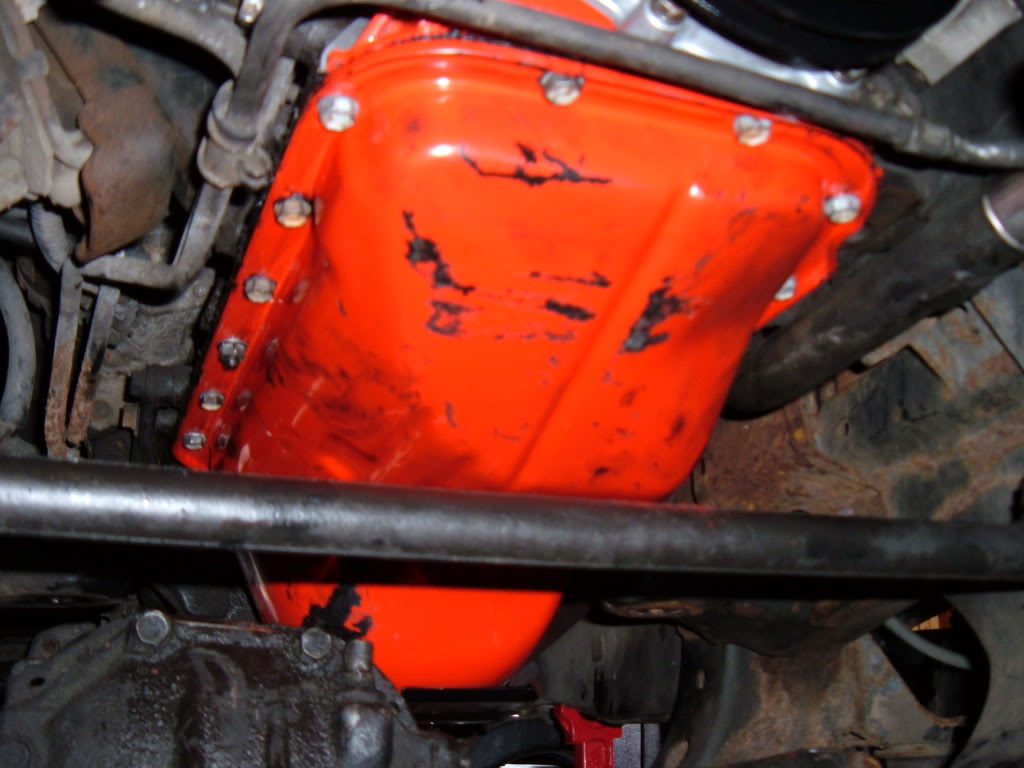
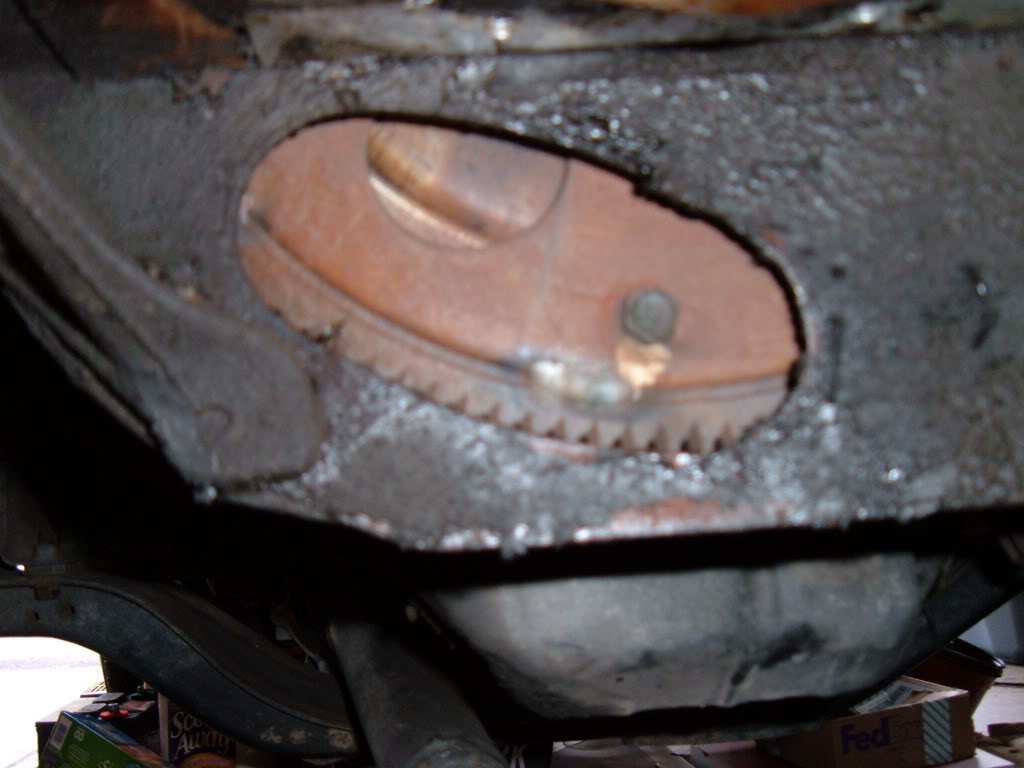
Oil pan installation
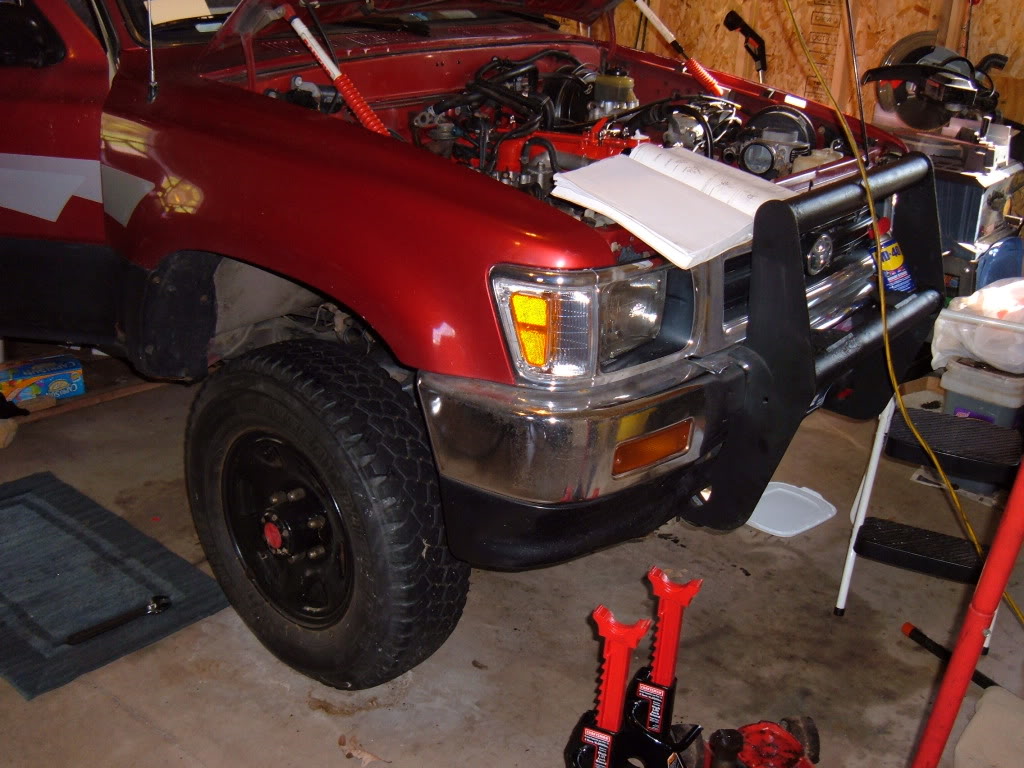
this rebuild has taken so long to this point that my truck has really been on jack-stands for months.....remember, unlike alot of members, i had no prior experience and many,many,many times i threw in the towel and would walk away from this project.....and for the most part, that is the best thing to do.....walk away, regroup and regain the ability to think objectively.
so i was finally at the point to put the pan back on. had ordered, and now had on-hand, the Black FIPG from TOYOTA recommended by the FSM. Is TOYOTA Black FIPG better than anything else available at any store? don't know....but if they told me i needed to eat 3 eggs before doing this part, i sure would.
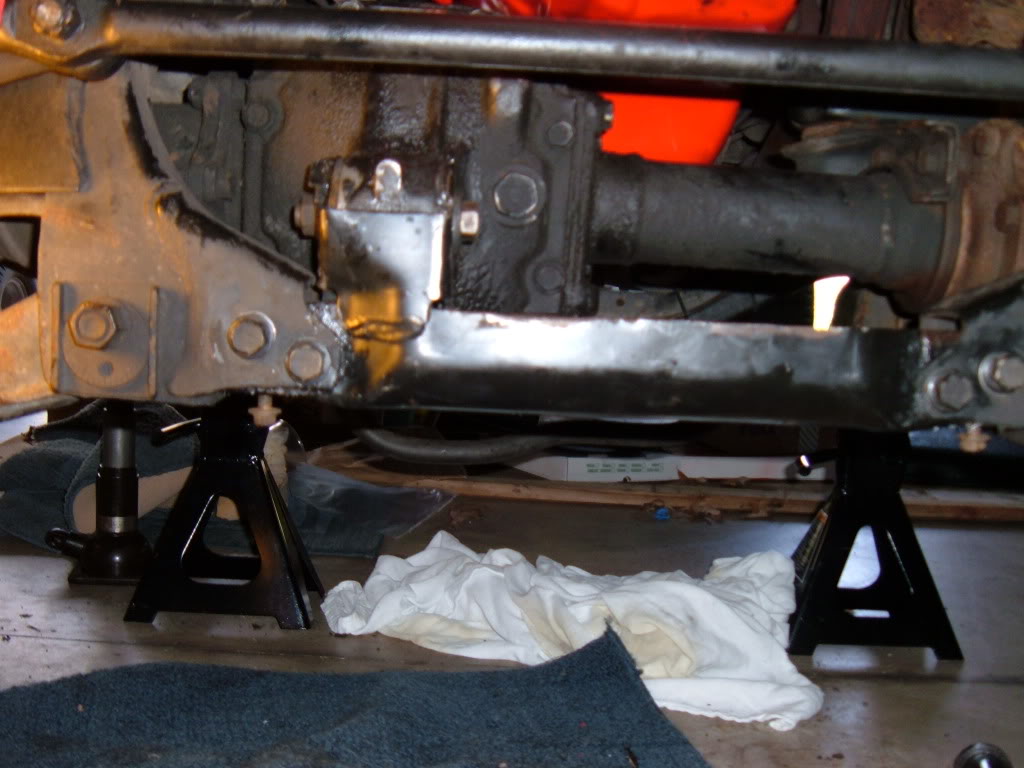
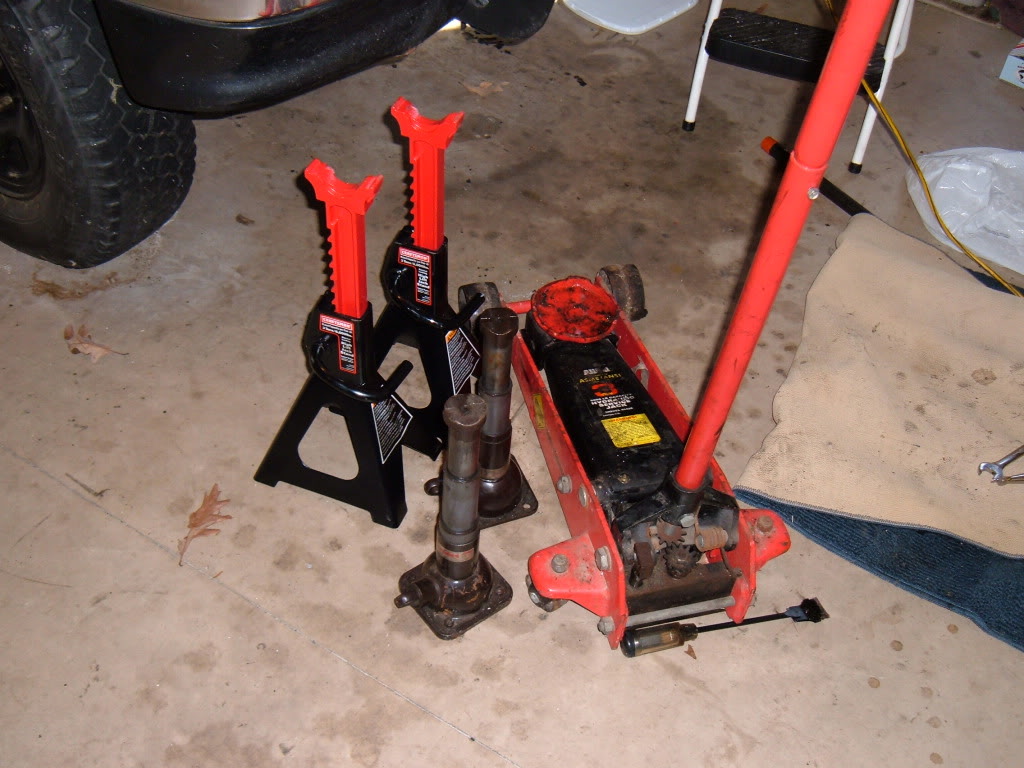
so anyway, I (rather we,...my wife and i) lowered the diff as far as it would go, working the floor jack and bottle jack holding up the drivershaft mating area (because with the multiple articulation areas, when the diff is disconnected from the crossmember,body mounts and driveshaft, it is quite unstable...and i know unstable...hahahahaha)
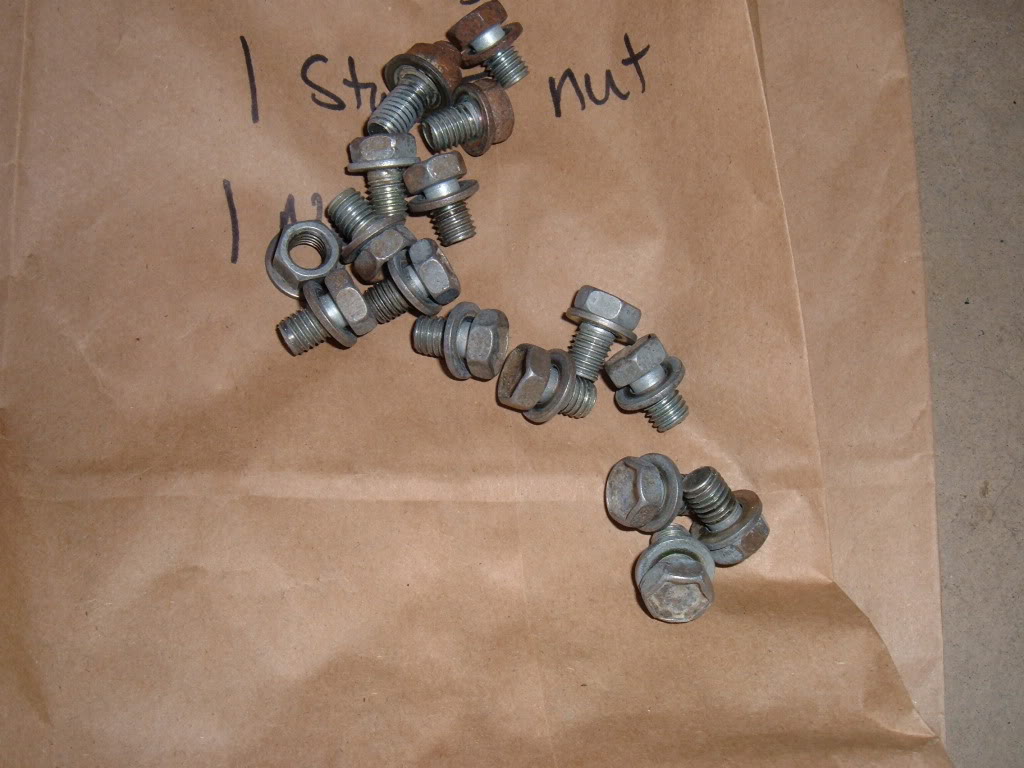
I gathered up all my necessary stuff.....14 bolts, 2 nuts for the pan, FIPG, oil pickup tube and new gasket for that.
and remember, wash your nuts....and bolts....in my case i came up with an easy and cool trick.....took a big plastic cup...dropped all the nuts and bolts in it, squirted ORANGE HAND CLEANER in the cup, shook it up a million times, rinse repeat. and when i was all done i gave them a quick squirt of oil because i felt i should.
PICS>>>>
here's how it was supported for a long time

covered the diff etc, with a beach towel because i didn't want to scratch my beautiful pan.
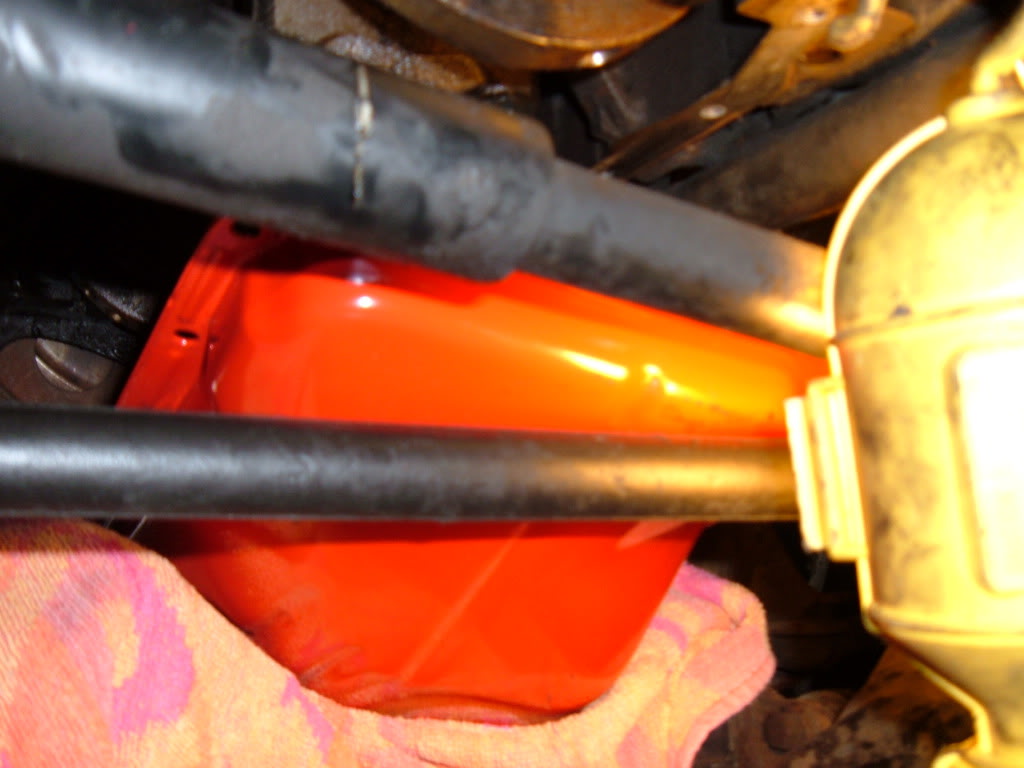
so anyway, good luck on not scratching anything....didn't work out for me.
and, make sure the steering dampener is still unhooked.....it will be in the way if it's attached with it's nut.
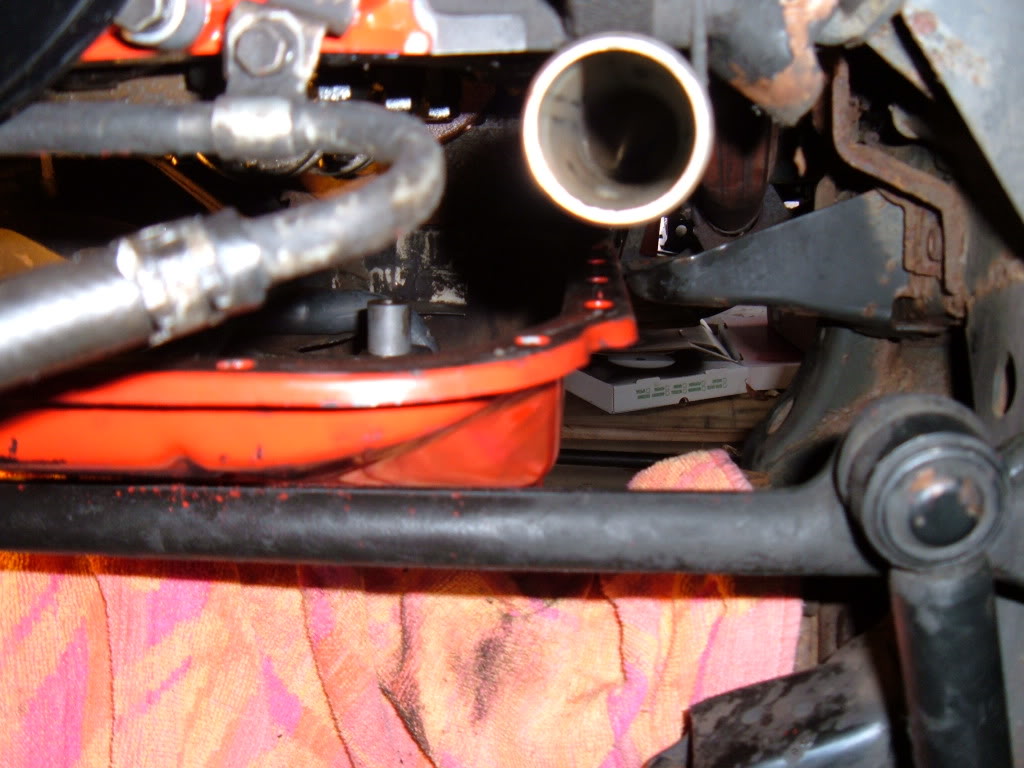
so after i figured that steering-dampener-in-the-way part and that one of my body mounts was bound up, i was able to gain slightly enough room to get the pan exactly below where it needed to be.
let me add, the oil pickup tube needs to be laying in the pan BEFORE you try putting the pan under there.
have to magically make your arms about a foot longer and really skinny now to maneuver getting the pickup tube and it's gasket....of course it can be done...i did it.....careful not to drop the gasket in the pan.... tacked it where it needed to be with a smear of RTV.....doesn't help, don't bother.
let me add....this whole oil pan thing....XXTREME22R said it best....this is reason #2 to pull the engine (#1 being the crankshaft bolt)...at this point, I totally agree.
Once the tube is bolted and torqued in place, i dry fitted the pan to be sure it was going to match up well. with only 1 stud (yep, 1 stud, the other one came out with it's nut attached and that's the way it had to stay) it was going to be a little difficult.
the TOYOTA Black FIPG........it says you have about 5 minutes cushion before it hardens up.....good luck with that too (and that is pretty un-true too...should have really messed around seeing with samples just how long it takes....but it's certainly longer than 5 minutes..probably quite variable based on temperature and humidity).
again, now you have to make your arms very long and skinny to reach the very back of the pan.....my experience.....you start off making a beautiful, textbook, photo quality bead just like described in the FSM and you end up with squeezing the tube blindly hoping that you are getting it where it needs to be......by the way this stuff is TERRIBLE TO SCRUB OFF YOUR SKIN......but it's gonna be everywhere.
bolting the pan in place is just as exciting as you think it should be.....bad for me and maybe dangerous as well, was the fact that i had to remove my trusty floor-jack that has been steadying my diff this whole while, because i had to lay right there to bolt up the pan........the instruction to my son was simple.....if you see me squirming and not talking, jack the truck up, if i'm not moving, jack the truck up, otherwise just keep handing me bolts...with the diff right against my face, i bolted the pan down....14 bolts, 2 nuts, to 9ft/lbs as the good book says.
with this very difficult portion of the episode done, i regrouped....mostly happy because it was done, kinda pissed because i scratched the hell out of my pan.
and oh yeah, on an automatic (i don't know about the 5 speed)...you have this thing. a rubbery / undercoated-covered, oil-covered, deformed, mis-shaped plug...i assume it's some sort of inspection plug for the transmission.......put it in BEFORE you put the pan on....i didn't, and had to get it into place with alot of finesse afterwards.
so i was finally at the point to put the pan back on. had ordered, and now had on-hand, the Black FIPG from TOYOTA recommended by the FSM. Is TOYOTA Black FIPG better than anything else available at any store? don't know....but if they told me i needed to eat 3 eggs before doing this part, i sure would.
so anyway, I (rather we,...my wife and i) lowered the diff as far as it would go, working the floor jack and bottle jack holding up the drivershaft mating area (because with the multiple articulation areas, when the diff is disconnected from the crossmember,body mounts and driveshaft, it is quite unstable...and i know unstable...hahahahaha)
I gathered up all my necessary stuff.....14 bolts, 2 nuts for the pan, FIPG, oil pickup tube and new gasket for that.
and remember, wash your nuts....and bolts....in my case i came up with an easy and cool trick.....took a big plastic cup...dropped all the nuts and bolts in it, squirted ORANGE HAND CLEANER in the cup, shook it up a million times, rinse repeat. and when i was all done i gave them a quick squirt of oil because i felt i should.
PICS>>>>
here's how it was supported for a long time
covered the diff etc, with a beach towel because i didn't want to scratch my beautiful pan.
so anyway, good luck on not scratching anything....didn't work out for me.
and, make sure the steering dampener is still unhooked.....it will be in the way if it's attached with it's nut.
so after i figured that steering-dampener-in-the-way part and that one of my body mounts was bound up, i was able to gain slightly enough room to get the pan exactly below where it needed to be.
let me add, the oil pickup tube needs to be laying in the pan BEFORE you try putting the pan under there.
have to magically make your arms about a foot longer and really skinny now to maneuver getting the pickup tube and it's gasket....of course it can be done...i did it.....careful not to drop the gasket in the pan.... tacked it where it needed to be with a smear of RTV.....doesn't help, don't bother.
let me add....this whole oil pan thing....XXTREME22R said it best....this is reason #2 to pull the engine (#1 being the crankshaft bolt)...at this point, I totally agree.
Once the tube is bolted and torqued in place, i dry fitted the pan to be sure it was going to match up well. with only 1 stud (yep, 1 stud, the other one came out with it's nut attached and that's the way it had to stay) it was going to be a little difficult.
the TOYOTA Black FIPG........it says you have about 5 minutes cushion before it hardens up.....good luck with that too (and that is pretty un-true too...should have really messed around seeing with samples just how long it takes....but it's certainly longer than 5 minutes..probably quite variable based on temperature and humidity).
again, now you have to make your arms very long and skinny to reach the very back of the pan.....my experience.....you start off making a beautiful, textbook, photo quality bead just like described in the FSM and you end up with squeezing the tube blindly hoping that you are getting it where it needs to be......by the way this stuff is TERRIBLE TO SCRUB OFF YOUR SKIN......but it's gonna be everywhere.
bolting the pan in place is just as exciting as you think it should be.....bad for me and maybe dangerous as well, was the fact that i had to remove my trusty floor-jack that has been steadying my diff this whole while, because i had to lay right there to bolt up the pan........the instruction to my son was simple.....if you see me squirming and not talking, jack the truck up, if i'm not moving, jack the truck up, otherwise just keep handing me bolts...with the diff right against my face, i bolted the pan down....14 bolts, 2 nuts, to 9ft/lbs as the good book says.
with this very difficult portion of the episode done, i regrouped....mostly happy because it was done, kinda pissed because i scratched the hell out of my pan.
and oh yeah, on an automatic (i don't know about the 5 speed)...you have this thing. a rubbery / undercoated-covered, oil-covered, deformed, mis-shaped plug...i assume it's some sort of inspection plug for the transmission.......put it in BEFORE you put the pan on....i didn't, and had to get it into place with alot of finesse afterwards.
Last edited by 92 TOY; May 30, 2010 at 03:43 AM.
May 30, 2010 | 05:04 AM
#54
Thread Starter
YotaTech Milestone-Two Millionth Post
Joined: Jan 2009
Posts: 12,009
Likes: 122
From: Northeast Pennsylvania
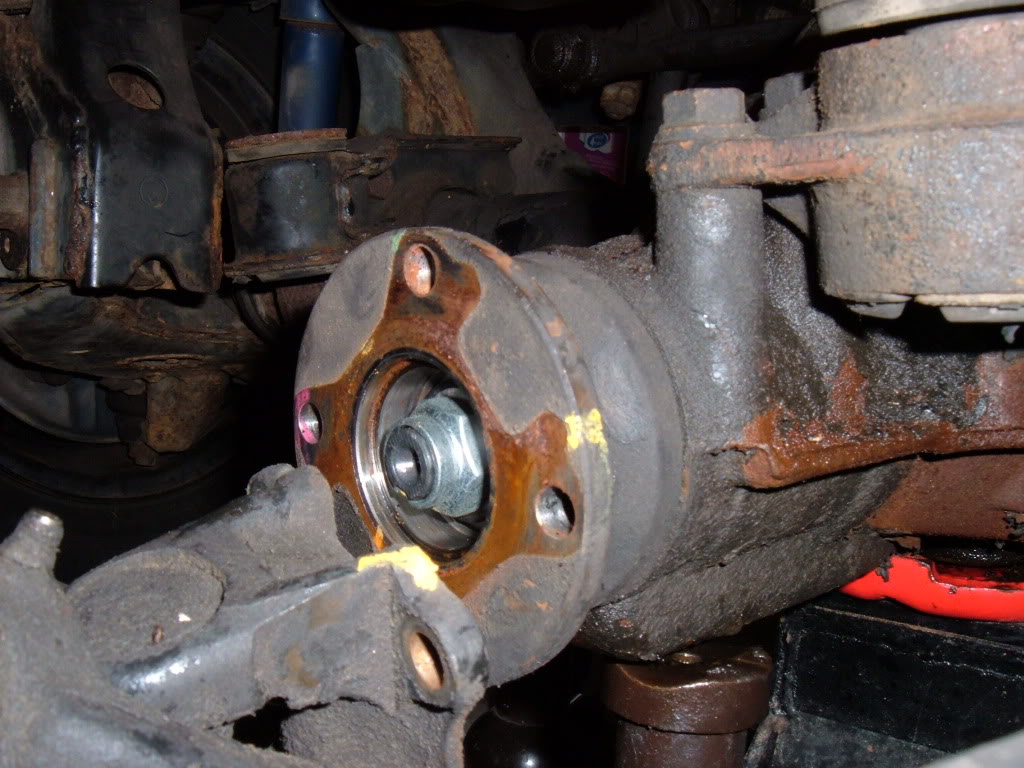
Front diff re-installation
this part actually went easier than i thought it would.
with all the movement, tweaking of position and overall girth of this thing, i thought there was a snowball's chance of getting it right.
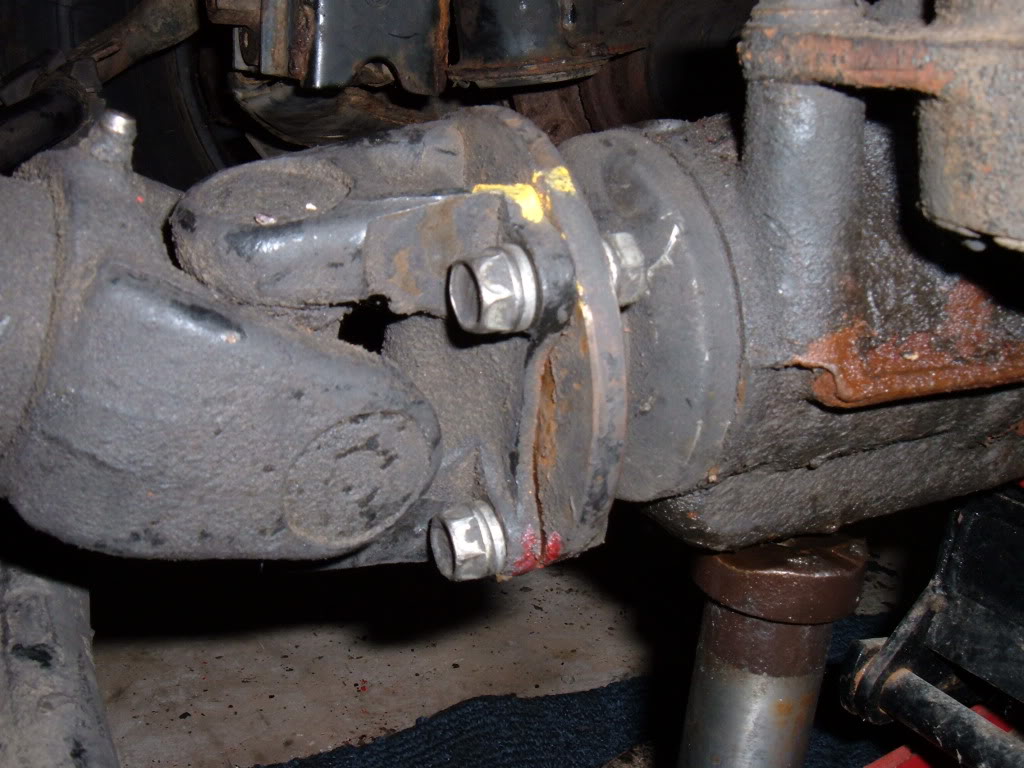
One of the 1st things I did, to try to help things, was to attach the front driveshaft to the diff. thinking that this would provide at least a little stability to the whole thing .....in other words, keep the diff from doing a nose-dive again (at one point the diff turned at the driveshaft mating area was almost pointing straight down...and it made me nervous)
so...using the painted match-marks, i hooked back up...again, with a wrench and a wrench because ,for me, there was no room for a socket or a torque wrench...i'm sure there is a way, just that i don't have the tools for it.....i believe the torque was to be something like 76ft/lbs on those....so i put them on "Levi-tight" (inside joke...let it go)
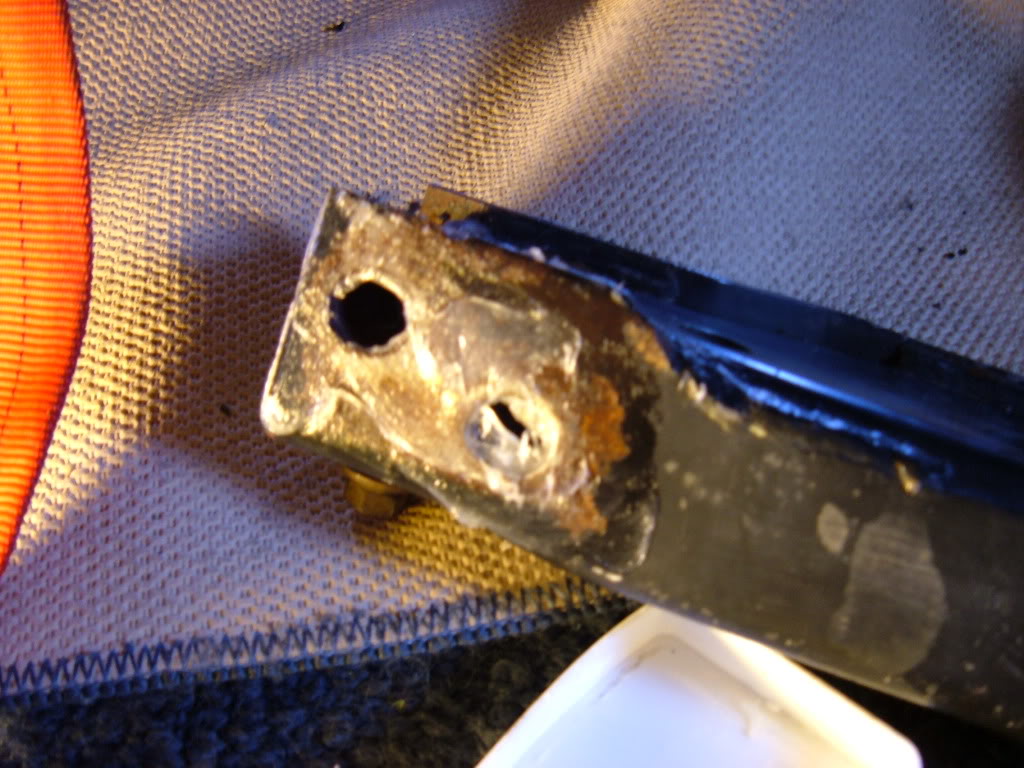
now it was time to get the body mounts back in place.....a little biding occurred when i was jacking the diff up, but nothing that a gentle nudge with my foot couldn't rectify...
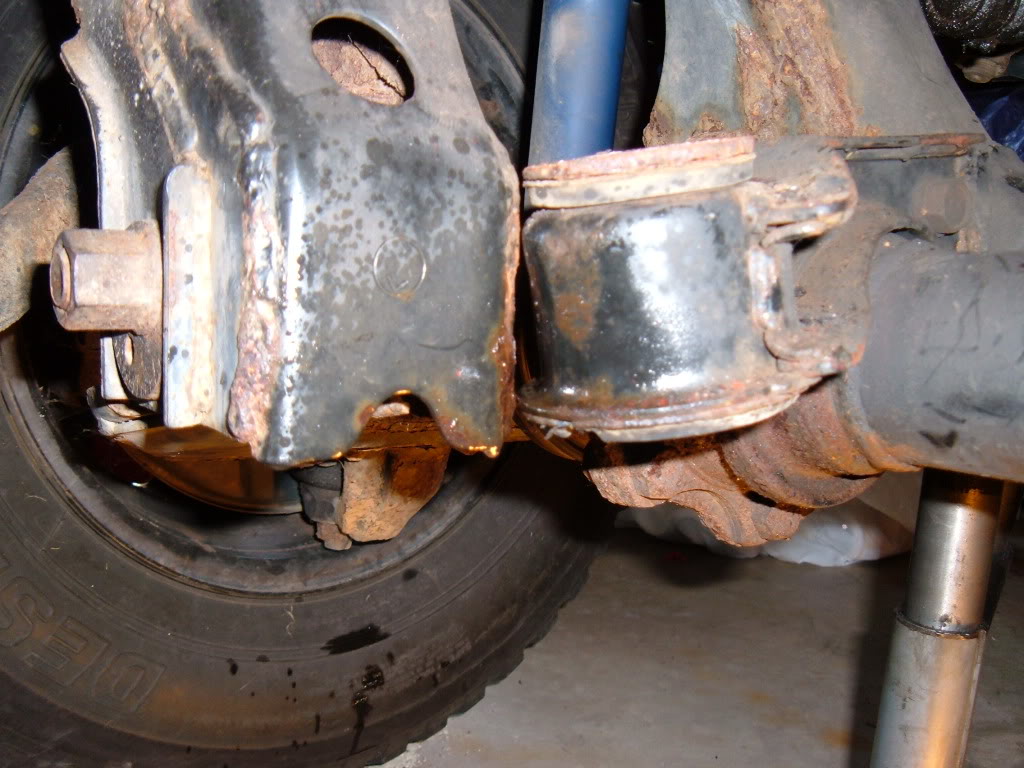
with that, and to my surprise, i was able to pass the bolt straight up and loosely bolt the driver's side......passengers side, same good story, though that side you do blindly and by feel alone....apparently the nut is tack-welded into place...or it should be....mine were not.....but they tighten down WITHOUT having to apply a wrench on top (can't say the same for removal....but on install, this was the case)
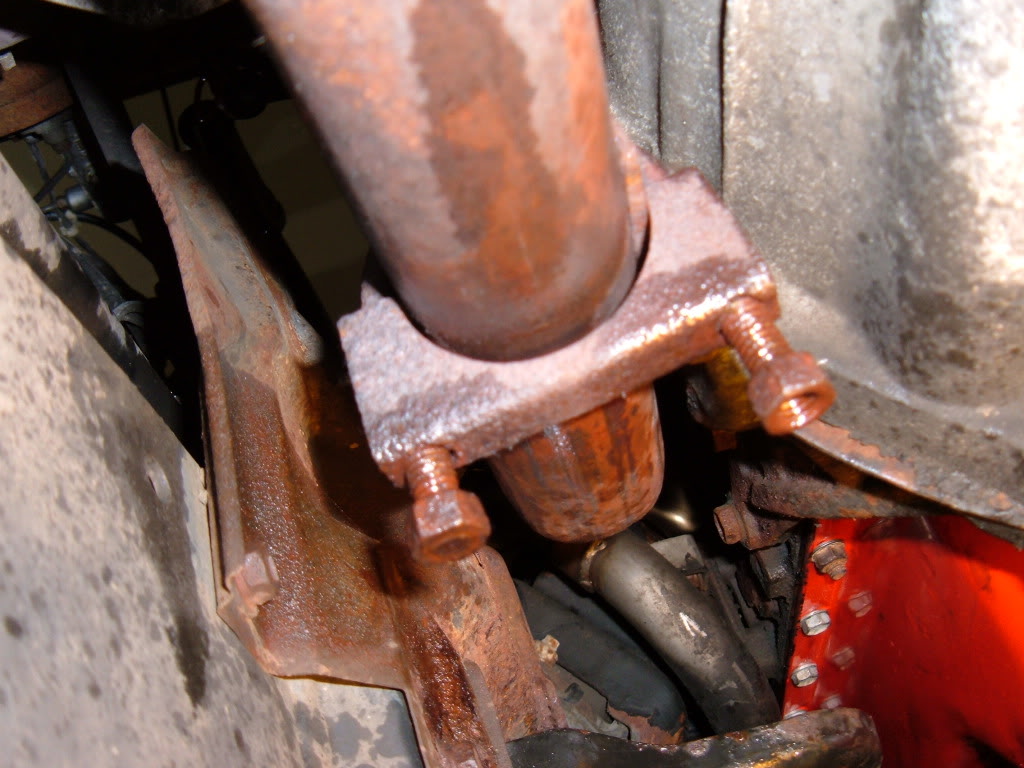
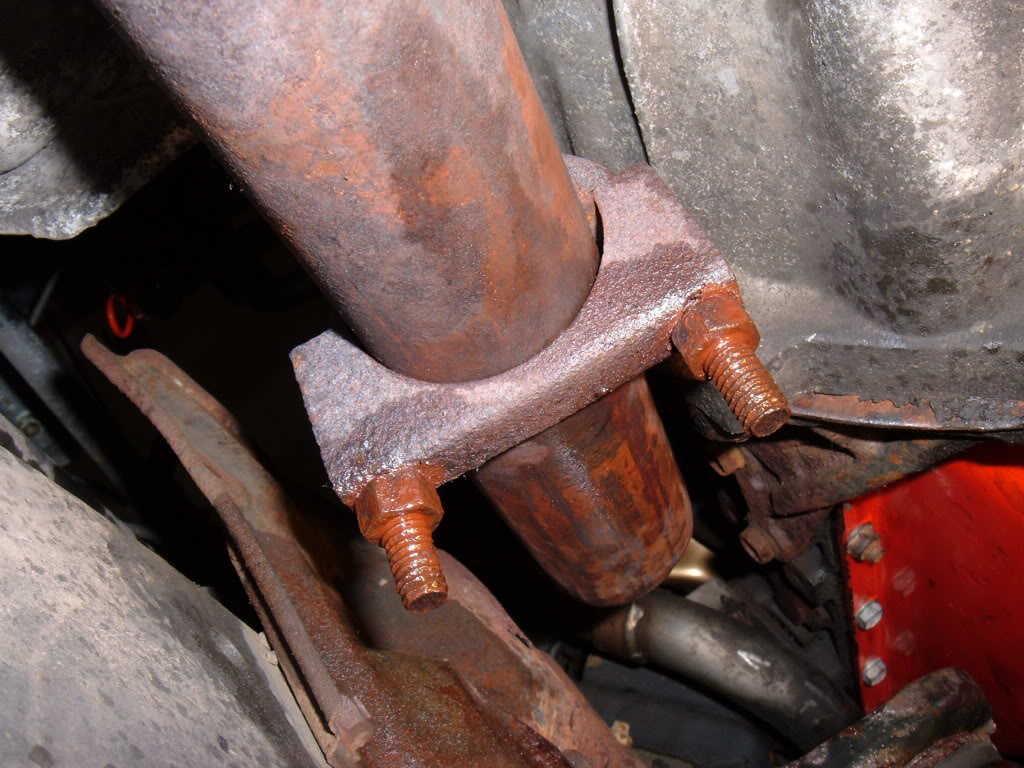
so, there's apparently a right way and a wrong way to put these "crown" things on (that's what i call them)....right way looks wrong, wrong way looks right....does it matter??? not sure....but i will show you.
wrong way (yep, it looks right)
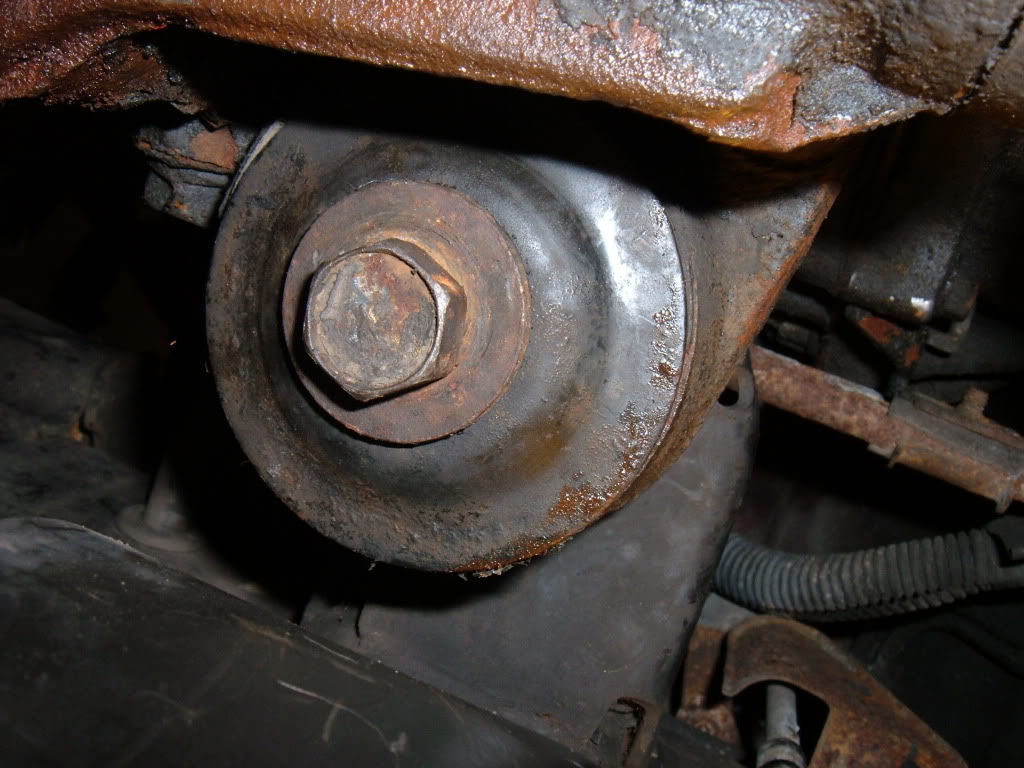
right way (looks wrong doesn't it)
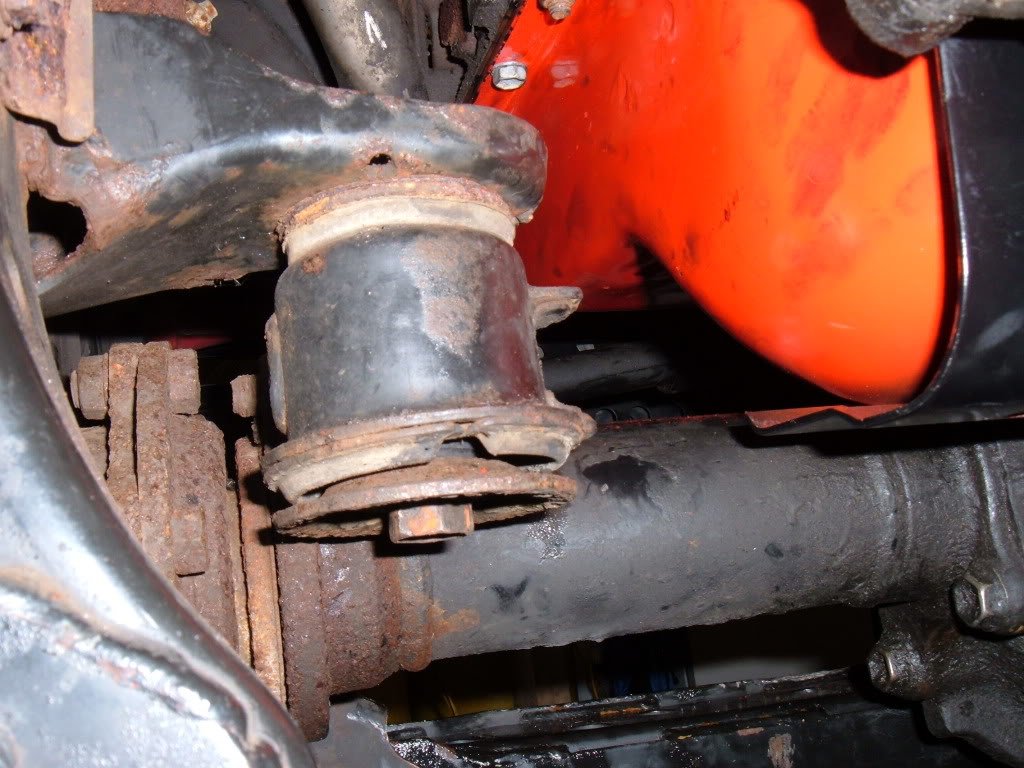
wrong way (looks right to me)

well, not really sure, right way , wrong way, what it all means.....i'm sure it matters somewhere, but actually, mine are on there, right now...the wrong way...so be it.
so it was time to put the crossmember back in........i had heard complaints from other members that this was very difficult to accomplish and because of that, i kinda dreaded it....
it went rather well....put some vaseline on the metal to metal surfaces and commenced to working it into place...
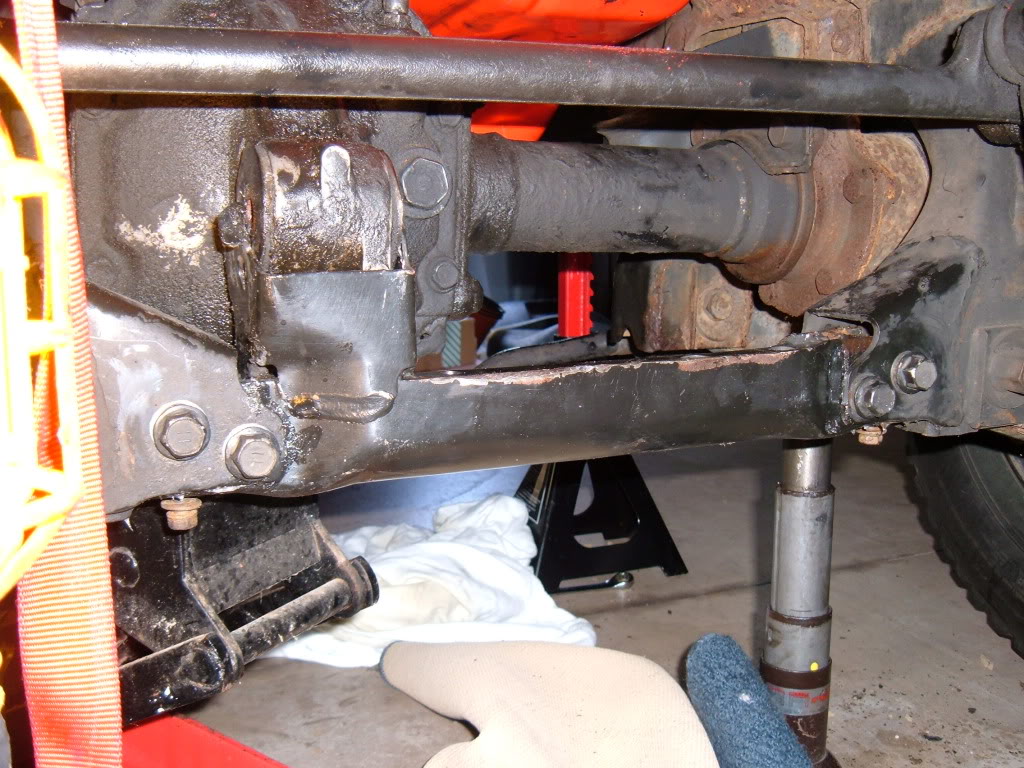
the last piece to this puzzle was to get the diff in it's cradle and pass the bolt through.......with just a little tweaking and a quick strike with the mallet, it passed through.....everything could now be torqued and for the 1st time in months my truck could stand on it's own feet.
this part of the episode was over....and now the steering dampener could be back in place as well.
with all the movement, tweaking of position and overall girth of this thing, i thought there was a snowball's chance of getting it right.
One of the 1st things I did, to try to help things, was to attach the front driveshaft to the diff. thinking that this would provide at least a little stability to the whole thing .....in other words, keep the diff from doing a nose-dive again (at one point the diff turned at the driveshaft mating area was almost pointing straight down...and it made me nervous)
so...using the painted match-marks, i hooked back up...again, with a wrench and a wrench because ,for me, there was no room for a socket or a torque wrench...i'm sure there is a way, just that i don't have the tools for it.....i believe the torque was to be something like 76ft/lbs on those....so i put them on "Levi-tight" (inside joke...let it go)
now it was time to get the body mounts back in place.....a little biding occurred when i was jacking the diff up, but nothing that a gentle nudge with my foot couldn't rectify...
with that, and to my surprise, i was able to pass the bolt straight up and loosely bolt the driver's side......passengers side, same good story, though that side you do blindly and by feel alone....apparently the nut is tack-welded into place...or it should be....mine were not.....but they tighten down WITHOUT having to apply a wrench on top (can't say the same for removal....but on install, this was the case)
so, there's apparently a right way and a wrong way to put these "crown" things on (that's what i call them)....right way looks wrong, wrong way looks right....does it matter??? not sure....but i will show you.
wrong way (yep, it looks right)
right way (looks wrong doesn't it)
wrong way (looks right to me)
well, not really sure, right way , wrong way, what it all means.....i'm sure it matters somewhere, but actually, mine are on there, right now...the wrong way...so be it.
so it was time to put the crossmember back in........i had heard complaints from other members that this was very difficult to accomplish and because of that, i kinda dreaded it....
it went rather well....put some vaseline on the metal to metal surfaces and commenced to working it into place...
the last piece to this puzzle was to get the diff in it's cradle and pass the bolt through.......with just a little tweaking and a quick strike with the mallet, it passed through.....everything could now be torqued and for the 1st time in months my truck could stand on it's own feet.
this part of the episode was over....and now the steering dampener could be back in place as well.
Last edited by 92 TOY; May 30, 2010 at 05:09 AM.
Jun 2, 2010 | 02:23 AM
#56
Thread Starter
YotaTech Milestone-Two Millionth Post
Joined: Jan 2009
Posts: 12,009
Likes: 122
From: Northeast Pennsylvania
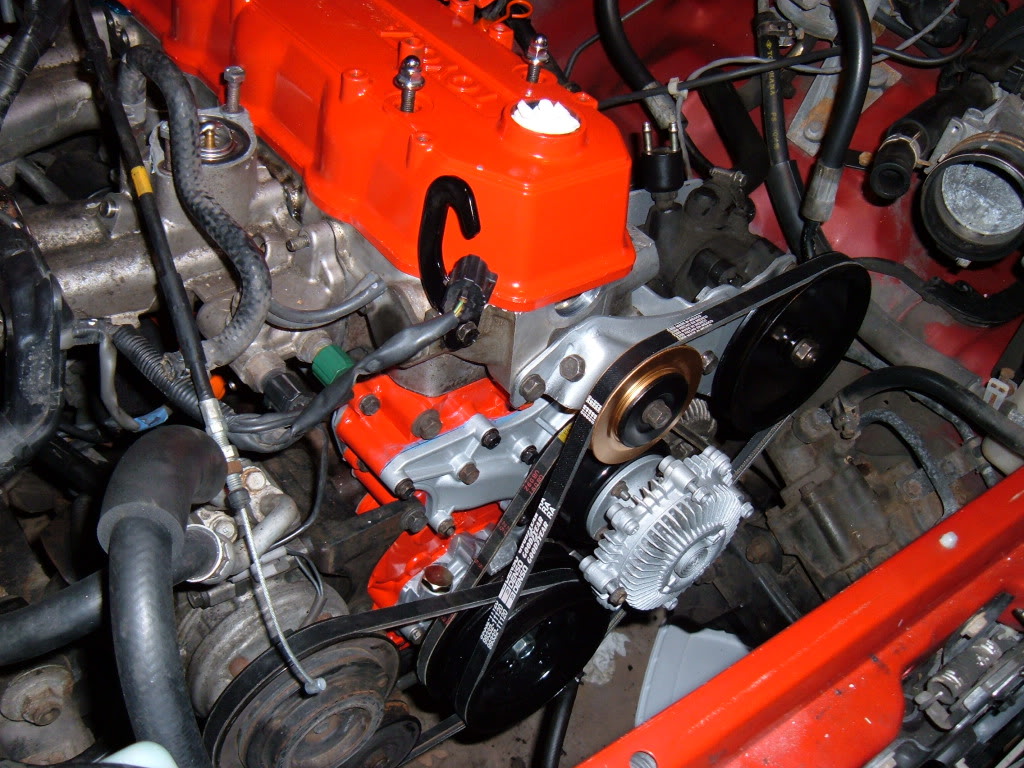
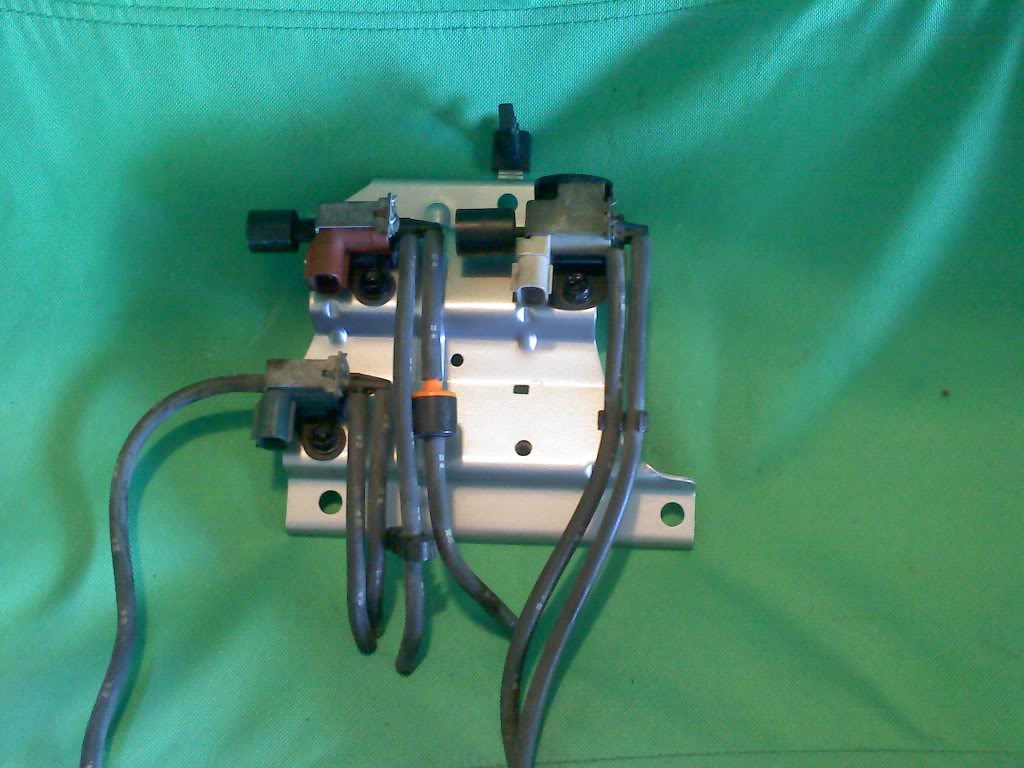
Power sterring / odds and ends
now it was time to button up more stuff.
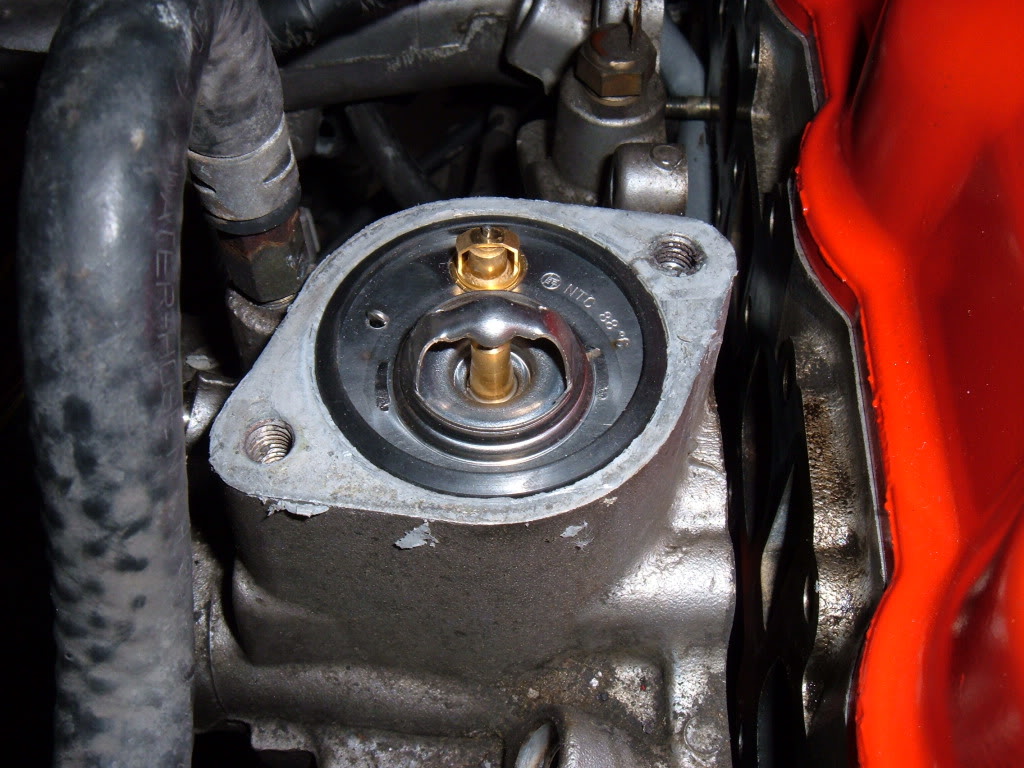
dual valve thermostat: was recommended more than a few times, so i bought it (i will have to edit in the part # and price) from www.trdparts4u.com
and the little hose from the water pump to the block (also from trdparts4u.com)
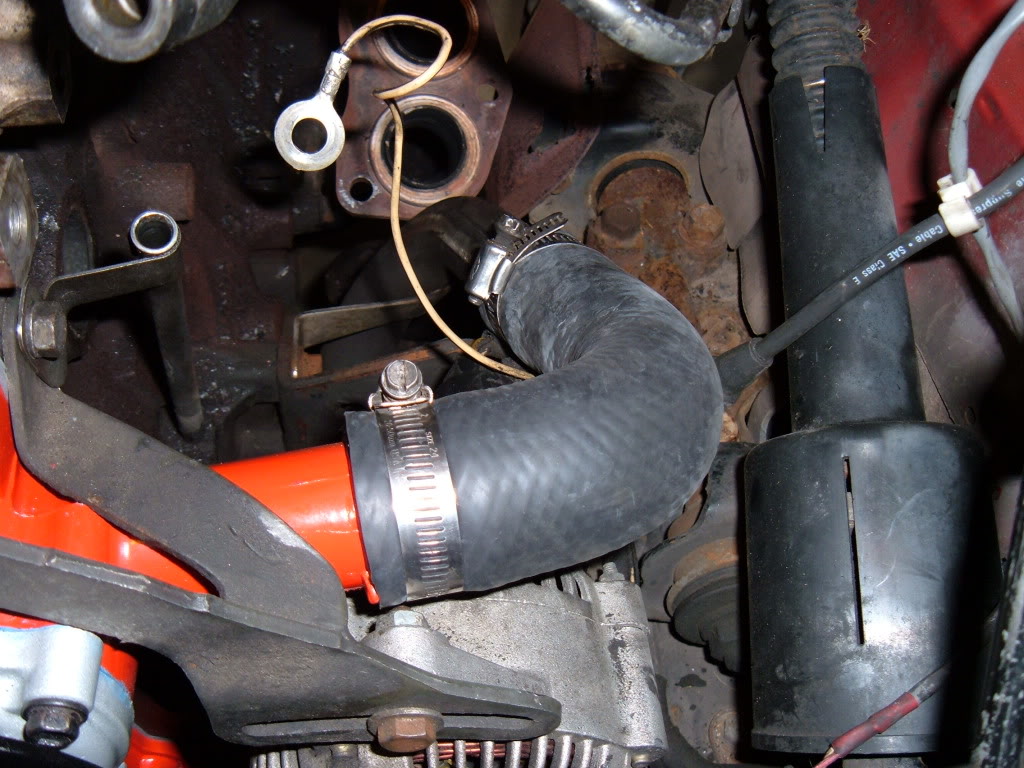
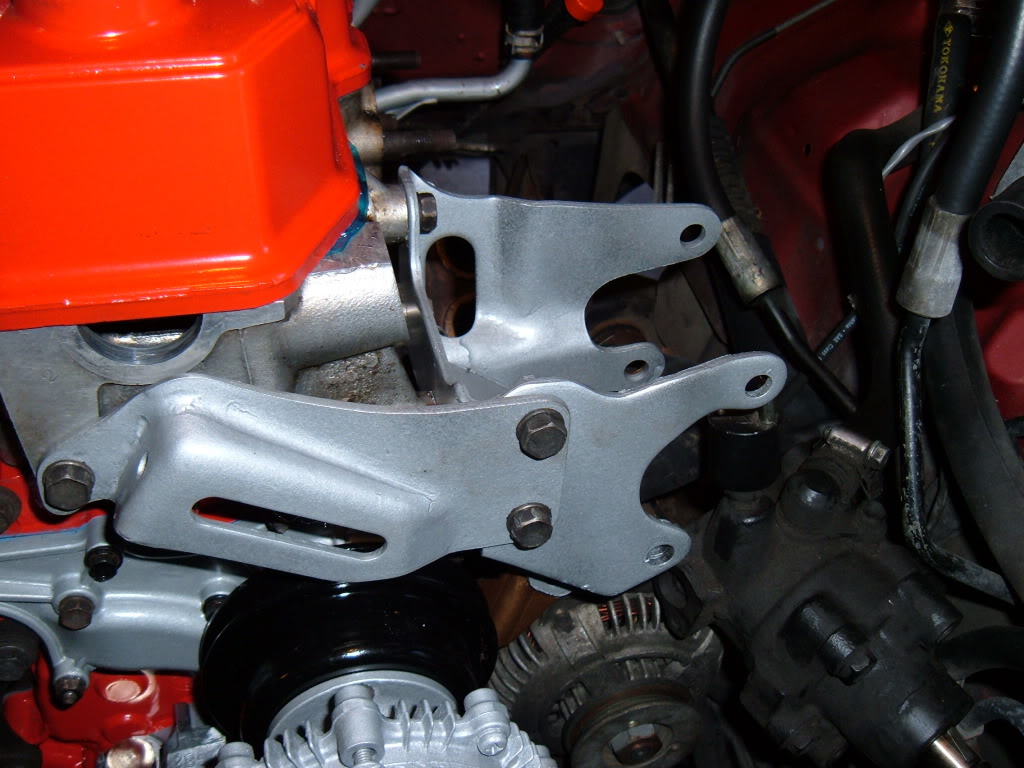
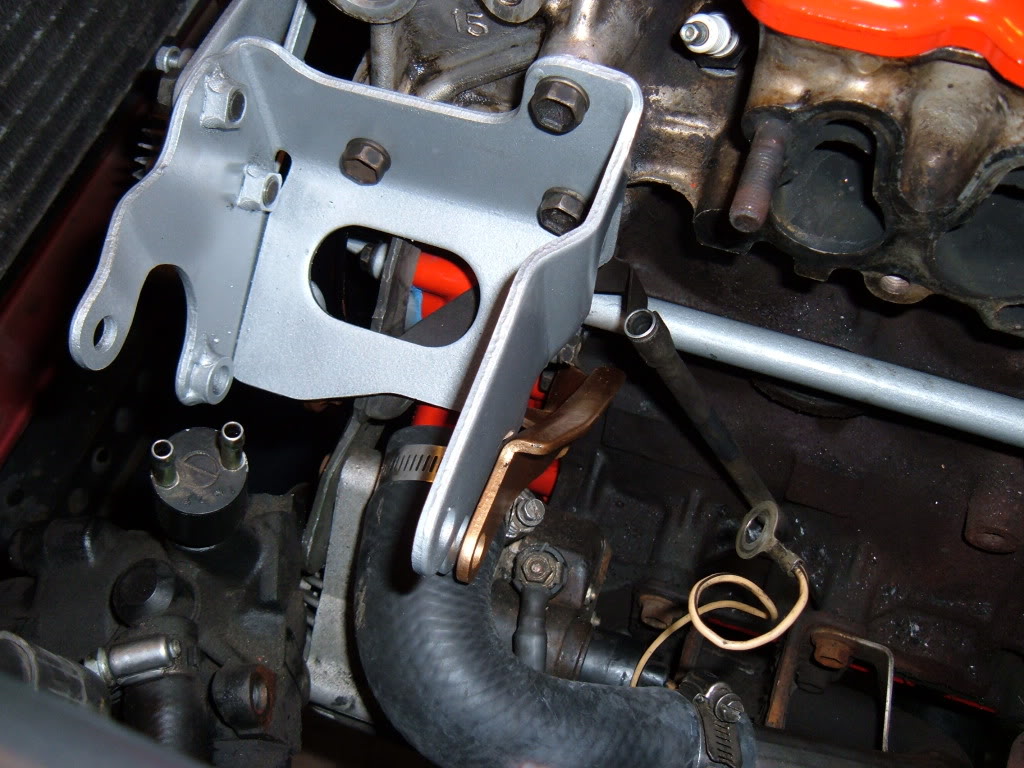
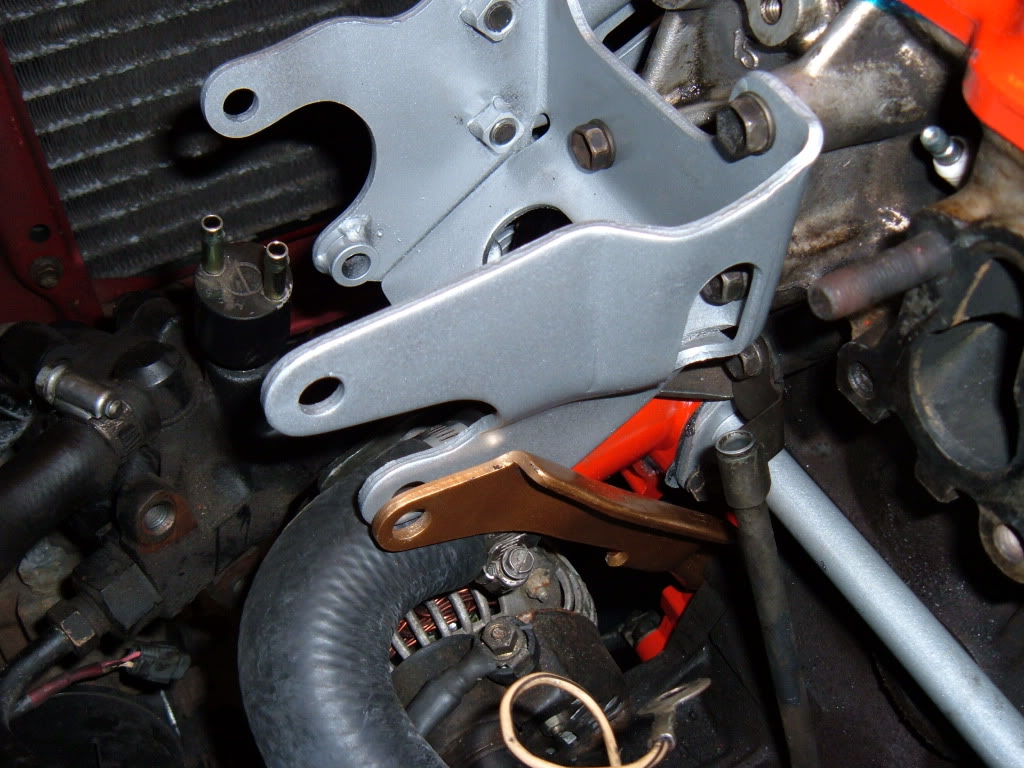
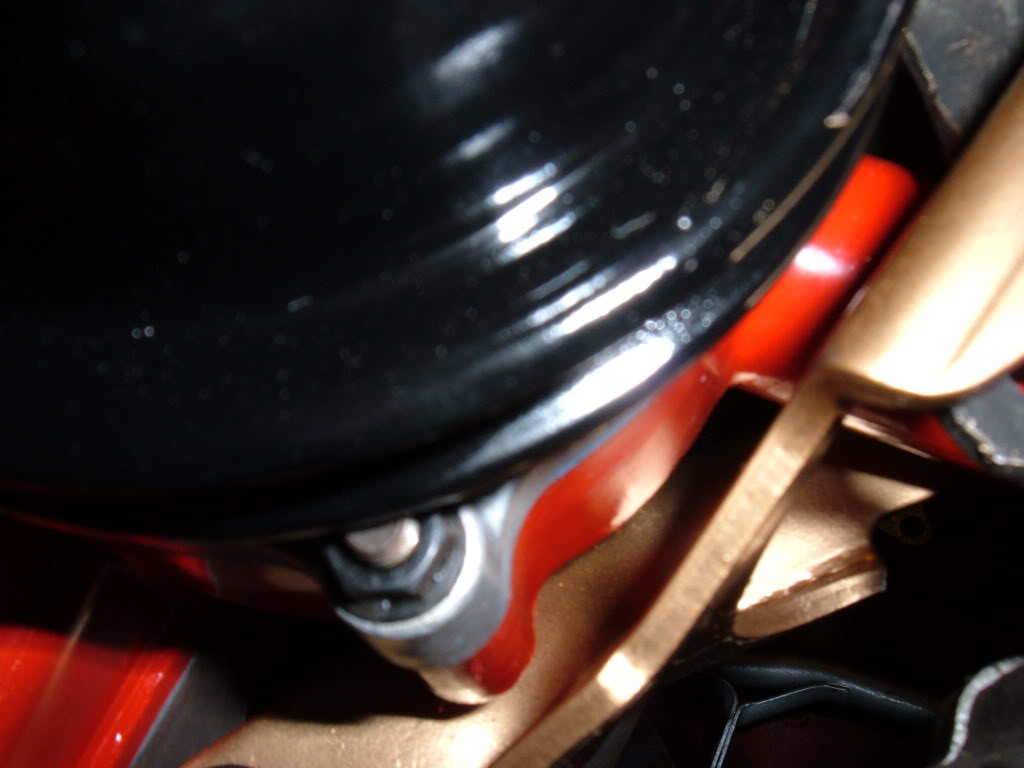
cleaned up and painted this stuff (pay attention to that GOLD one, it's a bugger to figure out where it goes, so because it's GOLD it's going to be easier to explain that)

kinda goes like this
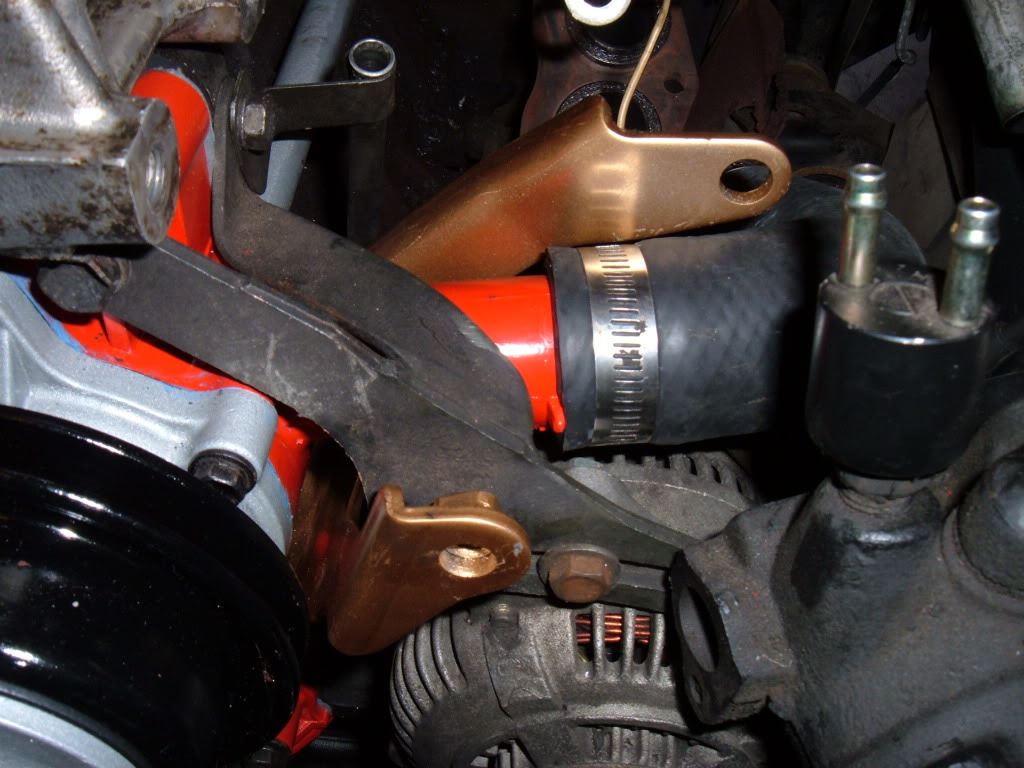

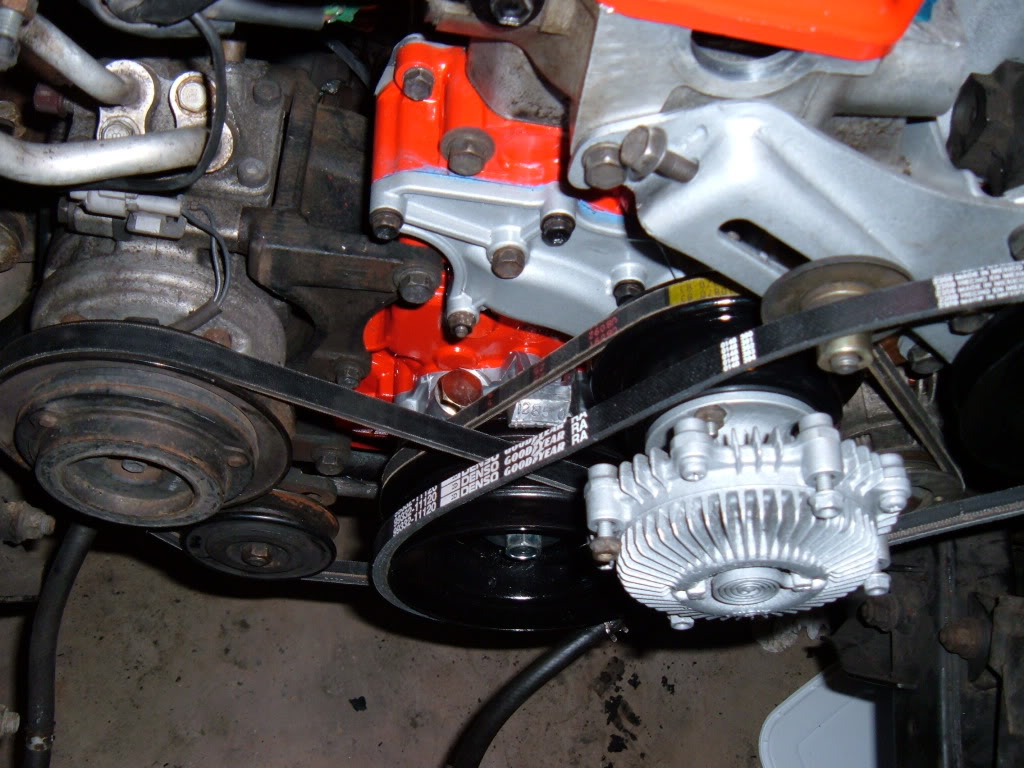
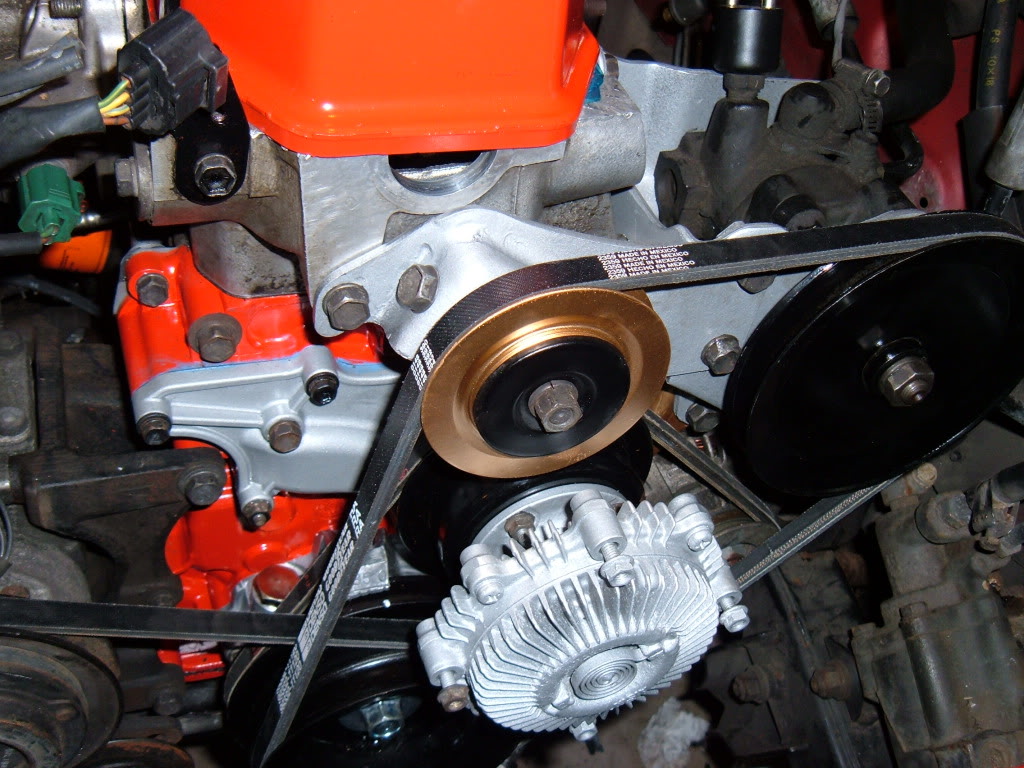
belts are all on now.....this was a 1st for me, and i got it right, and even after starting it up, no adjustments were needed
dual valve thermostat: was recommended more than a few times, so i bought it (i will have to edit in the part # and price) from www.trdparts4u.com
and the little hose from the water pump to the block (also from trdparts4u.com)
cleaned up and painted this stuff (pay attention to that GOLD one, it's a bugger to figure out where it goes, so because it's GOLD it's going to be easier to explain that)
kinda goes like this
belts are all on now.....this was a 1st for me, and i got it right, and even after starting it up, no adjustments were needed
Jun 2, 2010 | 02:33 AM
#57
Thread Starter
YotaTech Milestone-Two Millionth Post
Joined: Jan 2009
Posts: 12,009
Likes: 122
From: Northeast Pennsylvania
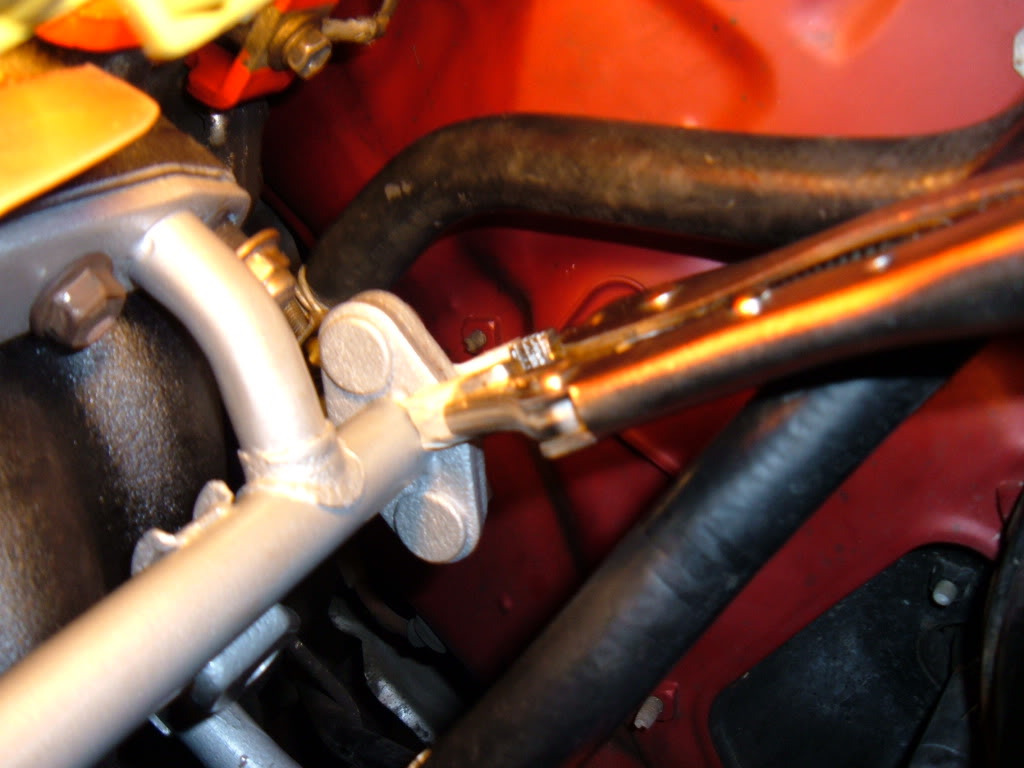
Exhaust manifold install
because of the stories i heard about broken exhaust studs during removal and install, i was nervous....it all went well.(yes, if you look closely, there is a missing stud....the dealer broke that on the previous repair and left it that way...no leaks....isn't that nice of them?)
here's the pics
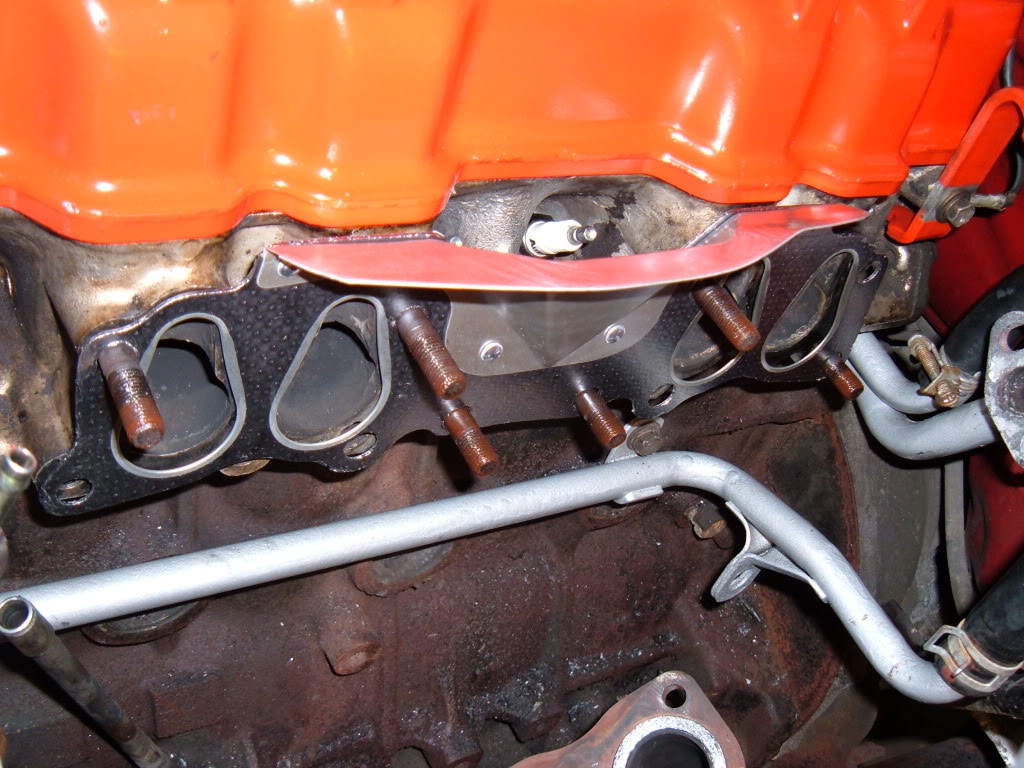
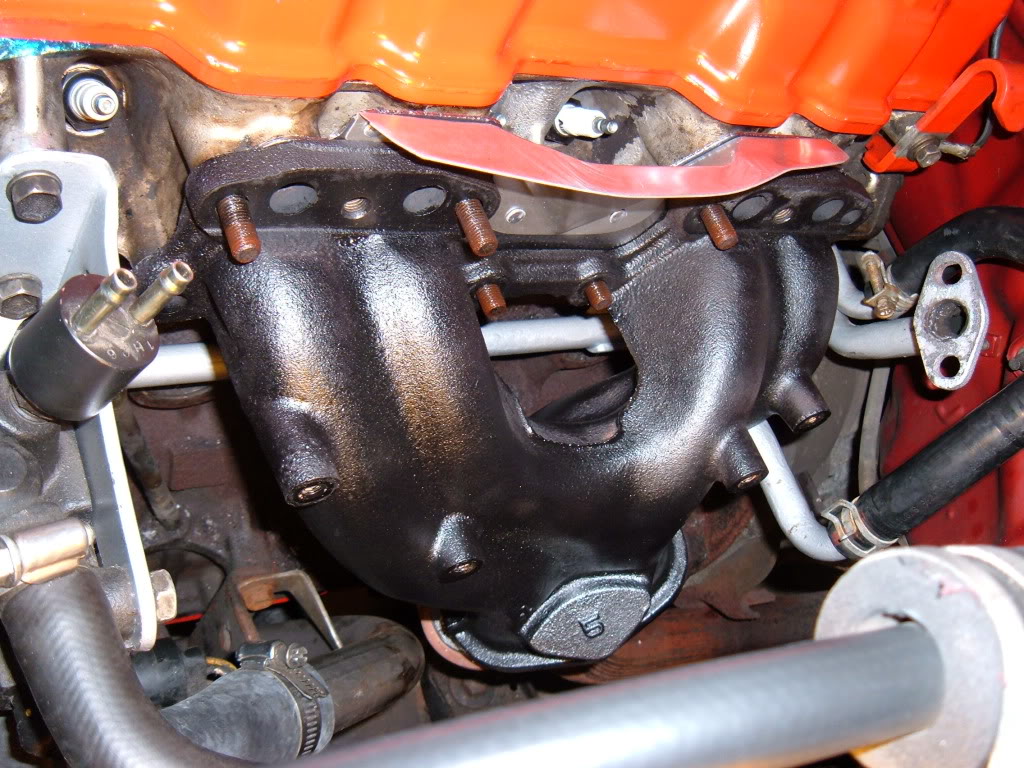
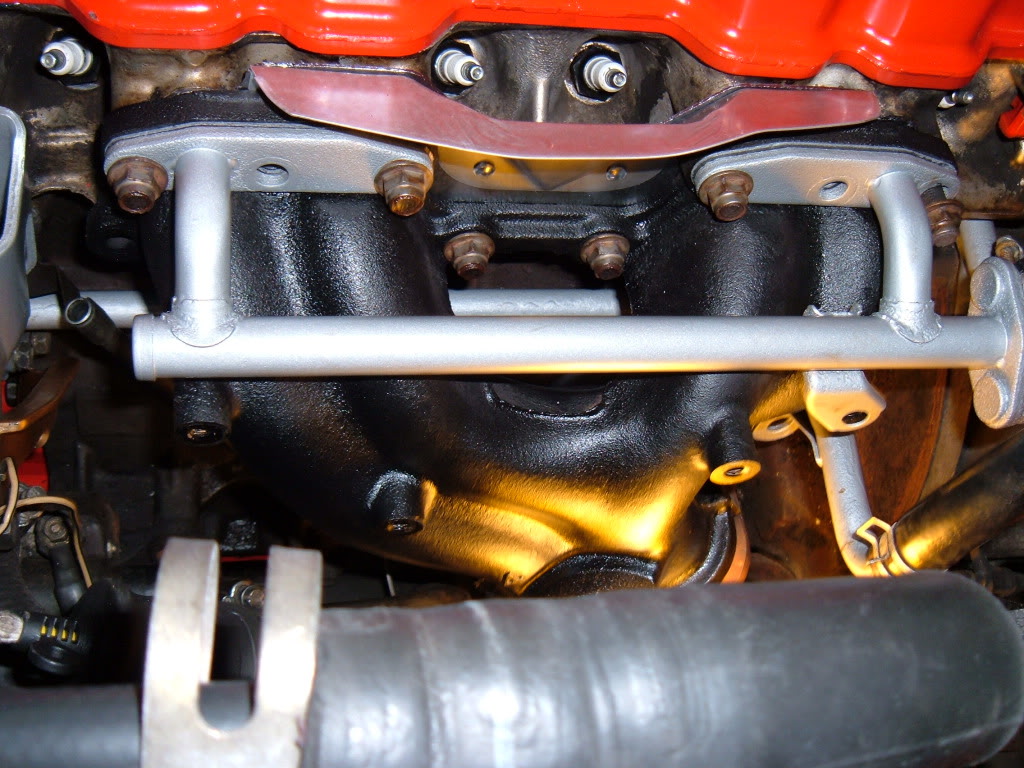
so right up until now i was doing well, i could not get this to line up (those dreaded pipes).....gasket sandwiched and vice grips employed....worked like a charm
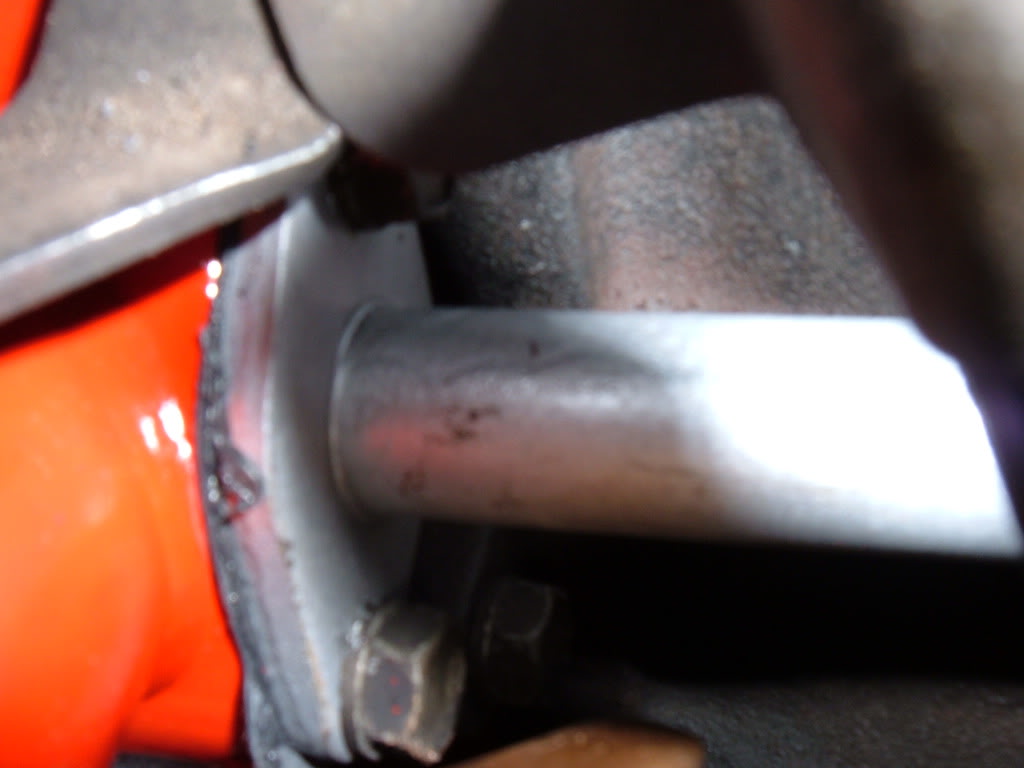
ah yes.....this pic is a pic of the location of a bolt i forgot....i did not understand my bag labeling and how and why a flange with 2 bolts is labeled as having 3.....but feeling around blindly with my fingers yielded it's location.......so with a little creative wrenching i got it in.
also it was time to re-assemble the long tool to do the connection between the exhaust manifold and it's down-pipe
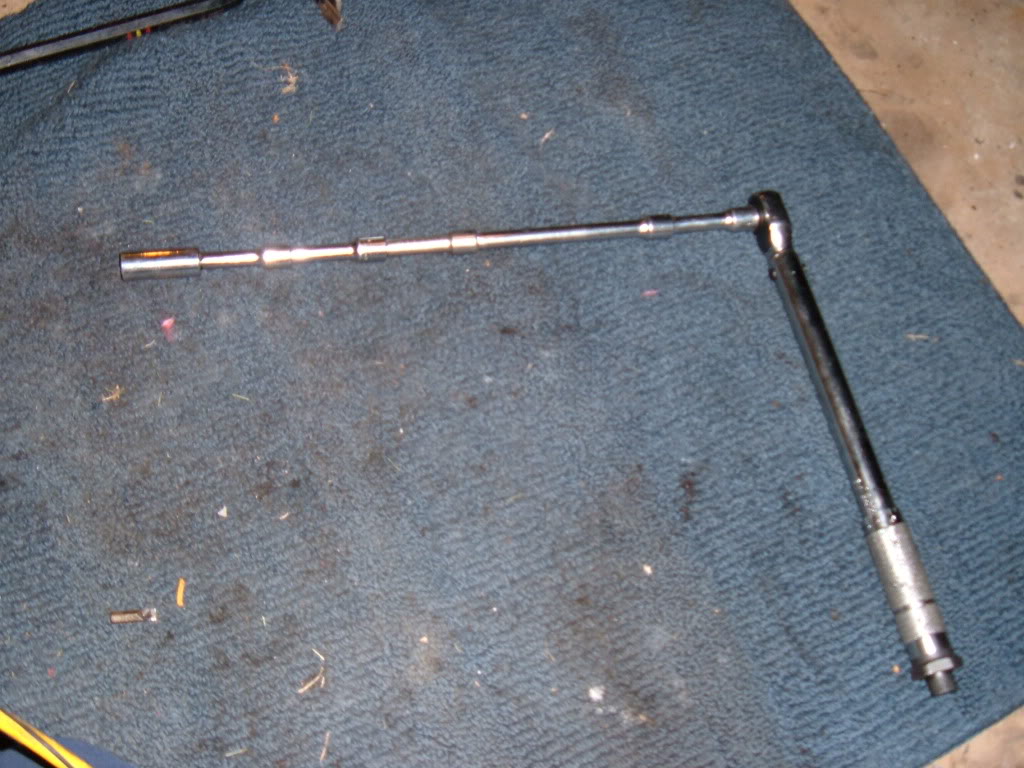
for waaaaay up there
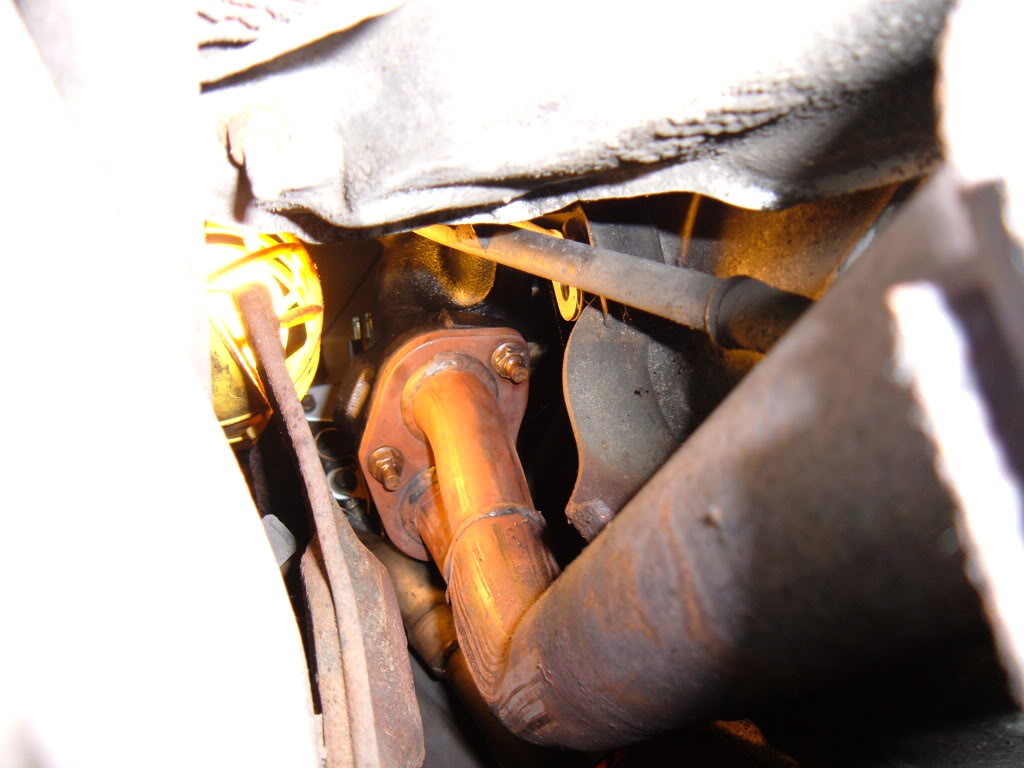
and don't forget the clamp that holds everything still to the transmission....
and with the installation of the heat shield, i was done with this
here's the pics
so right up until now i was doing well, i could not get this to line up (those dreaded pipes).....gasket sandwiched and vice grips employed....worked like a charm
ah yes.....this pic is a pic of the location of a bolt i forgot....i did not understand my bag labeling and how and why a flange with 2 bolts is labeled as having 3.....but feeling around blindly with my fingers yielded it's location.......so with a little creative wrenching i got it in.
also it was time to re-assemble the long tool to do the connection between the exhaust manifold and it's down-pipe
for waaaaay up there
and don't forget the clamp that holds everything still to the transmission....
and with the installation of the heat shield, i was done with this
Last edited by 92 TOY; Jun 2, 2010 at 02:35 AM.
Jun 2, 2010 | 02:41 AM
#59
Thread Starter
YotaTech Milestone-Two Millionth Post
Joined: Jan 2009
Posts: 12,009
Likes: 122
From: Northeast Pennsylvania
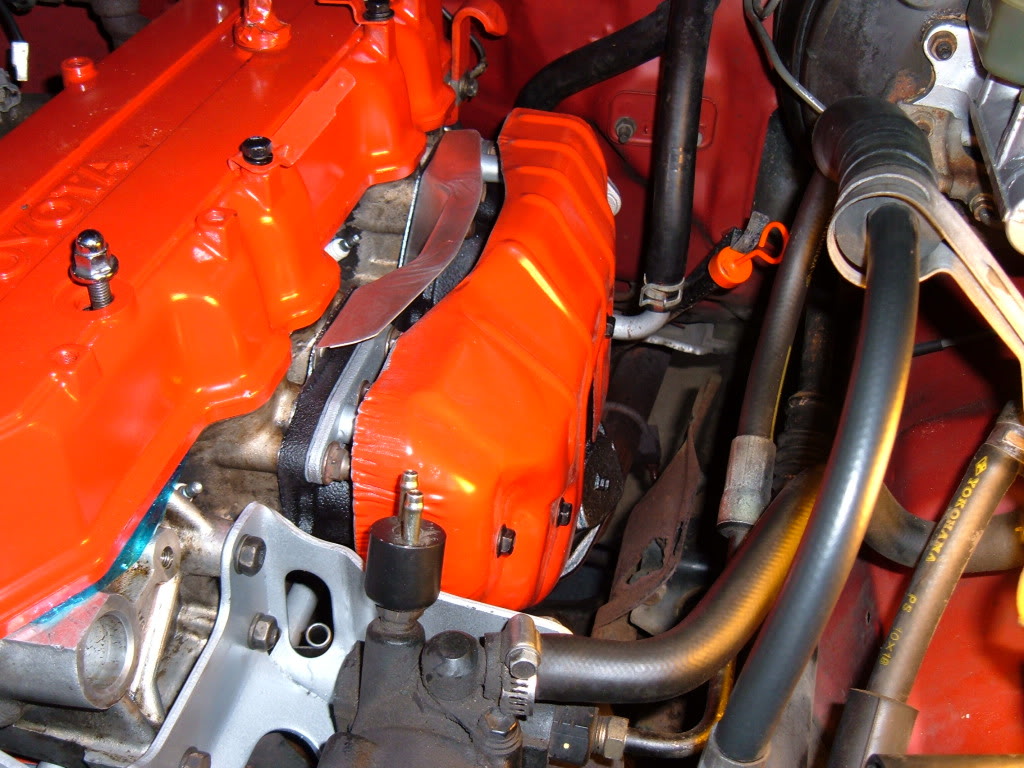
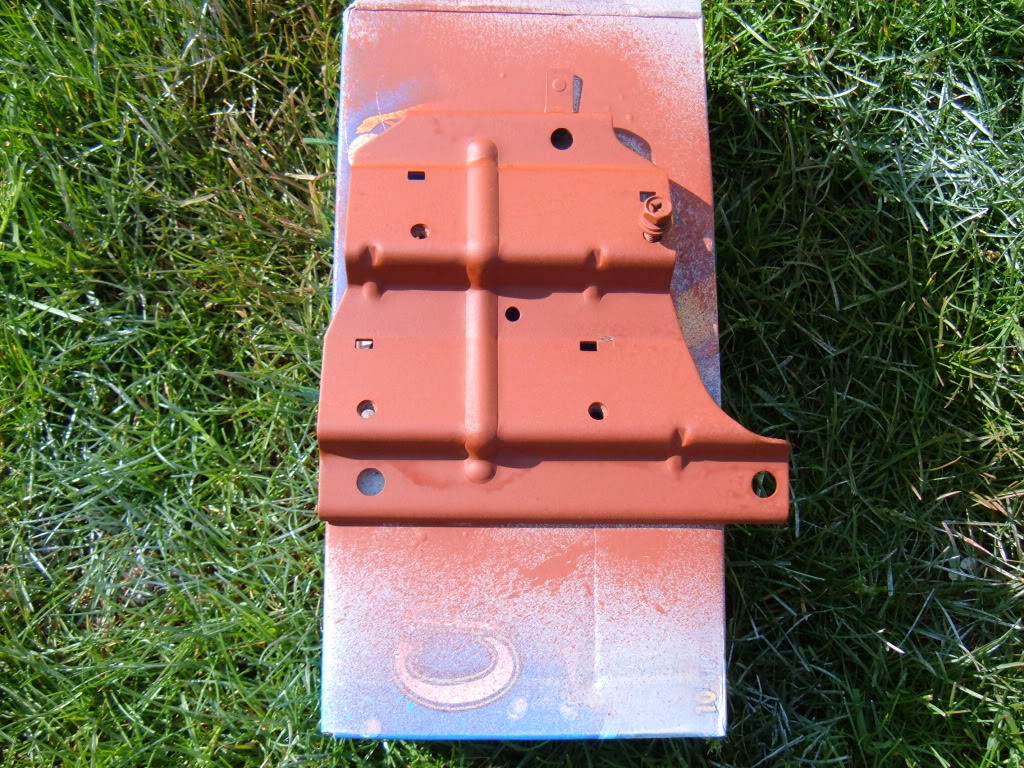
More ocd painting
so, i took this part, ground it down, cleaned it up and painted it nice.
had to re-install my special grinder
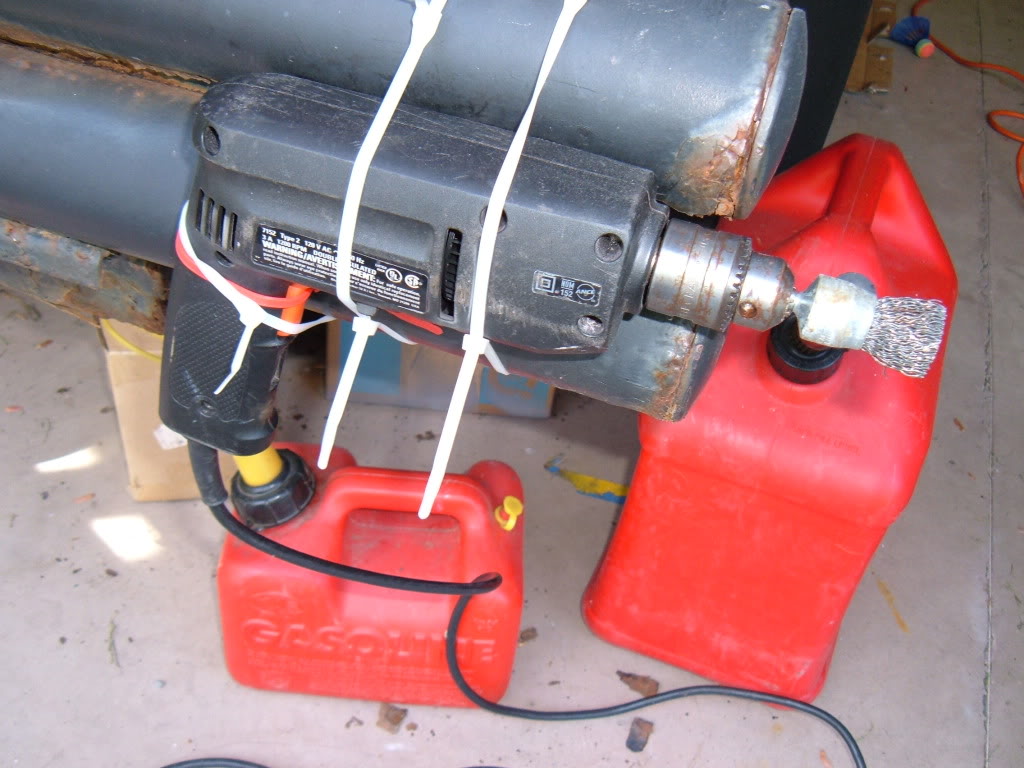
to work on this


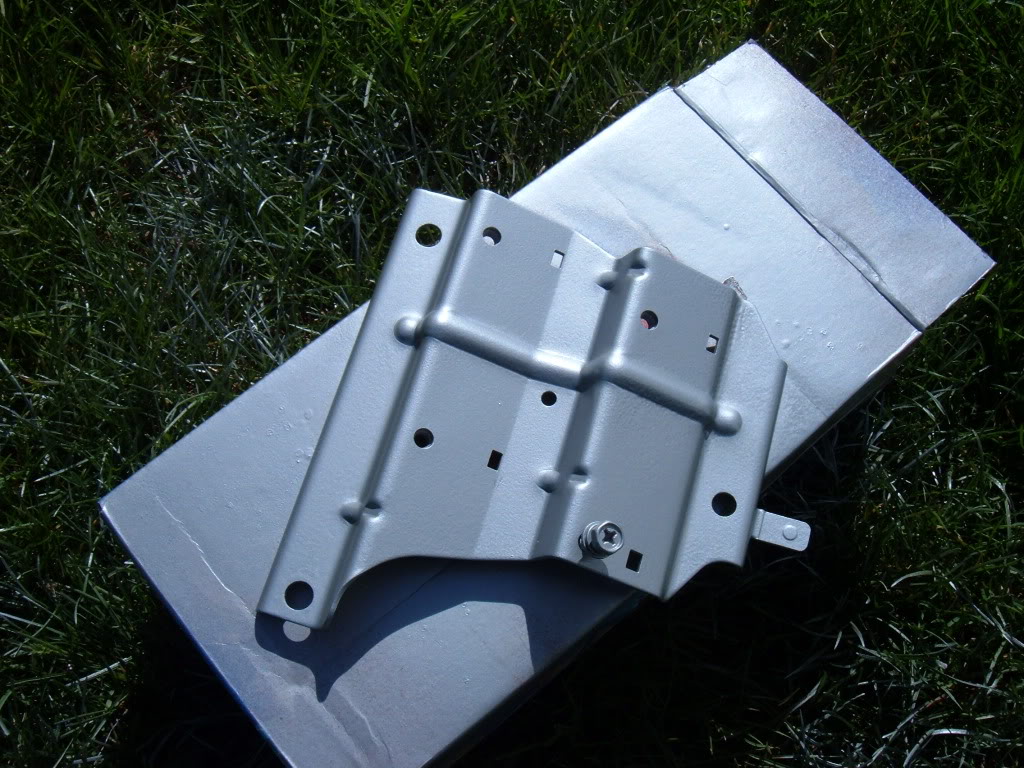
and done
had to re-install my special grinder
to work on this
and done


