
Advice on checking valve clearances
 Aug 10, 2013 | 06:09 PM
#1
Thread Starter
Registered User
Joined: Jul 2013
Posts: 294
Likes: 0
From: Big Bear Lake, Cali
Advice on checking valve clearances
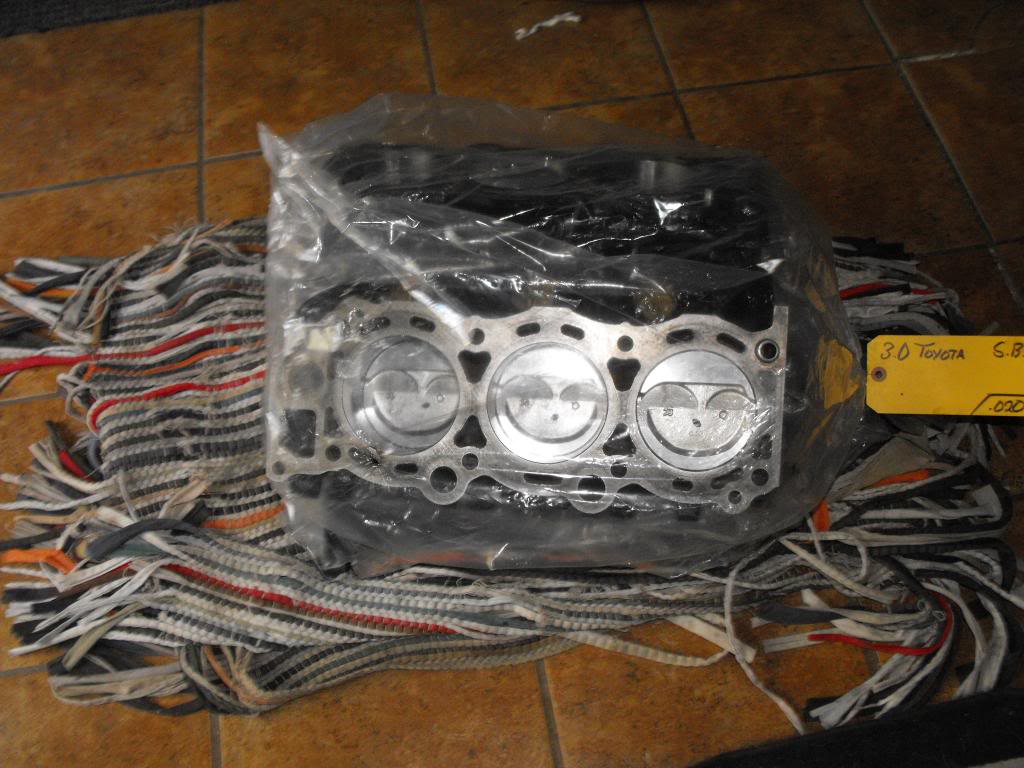
90 Runner 3vze 5 speed 4X4 SR5.
I think the machine shop may have made a mistake, I'd like to double check their work.
Valves on the left head seem loud, and getting smoke out of the tail pipe, poor throttle response, and a miss. No check engine light.
Heads: Valve grind, new valve seals, surface check, and micro flux.
Block: new pistons, rings, bearings, thrust washer, and seals.
All machine work done by Southwest Engines in San Bernardino.
New gaskets though out, new head bolts, new O2 sensor (Denso), new plugs and wires (both NGK), new oil and water pumps(Asian), everything torqued to spec.Ignition timing set, air gap checked (.011)inch. coil resistance checked.Vacuum hoses replaced one by one after re-install. hose clamps replaced where needed.
So I'd like to hear your thoughts on checking the valve clearances.
In the 80s I had Honda motorcycles, a 10mm wrench, screwdriver, and feeler gauges was all you needed.
I've read other threads on the matter, but I'd like to hear some first hand advice.
Last edited by big bear; Aug 10, 2013 at 08:21 PM.
Aug 10, 2013 | 06:14 PM
#2
Thread Starter
Registered User
Joined: Jul 2013
Posts: 294
Likes: 0
From: Big Bear Lake, Cali
From reading other threads, I know there is some fiction between RSR and gamefreakgc.
But from what I've read I value both of your thoughts, I'd like to hear from both of you, please.
RSR, no wasted time here.
But from what I've read I value both of your thoughts, I'd like to hear from both of you, please.
RSR, no wasted time here.
Aug 10, 2013 | 09:47 PM
#7

Registered User

Joined: Sep 2007
Posts: 8,384
Likes: 875
From: San Francisco East Bay
What sayeth the Good Book? http://personal.utulsa.edu/~nathan-b...e/64tuneup.pdf
Uh, think that through. The clearance "from when the lobe allows the valve to close" is zero.zero. It's only after the valve is completely closed and the lobe has turned away from the lifter will you be able to measure clearance. The good news is that this cam orientation is pretty hard to miss; if the lobe is sorta pointing up, you're good to measure.
You'll end up needing a few more tools. You have to remove the plenum to get to the valve covers, and some find that a little daunting. You really only want to check, but if you need to change a valve clearance you have to remove the shims, and that gets a little tricky. Not hard, just tricky.
Last, when you reinstall the valve covers, READ THE DIRECTIONS. If you fail to follow the directions they will leak. If you follow the directions, you will be fine.
Trending Topics

 Aug 11, 2013 | 03:48 PM
#12
Thread Starter
Registered User
Joined: Jul 2013
Posts: 294
Likes: 0
From: Big Bear Lake, Cali
Do believe it was my mistake during assembly, live and learn.
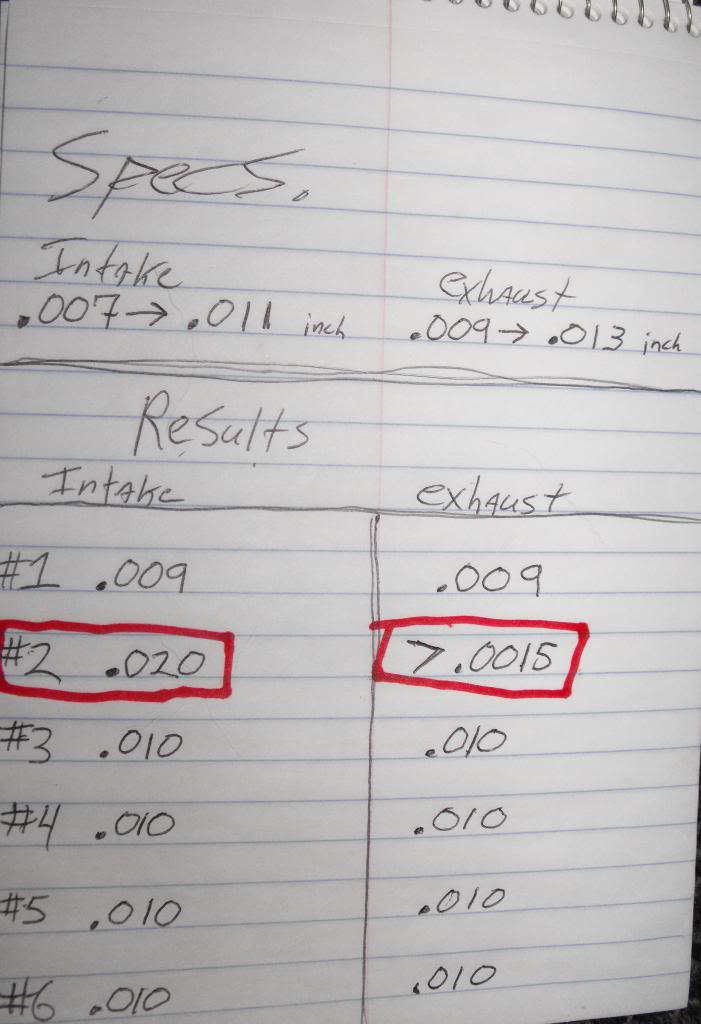
Looks like I got the #2 cylinder hockey pucks (lifters) switched around.
#2 intake has too much slop, #2 exhaust is too tight.
I'll switch the pucks and take measurements.
I got the timing covers and belt off, cam sprockets off, ready to pop the cam bearings off.
I'm taking a break ATM, I'll be back at it soon.
I'll post up the results later.
 Aug 11, 2013 | 04:12 PM
#16
Thread Starter
Registered User
Joined: Jul 2013
Posts: 294
Likes: 0
From: Big Bear Lake, Cali

Like I said I do believe I got the #2 lifters switched around during installation of the heads.
See I had the heads and short block done separately, originally I was only going to have the heads done, but when the heads came back from the shop I couldn't bring myself to install those beautiful heads on that nasty old block, so I brought the short block to the shop to be re-built.
The shop I went to has been in business since the 80s, they must be doing something right.
Aug 11, 2013 | 07:20 PM
#17
Thread Starter
Registered User
Joined: Jul 2013
Posts: 294
Likes: 0
From: Big Bear Lake, Cali
Aug 11, 2013 | 07:27 PM
#18
Thread Starter
Registered User
Joined: Jul 2013
Posts: 294
Likes: 0
From: Big Bear Lake, Cali
Alright, swapped the lifters in #2.
They are both 0.011 (inch), in spec now.
Looks like I made a mistake when I put the heads on, I used an egg carton for the lifters, but must have put or pulled one out of the wrong slot.
Got the cam back in, sprockets on, I'll finish up tomorrow.
They are both 0.011 (inch), in spec now.
Looks like I made a mistake when I put the heads on, I used an egg carton for the lifters, but must have put or pulled one out of the wrong slot.
Got the cam back in, sprockets on, I'll finish up tomorrow.
Last edited by big bear; Aug 11, 2013 at 07:29 PM.
Aug 11, 2013 | 08:26 PM
#19

Registered User
Joined: Mar 2013
Posts: 1,047
Likes: 1
From: Central TX
Looks like you got it covered. I actually had my mechanic do my valve adjustment -- I tried to talk my wife into letting me do it but when I told her it would probably take 2 days, she said that meant it would actually take me a week, so no...
To be be clear, I have no issue with gamefreak. I have been trying to help KH, but have been banging my head against a wall... I do like when folks first try to help themselves by using search instead of beating dead horses -- not to mention there's way more help in the archives than active members here.
To be be clear, I have no issue with gamefreak. I have been trying to help KH, but have been banging my head against a wall... I do like when folks first try to help themselves by using search instead of beating dead horses -- not to mention there's way more help in the archives than active members here.
Last edited by RSR; Aug 11, 2013 at 08:29 PM.
Aug 11, 2013 | 08:40 PM
#20
Registered User
Joined: Sep 2012
Posts: 1,172
Likes: 1
From: Roseville, CA
Alright, swapped the lifters in #2.
They are both 0.011 (inch), in spec now.
Looks like I made a mistake when I put the heads on, I used an egg carton for the lifters, but must have put or pulled one out of the wrong slot.
Got the cam back in, sprockets on, I'll finish up tomorrow.
They are both 0.011 (inch), in spec now.
Looks like I made a mistake when I put the heads on, I used an egg carton for the lifters, but must have put or pulled one out of the wrong slot.
Got the cam back in, sprockets on, I'll finish up tomorrow.
 Same here! Every time I tell it her "it'll only take a couple of hours" she knows I'll be out there all day.
To be be clear, I have no issue with gamefreak. I have been trying to help KH, but have been banging my head against a wall... I do like when folks first try to help themselves by using search instead of beating dead horses -- not to mention there's way more help in the archives than active members here.


