
91 Pickup headlight retrofit to HID projectors
 Dec 10, 2011 | 02:35 PM
#1
Thread Starter
Registered User
Joined: Jul 2009
Posts: 319
Likes: 0
From: Denver, Colorado
Pickup headlight retrofit to HID projectors! LOTS AND LOTS OF PICTURES!
This thread is a branch off of my original build up thread that can be found here
https://www.yotatech.com/forums/f212...-grave-231390/
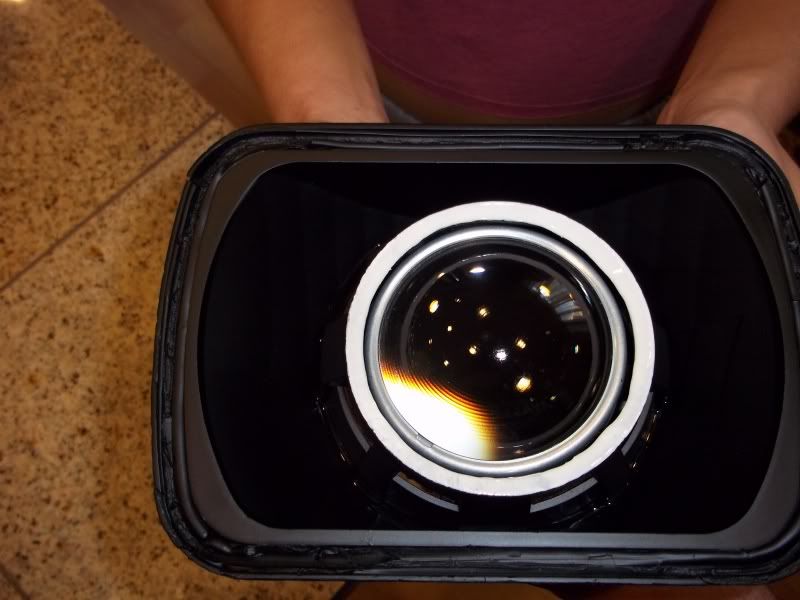
I managed to get the projectors from a junkyard and they are off of a 2003 BMW X-5. They are the single beam projectors and do not have the flap for the high beam. I plan on getting some additional lights in the future for the high beam and making it look as clean as possible. Here are some pictures of my progress.
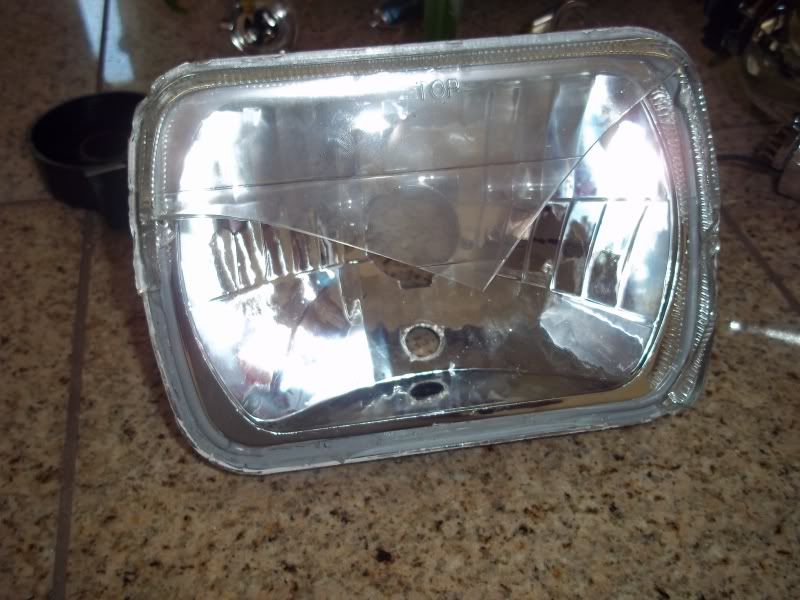
This is what the headlight looked like before I started the project. I bought these off of ebay for 25 bucks. They are HORRIBLE. They might look somewhat decent from the front but on the side they look cheap and they tend to pose a real driving hazard when driving at night.
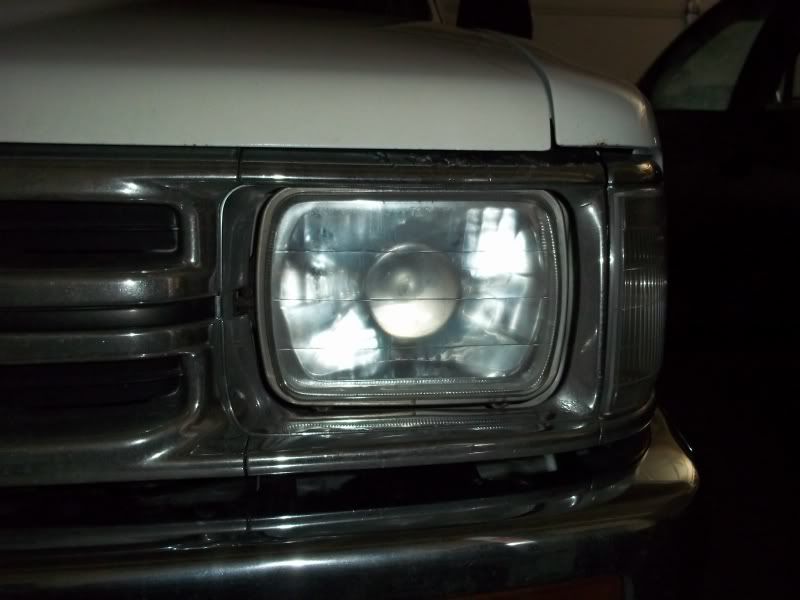
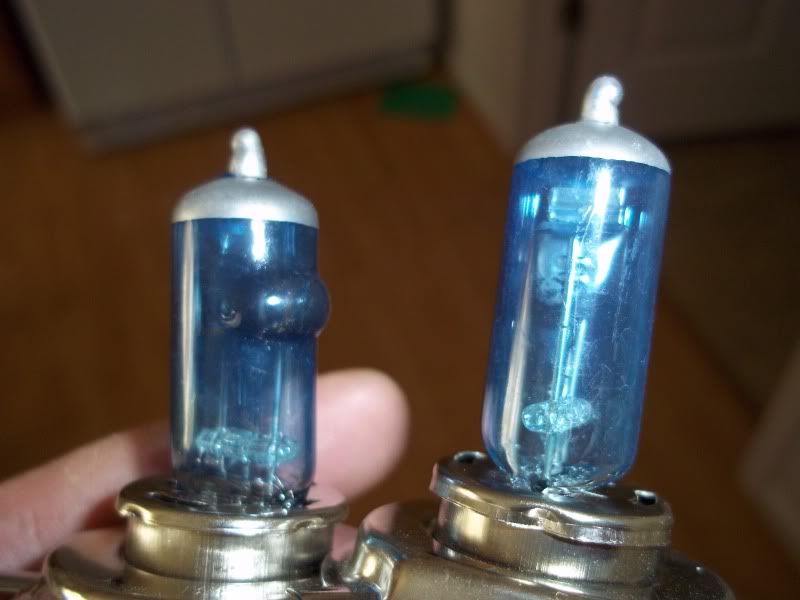
I pulled the bulbs out and discovered this. No wonder I was having a hard time seeing at night.
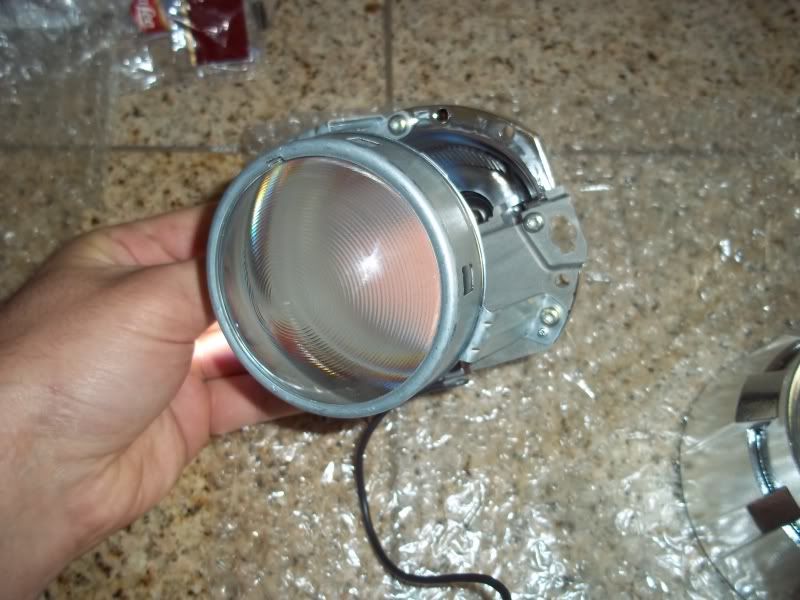
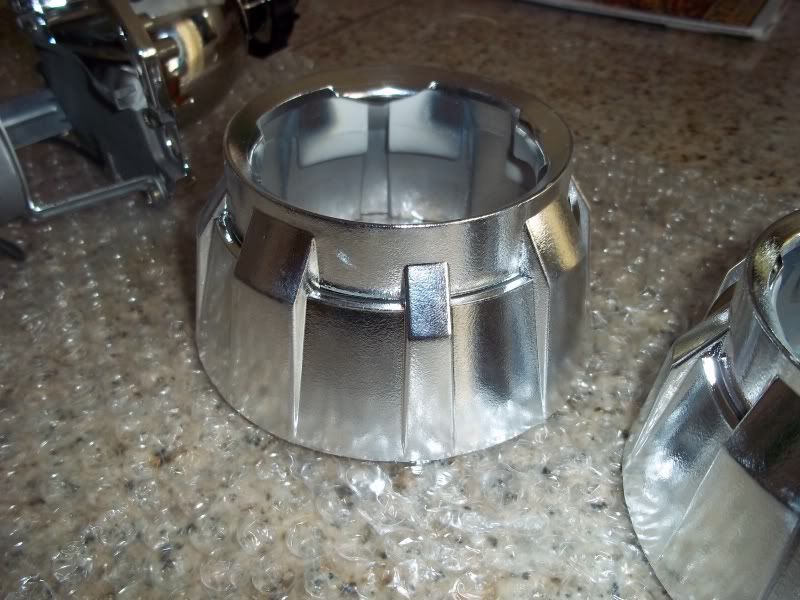
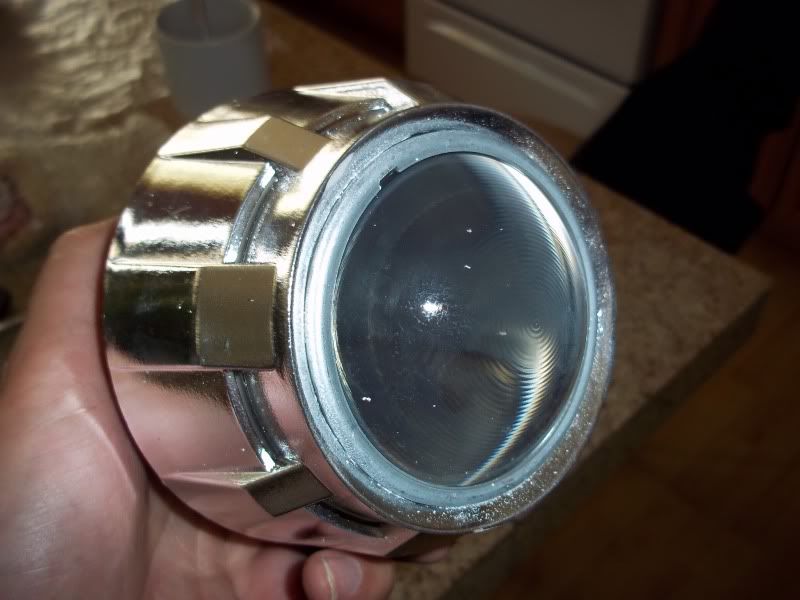
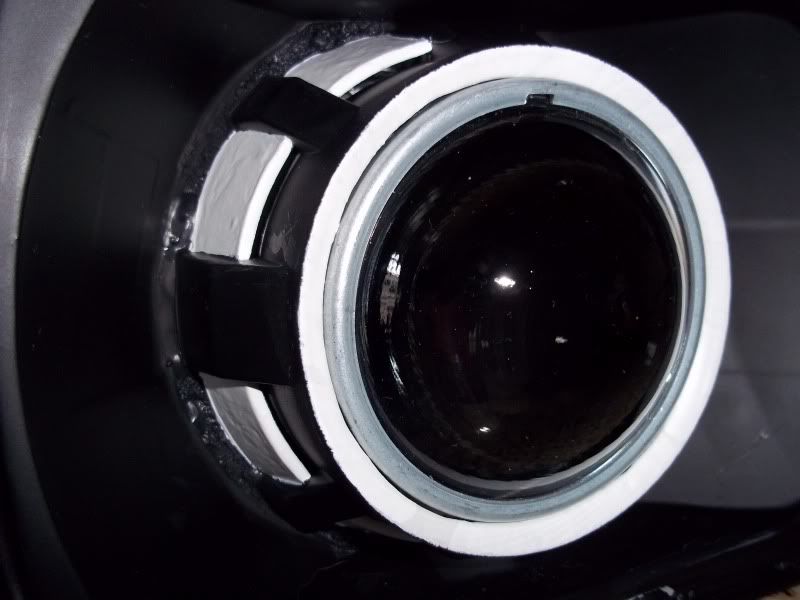
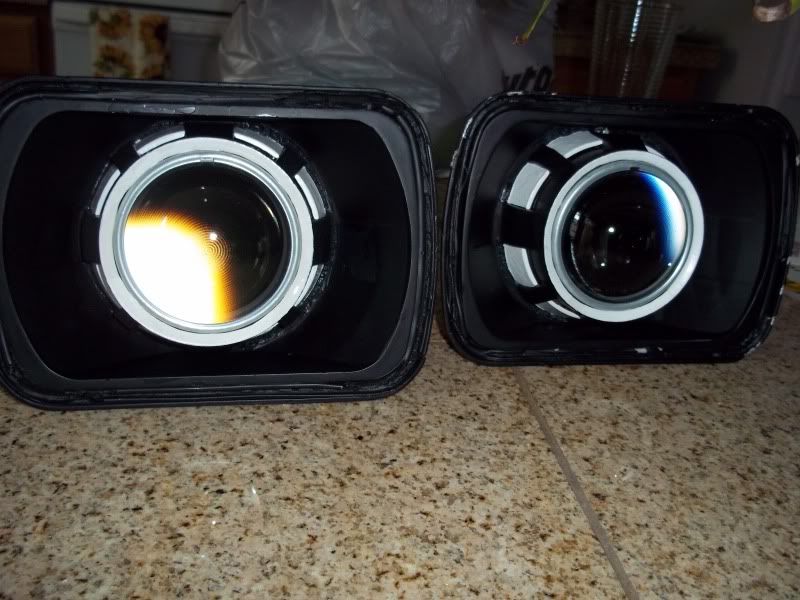
Like I mentioned above, the projectors are from an x5. They are very large and measure about 3 inches in width. I purchased some gatling gun shrouds for them from ebay for about 25 bucks.
I'm sure those of you that have done a retrofit had their own fun trying to get the glass off of the light. I ended up having to order some new headlights because I failed miserably in my attempts to take the glass off smooth. 300 degrees for 10 minutes didn't work so well for me like I read that it had worked for others.
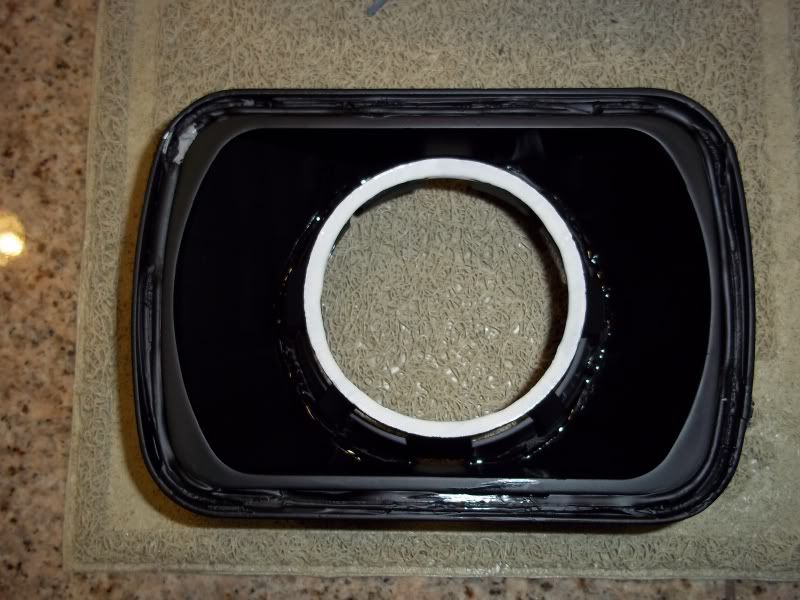
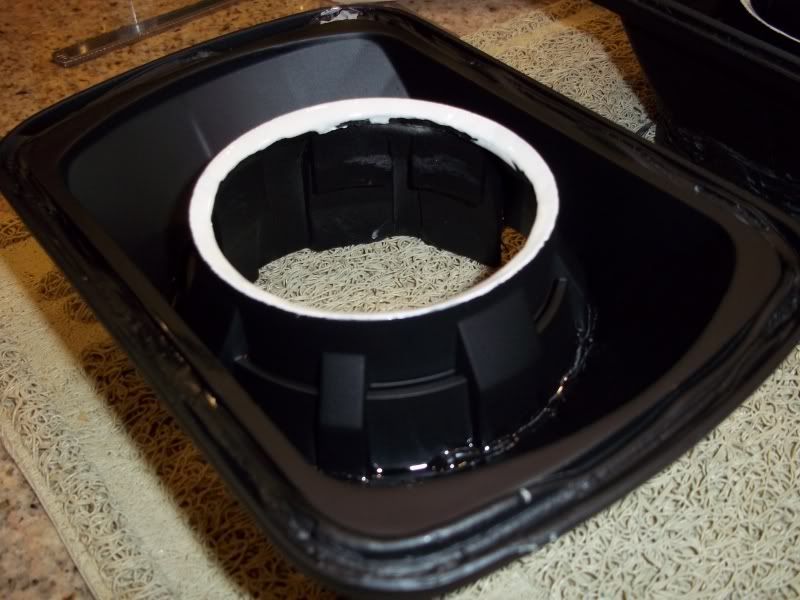
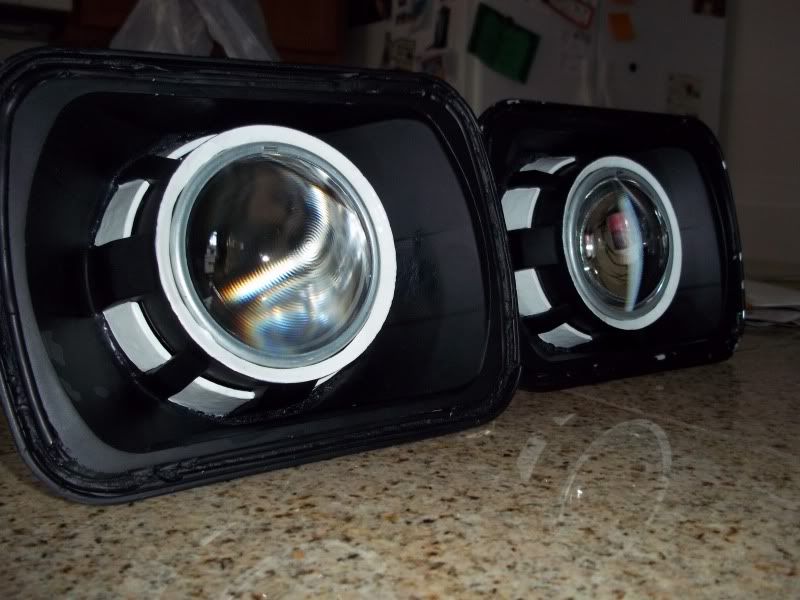
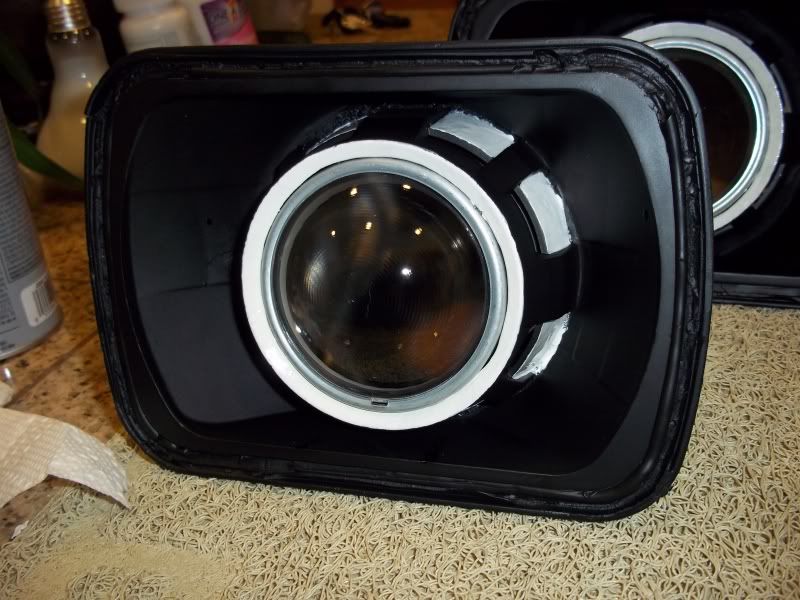
This is my progress so far. I plan on painting them white where the gatling gun shrouds stick out of the sides. Hard to explain but I'll upload a picture once I get there.
Any thoughts or ideas are always greatly appreciated! I'll post more as I progress.
https://www.yotatech.com/forums/f212...-grave-231390/
I managed to get the projectors from a junkyard and they are off of a 2003 BMW X-5. They are the single beam projectors and do not have the flap for the high beam. I plan on getting some additional lights in the future for the high beam and making it look as clean as possible. Here are some pictures of my progress.
This is what the headlight looked like before I started the project. I bought these off of ebay for 25 bucks. They are HORRIBLE. They might look somewhat decent from the front but on the side they look cheap and they tend to pose a real driving hazard when driving at night.
I pulled the bulbs out and discovered this. No wonder I was having a hard time seeing at night.
Like I mentioned above, the projectors are from an x5. They are very large and measure about 3 inches in width. I purchased some gatling gun shrouds for them from ebay for about 25 bucks.
I'm sure those of you that have done a retrofit had their own fun trying to get the glass off of the light. I ended up having to order some new headlights because I failed miserably in my attempts to take the glass off smooth. 300 degrees for 10 minutes didn't work so well for me like I read that it had worked for others.
This is my progress so far. I plan on painting them white where the gatling gun shrouds stick out of the sides. Hard to explain but I'll upload a picture once I get there.
Any thoughts or ideas are always greatly appreciated! I'll post more as I progress.
Last edited by 93YotaGuy; Dec 23, 2011 at 07:06 AM.
Dec 15, 2011 | 06:16 PM
#2
Thread Starter
Registered User
Joined: Jul 2009
Posts: 319
Likes: 0
From: Denver, Colorado
Just a quick update. I had to wait for a new set of headlights to get here so I could attempt to pull the glass. I had one failed attempt and achieved in taking one of the lenses off. For anyone doing a retrofit with these 7x6 lights all I have to say is GOOD LUCK. It is a PITA to take the lens off without breaking or cracking it. I went ahead and ordered another set today and will have to wait a week until I am able to try to pull the glass again.
Here are some pictures of the progress I have made. ENJOY!
Finished painting
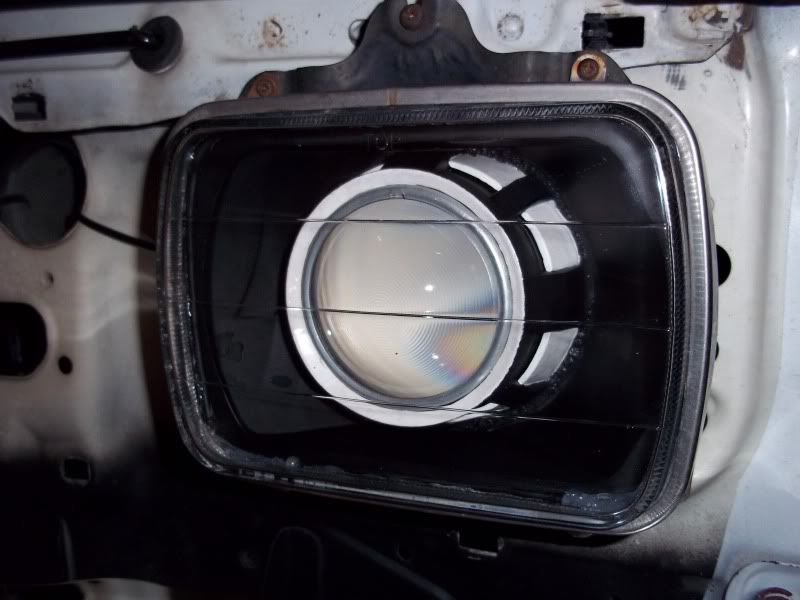
Mounted Glass and back in the truck
Test shot
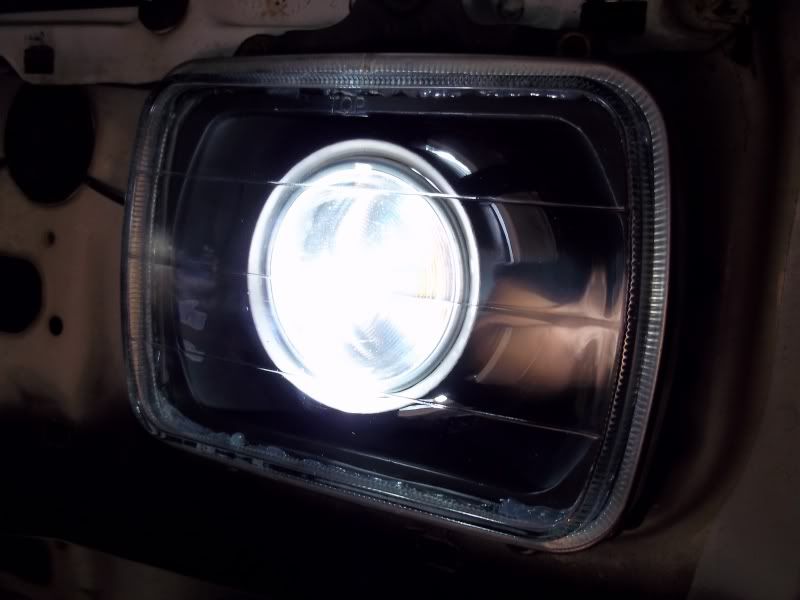
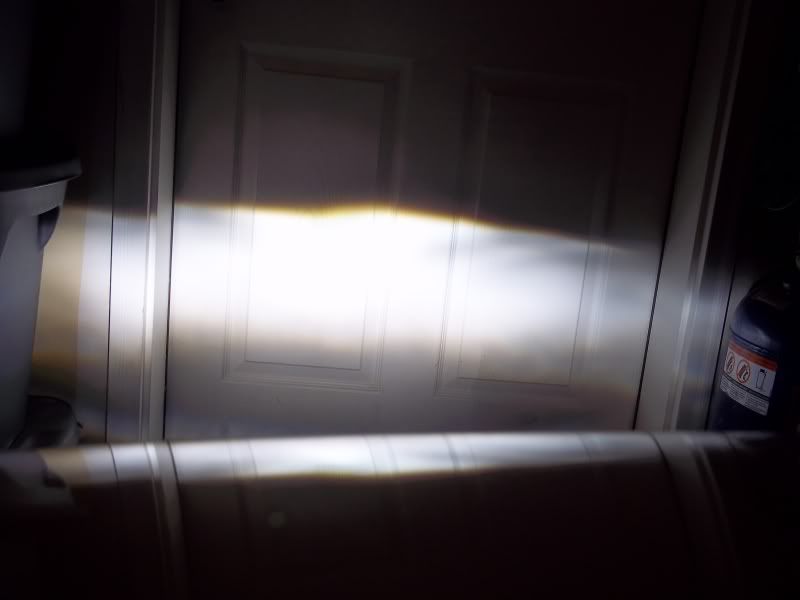
They are obviously not aligned and the passenger's side still needs the glass. I did manage to pull it out into the street and do a quick test as to how big the light output would be... All I can say is WOW. These lights are AMAZING. Even my brights on my 4x4 don't match the light output that I have with these.
Here are some pictures of the progress I have made. ENJOY!
Finished painting
Mounted Glass and back in the truck
Test shot
They are obviously not aligned and the passenger's side still needs the glass. I did manage to pull it out into the street and do a quick test as to how big the light output would be... All I can say is WOW. These lights are AMAZING. Even my brights on my 4x4 don't match the light output that I have with these.
Last edited by 93YotaGuy; Dec 15, 2011 at 06:18 PM.
Dec 15, 2011 | 06:30 PM
#3
Thread Starter
Registered User
Joined: Jul 2009
Posts: 319
Likes: 0
From: Denver, Colorado
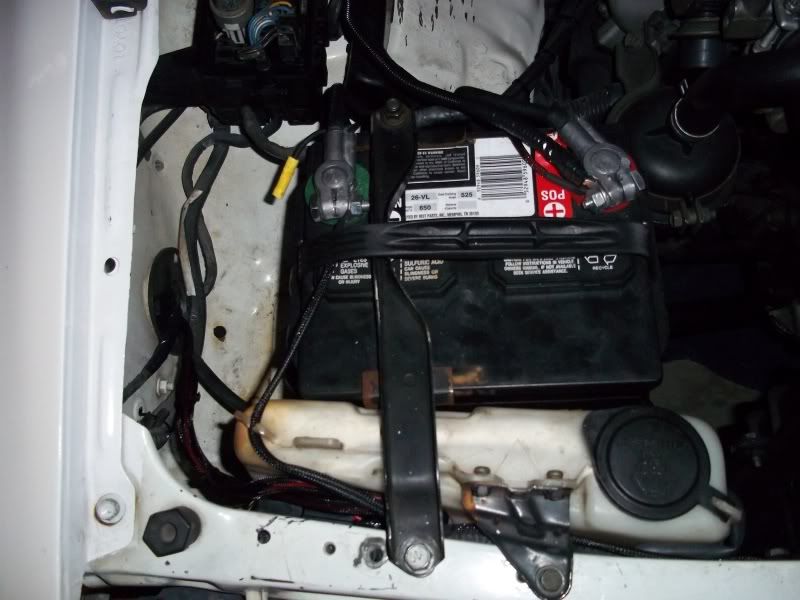
Just wanted to include some pictures of the wiring. I tried to make it look as clean as possible by mounting the ballasts and main wires in the fenders. The driver�s side gave me plenty of room even with the air box in its normal place, however, the passenger's side was another story. I had to move the battery over and drill a new mounting spot for it as well as the windshield washer fluid container. Here is what the finished product looks like.
New bolt holes for the battery and washer fluid container
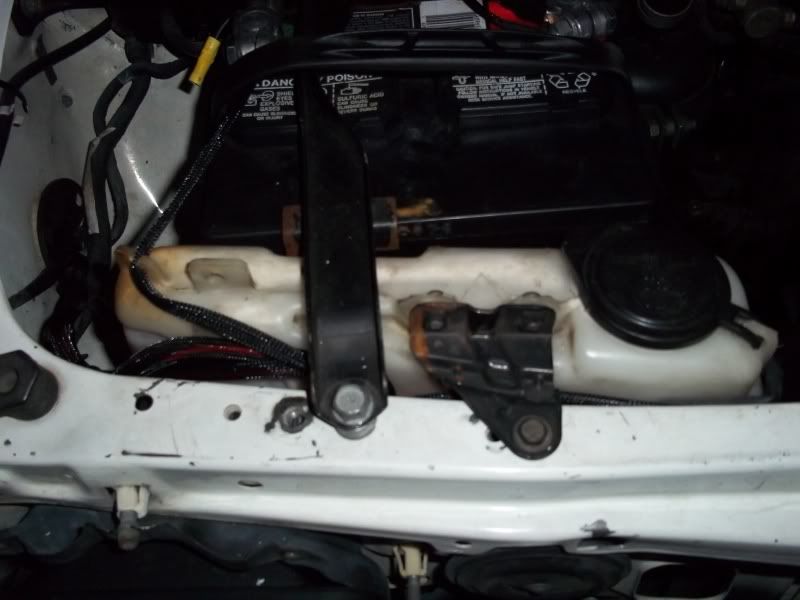
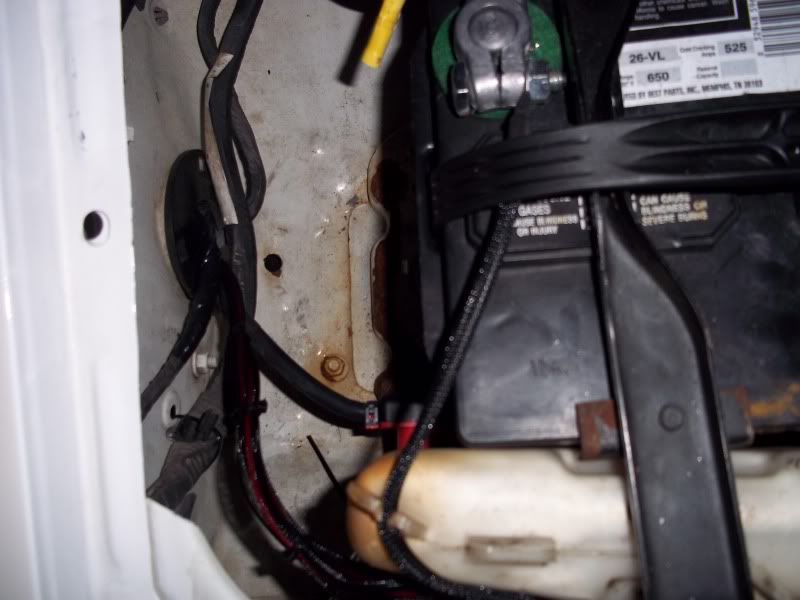
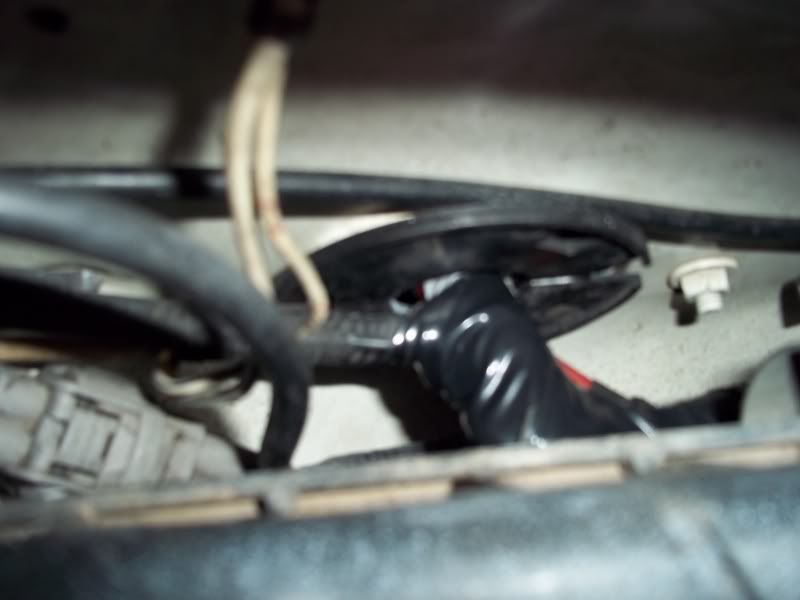
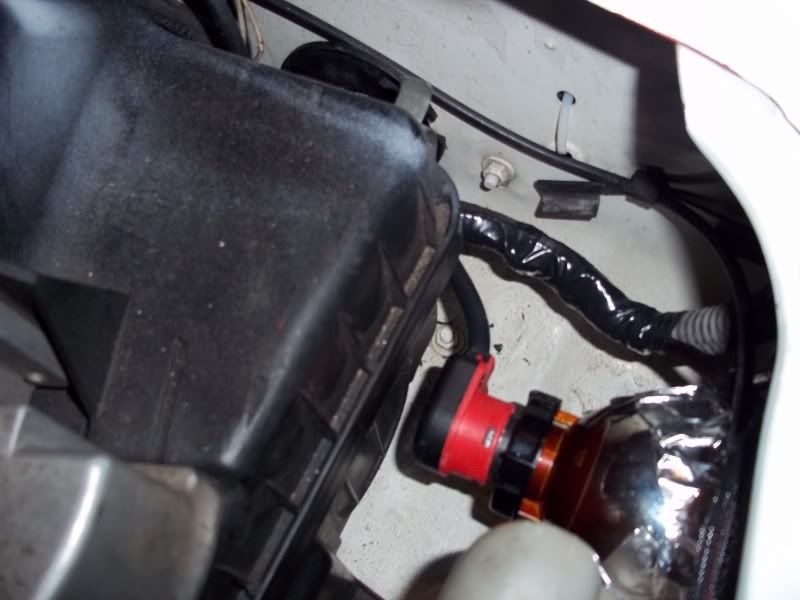
I tucked all the wires in the fenders and mounted the ballasts on the insides to keep things clean. Below is the passenger's side.
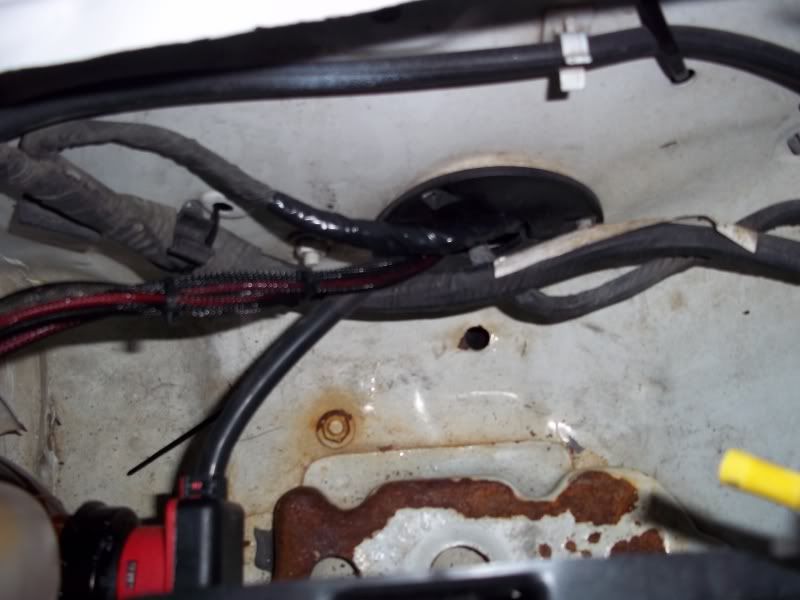
Drivers side wires near air box
The foil tape holding the projector to the housing shown below is not complete. I will be laying out fiberglass around the light to make it weatherproof and to keep it clean.
New bolt holes for the battery and washer fluid container
I tucked all the wires in the fenders and mounted the ballasts on the insides to keep things clean. Below is the passenger's side.
Drivers side wires near air box
The foil tape holding the projector to the housing shown below is not complete. I will be laying out fiberglass around the light to make it weatherproof and to keep it clean.
Last edited by 93YotaGuy; Dec 15, 2011 at 06:33 PM.


Trending Topics
Dec 15, 2011 | 11:54 PM
#8
subscribed.
good deal doing a proper retrofit; I have been noticing more and more PnP HID kits on the road and it is VERY annoying. almost made the same mistake but thanks to YT'ers, I have 'seen the light', hahhahaha!
plus there's something just plain cool seeing an 'old Yota' with some good HID's.... love the HID's in my 93 4runner, I'm sure it confuses some people. "yes it's old, yes my headlights are better than yours..."
Dec 16, 2011 | 05:50 PM
#9
Registered User
Joined: Feb 2011
Posts: 40
Likes: 0
From: Virginia Beach, Va.
Just a quick update. I had to wait for a new set of headlights to get here so I could attempt to pull the glass. I had one failed attempt and achieved in taking one of the lenses off. For anyone doing a retrofit with these 7x6 lights all I have to say is GOOD LUCK. It is a PITA to take the lens off without breaking or cracking it. I went ahead and ordered another set today and will have to wait a week until I am able to try to pull the glass again.
Here are some pictures of the progress I have made. ENJOY!
Finished painting
Mounted Glass and back in the truck
Test shot
They are obviously not aligned and the passenger's side still needs the glass. I did manage to pull it out into the street and do a quick test as to how big the light output would be... All I can say is WOW. These lights are AMAZING. Even my brights on my 4x4 don't match the light output that I have with these.
Dec 16, 2011 | 06:30 PM
#10
Thread Starter
Registered User
Joined: Jul 2009
Posts: 319
Likes: 0
From: Denver, Colorado
The glass on the headlight is the same glass you would buy from getting the headlights from ebay. I had to bake it in the oven to soften the glue and slowly pull it apart from the housing. Just search 7x6 headlights on ebay and you will come up with all kinds. They are fairly cheap at $20-25 a pair.
I was unable to find the glass by itself. I'm sure there are not too many people looking for just the glass so it would make sense that they would not sell it.
As far as plexiglas is concerned I would not even know where to begin. Sorry.
Good luck!
 Dec 17, 2011 | 07:59 AM
#12
Registered User
Joined: Feb 2011
Posts: 40
Likes: 0
From: Virginia Beach, Va.
Why would you quote my entire post?
The glass on the headlight is the same glass you would buy from getting the headlights from ebay. I had to bake it in the oven to soften the glue and slowly pull it apart from the housing. Just search 7x6 headlights on ebay and you will come up with all kinds. They are fairly cheap at $20-25 a pair.
I was unable to find the glass by itself. I'm sure there are not too many people looking for just the glass so it would make sense that they would not sell it.
As far as plexiglas is concerned I would not even know where to begin. Sorry.
Good luck!
Dec 17, 2011 | 09:03 AM
#13
Thread Starter
Registered User
Joined: Jul 2009
Posts: 319
Likes: 0
From: Denver, Colorado
What do they look like on your 92? I'd be shocked to see them not offer an aftermarket light for a 92. Upload a picture.
Dec 17, 2011 | 03:21 PM
#15
Thread Starter
Registered User
Joined: Jul 2009
Posts: 319
Likes: 0
From: Denver, Colorado
The good news is that you don't have to spend a whole lot of time painting or getting the glue just right!
Dec 19, 2011 | 10:06 AM
#18
find someone local with a vacuum table to do some clear lenses, this will be the route I go eventually; I'm still rockin' patterned glass on my HID's but some plastic molded to exactly what you need should be pretty cheap and work perfect.
Vacuum tables are not too hard to build either but don't have much other use for it...
Vacuum tables are not too hard to build either but don't have much other use for it...
Dec 19, 2011 | 01:03 PM
#19
Registered User
Joined: May 2009
Posts: 113
Likes: 0
From: Thunder Bay, Ontario, Canada
If you can set the projector back far enough so you can get it behind where the edge of the housing is, you can just butyl rubber seal a piece of lexan onto the 4runner 92+ lights.. Lexan from home depot / home hardware kinda style.
As for the OP : Very cool that you went this route, and in case you didn't know you can get better performance out of those x5's with a 3" clear lens upgrade - look at www.theretrofitsource.com or www.lightwerkz.net - http://www.theretrofitsource.com/pro...roducts_id=136 this should be the lens you'd need..
As for housings I also had a hell of a time getting my lenses off, 350+ didn't do anything... Gotta wedge a paint scraper in and saw at the hell forged glue the China lights use... I believe the easier lights to retro are "Pilot" brand 7x6's.. Plastic lens versions. Clearer as well - I noticed my lenses killed my blue cut off of my projectors.
Dec 19, 2011 | 01:59 PM
#20
Thread Starter
Registered User
Joined: Jul 2009
Posts: 319
Likes: 0
From: Denver, Colorado
If you can set the projector back far enough so you can get it behind where the edge of the housing is, you can just butyl rubber seal a piece of lexan onto the 4runner 92+ lights.. Lexan from home depot / home hardware kinda style.
As for the OP : Very cool that you went this route, and in case you didn't know you can get better performance out of those x5's with a 3" clear lens upgrade - look at www.theretrofitsource.com or www.lightwerkz.net - http://www.theretrofitsource.com/pro...roducts_id=136 this should be the lens you'd need..
As for housings I also had a hell of a time getting my lenses off, 350+ didn't do anything... Gotta wedge a paint scraper in and saw at the hell forged glue the China lights use... I believe the easier lights to retro are "Pilot" brand 7x6's.. Plastic lens versions. Clearer as well - I noticed my lenses killed my blue cut off of my projectors.
As for the OP : Very cool that you went this route, and in case you didn't know you can get better performance out of those x5's with a 3" clear lens upgrade - look at www.theretrofitsource.com or www.lightwerkz.net - http://www.theretrofitsource.com/pro...roducts_id=136 this should be the lens you'd need..
As for housings I also had a hell of a time getting my lenses off, 350+ didn't do anything... Gotta wedge a paint scraper in and saw at the hell forged glue the China lights use... I believe the easier lights to retro are "Pilot" brand 7x6's.. Plastic lens versions. Clearer as well - I noticed my lenses killed my blue cut off of my projectors.
I too have noticed that the blue cut off is gone with the headlight lens on. I wonder if the plastic covers would remedy this. I currently have one with the lens off and one with the lens on. The one with the lens on has a yellow cut off rather than blue.

Thanks for the information!
Last edited by 93YotaGuy; Dec 19, 2011 at 02:03 PM.


