
22RE Head gasket failure due to rust. Learn from my mistake
 Mar 3, 2013 | 04:59 PM
#1
Thread Starter
Registered User
Joined: Jul 2009
Posts: 319
Likes: 0
From: Denver, Colorado
22RE Head gasket failure due to rust. Learn from my mistake
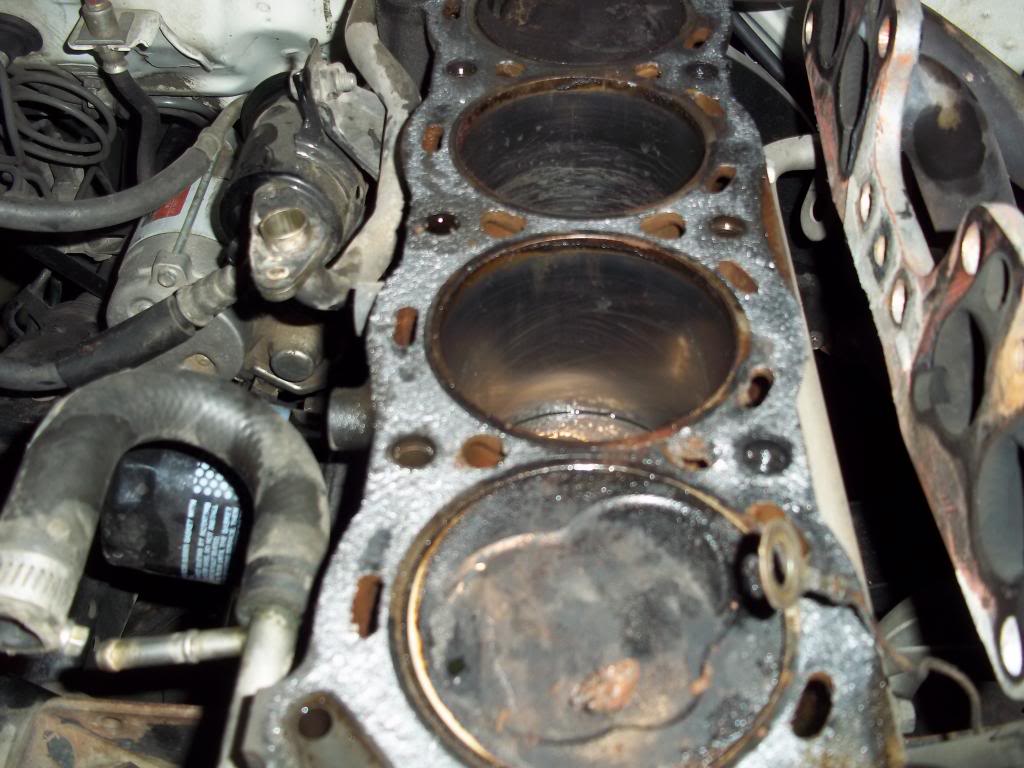
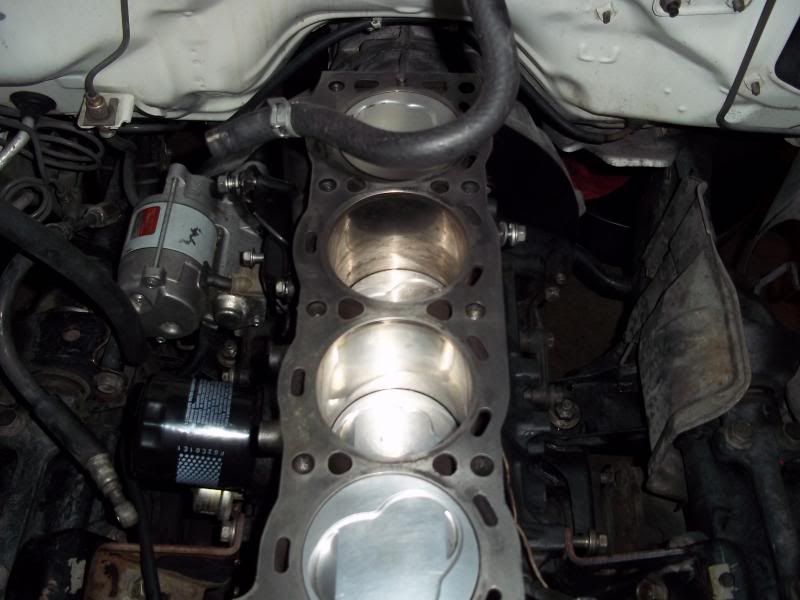
So a couple of weeks ago my truck started to run a little funny. I checked the oil to discover the famous milkshake. I had coolant in the oil! I just finished taking the head off and discovered what is shown below.
Learn from me and change your antifreeze often. The engine was purchased new from LC Engineering and currently has about 70,000 miles on it. I recall changing the coolant a couple of times but always used tap water and not distilled. If I could I would go back and change it often with distilled water.
Enjoy!
Mar 3, 2013 | 06:19 PM
#2

Registered User

Joined: Sep 2007
Posts: 8,381
Likes: 873
From: San Francisco East Bay
Distilled water is even better at rusting than "tap" water. Usually, you worry about tap water because of Total Suspended Solids (meaning: hard water that leaves deposits).
So the presence of rust doesn't point the finger at the type of water used to fill the coolant system (at least, it doesn't for me). I can't see anything obvious in your pictures that suggests excessive deposits in the coolant channels.
What am I missing?
So the presence of rust doesn't point the finger at the type of water used to fill the coolant system (at least, it doesn't for me). I can't see anything obvious in your pictures that suggests excessive deposits in the coolant channels.
What am I missing?
Mar 3, 2013 | 09:21 PM
#3

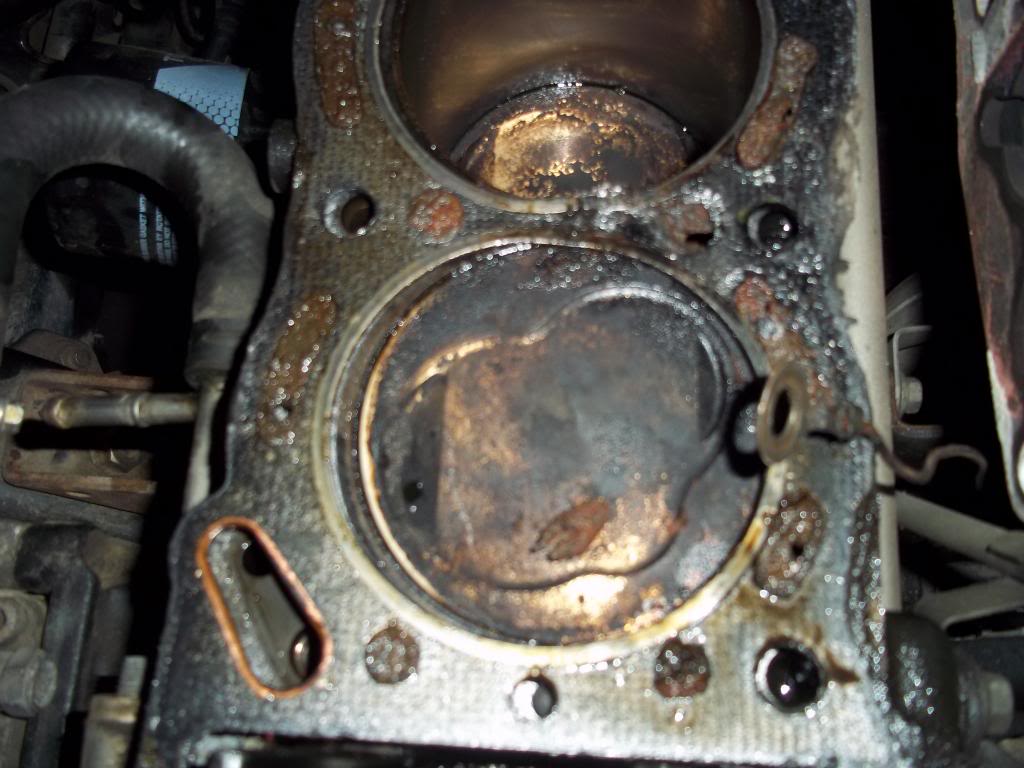
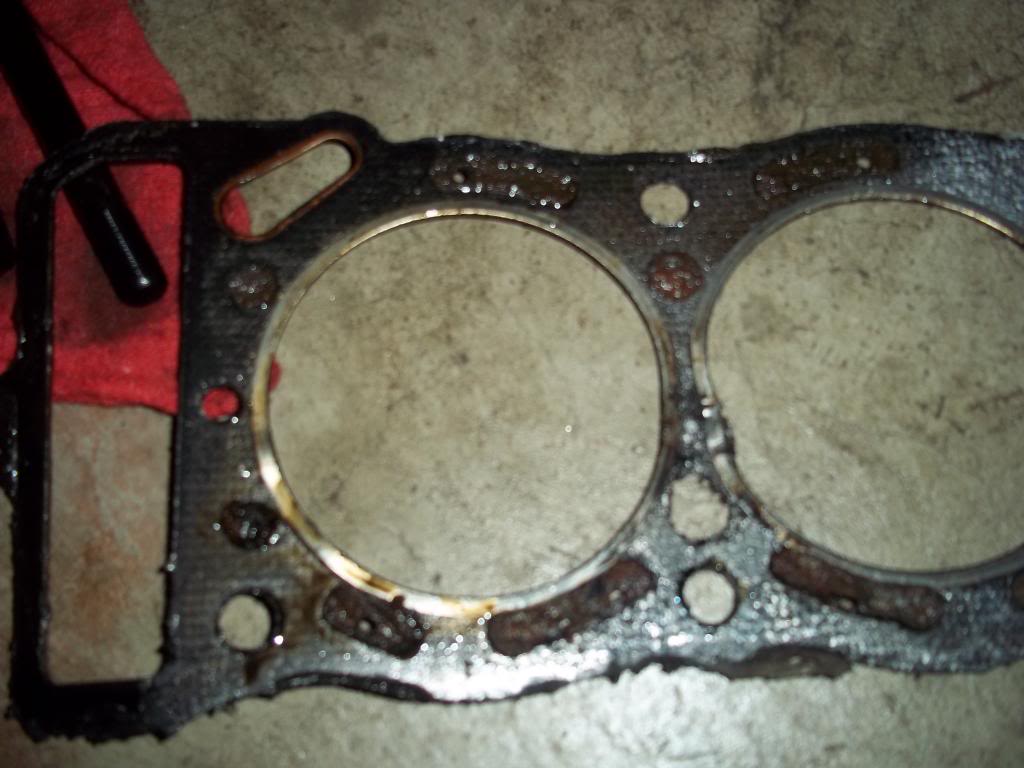
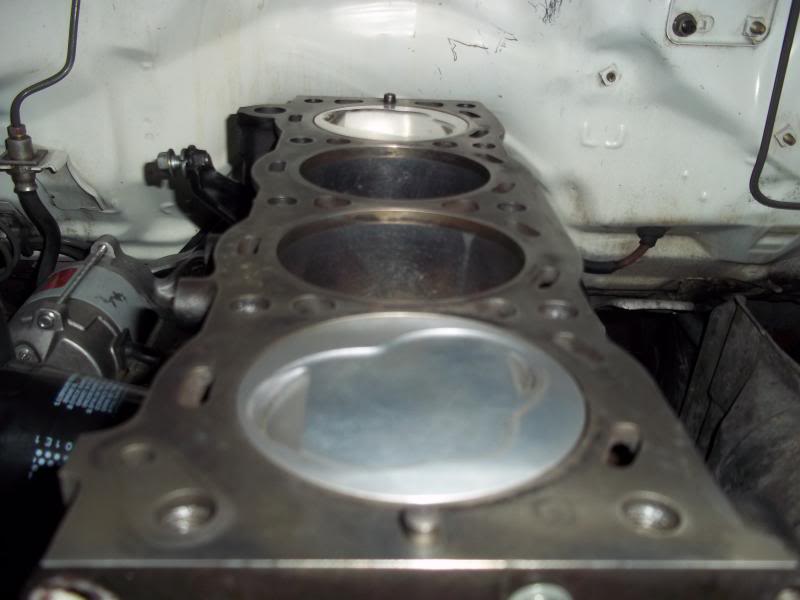
#2 is clean cylinder, #3 is clean piston, #2 has some water in the cylinder still. Pics #3-4 show the failures, both D-side (return from head passages?).
Two or three fully clogged water passages.
THIS is why you routinely flush the coolant system and it's still not a guarantee to save you. It's the "usual" clogged artery syndrom.
Two or three fully clogged water passages.
THIS is why you routinely flush the coolant system
and it's still not a guarantee to save you. It's the "usual" clogged artery syndrom.
Mar 4, 2013 | 05:55 AM
#4
Registered User
Joined: Jan 2007
Posts: 6,106
Likes: 27
Engine has 70k miles. He changed the coolant twice. That's more than enough. So the coolant must have been over diluted(too much water, not enough coolant). And/or improperly flushed during changings.
IMO, the head gasket blowing like that isn't necessarily "caused by rust". Or a coolant blockage(which I don't see either). I'd need more proof than is shown to believe that.
This is just your typical 22R-E head gasket failure. Why? Because that's what they do...
IMO, the head gasket blowing like that isn't necessarily "caused by rust". Or a coolant blockage(which I don't see either). I'd need more proof than is shown to believe that.
This is just your typical 22R-E head gasket failure. Why? Because that's what they do...
 Mar 31, 2013 | 01:11 PM
#6
Thread Starter
Registered User
Joined: Jul 2009
Posts: 319
Likes: 0
From: Denver, Colorado
I always eyeballed adding half coolant and half water. Maybe that was the case. Not sure, but either way I'm stuck doing the work now.
Below are some additional pictures of what it looked like when I took it apart and pictures of what it looks like now.
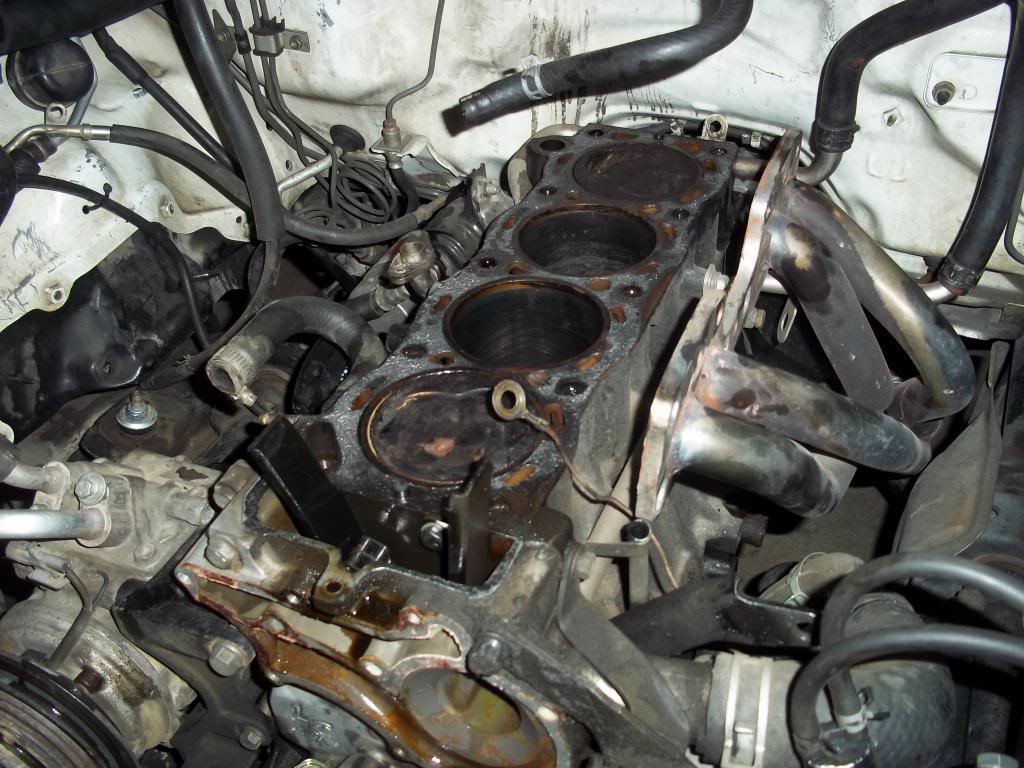


It took me a while to clean the piston tops. I used a brass brush and wd 40 to get most of the carbon off. I then cleaned it all up with lacquer thinner and a terry cloth.
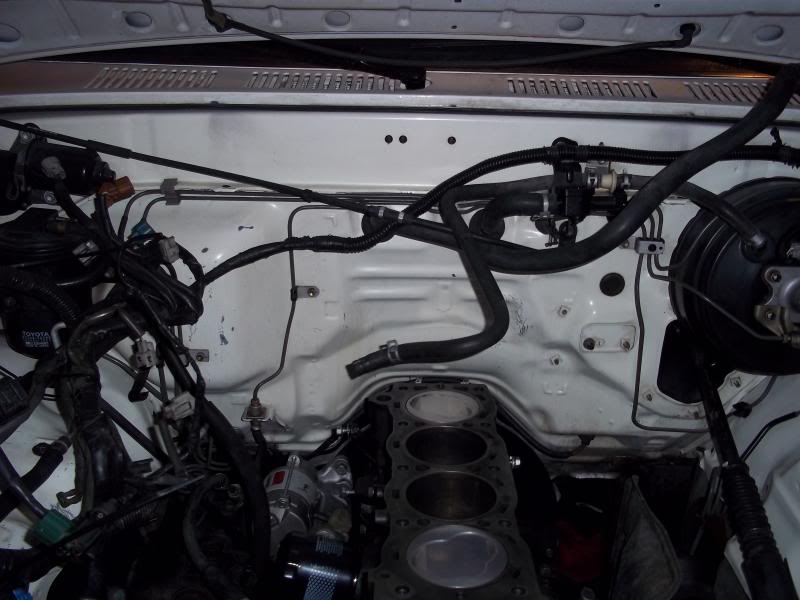
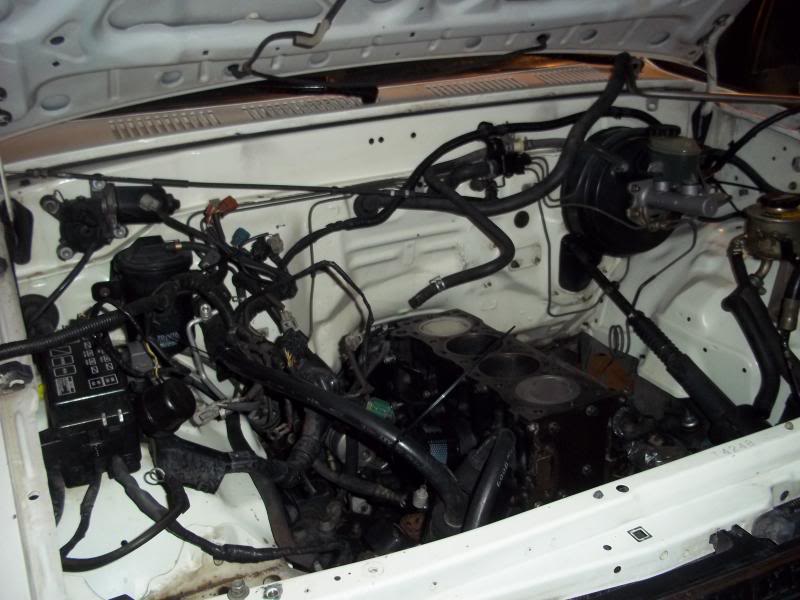
I still have alot of work to do but this is the cleanup process so far. I have been using a scotch brite pad to get the material off of the block and it seems to be working a little at a time.
Any other ideas as to what to use?
Thank you all for the feedback
Apr 2, 2013 | 09:37 PM
#7

Registered User

Joined: Aug 2007
Posts: 356
Likes: 56
From: Fresno
i wouldn't use scotchbrite
http://www.mycertifiedservice.com/_r...Procedures.pdf
unless you can be absolutely certain no abrasive dust particles remain that can get into the oil system...
http://www.mycertifiedservice.com/_r...Procedures.pdf
unless you can be absolutely certain no abrasive dust particles remain that can get into the oil system...
Trending Topics
Apr 3, 2013 | 04:31 AM
#8
When most people say scotchbrite pads they really mean scotchbrite pads, not sanding disks There are no aluminum oxide in these it's just plastic.
Bag the sensors and wires with ziplocks and tape, seal the block with tape and plastic wrap and goto town with the "GUNK" or cleaning product of your choice. Rather fond of the high powered brake cleaners myself, degreaser and power washer in one but it gets kind of expensive. Napa had them on sale last time I was in there and I'm still kicking myself for not buying an arm load.
There are no aluminum oxide in these it's just plastic.Bag the sensors and wires with ziplocks and tape, seal the block with tape and plastic wrap and goto town with the "GUNK" or cleaning product of your choice. Rather fond of the high powered brake cleaners myself, degreaser and power washer in one
but it gets kind of expensive. Napa had them on sale last time I was in there and I'm still kicking myself for not buying an arm load.
Apr 3, 2013 | 07:25 AM
#9
Registered User
Joined: Jan 2007
Posts: 6,106
Likes: 27
i wouldn't use scotchbrite
http://www.mycertifiedservice.com/_r...Procedures.pdf
unless you can be absolutely certain no abrasive dust particles remain that can get into the oil system...
http://www.mycertifiedservice.com/_r...Procedures.pdf
unless you can be absolutely certain no abrasive dust particles remain that can get into the oil system...

BTW, thanks for the .pdf supporting our case.

ALL Scotch-Brite pads/discs contain metallic and/or mineral abrasives(such as aluminum oxide, titanium dioxide, quartz silica, etc.). Check the MSDS for any of them.
Here's the one for the pads you're talking about.
3M(TM) Scotch-Brite(TM) Products, 7447, 7467, General Purpose Pad
Document Number: 18-8534-2
Safety Data Sheet (PDF, 26KB)
_____________
SECTION 2: INGREDIENTS
Ingredient / C.A.S. No. / % by Wt
Aluminum Oxide Mineral / 1344-28-1 / 30 - 40
Filler / 1317-65-3 / 5 - 15
Titanium Dioxide / 13463-67-7 / 0 - 1.5
Quartz Silica / 14808-60-7 / 0.10 - 0.12
Cured Resin Mixture // 20 - 30
Nylon Fiber Mixture // 15 - 25

Last edited by MudHippy; Apr 3, 2013 at 09:25 AM.
 Apr 3, 2013 | 12:42 PM
#11
(added the alarm light, cause I got that and a buzzer mentally)
That explains alot, like the sludge if you soak one for along time. Always thought that was random dust settleing out of the air.
Thanks guys(or gals). Can honestly say I've never even read the packaging so definitely never thought to look for a msds.
It even says "aluminium oxide" and "#1 grade steel wool" on the product pages. Looks like maybe I'm changing to steel wool and sand paper, they're much cheaper!
 WRONG!
That explains alot, like the sludge if you soak one for along time. Always thought that was random dust settleing out of the air.
Thanks guys(or gals). Can honestly say I've never even read the packaging so definitely never thought to look for a msds.
It even says "aluminium oxide" and "#1 grade steel wool" on the product pages. Looks like maybe I'm changing to steel wool and sand paper, they're much cheaper!
Apr 29, 2013 | 11:37 PM
#12
Registered User
Joined: Jan 2010
Posts: 182
Likes: 1
From: Lihue,HI
You guys are funny.. Ive use what evers in the tool box to clean the pistons and blocks on a hg job. From scrappers to scotch bright disks. It all works pretty good.I second the brake cleaner!!
Distilled water is for the head, so electrolisist doesnt form.
Your pics look pretty normal for this motor. When you pull the head water and gunk goes all over its hard to tell whats what by the time the heads actully out of the engin bay.
Distilled water is for the head, so electrolisist doesnt form.
Your pics look pretty normal for this motor. When you pull the head water and gunk goes all over its hard to tell whats what by the time the heads actully out of the engin bay.
Jun 9, 2013 | 08:31 AM
#13
Thread Starter
Registered User
Joined: Jul 2009
Posts: 319
Likes: 0
From: Denver, Colorado
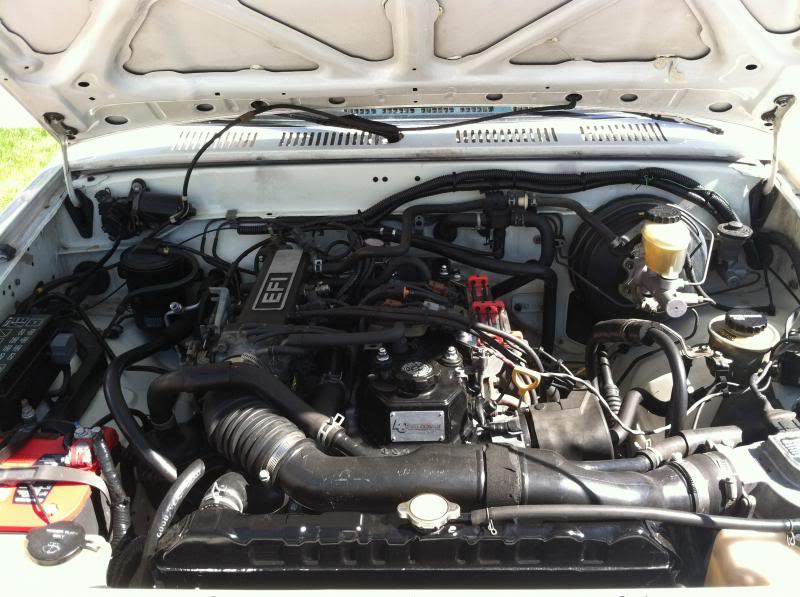
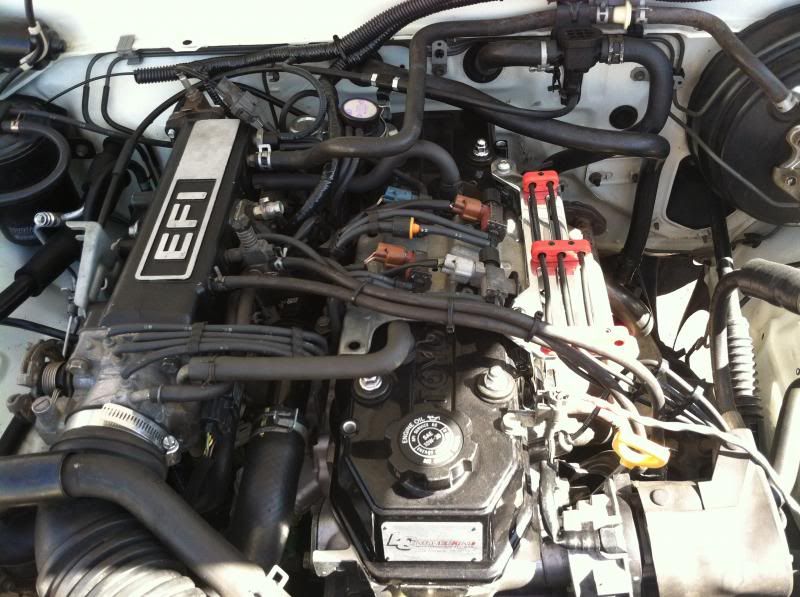
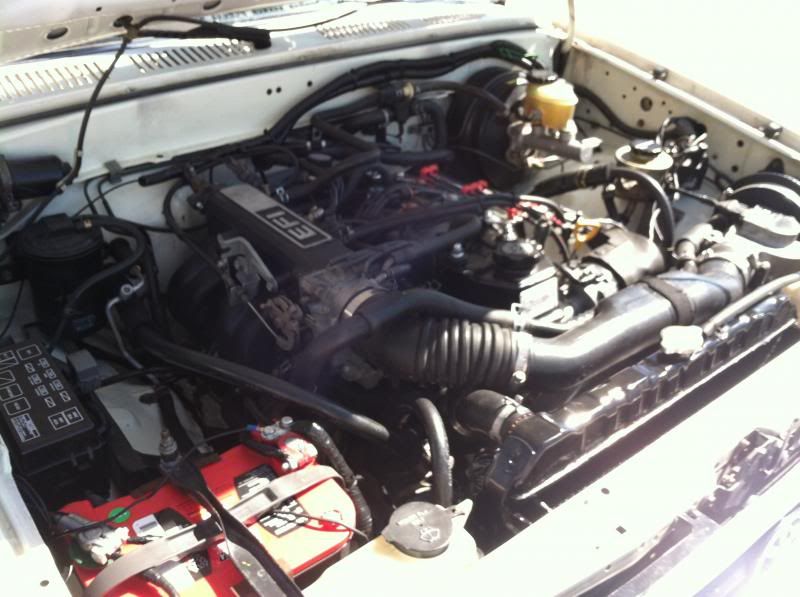
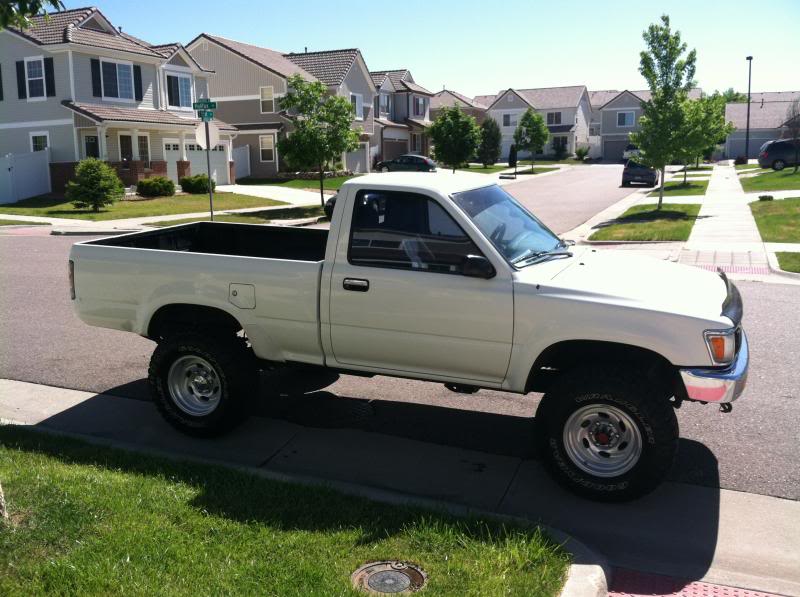
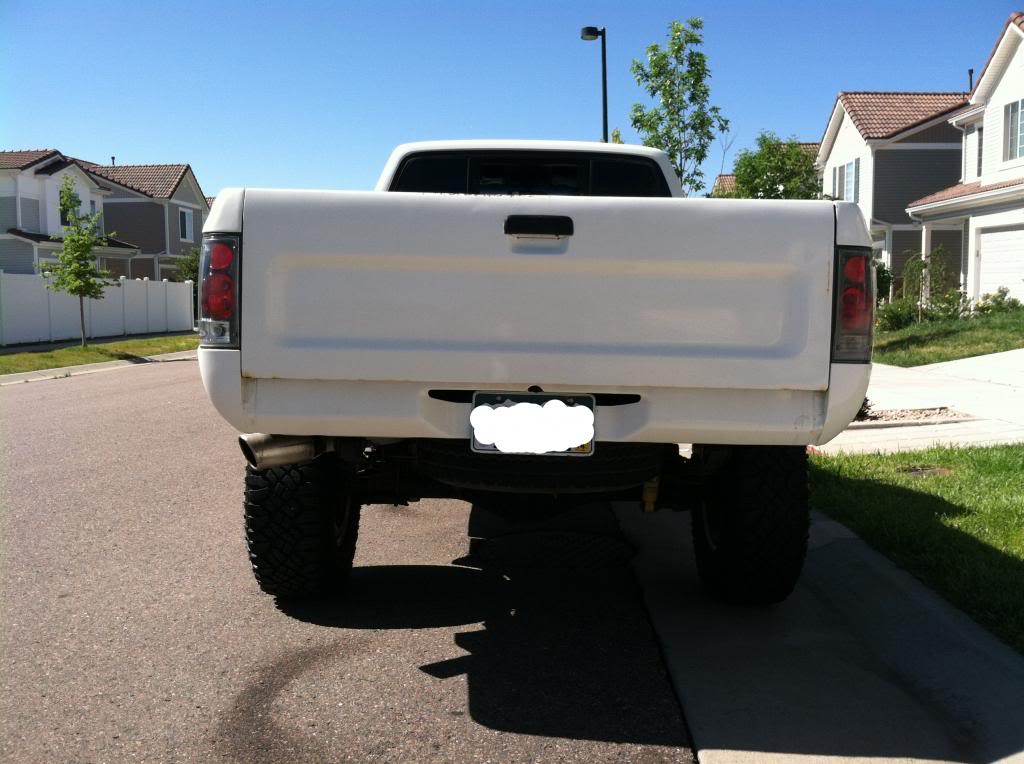
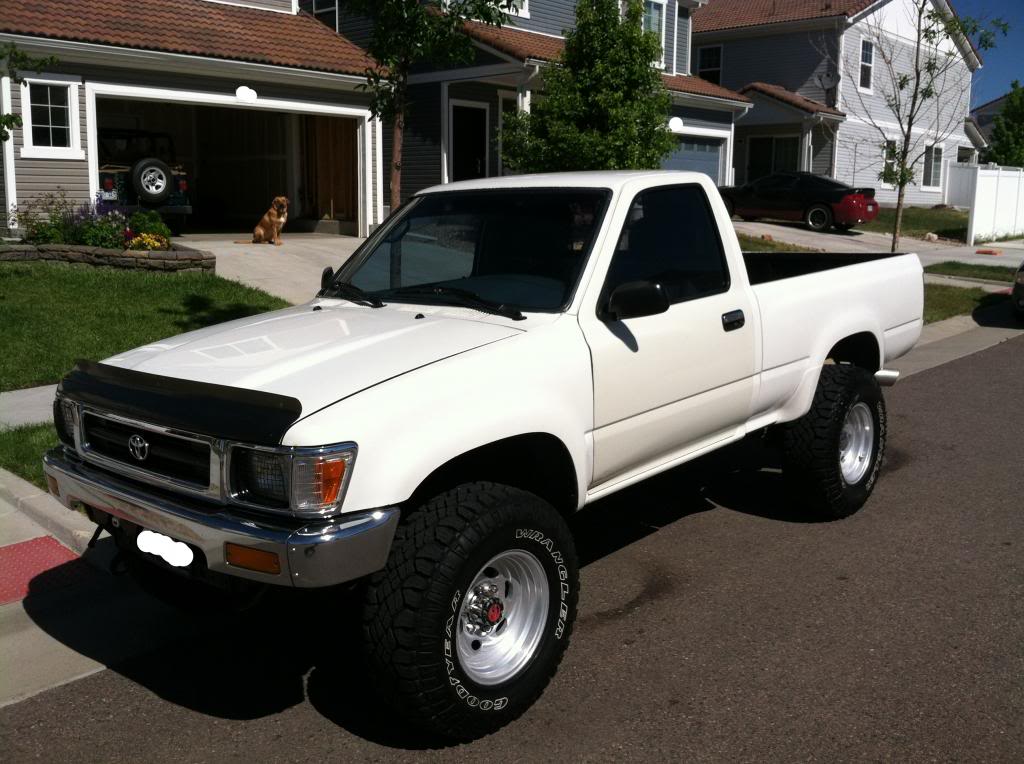
It's been a long time since I've posted anything but after a few months of my truck sitting in the garage and me slowly working on it I finally finished.
I took everything off, cleaned it, and painted it. It's all practically brand new.
I've added a couple things too. Overall I spent about 1000 bucks on everything. The list of stuff that I replaced is as follows:
All radiator hoses including the hoses from the heater core and throttle body
Head was milled and thoroughly cleaned
Valve job was performed on head
New water pump
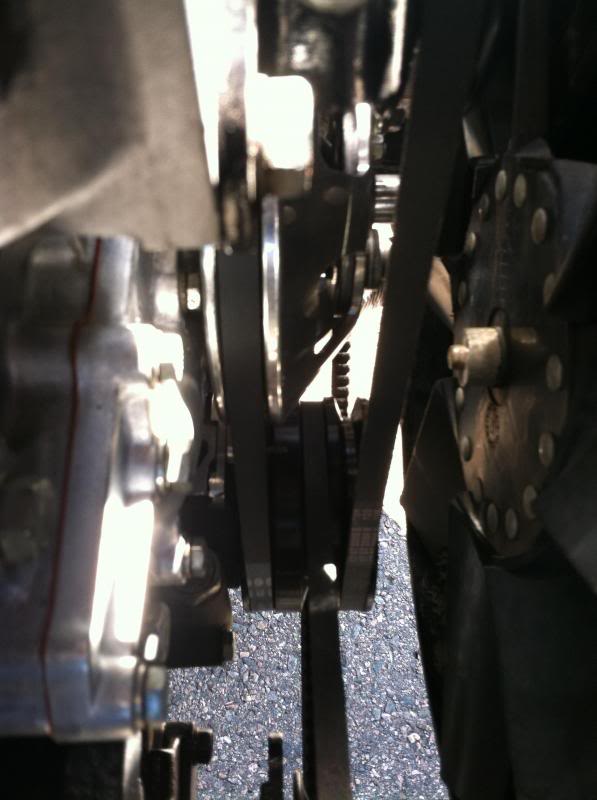
LC engineering billet wire loom kit
LC engineering under drive pulley kit
Entire exhaust was taken out and re-welded
Entire exhaust was painted with high temp paint - It's been a month now and its still holding up great!
2 new oem oxygen sensors - My truck is from CA so it has 2 oxygen sensors
New oem fuel filter
New CSF radiator
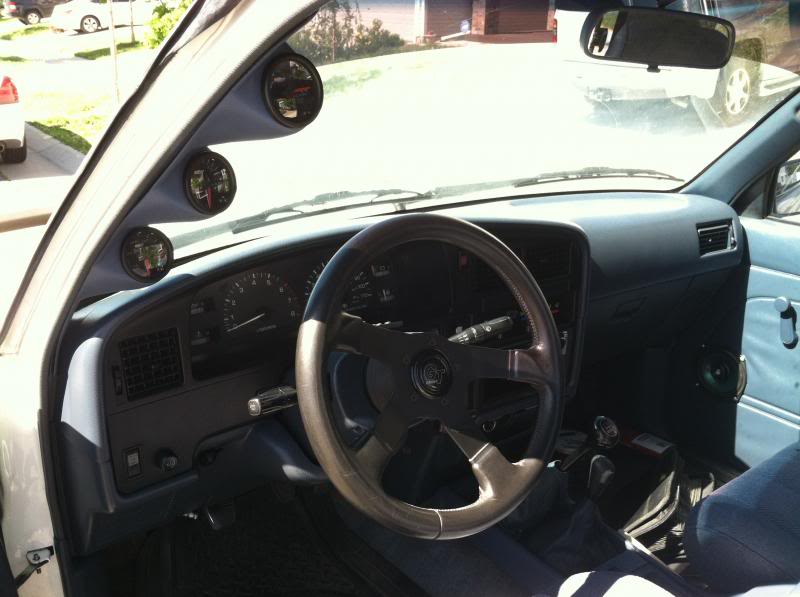
A pillar with glowshift guages - vacuum, oil temp, and air/fuel ratio
And a Marlin Crawler Turbo Clutch Kit that I put in 1000 miles before the head gasket went out. :-D
I took everything off, cleaned it, and painted it. It's all practically brand new.
I've added a couple things too. Overall I spent about 1000 bucks on everything. The list of stuff that I replaced is as follows:
All radiator hoses including the hoses from the heater core and throttle body
Head was milled and thoroughly cleaned
Valve job was performed on head
New water pump
LC engineering billet wire loom kit
LC engineering under drive pulley kit
Entire exhaust was taken out and re-welded
Entire exhaust was painted with high temp paint - It's been a month now and its still holding up great!
2 new oem oxygen sensors - My truck is from CA so it has 2 oxygen sensors
New oem fuel filter
New CSF radiator
A pillar with glowshift guages - vacuum, oil temp, and air/fuel ratio
And a Marlin Crawler Turbo Clutch Kit that I put in 1000 miles before the head gasket went out. :-D
Last edited by 93YotaGuy; Jun 9, 2013 at 08:35 AM.
Jun 9, 2013 | 08:39 AM
#14
Thread Starter
Registered User
Joined: Jul 2009
Posts: 319
Likes: 0
From: Denver, Colorado
(added the alarm light, cause I got that and a buzzer mentally)
That explains alot, like the sludge if you soak one for along time. Always thought that was random dust settleing out of the air.
Thanks guys(or gals). Can honestly say I've never even read the packaging so definitely never thought to look for a msds.
It even says "aluminium oxide" and "#1 grade steel wool" on the product pages. Looks like maybe I'm changing to steel wool and sand paper, they're much cheaper!
I made sure to clean up the pistons with compressed air and a little oil to grab anything that may have been on the walls before putting it back together.
They are very reputable and are known nationwide.
It's been a month since I've been driving it and I haven't had any issues. She runs great. Passed emissions with flying colors too!
 Jan 19, 2015 | 06:10 AM
#17
Thread Starter
Registered User
Joined: Jul 2009
Posts: 319
Likes: 0
From: Denver, Colorado
I haven't been on in years and wanted to throw a quick update on here to not scare anyone about their antifreeze and how they should change it so they don't have the same issue i did.
I failed to mention that after putting it all back together I discovered that the throttle body had the wrong gasket on it and was not sealing it completely causing the engine to run lean due to an unregulated entry of air.
After placing the appropriate gasket on there it not only ran better but I have not had an issue since.
The truck has an additional 20k miles on it after completing everything and it still runs and rives like a champ.
For anyone doing this job I recommend taking your time with the project and doing it right so you don't have to worry about it in the future.
Although the rust and old antifreeze in my truck prior to the repair was likely not the culprit I do think it is a good idea to change it regularly for not only the peace of mind but also to help prolong the life of all the cooling components.
Jan 19, 2015 | 08:07 AM
#18

Registered User

Joined: Jan 2015
Posts: 592
Likes: 3
How's your radiator holding up? My original copper radiator failed after 6 years with coolant flush every year. The next aftermarket copper radiator fell apart at the mounts after 2 more years, then core started leaking after another year. I talked to a trusted radiator shop (Kirks Radiator in El Cajon Ca, they make custom radiators) he said all copper radiators are pretty much junk because of the low-lead solder used now. He said the best thing to do is get the aluminum core w/plastic tank type for $160, or he could build a better quality custom copper for $300. I hesitated on the aluminum/plastic type, but after seeing my copper one fail so early I went ahead and bought the aluminum one, which was $40 cheaper than an aftermarket cheapo copper type. I had to modify the fan shroud slightly but other than that if was a bolt-on replacement.
Jan 19, 2015 | 09:14 AM
#19
Thread Starter
Registered User
Joined: Jul 2009
Posts: 319
Likes: 0
From: Denver, Colorado
How's your radiator holding up? My original copper radiator failed after 6 years with coolant flush every year. The next aftermarket copper radiator fell apart at the mounts after 2 more years, then core started leaking after another year. I talked to a trusted radiator shop (Kirks Radiator in El Cajon Ca, they make custom radiators) he said all copper radiators are pretty much junk because of the low-lead solder used now. He said the best thing to do is get the aluminum core w/plastic tank type for $160, or he could build a better quality custom copper for $300. I hesitated on the aluminum/plastic type, but after seeing my copper one fail so early I went ahead and bought the aluminum one, which was $40 cheaper than an aftermarket cheapo copper type. I had to modify the fan shroud slightly but other than that if was a bolt-on replacement.
Last edited by 93YotaGuy; Jan 19, 2015 at 09:16 AM.


