22re head gasket adventure. [Pics] Help / Advice / Tips welcome!
 01-21-2010, 04:52 PM
#61
Registered User
Thread Starter
Join Date: Nov 2009
Posts: 58
Likes: 0
Received 0 Likes
on
0 Posts
Well I went out and got a little done. Used an airgun attachment on my compressor to blow all the crud and water out of the cylinders and head bolt holes, water passages ect... then used my new taps to chase all the holes. Turned out well, the holes are clean now, but will get one more chase before the head goes on at some point. I gave the crank bolt a shot.... but to no avail. Truck in 4H, 4th gear, ebrake on, and the motor just spins backwards till it locks, then the bolt wont budge. Tried my 1/2 in Craftsman breaker, with a cheater pipe (25lb), impact gun, couldnt get it to budge. So now its soaking in PB blaster till I get another shot at it.
I already removed the belt that goes over the crank pulley, was that a mistake? Would keeping that pulley from turning help?
I already removed the belt that goes over the crank pulley, was that a mistake? Would keeping that pulley from turning help?
 01-21-2010, 05:19 PM
#63
marry that chick! that is by far one of the coolest things a girlfriend can do. When your done feel free to send her down to missouri so she can give my wife some pointers on how to take care of her gear head hubby. j/k really that's pretty cool of her. you're a lucky guy. Oh and by the way when i pulled my old motor i just fastened the chain to the head bolts by screwing them in through the chain links.
01-21-2010, 05:40 PM
#64
Registered User
Dude you gotta marry that girl!!!!
I can't believe I have missed this thread.
I skimmed the whole thing this evening, I'll give it another go over soon but I don't think anything has been missed and you seem well on your way.
Good work and great find!
I can't believe I have missed this thread.
I skimmed the whole thing this evening, I'll give it another go over soon but I don't think anything has been missed and you seem well on your way.
Good work and great find!
01-21-2010, 09:20 PM
#66
Registered User
Thread Starter
Join Date: Nov 2009
Posts: 58
Likes: 0
Received 0 Likes
on
0 Posts
Thanks guys! And yes, she will soon be my wife, I found a keeper for sure. She amazes me more and more every day.
But, back to business, damn crankshaft bolt. Am I too far into the teardown to do the starter trick? Couldn't I just hook the Battery back up, pull the fuel pump fuse so I don't get fuel everywhere, and give it a go? I'll get a longer pipe and try the breaker bar again tomorrow but I'm not sure if my clutch can hold that much pressure. Even though it is a semi-new clutch, I think it may have slipped a tiny bit after yanking on it with the breaker bar. I was also using a puny little senco single tank compressor to power my impact gun, maybe a bigger compressor? I'm running out of ideas and I can't progress without this stupid bolt coming off/ :/
But, back to business, damn crankshaft bolt. Am I too far into the teardown to do the starter trick? Couldn't I just hook the Battery back up, pull the fuel pump fuse so I don't get fuel everywhere, and give it a go? I'll get a longer pipe and try the breaker bar again tomorrow but I'm not sure if my clutch can hold that much pressure. Even though it is a semi-new clutch, I think it may have slipped a tiny bit after yanking on it with the breaker bar. I was also using a puny little senco single tank compressor to power my impact gun, maybe a bigger compressor? I'm running out of ideas and I can't progress without this stupid bolt coming off/ :/
01-23-2010, 02:11 PM
#67
I'd try the starter trick.. it worked for me. I had to actually use a different battery as mine didn't have enough juice..
You'll be amazed at how small that bolt is once you get it out. It was a real pain for me until I put in a different battery.
You'll be amazed at how small that bolt is once you get it out. It was a real pain for me until I put in a different battery.
01-23-2010, 02:52 PM
#68
YotaTech Milestone-Two Millionth Post
did you try my trick?? with the webbing. I'm thinking that if it worked for me, and I thought I tried everything, it's gotta work for you.
if you want me to find the thread, i will but i think you said you read it...
here it is anyway
https://www.yotatech.com/forums/f116...emoval-193505/
and then there's my stupid slow / stopped thing
https://www.yotatech.com/forums/f116...-start-188472/
in retrosepct, I remember absolutely rocking the truck with that bar remembering that some guys said you have to "shock" in in the same way as an impact wrench.
01-24-2010, 03:19 PM
#69
Registered User
Thread Starter
Join Date: Nov 2009
Posts: 58
Likes: 0
Received 0 Likes
on
0 Posts
92 toy, sounds silly but I don't have any webbing or rubber matting around, so I would have to go purchase some hahah. I've had my battery charging all night, so when I get off work I'll pull the fuel pump fuse, and try out the starter trick. Hopefully that will get it. If that doesn't work, I'll get some materials to tie off the pulley, or get a chain wrench and give the breaker bar another go.
01-24-2010, 04:10 PM
#70
YotaTech Milestone-Two Millionth Post
the chain wrench IS what the manual says to use........just couldn't get my hands on one so I Maguivered it....LOL
Good luck
Good luck
01-24-2010, 08:52 PM
#71
Registered User
Thread Starter
Join Date: Nov 2009
Posts: 58
Likes: 0
Received 0 Likes
on
0 Posts
woo! The starter trick worked like a charm. I was scared to do it, but I went for it. Charged the batter up, hooked it up, grabbed an empty jug and stuck my fuel inlet hose into it, positioned my Craftsman breaker bar and 6pt Craftsman socket (like you all said, tool quality is important here) against the driver side frame rail. and tapped the starter..... heard a big KABLAMCRACK! and though oh , I just broke something.... Went out and check and that big crack was my the sound of success. Bolt broken loose, and everything else still in tact. Looks like I may finish this project this week! Stoked! Thanks for all your help and suggestions everyone. Updates soon to follow...
01-28-2010, 09:21 AM
#75
Registered User
Thread Starter
Join Date: Nov 2009
Posts: 58
Likes: 0
Received 0 Likes
on
0 Posts
Update!
Got some work done yesterday, so I though I would post an update... Along with a few concerns / questions I have for the rest of the timing chain procedure.
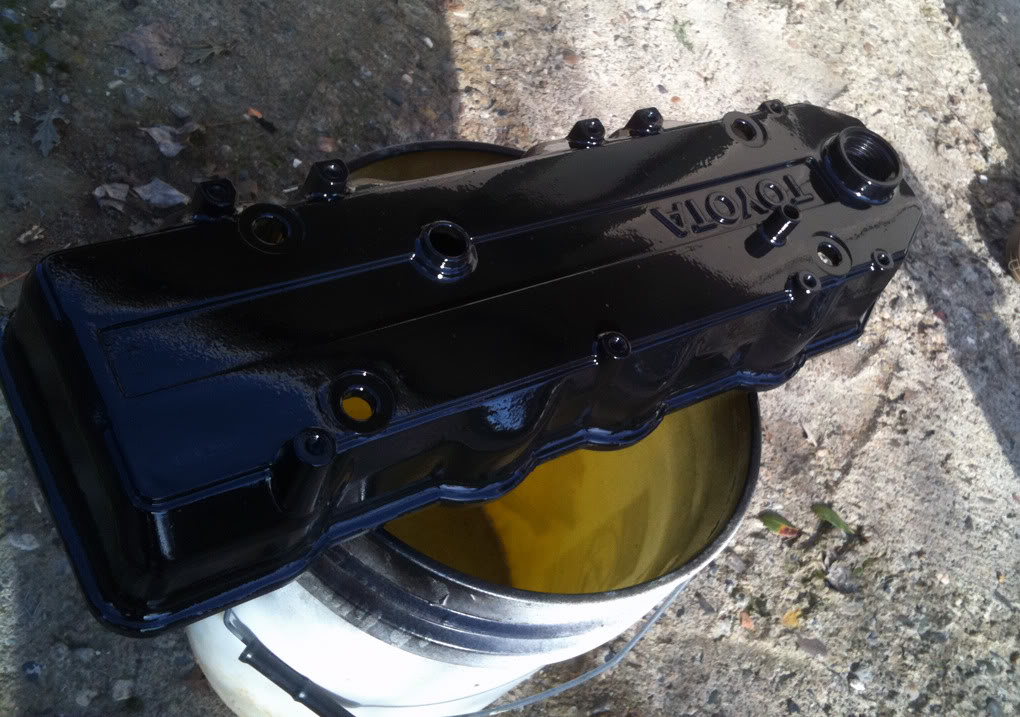
Valve Cover Painted:
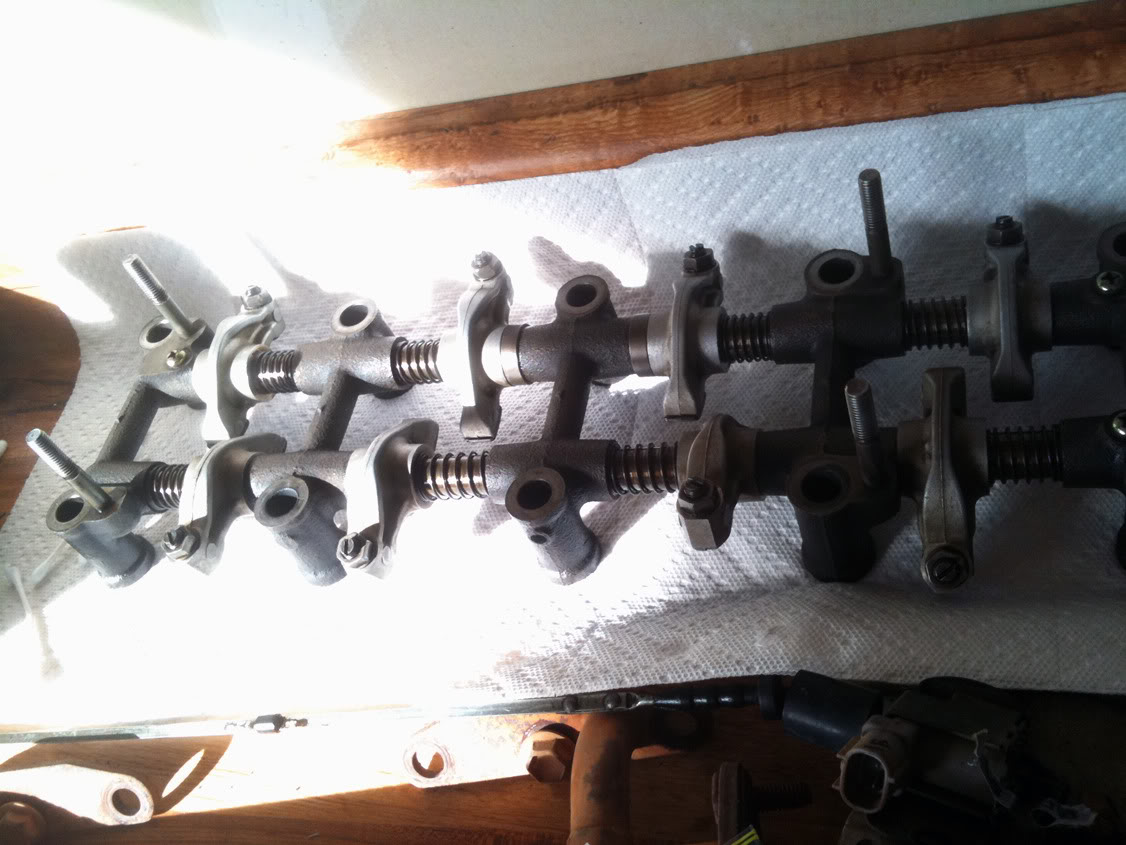
Rocker Arm assembly Cleaned:
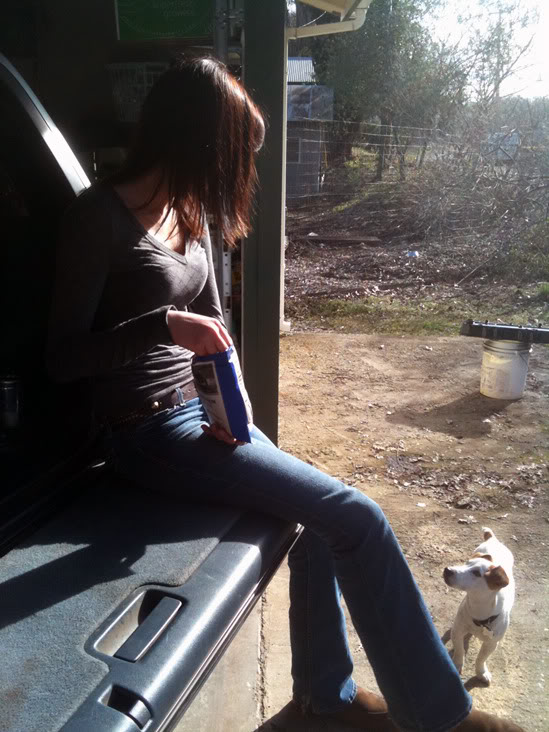
My assistants. (Shes camera shy, but my dog isn't.)
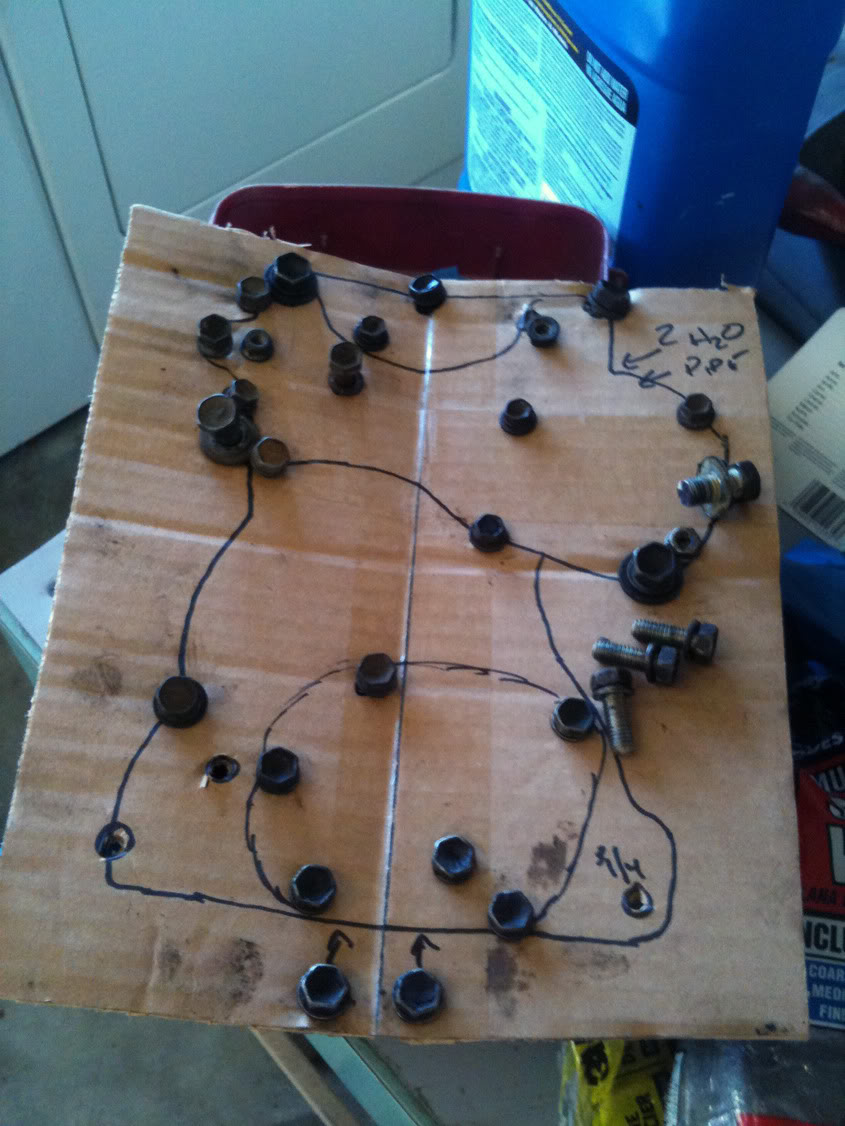
My cardboard template for the timing chain bolts. (Excellent Idea btw)
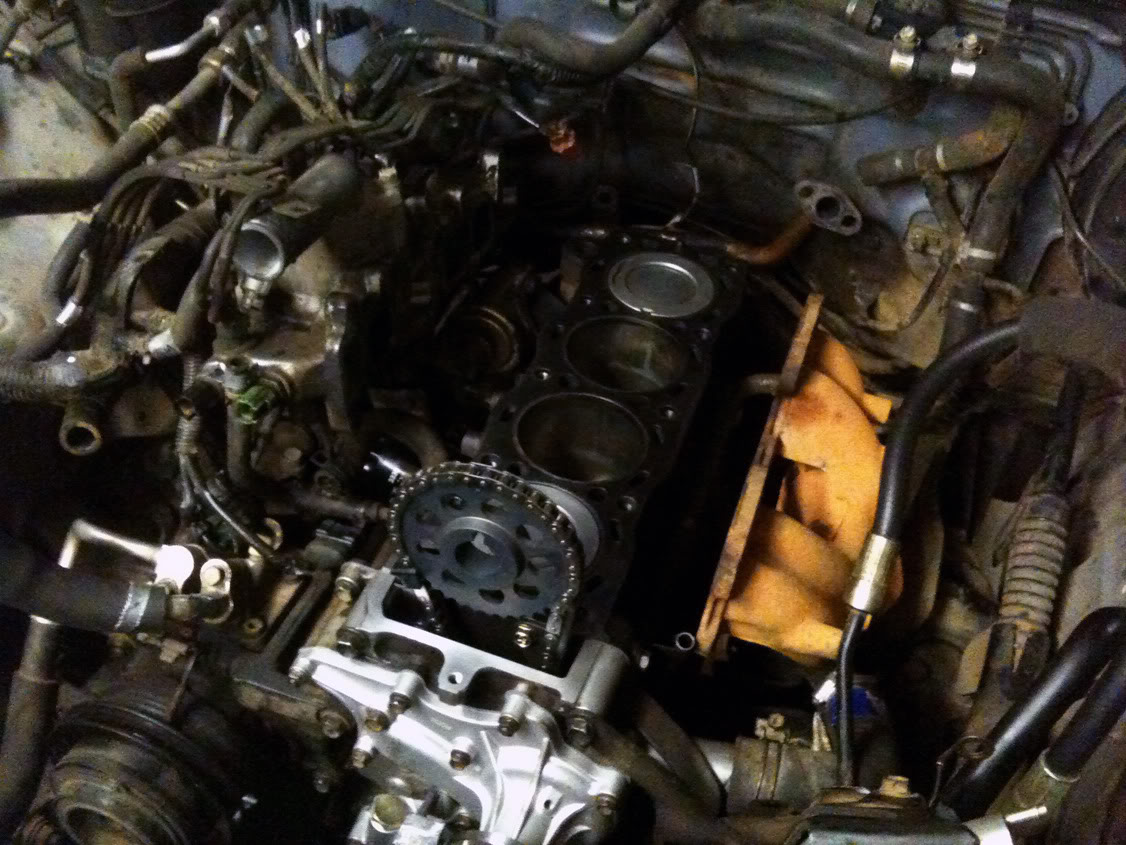
Alternator, brackets, Crank bolt, Crank bolt pulley, Water pump, Oil pump, and timing cover removed:
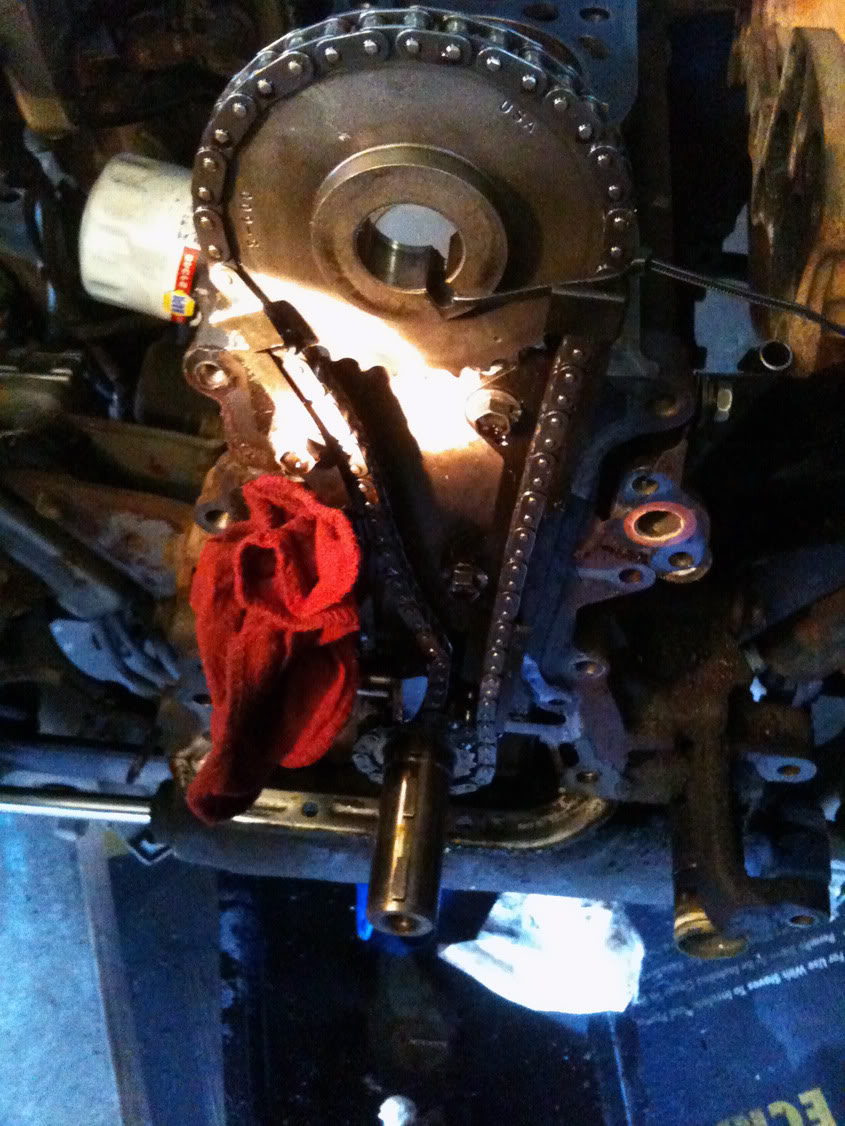
There was a small plastic piece missing from the driver side guide, but It must have broken when I removed the cover because it just fell into the pan and I was able to grab it with tweezers.
So thats where I am at, and I have a few questions.
1. Since I have the head already removed, 4crawlers writeup is quite a bit different that my procedures. So whats the best way to get the Crank and Cam Gears lined up and the timing spot on? Will I install the new guides, tensioner, chain, line up the dimples for the crank gear, then put the timing cover back on, install head, install the chain on the crank gear, with the bright link on the dimple, rotate the cam until it will slide on, then slide it on? I'm just a little confused on that. Before removing the crank pulley, I lined the mark on the pully with the 0, and the crank key is pointing straight up. I think I am on compression stroke, but I'm not sure. Is there anyway to tell? Also, how am I going to compress the tensioner to allow enough play to slide the cam gear onto the cam? How Will I make sure the Valves wont smack the pistons? Some guidance and tips here would be great.
2. When installing the new head gasket, do you guys usually lay down a thin layer of black RTV on the block and head surfaces, or not at all?
3. How do you usually prime the oil pump? Pack the entire thing with vasoline, or just put some on the gears?
Help would be greatly appreciated.
Got some work done yesterday, so I though I would post an update... Along with a few concerns / questions I have for the rest of the timing chain procedure.
Valve Cover Painted:
Rocker Arm assembly Cleaned:
My assistants. (Shes camera shy, but my dog isn't.)
My cardboard template for the timing chain bolts. (Excellent Idea btw)
Alternator, brackets, Crank bolt, Crank bolt pulley, Water pump, Oil pump, and timing cover removed:
There was a small plastic piece missing from the driver side guide, but It must have broken when I removed the cover because it just fell into the pan and I was able to grab it with tweezers.
So thats where I am at, and I have a few questions.
1. Since I have the head already removed, 4crawlers writeup is quite a bit different that my procedures. So whats the best way to get the Crank and Cam Gears lined up and the timing spot on? Will I install the new guides, tensioner, chain, line up the dimples for the crank gear, then put the timing cover back on, install head, install the chain on the crank gear, with the bright link on the dimple, rotate the cam until it will slide on, then slide it on? I'm just a little confused on that. Before removing the crank pulley, I lined the mark on the pully with the 0, and the crank key is pointing straight up. I think I am on compression stroke, but I'm not sure. Is there anyway to tell? Also, how am I going to compress the tensioner to allow enough play to slide the cam gear onto the cam? How Will I make sure the Valves wont smack the pistons? Some guidance and tips here would be great.
2. When installing the new head gasket, do you guys usually lay down a thin layer of black RTV on the block and head surfaces, or not at all?
3. How do you usually prime the oil pump? Pack the entire thing with vasoline, or just put some on the gears?
Help would be greatly appreciated.
01-28-2010, 09:35 AM
#77
YotaTech Milestone-Two Millionth Post
put some tape on top of those bolts or a rubberband on the threads just in case you drop that thing on the floor, so they don't go flying all over the place.
and I will accept that "thanks" for the cardboard idea.....except I likes pizza boxes.
as far as you questions, not there yet. sorry.
and I will accept that "thanks" for the cardboard idea.....except I likes pizza boxes.
as far as you questions, not there yet. sorry.
01-28-2010, 09:22 PM
#78
Registered User
Thread Starter
Join Date: Nov 2009
Posts: 58
Likes: 0
Received 0 Likes
on
0 Posts
Update! Got quite a bit done tonight.
- removed Timing cover and old timing components.
- cleaned T cover, and installed new cam and crank gears, new chain, tensioner, oil pump, and water pump.
- Also reinstalled the alternator, and AC condenser, as well as changed teh oil filter while I was in there. Fuel filter will come tomorrow.
Lots of scraping, cleaning, patience, and here is my progress for tonight.
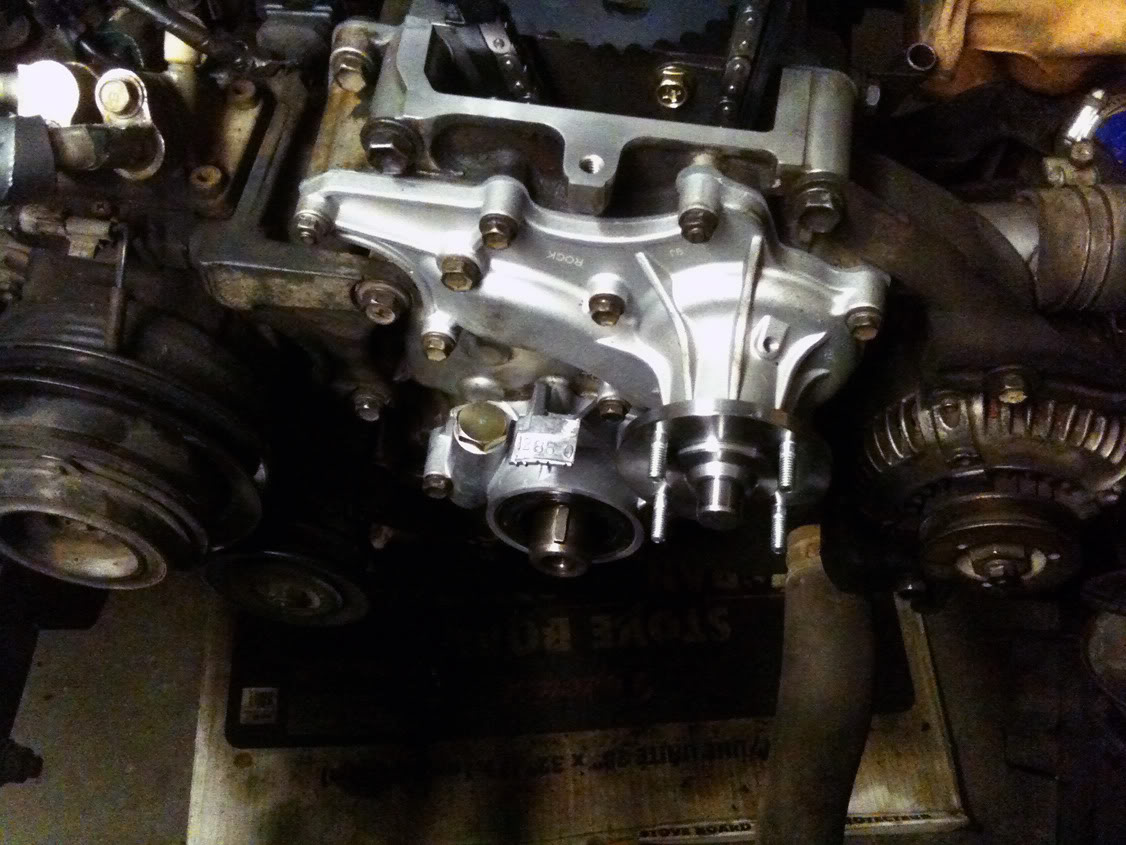
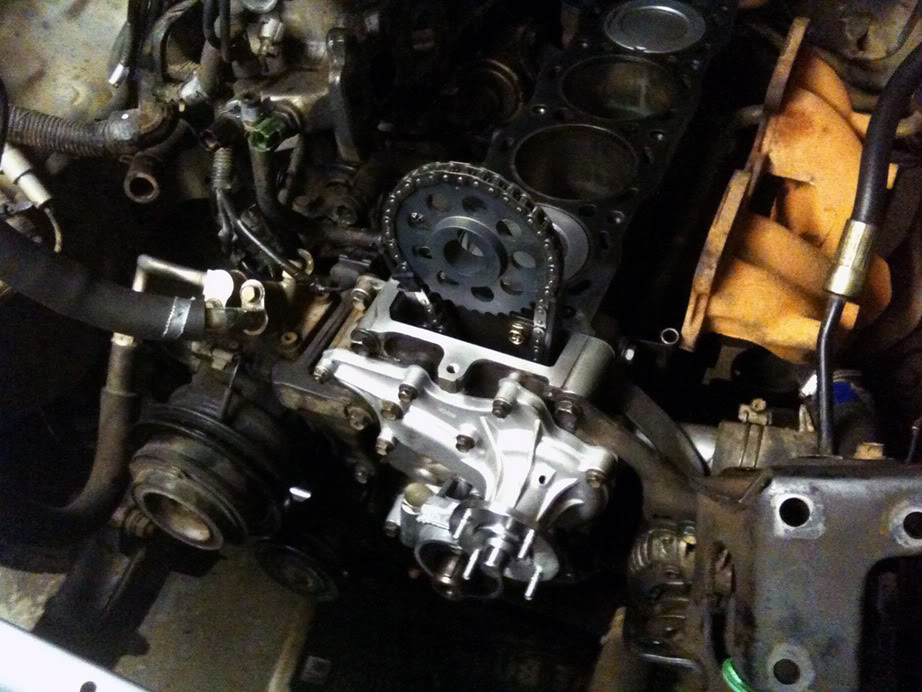
Being officially on the re-assembly stage feels great! Feel free to keep the tips and suggestions up for I'm sure I'll forget some things along the way. Thanks for all the help so far.
- removed Timing cover and old timing components.
- cleaned T cover, and installed new cam and crank gears, new chain, tensioner, oil pump, and water pump.
- Also reinstalled the alternator, and AC condenser, as well as changed teh oil filter while I was in there. Fuel filter will come tomorrow.
Lots of scraping, cleaning, patience, and here is my progress for tonight.
Being officially on the re-assembly stage feels great! Feel free to keep the tips and suggestions up for I'm sure I'll forget some things along the way. Thanks for all the help so far.
01-30-2010, 12:25 PM
#79
Registered User
Thread Starter
Join Date: Nov 2009
Posts: 58
Likes: 0
Received 0 Likes
on
0 Posts
Well I just was looking at my old timing chain components, and I noticed that 2 teeth were missing from the old crank gear. I'm not sure when they got broken but they almost inevitably fell into the oil pan. Could have been when I did the starter trick.
Anyways, this is probably a dumb questions, but will I have to pull the oil pan to get these out, or since they are so small with they just flow out when I change the oil? Doesn't our oil pickup tube have a filter one it? In that case it couldn't get sucked up could it?
I don't want to pull the pan if I don't have to, because I don't want to drop the front diff ect ect.... I will If I must but I just am ready to get this thing finished.
01-30-2010, 12:31 PM
#80
Registered User
Join Date: Feb 2009
Posts: 48
Likes: 0
Received 0 Likes
on
0 Posts
Well I just was looking at my old timing chain components, and I noticed that 2 teeth were missing from the old crank gear. I'm not sure when they got broken but they almost inevitably fell into the oil pan. Could have been when I did the starter trick.
Anyways, this is probably a dumb questions, but will I have to pull the oil pan to get these out, or since they are so small with they just flow out when I change the oil? Doesn't our oil pickup tube have a filter one it? In that case it couldn't get sucked up could it?
I don't want to pull the pan if I don't have to, because I don't want to drop the front diff ect ect.... I will If I must but I just am ready to get this thing finished.
Anyways, this is probably a dumb questions, but will I have to pull the oil pan to get these out, or since they are so small with they just flow out when I change the oil? Doesn't our oil pickup tube have a filter one it? In that case it couldn't get sucked up could it?
I don't want to pull the pan if I don't have to, because I don't want to drop the front diff ect ect.... I will If I must but I just am ready to get this thing finished.
The oil pickup does have a screen on it, however those broken teeth need to come out some how or another whether its through the drain bolt or removing the whole pan.


