
1st Gen 4Runner 3-gang Switch Panel Install - Lots of Pics
 Sep 7, 2009 | 08:40 PM
#1
Thread Starter
Registered User
Joined: Dec 2007
Posts: 710
Likes: 2
From: Santa Rosa, CA
1st Gen 4Runner 3-gang Switch Panel Install - Lots of Pics
I have a 1989 4Runner SR5 V6 Auto trans that I am in the middle of building up for as a trail/expedition type rig. I just added an ARB bumper and PIAA driving lights. The PIAA switch was kind of hokey, a push button thing that you stick to the dash. The dash panel area to the left of the steering column has been an area that I have been eyeing for a while.
Since I have an auto rig, I do not have a clutch cancel button over there, just a filler plate in that hole. I did some looking around and found some Euro style rocker switches from Daystar on Summit Racing. I then found them on Amazon.com for way cheaper. After receiving the switches I saw that they were actually made by Carling Technologies, so, I cruised on over to their website. They are a large switch manufacturer for the OEM's and marine industry. They also make a 3 gang switch panel insert for their Contura II line of swtiches, which is what the Daystar swtiches are. So, I ordered that panel up from Digi-Key, an electronics supply house that I use at work.
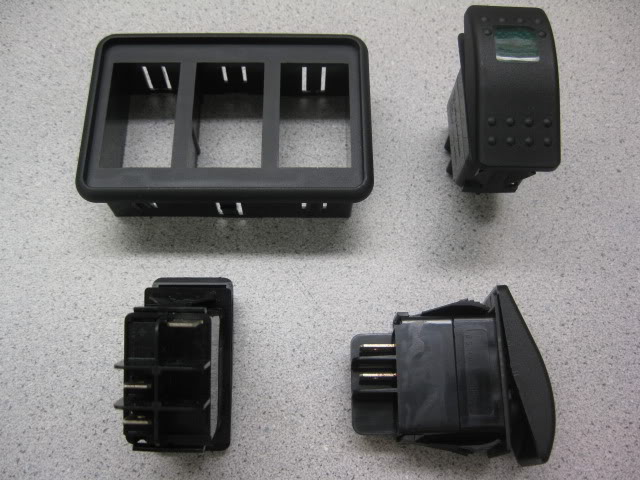
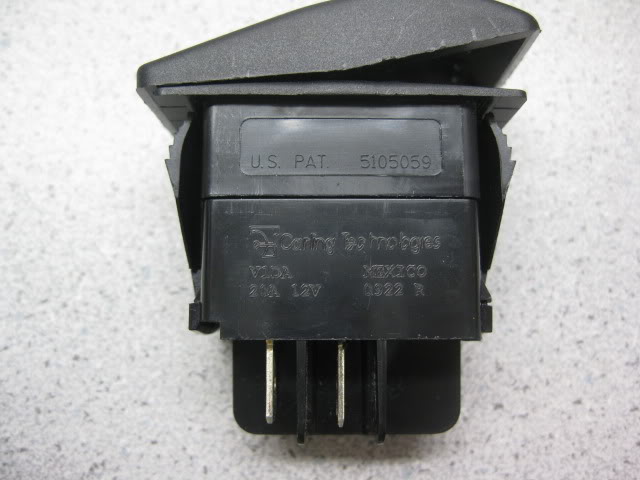
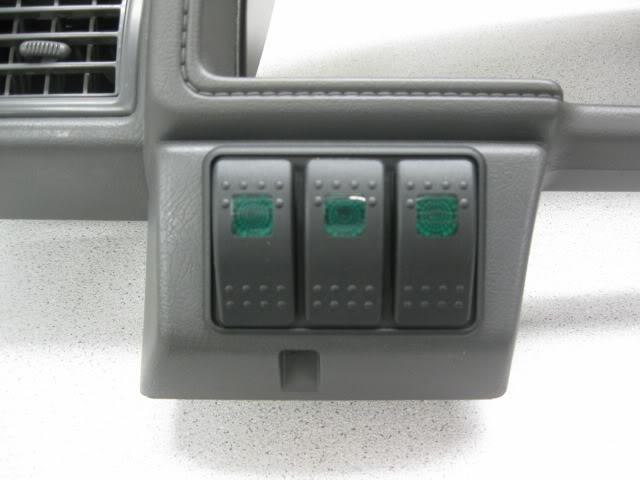
The swtiches are quality units, 20 amp rated, on/off with an LED light when they are on. Overkill for what I am doing, as am running everything off of relays, but they are just so nice, had to have them.
Pictures of the switches and panel:
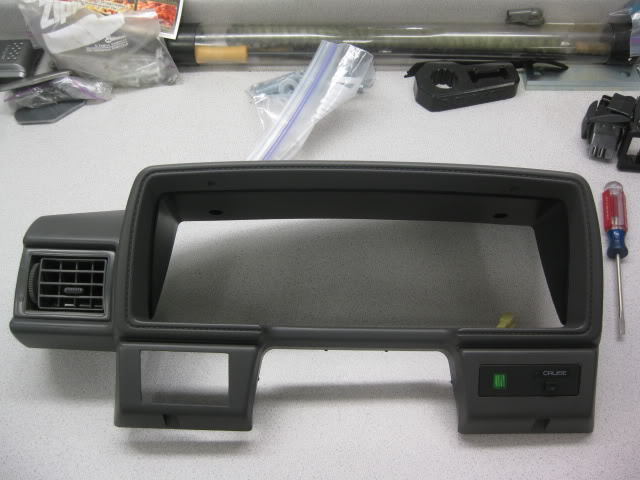
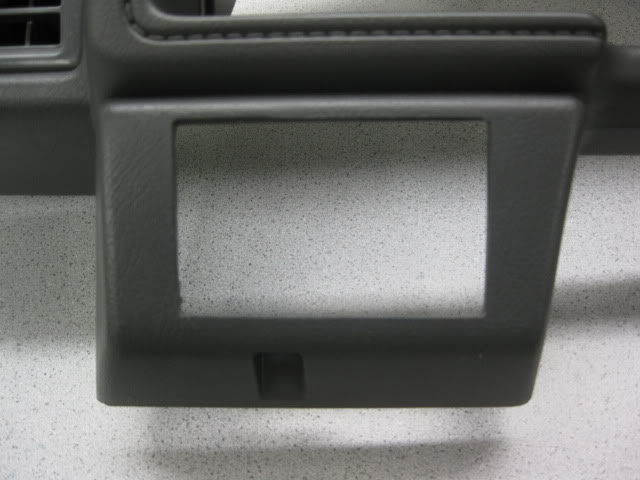
The panel requires a 1.90 x 3.05 " cutout. This is a perfect fit width wise and just a bit tight on height for the area next to the column. I started with the clutch cancel cutout as the reference in the upper left corner. I then cut sideways along the top and down along the left. I used a piece of a hacksaw balde mounted in my hand drywall saw, slow and careful. I also cut it undersize and then filed it out to size with a rasp. I used digital calipers and straight edges to verify I was getting everything square and level. It took about 1/2 hour to cut the opening and file it to size.
Pictures of the opening:
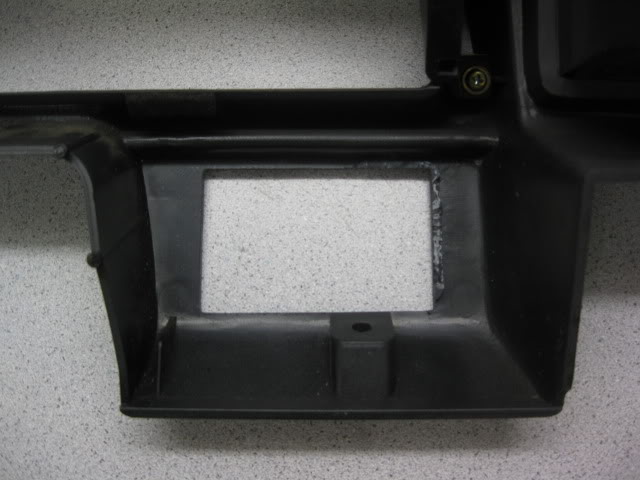
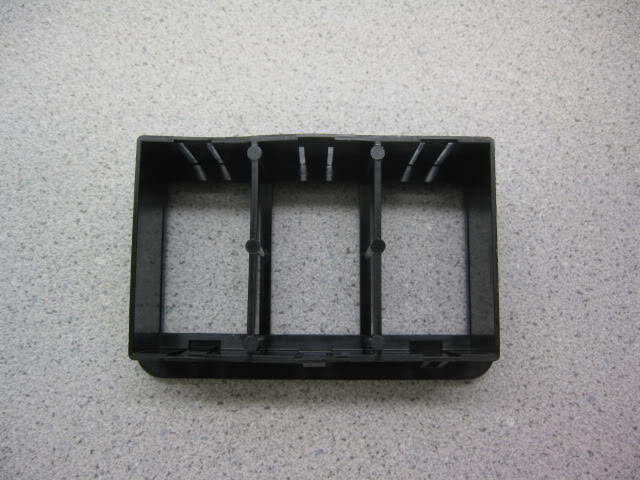
The panel just pops right in. It fits varying thicknesses of material with it's barbed retention fingers. It is also fairly easy to remove, just push on the fingers from the back with a flat blade screwdriver and work your way around, it will slowly work it's way out.
The switches pop into the bezel with their own barbed wings. They are also easy to take back out with flat blade screwdriver.
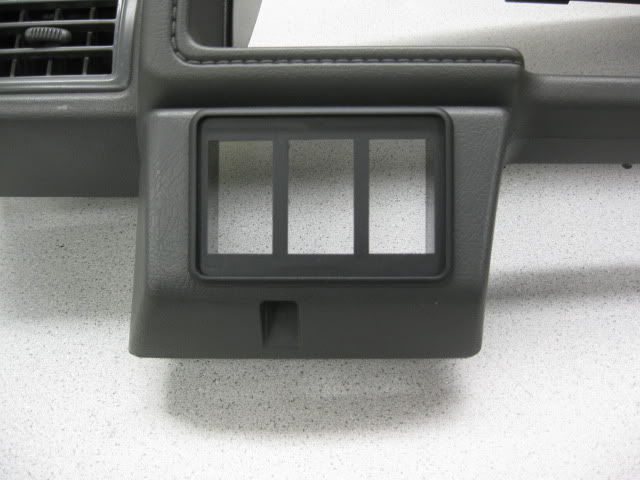
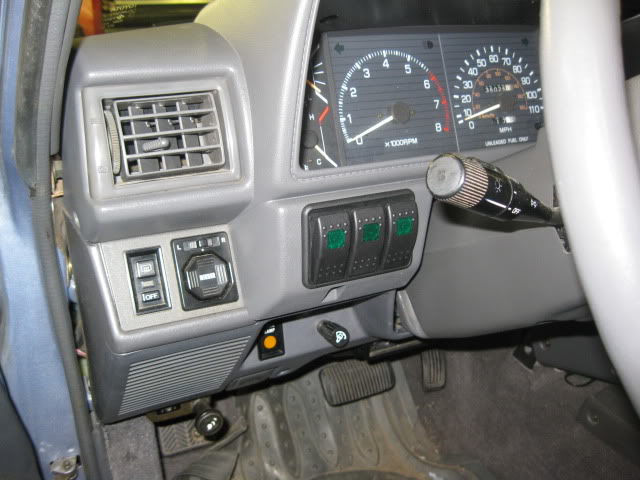
Pictures of the switches installed in the dash panel:
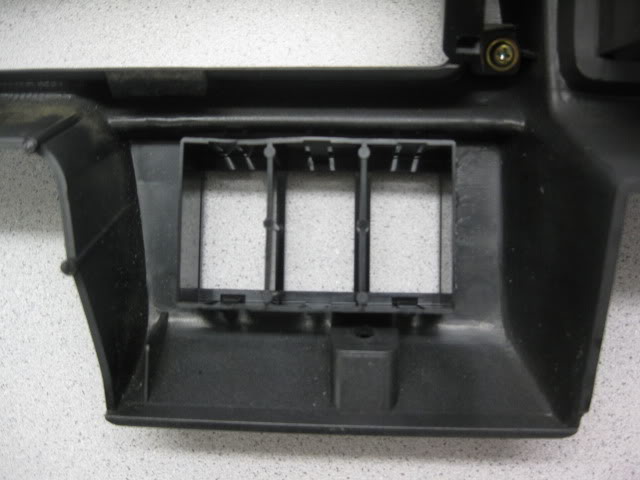
I did have to hack one small bracket in the dash to clear the switches. It is plastic and was a quick mod with the hacksaw blade. Also, the screw that attaches the dash panel to this bracket should be cut down to minimum length. Otherwise it hits the switch bezel insert.

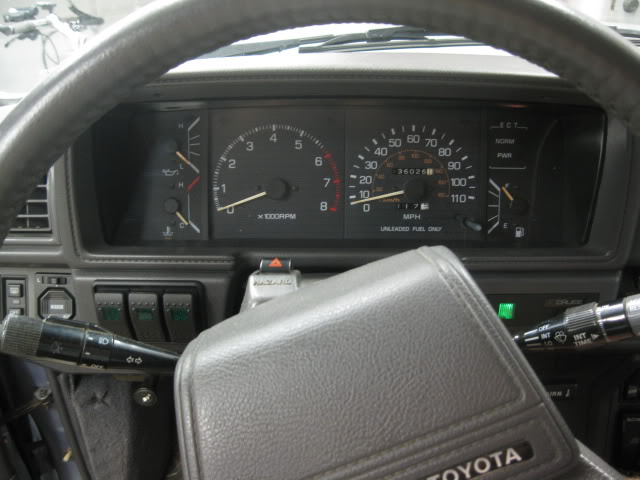
And here is the finished install. Very clean, almost looks factory.
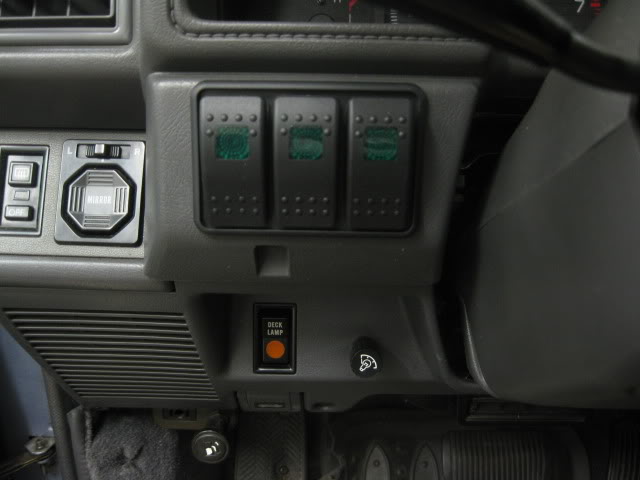

Now I need to wire in the driving lights and install my LED backup lights. The third switch is going to be for fog lights, at some point.
P/N's and links:
Switches: Daystar KU80012 , also offered in red, blue, and amber.
Carling Technologies Contura II switch family.
Amazon.com: $10.95 each, free shipping over $25
Bezel: Carling Technologies VM3-01
Digi-key P/N: 432-1107-ND ($5 Plus Shipping)
Carling also makes a six gang and a modular panel system
with end caps and a center section, dovetails together.
Links
Daystar:
http://daystarweb.com
Carling Technologies:
http://rocker-switches.carlingtech.c...switch__19.asp
Amazon.com:
http://www.amazon.com/Daystar-KU8001...2381336&sr=8-1
Digi-Key:
http://search.digikey.com/scripts/Dk...me=432-1107-ND
Since I have an auto rig, I do not have a clutch cancel button over there, just a filler plate in that hole. I did some looking around and found some Euro style rocker switches from Daystar on Summit Racing. I then found them on Amazon.com for way cheaper. After receiving the switches I saw that they were actually made by Carling Technologies, so, I cruised on over to their website. They are a large switch manufacturer for the OEM's and marine industry. They also make a 3 gang switch panel insert for their Contura II line of swtiches, which is what the Daystar swtiches are. So, I ordered that panel up from Digi-Key, an electronics supply house that I use at work.
The swtiches are quality units, 20 amp rated, on/off with an LED light when they are on. Overkill for what I am doing, as am running everything off of relays, but they are just so nice, had to have them.
Pictures of the switches and panel:
The panel requires a 1.90 x 3.05 " cutout. This is a perfect fit width wise and just a bit tight on height for the area next to the column. I started with the clutch cancel cutout as the reference in the upper left corner. I then cut sideways along the top and down along the left. I used a piece of a hacksaw balde mounted in my hand drywall saw, slow and careful. I also cut it undersize and then filed it out to size with a rasp. I used digital calipers and straight edges to verify I was getting everything square and level. It took about 1/2 hour to cut the opening and file it to size.
Pictures of the opening:
The panel just pops right in. It fits varying thicknesses of material with it's barbed retention fingers. It is also fairly easy to remove, just push on the fingers from the back with a flat blade screwdriver and work your way around, it will slowly work it's way out.
The switches pop into the bezel with their own barbed wings. They are also easy to take back out with flat blade screwdriver.
Pictures of the switches installed in the dash panel:
I did have to hack one small bracket in the dash to clear the switches. It is plastic and was a quick mod with the hacksaw blade. Also, the screw that attaches the dash panel to this bracket should be cut down to minimum length. Otherwise it hits the switch bezel insert.
And here is the finished install. Very clean, almost looks factory.
Now I need to wire in the driving lights and install my LED backup lights. The third switch is going to be for fog lights, at some point.
P/N's and links:
Switches: Daystar KU80012 , also offered in red, blue, and amber.
Carling Technologies Contura II switch family.
Amazon.com: $10.95 each, free shipping over $25
Bezel: Carling Technologies VM3-01
Digi-key P/N: 432-1107-ND ($5 Plus Shipping)
Carling also makes a six gang and a modular panel system
with end caps and a center section, dovetails together.
Links
Daystar:
http://daystarweb.com
Carling Technologies:
http://rocker-switches.carlingtech.c...switch__19.asp
Amazon.com:
http://www.amazon.com/Daystar-KU8001...2381336&sr=8-1
Digi-Key:
http://search.digikey.com/scripts/Dk...me=432-1107-ND
Last edited by OutlawMike; Mar 17, 2010 at 02:14 PM.


Trending Topics

 Sep 8, 2009 | 03:01 PM
#10
Registered User
Joined: Jun 2007
Posts: 1,825
Likes: 6
From: Inverness,FL
looks good, i might have to try somethin like that....when i get some accessories lol, i have a 5spd but its got a jerry riged starter that doesent need the clutch cancel button.....or even the ignition to be on...lmao that one has burned me a couple times...(turns over for like 10 sec...i do it again......im like wtf it a couple times...do it again..... i see my keys arent even in the ignition
it a couple times...do it again..... i see my keys arent even in the ignition


 Nice install!
 Sep 8, 2009 | 07:54 PM
#16
Thread Starter
Registered User
Joined: Dec 2007
Posts: 710
Likes: 2
From: Santa Rosa, CA
The only switch I tried in there was a clutch cancel switch I picked up at a boneyard thinking it might work as a switch. It was loose, too lose, did not retain. I have no idea on any other factory switches. I can try some of the others in my rig if you want. Any inparticular? I have the three in the center console (rear wiper, window lock, and rear window up/down) and one in the dash (antenna up/down).
Sep 8, 2009 | 07:55 PM
#17
Thread Starter
Registered User
Joined: Dec 2007
Posts: 710
Likes: 2
From: Santa Rosa, CA
Sep 8, 2009 | 07:56 PM
#18
Thread Starter
Registered User
Joined: Dec 2007
Posts: 710
Likes: 2
From: Santa Rosa, CA
Sep 8, 2009 | 08:09 PM
#20
Thread Starter
Registered User
Joined: Dec 2007
Posts: 710
Likes: 2
From: Santa Rosa, CA
I agree, most aftermarket switches look like crap. I started digging around and found these at Summit, then figured out where they really came from. Carling makes some beautiful switches, some of their other lines are even better. The problem is they do not sell retail, so, you have to find someone who is selling them under their brand.


