
$150 paint job
 May 29, 2009 | 07:36 PM
#81
Thread Starter
Registered User
Joined: Oct 2007
Posts: 296
Likes: 0
From: Bismarck, ND
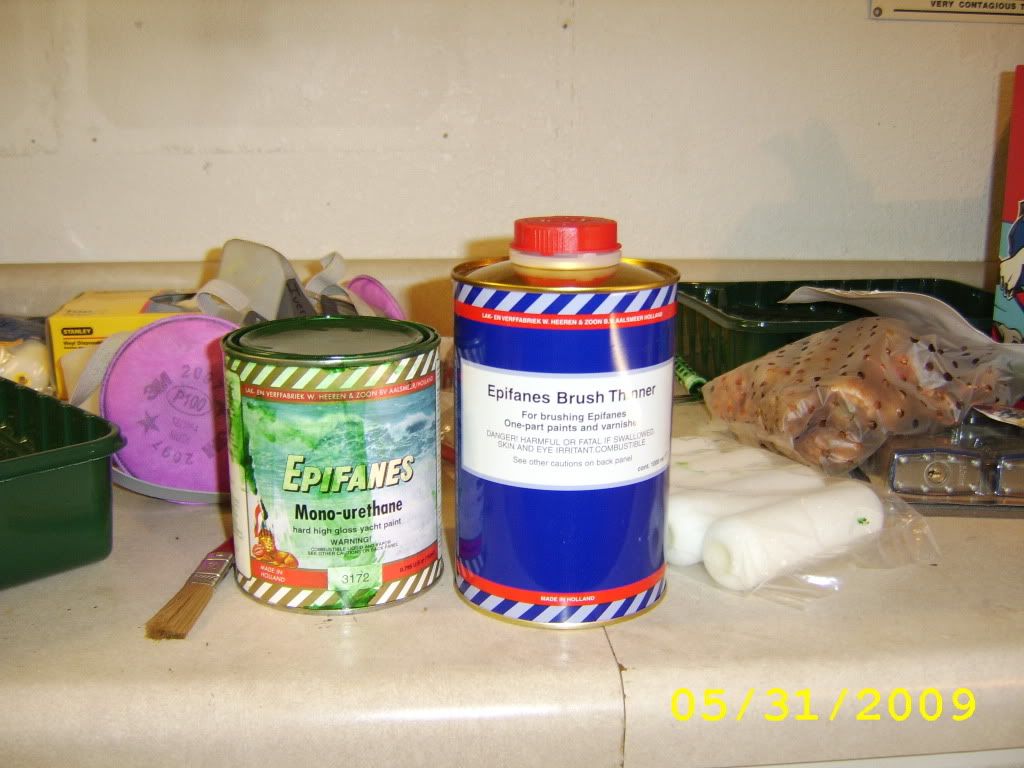
I used a urethane thinner i got at my local auto body store, wasn't happy with it so i ordered the epifanes thinner. I think im gonna need about 2 and a half quarts of paint when all is said and done.
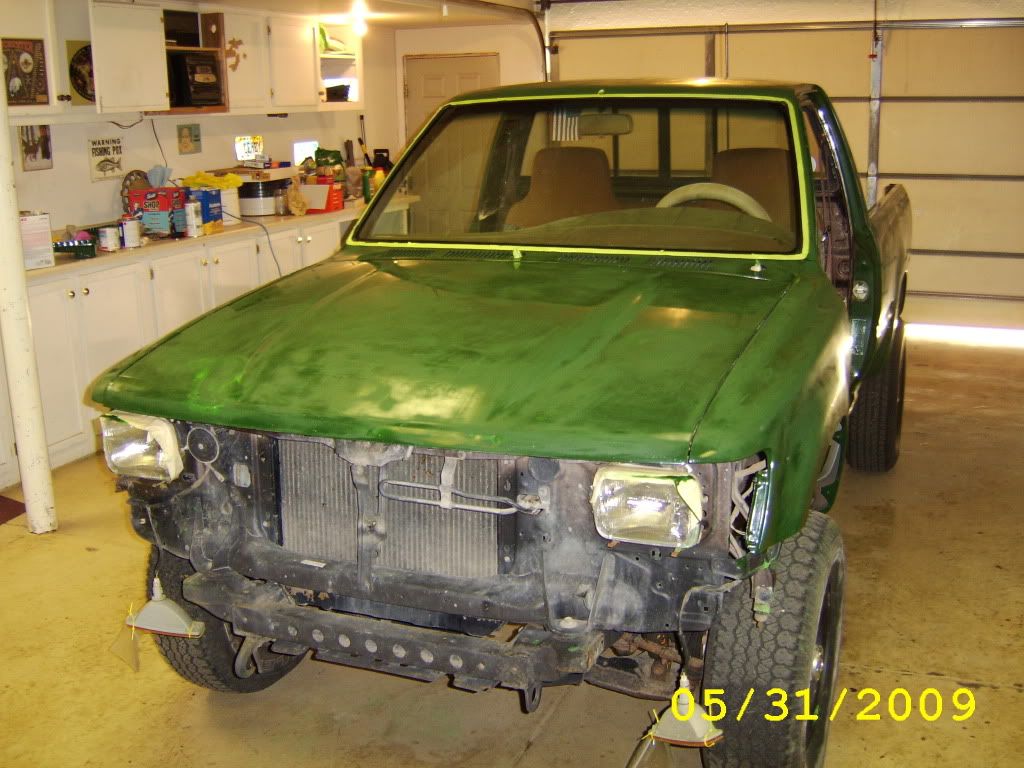
I burned through the first coat in a few spots with the 600 grit, gotta be careful around edges.
I burned through the first coat in a few spots with the 600 grit, gotta be careful around edges.
 May 30, 2009 | 06:14 AM
#83
Thread Starter
Registered User
Joined: Oct 2007
Posts: 296
Likes: 0
From: Bismarck, ND
hey thanks for the tip man my job for today is to completely prep the whole truck for the second coat. I plan on taking more time this go around. Tomorrow morning I am going to start painting around 7 am and will post up more pics in the arfternoon
May 31, 2009 | 11:21 AM
#86
Thread Starter
Registered User
Joined: Oct 2007
Posts: 296
Likes: 0
From: Bismarck, ND
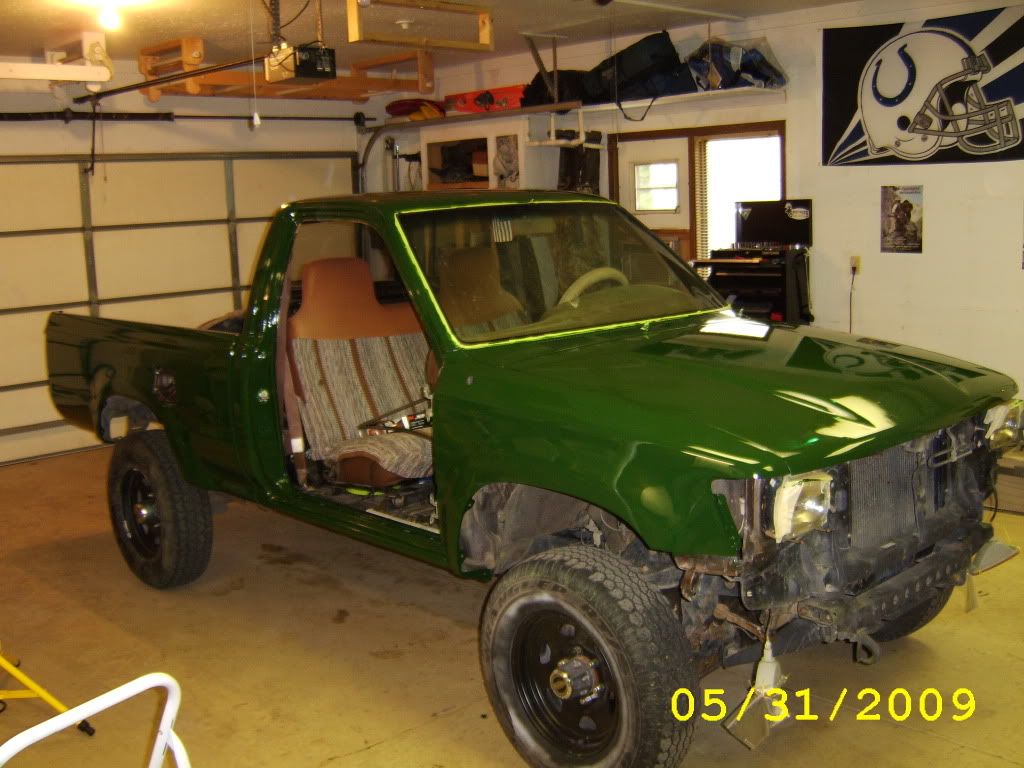
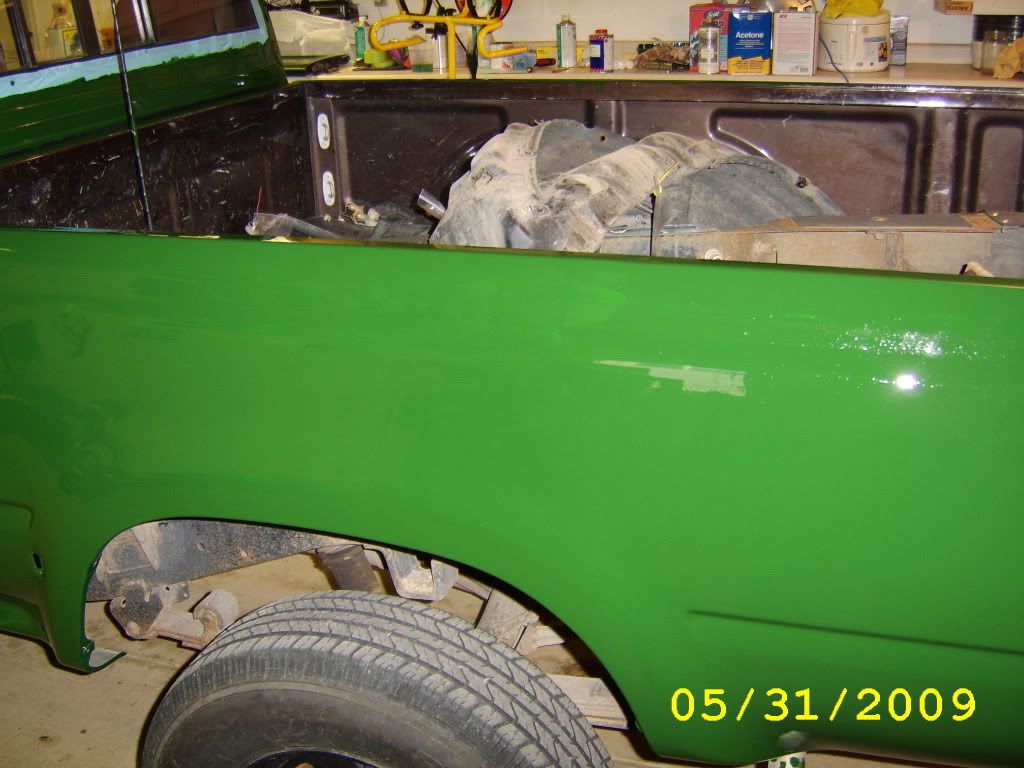
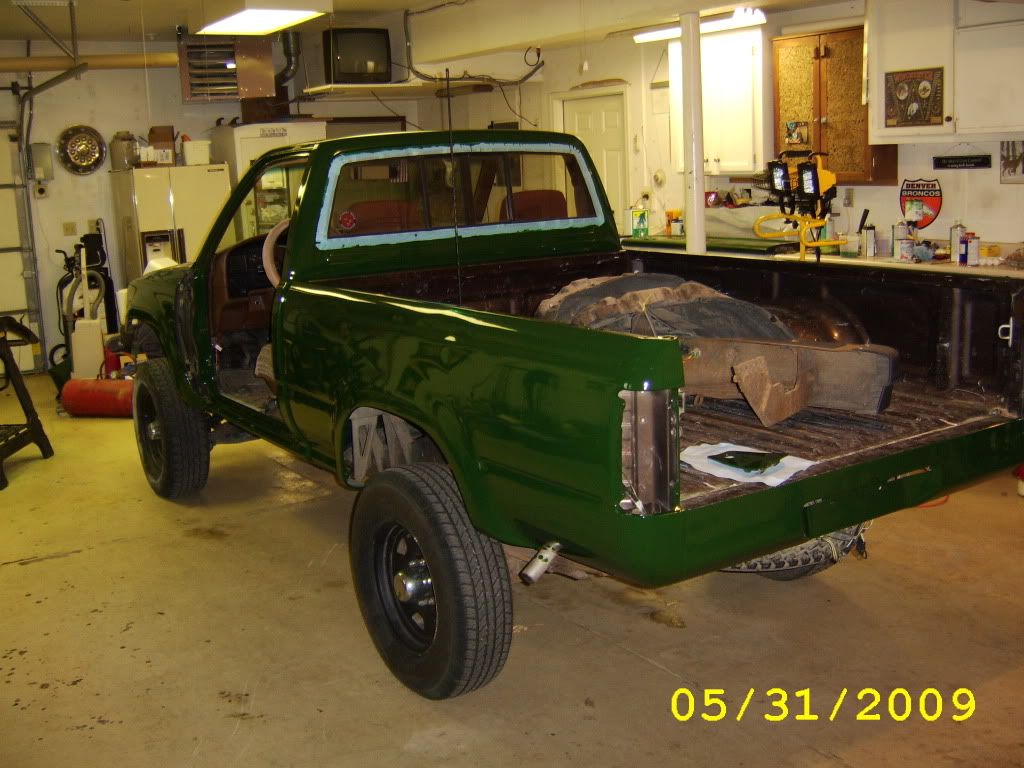
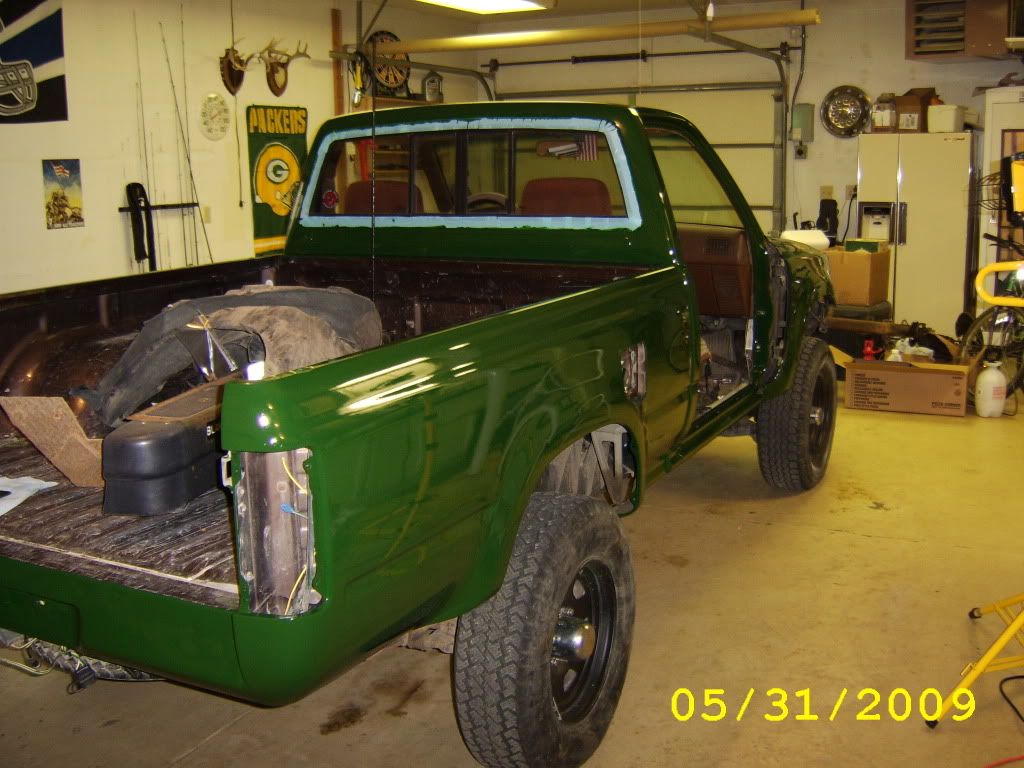
well I just got done with the second coat, started my finally wipe down at 8 am and finished painting at 1:30. I took a lot more time on this coat then the first and it turned out a lot better then I thought. I bought an adjustable 6' twin lamp painting light, it helped immensely to be able to see the thin spots and runs.
I have guard drill all this week and weekend so I won't get to it again till next week I hope to have it done in the next to weeks, I can't wait to drive it again.
here are some pics
ready for paint
I used the correct reducer this time and it seemed to go on smoother
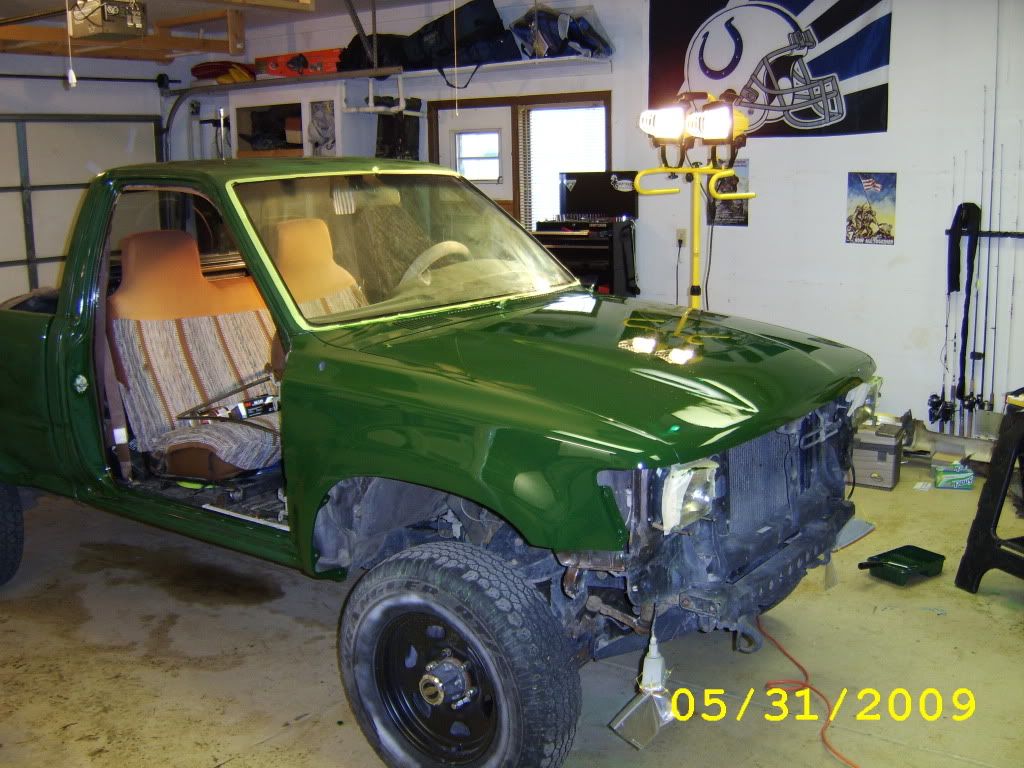
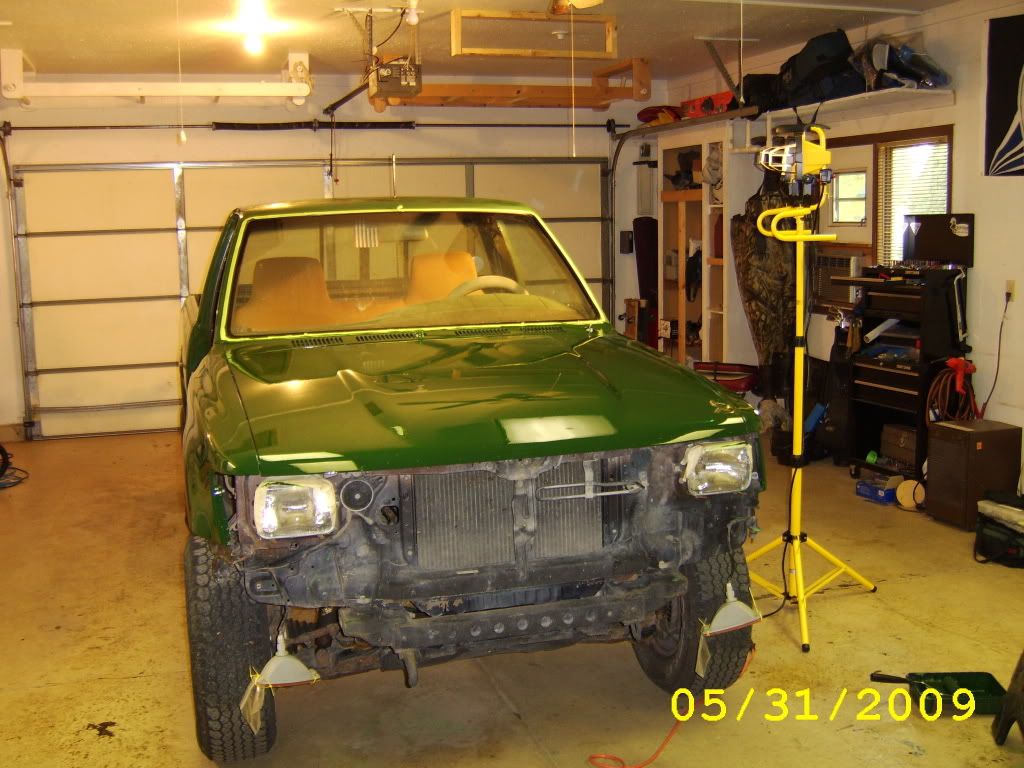

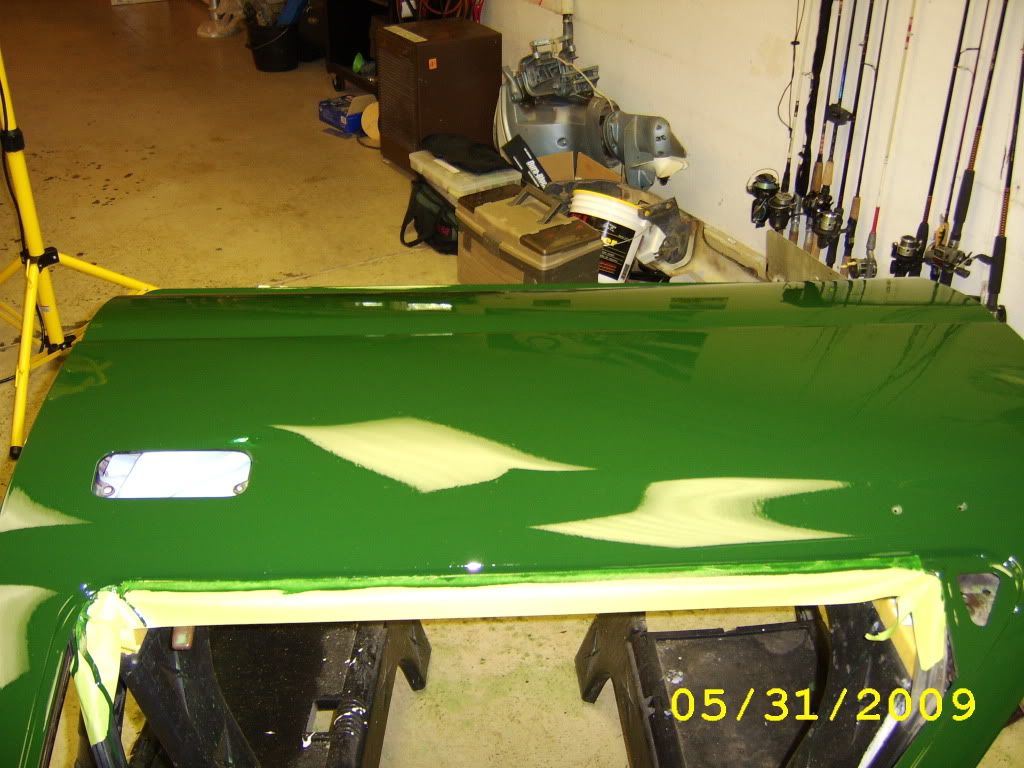
looks kinda cool I think, its a bit darker then the pics make it look like though

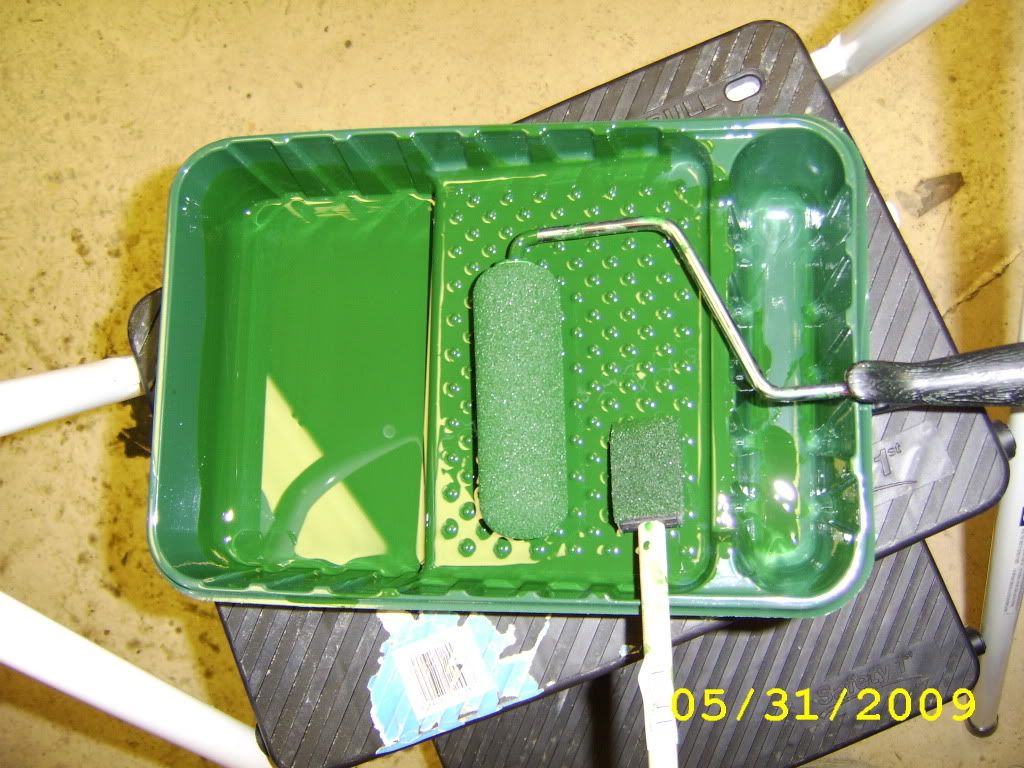
here is my setup 4" dense foam roller and a foam brush.
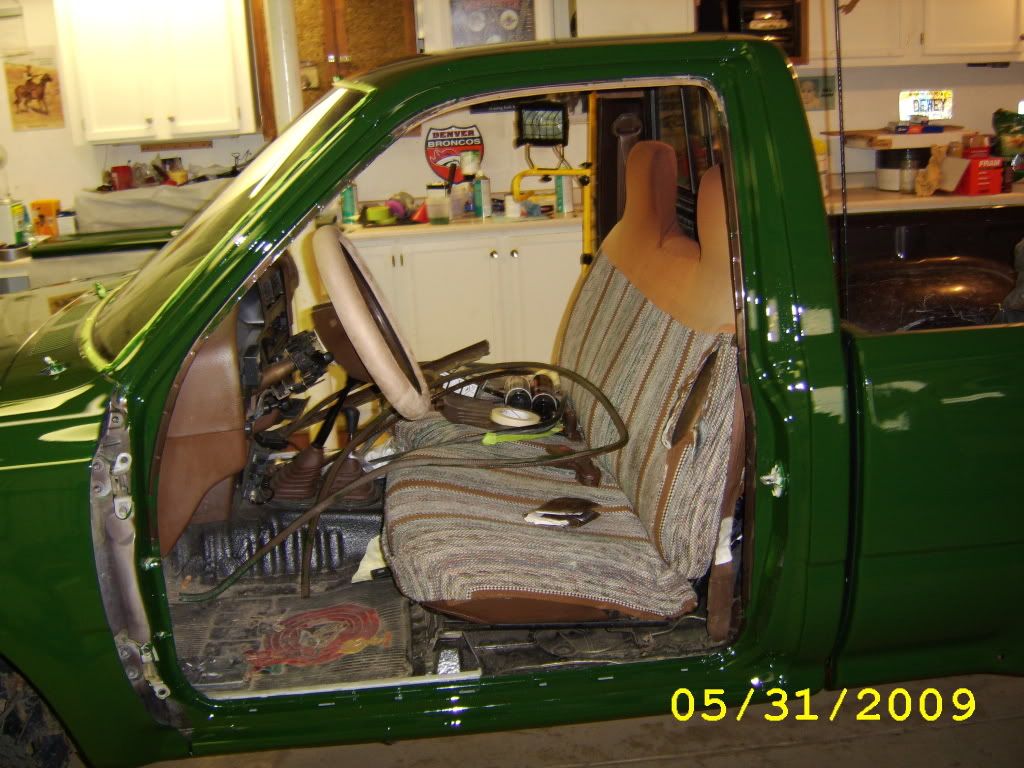
Door jams are a pain, I used the foam brush to kind of pat the paint on till it got decent coverage.

I have guard drill all this week and weekend so I won't get to it again till next week I hope to have it done in the next to weeks, I can't wait to drive it again.
here are some pics
ready for paint
I used the correct reducer this time and it seemed to go on smoother
looks kinda cool I think, its a bit darker then the pics make it look like though
here is my setup 4" dense foam roller and a foam brush.
Door jams are a pain, I used the foam brush to kind of pat the paint on till it got decent coverage.
 May 31, 2009 | 04:26 PM
#88
Registered User
Joined: Aug 2007
Posts: 872
Likes: 1
From: Reno, NV
It's great that you are doing this and giving us all your feedback.
That second coat of paint makes it look awesome. The third coat will do it for you.
Good luck with the rest of it. Keep posting them pics.
Last edited by phildelfino; May 31, 2009 at 04:55 PM.
 May 31, 2009 | 06:30 PM
#91
Thread Starter
Registered User
Joined: Oct 2007
Posts: 296
Likes: 0
From: Bismarck, ND
To be honest with you I'm not sure if I want to wet sand the final coat after looking at this last coat. It's smooth like glass and I am worried that wet sanding would cloud it up or something. I had planned on wet sanding with 1500 or 2000 grit.
This is my first paint job so I am not really sure what to do. If anyone has an opinion let me know.
May 31, 2009 | 06:31 PM
#92
Thread Starter
Registered User
Joined: Oct 2007
Posts: 296
Likes: 0
From: Bismarck, ND
Isn't tremclad the same as rustoleum I think I read some were that its the same company or something like that.
May 31, 2009 | 07:44 PM
#94
Registered User
Joined: Mar 2008
Posts: 582
Likes: 0
From: Lewiston, Idaho
see Im in the same boat you are! I have never done a pint job either! I think tremclad is just a canadian version on rustoleum. I tired the rustoleum on a finder ,I used gloss black and i dident like how it layed down! But I think im sold on the epifans man it did go down like glass! Im going to try it out on my 87 runner!
Last edited by 94toy4x4fever; May 31, 2009 at 07:45 PM.
May 31, 2009 | 08:37 PM
#95
Contributing Member
Joined: Feb 2007
Posts: 9,055
Likes: 10
From: maple ridge, British Columbia, Canada
The beauty of these boat paints is that they are self leveling.do it right and it will look great a few mins after you lay it down.
I would wetsand, then slowly go up and up polishing it back to a shine. This would give you a glass like finish that all the rattle can trucks will envy!
I would wetsand, then slowly go up and up polishing it back to a shine. This would give you a glass like finish that all the rattle can trucks will envy!
 May 31, 2009 | 10:53 PM
#98
Registered User
Joined: Feb 2009
Posts: 161
Likes: 0
From: Maui/Las Vegas
dude i rolled my last toy it was a little lowrider on bags (yea i know gay), but it came out pretty dam good, people didnt know it was rolled on. i got the idea from a friend who did it on his 69 cuda (white) so i did mine (black) dam i was suprise at how good it looked worth the $60 i spent, hell i got $4000 when i sold it and bought the toy in my pic for my log in.. the prep work + sanding buffing took alot of work tho, here are some pic.....oh yea i used rustolem. by the way looks really good !!!
Last edited by yoda84; Oct 26, 2012 at 11:38 PM.
Jun 1, 2009 | 05:22 PM
#99
Registered User
Joined: Mar 2009
Posts: 221
Likes: 0
From: dayton ohio
im looking to paint my truck real soon. it would be cool if you post a list of all your materials you used. sorry im too lazy to go through this whole thread to find it all. 
actually anyone in the western ohio region wanna paint my truck?
actually anyone in the western ohio region wanna paint my truck?
Jun 1, 2009 | 05:43 PM
#100

Registered User
Joined: Mar 2008
Posts: 240
Likes: 0
dude i rolled my last toy it was a little lowrider on bags (yea i know gay), but it came out pretty dam good, people didnt know it was rolled on. i got the idea from a friend who did it on his 69 cuda (white) so i did mine (black) dam i was suprise at how good it looked worth the $60 i spent, hell i got $4000 when i sold it and bought the toy in my pic for my log in.. the prep work + sanding buffing took alot of work tho, here are some pic.....oh yea i used rustolem. by the way looks really good !!!


