
‘82 4x4, GM LV3 4.3l Engine Swap
 Oct 7, 2018 | 02:25 PM
#1
Thread Starter
Registered User
Joined: Dec 2017
Posts: 96
Likes: 24
From: Flower Mound, Texas
‘82 4x4, GM LV3 4.3l Engine Swap
Hello everyone.
First I would like to say that I have really enjoyed and benefited by reading the tech articles and forums here. I bought my pickup on Nov 10, 2017 from a nice gentleman in New Mexico, all original, and drove it back home to Flower Mound, Texas. I was a little nervous but made it back without a hiccup. I love driving this little truck around. It has been a blast. I pulled out the old seat and floor mat and put new stuff in. I did a desmog, added LCE headers, put a new Offenhauser intake with Weber 32/36 carburater, put in an OME suspension, added new wheels and tires, and practically put in a whole new cooling system. It runs great, except I can’t really get out of my own way while driving around town, which is 99.9% of my driving.
That brings us to today. I made the decision, after much thought and research, to swap in GM’s new generation 5 4.3l V6 Engine. It is the LV3 engine and not at all like the 4.3 of yesteryear. It shares the same architecture of the newer LT1’s (so I’ve read). It puts out plenty of power, probably more than I should have: 285 HP and 305 lb/ft of torque. It has a very broad torque band with around 200 lb/ft available at 1000 rpm. This project is going to be interesting at the very least and I’m sure I’ll cuss myself out several times before I’m finished. I bought an engine from a wrecked 2018 Silverado. It was wrecked in transport to the dealership. The engine has 2 miles of use. I’m getting the whole enchilada: Engine, 6l80e Transmission, wiring harness, ecu, all acceries, even the catalytic converters.
As as if I’m not already going to catch a little flack from going with a GM motor, I’m also going with an Atlas 4sp Transfer case. Yes, I know, the RF1A is solid. However, nobody makes an adaptor (yet) for the 6l80e. Advance Adaptors makes an adaptor for my application here. I have been given a build date of Nov 9th. Hopefully I’ll receive it by the end of that month.
Until then, I’ll be pulling the 22r, L52, RF1A, removing any wiring not needed, and cleaning up the front half of the frame and engine bay. I’ll try to take and post pics along the way. I will definitely document everything that needs to be accomplished for this swap. I’m probably not the first to swap this motor into a Toyota 4x4, but I haven’t found any other builds while researching. I am open to all suggestions and advice. My goal is to have this combo running like it’s from the factory AND meet all emissions (though it is not needed).
Things I have identified so far that I need to accomplish or don’t know how to do:
-moving the front axle forward about 2” or more
-body lift will most likely be needed, but hopefully not
-wiring (gotta learn this part)
-engine mounts
-transmission mount
-order new drive shafts to proper length
-possible cooling (just bought a new 3 core brass/copper radiator and not sure it will support this much power)
As soon as I figure out this pic hosting thing I’ll start putting up some pictures of progress.
Bryan


 Oct 8, 2018 | 12:06 PM
#4
Thread Starter
Registered User
Joined: Dec 2017
Posts: 96
Likes: 24
From: Flower Mound, Texas
Thanks Lon
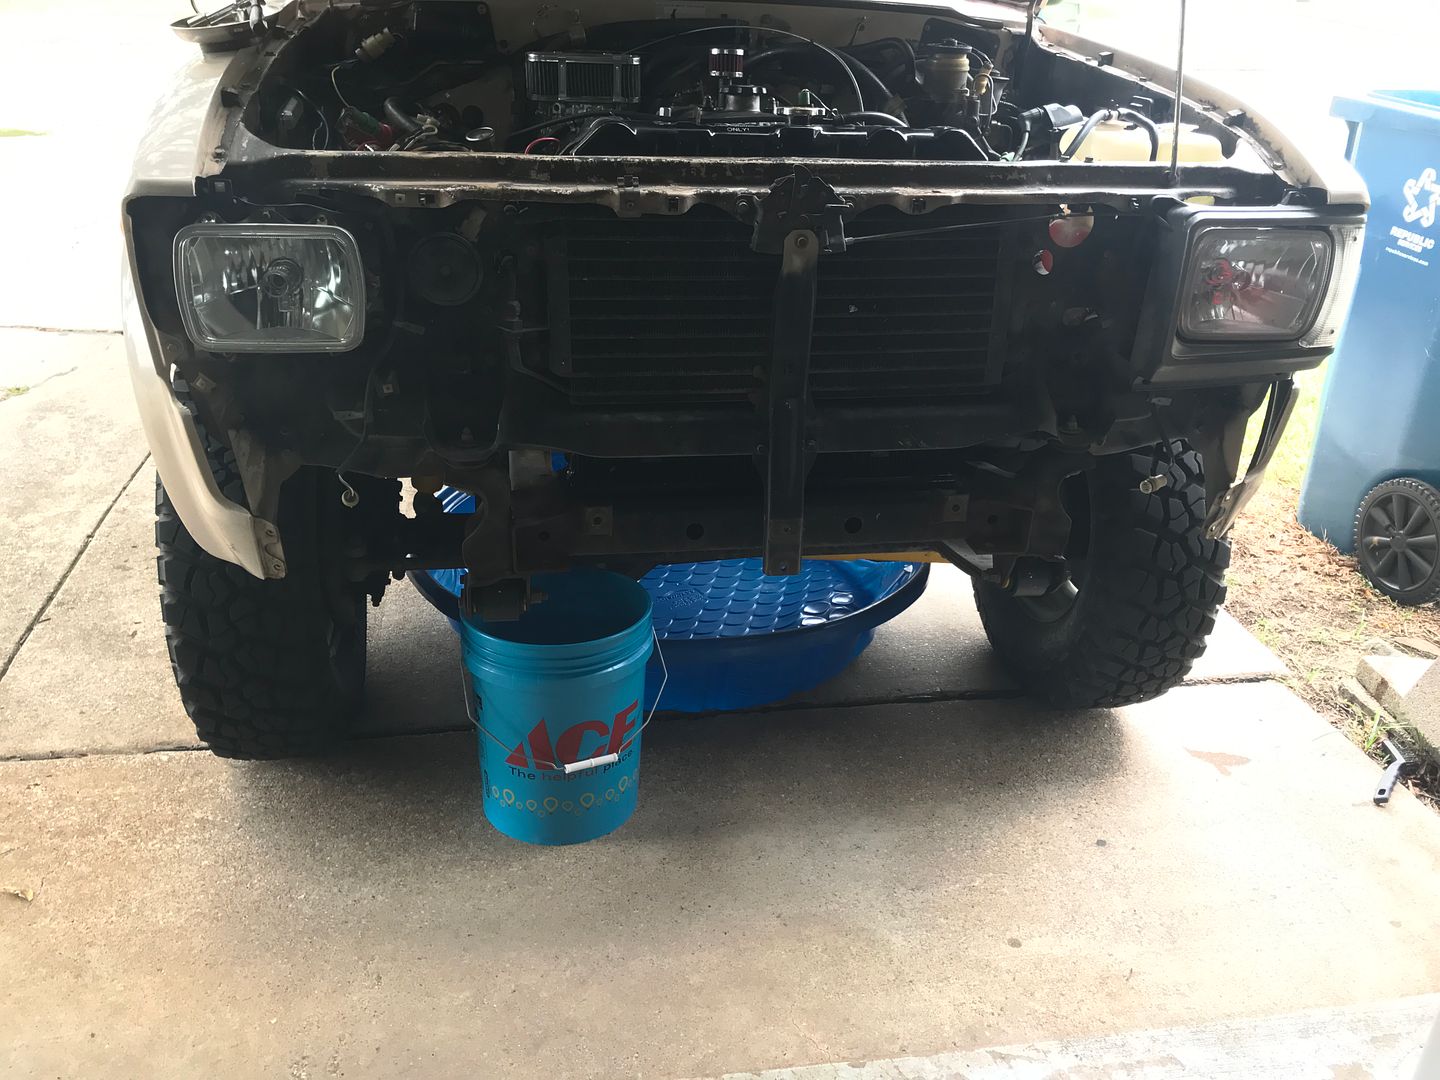
Not much progress today. Started taking things off and cataloguing as I go. Picked up an engine puller at Northern Tool. Had to go back because apparently there are two boxes. No worries. I decided to go with the Lokar Electronic Transmission Shifter. You have the option of choosing which gear to use, kind of like a manual.
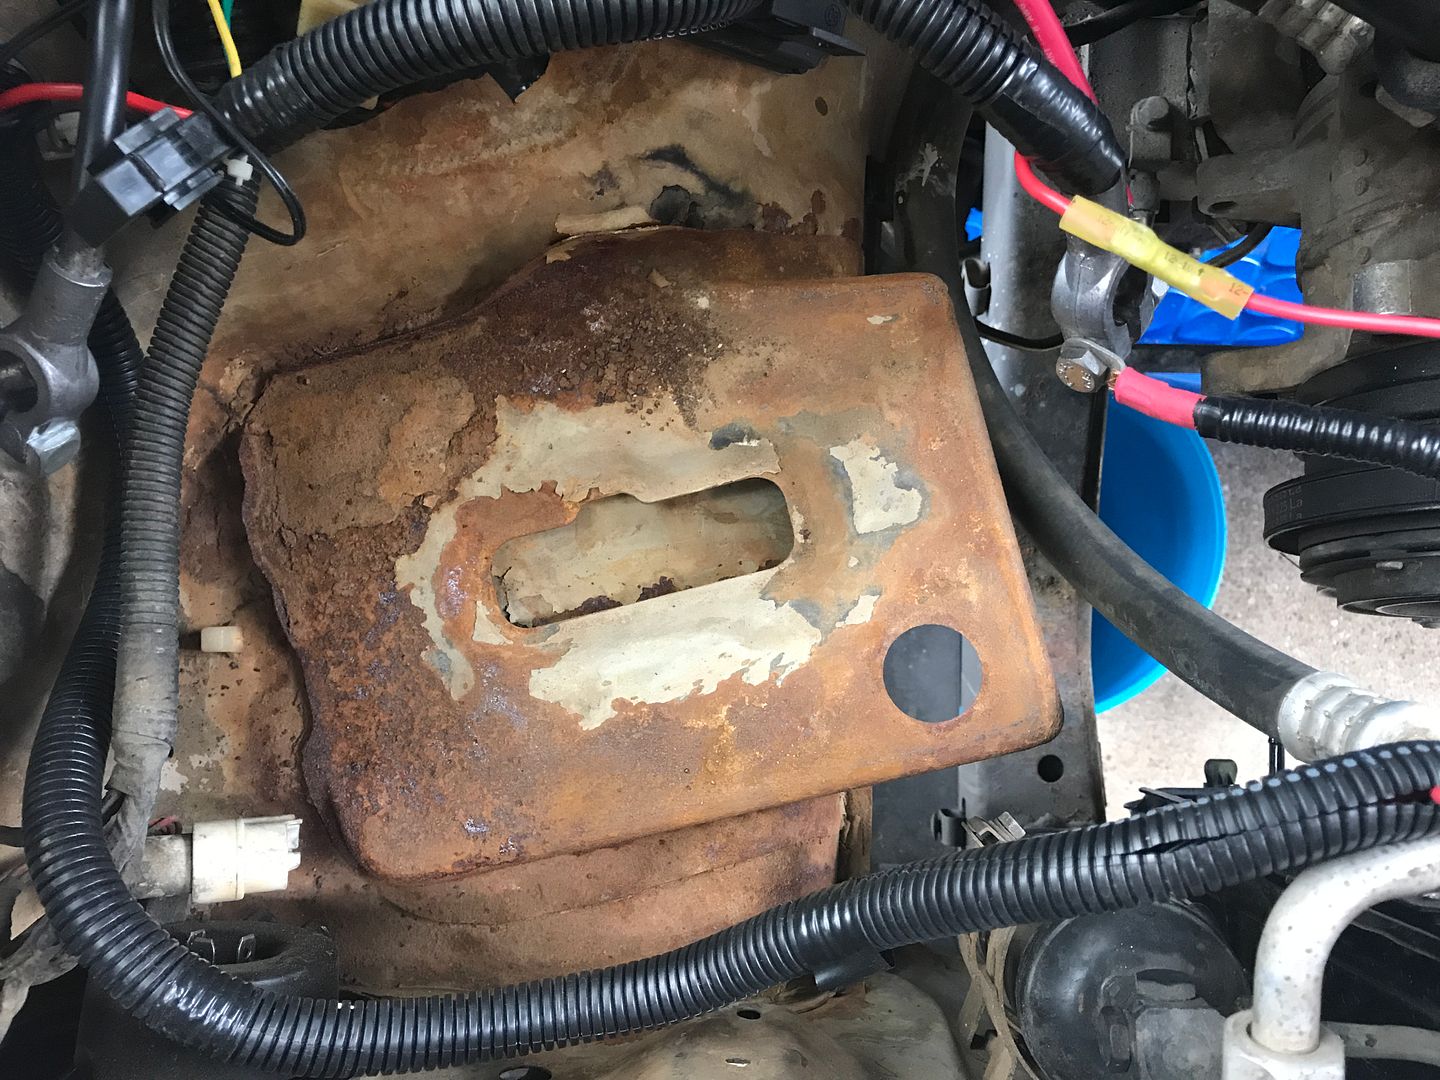
It looks like some battery acid spilled out at some point. We’ll get that fixed up
Lokar shifter
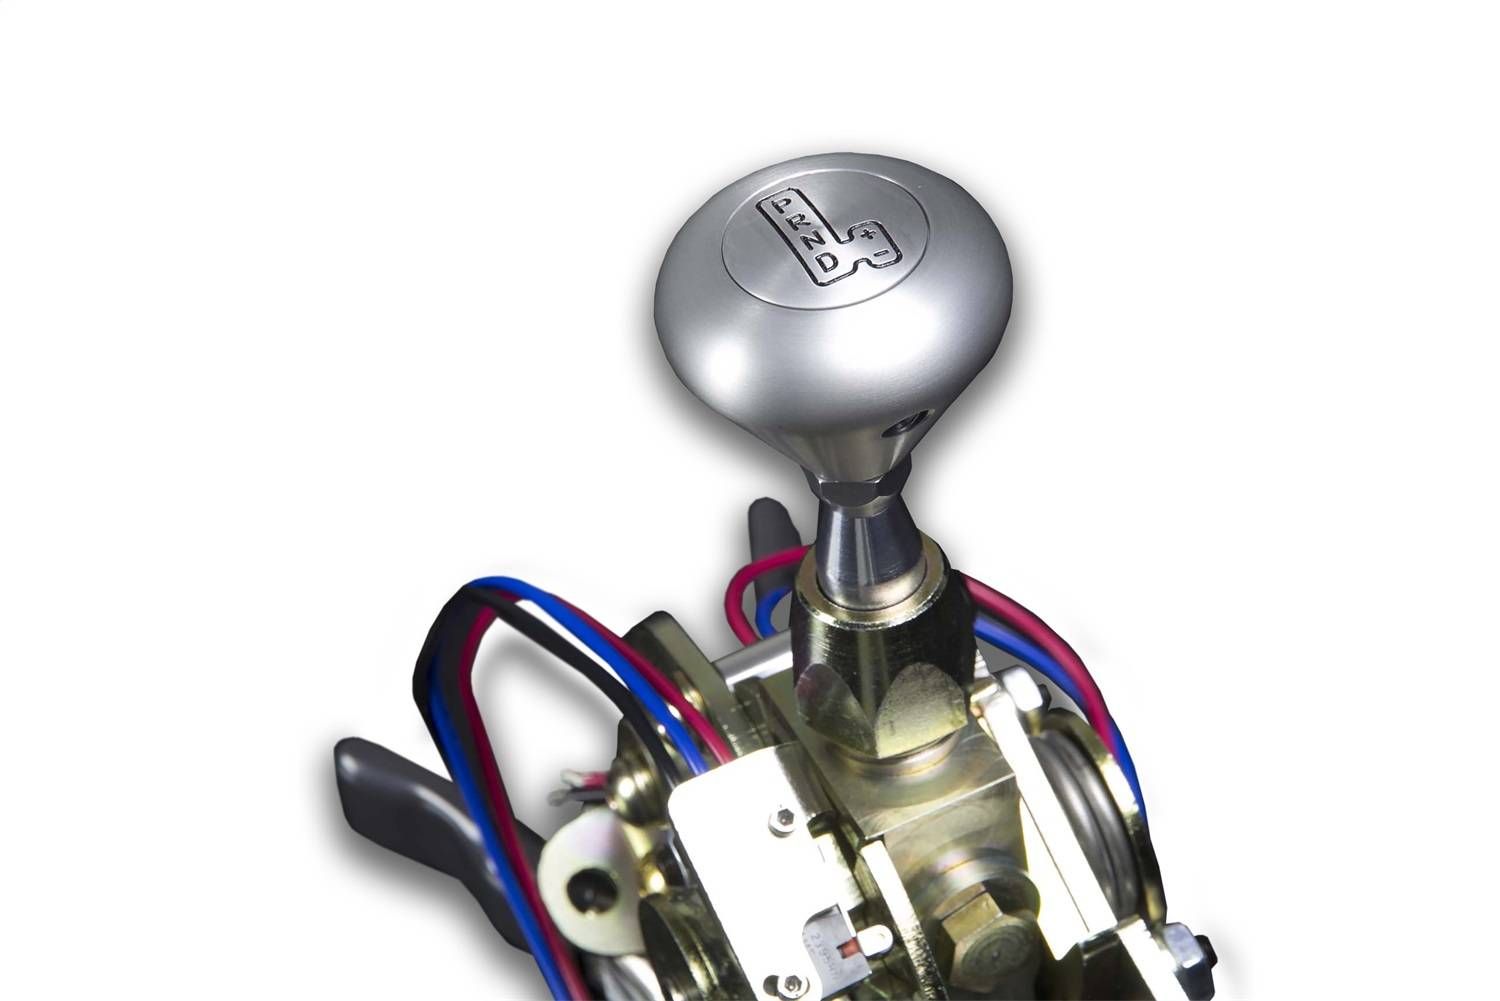
Not much progress today. Started taking things off and cataloguing as I go. Picked up an engine puller at Northern Tool. Had to go back because apparently there are two boxes. No worries. I decided to go with the Lokar Electronic Transmission Shifter. You have the option of choosing which gear to use, kind of like a manual.

It looks like some battery acid spilled out at some point. We’ll get that fixed up

Lokar shifter
 Oct 8, 2018 | 04:04 PM
#5

Registered User
Joined: Jan 2016
Posts: 221
Likes: 37
From: Where Prairie meets Mountians
Well when you get this done you'll certainly have the fastest 82 in town!
My concern would be rear axle strength. Back in my day when guys would put 44" tires on with V6 swaps, usually the original Ford 9" axle was put in, these suckers will take a 427 Cobra Jet so it'll take any GM engine. Considering your pushing 300% more power then the original engine, and likely twice the power Toyota ever thought that axle was going to take, you may want to look into that. The stock axle may take it but with that much power you're going to punch it and sooner or later something is going to blow. The Toyota front axle wasn't changed.
Moving the front axle forward 2" seems like a Pandora's box of problems.
Have you looked at more mild engine swaps which may be easier to do and still give the power gains you want?
Oct 8, 2018 | 07:25 PM
#6
Thread Starter
Registered User
Joined: Dec 2017
Posts: 96
Likes: 24
From: Flower Mound, Texas
Old83, lol! Probably so but I drive like an old man (which I feel like too). At any rate, I have thought about the rest of the drive train. It’s that age old problem of money that’s getting in the way. My plan there is to do the drop in 3rd members built by Marlin. I haven’t decided on gearing yet. Originally, I was thinking 5.29’s, but that was with the 22r. Once (if) everything is together and I put some miles on those stock open differential 4.11’s, I’m hoping to glean enough feedback with 32” or 33” tires to see what gears to go with. When I start that part of the project I’m going to rebuild both axles with the stronger stuff. Something off the Marlin Crawler site. With the 10.34 TC gear I don’t think it will matter much what gears I put in the differentials. And about that Pandora’s Box, I am expecting some issues to come up. Right now, the plan Is to drill the spring perch to move it forward about an inch to see what that clears. I’ve done some rough calculations based on measurements taken and posted on the Internet. We’ll see how it plays out in the real world. I think I have several options for this problem, one I’ve mentioned above and another would to use a rear spring up front. The thinking here is that the longer spring wil add some spring weight to help with a heavier motor and transmission. Also, the locating pin is forward of center, pushing the axle forward a bit. Some have accomplished this, but to what kind of ride I don’t know. Moving spring hangers is another option too. I’m sure there are many things I haven’t come across in research or thought of. I believe it will all work out in the end. And on your last comment, yes! Oh God yes I have thought of so many scenarios my head was hurting. There are a lot of v8 Toyota’s running around so I know it will fit. I’ll get there eventually. My ambien is kicking in so I better stop here or things will get weird.
Bryan
Bryan
Last edited by Trueblue93; Oct 9, 2018 at 03:27 AM.
Oct 8, 2018 | 09:08 PM
#7
Registered User
Joined: Nov 2009
Posts: 75
Likes: 0
From: Kaneohe Hawaii
this is very intriguing! an all aluminum v6 should be perfect for these old yotas. id be willing to bet that your lv3 weighs about the same as the iron 22r. I dont think you will need to regear especially with the transfer case your using. if anything i would try to match the donor vehicles gearing. if you rebuild the axle and put stronger shafts i think you will be fine since this isnt a hard core trail rig with big tirers . i drive a silverado at work with an lv3 and boy does it have a pleasing powerband! instant tire chirping torque.
good luck! i will be watching this one closely.
good luck! i will be watching this one closely.
Trending Topics
Oct 9, 2018 | 03:46 AM
#8
Thread Starter
Registered User
Joined: Dec 2017
Posts: 96
Likes: 24
From: Flower Mound, Texas
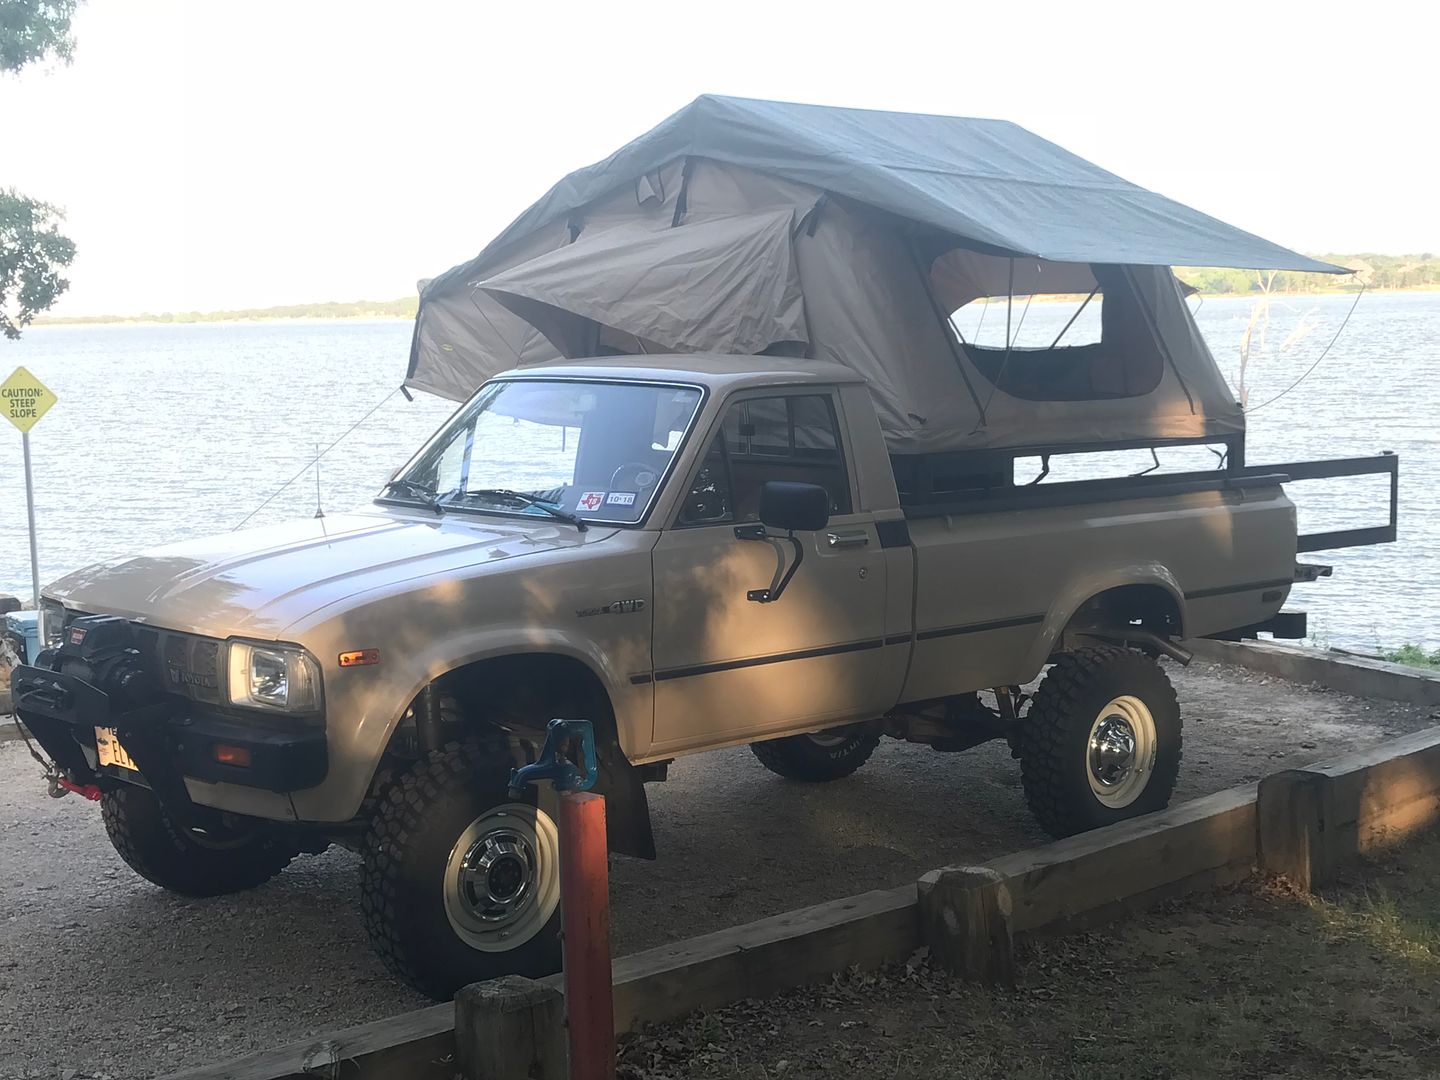
Rube, that is a great point about matching the gearing from the doner. I’ll try to find out. This will be my daily driver with occasional trips to Colorado for some mountain trails in more of an overlanding role. Maybe someday I’ll get to take that Grand Canyon/Yosemite/Crater Lake road trip I have always dreamed about. Here are a couple pics out at the local lake earlier this summer.
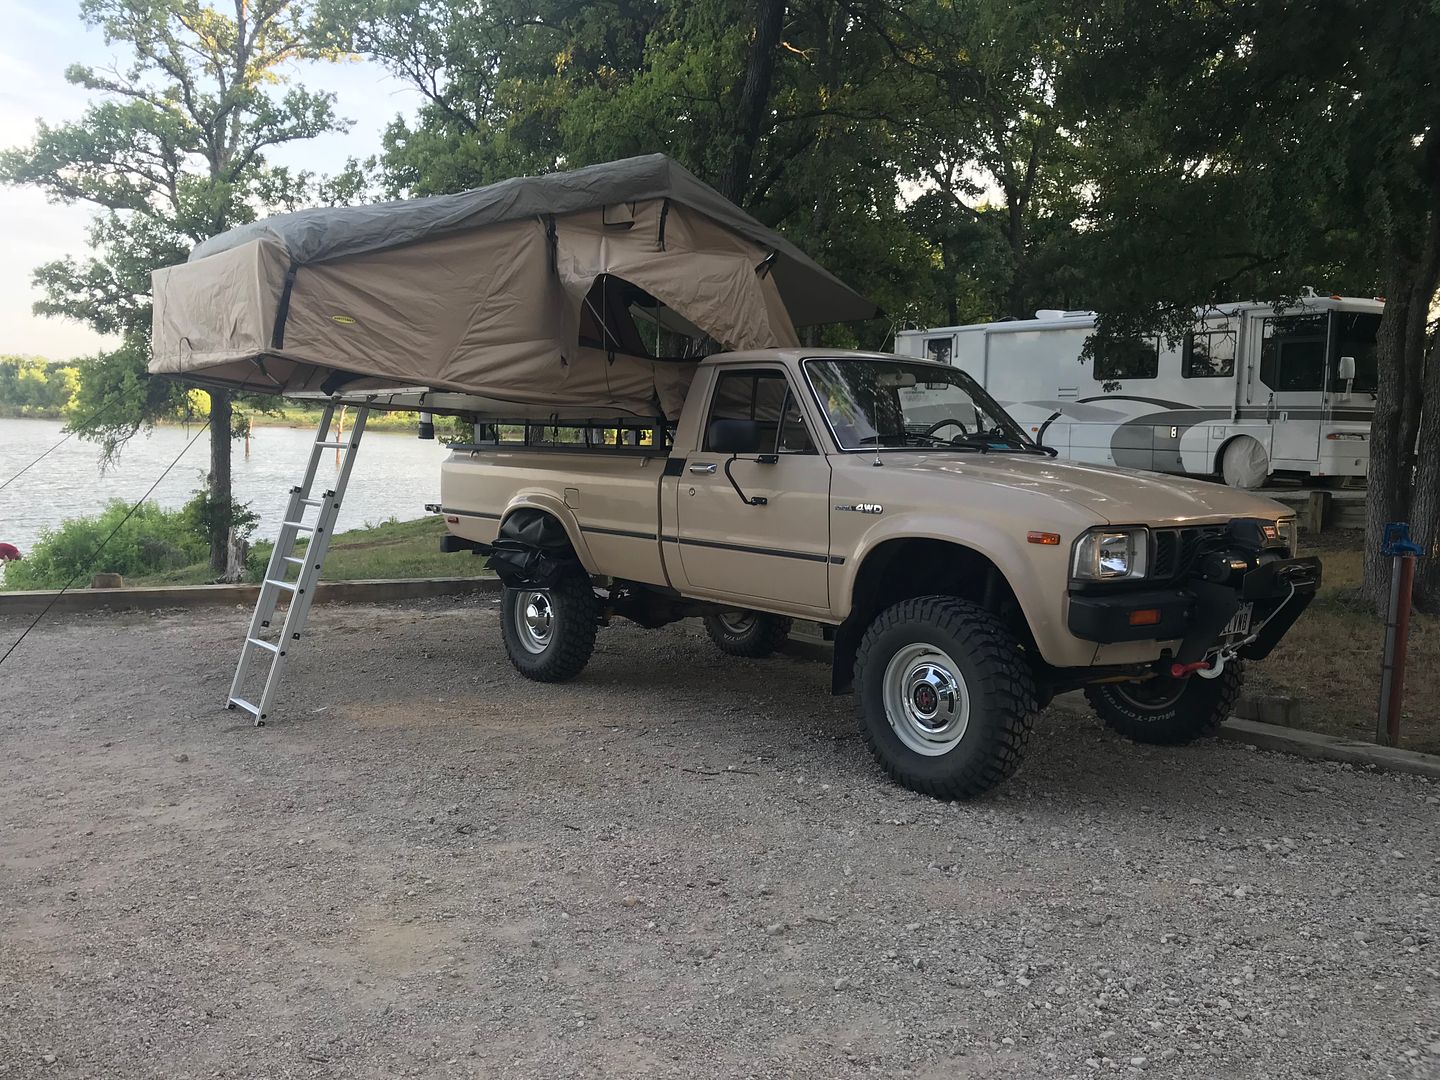
my Grandson


my Grandson


Last edited by Trueblue93; Oct 9, 2018 at 03:48 AM.
 Oct 9, 2018 | 07:19 PM
#11
Thread Starter
Registered User
Joined: Dec 2017
Posts: 96
Likes: 24
From: Flower Mound, Texas
Bump530, no problem! What would we do without a another project? FedEx tried to call me today about delivery but it’s been so long since I’ve used eBay my phone number needs updating. They sent me an email. I’ll call tomorrow to set up delivery. I’ll take a bunch of pics with measurements....something I looked for for hours and couldn’t find much info on.
selzz, yes I will be selling the old drivetrain. Motor (and anything attached to it), L52 trans, and RF1A. My truck was made later in the production year and they had already started putting the newer (at the time) L52. I was pleasantly surprised when my VIN code showed that.
selzz, yes I will be selling the old drivetrain. Motor (and anything attached to it), L52 trans, and RF1A. My truck was made later in the production year and they had already started putting the newer (at the time) L52. I was pleasantly surprised when my VIN code showed that.
Oct 11, 2018 | 04:29 AM
#12
Thread Starter
Registered User
Joined: Dec 2017
Posts: 96
Likes: 24
From: Flower Mound, Texas
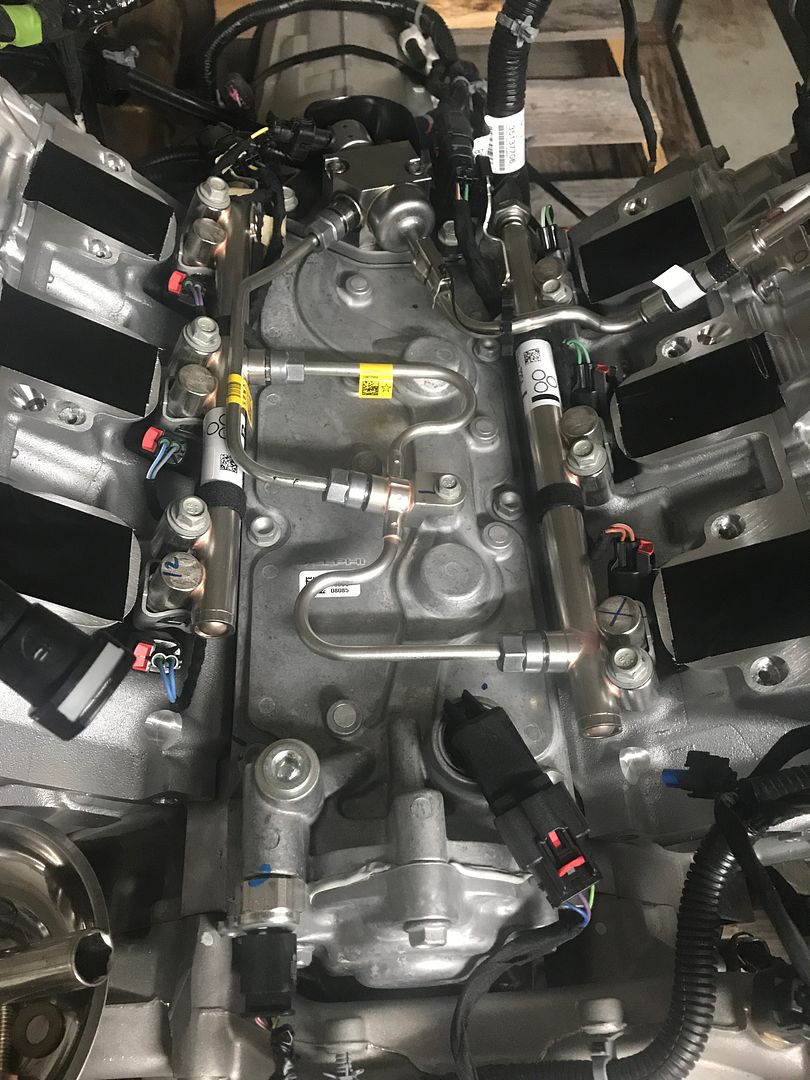
Oh boy, what have I got myself into! Picked up the motor last evening with a buddy’s trailer. Took me forever to figure out how to get it off. The boom on the hoist wasn’t long enough so I had to get creative. This thing has some sort of electric plug every 2” it seems like. To make a long story short, with the intake off I was able to get a bolt in each head to get it off. I’ll try to get measurements after work today. Here’s a pic of the valley.


 Oct 11, 2018 | 08:21 PM
#14
Thread Starter
Registered User
Joined: Dec 2017
Posts: 96
Likes: 24
From: Flower Mound, Texas
Ok, some semi-rough estimated measurements ��
From the bottom of the rear of the oil pan to the block is 8.5”
From there to the top of the coil packs is 19.5”
From there to top of the intake without the cover is 3.5”
Total height at rear of motor is 31.5”
Rear of oil pan to front of the oil filter (at this point it goes more shallow) is 7.5”
From there to front of oil pan is 11.5”
From there add 4” for the accessories.
Total legnth is 23”
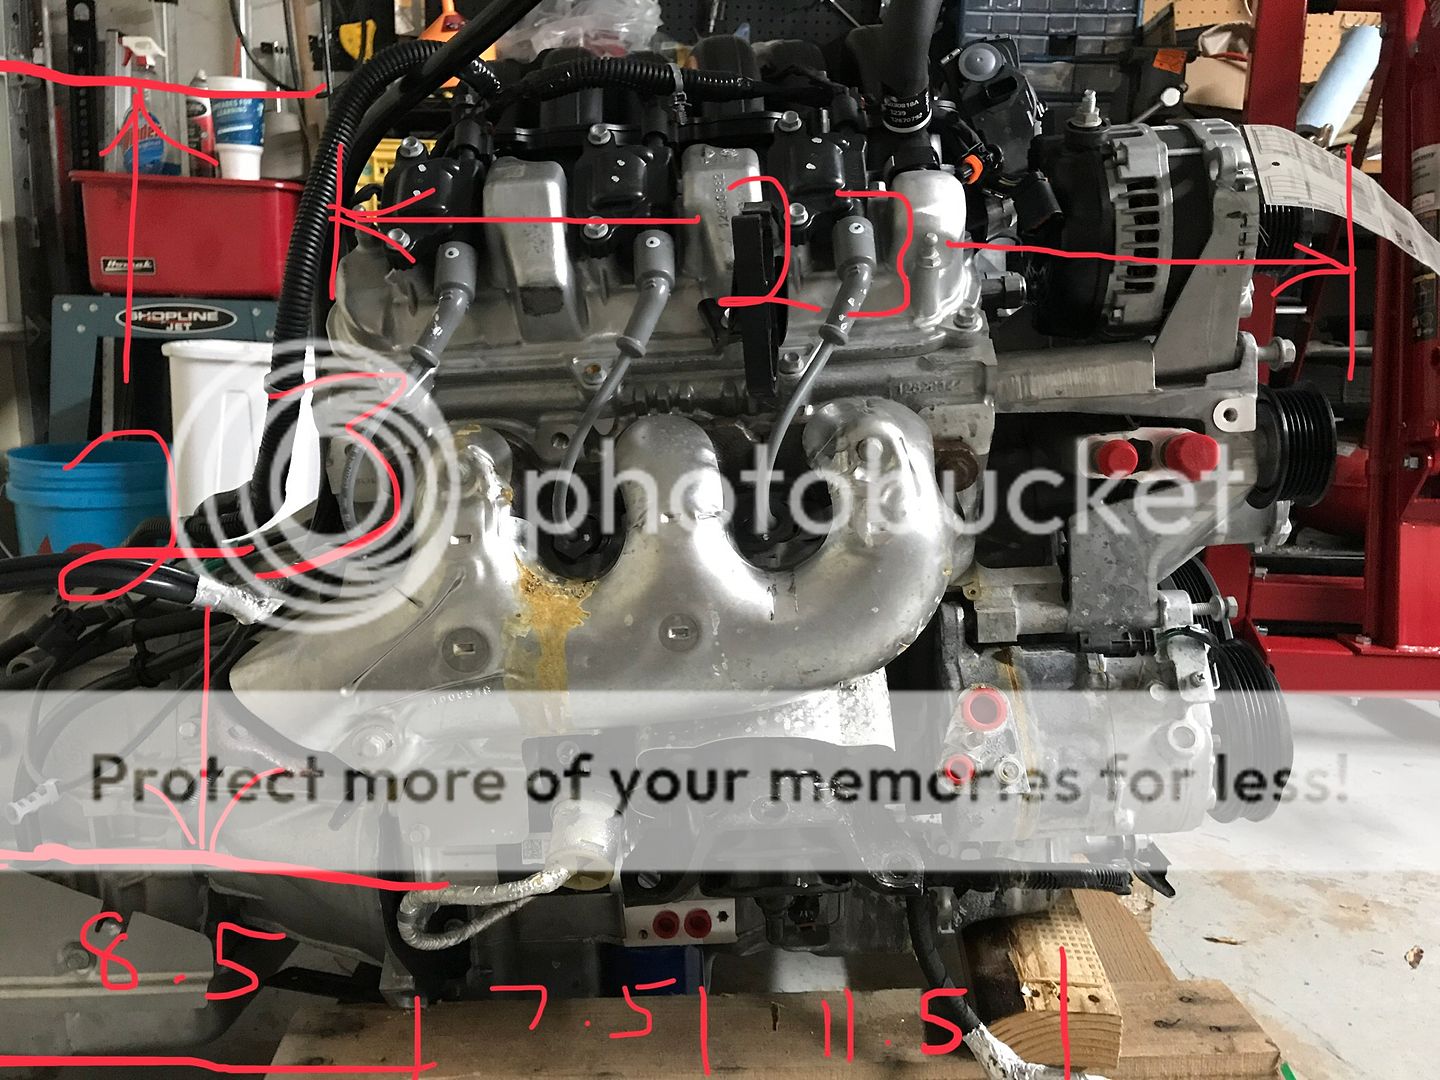
SECOND PICTURE
From crankshaft center to a/c compressor is 10.5”
From crankshaft center to water pump pulley is 11.5”
From crankshaft center bolt to bottom front of oil pan is 7.5”
From crankshaft center bolt to top of alternator is 16”
From top of alternator to top of intake without cover is 3.5”
Total height from bottom front of oil pan to top of intake is 27”
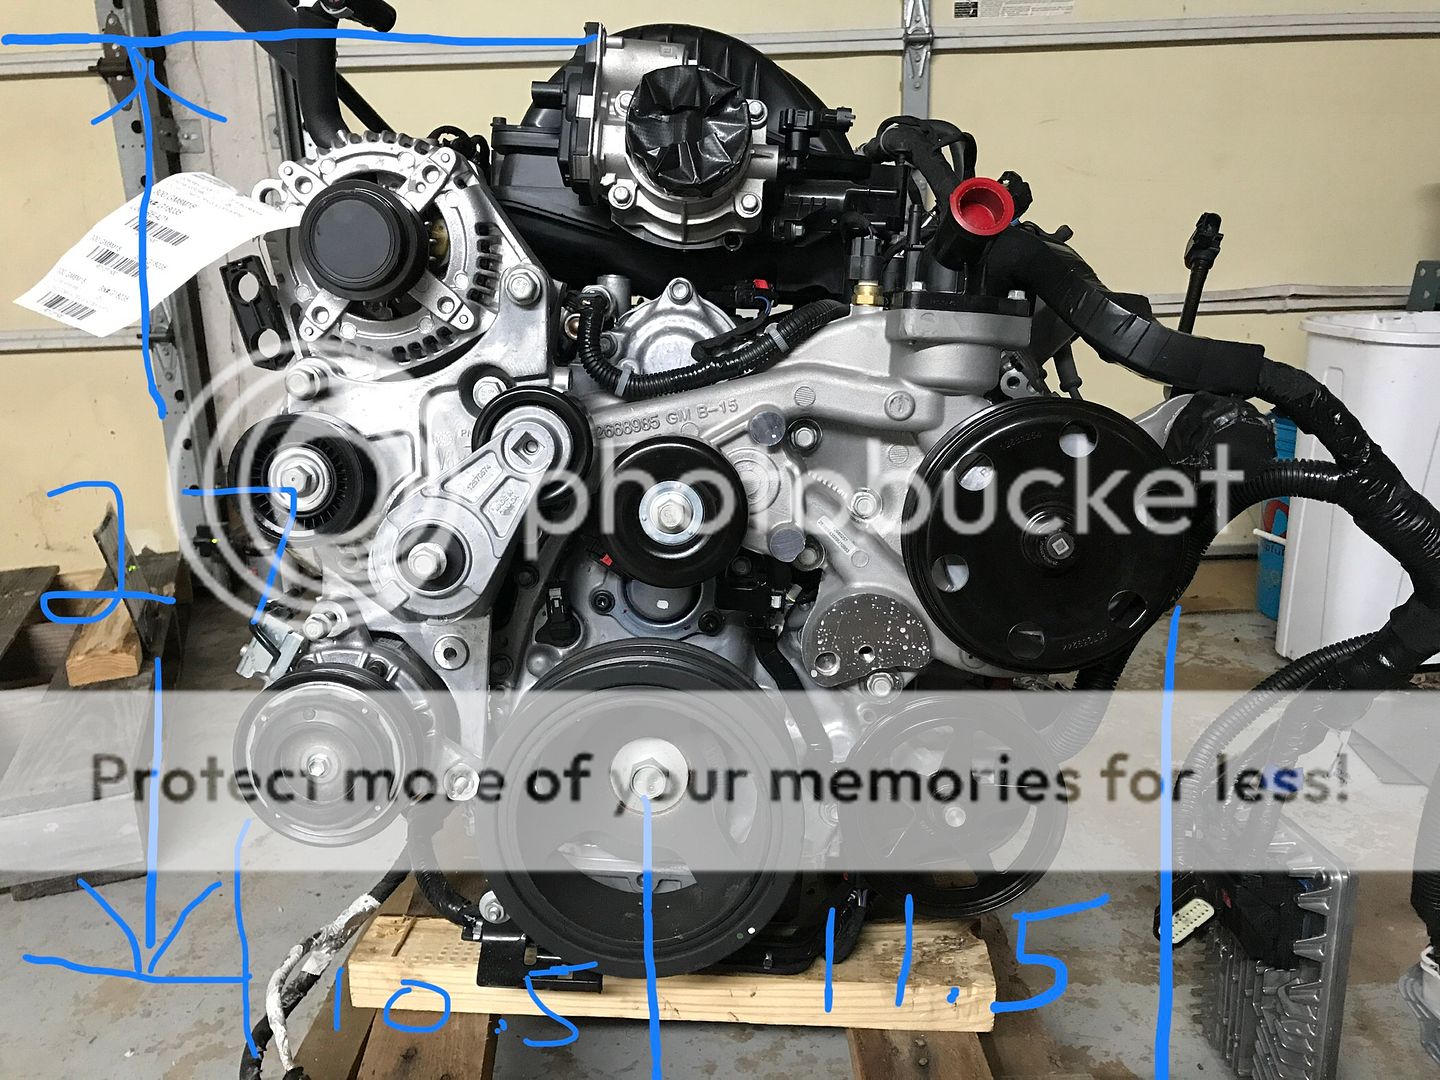
It looks like I’ll have clearance for that a/c compressor. My frame rails are 23” inside. That pulley on the bottom drivers side a vacuum pump.
Last edited by Trueblue93; Oct 11, 2018 at 08:26 PM.
Oct 14, 2018 | 04:21 PM
#15
Thread Starter
Registered User
Joined: Dec 2017
Posts: 96
Likes: 24
From: Flower Mound, Texas
Update
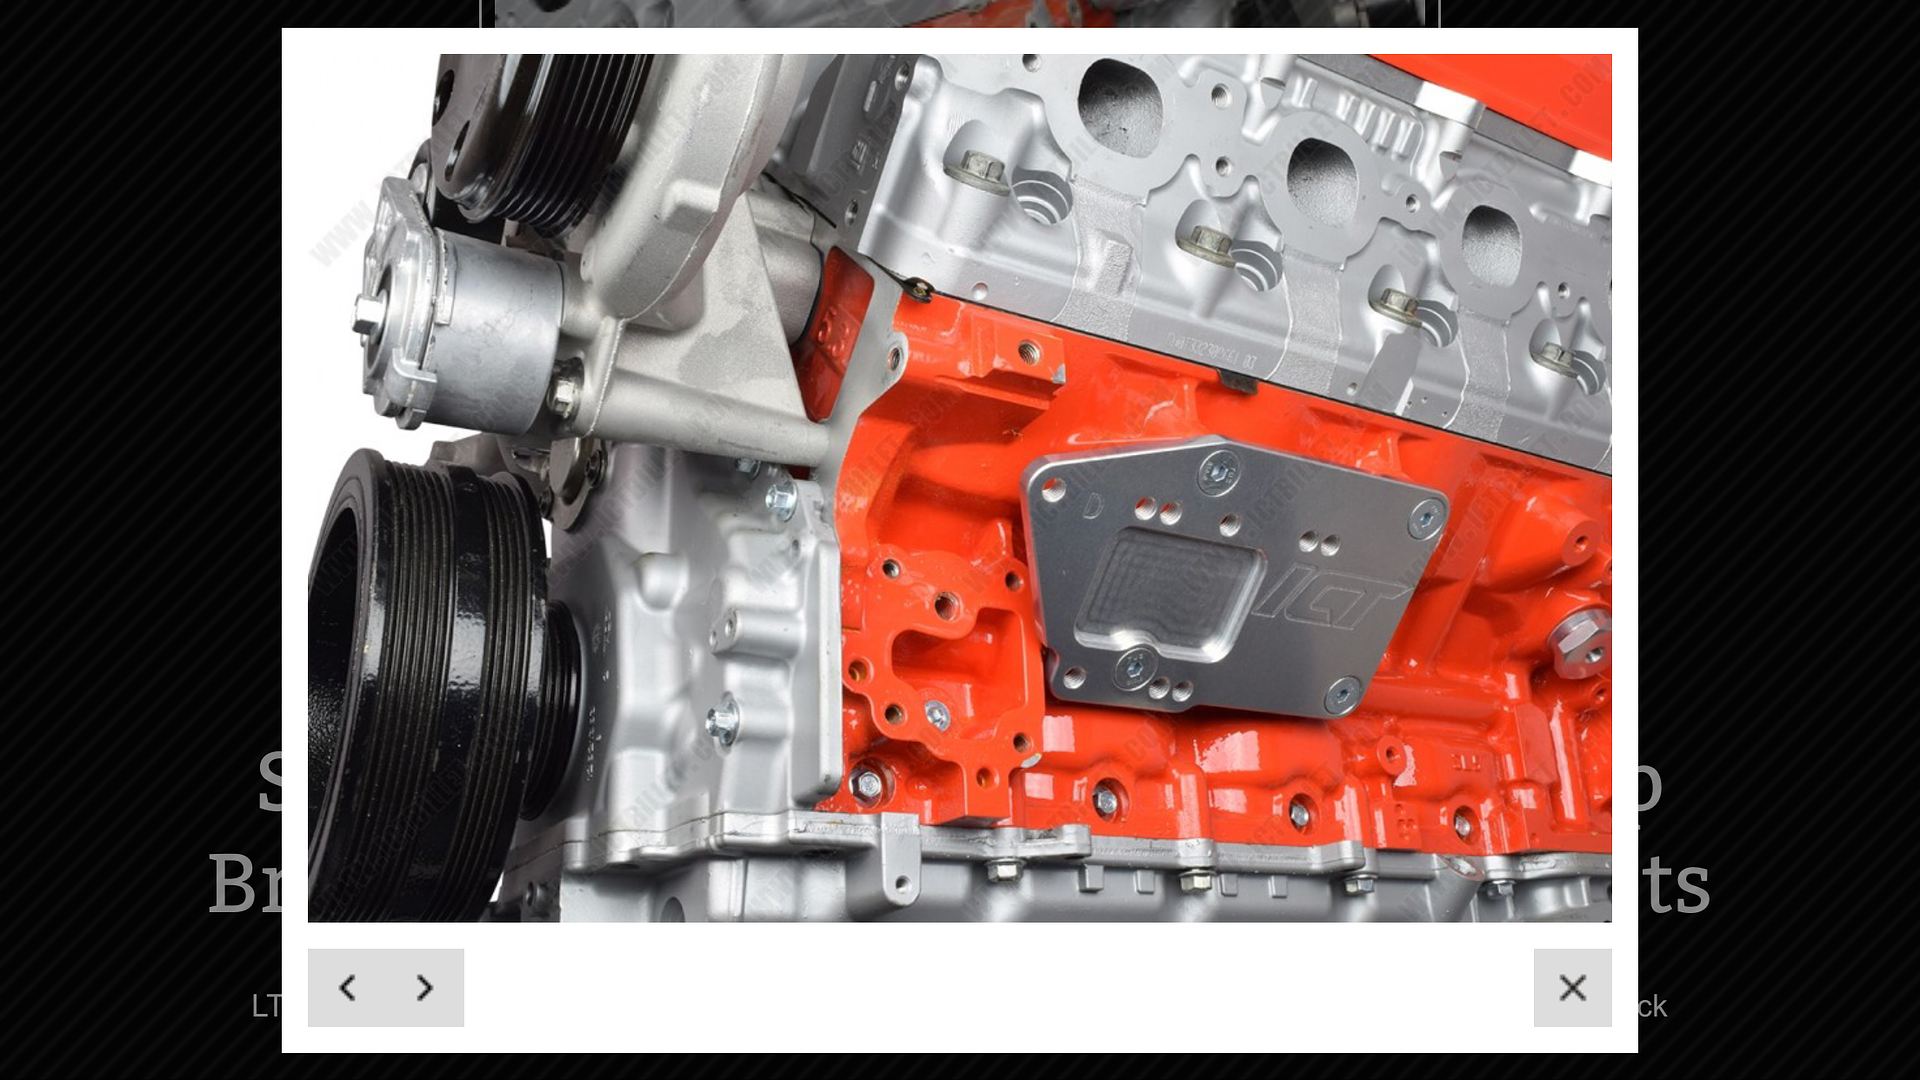
I figured out which motor mounts I’m going to use. ICT makes a Gen 5 to SBC adaptor that I will attach AA’s weld in Toyota SBC swap mount. Pictures below.
I think I found the oil cooler blockoff plate and gasket. There was no picture but they are on the way. GM Part No.: 12633987 and GM Part No.: 12633986.
Update: these are, in fact, the correct blockoff plate and gasket.
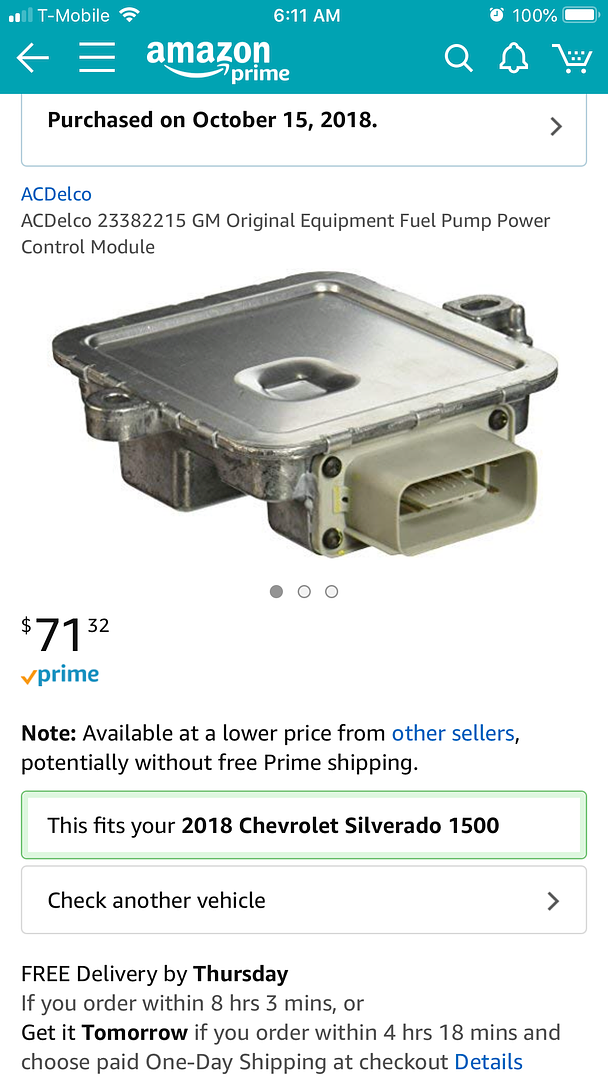
Fuel delivery may be expensive. There are two pumps on the setup; one in the gas tank and one under the intake. I think the Aeromotive Phantom 340 returnless kit is what I’ll need. It will deliver 340 lph at up to something like 90 psi. The computer sends a voltage signal to that pump to supply the direct injection pump with (if memory serves correct) a constant 74 psi. I’m still researching though.
I’m struggling with the harness issue. I’ve never had to work with one before. I have the stock harness and ecm but there are other large multiple pin connectors that I don’t know where they go. I thought it would be more of a plug and play type deal. Maybe it is, but it seems that is not the case. Mr Howell at Howell EFI emailed me back and said they can make a custom harness for whatever I need. That’s about $900 more dollars I wasn’t anticipating.....on top of the $500 or so for fuel delivery. If I can use the stock harness, please let me know.
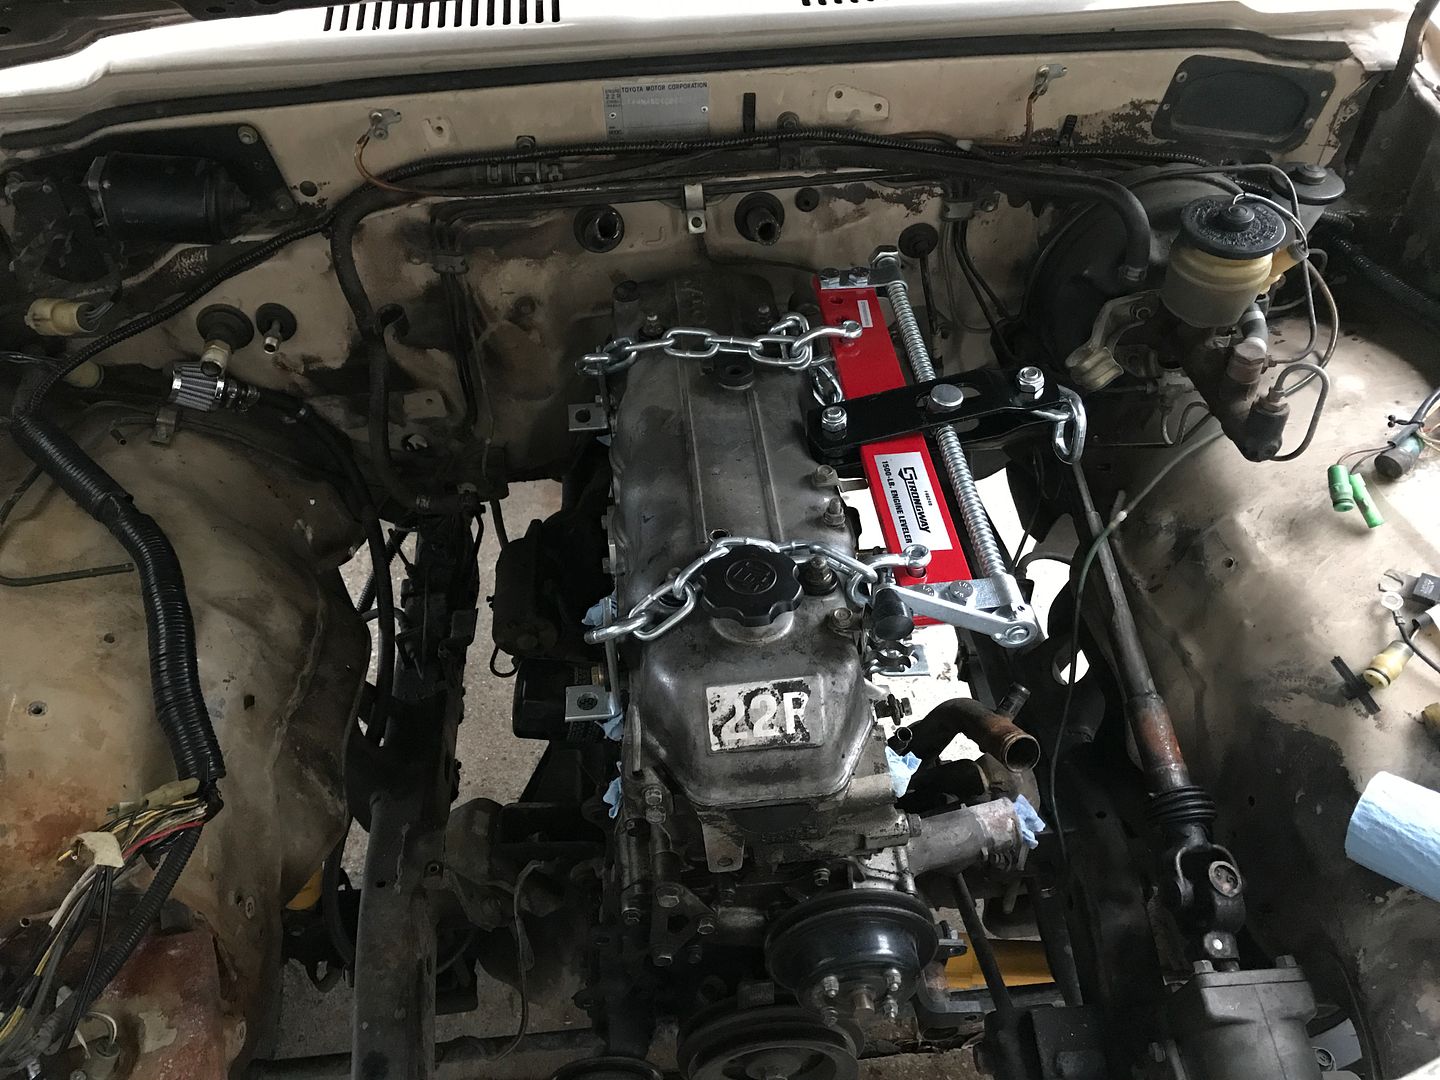
Otherwise, I’m ready to pull the motor out but didn’t have any help today. I’ll get it out this week sometime. I may have a mobile wet blasting service come out and clean up the engine bay and front part of the frame. It’ll be a minimum of $300. Still debating that. If so, I’ll put some POR15 on everything.
I figured out which motor mounts I’m going to use. ICT makes a Gen 5 to SBC adaptor that I will attach AA’s weld in Toyota SBC swap mount. Pictures below.


I think I found the oil cooler blockoff plate and gasket. There was no picture but they are on the way. GM Part No.: 12633987 and GM Part No.: 12633986.
Update: these are, in fact, the correct blockoff plate and gasket.
Fuel delivery may be expensive. There are two pumps on the setup; one in the gas tank and one under the intake. I think the Aeromotive Phantom 340 returnless kit is what I’ll need. It will deliver 340 lph at up to something like 90 psi. The computer sends a voltage signal to that pump to supply the direct injection pump with (if memory serves correct) a constant 74 psi. I’m still researching though.
I’m struggling with the harness issue. I’ve never had to work with one before. I have the stock harness and ecm but there are other large multiple pin connectors that I don’t know where they go. I thought it would be more of a plug and play type deal. Maybe it is, but it seems that is not the case. Mr Howell at Howell EFI emailed me back and said they can make a custom harness for whatever I need. That’s about $900 more dollars I wasn’t anticipating.....on top of the $500 or so for fuel delivery. If I can use the stock harness, please let me know.
Otherwise, I’m ready to pull the motor out but didn’t have any help today. I’ll get it out this week sometime. I may have a mobile wet blasting service come out and clean up the engine bay and front part of the frame. It’ll be a minimum of $300. Still debating that. If so, I’ll put some POR15 on everything.

Last edited by Trueblue93; Oct 24, 2018 at 05:58 PM.
Oct 16, 2018 | 04:07 AM
#16
Thread Starter
Registered User
Joined: Dec 2017
Posts: 96
Likes: 24
From: Flower Mound, Texas
Not much progress. It’s been raining a ton here in the DFW area. I did get some parts ordered. I found the correct Fuel Control Module and Fuel Pressure Sensor Install Kit. VaporWorx had the set up in the second pic. I still need to order the sensor. Both of these items are mandatory for correct fuel delivery.
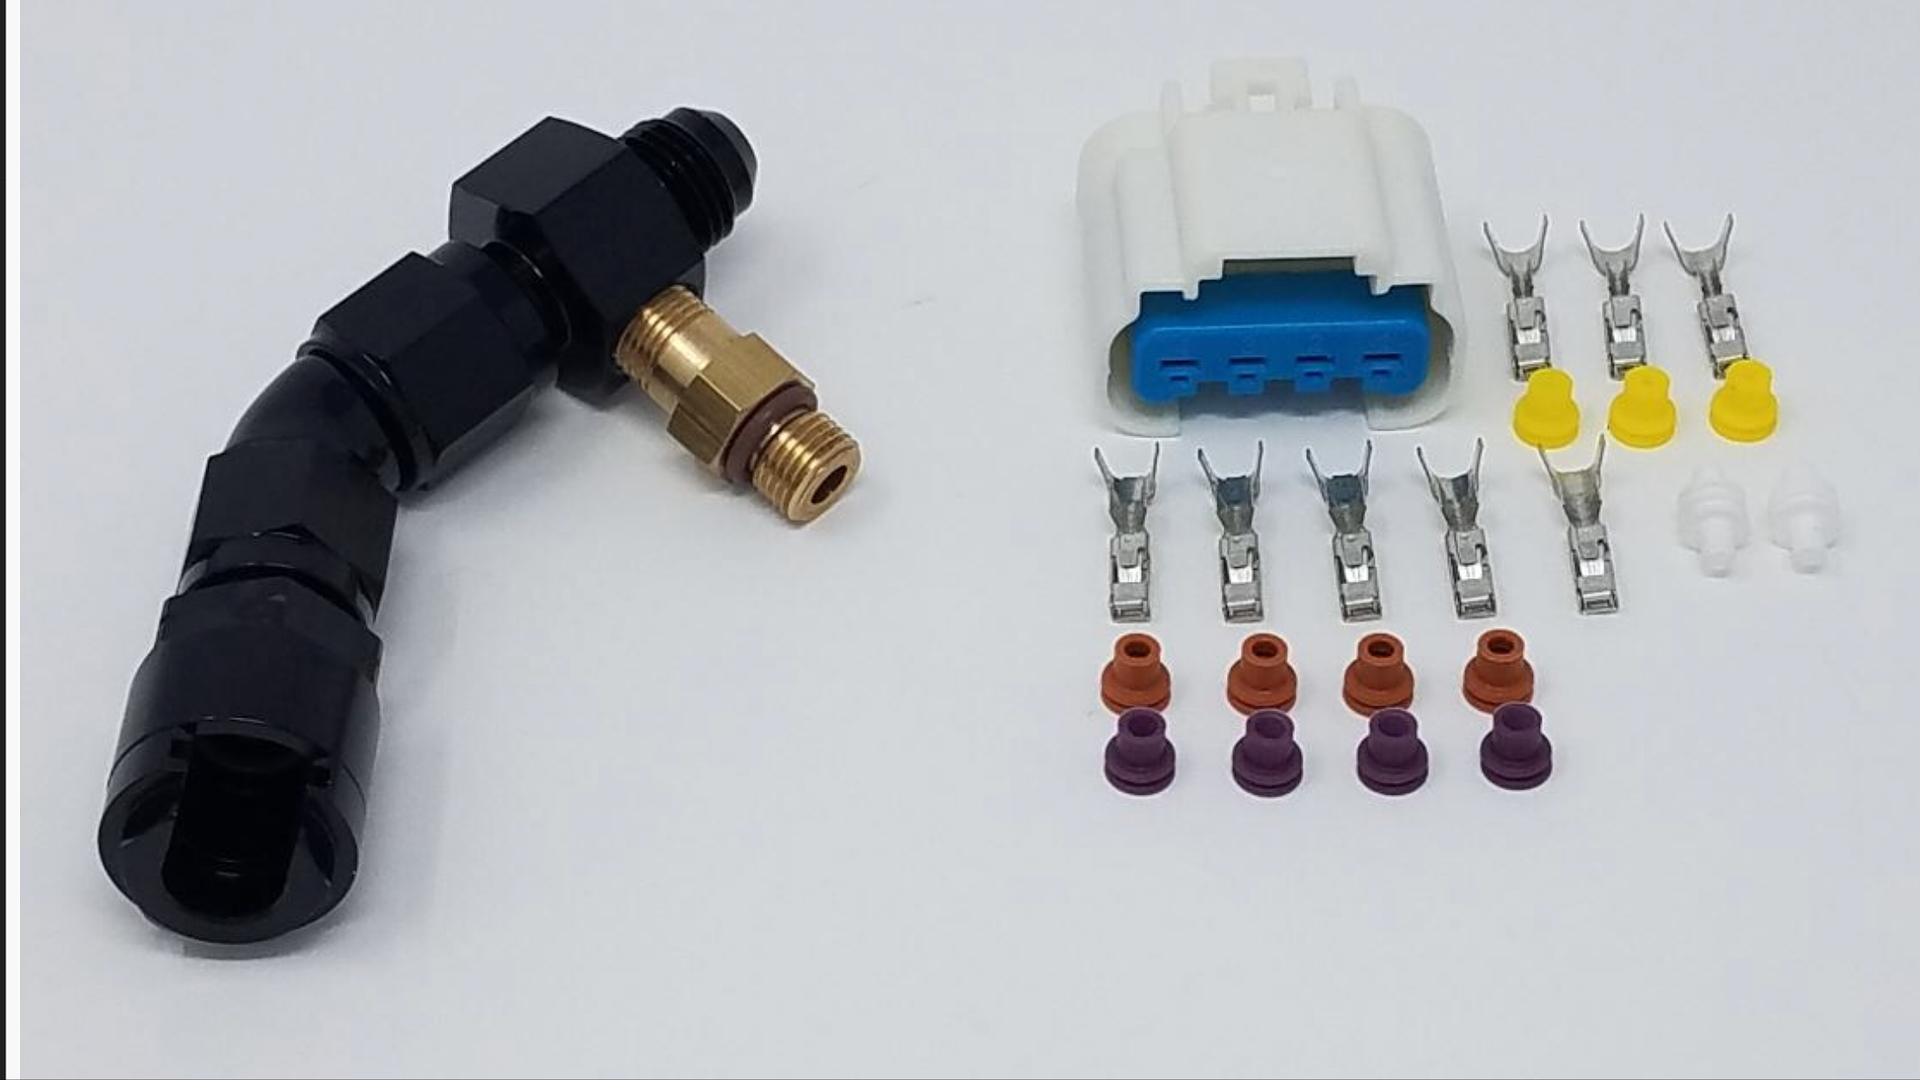
I’ve read about the “snowball effect” but now I’m experiencing it. ‘Since I have everything out I should go ahead and replace........fill in the blank.’ I decided to put a new chassis wiring harness in. I choose the 26 circuit Painless Weatherproof 10140 and an assortment of Delphi Weather Pack connectors.
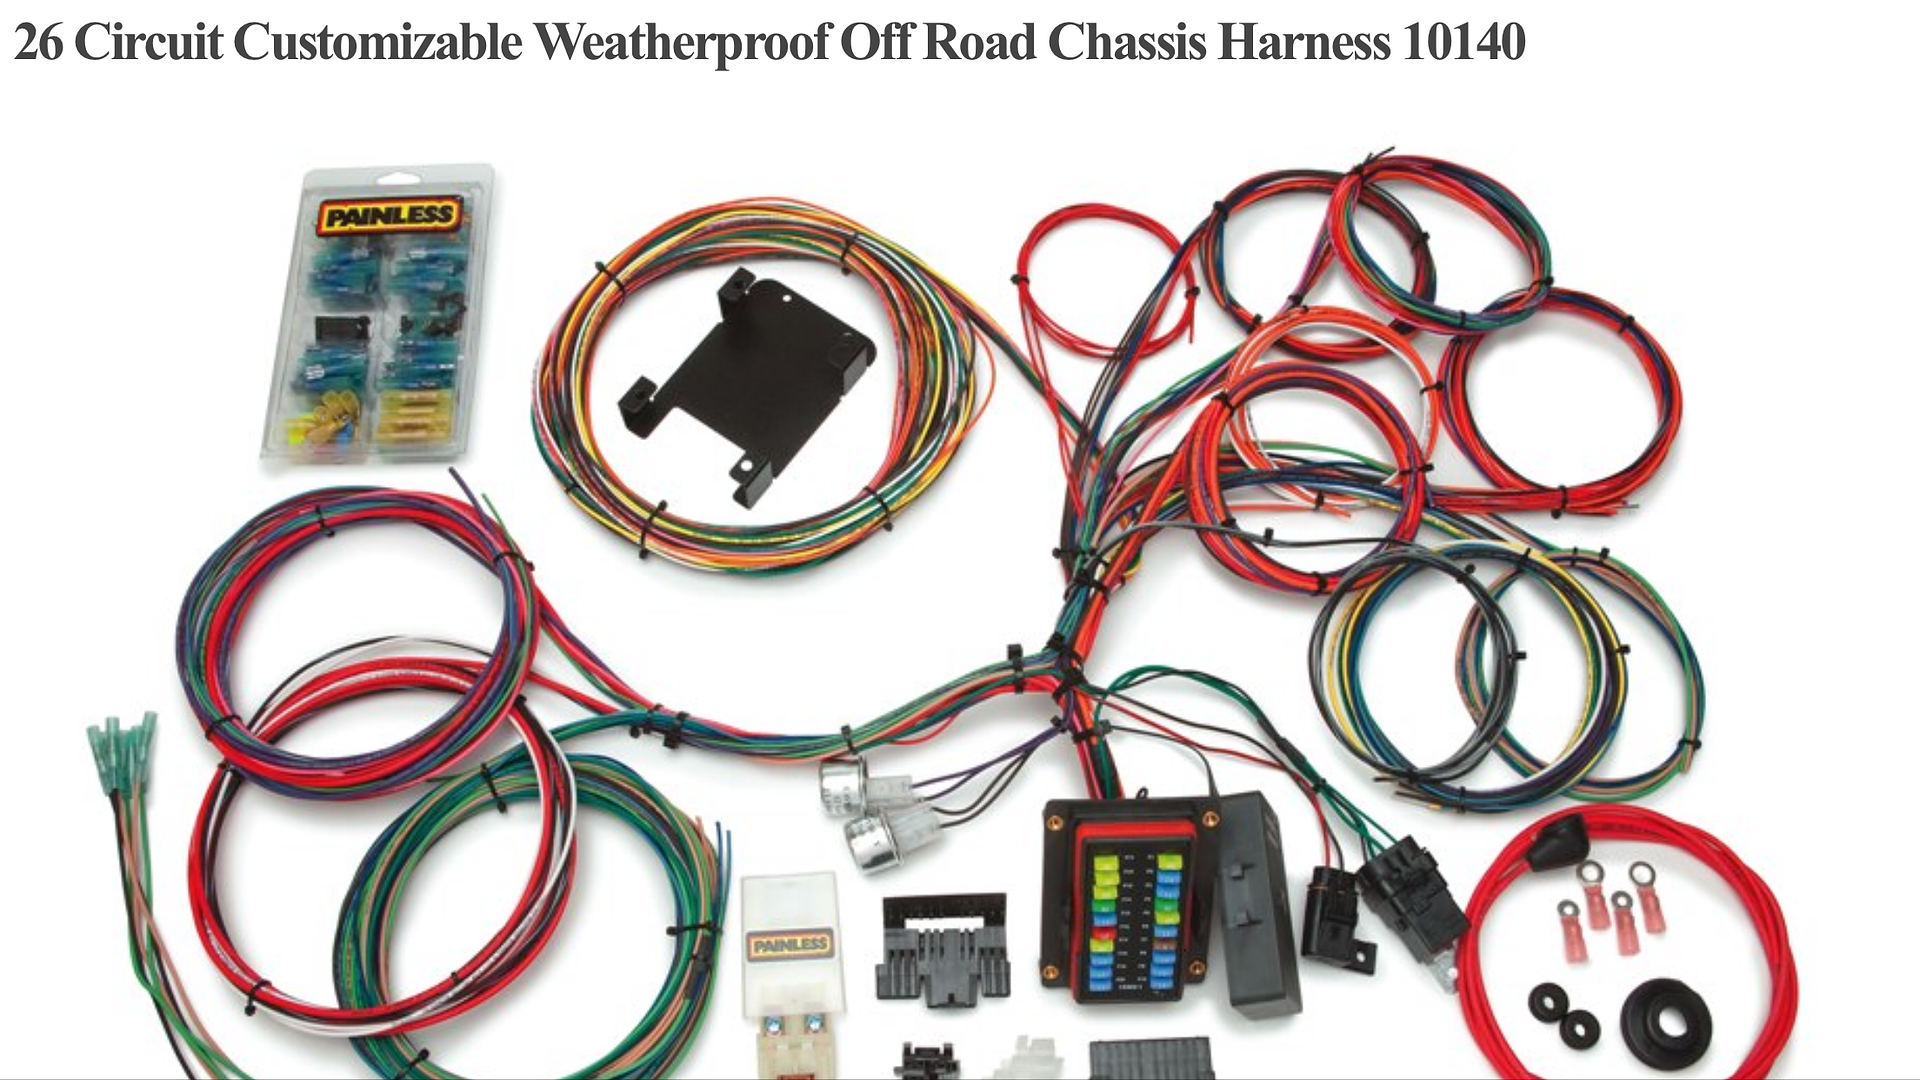


I’ve read about the “snowball effect” but now I’m experiencing it. ‘Since I have everything out I should go ahead and replace........fill in the blank.’ I decided to put a new chassis wiring harness in. I choose the 26 circuit Painless Weatherproof 10140 and an assortment of Delphi Weather Pack connectors.

Last edited by Trueblue93; Oct 16, 2018 at 04:09 AM.
Oct 16, 2018 | 07:02 AM
#18
It is wise to replace the wiring harness in our old trucks. Mmine was eaten up by those pesky field mice. Did Painless have an engine specific harness for your engine". Sure would help you out, you may inquire just for grins. They are in Fort Worth and it might be worth a trip for information
Oct 16, 2018 | 01:52 PM
#19
Registered User
Joined: Apr 2013
Posts: 478
Likes: 4
From: Louisiana
The factory harness is not plug and play but its not too bad to thin out (at least mine wasn't, but I did a lot of studying first). I would imagine you would have to have the computer flashed to get rid of the security features to allow to it crank.
Greg
Greg
Oct 17, 2018 | 04:26 AM
#20
Thread Starter
Registered User
Joined: Dec 2017
Posts: 96
Likes: 24
From: Flower Mound, Texas
Discombobulated, it doesn’t feel like it now, but when I’m finished........OH YEA!
Lons81, They did not have an engine specific harness for my truck. I’m not sure how I’m going to route everything yet anyway. It should be fun though, I love a good challenge. It feels overwhelming at times but I remind myself its just one step at a time.
Bump530, I talked with Mr. Howell with Howell EFI on the phone for a short bit. He told me with his reprogramming that the factory fuel delivery componants can be eliminated, which is contradictory to what I’ve been reading. It was designed as a pulse width modulated system that is returnless. His way ads a regulator and a return with no PWM. I’m still trying to decide what to do. I started labeling and removing the harness last night. To save $900 I’ll take a stab at reworking this factory harness.Update: I choose to have my harness reworked by Mitchell with SwapTime. He was very helpful and patient with my questions. It can be hard to get an answer from him at times, but only because he is swamped with orders. Be patient with him. It will be work it. I thought he did an excellent job with the harness and he also reprogrammed my computer. All said and done, with a new gas pedal, it ran me $850. I assume those prices are going to go up as his company grows and becomes more popular. He is able to wire it for the factor PWM fuel setup or the LS style with return fuel system. It is definitely better to use the factory style PWM. The motor was designed with this in mind. The other way will work though.
UPDATE:
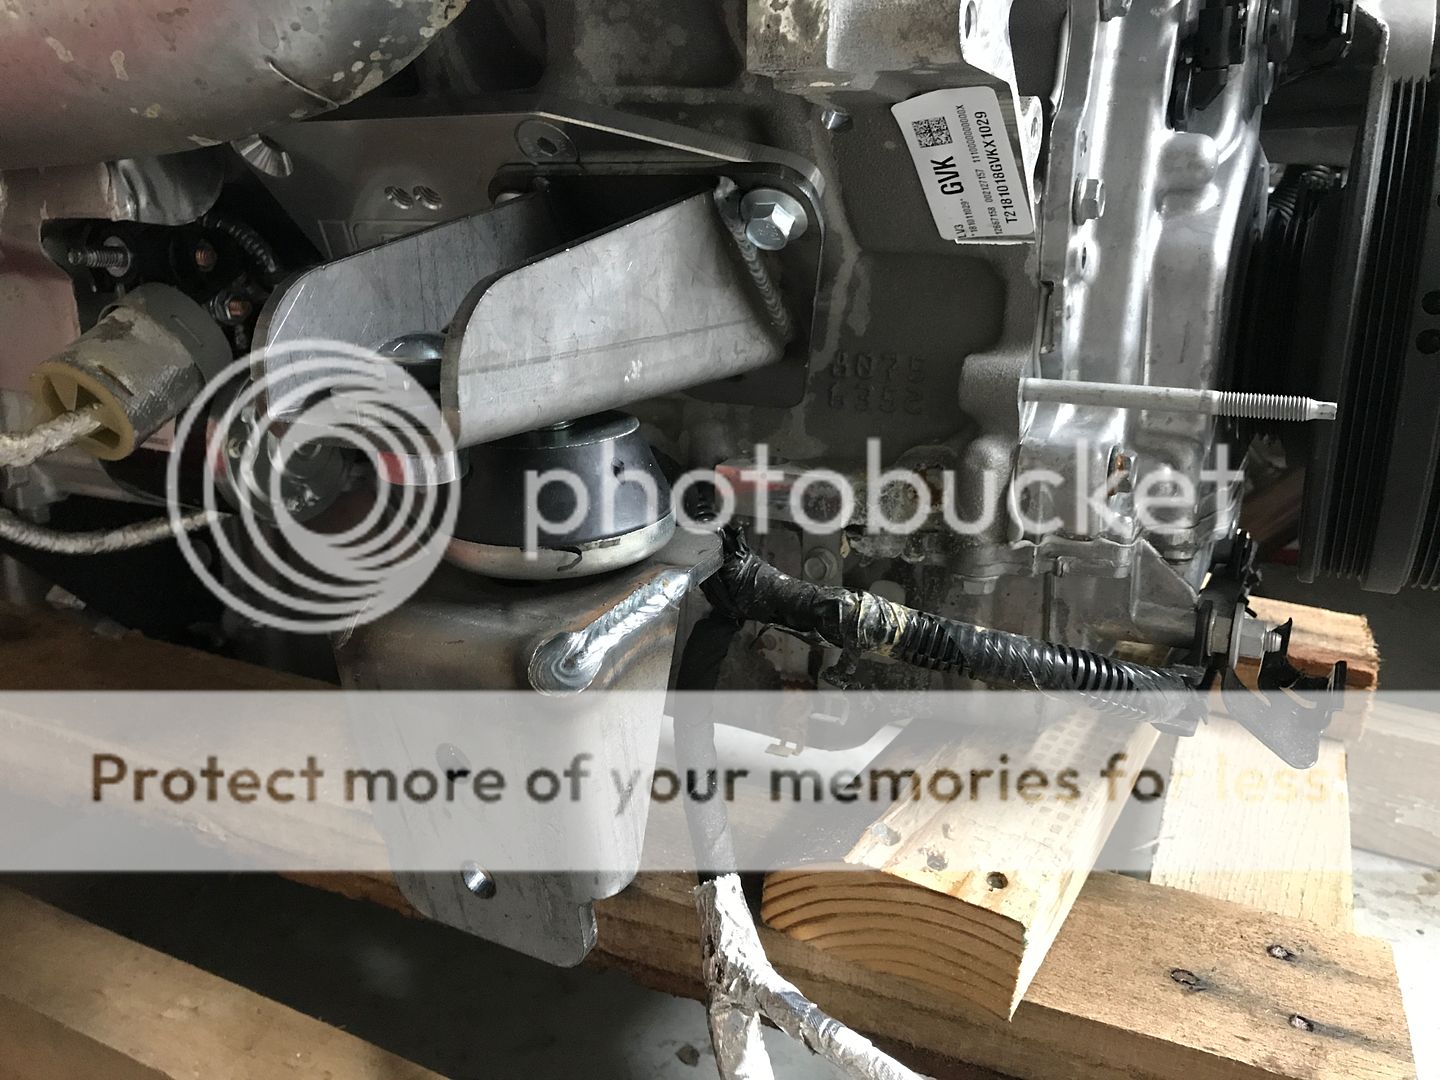
I put one of the motor mount setups on the engine. It interferes with the A/C pump. Soooooo, there is more money to be spent on a different serpentine setup. Holley makes a complete setup for the LT and includes everything needed for $1500. I don’t need everything. Dirty Dingo makes a set up with the mounting brackets only for $470 but then you still need an LS Corvette water pump, $220, and their LT to LS water pump adaptor kit, $145. This also means I have to remove the vacuum pump. I’m going to call Mr. Howell to see if the intake can be plumbed similar to the L83 intake and still provide enough vacuum for the brakes. That would save me a little money...electric vacuum pumps are a bit pricey. Leed Brakes makes a quiet one for $350.
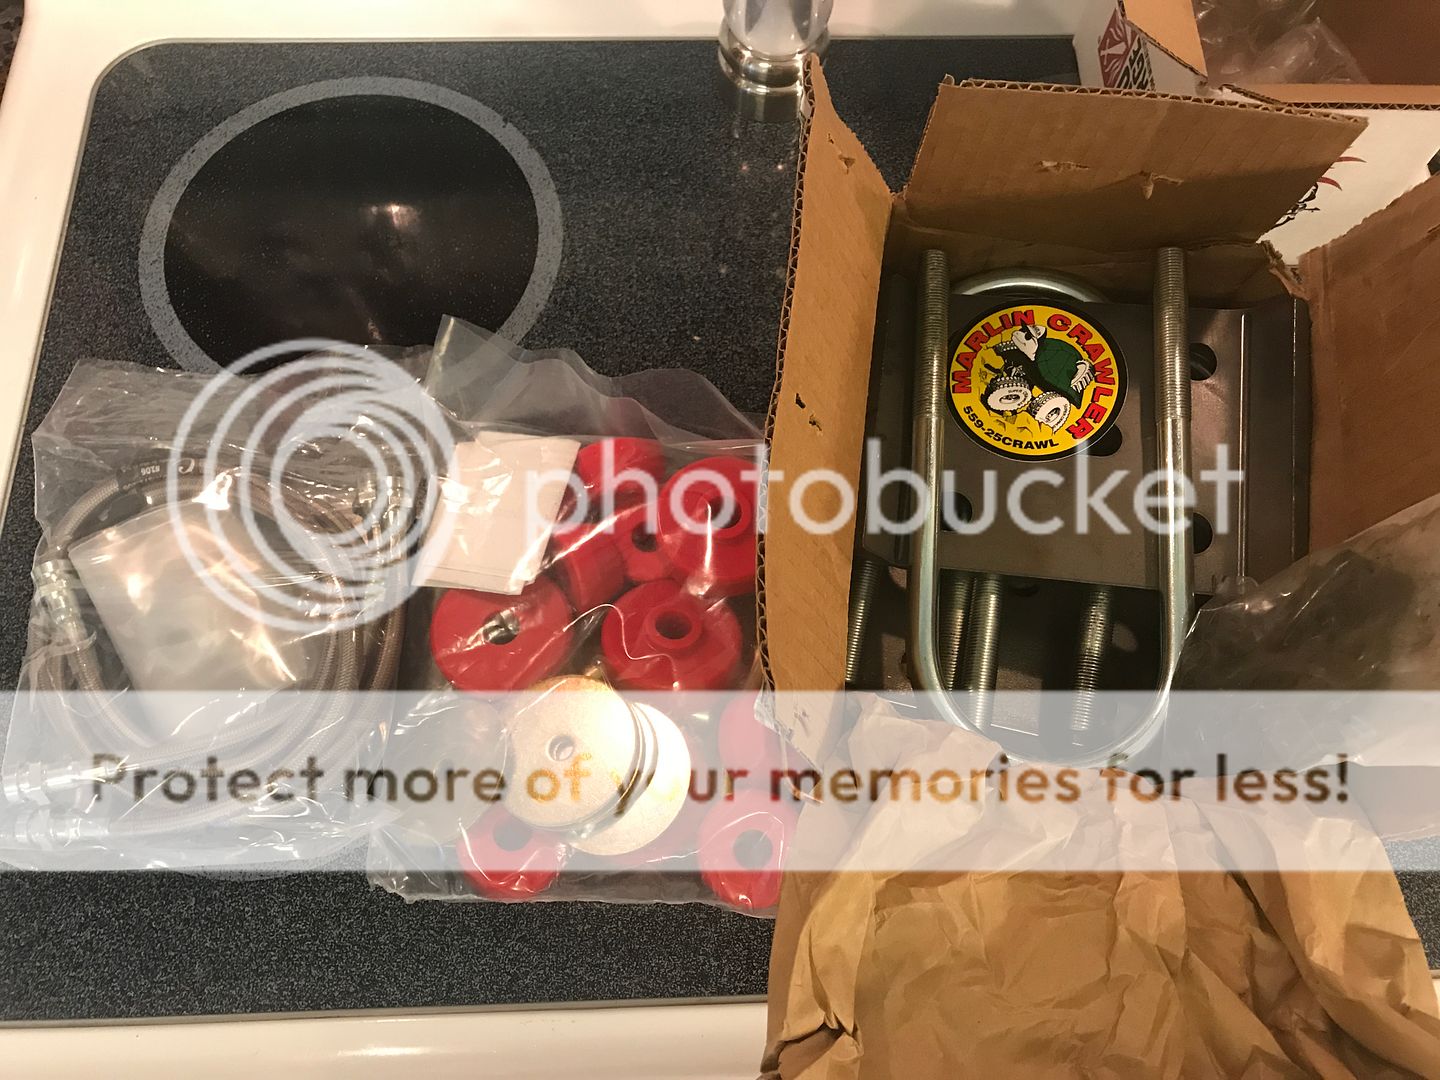
On a more positive note, I got some goodies dropped off yesterday.
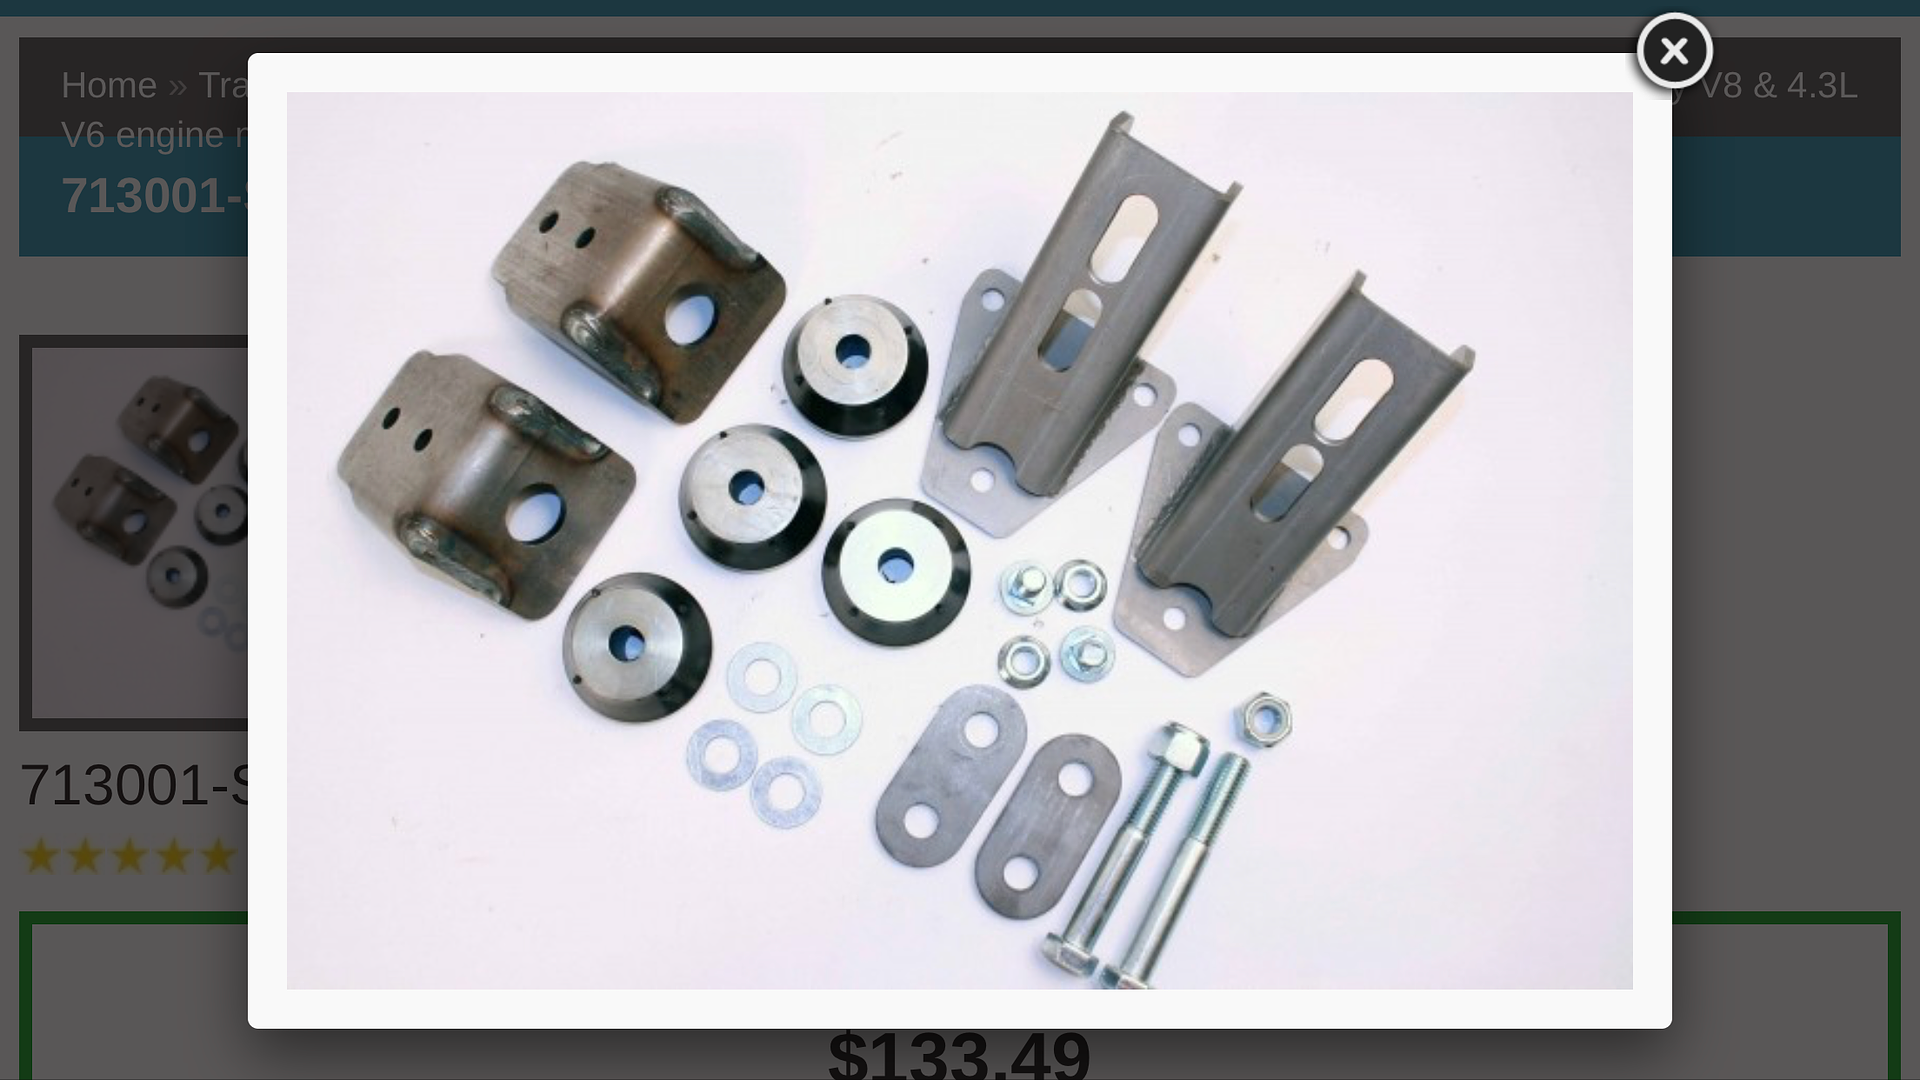
Motor mount setup
Extended brake hose kit, front u-bolt flip kit, and body mount kit. I should get the 2” body lift kit soon.
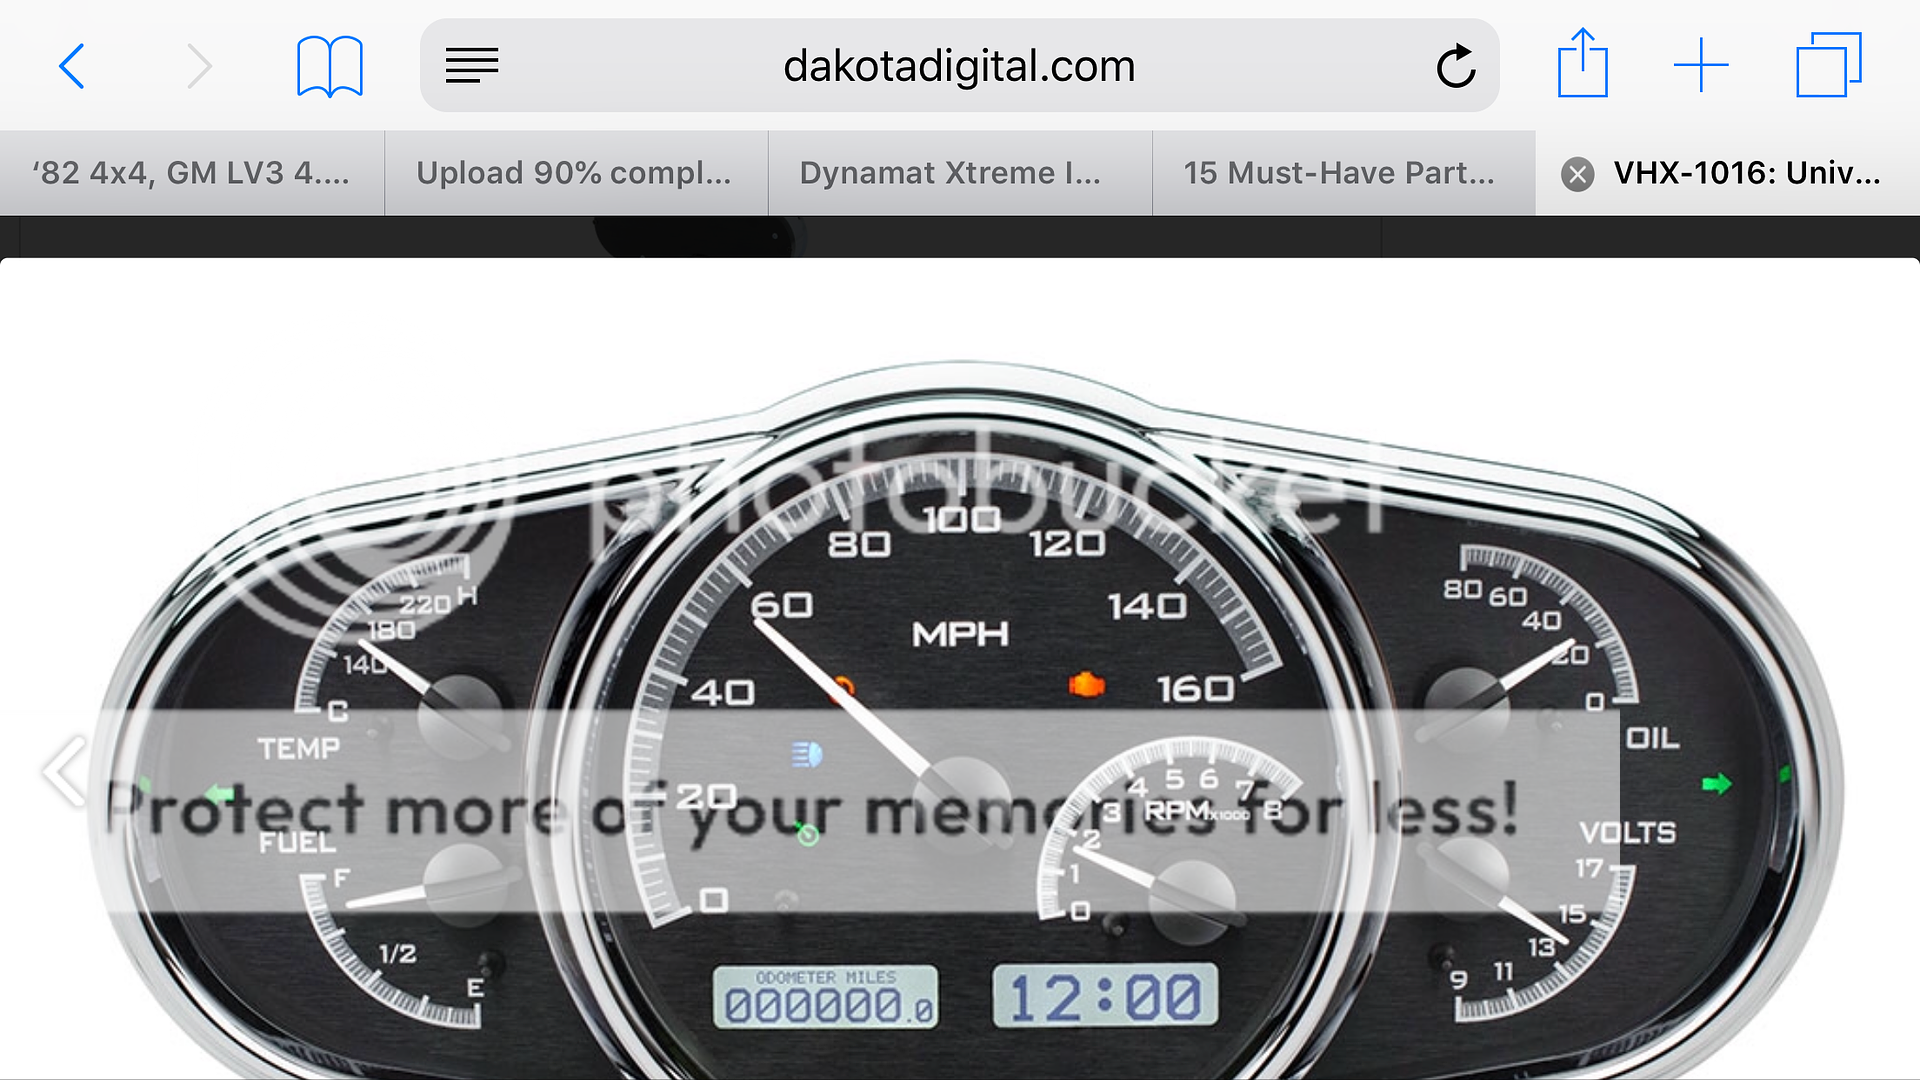
I’m drooling over this gauge package from Digital Dakota. I’m going to measure to see if it wil fit in the gauge area today.
Lons81, They did not have an engine specific harness for my truck. I’m not sure how I’m going to route everything yet anyway. It should be fun though, I love a good challenge. It feels overwhelming at times but I remind myself its just one step at a time.
Bump530, I talked with Mr. Howell with Howell EFI on the phone for a short bit. He told me with his reprogramming that the factory fuel delivery componants can be eliminated, which is contradictory to what I’ve been reading. It was designed as a pulse width modulated system that is returnless. His way ads a regulator and a return with no PWM. I’m still trying to decide what to do. I started labeling and removing the harness last night. To save $900 I’ll take a stab at reworking this factory harness.Update: I choose to have my harness reworked by Mitchell with SwapTime. He was very helpful and patient with my questions. It can be hard to get an answer from him at times, but only because he is swamped with orders. Be patient with him. It will be work it. I thought he did an excellent job with the harness and he also reprogrammed my computer. All said and done, with a new gas pedal, it ran me $850. I assume those prices are going to go up as his company grows and becomes more popular. He is able to wire it for the factor PWM fuel setup or the LS style with return fuel system. It is definitely better to use the factory style PWM. The motor was designed with this in mind. The other way will work though.
UPDATE:
I put one of the motor mount setups on the engine. It interferes with the A/C pump. Soooooo, there is more money to be spent on a different serpentine setup. Holley makes a complete setup for the LT and includes everything needed for $1500. I don’t need everything. Dirty Dingo makes a set up with the mounting brackets only for $470 but then you still need an LS Corvette water pump, $220, and their LT to LS water pump adaptor kit, $145. This also means I have to remove the vacuum pump. I’m going to call Mr. Howell to see if the intake can be plumbed similar to the L83 intake and still provide enough vacuum for the brakes. That would save me a little money...electric vacuum pumps are a bit pricey. Leed Brakes makes a quiet one for $350.
On a more positive note, I got some goodies dropped off yesterday.
Motor mount setup

Extended brake hose kit, front u-bolt flip kit, and body mount kit. I should get the 2” body lift kit soon.

I’m drooling over this gauge package from Digital Dakota. I’m going to measure to see if it wil fit in the gauge area today.

Last edited by Trueblue93; Jul 21, 2019 at 01:44 PM. Reason: update


