
79 Rebuild/Restore Project Brittany
 Mar 2, 2013 | 11:27 AM
#1

Thread Starter
Registered User
Joined: Mar 2013
Posts: 47
Likes: 0
79 Rebuild/Restore Project Brittany
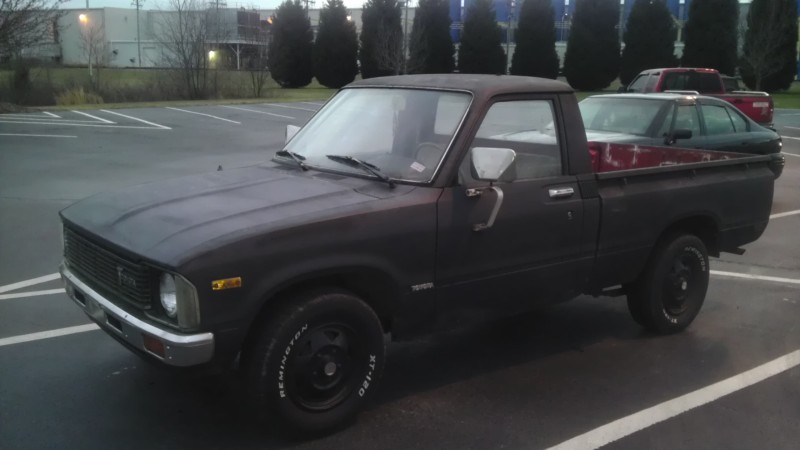
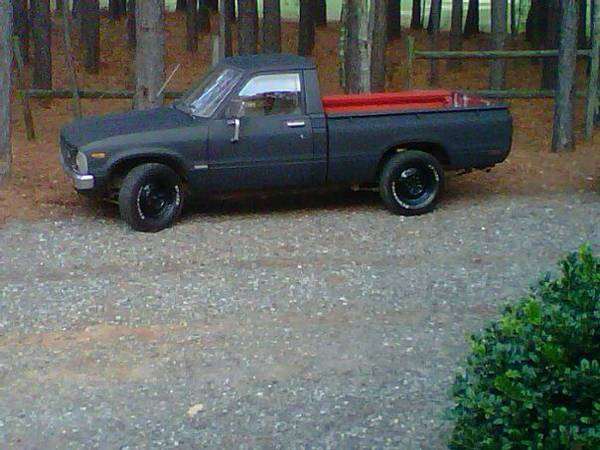
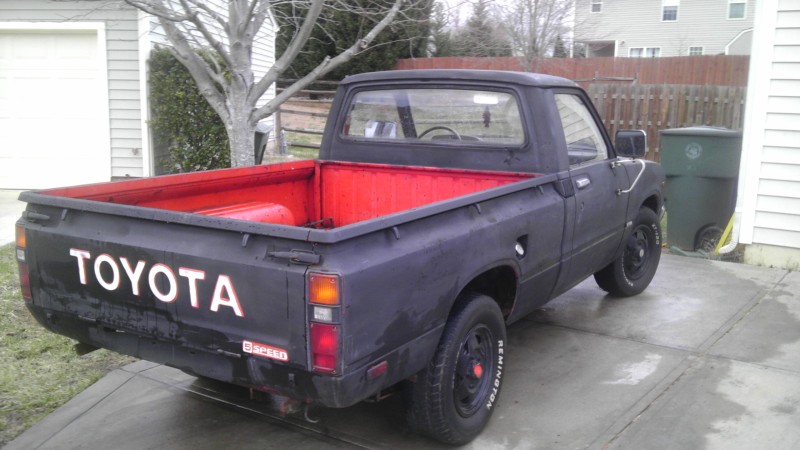
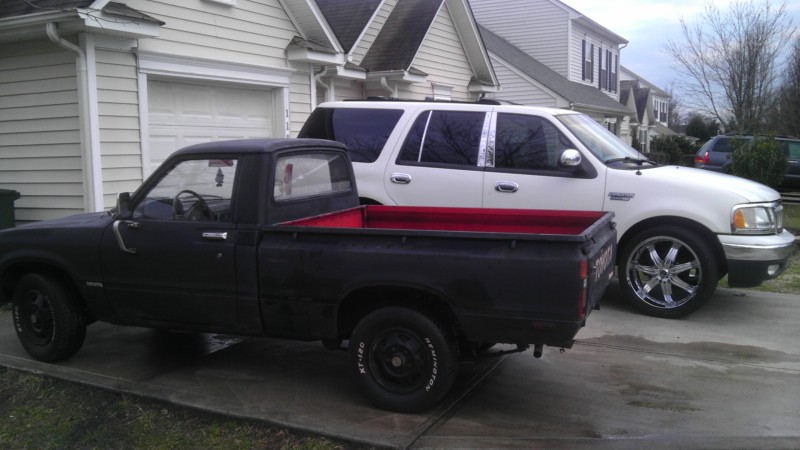
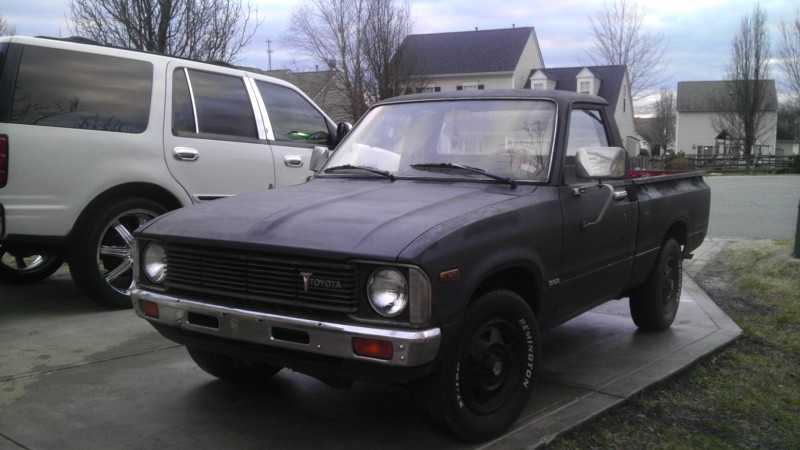
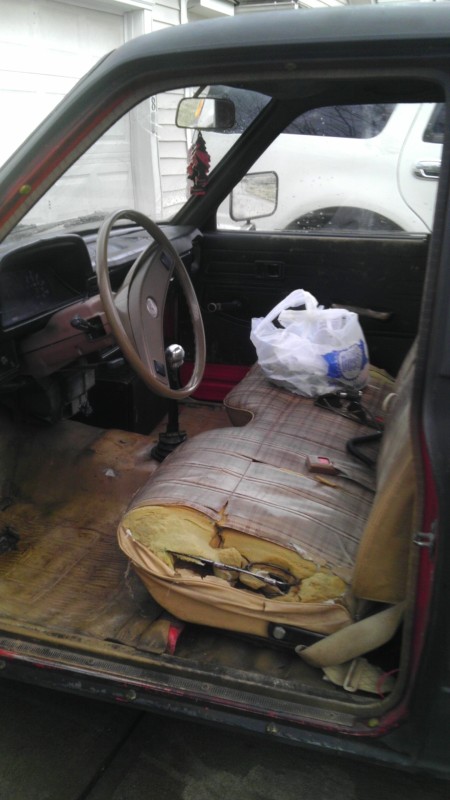
How's it going. I'm from Mooresville Nc, I just picked up a 5 speed 1979 pickup with 175,xxx miles. 2wd 20R, Only a few slight issues but runs and drives good as is. I paid 1100 for it which most go for over 1500 in my area, needing major work. I figure I got a great deal. Issues I plan on addressing are a new bench seat as mine is far gone, valve cover gasket, back tires, spark plugs,fix a few exhaust leaks, and some interior work. No rust on frame or main cab, only a few small spots on the bed. I am hoping to maybe eventually paint it. I have painted a few motorcycles and have a gallon of metallic red that would look great on her. I look forward to learning more about it and excited about being here. I've already started taking a few parts off under the hood as I do powder coating so I am going to refresh those. Also have ordered a few parts already and waiting on them to come in. I am going to try and research and see what else I should address while I have it semi apart. I can't get too crazy for now as this is a semi budget build.
At work we all get together on my team and name our cars, she got the name Brittany as that name is scratched into the dash lol.
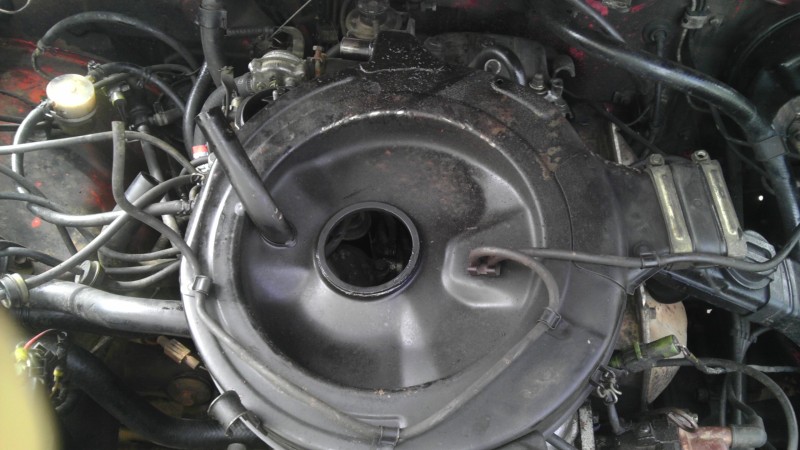
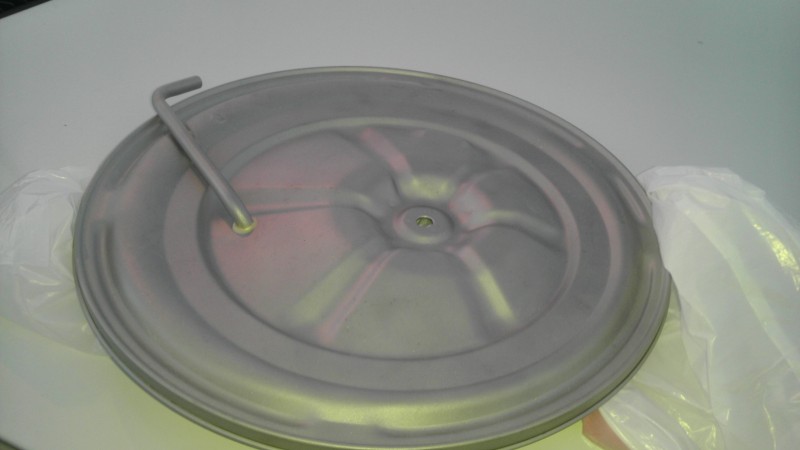
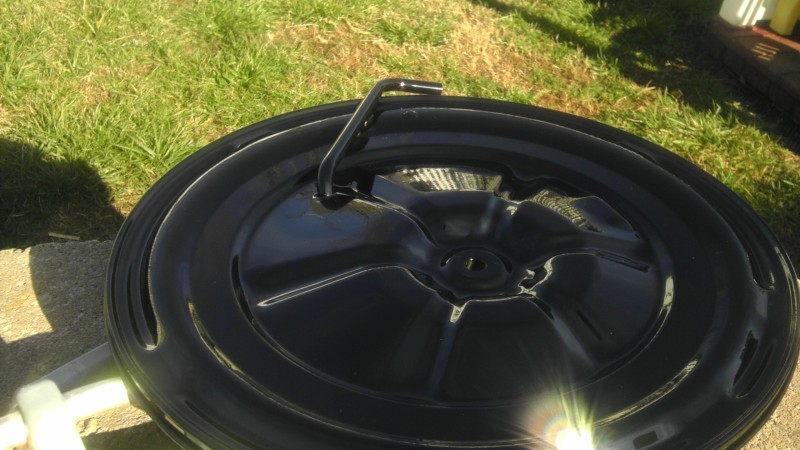
Breather before
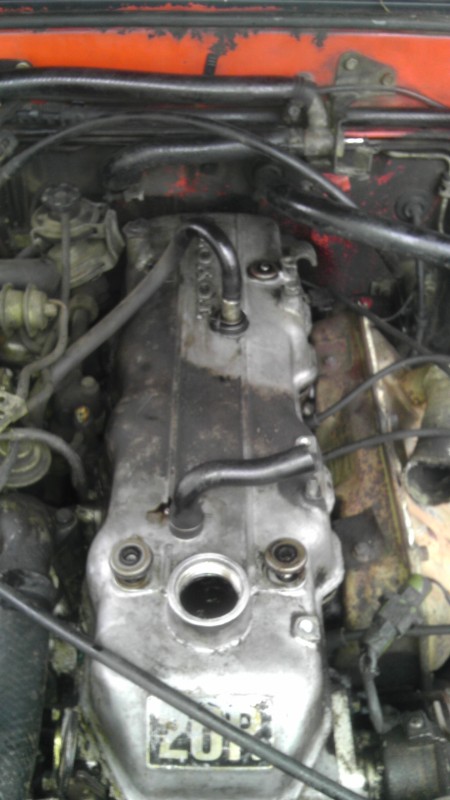
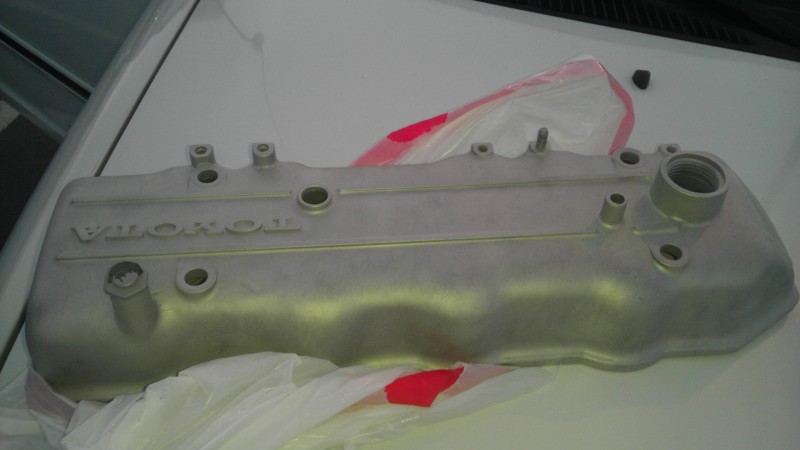
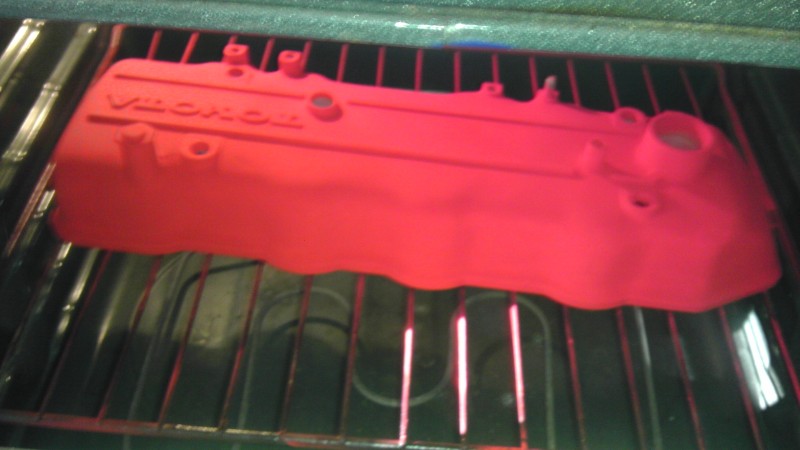
Valve cover before. Im trying to decide red or a yellow. I have many colors but I do like it to stand out a bit. I'm thinking one of those on it and maybe black for the breather assembly.
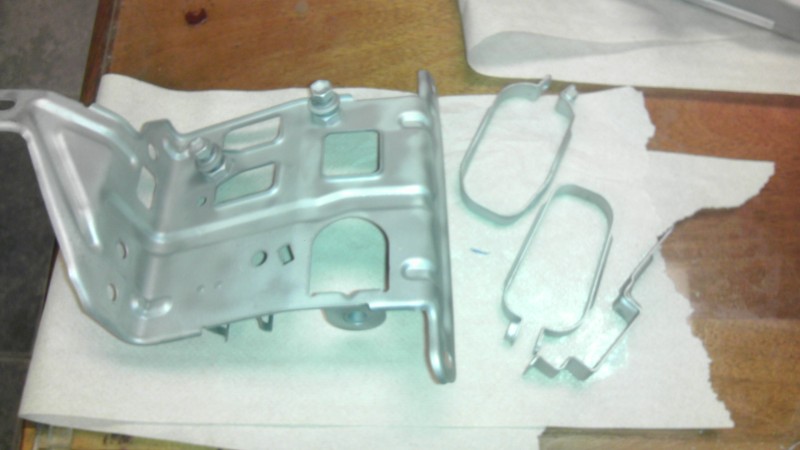
Still more work to be done and plan on taking more brackets off to do
I will post more as it happens
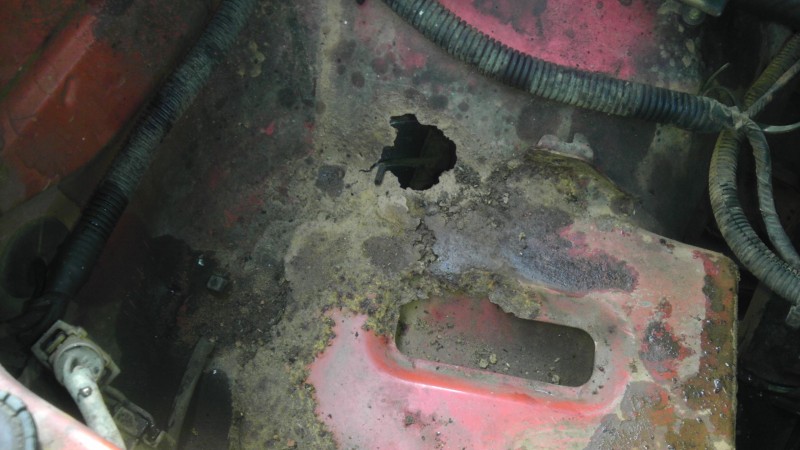
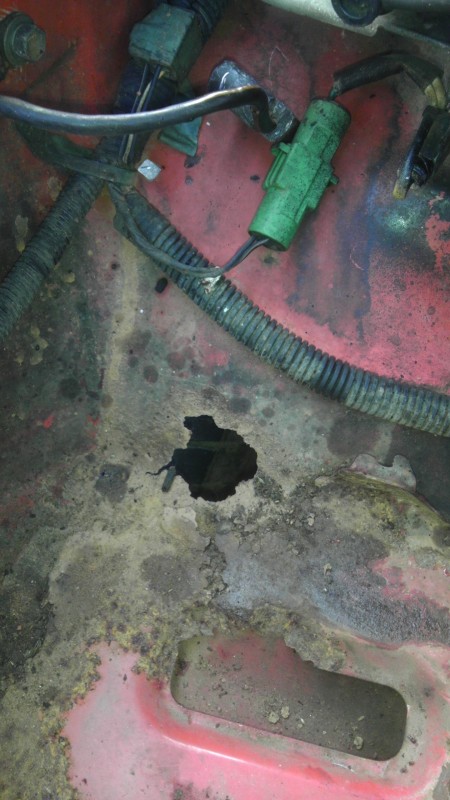
Well have found one place which I am hating, right under the battery there is a nice cancer spot. Trying to decide what to do about it. May try to cut it out and form some new sheet metal in it's place.
Don't have a welder but maybe can get a friend to help out
At work we all get together on my team and name our cars, she got the name Brittany as that name is scratched into the dash lol.
Breather before
Valve cover before. Im trying to decide red or a yellow. I have many colors but I do like it to stand out a bit. I'm thinking one of those on it and maybe black for the breather assembly.
Still more work to be done and plan on taking more brackets off to do
I will post more as it happens
Well have found one place which I am hating, right under the battery there is a nice cancer spot. Trying to decide what to do about it. May try to cut it out and form some new sheet metal in it's place.
Don't have a welder but maybe can get a friend to help out
Last edited by on1wheel01; Mar 2, 2013 at 11:56 AM.


 Mar 2, 2013 | 05:35 PM
#4


 Mar 2, 2013 | 06:12 PM
#6
Trending Topics
Mar 3, 2013 | 01:31 PM
#8
Thread Starter
Registered User
Joined: Mar 2013
Posts: 47
Likes: 0
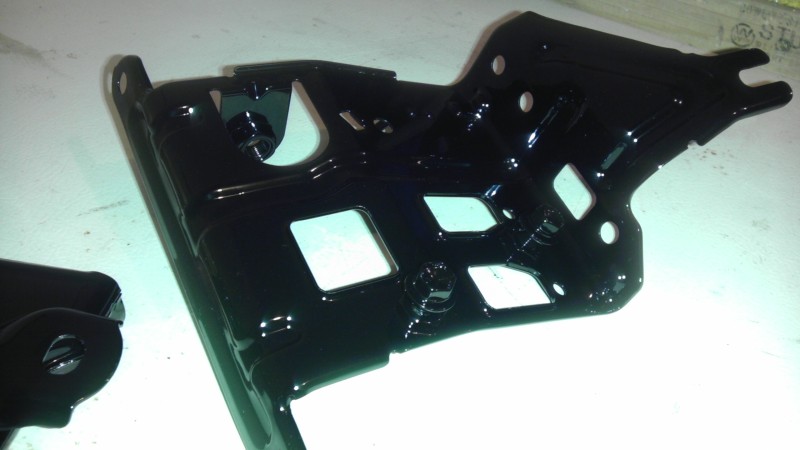
Well did a small bit of powder coating today before getting ready for work tonight.
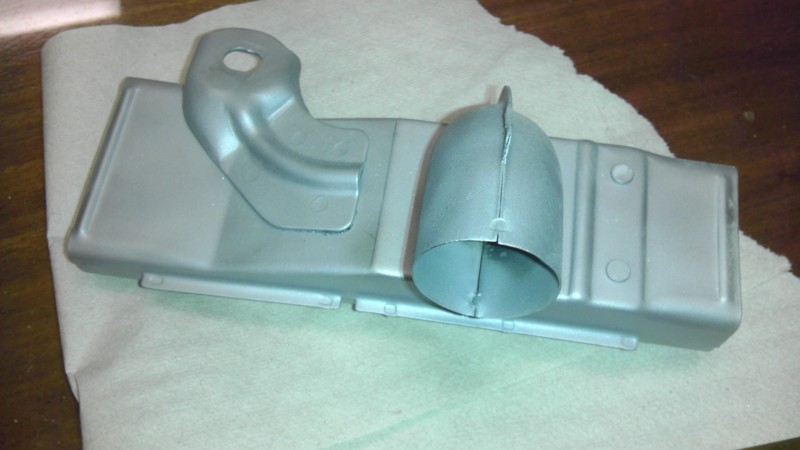
All cleaned up ready to spray

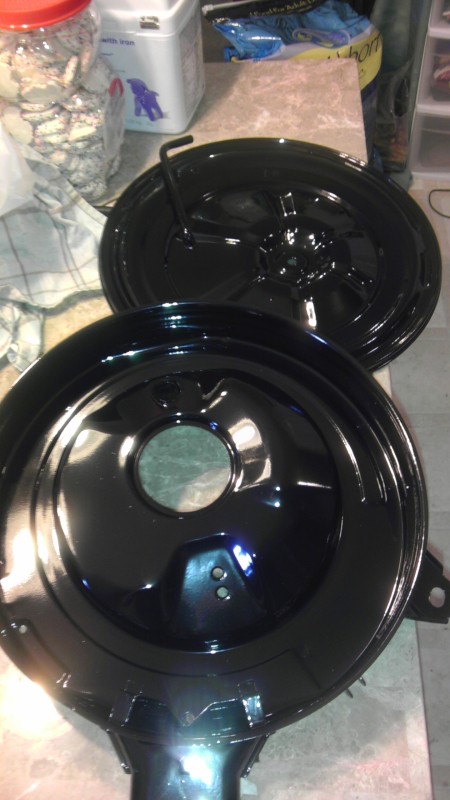
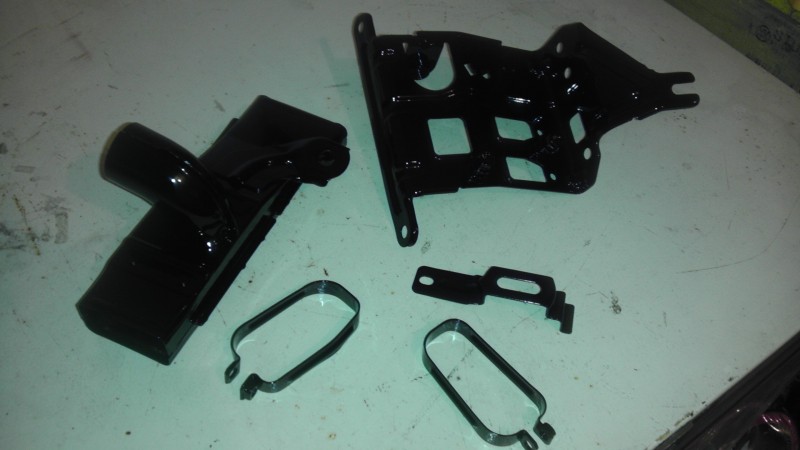
Finished air cleaner looks great
Will be doing to valve cover tomorrow, and took a few other brackets off to do.
All cleaned up ready to spray
Finished air cleaner looks great
Will be doing to valve cover tomorrow, and took a few other brackets off to do.
 Mar 3, 2013 | 08:19 PM
#11
Thread Starter
Registered User
Joined: Mar 2013
Posts: 47
Likes: 0
I'm searching Craigslist for some new seats for Britt. I'm really wanting some black leather heated seats. But all else fails I will settle for something else. I'm mainly concentrating on the basics right now though. I am thinking of doing some painting under the hood the next few days so it freshes it up a little more.
 Mar 4, 2013 | 08:02 PM
#16
Thread Starter
Registered User
Joined: Mar 2013
Posts: 47
Likes: 0
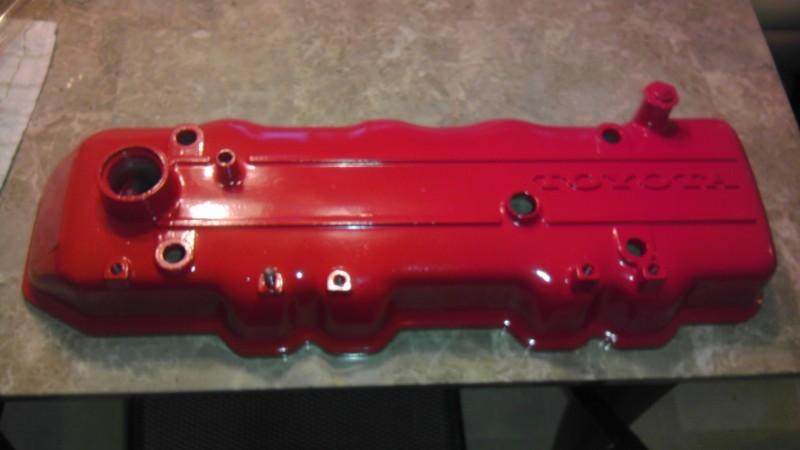
Thanks. As said its powder coat, not really paint. It's a powder shot on to the part via an electrolysis procedure. Much much stronger than paint and will far outlast it. It's a business I have on the side. Everything you see in pictures has been done this way. Now I just have to find a new 20R sticker for it
Mar 4, 2013 | 08:17 PM
#17
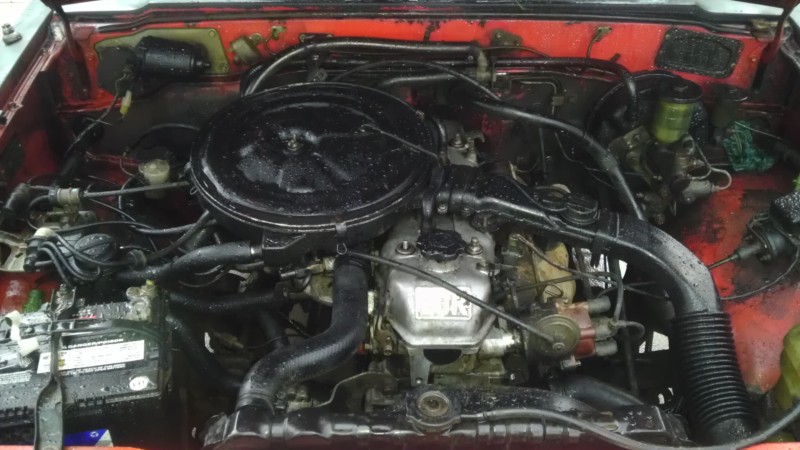
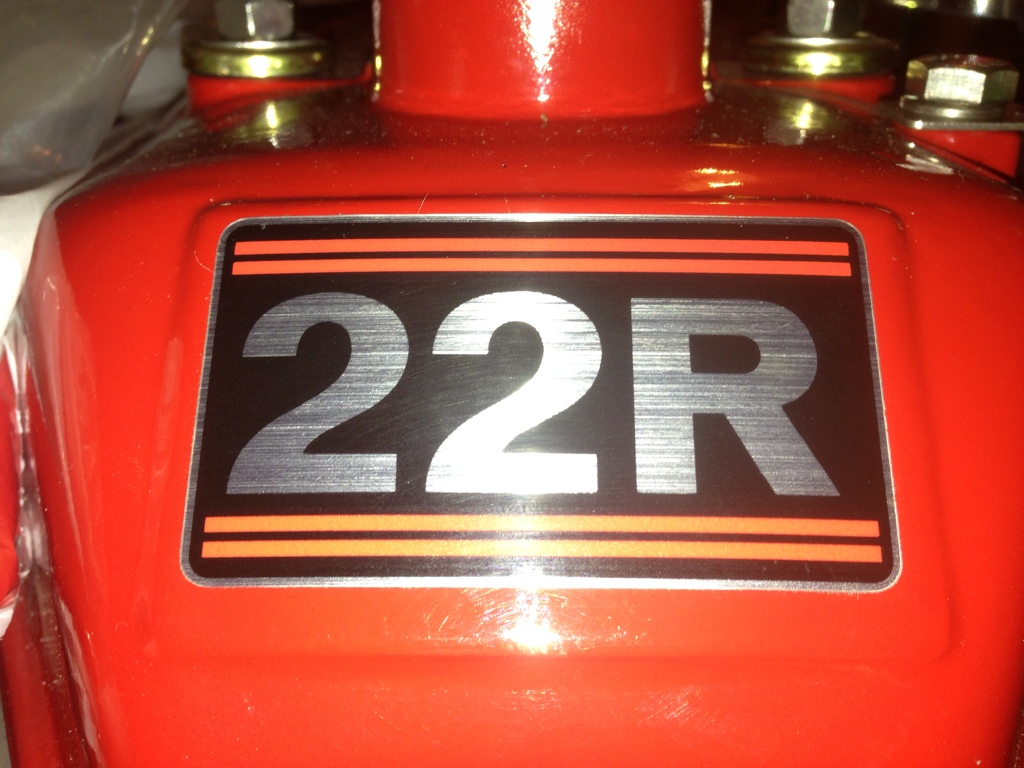
Oh ok, I thought it was some sort of do it yourself powder coat in a can that I hadn't heard of. I didn't know you actually did powder coating. Nonetheless, still looks good! If you're looking for the sticker, I got mine from www.lowrangeoffroad.com for something like $3 each. It's same size and material as the factory sticker
Here's mine:
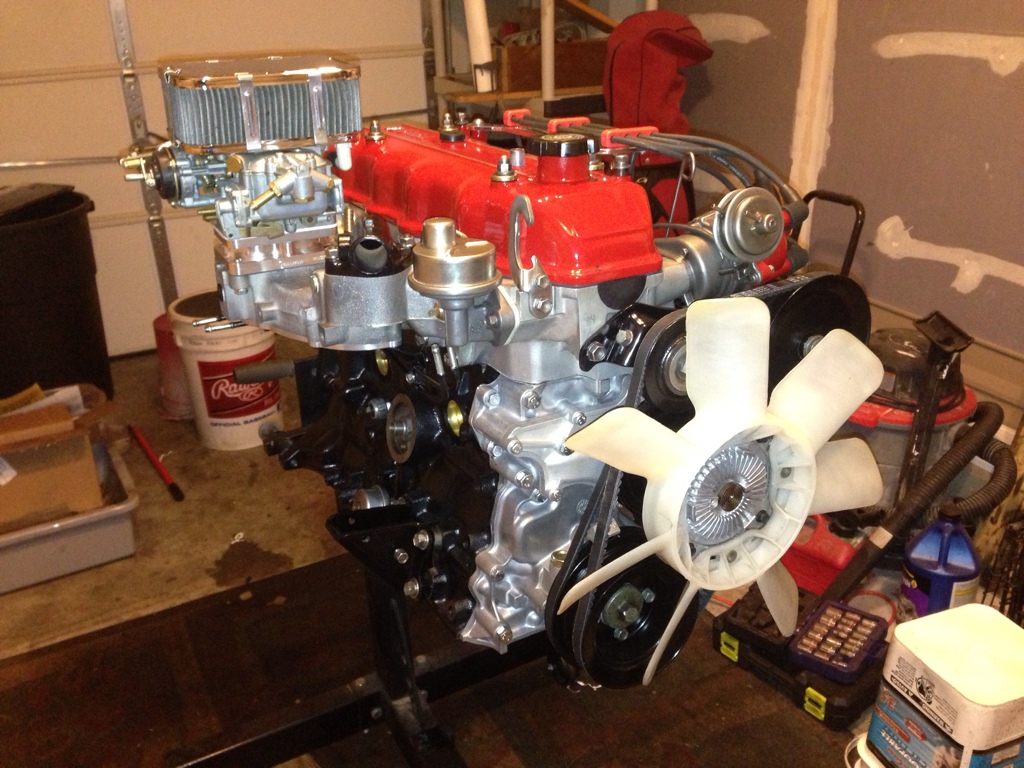
Here's mine:
Mar 4, 2013 | 08:22 PM
#18
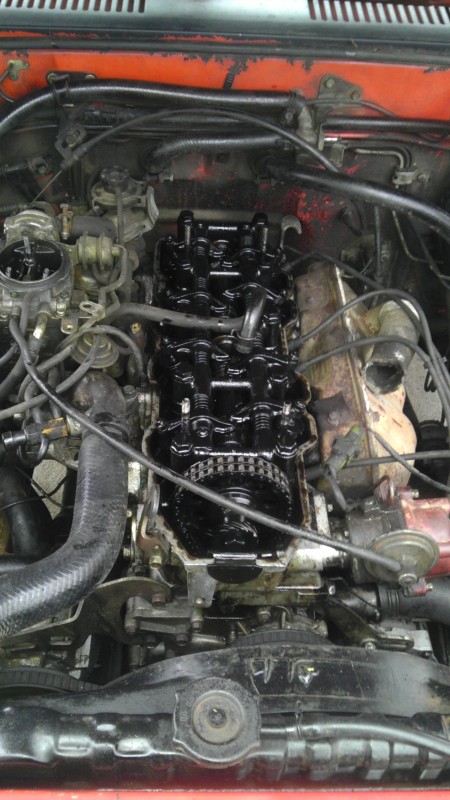
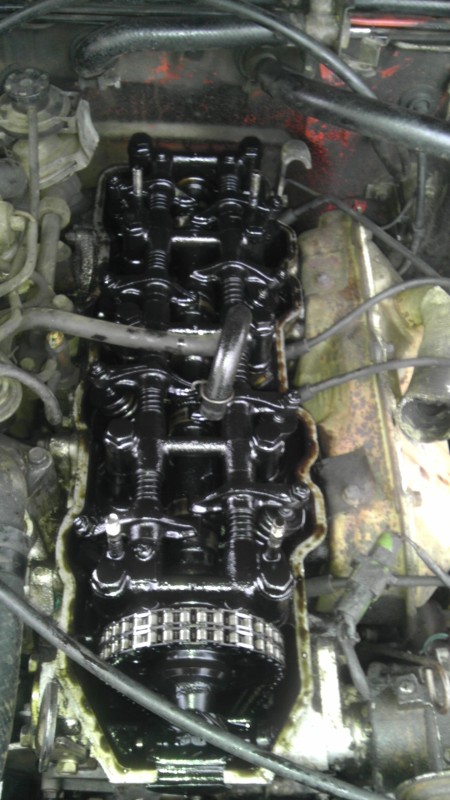
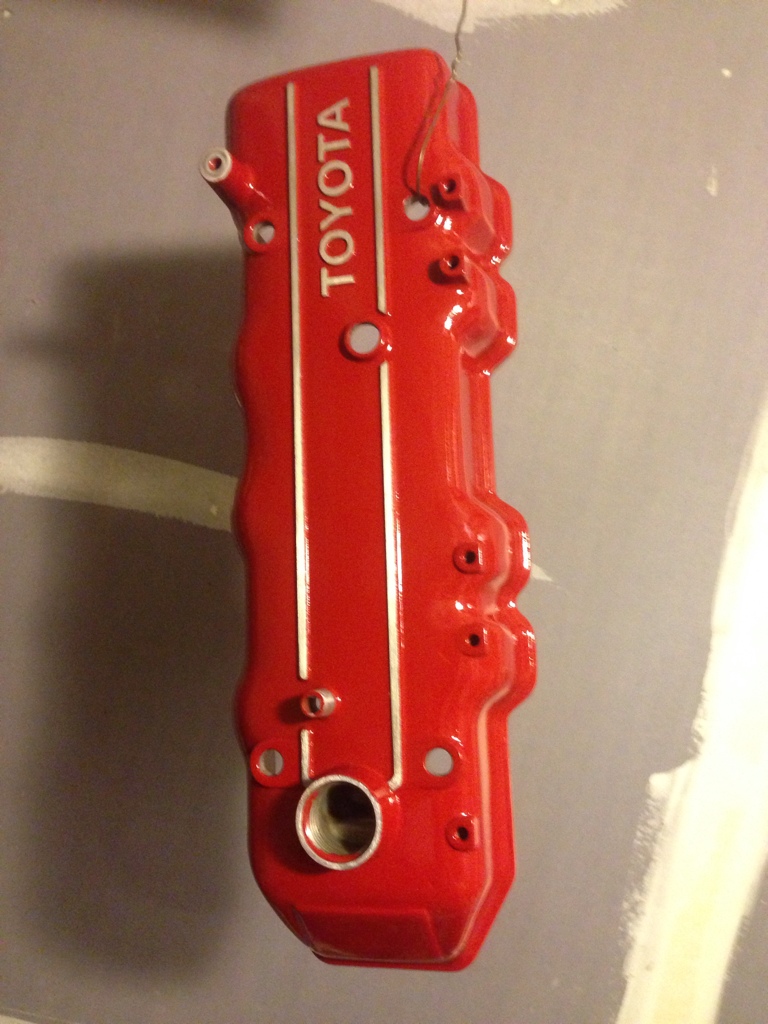
Oh, and I would also recommend brushing the raised letters and lines in your valve cover. Mine turned out awsome and really makes the valve cover pop:
And apparently, we have the same good taste in under the hood color schemes! Looking forward to the rest of your build!
And apparently, we have the same good taste in under the hood color schemes! Looking forward to the rest of your build!
Mar 4, 2013 | 08:31 PM
#19
Thread Starter
Registered User
Joined: Mar 2013
Posts: 47
Likes: 0
Wow I must say your engine looks amazing. Yea I have been doing it for about 5 years or so. Make decent amount on the side but really pays off for my projects. I am hoping to eventually purchase an extra motor and rebuild it and have it ready for use. I have big plans for Brittany hopefully they all happen.
Mar 5, 2013 | 02:35 PM
#20
Thread Starter
Registered User
Joined: Mar 2013
Posts: 47
Likes: 0
Well found out today my exhaust manifold is cracked up. So I am going to order a pacesetter header. Just gotta research which to buy as I see different ones.
Update seems this one fits well and can use the rest of the stock exhaust
http://www.ebay.com/itm/PaceSetter-7...0276f0&vxp=mtr
Update seems this one fits well and can use the rest of the stock exhaust
http://www.ebay.com/itm/PaceSetter-7...0276f0&vxp=mtr
Last edited by on1wheel01; Mar 5, 2013 at 02:46 PM.


