Bpealer's 1994 4Runner Build-Up thread
 03-23-2013, 02:04 PM
#1
Registered User
Thread Starter
Bpealer's 1994 4Runner Build-Up thread
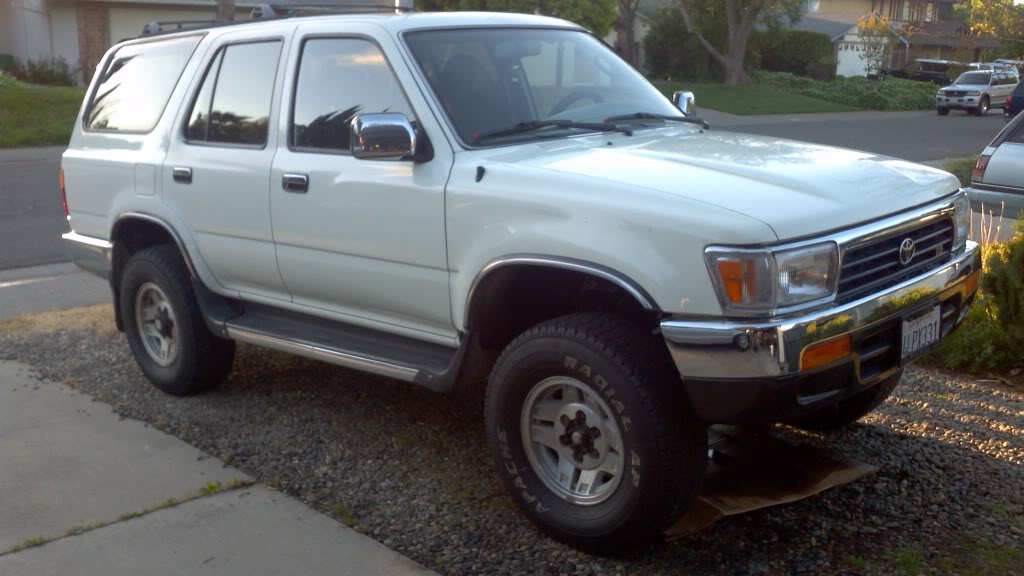
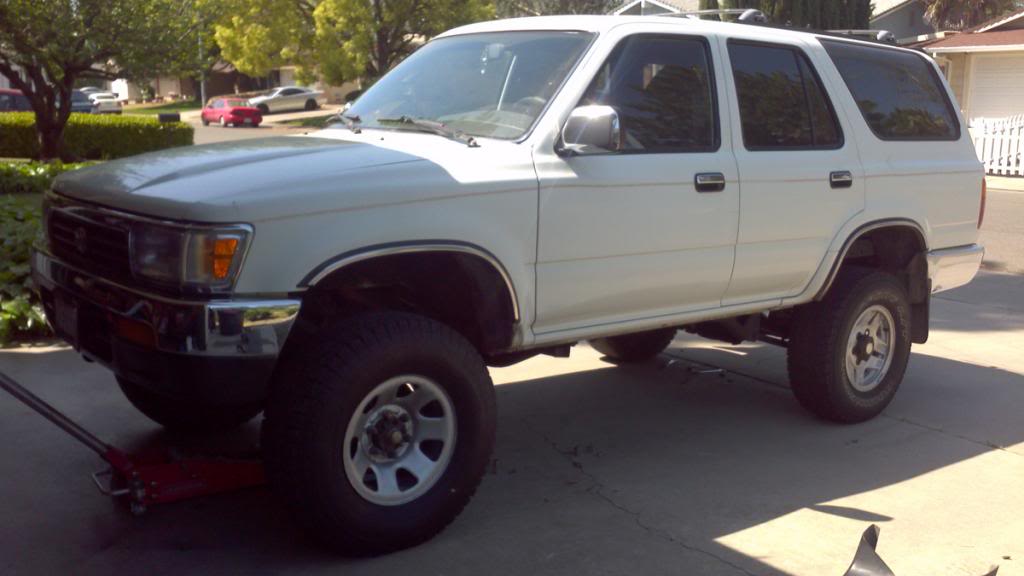
Bought my 94 about 3 weeks ago for only 900. Pretty good deal considering the body and drive train are in great condition. The downside is that everything else needs some attention.
To please the wifey i'm gonna tackle the oil leaks first. The entire underside of this thing is covered in oil. Figure I'll start from top to bottom and clean my way down. First step is the pesky valve covers.
For some reason the previous owner used two driver side valve covers. There was no hookup for the pcv valve! yikes... After a trip to the junkyard and I'll kill two birds with one stone.

Driver side cover removed. Head looks real clean, must have had some work done recently. If you look closely, one of the rear cover bolts had been snapped off. Not sure why they didn't fix it then when it happened. It was leaking at the usual rear corner. No rtv to be seen plus with the snapped bolt, no wonder it was leaking.
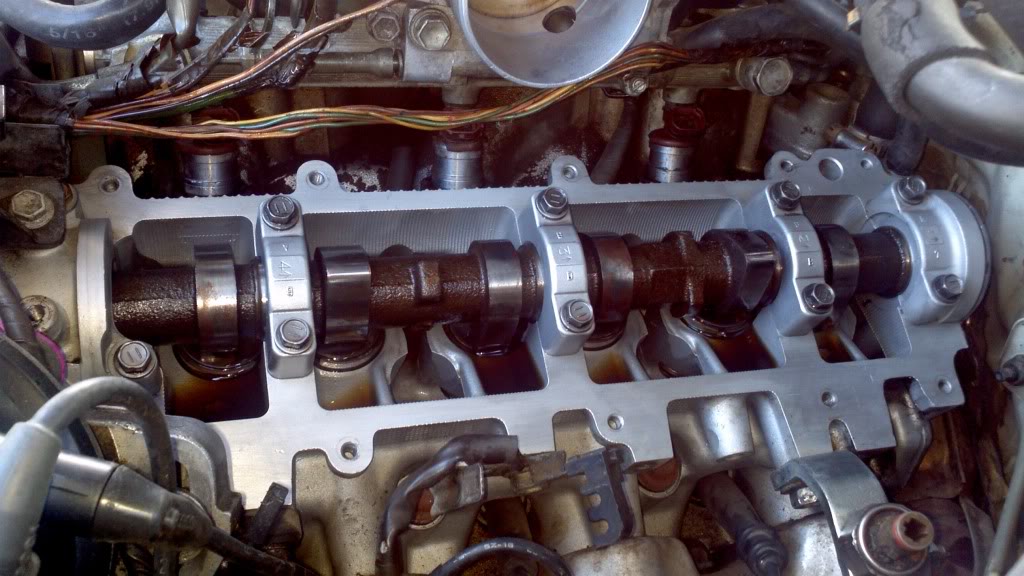
All cleaned up.
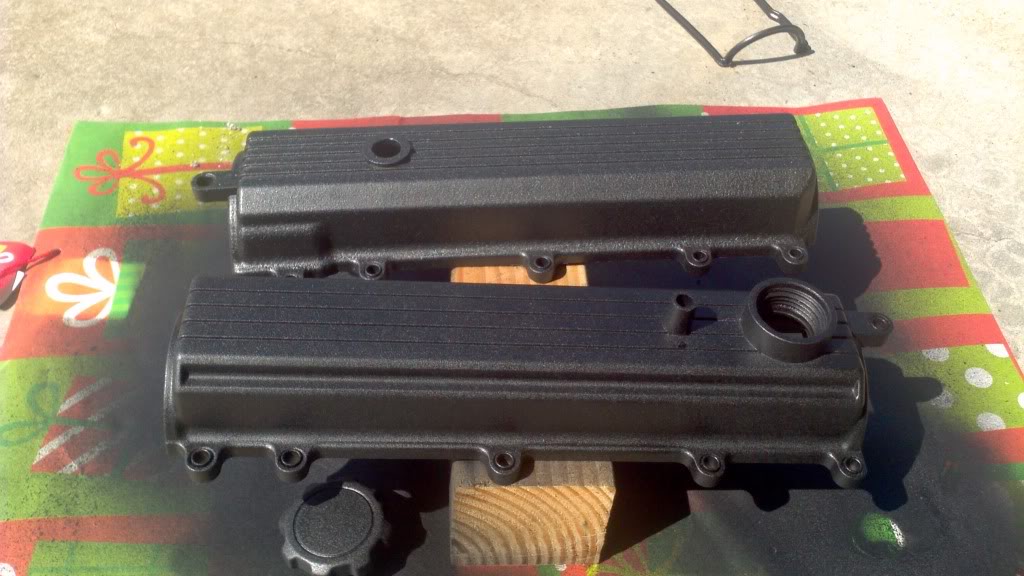
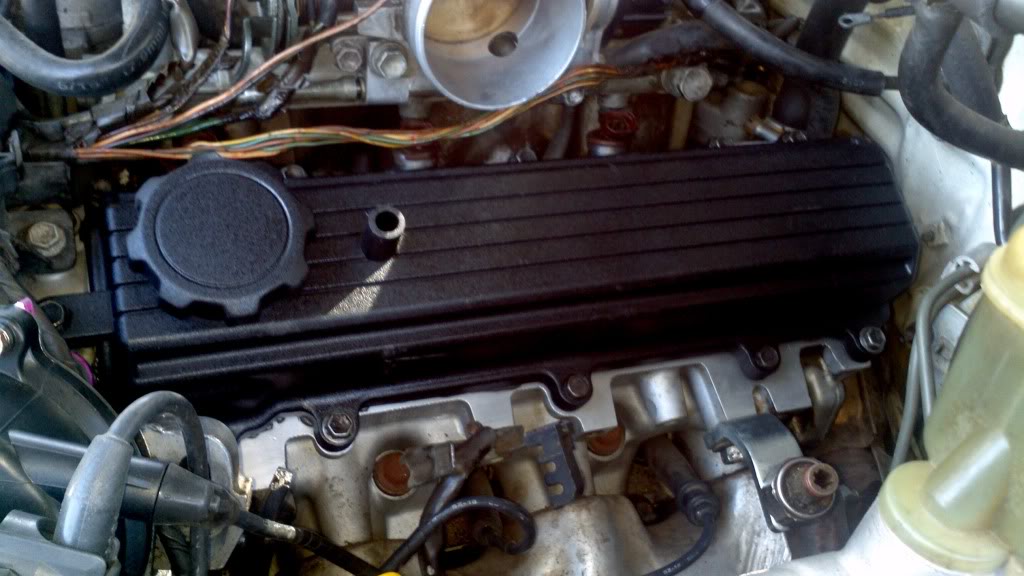
Decided to re paint the valve covers wrinkle black. Turned out nicely.
To please the wifey i'm gonna tackle the oil leaks first. The entire underside of this thing is covered in oil. Figure I'll start from top to bottom and clean my way down. First step is the pesky valve covers.
For some reason the previous owner used two driver side valve covers. There was no hookup for the pcv valve! yikes... After a trip to the junkyard and I'll kill two birds with one stone.
Driver side cover removed. Head looks real clean, must have had some work done recently. If you look closely, one of the rear cover bolts had been snapped off. Not sure why they didn't fix it then when it happened. It was leaking at the usual rear corner. No rtv to be seen plus with the snapped bolt, no wonder it was leaking.
All cleaned up.
Decided to re paint the valve covers wrinkle black. Turned out nicely.

 03-25-2013, 11:36 AM
#3
Registered User
Thread Starter
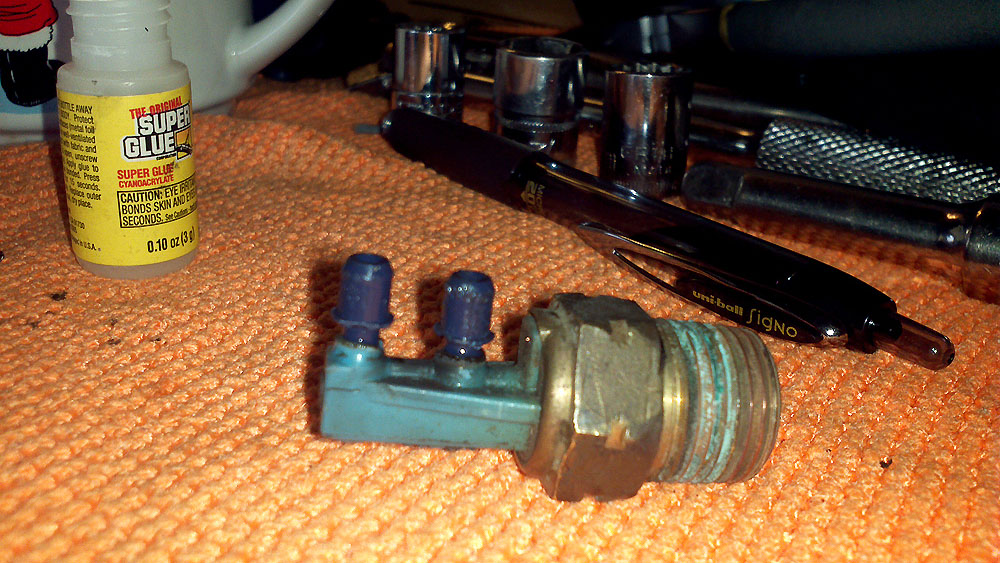
Well trying to replace the "U" shaped coolant hose I broke the plastic nipples on the tvv going to the vapor canister. The heat from the crossover pipe no doubt cooked these things a long time ago. About 50.00 from the dealer, I'm a little broke right now so I did a little quick fix.
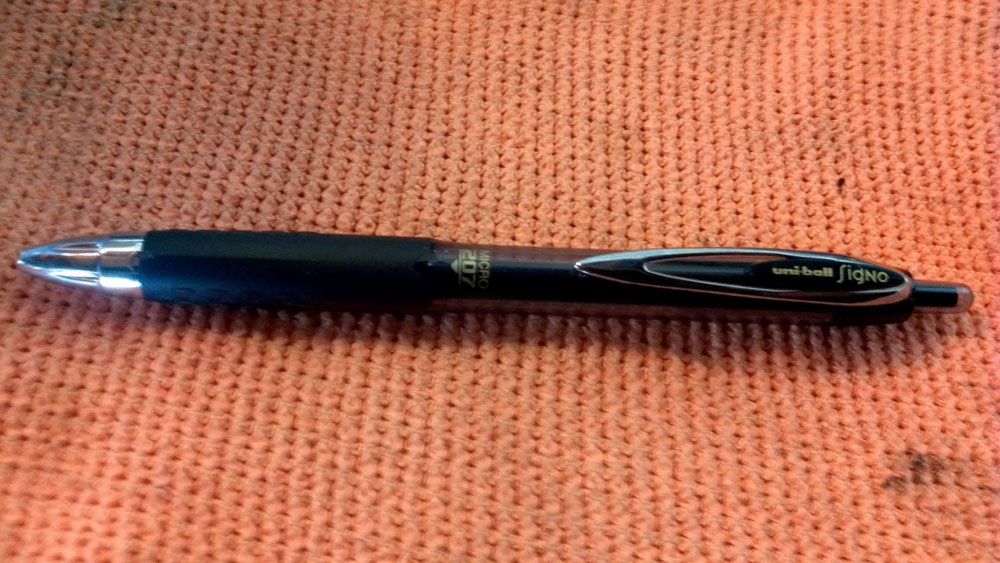
I ransacked my wifes desk and found a couple pens that I thought could work.
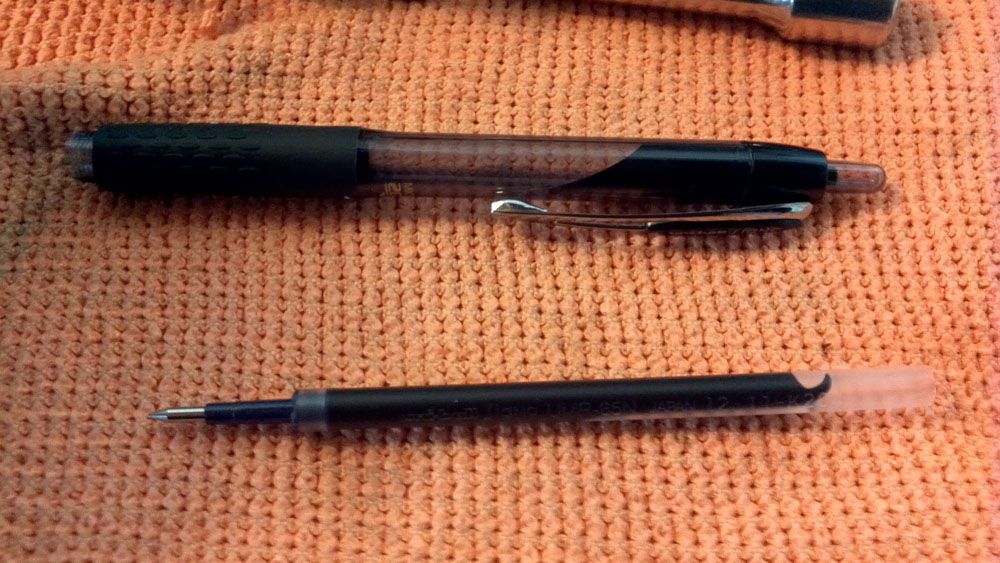
Below is a pic of the pen I used. I'm sure a lot pens could work but this one seems to be a really good fit. Its a Uniball Signo.

Unscrew the tip and pull out the ink tube.

Use some needle nose pliers and pull the plastic end out and separate the metal tip.
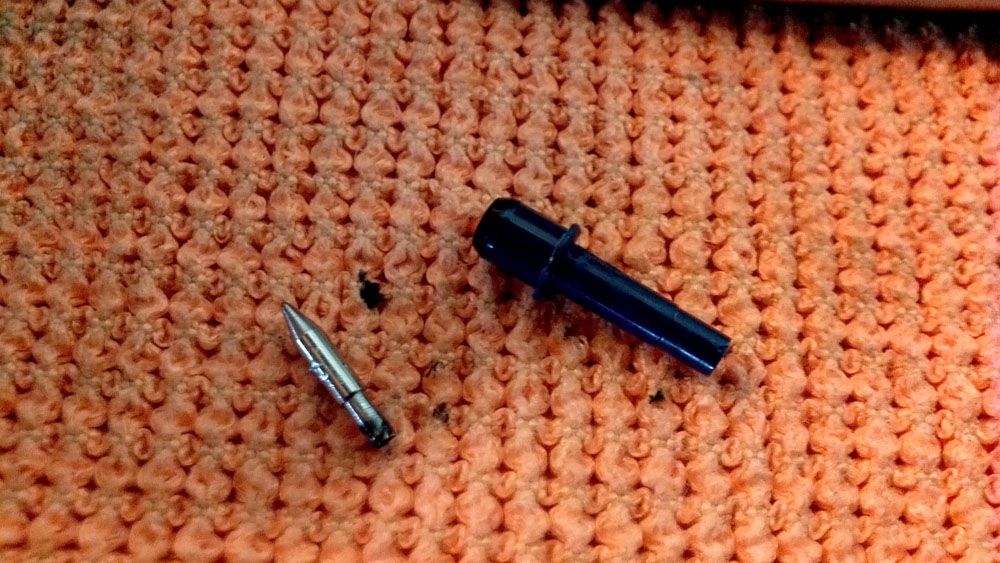
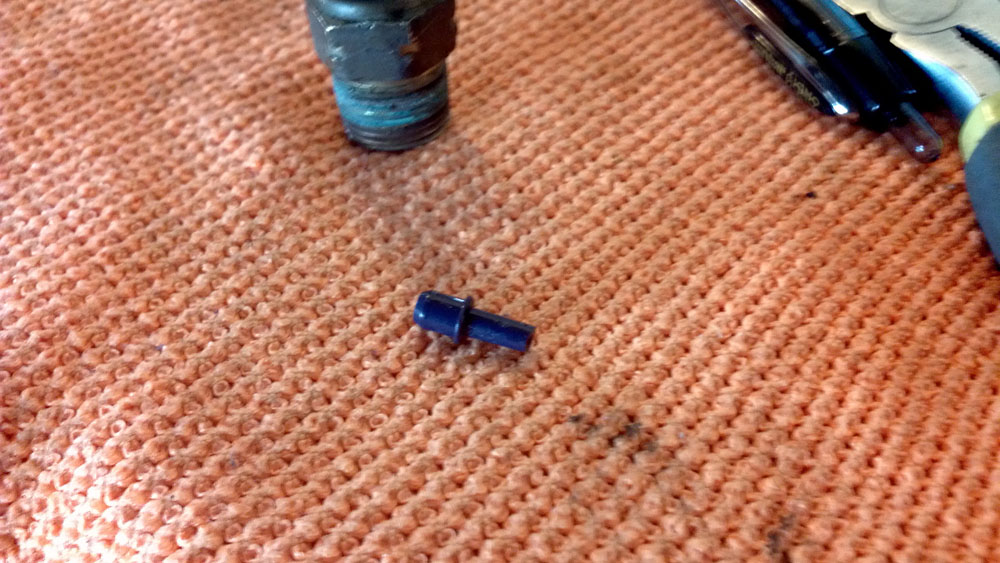
This is what we're gonna use. The end for the vacuum line is a good fit. Won't slip off.
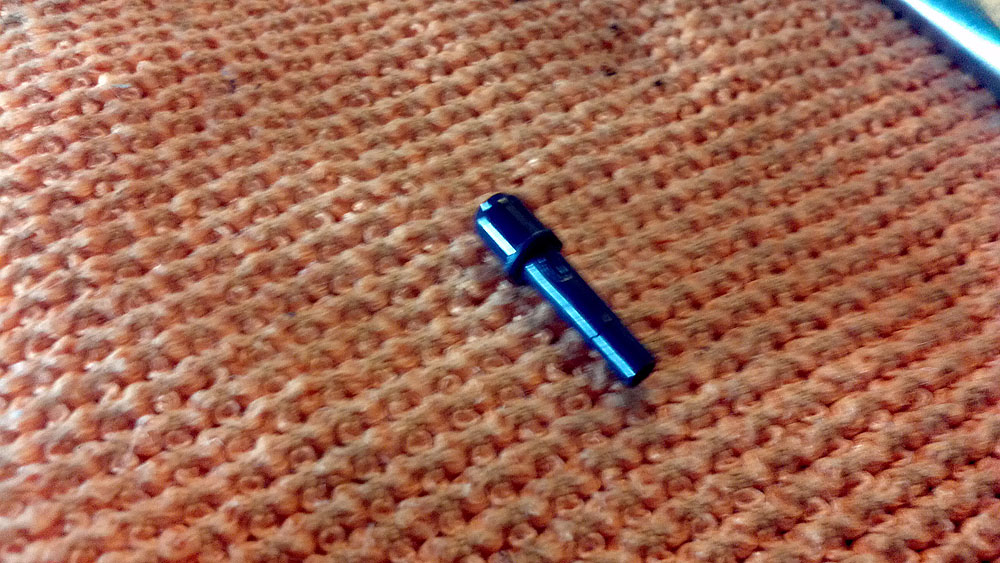
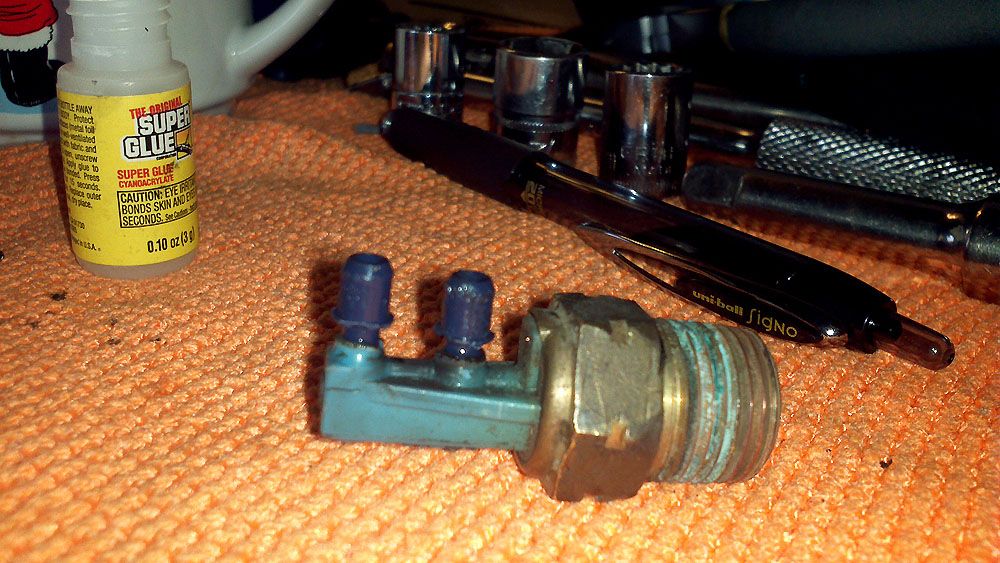
If you look closely there is a slight step at the tapered end, (the part that is going into the sensor) I used some wire cutters and shortened it to that point.
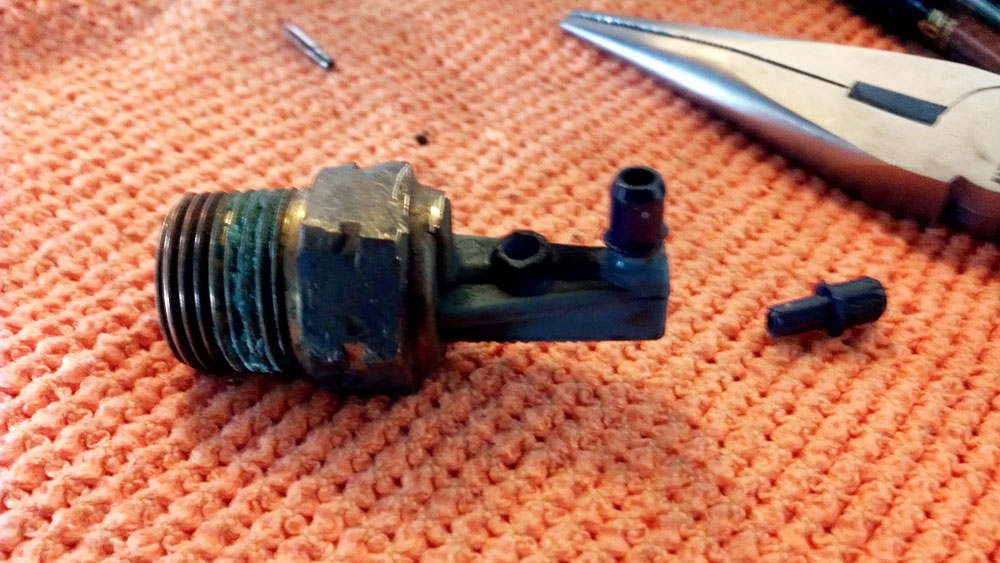
Next, I used a 9/64 drill bit and opened up the "new" holes in the sensor where the original nipples broke. Now, mine broke off relatively flat, but you may want to sand it down a little.
Test to make sure the new nipple fits in there snug, not too tight that you break it trying to make it fit.
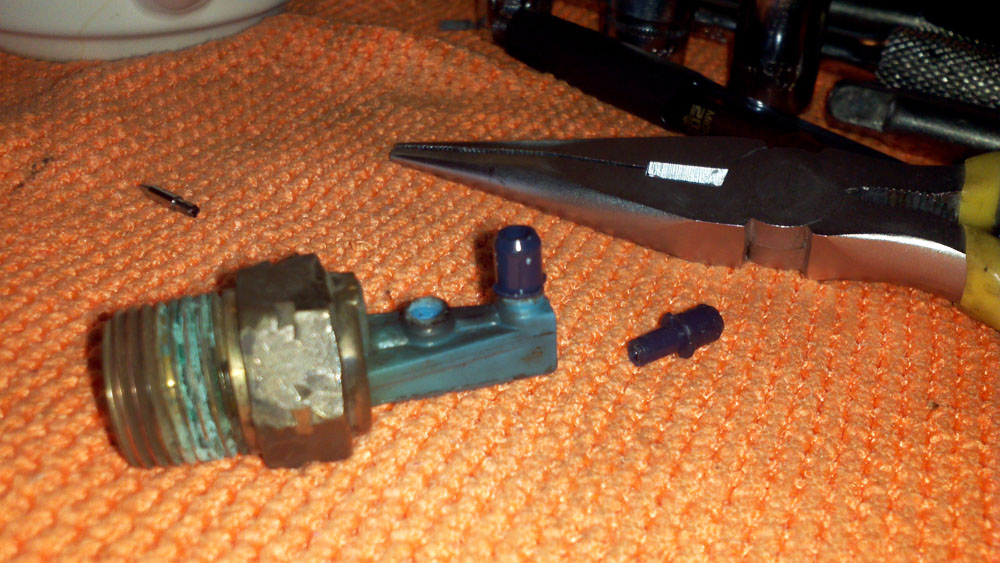
A little dap of super glue and pop them in. Let it dry and I just saved my self 50 bux.
I ransacked my wifes desk and found a couple pens that I thought could work.
Below is a pic of the pen I used. I'm sure a lot pens could work but this one seems to be a really good fit. Its a Uniball Signo.
Unscrew the tip and pull out the ink tube.
Use some needle nose pliers and pull the plastic end out and separate the metal tip.
This is what we're gonna use. The end for the vacuum line is a good fit. Won't slip off.
If you look closely there is a slight step at the tapered end, (the part that is going into the sensor) I used some wire cutters and shortened it to that point.
Next, I used a 9/64 drill bit and opened up the "new" holes in the sensor where the original nipples broke. Now, mine broke off relatively flat, but you may want to sand it down a little.
Test to make sure the new nipple fits in there snug, not too tight that you break it trying to make it fit.
A little dap of super glue and pop them in. Let it dry and I just saved my self 50 bux.

 03-27-2013, 01:58 PM
#6
Registered User
Thread Starter
Ugh...got the plenum and everything back together and the last thing to do was bolt up the cold start injector. Im pretty good about not dropping things but I let the banjo bolt fall down into the engine bay. Never hit the ground and for the life of me can't find it. All the pick n pull yard 4runners/pickups are missing the upper manifold. Im skipping the the dealer and stopping by a hydrolic shop nearby that has the right size banjo bolt. Hopefully it'll work.
04-05-2013, 01:44 PM
#7
Registered User
Thread Starter
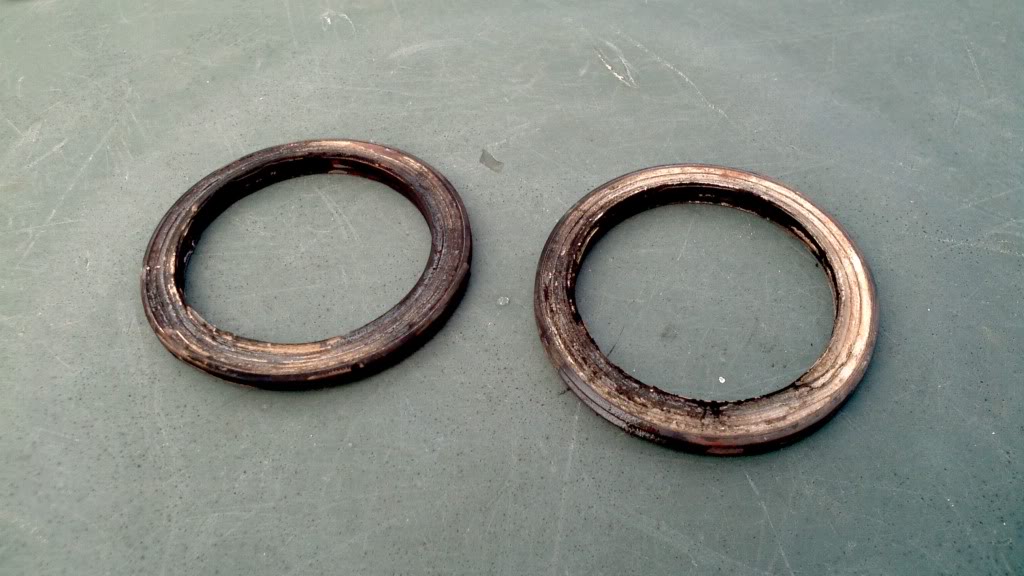
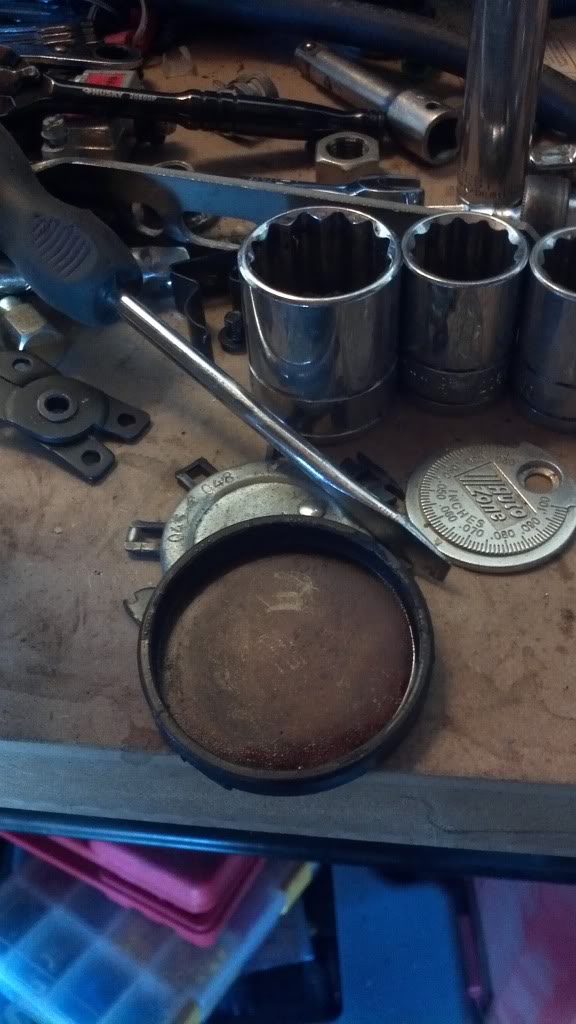
Got around to replacing the exhaust crossover gaskets. I had an exhaust tick that hopefully clears up after putting in some new ones. The old ones were pretty shot, they're worse than they look in the picture. Out of round and the gasket material was missing in parts between the metal rings.
Trending Topics
 04-10-2013, 04:38 PM
#9
Registered User
Thread Starter
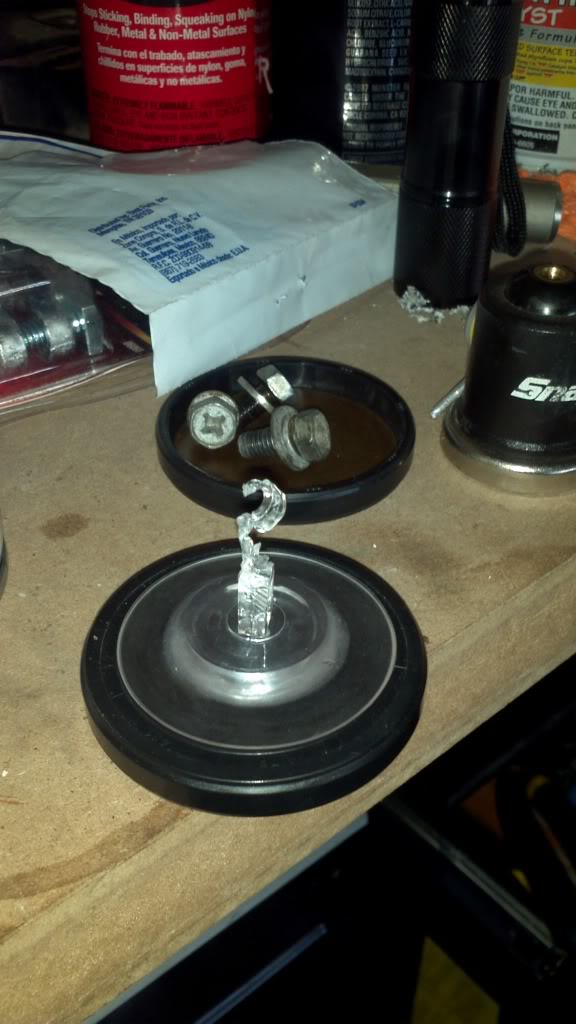
Well got my rear camshaft circular plugs. Kinda wish I did this when I changed the valve covers. I got the plate that holds them in off, but not sure how to get the plug out. Off to find a small suction cup and see if that works.
04-10-2013, 05:20 PM
#10
Nice trick with the pens. I myself always try to scavenge parts or other things to make something come together.
Seriously a clean runner. Wish I could find a nice one like that with a 22re in her.
Not sure on the cam plugs. I've never taken them out of the 3.0 before. Wish I could be more help.
Seriously a clean runner. Wish I could find a nice one like that with a 22re in her.
Not sure on the cam plugs. I've never taken them out of the 3.0 before. Wish I could be more help.
04-10-2013, 05:33 PM
#11
Registered User
Thread Starter
Yea it would be wrong for me not to buy this for the price. Although right now the 22r is looking a lot more appealing. Im actually eyeballing a 3.4 hopefully by the end of the year. Need to get my Z off the jackstands so the runner can be worked on in the garage.
 04-11-2013, 07:52 AM
#13
Registered User
Thread Starter
Went back at it this morning. The suction cup worked well. It was a little tedious but it did pop out. The trick was to pull with little force and hold it work as long as I could. Pulling too hard just made the cup pop off. Time to seal her up and on to the passenger side.
 04-23-2013, 02:30 PM
#15
Registered User
Thread Starter
Came across a guy that was parting out a few Land Cruisers. I ended up trading him some old air tools that I don't use anymore for the rear springs. I grabbed two shorter rear springs. Don't have the longer shocks or panhard drop bracket yet, but I was dying to see what it looks like without the ass drag.
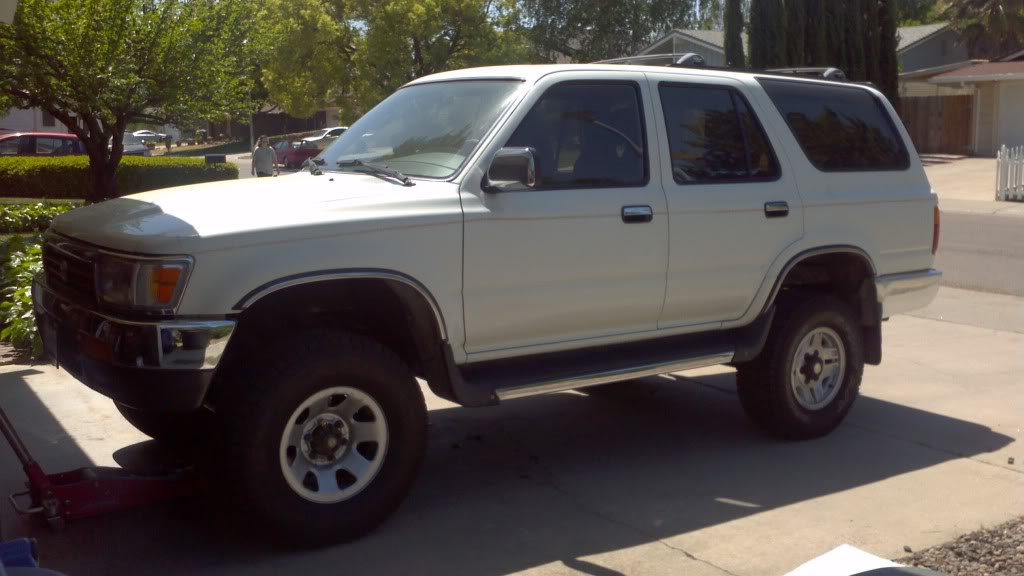
Measured before and after and the lc coils gave me a 3.5 in lift. Went from ass down to ass up. So just to even her out I adjusted the torsion bars about an inch. Just enough to level it out but didn't hurt the ride quality. I will be ordering some bj spacers though soon so I can turn them back down.
Rear lift first.
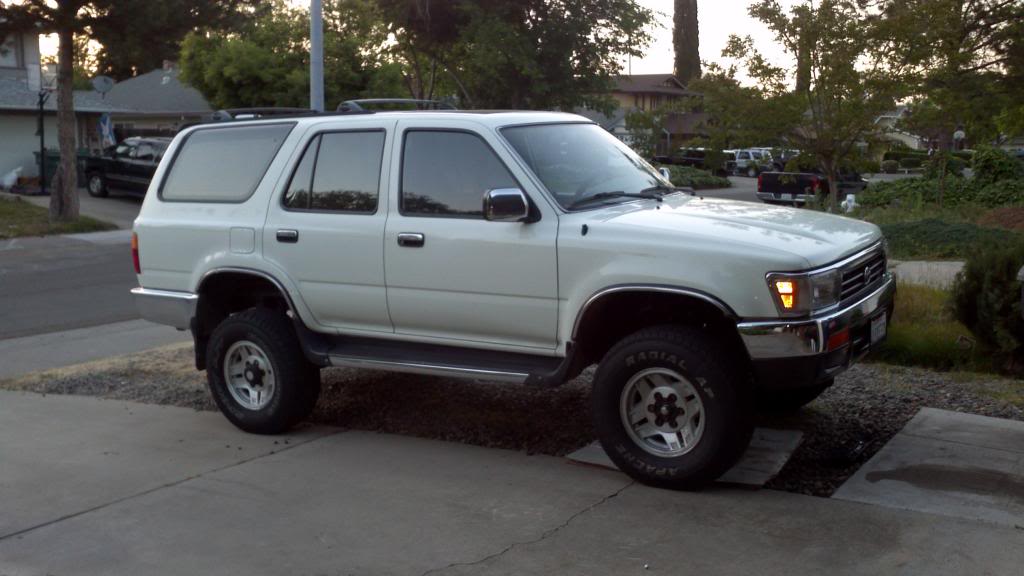
Front end adjustment. I think it looks a lot better. My balding tires seem even smaller now.
Measured before and after and the lc coils gave me a 3.5 in lift. Went from ass down to ass up. So just to even her out I adjusted the torsion bars about an inch. Just enough to level it out but didn't hurt the ride quality. I will be ordering some bj spacers though soon so I can turn them back down.
Rear lift first.
Front end adjustment. I think it looks a lot better. My balding tires seem even smaller now.
04-23-2013, 03:10 PM
#16
Registered User
looks nice. might i ask what you mean by front end adjustment? torsion bars? i highly advise against that. get some BJ spacers in there and relax them back down. its a much smoother ride.
04-26-2013, 10:59 AM
#18
Registered User
Thread Starter
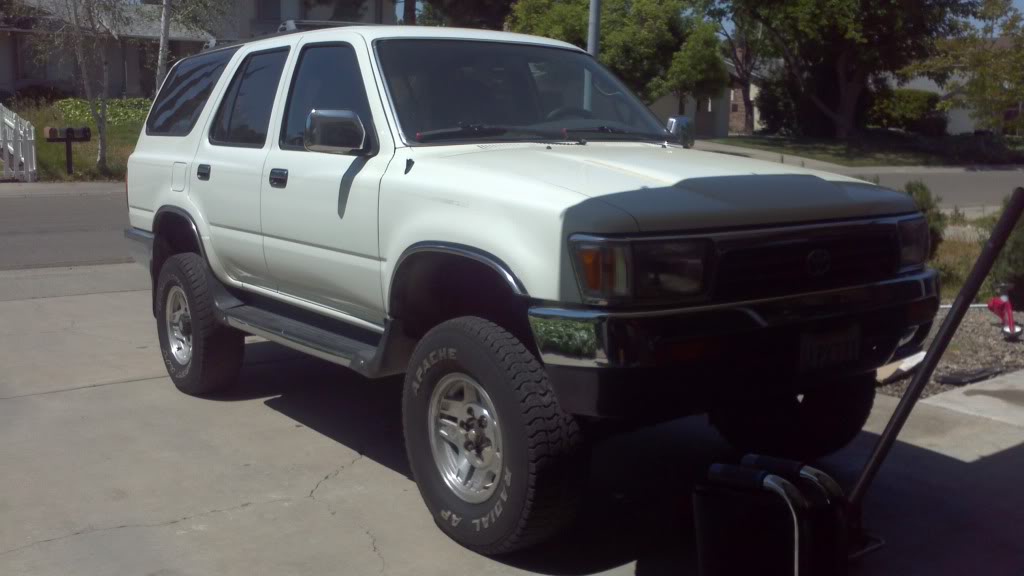
Took off the driver side step bar just too see if I like the look. I'm kinda diggin it. Waiting to see if the wife sees the difference.
Next I wanna remove that hideous sticker that runs down the sides of the truck, and new tires so I can have matching wheels.
Next I wanna remove that hideous sticker that runs down the sides of the truck, and new tires so I can have matching wheels.
 04-27-2013, 12:05 PM
#19
Registered User
Thread Starter
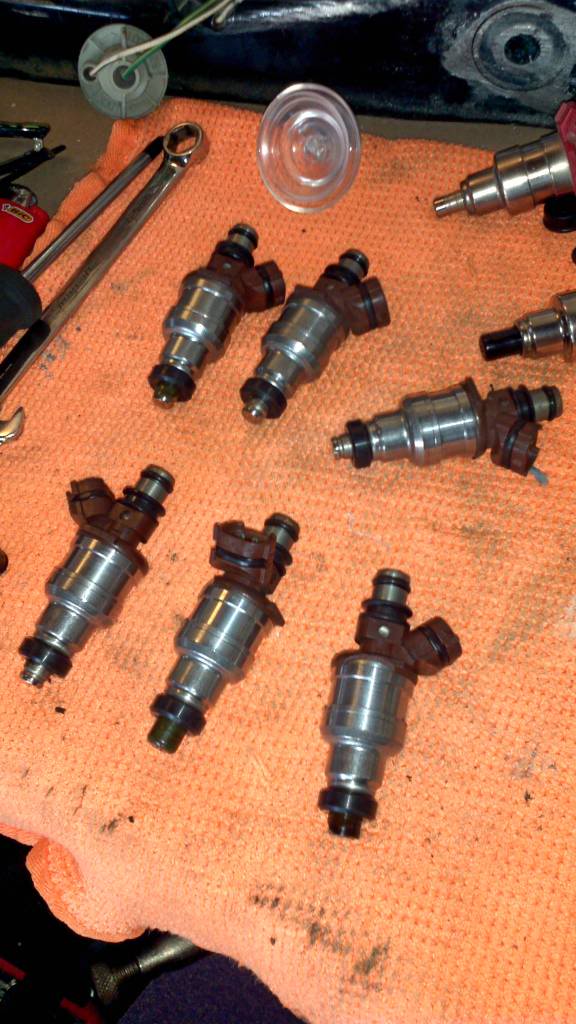
Picked up some fuel injector seal kits at Napa. If I was able to have my truck down for more time I'd send them out to be clean and balanced. For now I'm just gonna throw in some new seals and mine were in bad shape.
The bottom seal that goes into the manifold was missing chunks on 3 of the injectors.
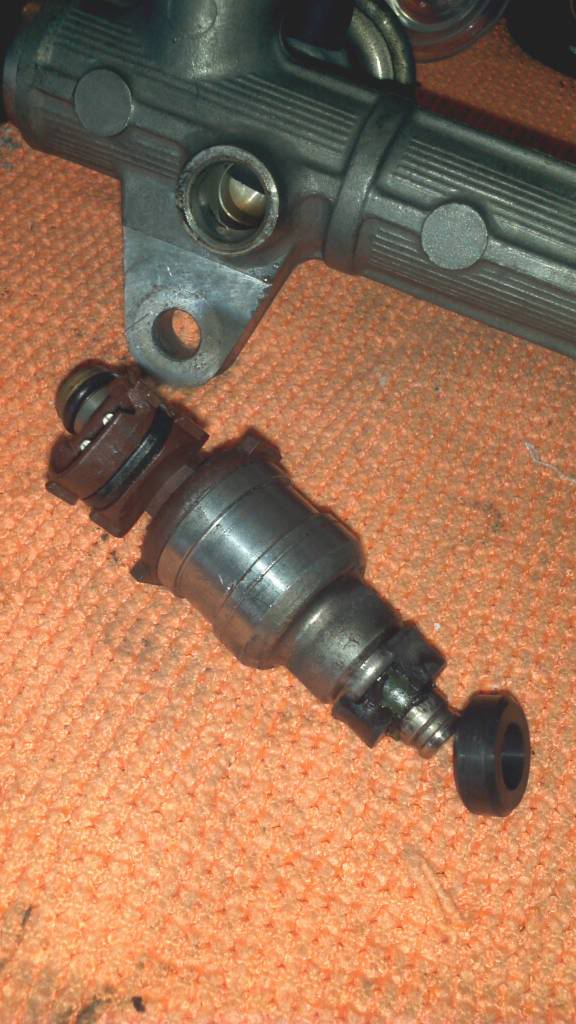
I'm surprised this wasn't enough of a leak to throw a code.
All ready to go. If anybody needs the part number, it's ATM IK2401 from Napa Auto. 1.99 for just the 3 seals x6 injectors. In the future I'll have them fully serviced.
The bottom seal that goes into the manifold was missing chunks on 3 of the injectors.
I'm surprised this wasn't enough of a leak to throw a code.
All ready to go. If anybody needs the part number, it's ATM IK2401 from Napa Auto. 1.99 for just the 3 seals x6 injectors. In the future I'll have them fully serviced.
04-27-2013, 07:36 PM
#20
Registered User
Join Date: Apr 2013
Location: Anthem, Arizona
Posts: 5
Likes: 0
Received 0 Likes
on
0 Posts
Well trying to replace the "U" shaped coolant hose I broke the plastic nipples on the tvv going to the vapor canister. The heat from the crossover pipe no doubt cooked these things a long time ago. About 50.00 from the dealer, I'm a little broke right now so I did a little quick fix.
I ransacked my wifes desk and found a couple pens that I thought could work.
Below is a pic of the pen I used. I'm sure a lot pens could work but this one seems to be a really good fit. Its a Uniball Signo.
Unscrew the tip and pull out the ink tube.
Use some needle nose pliers and pull the plastic end out and separate the metal tip.
This is what we're gonna use. The end for the vacuum line is a good fit. Won't slip off.

If you look closely there is a slight step at the tapered end, (the part that is going into the sensor) I used some wire cutters and shortened it to that point.

Next, I used a 9/64 drill bit and opened up the "new" holes in the sensor where the original nipples broke. Now, mine broke off relatively flat, but you may want to sand it down a little.
Test to make sure the new nipple fits in there snug, not too tight that you break it trying to make it fit.

A little dap of super glue and pop them in. Let it dry and I just saved my self 50 bux.

I ransacked my wifes desk and found a couple pens that I thought could work.
Below is a pic of the pen I used. I'm sure a lot pens could work but this one seems to be a really good fit. Its a Uniball Signo.
Unscrew the tip and pull out the ink tube.
Use some needle nose pliers and pull the plastic end out and separate the metal tip.
This is what we're gonna use. The end for the vacuum line is a good fit. Won't slip off.
If you look closely there is a slight step at the tapered end, (the part that is going into the sensor) I used some wire cutters and shortened it to that point.
Next, I used a 9/64 drill bit and opened up the "new" holes in the sensor where the original nipples broke. Now, mine broke off relatively flat, but you may want to sand it down a little.
Test to make sure the new nipple fits in there snug, not too tight that you break it trying to make it fit.
A little dap of super glue and pop them in. Let it dry and I just saved my self 50 bux.


